1
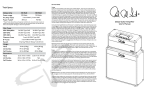
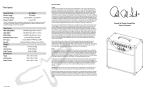
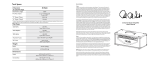
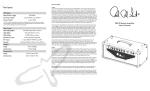
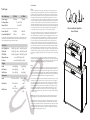
Service Notes
Tech Specs
Blue Sierra Amp
Power usage
Pre Amp Tubes
Reverb Tube*
Tubes
50 Watt
100 Watt
250 Watts
350 Watts
3 each ECC83
1 each 12AT7
* Reverb is an option that may not exist in your amp.
Power Tubes**
Power Tube Option**
2EA EL34
4EA EL34
2EA 6L6
4EA 6L6
* *Power Tubes should be purchased as matched sets. Use only tubes in pairs or
quads that are factory-matched. Failure to use matched tubes can lead to tube
failure and amplifier damage or abnormal operation.
Main Fuses
100V 50Hz/60Hz
120V 60Hz
230V 50Hz
Filament Fuses
B+ Fuses
Weight
Head
1x12 Combo
2x12 Combo
Dimensions
Head
2A 250V Type 3AG
4A 250V Type 3AG
2A 250V Type 3AG
4A 250V Type 3AG
1.5A 250V Type 3AG 2.5A 250V Type 3AG
2 each 10A 250V Type 3AG
2 each 500mA 440V Type 3AG
34 lbs (15.5kg)
40 lbs (18.2kg)
54 lbs (24.5kg)
N/A
62 lbs (28.2kg)
68 lbs (31kg)
22.5in X 11in X 9.75in
22.5in X 11in X
9.75in
1x12 Combo
22.5in X 20in X
9.75in
N/A
2x12 Combo
26.5in X 21in X
9.75in
26.5in X 21in X
9.75in
Tubes are consumables as they have a given usable lifespan. They are part of the heart of
the tone, so keeping correctly operating tubes is essential. Tubes can fail catastrophically or
gradually and it’s good to know what to look for if they start to go bad. Periodically inspect
them and look to see if anything inside the tube is glowing cherry red other than the normal
orange glow of the filament. This would indicate a situation where the tube is conducting
more current than it is capable of handling and most likely about to fail. Two other conditions
to observe are 1) filaments not glowing or 2) a miniature fireworks display inside the tube. Any
of the above conditions indicate serious problems with the tube and should be taken care of
immediately. Tubes quite often are the cause of spurious noise in the amp. Microphonic tubes
will squeal or rattle with the vibrations of the cabinet. If suspected, tap each tube lightly with
a pencil with the amp powered up—the suspect tube will let you know. Note that there is a
normal metallic clinking when doing this, but a microphonic tube will be quite loud.
Instructions for Qualified Service Technician: To install the tubes, check that the power cord
is not plugged in, then remove the wooden back panel with a screwdriver and notice the
tube sockets. Note that the cooling fan may need to be unplugged from the chassis. Looking
from the back, install the Power tubes (EL34, 6L6, etc.) in the left sockets. In each case, align
the center pin guide correctly with the socket, making sure that the pin guide key fits with
the corresponding slot in the socket. The ECC83 preamp tubes can then be placed in the
smaller 9-pin sockets to the right of the power tubes. Please refer to the tube chart inside
the amplifier for proper tube locations. Be aware of the pin alignment with these, as there is
only one way they can fit. We utilize tube sockets that allow relative ease of tube installation,
but never force tubes into the sockets if there becomes a problem. Also, never torque the
tubes, only gently rock them from side to side during insertion or removal. After preamp tube
installation, place the cylindrical spring tension preamp tube covers over the tubes. Ensure
the cooling fan is plugged back into the jack on the chassis. Failing to do so can create a safety
hazard.
Replacing preamp tubes will not require any adjustment, but the power tubes will need
rebiasing to assure proper operation. After power tube replacement, initially inspect the tubes
often to assure there are no “cherry red” components within the tube. Tubes today can have a
wide variety of tolerances and a re-bias is highly recommended with new ones.
Fuses
There are 5 fuses installed in the amplifier. Only 1 of these, the main input fuse, is accessible
and replaceable by the user. There are 4 fuses internally for added safety. 2 of these fuses are
high voltage fuses and 2 fuses are for the lower filament voltages. In all cases, labels indicate
the type and rating of the fuse. Replacement fuses MUST BE THE SAME TYPE AND RATING. If
they are not you can permanently damage your amplifier. Please contact your local PRS dealer
or the PRS accessories web site for information on ordering replacement fuses.
Instructions for Qualified Service Technician: Replacement of internal fuses requires removal
of the back panel and removal of the chassis. First, ensure the power cord is not plugged in,
then remove the back panel with a screwdriver. Turn the amplifier upside down and place on
padded and safety-certified work surface. Loosen the 4 bolts holding the chassis to the top
of the cabinet. The reverb pan may need to be removed before removing the chassis. Ensure
the reverb cords are unplugged, and remove the hardware holding the reverb pan in place.
Check that all components are cool so that burns do not occur. Then, by holding onto the
transformers, lift the front of the amp so the front control is out of the cabinet and carefully
pull the chassis out.
NOTE! Capacitors may retain an electric charge and can be dangerous even when the unit is
off, unplugged and has not been played for an extended period of time. USE CAUTION!!!!
Locate the fuse holders, remove them, and check for continuity. Blown fuses can indicate a
failure condition and should be treated as though a problem exists. Check the label for the
proper type and rating. After all fuses have been replaced and the amp is tested as acceptable
and safe, reinstall the chassis by working in reverse. Be sure to replace the reverb pan and
hardware, then plug the reverb cords back into place. Before installing the back panel, ensure
the cooling fan cord is plugged into the proper jack.
Blue Sierra Guitar Amplifier
User’s Manual
Using your PRS Amplifier
A few years ago, I was at the Dallas Vintage Guitar Show and
my band was scheduled to perform a few times. A friend said,
“Hey. You need an amp to play through, and I have a friend
who makes great amps.” He took me to the booth of a Texas
amp builder, Doug Sewell. I loved the way his amps sounded,
and after barely saying hello, Doug and I were inside rewiring
the amp I was going to play through. Since that day, Doug and I
have spent years rewiring and listening to every single possible
variation to finalize the circuits. Our goal was to have highly
usable and musical amplifiers.
I am not an amp collector. I am an amplifier user who keeps
the amps I am presently playing through. That said, after Doug
and I got several of the prototypes finalized, I sold some of
my old coveted live and studio amps because ours sounded
considerably better. The next step was to take the prototypes
to musicians who are known for their amplifier tone as well as
their playing. What’s interesting is that when I spoke to these
artists about trying the amps, they all said the same thing.
“Sure I’ll use them, if I love them.”
In a real way, amplifiers are musical instruments. They are the
devices that “amplify” the sound of the player’s hands, the
guitar and possibly the pedal board. They must share many
qualities. They must work - they have to have a beautiful
balance of bass, midrange, and treble; the highs should be
sweet - not harsh; they should be easy to operate and be
highly musical. In addition, amps should clean up really well
when you turn your guitar down. The final quality that Doug
and I looked for are amps that sound good no matter where
the knobs are. It is a rare quality that we insisted on.
I hope this hand-crafted amplifier gives you years of
enjoyment, musical results, and pride in ownership. I
appreciate your confidence.
Rear Panel Controls
IMPORTANT: Before using your amplifier, refer to the IMPORTANT SAFETY INSTRUCTIONS insert
supplied with the product.
Powering Up:
1. Make sure your speaker cabinet is connected to the correct speaker output impedance jack with a
high quality speaker cable. Do not use guitar cords.
2. Make sure the power cord is connected to the correct grounded outlet.
3. Make sure there is at least 6 inches of clearance behind the amplifier to allow for proper cooling.
Never place the amplifier against a wall or other equipment, and keep it clear of other heat sources,
such as other amplifiers or stoves. Make sure there are no flammable items such as curtains,
behind the amp. Do not drape items over the amps that can prevent proper cooling. Do not set
drinks or other liquids on top of the amp that can spill into the amp.
4. To increase the life of the tubes, set the “Standby” switch to the STANDBY position before
powering on. Turn the POWER switch on and let the amplifier warm up for 2 minutes before setting
the standby switch to “ON.” If this is the first time you are turning on the amp, check to see if all of
the tubes are glowing.
5. Plug in the guitar cable, turn the volume knob down and turn the standby switch on. Wait a few
seconds for the bias to settle. Bring the volume up and play some tunes.
VOLUME
TREBLE
MIDDLE
ADJUSTMENTS ONLY TO BE MADE BY QUALIFIED TECHNICIAN
TO AVOID DAMAGE, NEVER OPERATE WITHOUT PROPER SPEAKER LOAD
250 W
FUSE
FUSE - 2A 250V
Type 3AG
Replace fuse only with
same type and rating.
CAUTION - RISK OF ELECTRIC SHOCK - DO NOT OPEN. No user serviceable parts inside
ATTENTION - RISQUE DE CHOC ÉLECTIQUE - NE PAS OUVRIR. No pièce réparable par l'utilisateur
WARNING - TO REDUCE THE RISK OF FIRE OR ELECTRIC SHOCK,
DO NOT EXPOSE THIS EQUIPMENT TO RAIN OR MOISTURE
AVIS - POUR RÉDUIRE LE RISQUE D'INCENDIE OU DE CHOC ÉLECTRIQUE,
NE PAS EXPOSER CET EQUIPEMENT A LA PLUIE OU L'HUMIDIT
Fuse: Blown fuses may indicate that the amplifier needs servicing. Use only the type and rating
specified on the back of the amplifier. See the section on Service Notes for proper fuse servicing
and replacement.
Power Switch: This cuts off all power to the amplifier. No filament current or tube voltages are
supplied.
Standby Switch: When this switch is in STANDBY, the amplifier tubes are effectively turned off, but
are still being warmed by the filaments if the POWER is on. Keep this switch set to STANDBY when
powering on the amplifier for at least 2 minutes to allow the tubes to warm up. This also helps
extend the life of the tubes. When set to ON, the tubes are turned on and the amplifier can be
used. Always check this switch if the amp is ON but no sound is being heard.
Bias Jacks: Biasing and Tube Replacement should be performed only by a qualified technician.
Blue Sierra Amplifier Front Panel Controls
INPUT
Input Power
120V~60HZ
BASS
MASTER
Input: 1/4” standard guitar cord.
Volume: The volume is one of the most important controls on the amp. Depending on the output of
your pickups, you can find your sweet spot at various locations on the sweep. There will be a point
in which actual volume stops increasing and the tone becomes thicker and more compressed. Each
guitar will react differently, and exploring this control should be a source of great enjoyment. Be
aware that settings beyond 2 o’clock will increase background noise.
Reverb: The reverb on the Blue Sierra is designed to enhance and thicken the tone without covering it
up too much. This is important to reduce unwanted modulation with heavy distortion settings.
Treble: The treble control is very sensitive in both clean and dirty settings. Like all five knobs, there
are no numbers to encourage you to set the amp with your ears.
Speaker Jacks: Get into the habit of checking these first. The jacks include a connection for 4, 8 and
16 ohm loads. There is an extension (EXT) jack with the 4 ohm and 8 ohm connection to connect
two 8 ohm loads if you wish. This scenario could most commonly be the use of an 8 ohm extension
speaker along with the internal speaker—connect each to the 4 ohm jacks since their combination
produces a 4 ohm load. Do not connect an 8 ohm load in the 8 ohm jack along with a 4 ohm or
16 ohm load in those jacks. This procedure halves the reflected impedance of each and will not
allow ideal operating conditions. If you are using more than one speaker, they must be the same
impedance. For example, use two 4-ohm speakers, or two 8-ohm speakers. Never use 2 different
speaker impedances - You should not mix and match. The maximum number of speakers you can
safely connect is 2. Always ensure that the speaker impedance matches the correct speaker jack,
since this amp is designed to be played “wide open”. Mismatching impedances from a lower tap to
a higher speaker impedance stresses the amp more than going into a lower impedance mismatch,
and can cause arcs on the tube sockets, failure of power tubes, or even failure of the output
transformer.
Confirm that the speaker cabinet you are using matches to the correct speaker jack on the back of
the amp. For the 4 OHM and 8 OHM speaker jacks, a second cabinet may be plugged into the “EXT”
(Extension) cabinet. Note: The total speaker impedance must be determined before connecting to
the speaker jacks.
Middle: Using less mids creates crisper, more “hollow” sounding tones. Clean settings using less
mids can sound very American, working well with single coil tones for clean blues, surf, and country.
Adding mids tranforms the tone to a warm, fatter jazz-approved tone. Distortion with more mids can
sound very 60s and 70s, less mids ventures into 80s metal tones.
Bass: The low end control allows you to tailor the amount of bass appropriate for the speakers and
cabinet you are playing through. Inherently bassy cabinets can sound very boomy with high bass
settings on the amp. Open back cabinets generally can accept higher bass settings without this.
Master: Controls the overall volume of the amplifier. The master volume is a post phase-inverter style
and allows you to drive the preamp into distortion while maintaining low volumes. Turn it all the
way up (with the volume down) for maximum clean settings, and reverse that setting for distortion.
For higher gain settings with high volume, the master can be backed off slightly to reduce inherent
background noise.
Bright Switch: This switch uses a capacitor to bypass highs around the volume potentiometer. It is
only effective when the volume is set low and increasingly fades out as the volume is increased. This
switch adds sparkle to your clean settings.
Jewel Power Indicator: If the jewel is lighted, the amp is on. This does not indicate the standby
setting of the amp. Note: An amplifier may be plugged in and “on”, but a malfunctioning or burnt-out
indicator will not show the amp is on. Check the power cord and Power Switch if the jewel light is not
on. If these are connected correctly, then check the main fuse. If the main fuse burns out, check for
proper speaker connections. If the fuses continue to blow, the amplifier may need servicing.
Sample Settings: For American-flavored clean tones, a good starting point would be the treble at
2 o’clock, middle at 10, and bass at noon with the bright switch on. For jazz settings, set treble at 9
o’clock, middle at 2, and bass at 10 o’clock. Set the master all the way up, then bring the volume up to
taste. For metal type distortion, set the bass at 3 o’clock, middle at 9, and treble at 3. For old-school
rock, bass at 11 o’clock, middle at 2, and treble at noon. Set the volume to between 2 and 3 o’clock,
then bring the master volume up to taste.
© 2009 PRS Guitars
All rights reserved.
“Paul Reed Smith,” “PRS,” the PRS logo, the PRS Paul Reed Smith logo, the Paul Reed Smith signature, the
bird inlays, the headstock bird, the PRS headstock shape, the PRS body shape, the PRS “scoop” design,
“Singlecut”, “Mira” and the “SE” are all registered trademarks of Paul Reed Smith Guitars “Custom
24,” “Modern Eagle,” “SE Custom,” “SC 245,” “SC 250,” “Starla”, “Tonare”, “Sewell”, “ Blue Sierra”, and
“Angelus” are all trademarks of Paul Reed Smith Guitars. The Birds, New Birds, are copyrighted by PRS
Guitars.