1
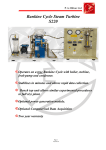
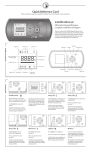
The EDUSTAK JUNIOR from Horizon Fuel Cell
Technologies is designed as an educational product to
teach key stage 3 & 4 students about fuel cell
technology, chemistry and architecture, but with
applications far beyond…
Easy-Assembly clear plastic cells – no tooling required
5-cell or 10-cell stack option provides option for 2W or 4W output for EDUSTAK JUNIOR
Can be bundled with Horizon Energy Monitor for PC connect and software
Includes HYDROSTIK PRO with tubing and adapted pressure regulator.
HYDROFILL PRO (optional) can be used for HYDROSTIK PRO charging
EDUSTAK JUNIOR kit
DC Electronic Load (not provided)
Multimeter (not provided)
Calculate and draw the IV curve and peak
power of single and multiple cells using a DC
load
Whole cell (without REM)
2
Examine the difference in output when cells are connected in
series and parallel
3
2
Without REM (10 Cells)
3
Single cell (without REM)
2
With REM (10 Cells)
4
Whole cell (with REM)
2
Without REM (5 Cells)
4
With REM (5 Cells)
5
Single cell (with REM)
Examine How Purging Effects The Electrical
Output Of The Fuel Cell
Without REM
With REM
Examine the effect of increased airflow through
the stack
3
3
3
3
How is the temperature of the stack affected by running for a
sustained period (what does this show?)
Compare voltage of cells at both ends and middle of stack
(what changes?)
How is the voltage of single cells affected by the increase in
temperature associated with running for a sustained period?
Compare gas consumption at half and full load
5
5
5
6
v1.0
Whole cell (without REM)
1. Assemble the EDUSTAK JUNIOR following the instructions in the user manual
2. Connect EDUSTAK JUNIOR output to your DC load
3. Set DC load to Constant Current Mode (CC) with the value of Amps set to zero
4. Connect HYDROSTIK PRO to your EDUSTAK JUNIOR and press the purge valve for 1 second
5. Plot the voltage on your graph
6. Increase load by 0.1 Amp steps plotting the change in voltage on your graph
7. Once the maximum output of 0.8 Amp is reached stop increasing the current
8. Using the equation Power(Watts)=Voltage(V) x Current (I) calculate the fuel cell's power output at each step
9. Plot the fuel cells output in watts on a new graph and find the peak power output
Single cell (without REM)
1. Assemble the EDUSTAK JUNIOR following the instructions in the user manual
2. Connect a single cell's output to your DC load
3. Set DC load to Constant Current Mode (CC) with the value of Amps set to zero
4. Connect HYDROSTIK PRO to your EDUSTAK JUNIOR and press the purge valve for 1 second
5. Plot the voltage on your graph
6. Increase load by 0.1 Amp steps plotting the change in voltage on your graph
7. Once the maximum output of 0.8 Amp is reached stop increasing the current
8. Using the equation Power(Watts)=Voltage(V) x Current (I) calculate the fuel cell's power output at each step
9. Plot the fuel cells output in watts on a new graph and find the peak power output
Whole cell (with REM)
1. Assemble the EDUSTAK JUNIOR following the instructions in the user manual
2. Connect EDUSTAK JUNIOR output to your renewable energy monitor input
3. Connect renewable energy monitor USB to your computer
4. Connect renewable energy monitor output to your DC load
5. Set DC load to Constant Current Mode (CC) with the value of Amps set to zero
6. Start data monitoring software on your computer
7. Connect HYDROSTIK PRO to your EDUSTAK JUNIOR and press the purge valve for 1 second
8. Turn on your DC load and slowly increase the value of Amps at as constant a rate as possible
9. Once the maximum output of 0.8 Amp is reached stop increasing the current
10. Using the equation Power(Watts)=Voltage(V) x Current (I) calculate the fuel cell's power output at each step
11. Plot the fuel cells output in watts on a new graph and find the peak power output
Single cell (with REM)
1. Assemble the EDUSTAK JUNIOR following the instructions in the user manual
2. Connect a single cell's output to your renewable energy monitor input
3. Connect renewable energy monitor USB to your computer
4. Connect renewable energy monitor output to your DC load
5. Set DC load to Constant Current Mode (CC) with the value of Amps set to zero
6. Start data monitoring software on your computer
7. Connect HYDROSTIK PRO to your EDUSTAK JUNIOR and press the purge valve for 1 second
8. Turn on your DC load and slowly increase the value of Amps at as constant a rate as possible
9. Once the maximum output of 0.8 Amp is reached stop increasing the current
10. Using the equation Power (Watts)=Voltage(V) x Current (I) calculate the fuel cell's power output at each step
11. Plot the fuel cells output in watts on a new graph and find the peak power output
v1.0
Without REM
1. Assemble the EDUSTAK JUNIOR following the instructions in the user manual
2. Connect EDUSTAK JUNIOR output to your DC load
3. Set DC load to Constant Current Mode (CC) with the value of Amps set to 0.7
4. Connect HYDROSTIK PRO to your EDUSTAK JUNIOR and press the purge valve for 1 second
5. Turn on your DC load
6. Leave cell running for 3 minutes before next purge, note any changes in voltage
7. Decrease time between purges by 10 second steps
8. From the data collected calculate the optimum length of time between purges
With REM
1. Assemble the EDUSTAK JUNIOR following the instructions in the user manual
2. Connect EDUSTAK JUNIOR output to your renewable energy monitor input
3. Connect renewable energy monitor USB to your computer
4. Connect renewable energy monitor output to your DC load
5. Set DC load to Constant Current Mode (CC) with the value of Amps set to 0.7
6. Start data monitoring software on your computer
7. Connect HYDROSTIK PRO to your EDUSTAK JUNIOR and press the purge valve for 1 second
8. Turn on your DC load
9. Leave cell running for 3 minutes before next purge, note any changes in voltage
10. Decrease time between purges by 10 second steps
11. From the data collected calculate the optimum length of time between purges
1. Assemble the EDUSTAK JUNIOR following the instructions in the user manual
2. Connect EDUSTAK JUNIOR output to a multimeter (set to measure voltage) or REM (start data monitoring software on your
computer)
3. Connect HYDROSTIK PRO to your EDUSTAK JUNIOR and press the purge valve for 1 second
4. Take a voltage reading from your multimeter or REM and note down the value
5. Connect the fan provided to a small battery or bench power supply and direct airflow through the stack
6. Press the purge valve for 1 second
7. Take a voltage reading from your multimeter or REM and note down the value
Without REM (10 Cells)
1. Assemble the EDUSTAK JUNIOR following the instructions in the user manual
2. Using 10 jumper cables connect the positive terminal of each cell to the positive input of your DC load
3. Using another 10 jumper cables connect the negative terminal of each cell to the negative input of your DC load (this is
parallel)
4. Set DC load to Constant Current Mode (CC) with the value of Amps set to zero
5. Connect HYDROSTIK PRO to your EDUSTAK JUNIOR and press the purge valve for 1 second
6. Turn on your DC load and increase the value of Amps by 0.5
7. Plot the voltage on your graph
8. Increase load by 0.5 Amp steps plotting the change in voltage on your graph
v1.0
9. Once the maximum output of 8 Amps is reached stop increasing the current, turn off your DC load, disconnect your
HYDROSTIK PRO and remove all the jumper cables
10. Using your jumper cables connect each positive and negative terminal to its neighbor; you should have 2 cables leftover
11. Connect the remaining jumper cables from the last cell at either ends positive and negative terminals and connect to your
DC load (this is series)
12. Set DC load to Constant Current Mode (CC) with the value of Amps set to zero
13. Connect HYDROSTIK PRO to your EDUSTAK JUNIOR and press the purge valve for 1 second
14. Turn on your DC load and increase the value of Amps by 0.1
15. Plot the voltage on your graph
16. Increase load by 0.1 Amp steps plotting the change in voltage on your graph
17. Once the maximum output of 0.8 Amps is reached stop increasing the Current, turn off your DC load, disconnect your
HYDROSTIK PRO and remove all the jumper cables
With REM (10 Cells)
1. Assemble the EDUSTAK JUNIOR following the instructions in the user manual
2. Using 10 jumper cables connect the positive terminal of each cell to the positive input of your renewable energy monitor
3. Using another 10 jumper cables connect the negative terminal of each cell to the negative input of your renewable energy
monitor (this is parallel)
4. Connect renewable energy monitor USB to your computer
5. Connect renewable energy monitor output to your DC load
6. Set DC load to Constant Current Mode (CC) with the value of Amps set to zero
7. Connect HYDROSTIK PRO to your EDUSTAK JUNIOR and press the purge valve for 1 second
8. Turn on your DC load and slowly increase the value of Amps at as constant a rate as possible
9. Once the maximum output of 8 Amps is reached stop increasing the Current, turn off your DC load, disconnect your
HYDROSTIK PRO and remove all the jumper cables
10. Using your jumper cables connect each positive and negative terminal to its neighbor; you should have 2 cables leftover
11. Connect the remaining jumper cables from the last cell at either ends positive and negative terminals and connect to your
DC load (this is series)
12. Set DC load to Constant Current Mode (CC) with the value of Amps set to zero
13. Connect HYDROSTIK PRO to your EDUSTAK JUNIOR and press the purge valve for 1 second
14. Turn on your DC load and slowly increase the value of Amps at as constant a rate as possible
15. Once the maximum output of 0.8 Amps is reached stop increasing the Current, turn off your DC load, disconnect your
HYDROSTIK PRO and remove all the jumper cables
Without REM (5 Cells)
1. Assemble the EDUSTAK JUNIOR following the instructions in the user manual
2. Using 5 jumper cables connect the positive terminal of each cell to the positive input of your DC load
3. Using another 5 jumper cables connect the negative terminal of each cell to the negative input of your DC load (this is
parallel)
4. Set DC load to Constant Current Mode (CC) with the value of Amps set to zero
5. Connect HYDROSTIK PRO to your EDUSTAK JUNIOR and press the purge valve for 1 second
6. Turn on your DC load and increase the value of Amps by 0.5
7. Plot the voltage on your graph
8. Increase load by 0.5 Amp steps plotting the change in voltage on your graph
9. Once the maximum output of 4 Amps is reached stop increasing the current, turn off your DC load, disconnect your
HYDROSTIK PRO and remove all the jumper cables
10. Using your jumper cables connect each positive and negative terminal to its neighbor; you should have 2 cables leftover
11. Connect the remaining jumper cables from the last cell at either ends positive and negative terminals and connect to your
DC load (this is series)
12. Set DC load to Constant Current Mode (CC) with the value of Amps set to zero
13. Connect HYDROSTIK PRO to your EDUSTAK JUNIOR and press the purge valve for 1 second
14. Turn on your DC load and increase the value of Amps by 0.1
15. Plot the voltage on your graph
16. Increase load by 0.1 Amp steps plotting the change in voltage on your graph
v1.0
17. Once the maximum output of 0.8 Amps is reached stop increasing the Current, turn off your DC load, disconnect your
HYDROSTIK PRO and remove all the jumper cables
With REM (5 Cells)
1. Assemble the EDUSTAK JUNIOR following the instructions in the user manual
2. Using 5 jumper cables connect the positive terminal of each cell to the positive input of your renewable energy monitor
3. Using another 5 jumper cables connect the negative terminal of each cell to the negative input of your renewable energy
monitor (this is parallel)
4. Connect renewable energy monitor USB to your computer
5. Connect renewable energy monitor output to your DC load
6. Set DC load to Constant Current Mode (CC) with the value of Amps set to zero
7. Connect HYDROSTIK PRO to your EDUSTAK JUNIOR and press the purge valve for 1 second
8. Turn on your DC load and slowly increase the value of Amps at as constant a rate as possible
9. Once the maximum output of 4 Amps is reached stop increasing the Current, turn off your DC load, disconnect your
HYDROSTIK PRO and remove all the jumper cables
10. Using your jumper cables connect each positive and negative terminal to its neighbor; you should have 2 cables leftover
11. Connect the remaining jumper cables from the last cell at either ends positive and negative terminals and connect to your
DC load (this is series)
12. Set DC load to Constant Current Mode (CC) with the value of Amps set to zero
13. Connect HYDROSTIK PRO to your EDUSTAK JUNIOR and press the purge valve for 1 second
14. Turn on your DC load and slowly increase the value of Amps at as constant a rate as possible
15. Once the maximum output of 0.8 Amps is reached stop increasing the Current, turn off your DC load, disconnect your
HYDROSTIK PRO and remove all the jumper cables
1. Assemble the EDUSTAK JUNIOR following the instructions in the user manual
2. Connect EDUSTAK JUNIOR output to your DC load
3. Set DC load to Constant Current Mode (CC) with the value of Amps set to zero
4. Connect HYDROSTIK PRO to your EDUSTAK JUNIOR and press the purge valve for 1 second
5. Turn on your DC load and increase the value of Amps to 0.7
6. Every 30 seconds purge the stack and take a temperature reading
7. Plot the temperature and voltage change on your graph
1. Assemble the EDUSTAK JUNIOR following the instructions in the user manual
2. Connect HYDROSTIK PRO to your EDUSTAK JUNIOR and press the purge valve for 1 second
3. Using a multimeter measure the voltage of each cell
4. Plot the voltage on your graph
1. Assemble the EDUSTAK JUNIOR following the instructions in the user manual
2. Connect EDUSTAK JUNIOR output to your DC load
3. Set DC load to Constant Current Mode (CC) with the value of Amps set to zero
4. Connect HYDROSTIK PRO to your EDUSTAK JUNIOR and press the purge valve for 1 second
5. Turn on your DC load and increase the value of Amps to 0.7
v1.0
6. Every 30 seconds purge the stack and take a reading of the internal temperature and the voltage from each cell
7. Plot the temperature and voltage change on separate graphs
8. From the results taken calculate the optimum running temperature of the fuel cell
1. Assemble the EDUSTAK JUNIOR following the instructions in the user manual
2. Connect EDUSTAK JUNIOR output to your DC load
3. Set DC load to Constant Current Mode (CC) with the value of Amps set to 0.35
4. Connect a full HYDROSTIK PRO to your EDUSTAK JUNIOR and press the purge valve quickly
5. Turn on your DC load and start stop watch
6. Every 3 minutes quickly purge the stack
7. When your HYDROSTIK PRO is empty (purging does not affect voltage) turn off your DC load and note down how long the
system ran for
8. Next set DC load to 0.7 Amps
9. Connect a full HYDROSTIK PRO to your EDUSTAK JUNIOR and press the purge valve quickly
10. Turn on your DC load and start stop watch
11. Every 3 minutes quickly purge the stack
12. When your HYDROSTIK PRO is empty (purging does not affect voltage) turn off your DC load and note down how long the
system ran for
13. Using the results you have collected calculate the hydrogen consumption per minute (remember a HYDROSTIK PRO holds
10litres decompressed gas)
v1.0