1
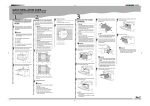
HURRICANE DEEP BLUE
3D GROUND MONITORING
USER’S MANUAL AND GRAPH ANALYSIS
TORA TORA – www.toratorashop.net – [email protected] – 00390438842829
Page 1
Dear customer; thank you for preferring the Hurricane EM products. We request you to carefully read this user’s
manual prepared for the detailed use and analysis of the 3D Ground Monitoring and used for the analysis of the data
obtained with Hurricane EM Systems.
3D Ground Monitoring program is used in integration with the Conrad EM system products. It enables the
transformation of the numeric data obtained from the EM system products into graphs, and 2D and 3D analysis.
1-
System Requirements;
The minimum system requirements for the 3D Ground Monitoring software to be installed in your
computer are specified in the following table.
Operating System:………………………………………………………Windows Xp, Windows 7,Windows 8
Memory ( RAM) :……………………………………………………. Min. 128 MB
Graphics Card:………………………………………………………. Min. 64 MB (OpenGL Compatible)
Disk Space:………………………………………………………… Min. 100 MB
Data Transfer(Interface):……………………………………….. USB, RS232
2-
Menu and the Buttons
The Splash Screen of the program is as follows. The definitions of the menu part and the buttons in the
program are explained below.
Figure 3 : Program Main Screen
Figure 4: Folder Menu and Settings.
TORA TORA – www.toratorashop.net – [email protected] – 00390438842829
Page 2
New Project Button enables you to create a new project.
Open Folder button enables you to open the stored folders.
Save button enables you to save the new project.
It enables you to separately analyze the Gap, Soil and Metal data.
It is used to calculate the Graph size. Each frame is equal to 30 cm.
It enables the bird’s-eye view of the graph.
It enables the up and down movement of the depth line.
Image Quality Button enables you to increase the graphic quality and confirm the graph values.
Signal Edit button enables the edit of the faulty signals.
Zoom buttons enabling the adjustment of the graph size
Menu of the soil type selection
The inquiry buttons used for the inquiry of the metal and gap data
The direction buttons enabling you to move the graph on the screen
The bottom bar displaying the number, scan line order and depth of signals.
TORA TORA – www.toratorashop.net – [email protected] – 00390438842829
Page 3
With the new project button, it enables you to create a new study. You
can create a new project by specifying the compatible model, port,
transfer type, signal beat number and mode of operation for your device
and evaluate. You can find the information about the data transfer in the
user’s manual of your device.
The function and use of the buttons will be discussed in detail during the evaluation of the analysis and
measures. In this part, there is brief information about the functions of the buttons.
3-
THE GRAPH ANALYSIS AND THE EVALUATION OF THE MEASURES
Before the measures, you must have information about what you scan (gap, water or metal) and the field
where you scan. The mistakes in the measures will cause different graphs. In order to eliminate the mistakes
and get the accurate data in the measures, please read the following articles carefully;
You should have information about the field where the scan is conducted. You should consider the
information such as historical background and the structure of the soil of the field of scan .
If there is an energy line in the field of scan , this will cause you to be mistaken in the data. You should
scan at least 50 meters away of the factors that can affect the scan such as the energy lines.
During the scan in an unknown field, wide measures should generally be conducted. For example, the
scan should be conducted as 20 signals and 20 lines.
If you scan for big objects (tomb, room and big objects); you can increase the signal beat range (50 cm
between each signal). If you scan for small objects, you should maintain the signal beat range closer (such as 20
cm, 30 cm).
Measures in north and south axis enable you to obtain more reliable data. You should consider this as far
as possible.
The shape of the object you scan for (for example, square metal box) must be the same in the graph.
The longer a buried object lies underground, the more the magnetic field it creates and the easier it is
detected.
You should check by scanning in the same way at least twice. The extra measures enable you to eliminate
the minerals and the errors (if any).
In the measures, the object or the gap data should be in the middle of the graph. If the metal or gap data
is near the edge in the graph, you should re-measure by centering this data.
During the scan , you should check the battery and charge of your product. You should scan with fullycharged product. Low battery level is one of the factors affecting your measures.
You should conduct the graph analysis in the light of this information. In the following information, metalmineral distinction, and the analysis of metal and gap data are exemplified.
TORA TORA – www.toratorashop.net – [email protected] – 00390438842829
Page 4
4.1 – INITIAL EVALUATION OF THE MEASURES
CARRY OUT THE FOLLOWING STEPS TO BEGIN THE ANALYSIS OF THE MEASURES;
The Meaning of the Colors in the Graph;
Red; Metal
Blue; Cavity
Green; Soil
Orange and Yellow; Mineral
Carry out the following steps in turn for the analysis of the measures. The explanations in the examples will
provide information about the analysis of the graph.
1- First of all, you should use the button
in order to make the lines of the metal and gap data
apparent in the graph. Make the lines of the metal data apparent by clicking the F7 button once in turn.
Then, make the lines of the gap data apparent by clicking the F6 button once. When you click once, the
graph colors should be apparently the blue or the red. You should not use this buttons more than once or
twice; otherwise the mineral data also becomes red and is mistaken for the metal. The F8 button enables
you to undo the changes in the metal data, and the F5 button enables you to undo the changes in the gap
data.
2- If you shake the device or there are any factors causing magnetic field pollution (such as base station, energy
lines) and if you think you have made a mistake, you should use the signal correction button. If
there are no factors affecting your work in the field of scan , it should be “Correct only the Data
Under the Determination Line” to confirm the accuracy of your graph. If there are no changes in
the graph, it means that there are no mistakes in the data obtained. If there are any factors affecting the
work in the field of scan , you should use the “Correct All the Data” optionally used. The values in this option
should be 5 on the upper bar and 4 on the lower bar.
3- After the above adjustments, you should carefully examine the object in the graph. You should pay attention
to some significant features of the metal objects and gaps in the graph during the analysis. To do this, you
may use the “Image Quality (Interpolate)” button in the program. When you click this button, you
should select “3” as average value or you can do 3 or 4 times with the “1” option. With the Image
Quality (Interpolate) option, you can understand if the object in the graph is metal or mineral, and
confirm the gap data. If you use this option and conduct the analysis accurately, you will be
mistaken less. After these settings, examine the graph in the light of the following information.
It may be hard to discriminate between the metal and mineral at first sight. In some measures, you may get the
minerals in reddish. However, there are some differences between metal and mineral, and this analysis reveals
these differences. Some of these differences are as follows;
If the graph represents a certain shape, it is the metal data (such as square, rectangle, and circle).
If there is orange and yellow toning surrounding the object in the graph, this is probably the mineral data.
If the depth of the object is 10 cm or 30 cm in the measures, it is more likely to be mineral.
In the control measures conducted again, you should obtain and confirm the same data. Metal and
mineral images are exemplified in the following graph.
TORA TORA – www.toratorashop.net – [email protected] – 00390438842829
Page 5
The differences among metal, gap and mineral are explained in the following table. The features in the table are
exemplified in the graph. Please examine meticulously;
METAL
A certain shape
CAVITY
A certain shape
Top-down structure in graph
Red in graph
The graph continues apparently
downwards, levels at the bottom
Blue reflection in graph
Top-down structure in graph
Dark Blue in graph
The graph continues apparently
downwards, levels at the bottom
Green reflection in graph
Metal data
MINERAL
No certain shape, scattered in the
graph
No top-down structure in graph
Orange in graph
The graph is usually superficial, no
levels
No reflection in graph
Mineral data
METAL GRAPH;
The following sample graph is precious metal data inside the gap, which is created for testing by the user.
The information about the analysis of the metals in a square metal box is given.
Gerçek Obje, Metal verisi
The real metal objects represent a
certain shape. The shapes are the
most significant features that
separate the metal from the mineral.
In the side graph, the metal in a gap is
displayed and it is square. There is a
thin yellow layer surrounding the red
square, and this should be in all the
metal data. The yellow layer should
be in the same shape of the red
object.
TORA TORA – www.toratorashop.net – [email protected] – 00390438842829
Page 6
When the metal inquiry is conducted with
F7 and the gap inquiry with F6 in the
program, there should be BLUE reflection
representing the metal object (the data is
obtained with the north and south
magnetic pole in the values obtained).
There are no reflections in the minerals.
When the 3-dimension view of the examples above is examined, the metal data and gap data continue downwards
in the graph. In a simpler explanation, cavitation occurs. The bottom of the metal and gap data always creates a
level in the graph. The mineral data creates a pointy part in the bottom instead of a level. If there is a pointy part
at the bottom of the graph, it is the mineral data.
When the analysis of the metal data is
conducted in the side graph (Cavity data and
soil data are removed), it is observed that the
metal data creates a TOP and DOWN structure.
The feature should be regarded in the metal
and gap data. The mineral does not include this
feature. The metal and gap take up space as a
mass in the graph.
TORA TORA – www.toratorashop.net – [email protected] – 00390438842829
Page 7
You can confirm the data by using the “Image Quality (Interpolate)” button in the program. When you click this
button, you should select “3” as average value or you can do 3 or 4 times with the “1” option. With the Image
Quality (Interpolate) option, you can understand if the object in the graph is metal or mineral, and confirm the
gap data. If you use this option and conduct the analysis accurately, you will be mistaken less. The object
maintains its position before using the image quality scale and after using the image quality scale in the metal
and gap data. The object not only loses its previous position, but also scatters the graph in the mineral data. The
position of the graph should be same after using the image quality scale, the graph should not be scattered, and
the structure should not be ruined. In the following graph, the before and after images are shown.
The Graph before the use of The Image Quality
Scale (Interpolate)
The Graph after the use of The Image Quality
Scale (Interpolate)
When you consider all the features mentioned above, you can understand if the object is real or not. In brief, to
understand if the object is metal data; there should be cavitation in the graph, namely the graph should continue
downwards, metal objects have blue reflection, there must be a certain shape in the graph, there is a thin yellow
layer surrounding the object, and the position should be the same after the use of the image quality scale.
In order to make a distinction between the precious metal and the worthless metal; you have to use the image
quality scale. The precious metal and the worthless metal have the same features in the graph (reflection,
cavitation, thin yellow layer, top-down structure). However, it is possible to make a distinction between the
precious metal and the worthless metal by using the “image quality scale (interpolate)”. If the red object turns
orange and has more orange around when the image quality scale is used, then it is worthless metal. The
precious metal maintains the color red and has only thin yellow layer surrounding itself.
TORA TORA – www.toratorashop.net – [email protected] – 00390438842829
Page 8
The worthless metal after the use of image
quality scale
The precious metal after the use of image
quality scale
CAVITY DATA GRAPH;
All the features explained up until this point are the features of the metal data. The cavity data has the same
features. The gaps data also continues downwards (cavitation), and has top-down structure. However, the color
of the gap (such as room, tomb, and tunnel) is BLUE. When the graph is examined, there is a THIN LIGHT BLUE
layer similar to the BLUE lines (like the thin yellow layer in the metal). Besides, the north-south magnetic pole of
the gap has GREEN reflection.
There is a room view in the side graph. As
explained above, there is a LIGHT BLUE line
specifying the lines of the gap. It creates a TOP and
DOWN structure. The graph continues downwards
(cavitation).
In this graph, there is also a room view. It is seen in
the green lines, the reflection of the gap in the left
part.
TORA TORA – www.toratorashop.net – [email protected] – 00390438842829
Page 9
The gap data is similar to the data of the metal objects. They have the same features. While there is a thin
yellow layer surrounding the metal object, there is a thin light blue layer surrounding the gap data. While the
reflection of the metal is blue, the reflection of the gap data is green. The gap can be defined with the depth,
width and height in the gap data (such as tomb, room and tunnel). It is not necessary to explain in detail because
the metal data is explained in detail and the gap data has the same features. Please contact our experts for the
subjects you require more information.
THE DEPTH MEASURE IN GRAPH;
In order to measure the depth in the graph; the data of the object you scan should be at the center of the graph.
If there is data at the sides, you should conduct control-scan after centering these. In the depth measures, there
is error margin at the least (like 0.50 cm). In order to minimize the errors, you have to know the type of the soil
that you measure. You have to select the type of the soil in the soil option menu in the software.
Soil Type Option Menu
If you do not know the soil type of the field of scan exactly, you should conduct depth calculation before saving
the graph data you obtained in the program. Stop the incoming data inflow in your device, and conduct the
necessary analysis (such as metal confirmation by using the F6 and F7 inquires, and Image Quality Scale
(Interpolate)). Select the bird’s-eye view after the analysis. With the left-right/up-down direction button on your
keyboard, center the depth measure lines to the object on the screen. You can see the depth in the depth bar
indicator at the bottom.
As is seen in the side graph; when you center
the direction lines to the object, the depth
measure is displayed in the bar (depth) at
the bottom. You can obtain the depth with
the measure in the unknown soils.
TORA TORA – www.toratorashop.net – [email protected] – 00390438842829
Page 10
The Detailed Depth Measure of the Object
To get the detailed depth measure of the object in the graph, use the down button for the depth line in the
program with the side view of the graph. By using the up-down depth button, you can get the total measure
between the top-down structures of the object.
When you use the down button for the depth line in the
graph, the depth line will move downwards. The exact
meter is displayed numerically in the bar (Depth) showing
the depth at the bottom in the program. When you come
to the edge of the object (the point where the color red
starts), you will reach the top of the buried object. When
you move the depth line to the bottom of the object, you
will learn the total measures of the object.
In order to understand the position of the object, you should use the NET VIEW button in the program.
When you click the button, the graph will be displayed as small squares. You can move with the rightleft/up-down direction buttons on the keyboard on the squares in the net view. You must count each square
while moving to the center of the object with the direction buttons. The direction line moving at the right
enables you to learn row, and the direction line moving at the bottom enables you to learn the signal number
in order.
Examining the graph with net view
LIVE SCAN
You can learn the row and number in order of
the object in the net view.
The Live Scan option is optionally presented in a few models. If your product has live scan feature, you can use
this feature in the software. For the live scan in the software; you should select Menu – New Project – Device –
Ultrasound – scan , and the scan type should be live scan (Horizontal exploration). You cannot record the Live
Scan image. The graph constantly flows on the screen and is renewed. The color red represents metal; the color
blue represents gap; and the color green represents soil in the Live Scan. Conduct a detailed graph analysis in the
Ground Scan (Normal Ground Scan) with the pre-graph information you obtain here.
TORA TORA – www.toratorashop.net – [email protected] – 00390438842829
Page 11
Live Scan (Simultaneous live scan) feature is
optionally presented in some models. The
side graph displays the Live Scan.
All rights reserved to © Tora Tora Company. The unauthorized distribution, copy and amendment are
forbidden. Please contact our authorized personnel for the detailed information about the analysis and graph
interpretations.
TORA TORA – www.toratorashop.net – [email protected] – 00390438842829
Page 12