1
iHRIS Manage User's
Manual
PDF generated using the open source mwlib toolkit. See http://code.pediapress.com/ for more information.
PDF generated at: Thu, 11 Mar 2010 01:01:46 CET
Contents
Articles
Introduction to iHRIS Manage
1
iHRIS:Understanding iHRIS Manage
1
iHRIS:Before Installing iHRIS Manage
6
System Administration
15
iHRIS:Administer the System
15
iHRIS:Administer Users
16
iHRIS:Create Reports
18
Accessing the System
21
iHRIS:User Access
21
Managing the Database
23
iHRIS:Add Geographical Areas
23
iHRIS:Administer Database for iHRIS Manage
28
iHRIS:In-service Training Management Module
38
iHRIS:Create a Job Structure
44
iHRIS:Administer Positions
47
Managing Employee Records
53
iHRIS:Manage People
53
iHRIS:Add Employee Information
55
iHRIS:Add Position Information
57
iHRIS:Add Qualifications
60
iHRIS:Add Trainings
62
iHRIS:Add an Application
64
iHRIS:Add Employee History
66
iHRIS:Manage Job Applicants
68
iHRIS:Search Records in iHRIS Manage
70
iHRIS:Run Reports in iHRIS Manage
72
About Windows iHRIS
iHRIS:Using Windows iHRIS
Back Matter
74
74
78
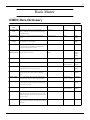
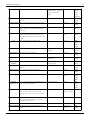
iHRIS:Data Dictionary
78
iHRIS:Copyright
91
References
Article Sources and Contributors
92
Image Sources, Licenses and Contributors
93
Article Licenses
License
96
1
Introduction to iHRIS Manage
iHRIS:Understanding iHRIS Manage
iHRIS Manage is a human resources management tool that enables an organization to design and manage a
comprehensive human resources strategy. iHRIS Manage helps an organization manage its workforce more
effectively and efficiently, while reducing costs and data errors. Using the system, the HR professional can create a
hierarchy of positions for an organization based on standard titles, job classifications and job descriptions, even
spread over diverse geographic locations, offices and facilities. HR staff can solicit job applications for open
positions, assign employees to fill positions and maintain a searchable database of all employees, their identifying
information and their qualifications. Managers can track each employee's history with the organization, including
their position and salary histories, and record the reason for departure when the employee leaves.
A decision maker within the organization can analyze this data to answer key human resource management and
policy questions, such as:
• Are employees deployed in positions that match their qualifications and education?
• Are employees optimally deployed in locations to meet needs?
• How many workers need to be recruited to fulfill anticipated vacancies?
• Are pay rates equitable across similar jobs?
• Are employees being promoted in alignment with competencies?
• What are the reasons for employee attrition?
iHRIS Manage is primarily intended to be used to manage health care workers employed by a country's Ministry of
Health, a hospital or other large health care organization, or a private provider of health care services. However, it
may be readily adapted to other types of organizations and workforces.
Modules and Features
Version 4.0 of iHRIS Manage consists of several key modules designed to store and report position, employee and
job applicant information:
• User Management: Create and manage password-protected user accounts to control access to the system.
Accounts are role-based so that non-authorized user actions and data sets are hidden from the user.
• System Configuration: Turn on and off modules and set options for each module to customize the system and its
features.
• Database Management: Design a standard data structure by creating lists of items to be tracked in the database
such as geographical locations, offices and facilities.
• Position Management: Create positions with standardized descriptions, codes and qualifications within the
organizational structure and manage the hiring, transfer and promotion process.
• Applicant Management: Record information about a job applicant, including interview notes, and log hiring
decisions.
• Employee Management: Match an employee to a position, record important information about an employee and
maintain a record of the employee's complete work history with the organization.
• In-service Training Management: Track in-service trainings that employees have completed and assess
competencies and continuing education credits earned from training (turned off by default).
iHRIS:Understanding iHRIS Manage
• Custom Reporting: Create reports to aggregate and analyze data in a variety of ways to answer key management
and policy questions as well as generate staff lists and directories.
• Search: Search for employee and applicant records in the system.
The following features ensure security and accuracy of data stored in the system:
• Error checking and data correction by authorized data managers to ensure data integrity
• Automated logging of the username, date and time when data are entered or changed for auditing purposes
• Permanent archiving of all data changes to ensure a consistent record of each employee's history with the
organization
iHRIS Manage will be extensible to the Capacity Project's other iHRIS products, iHRIS Qualify, a certification and
licensing management system for health professionals, and iHRIS Plan, workforce modeling and planning software.
Both of these systems are currently under development.
User Roles
Five user roles can be assigned in iHRIS Manage. The user role limits the activities that the person can perform in
the system and helps enforce data quality and management protocols.
• System Administrator is responsible for ensuring that system security procedures are enforced and for keeping
the system maintained and functioning. The System Administrator can view any record and perform any action in
the system. The System Administrator also configures the system, defines high-level reports and manages the user
accounts.
• HR Manager is a manager of human resources personnel and is responsible for managing all system data and for
ensuring that data in the system are complete, correct and up to date. The HR Manager can view and enter data in
any record. The HR Manager defines reports and analyzes data in order to make organizational or individual HR
decisions. In addition, the HR Manager is the only role (other than the System Administrator) that can create
standard lists of data, configure the system's job structure and correct data entered in the system.
• HR Staff is a data entry person in human resources who is responsible for entering and updating data in the
system. The HR Staff role can view and enter data in any record in the system and can view reports. However, the
HR Staff role cannot correct erroneous information, define reports or create standard lists of data. The integrity of
the data entered by HR Staff is enforced by the HR Manager.
• Executive Manager may manage the entire organization or one district, department, office or facility within the
organization. The Executive Manager views reports and analyzes data entered in the system in order to make HR
decisions and set organizational policy. The Executive Manager can view any record in the system, review job
applications and access all reports but cannot update or change data entered in the system.
• Training Manager manages in-service training programs for employees and updates employee competencies
gained by training. The Training Manager can only update the Trainings section of an employee's record. (These
functions may also be completed by HR Managers or HR Staff.)
2
iHRIS:Understanding iHRIS Manage
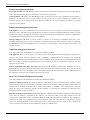
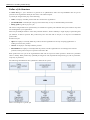
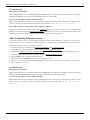
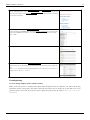
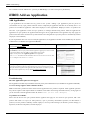
System Functions
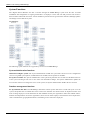
The diagram below illustrates the flow of actions through the iHRIS Manage system from the time of initial
installation and configuration to ongoing maintenance of employee records. The role that performs each action is
listed in italics underneath the action. Actions should be performed in the general order indicated, although updates
and changes can be made at any time.
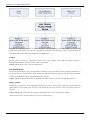
The following system functions are supported by Version 4.0 of iHRIS Manage.
System administration functions
Install and configure system: The System Administrator installs the system files and accesses the configuration
screen to set global system options, install and turn on modules, and set options for modules.
Set up user accounts: The System Administrator creates password-protected user accounts for all authorized users
of the system and assigns each user a role. If the user information changes, the System Administrator updates the
user account. If the user no longer has access to the system, the System Administrator disables the user account.
Database management functions
Set up standard data lists: The HR Manager determines which specific data items to track and report on in the
system, and updates lists to include those items. These lists determine the selection items in dropdown menus used
when creating employee records and define the data standards used by the organization. These lists include offices,
facilities and departments used in the organization; items used to define employee characteristics and competencies,
such as marital status; geographical locations; and training courses offered to employees.
3
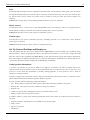
iHRIS:Understanding iHRIS Manage
Position management functions
Set up job structure: The HR Manager creates a job structure to match the organizational structure by defining the
cadres, job classifications, salary grades and jobs used within the organization.
Create positions: HR Staff or the HR Manager creates positions that exist in the organization. Each position is
linked to a job, and there may be several positions for each generic job. A position is filled by one employee and
represents one spot on the organizational chart. Positions marked as "open" are available to be filled by an existing
employee or job applicant.
Employment management functions
Add employee: At any time, HR Staff can add a person to the system as an employee. This includes recording the
employee's name, nationality and geographical area of residence, as well as information about the employee, such as
identification numbers, demographic information and contact information. In addition, the employee's qualifications
and educational and employment history may be recorded.
Manage employees: HR Staff record any updates or changes to an employee's information when they occur,
including changes in position or salary, termination of employment and a log of notes about the employee. HR Staff,
the HR Manager or Executive Managers may review history of name changes, position changes, salary changes and
notes at any time.
Applicant management functions
Note: This module may be disabled if not needed. It is enabled by default.
Add applicant: When a person applies for an open position at the organization, HR Staff add the applicant as a
record in the system with the applicant's name, nationality, geographical area of residence and supporting
information, including required identifications, contact information, employment history and educational history. HR
Staff can complete a standard job application form for the applicant, as well. Note that current employees may also
apply for open positions.
Review applications and make job offers: HR Staff, the HR Manager and Executive Managers review the
applications for an open position and record notes about each applicant, including interview notes and notes about
the decision whether to hire the applicant. Once an applicant has been hired to fill an open position, HR Staff convert
the applicant to an employee and assign the position to the person.
In-service Training Management Functions
Note: This module may be disabled if not needed. It is disabled by default.
Manage a training program: The Training Manager or HR Manager enters information about available training
courses into the system for selection when scheduling employees for training. Training programs include funders of
training courses, institutions hosting courses, names and schedules of available courses, competencies earned by
taking the course and continuing education credits. Requests for training and evaluations of employees after
completing training can also be tracked.
Schedule an employee for training: The Training Manager or HR Staff can schedule an employee to take a training
course after the training is requested by the employee, the supervisor, HR or some other requestor. Once the
employee has completed the course, the Training Manager or HR Staff can evaluate the employee. The evaluation is
retained in the employee's evaluation history. If an employee gains new competencies by completing a training
course, the Training Manager or HR Staff can asses those competencies after the employee has completed the
course. Assessed competencies are then added to the employee's qualifications.
4
iHRIS:Understanding iHRIS Manage
Search
All users can search the system for employee and position records. They may then review the record on the screen or
print a copy.
Reporting
iHRIS Manage includes a customized report builder that enables System Administrators to define reports based on
any data entered in the system. In addition, the system is installed with a large number of pre-defined standard
reports that any user can view as a table or chart, export or print.
In addition, System Administrators may export data from iHRIS Manage for use in other instances of the system or
in other systems. Data may also be imported into iHRIS Manage.
Planned Features
Version 4.0 of iHRIS Manage, which this manual accompanies, provides a complete solution for setting up an
organization's position structure and managing job applications and employee information. Later releases will
support additional modules and functions, including:
• Customizable roles to enable System Administrators to create roles other than the five pre-configured roles and
assign them tasks that they can perform in the system
• Customizable headers to enable database managers to easily change header or field names for their context (i.e.,
change District to State or Province).
• Self-service option to enable employees and supervisors to view and update their records in the system while
protecting private and sensitive data
New features and development are ongoing. As this is an Open Source development project, volunteers and other
organizations may also contribute to the core code. Check the iHRIS Manage page (http:/ / www. capacityproject.
org/ hris/ suite/ ihris_manage. php) on the HRIS Strengthening Website for the most up-to-date list of planned
features and a development calendar.
5
iHRIS:Before Installing iHRIS Manage
iHRIS:Before Installing iHRIS Manage
Before installing iHRIS Manage, spend some time collecting data about your organization and its employees. This
will enable set up of the necessary data structure for entering data into the system. This section gives guidance on the
data that should be collected and provides checklists for recording and organizing the data.
There are four checklists to complete to set up iHRIS Manage:
• Data Setup Checklist
• Define Geographical Locations
• Define a Job Structure
• Set Up Current Positions and Employees
If your organization offers in-service trainings to employees, you may also choose to set up a training program in
iHRIS Manage. This module is optional.
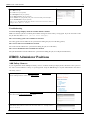
Data Setup Checklist
Before entering data into iHRIS Manage, you must configure lists for selecting standard items. Standardizing these
selection lists ensures that data can be reported consistently. Complete the following exercises before beginning to
identify and gather all the data needed to complete the setup. This exercise should be completed by an HR Manager.
Note: Some data lists are pre-filled when iHRIS Manage is installed. You may use these pre-filled lists as is, or any
of these items may be edited to match the standards used in your organization.
Education types and degrees
List all education types (such as high school, college, university, professional) and degrees for each education type
(such as diploma, bachelor's degree, master's degree, certificate) to track for job applicants and employees.
Action: Enter all education types and degrees in the system (see Add an education type and Add a degree).
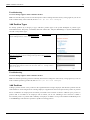
Languages
Do you want to track employees' language skills--their proficiency at reading, writing and speaking non-native
languages? List all languages to track.
Action: Enter all languages (see Add a language).
Competency categories and competencies
Is your organization using a competency model to track employee competencies or skills? A competency is any skill
in which an employee has been assessed to be competent. For easier organization, related competencies can be
grouped under the same competency type, or a category of related competencies. When an employee is assessed for a
competency, a competency evaluation level can be selected.
List each competency type and all the competencies that belong in each category. List all the levels of competency
evaluation used in your organization.
Action: Enter all competency types and competencies in the system (see Add a competency type and Add a
competency). Enter all competency evaluations used by your organization (see Add a competency evaluation.)
6
iHRIS:Before Installing iHRIS Manage
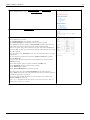
Identification types
Identification types are non-changing IDs, such as a Social Security Number, driver's license, passport or national
health insurance card, that are used to identify an employee. Identification numbers are entered into the system when
a job applicant completes an application and when an employee is hired. The types of identification that are required
depend on the laws of your country and the policies of your organization.
List all identification types that will need to be tracked.
Action: Enter all identification types in the system (see Add an identification type).
Benefit types
Will you be tracking special non-salary payments made to employees, such as benefits, allowances, travel advances
or bonuses? List all benefit types, or special payments.
Action: Enter all benefits types in the system (see Add a benefit type).
Marital status types
List the types of marital status--such as single, married, divorced and widowed--you need to track for your
employees.
Action: Enter all marital status categories in the system (see Add a marital status).
Reasons for departure
List the reasons for departure that you would like to track when employees leave or change positions within the
organization.
Action: Enter all reasons for departure in the system (seeAdd a reason for departure).
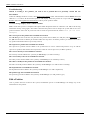
Define Geographical Locations
iHRIS Manage can track human resources data by four types of geographical locations. The system reports aggregate
data at each level in order to analyze human resources at the national, regional, district and/or county level.
7
iHRIS:Before Installing iHRIS Manage
When data with a geographical component is entered in the system, such as an employee's home address or the
location of an office or facility, you are first prompted to select a country. The system then displays a list of regions
within that country for selection. After selecting a region, the system displays a list of districts within that region, as
well as any counties that may have been entered for the district. Choosing the district is required; choosing a county
is not, but is useful for tracking data by the smallest geographical subset.
Each office or facility in the organization is linked to a district and, optionally, a county. Each office or facility is
assigned a type, which defines the category it belongs in (such as office, hospital or clinic). Positions can then be
defined for each office/facility.
Locations Worksheet
Complete the following exercise for each country where employees are located. This will determine the geographical
and office/facility data that need to be entered into the system. This exercise should be completed by an HR
Manager.
Country name:
Currency (for employee salaries):
Region names:
If you are not tracking data by region, enter one country-wide region, such as "National."
District/state/province names for each region:
County/sector names for each district/state/province (optional):
Offices/facilities in the country and type of facility:
Departments used by the office/facility or by the organization as a whole (optional):
8
iHRIS:Before Installing iHRIS Manage
Example Scenarios
The following examples illustrate several scenarios for setting up geographical locations and offices/facilities in the
system, depending on your organization's locations and needs.
1) The organization has one office and does not track data regionally.
Create a country with the name of the country where the office is located. For that country, enter any meaningful
name to signify the one required region, such as "National." For that region, enter the name of the district, state or
province where the office is located. For that district, enter the name of the county or sector where the office is
located (optional). Enter one facility type, such as "office," to categorize the office. Create an office and enter a
meaningful name for the office, such as "Headquarters." Link it to the country, district and county entered.
2) The organization has several offices or facilities in one country and needs to track data regionally.
Create a country with the name of the country where the offices/facilities are located. Enter the names of the regions
where the offices/facilities are located, or all regions in the country. Enter the names of the districts, states or
provinces within each region where the offices/facilities are located, or all districts in the country. Enter the names of
the counties or sectors within each district where the offices/facilities are located, or all counties in the country
(optional). Enter the names of all offices or facilities, assigned to their specific district and county locations, and
categorized by the specific facility types you have defined.
3) The organization has several offices or facilities in several countries and may need to track data regionally
for some.
Create all countries where offices/facilities are located. For each country where regional data should be tracked, enter
the names of the regions within that country. For each country where regional data does not need to be tracked, enter
one "region," such as "National." For each defined region, enter the name of at least one district, state or province.
Enter the names of counties or sectors within defined districts (optional). Enter the names of all offices or facilities,
assigned to their specific country, district and county locations, and categorized by the specific facility types you
have defined.
4) The organization has only office but has personnel assigned to work in several different geographical
locations.
Create all countries where employees are located. For each country, enter the name of at least one region; if regional
data does need to be tracked, enter a meaningful name for one region per country, such as "National." For each
region, enter the names of all districts, states or provinces where employees are located. Enter the name of counties
or sectors where employees are located within defined districts (optional). Configure the system to globally turn off
the offices/facilities feature; all positions will be linked to a geographical location instead. (Requires customization
by a programmer.)
Actions: When you have completed this worksheet, enter into the system, in the following order:
• all countries identified -- at least one must be entered (see Add a country)
• all regions identified for each country -- at least one region per country (see Add a region)
• all districts identified for each region -- at least one district per region (see Add a district)
• all counties identified for each district -- optional (see Add a county)
• all currencies identified -- at least one must be entered (see Add a currency)
• all facility types identified -- at least one type must be entered (see Add a facility type)
• all information about each office or facility in the organization -- at least one office must be entered (see Add an
office or facility)
• all departments identified -- optional (see Add a department)
9
iHRIS:Before Installing iHRIS Manage
Define a Job Structure
In iHRIS Manage, a job is defined as a general set of qualifications, duties and responsibilities that one person
performs in the organization. Each job has a title, code and description.
A job may be categorized by any of the following:
• Cadre: a category of health professionals who work for the organization
• Job classification: a standard job category and code that may or may not include health professionals
• Salary grade: a grade of pay for a job
All of these categorizations are optional. They are intended to organize jobs and track and report on data in ways that
are meaningful for your organization.
There may be multiple instances of the same job. Each instance, which is filled by a single employee performing that
job function, is called a position. The position may have the same title as the job, or it may have an additional
position title.
Positions may be:
• Open: No employee currently holds the position, and the organization is actively accepting applications or
seeking to hire into the position.
• Closed: An employee currently holds the position.
• Discontinued: No employee currently holds the position, and the organization is not seeking to hire into the
position, but the position may be reopened at some later date
Each position has one spot on the organizational chart and one supervisor. Each position is located at a particular
office or facility. Each position may optionally be assigned a code, department and position type (such as permanent,
temporary or part-time).
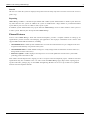
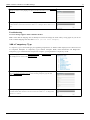
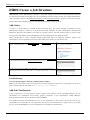
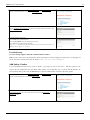
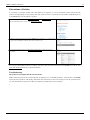
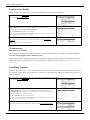
The following chart illustrates how job data are related in the system:
This is an example of a specific job:
10
iHRIS:Before Installing iHRIS Manage
Complete the following exercises to define all cadres, job classifications and salary bands in use in your
organization. Then identify each job in the organization and link it to the appropriate cadre, job classification and
salary band. This section should be completed by an HR Manager.
Cadres
List all cadres in use in the organization. Cadres refer only to health professionals and should conform to
international standards as much as possible. Cadres are optional.
Action: Add all cadres to the system (see Add cadres).
Job classifications
List all job classifications in use in the organization, including a description and a code for each job classification. A
job classification is a category used to group similar jobs. Job classifications may be the same as cadres but will also
include non-health professionals. Job classifications are optional.
Action: Add all job classifications and corresponding information to the system (see Add job classifications).
Salary grades
List all salary grades in use in the organization. Include the currency, starting salary, midpoint (or market rate) and
ending salary for each salary grade. A salary grade defines the pay range for one or more jobs. Salary grades are
optional.
Action: Add all salary grades and corresponding information to the system (see Add salary grades).
Currencies also need to be entered into the system (see Add a currency).
11
iHRIS:Before Installing iHRIS Manage
Jobs
List all jobs that currently exist in the organization with their cadre, job classification, salary grade, job code and job
description. Remember that a job is not the same as a position. Several positions may exist for one job. Once the jobs
are entered in the system, at least one position may be created for each job, which may then be linked to an
employee.
Action: Enter each job and its corresponding information into the system (see Add jobs).
Salary sources
List all salary sources. A salary source is any distinguishable source of an employee's salary or a special payment or
benefit paid to an employee that needs to be tracked. Tracking salary sources is optional.
Action: Enter all salary sources in the system (see Add salary sources).
Position types
List all position types (such as permanent, temporary, consultant, part-time, etc.) to track in the system. Tracking
position types is optional.
Action: Enter all position types in the system (see Add position types).
Set Up Current Positions and Employees
Once the standard data lists have been configured in the iHRIS Manage system according to the worksheets "Data
Setup Checklist", "Define Geographical Locations" and "Define a Job Structure", you are ready to begin the initial
data entry. This involves populating the iHRIS Manage system with all current position and employee information.
Print and complete the following checklist first to ensure that all the data is available before entering data into the
system. This checklist should be completed by an HR Manager or HR Staff.
Gather position information
A position is an instance of a job that is filled by one employee, is located at one office or facility and has one
supervisor. Each position represents a box on the organizational chart. A position may be open or closed. An open
position is one for which the organization is currently seeking applicants. A closed position is one to which an
employee is currently assigned.
Compile a complete list of all current positions, both open and closed. For all closed positions, you will also need to
gather additional information about the employee filling the position.
For each position, gather the following required information:
• Job -- Each position is categorized under a generic job that has already been defined in the system.
• Position title -- This may be the same or different as the generic job title.
• Position code
• Actual or proposed salary, including the currency in which the salary is paid
• Facility or office where the position is located
In addition, gather as much of the following information about each position as possible (all of these fields are
optional):
• Position description, if different from or in addition to the job description
• Salary sources
• Supervisor's position
• Department
12
iHRIS:Before Installing iHRIS Manage
• Position type
• Hiring date
• Proposed end date, if the position is a short-term or contract position
Action: Enter all positions into the system (see Add positions).
Gather employee information
For each employee, gather the following required information:
• Full name (first name and surname)
• Nationality
• Country and district/state province of residence; county of residence is optional
• Position
In addition, gather as much of the following information about each employee as is available to you (all of these
fields are optional):
• Date of birth
• Gender
• Marital status
• Number of dependents
• Identification types and numbers
• Personal contact information -- mailing address, telephone number(s), fax number, email address
• Work contact information -- mailing address, telephone number(s), fax number, email address
• Emergency contact information -- mailing address, telephone number(s), fax number, email address, notes such as
emergency contact name and relationship
• Other contact information -- mailing address, telephone number(s), fax number, email address that do not fit into
any of the other contact categories
• Benefit information -- benefit type, source, currency, amount, start date, end date and recurrence frequency
iHRIS Manage also supports storing the following information about each employee (you may or may not choose to
enter this information during the initial data entry process):
• Educational history -- institutions attended, graduation dates, education types and degrees, and majors
• Employment history -- previous company names, addresses, telephone numbers, supervisors, reasons for leaving,
starting positions, dates and salaries, ending positions, dates and salaries, and job responsibilities
• Qualifications -- languages and competencies in which the employee is proficient
Action: Enter all employees in the system (see Manage People).
Set Up a Training Program
The in-service training management module is an optional module that can be used to manage in-service training
courses offered to employees. Using this module, you can schedule employees to take courses, evaluate employee
performance in training courses and assess competencies earned from training. If you choose to use this module, you
should gather data about training courses offered to employees to enter in the system. The training program data may
be entered by a Training Manager or HR Manager. After initially setting up the training program, you may update
training course information or add new courses at any time.
Before you can use this module, you must enable it in the system (see Enable the In-Service Training Management
Module).
13
iHRIS:Before Installing iHRIS Manage
Training Course Descriptions
There are various ways you can categorize a training course in the training program management module. You can
set up course categories. You can assign a status to a course, such as open, closed or full. You will select these
descriptors when you enter a training course's details.
You can also select the requestor who asked that an employee be scheduled for a course, such as the employee, their
supervisor, human resources, a manager or a donor. Finally, you can set up options for evaluations of an employee's
performance in a training course, such as Pass, Fail or Incomplete. You will select these descriptors when scheduling
a training course for an employee.
Action: Determine which of these descriptions you want to use and what the standards should be for your
organization. Enter each into the system (see Set up the In-Service Training Management Module.)
Training Institutions
If you like, you can record information about institutions that offer training courses in the system. For each training
institution, you can record the name, its geographical location, and its mailing address, telephone numbers, fax
number, email address and primary contact person. You can then select the training institution giving each course
when you enter the training course's details.
Action: Enter all training institutions into the system (see Add a training institution).
Training Funders
You can also record information about the organization or donor that is funding a training course. For each training
funder, you can record the name, its geographical location, and its mailing address, telephone numbers, fax number,
email address and primary contact person. You can then select the training institution giving each course when you
enter the training course's details.
Action: Enter all training funders into the system (see Add a training funder).
Continuing Education Courses
Continuing education courses are courses that provide official continuing education units (CEUs) to an employee, in
order to renew a license, for instance. Continuing education courses may be associated with training courses if an
employee can earn CEUs by taking the course. A training course may include one or more continuing education
courses. You can enter the name and the number of credit hours (CEUs) earned in each continuing education course.
You can then associate the continuing education course with its training course when adding the training course
details.
Action: Enter all continuing education courses into the system (see Add a continuing education course).
Training Courses
For each in-service training course, collect the Name of the course, its topic and the schedule of classes offered,
including the maximum number of students and site for each course. You may also record the course category, the
training institution offering the course, the training funders funding the course, CEUs (continuing education units)
and competencies provided by the course, the names of the instructors, and the geographical location where each
class is being given.
Action: Enter all training courses and their schedules into the system (see Add a training course and Schedule a
course).
14
15
System Administration
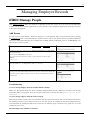
iHRIS:Administer the System
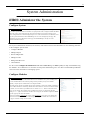
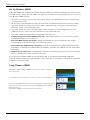
Configure System
Click Configure System on the main menu to access options for setting up and customizing iHRIS.
Here is where you can administer the database (set up dropdown menus, configure modules that will be
used in the system, export and import data, and create and update user accounts), manage reports,
browse configuration data, examine background processes, control cached forms, and administer users.
Only the System Administrator and the HR Manager can access the Configure System page. The
Administrator can access all functions on this page, but the HR Manager can only access the
Administer Database functions.
The System Administrator manual (to be written) will contain extensive documentation for the following functions
in the Configure System menu:
• Configure Modules
• Manage Reports
• Browse Magic Data
• Manage Locales
• Background Processes
• Cached Forms
See the section Configure the Database for Use under iHRIS Manage or iHRIS Qualify for help with administering
the database. See Administer User Accounts for help with administering users. See The Customized Report Builder
section for more information on managing reports.
Configure Modules
Click Configure Modules to enable new modules and customize all modules that have been installed
for use in iHRIS. This page lists all modules that have been installed for the system, including those
that were installed with the main software package and any modules you may have installed
separately. Only the System Administrator can configure modules.
A checkbox appears beside most module names. If the checkbox is checked, the module is enabled, or
turned on. Most modules are enabled by default. Click the checkbox to remove the check and disable
the module, if it is not needed; you will then have to click the Enable button at the bottom of the
page to save the change. The module can be re-enabled at any time by re-checking the box and
clicking Enable again. Note that if the checkbox does not appear, the module is required for iHRIS
to operate properly and cannot be disabled.
Beside most modules a Configure link appears. Click Configure to open a new screen showing all
options for that module. These modules will change depending on the module that is selected. Use
this page to customize settings for the module.
iHRIS:Administer the System
Disable the Record Verify Module
The Record Verify Module is currently available only in iHRIS Qualify.
By default, the Record Verify Module is turned on when iHRIS Qualify is installed. This
module is optional and is intended to be used if the data manager wants to track verifications
and updates to health worker records. If this functionality is not needed, it may be disabled to
simplify the interface.
The System Administrator can disable this module in the Configure Modules page. To turn off
the module, follow these steps:
1.
2.
3.
4.
5.
Click Configure Modules.
Scroll down to the "Application" section and locate iHRIS Qualify.
Click Sub-Modules to the right of iHRIS Qualify.
Under the "Application Component" section, click the checkbox next to RecordVerify.
Scroll to the bottom of the page and click the Enable button. The module will be
disabled, and record verification functions will no longer be available in the system (see
Add a Verification for details).
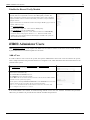
iHRIS:Administer Users
Click Administer Users to create, update and disable user accounts to enforce secure access to the system. Only the
System Administrator can add and update user accounts.
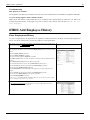
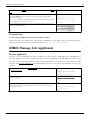
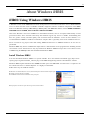
Add a User
In order to allow a user to access the system, the System Administrator must create a user account for the person,
with a unique username and password. Each user is assigned a role, which determines the actions that the user can
perform in the system.
On the Home page or left menu, click Configure System. Click Administer Users.
Select Add New User from the dropdown menu and click the Add button.
The Administer Users form opens. Enter a Username for the user: one word with no special
characters (letters and numbers only).
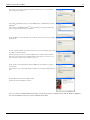
Enter the First Name and Surname of the user.
Enter an Email for the user, if known (optional).
Select the Role of the user (see below for roles). If no role is selected, the user will be disabled
and cannot access the system in any capacity.
Select the option to randomly Generate New Password or enter a Password for the user. If the
password is entered, re-enter it to confirm. The two passwords must match.
Click Confirm and confirm that the account entered is correct. If it is not correct, click
Edit to change it. If it is, click Save to save it.
If an email address was entered, an email message will be sent to the user with the username and password.
Otherwise, you will have to provide the user with the username and password.
16
iHRIS:Administer Users
iHRIS Qualify User Roles
• Administrator: has full access to the system
• Data Operations Manager: manages system data, including correcting data and managing data selection lists;
can search for, view, enter data in and correct any record and generate any report
• Decision Maker: generates reports in order to analyze data; can search for and view any record but cannot enter
data into the system
• Records Officer: enters general information about health workers, including demographic, education,
identification, contact, training, deployment and out migration information, as well as notes
• Registration Supervisor: enters all general information about health workers, plus issues registrations, licenses
and private practice licenses, and enters continuing education information and disciplinary notices
iHRIS Manage User Roles
• Administrator: has full access to the system
• Executive Manager: generates reports in order to analyze data; can search for and view any record but cannot
enter data into the system
• HR Manager: manages system data, including correcting data and managing data selection lists; can search for,
view, enter data in and correct any record and generate any report
• HR Staff: enters and updates records and positions; can generate any report
• Training Manager: sets up the in-service training management program, schedules employees for trainings and
evaluates employees performance in trainings
Troubleshooting
A required field was not completed.
The system will display an error message. The required field(s) will be outlined in red. Complete the missing fields
and try saving again. If you do not want to add the user account after all, click Return (do not save
changes).
The username is already in the system.
The system will generate an error for duplicate usernames. Return to the Administer Users screen and select the
username from the dropdown menu to edit the user account (see Update a User).
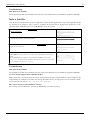
Update a User
If information about a user has changed, the System Administrator can update the user account with the change.
Usernames and passwords may also be changed. If a user no longer has access to the system, the account can be
disabled.
On the Home page or left menu, click Configure System. Click Administer Users.
From the menu select the user account to change.
17
iHRIS:Administer Users
The user account information is displayed. Make the change or select "No Access" from the
Role menu to disable the account.
Click Confirm and confirm that the changes entered are correct. If they are not correct, click
Edit to change them. If they are, click Save to save them.
Troubleshooting
A required field was not completed.
The system will display an error message. The required field(s) will be outlined in red. Complete the missing fields
and try saving again. If you do not want to update the user account after all, click Return (do not save
changes).
iHRIS:Create Reports
Reports enable analysis of health worker data in various ways. The options for building custom reports are located
on the Configure System page under "Manage Reports." Click View Reports on the home page or left side menu to
run, print and export standard or customized reports of health workers and offices/facilities, statistical charts and
other pre-configured reports. Administrators can define report relationships, reports and report views for other users
to access; Managers can also create new report views.
Report Relationships
The Administrator can define a relationship between system forms on which to base reports, or can edit or delete an
existing report relationship. Defining report relationships requires extensive knowledge of the database and forms
used in iHRIS and is restricted to Administrators. Unless you understand report relationships, you should not edit or
delete the existing report relationships pre-defined in iHRIS. These report relationships are used to create the
standard reports that are available once iHRIS is installed.
To edit the pre-defined report relationships and define new relationships, click Form Relationships under "Manage
Reports" on the Configure System screen.
Learn more about form and field relationships, and view a graphical representation, for iHRIS Qualify (see iHRIS
Qualify Form and Fields 4.0) and for iHRIS Manage (see iHRIS Manage Form and Fields 4.0).
Reports
The Administrator or Manager can define a new report, or can edit or delete an existing report. Creating reports
requires some knowledge of the data fields used in iHRIS. Unless you understand these fields, you should not edit or
delete the existing reports pre-defined in iHRIS. These reports are used to create the standard report views that are
available once iHRIS is installed.
To edit the pre-defined reports and create new reports, click Reports under "Manage Reports" on the Configure
Systems screen. Reports are generated automatically every 10 minutes. The time the report was last generated is
shown beneath the report name. If you need to manually generate a report--to immediately show a change to the
database, for example--do so by clicking Generate. If for some reason the report generation fails, click Generate
(Forced) to correct it.
18
iHRIS:Create Reports
Reports can be exported to an XML format file by clicking Save All Reports in the middle of the page, under the
"Staff Reports" section.
Report Views
Report views define how data are displayed in a report. Multiple report views can be created for the same report so
that data may be aggregated and analyzed in various ways. For each report, data can be displayed either as a table or
as a chart. The data may also be exported for further analysis, or the report may be printed.
Administrators and Managers can create new report views or edit views that have already been defined. At least one
report view must be defined before a report can be run. Other users may run any report view, but they cannot create
new views. Creating report views requires some knowledge of the data fields used in iHRIS. Unless you understand
these fields, you should not edit or delete the existing report views pre-defined in iHRIS.
To edit the pre-defined report views and create new report views, click Report Views under "Manage Reports" on
the Configure Systems screen. All users may access the defined reports by clicking View Reports on the home page
or left navigation screen.
Pre-defined Report Views in iHRIS Qualify
The following pre-defined report views are available once iHRIS Qualify is installed.
Training Reports
Exam Pass/Fail: A pass/fail comparison for all exams.
Exam Pass/Fail by Year: A pass/fail comparison for all exams by year.
Licensed Health Workers by Cadre: A chart of all licensed health workers by cadre.
Licensed Health Workers: A list of all licensed health workers.
Registered Health Worker: A list of all registered health workers.
Search Training: Search based on training information.
Discontinuations by Category: A pie chart of all discontinuation categories.
Discontinuations by Reason: A chart of all discontinuations by reason.
Discontinuations by Year: A chart of all discontinuations by year.
Resumption Report: A pie chart of disruptions that have been resumed or not.
Training Institutions
Training Institutions: A list of all training institutions.
Person Reports
Registration Results by First Training: The registration results for each person's first training.
Pass/Fail by First Training: The pass/fail results for each person's first training.
Student Intake Year: The number of students entering training by year.
Students in Training by Year: Students by intake year that are broken down by in or not in training.
Top Birth District: A pie chart of the top districts entering training.
19
iHRIS:Create Reports
Search Reports
Search People: Search people in the system.
Pre-defined Report Views in iHRIS Manage
The following pre-defined report views are available once iHRIS Manage is installed.
Facility Report
Facility List: A list of all facilities.
Position Reports
Position List: A list of all positions.
Position Open Duration: The length in days each position was open before being filled.
Search
Search People: Search all person records in the system.
Staff Reports
Age Distribution: Total of all staff by age range.
Classification Breakdown: A total of all staff by classification.
Hires per Year: Hire totals by year.
Job Breakdown: Total staff by job.
Nationality Breakdown: A list of all staff by nationality.
Retirement Planning: Staff totals by retirement year.
Emergency Contact List: A list of all staff with emergency contact details.
Home Contact List: All staff with home contact details.
Salary List: A list of all employees with salary details.
Staff Directory: A list of all current staff with work contact information.
20
21
Accessing the System
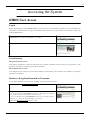
iHRIS:User Access
Log in
Before performing any task in iHRIS Qualify, you need to log in. You cannot log in unless a user account has been
created for you and you have been given a username and password. If you do not have a user account, contact your
System Administrator.
Connect to the system. The Welcome page appears. In the Log In form, enter the Username
and Password that were provided to you. Click the Login button.
The Home page opens listing the actions that you can perform based on your role.
Troubleshooting
The password is not correct.
You will be prompted to re-enter the password. If you cannot remember your password, you can generate a new
password (see Retrieve a forgotten password or username).
The username is not correct.
You will get an error message. If you cannot remember your username, you can retrieve it (see Retrieve a forgotten
password or username).
Retrieve a Forgotten Password or Username
If you have forgotten your password or username, you can generate a new one.
From the Log In page, click Forget username or password?
The Forgot Password page opens.
To reset the password, enter your Username in the box next to "Reset Password" and click the
Reset button. The system will email your new password to you.
To recover your username, enter your Email Address in the box next to "Display Username"
and click the View button. The system will display your username.
Click the link to Return to login page and log in as normal.
iHRIS:User Access
Troubleshooting
The system does not recognize the email address.
Contact your System Administrator for help.
Change Your Password
At any time, you can change your password for logging into the system.
Log in. Click Change Password in the main menu or left navigation menu.
The Change Password form opens.
Enter your Old Password (current password).
Enter the desired New Password.
Re-enter the password under Confirm New Password to confirm it.
Click Change Password to save the new password.
Troubleshooting
An error message appears when Confirm is clicked.
Re-enter the password twice. The two passwords must match or the system won't accept the new password.
Log Out
When you are finished working in the system, log out to prevent any unauthorized person from accessing the system.
In the upper left corner on any page, click Log out (next to the padlock).
The Welcome page appears. You will have to re-enter your username and password to regain
access to the system.
22
23
Managing the Database
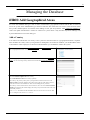
iHRIS:Add Geographical Areas
To ensure that standard data types such as cadres, marital status, geographical locations and the like are enforced
across the system, those standard data types must be created as lists. These lists are used to create selection menus
that provide standard options for selection when adding records, jobs and positions. Click Administer Database to
create and update standards lists of data for selection in system menus. Only the Data Operations Manager and
System Administrator can create data types.
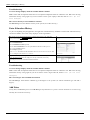
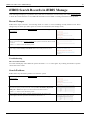
Add a Country
You will need to add at least one country to the system for selection whenever a geographical location is required.
This should be the country where your organization's headquarters are located. In addition, you should add the names
of all countries where employees are located or all nationalities you would like to track in the system.
From the home page or left menu, click Administer Database under Configure System.
In the "Geographic Information" section, select Country.
The Country page opens, showing all the countries entered in the database. Click Add New
Country. (To edit an existing country, click its name and then click Update This Information.)
The Country form opens. Enter or edit the Name of the country.
Enter the 2 Character Alpha Code for the country.
Enter the ISO Numeric Code for the country (optional).
If the country is the primary country where your organization is located, select Yes in the
Primary Country menu. This will place the country name at the top of all country selection
menus. Otherwise, leave the default as No. There can be multiple primary countries.
If the country is to be used for locations, such as addresses, select Yes in the Use for Location
Selection menu. Selecting No will not display the country in any location selection menus, only
for nationality selection.
Click Confirm and confirm that the information entered is correct. If it is not correct, click
Edit to change it. If it is, click Save to save it.
iHRIS:Add Geographical Areas
Troubleshooting
An error message appears when the Confirm button is clicked.
Make sure that the country and two-letter country code have not previously been entered into the system. The system
will not allow duplicate countries. Also check that the country name and code have been entered -- these fields are
required. Required fields will be outlined in red. Try completing the missing fields or changing the country name and
saving again. If you do not want to add the country after all, click Return (do not save changes).
The required 2-Character Alpha Code is not known.
Find a complete list of 2-letter country codes on the International Organization for Standardization (ISO) website [1].
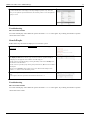
Add a Region
A region is a major subdivision of a country. Region choices depend on which country is selected; only a region that
is associated with a particular country can be chosen when that country is selected. For each country you have
entered in the system, add at least one region.
From the home page or left menu, click Administer Database under Configure System.
In the "Geographic Information" section, select Region.
The Region page opens. Click Add New Region. (To edit an existing region, select its country
from the menu and click the View button; then click the region's name and click Update This
Information.)
The Region form opens. Enter or edit the Name of the region.
Type the name of or select the Country in which the region is located.
Enter a Code for the region (optional).
If necessary, choose to Hide the region, for an old region that is no longer valid and therefore
should no longer be an option.
Click Confirm and confirm that the information entered is correct. If it is not correct, click
Edit to change it. If it is, click Save to save it.
Troubleshooting
An error message appears when the Confirm button is clicked.
Check that a region with the same name has not already been entered for that country. There cannot be two regions
with the same name in the same country. Also make sure that the region name was entered and its country was
selected -- these fields are required. Required fields are outlined in red. Fill in the missing information and try saving
again. If you do not want to add the region after all, click Return (do not save changes).
The country name is not available for selection.
Next to "Country", click Add New and add the country. Then click Administer Database and follow the steps above
to add the new region. You will have to re-enter any information that you previously entered for the region.
24
iHRIS:Add Geographical Areas
Add a District
A district is a subdivision of a region. In some locations, the district may be called the state or province. District
choices depend on which country is selected; only a district that is associated with a particular country can be chosen
when the country is selected. For each region you have entered in the system, add at least one district.
From the home page or left menu, click Administer Database under Configure System.
In the "Geographic Information" section, select District.
The District page opens. Click Add New District. (To edit an existing district, type or select the
region where it is located and click the View button; then click the district's name and click
Update This Information.)
The District form opens. Enter or edit the Name of the district.
Type the name of the Region or select the Country and then the Region in which the district is
located.
Enter a Code for the district (optional).
Click Confirm and confirm that the information entered is correct. If it is not correct, click
Edit to change it. If it is, click Save to save it.
Troubleshooting
An error message appears when the Confirm button is clicked.
Check that a district with the same name has not already been entered for that region. There cannot be two districts
with the same name in the same region. Also make sure that the district name has been entered and the country and
region for the district were selected -- these fields are required. Required fields are outlined in red. Fill in the missing
fields and try saving again. If you do not want to add the district after all, click Return (do not save
changes).
The region name is not available for selection.
Beside Region, click Add New and add region. Then click Administer Database and follow the steps above to add
the new district. You will have to re-enter any information that you previously entered for the district.
25
iHRIS:Add Geographical Areas
Add a County
A county is a smaller geographical division within a district. The term county corresponds to sector in some
locations. Assigning counties is optional for this system. County choices depend on which district is selected; only a
county that is associated with a particular district can be chosen after that district is selected. For any district entered
in the system, you may add multiple counties.
From the home page or left menu, click Administer Database under Configure System.
In the "Geographic Information" section, select County.
The County page opens. Click Add New County. (To edit an existing county, type or select the
district where it is located and click the View button; then click the county's name and click
Update This Information.)
Enter or edit the Name of the county.
The County form opens. Type the name of the District or select the Country, the Region and
the District in which the county is located.
Click Confirm and confirm that the information entered is correct. If it is not correct, click
Edit to change it. If it is, click Save to save it.
Troubleshooting
An error message appears when the Confirm button is clicked.
Check that a county with the same name has not already been entered for that district. There cannot be two counties
with the same name in the same district. Also check that the county name has been entered and the country, region
and district have been selected -- these fields are required. Required fields will be outlined in red. Try completing the
missing fields and saving again. If you do not want to add the county after all, click Return (do not save
changes).
The correct district is not available for selection.
Click Add New beside District and add the new district. Then click Administer Database and follow the steps above
to add the new county. You will have to re-enter any information you previously entered for the county.
Add a Currency
If your organization pays salaries or other payments in more than one currency, you should add each currency. The
correct currency may then be selected when entering the salary or special payment. At least one currency should be
added.
26
iHRIS:Add Geographical Areas
From the home page or left menu, click Administer Database under Configure System.
In the "Geographic Information" section, select Currency.
The Currency page opens, showing all currencies entered in the database. Click Add New
Currency. (To edit an existing currency, click its name; then click Update This Information.)
The Currency form opens. Enter the Currency Code, an abbreviation that will identify the
currency in selection menus.
Enter the Name of the currency (optional).
Select the Country for the currency (optional).
Enter the Symbol for the currency; the symbol will also appear in selection menus (optional).
Click Confirm and confirm that the information entered is correct. If it is not correct, click
Edit to change it. If it is, click Save to save it.
Troubleshooting
An error message appears when Confirm is clicked.
Make sure the currency code was entered and that it is not the same as a code that has already been entered. Change
the code and try saving again. If you do not want to add the currency after all, click Return (do not save
changes).
The currency code is not known.
Find a list of all standard currency codes at the International Organization for Standards (ISO) website [2].
The country for the new currency is not available for selection.
Click Add New next to Country and add the country name. Then click Administer Database and follow the steps
above to add the new currency. You will need to re-enter any information you previously entered for the currency.
How do I enter a currency symbol that does not appear on my keyboard?
If you are using a Windows computer and have a separate numeric keypad on your keyboard, you may enter a
currency symbol by holding down the ALT key and typing in the code for the symbol on the numeric keypad, then
releasing the ALT key.
• British pound: ALT+0163
• Euro: ALT+0128
• Yen: ALT+0165
• Generic currency symbol: ALT+0164
The symbol is optional and may be omitted.
References
[1] http:/ / www. iso. org/ iso/ en/ prods-services/ iso3166ma/ 02iso-3166-code-lists/ list-en1. html
[2] http:/ / www. iso. org/ iso/ support/ faqs/ faqs_widely_used_standards/ widely_used_standards_other/ currency_codes/ currency_codes_list-1.
htm
27
iHRIS:Administer Database for iHRIS Manage
iHRIS:Administer Database for iHRIS Manage
To ensure that standard data types such as marital status, reasons for position changes, facility and department
names, and the like are enforced across the system, those standard data types must be created as lists. These lists are
used to create selection menus that provide options for selection when adding records, jobs and positions. Click
Configure System and then click Administer Database to create and update standard lists of data for selection in
system menus. Only the HR Manager and System Administrator can create data types.
Add a Facility Type
The facility type classifies each office and facility in the organization for reporting and organizational purposes.
Examples of facility types include Office, Hospital and Clinic. Specify at least one facility type.
From the home page or left menu, click Administer Database under Configure System.
In the "Organization Lists" section, select Facility Type.
The Facility Type page opens, showing all the Facility Types entered in the database. Either
click Add New Facility Type or select an existing facility type and then click Update This
Information to edit it.
The Facility Type form opens. Enter the Name of the facility type. Click Confirm and
confirm that the name entered is correct. If it is not correct, click Edit to change it. If it is,
click Save to save it.
Troubleshooting
An error message appears when Confirm is clicked.
Make certain you have entered a name for the facility type and that it is not the same as a facility type that was
already entered. Change the name and try saving again. If you do not want to create the facility type after all, click
Return (do not save changes).
Add an Office or Facility
If your organization has multiple offices or facilities, you may add each one to the system in order to link positions
to the offices or facilities where they are located. You may also update information about an office or facility if it
changes. Enter at least one office or facility, preferably the location of your organization's headquarters.
28
iHRIS:Administer Database for iHRIS Manage
From the home page or left menu, click Administer Database under Configure System.
In the "Organization Lists" section, select Office/Facility.
The Office/Facility page opens.
Click Add New Office/Facility. (To edit an existing office or facility, first select or type the
country, region and district where the facility is located; then click its name and click Update
This Information to edit it.
The Office/Facility form opens
Enter the Name of the office or facility.
Select a Facility Type for the office or facility.
Enter the Contact Information for the office or facility (optional).
Under Location, either type the name of the district where the office or facility is located, or
click Select Value and select the Country, Region and District where the office or facility is
located.
Click Confirm and confirm that the information entered is correct. If it is not correct, click
Edit to change it. If it is, click Save to save it.
Troubleshooting
An error message appears when the Confirm button is clicked.
Make sure that all required fields have been completed and that the name of the office or facility has not already
been entered. Required fields are outlined in red. Fill in any missing information and try saving again. If you do not
want to add the office or facility after all, click Return (do not save changes).
The correct facility type is not available for selection.
Click Add New beside the "Facility Type" menu and enter the name of the facility type. Then click Administer
Database and follow the steps above to add the new office or facility. You will have to re-enter any information you
previously entered for the office or facility.
The correct country, district or county is not available for selection.
The geographical location needs to be added to the database (see Add geographical areas).
29
iHRIS:Administer Database for iHRIS Manage
Add a Department
If any part of your organization is structured into departments, you may add them to the system and then link
positions to their departments. Examples of departments include Finance, Information Technology and Human
Resources. If your organization does not use departments, you may skip this step.
From the home page or left menu, click Administer Database under Configure System.
In the "Organization Lists" section, select Department.
The Department page opens, showing all departments entered in the database. Either click Add
New Department or select an existing department and click Update This Information to edit it.
The Department form opens. Enter the Name of the department. Click Confirm and confirm
that the name entered is correct. If it is not correct, click Edit to change it. If it is, click
Save to save it.
Troubleshooting
An error appears when Confirm is clicked.
Make sure that you have entered a name for the department and that it is not the same as a department that was
already entered. Change the name and try saving again. If you do not want to add the department after all, click
Return (do not save changes).
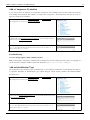
Add a Registration Council
A registration council is the professional association or licensing board that registers health professionals, such as
nurses or midwives. If your organization needs to track these registrations or licenses for your employees, enter the
name of at least one registration council for selection.
From the home page or left menu, click Administer Database under Configure System.
In the "Organization Lists" section, select Registration Councils.
The Registration Council page opens, showing all Registration Councils entered in the
database. Either click Add New Council or select an existing registration council's name and
click Update This Information to edit it.
The Registration Council form opens. Enter the Name of the registration council. Click
Confirm and confirm that the name entered is correct. If it is not correct, click Edit to
change it. If it is, click Save to save it.
30
iHRIS:Administer Database for iHRIS Manage
Troubleshooting
An error message appears when Confirm is clicked.
Make certain you have entered a name for the registration council and that it is not the same as a registration council
that was already entered. Change the name and try saving again. If you do not want to create the registration council
after all, click Return (do not save changes).
Add an Education Type
The education type classifies a type of educational institution that issues degrees. Education types are selected when
entering a person's educational history. Examples of education types include High School, College and University.
From the home page or left menu, click Administer Database under Configure System.
In the "Employee Lists" section, select Education Type.
The Education Type page opens, showing all Education Types entered in the database. Either
click Add New Education Type or select an existing education type and click Update This
Information to edit it.
The Education Type form opens. Enter the Name of the education type. Click Confirm and
confirm that the name entered is correct. If it is not correct, click Edit to change it. If it is,
click Save to save it.
Troubleshooting
An error message appears when Confirm is clicked.
Make certain that the education type has not already been entered. Change the name and try saving again. If you do
not want to add the education type after all, click Return (do not save changes).
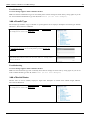
Add a Degree
After adding an education type, you will need to add one or more kinds of degrees for that type. The degree will be
selected when entering the educational history for a person into the system. Examples of degrees include: diploma
for high school; Bachelor's degree for college; and Master's degree or PhD for university.
31
iHRIS:Administer Database for iHRIS Manage
From the home page or left menu, click Administer Database under Configure System.
In the "Employee Lists" section, select Degree.
The Degree page opens. Either click Add New Degree or to edit an existing degree, select its
education type and click the View button to display all matching degrees; then click the
degree name and click Update This Information to edit it.
The Degree form opens.
Enter a Name for the degree.
Select the Education Type for the degree.
Click Confirm and confirm that the name entered is correct. If it is not correct, click Edit
to change it. If it is, click Save to save it.
Troubleshooting
An error message appears after clicking Confirm.
Make sure that the name of the degree has been entered and an education type has been selected -- these fields are
required. The required fields will be outlined in red. Also make certain that the degree has not already been entered
for that education type; duplicates are not allowed. Complete the missing or incorrect fields and try saving again. If
you do not want to add the degree after all, click Return (do not save changes).
The matching education type does not appear in the list.
Click Add New beside the "Education Type" menu to add a new education type. Then click Administer Database
and follow the steps above to add the new degree. You will have to re-enter any information you previously entered
for the degree.
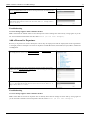
Add a Language
If you want to track employee proficiency in speaking, reading and writing foreign languages, each language must be
added to the system to be selected when adding the employee's qualifications.
From the home page or left menu, click Administer Database under Configure System.
In the "Employee Lists" section, select Language.
32
iHRIS:Administer Database for iHRIS Manage
The Language page opens, showing all languages entered in the database. Either click Add New
Language or select an existing language and click Update This Information to edit it.
The Language page opens. Enter the Name of the language. Click Confirm and confirm that
the name entered is correct. If it is not correct, click Edit to change it. If it is, click Save to
save it.
Troubleshooting
An error message appears when Confirm is clicked.
Make certain that the language has not already been entered. Change the name and try saving again. If you do not
want to add the language after all, click Return (do not save changes).
Add a Competency Type
A competency type is a broad category for organizing competencies, or skills in which employees have been assessed
as competent. Examples of competency types include Computer Skills, Client Interaction and Diagnostics.
Competency types combined with competencies comprise your organization's competency model.
From the home page or left menu, click Administer Database under Configure System.
In the "Employee Lists" section, select Competency Type.
The Competency Type page opens, showing all the Competency Types entered in the database.
Either click Add New Competency Type or select an existing competency type and click
Update This Information to edit it.
The Competency Type form opens. Enter the Name of the competency type. Click Confirm
and confirm that the name entered is correct. If it is not correct, click Edit to change it. If it
is, click Save to save it.
33
iHRIS:Administer Database for iHRIS Manage
Troubleshooting
An error message appears when Confirm is clicked.
Make certain that the competency type has not already been entered. Change the name and try saving again. If you
do not want to add the competency type after all, click Return (do not save changes).
Add a Competency
After adding a competency type, add one or more competencies--skills or qualifications in which an employee has
been assessed as competent--grouped under that competency type. For example, for the competency type Computer
Skills, specific competencies could include Data Entry, Software Use and Document Formatting. The set of
competencies and competency types comprise your organization's competency model. When an employee has been
assessed as having a particular competency, that competency can be added to the employee's record. Competencies
may also be earned by completing training courses.
From the home page or left menu, click Administer Database under Configure System.
In the "Employee Lists" section, select Competency.
The Competency page opens. Either click Add New Competency or to edit an existing
competency, select its competency type and click the View button to display all matching
competencies; then click the competency name and click Update This Information to edit it.
The Competency form opens.
Enter a Name for the competency.
Select the Competency Type for the competency.
Enter any Notes about the competency (optional).
Click Confirm and confirm that the name entered is correct. If it is not correct, click Edit
to change it. If it is, click Save to save it.
Troubleshooting
An error message appears when Confirm is clicked.
Make sure that a competency was not already entered for that competency type. Change the name or competency
type and try saving again. If you do not want to add the competency after all, click Return (do not save
changes).
The correct competency type is not available for selection.
Beside the "Competency Type" menu, click Add New and enter the correct competency type. Then click Administer
Database and follow the steps above to add the new competency. You will have to re-enter any information you
previously entered for the competency.
34
iHRIS:Administer Database for iHRIS Manage
Add a Competency Evaluation
If you want to assess an employee in a particular competency, each evaluation option must be added for selection
when making the assessment. For example, you might enter "Competent," "Not Competent" and "Not Assessed" as
options to select for the evaluation.
From the home page or left menu, click Administer Database under Configure System.
In the "Employee Lists" section, select Competency Evaluation.
The Competency Evaluation page opens, showing all the Competency Evaluations entered in
the database. Either click Add New Competency Evaluation or select an existing competency
evaluation and click Update This Information to edit it.
The Competency Evaluation form opens. Enter the Name of the competency evaluation. Click
Confirm and confirm that the name entered is correct. If it is not correct, click Edit to
change it. If it is, click Save to save it.
Troubleshooting
An error message appears when Confirm is clicked.
Make certain that the competency evaluation has not already been entered. Change the name and try saving again. If
you do not want to add the evaluation option after all, click Return (do not save changes).
Add an Identification Type
The identification type classifies a type of identification, or non-changing information, used to identify an employee
or applicant. Examples of identification types include Passport, Social Security Number and National Health
Insurance Card.
From the home page or left menu, click Administer Database under Configure System.
In the "Employee Lists" section, select Identification Type.
The Identification Type page opens, showing all the Identification Types entered in the
database. Either click Add New Identification Type or select an existing identification type and
click Update This Information to edit it.
The Identification Type form opens. Enter the Name of the identification type. Click
Confirm and confirm that the name entered is correct. If it is not correct, click Edit to
change it. If it is, click Save to save it.
35
iHRIS:Administer Database for iHRIS Manage
Troubleshooting
An error message appears when Confirm is clicked.
Make sure that the identification type has not already been entered. Change the name and try saving again. If you do
not want to add the identification type after all, click Return (do not save changes).
Add a Benefit Type
The benefit type classifies a type of benefit or special payment to an employee. Examples of benefit types include
Allowance, Travel Advance and Bonus.
From the home page or left menu, click Administer Database under Configure System.
In the "Employee Lists" section, select Benefit Type.
The Benefit Type page opens, showing all the Benefit Types entered in the database. Either
click Add New Benefit Type or select an existing benefit type and click Update This
Information to edit it.
The Benefit Type form opens. Enter the Name of the benefit type. Click Confirm and
confirm that the name entered is correct. If it is not correct, click Edit to change it. If it is,
click Save to save it.
Troubleshooting
An error message appears when Confirm is clicked.
Make sure that the benefit type has not already been entered. Change the name and try saving again. If you do not
want to add the benefit type after all, click Return (do not save changes).
Add a Marital Status
Marital status is used to identify employees' legal status. Examples of marital status include Single, Married,
Divorced and Widowed.
From the home page or left menu, click Administer Database under Configure System.
In the "Employee Lists" section, select Marital Status.
36
iHRIS:Administer Database for iHRIS Manage
The Marital Status page opens, showing all the Marital Status items entered in the database.
Either click Add New Marital Status or select an existing marital status and click Update This
Information to edit it.
The Marital Status form opens. Enter the Name of the marital status. Click Confirm and
confirm that the name entered is correct. If it is not correct, click Edit to change it. If it is,
click Save to save it.
Troubleshooting
An error message appears when Confirm is clicked.
Make certain that the marital status has not already been entered. Change the name and try saving again. If you do
not want to add the marital status after all, click Return (do not save changes).
Add a Reason for Departure
Reasons for departure are used to classify the reasons why an employee has left the employment of the organization
or changed positions. Examples of reasons for departure include Promotion, Termination, Layoff, Illness, Death and
Out Migration.
From the home page or left menu, click Administer Database under Configure System.
In the "Employee Lists" section, select Reasons for Departure.
The Reason for Departure page opens, showing all the reasons for departure entered in the
database. Either click Add New Reasons for Departure or select an existing reason for departure
and click Update This Information to edit it.
The Reason for Departure form opens. Enter the Name of the reason for departure. Click
Confirm and confirm that the name entered is correct. If it is not correct, click Edit to
change it. If it is, click Save to save it.
Troubleshooting
An error message appears when Confirm is clicked.
Make certain that the reason for departure has not already been entered. Change the name and try saving again. If
you do not want to add the reason for departure after all, click Return (do not save changes).
37
iHRIS:In-service Training Management Module
iHRIS:In-service Training Management Module
Please Note: The In-Service Training Management Module has not yet been updated for iHRIS Manage Version
4.0. It has been disabled by default in the current release, but an update is scheduled for release soon. This
documentation will also be updated when that release is available.
Add a Training Course
A training course is a course that an employee may take to gain new competencies or continuing education credits.
A training course covers only one topic, but it may have multiple classes that are available for employees to attend.
Either the Training Manager or the HR Manager can add a training course.
1. From the home page or left menu, click Administer Database under Configure System.
2. In the "Training Course Information" section, select Training Courses.
3. Either select Add New Training Course and click the Add button, or select an existing training course to edit
from the menu and click the View button, then click Update This Information.
4. Enter the Name of the training course.
5. Select the Category of the training course.
6. Enter the Topic of the course.
7. Select the name of the Training Institution giving the course.
8. Select any CEUs (continuing education units) earned by completing the course; hold down the CTRL key and
click to select more than one.
9. Select the training course Status.
10. Enter any Notes about the course.
11. Select the names of the Training Funders; hold down the CTRL key and click to select more than one.
12. Select any Competencies gained by completing the course; hold down the CTRL key and click to select more
than one.
13. Click Confirm and confirm that the information entered is correct. If it is not correct, click Edit to change
it. If it is, click Save to save it.
After saving the course information, the screen for entering the class schedule will appear (see Schedule a Course).
Troubleshooting
This option is not available.
Make certain that the In-service Training Management Module has been enabled (see Enable the In-Service Training
Management Module). Only the System Administrator can turn on the module.
An error message appears when Confirm is clicked.
Make certain that all required information has been entered. Fill in the required fields (outlined in red) and try saving
again. If you do not want to add the training course after all, click Return (do not save changes).
The category is not available for selection.
First add the training course categories (see Add a Category of Training Course).
The training institution is not available for selection.
First add the training institutions (see Add a Training Institution).
The correct CEUs are not available for selection.
First add the continuing education courses (see Add a Continuing Education Course).
The status is not available for selection.
38
iHRIS:In-service Training Management Module
First add the training course status (see Add a Status of Training Course).
The training funders are not available for selection.
First add the training funders (see Add a Training Funder).
The correct competencies are not available for selection.
First add the competencies (see Add a Competency). Only the HR Manager can add competencies.
Schedule a Course
After adding a training course, you need to schedule at least one class for that course. The class information includes
the dates of the class and the location where the class is given. When an employee is scheduled to take a training
course, that employee is assigned to one of these classes. A training course can have several classes.
1.
2.
3.
4.
5.
6.
From the home page or left menu, click Administer Database under Configure System.
In the "Training Course Information" section, select Training Courses.
From the dropdown menu, select the training course to schedule and click the View button.
Under "Scheduled Courses" click Schedule a Course.
Enter the Maximum Number of Students who can attend the class.
Select the Start Date and End Date for the class (today's date is entered for both by default).
7. Enter any Notes about the class.
8. Enter the class's Site, or the location where the class is taking place.
9. Enter the name(s) of the class's Instructors, if known.
10. Select the Country, District and County where the class is located (optional).
11. Click Confirm and confirm that the information entered is correct. If it is not correct, click Edit to change
it. If it is, click Save to save it.
Troubleshooting
This option is not available.
Make certain that the In-service Training Management Module has been enabled (see Enable the In-Service Training
Management Module). Only the System Administrator can turn on the module.
An error message appears when Confirm is clicked.
Make certain that all required information has been entered. Fill in the required fields (outlined in red) and try saving
again. If you do not want to schedule the class after all, click Return (do not save changes).
The country, district or county name is not available for selection.
Under the "Geographical Location" menu, click Add New and add the country, district or county (only the HR
Manager can do this). Then click Administer Database and follow the steps above to schedule the class. You will
have to re-enter any information that you previously entered for the class.
39
iHRIS:In-service Training Management Module
Add a Status of a Training Course
The training course status classifies whether the course is open, closed or any other status of your choosing. At least
one status should be added.
1.
2.
3.
4.
5.
From the home page or left menu, click Administer Database under Configure System.
In the "Training Course Information" section, select Status of a Training Course.
Either select Add New Training Course Status or select an existing status to edit.
Enter the Name of the status.
Click Confirm and confirm that the information entered is correct. If it is not correct, click Edit to change it.
If it is, click Save to save it.
Troubleshooting
This option is not available.
Make certain that the In-service Training Management Module has been enabled (see Enable the In-Service Training
Management Module). Only the System Administrator can turn on the module.
An error message appears when Confirm is clicked.
Make certain that the status has not already been entered. Change the name and try saving again. If you do not want
to add the status after all, click Return (do not save changes).
Add Requestors of a Training Course
The training course requestors are any person or group who requests that an employee attend a training course.
Examples of requestors include the employee, the employee's supervisor, the human resources department or a donor
organization.
1.
2.
3.
4.
5.
From the home page or left menu, click Administer Database under Configure System.
In the "Training Course Information" section, select Requestors of a Training Course.
Either select Add New Training Requestor or select an existing requestor name to edit.
Enter the Name of the requestor.
Click Confirm and confirm that the information entered is correct. If it is not correct, click Edit to change it.
If it is, click Save to save it.
Troubleshooting
This option is not available.
Make certain that the In-service Training Management Module has been enabled (see Enable the In-Service Training
Management Module). Only the System Administrator can turn on the module.
An error message appears when Confirm is clicked.
Make certain that the requestor has not already been entered. Change the name and try saving again. If you do not
want to add the requestor after all, click Return (do not save changes).
40
iHRIS:In-service Training Management Module
Add an Evaluation of a Training Course
The training course evaluation is used to evaluate an employee's performance in a training course. Examples of
evaluations include Pass, Fail and Incomplete. At least one evaluation option should be added.
1.
2.
3.
4.
5.
From the home page or left menu, click Administer Database under Configure System.
In the "Training Course Information" section, select Evaluation of a Training Course.
Either select Add New Training Course Evaluation or select an existing evaluation option to edit.
Enter the Name of the evaluation option.
Click Confirm and confirm that the information entered is correct. If it is not correct, click Edit to change it.
If it is, click Save to save it.
Troubleshooting
This option is not available.
Make certain that the In-service Training Management Module has been enabled (see Enable the In-Service Training
Management Module). Only the System Administrator can turn on the module.
An error message appears when Confirm is clicked.
Make certain that the evaluation option has not already been entered. Change the name and try saving again. If you
do not want to add the evaluation option after all, click Return (do not save changes).
Add a Category of a Training Course
Training course categories group similar courses. The category is generally more broad than the training course
topic. Using training course categories is optional.
1.
2.
3.
4.
5.
From the home page or left menu, click Administer Database under Configure System.
In the "Training Course Information" section, select Category of a Training Course.
Either select Add New Training Course Category or select an existing category to edit.
Enter the Name of the category.
Click Confirm and confirm that the information entered is correct. If it is not correct, click Edit to change it.
If it is, click Save to save it.
Troubleshooting
This option is not available.
Make certain that the In-service Training Management Module has been enabled (see Enable the In-Service Training
Management Module). Only the System Administrator can turn on the module.
An error message appears when Confirm is clicked.
Make certain that the category has not already been entered. Change the name and try saving again. If you do not
want to add the category after all, click Return (do not save changes).
41
iHRIS:In-service Training Management Module
Add a Training Institution
Training institutions are organizations that give courses. Using training institutions is optional.
1. From the home page or left menu, click Administer Database under Configure System.
2. In the "Training Course Information" section, select Training Institution.
3. Either select Add New Training Institution and click the Add button, or select an existing training institution to
edit from the menu and click the View button, then click Update This Information.
4. Enter the Name of the training institution.
5. Select the Country, District and County where the training institution is located.
6. Enter the Contact Information known for the training institution.
7. Click Confirm and confirm that the information entered is correct. If it is not correct, click Edit to change it.
If it is, click Save to save it.
Troubleshooting
This option is not available.
Make certain that the In-service Training Management Module has been enabled (see Enable the In-Service Training
Management Module). Only the System Administrator can turn on the module.
An error message appears when Confirm is clicked.
Make certain that all required fields have been completed. Fill in any missing fields (outlined in red) and try saving
again. If you do not want to add the training institution after all, click Return (do not save changes).
The country, district or county name is not available for selection.
Under the "Geographical Location" menu, click Add New and add the country, district or county (only the HR
Manager can do this). Then click Administer Database and follow the steps above to enter the training institution.
You will have to re-enter any information that you previously entered for the training institution.
Add a Training Funder
Training funders are organizations that fund employees to take training courses. Using training funders is optional.
1. From the home page or left menu, click Administer Database under Configure System.
2. In the "Training Course Information" section, select Training Funder.
3. Either select Add New Training Funder and click the Add button, or select an existing training funder to edit
from the menu and click the View button, then click Update This Information.
4. Enter the Name of the training funder.
5. Select the Country, District and County where the training funder is located.
6. Enter the Contact Information known for the training funder.
7. Click Confirm and confirm that the information entered is correct. If it is not correct, click Edit to change it.
If it is, click Save to save it.
42
iHRIS:In-service Training Management Module
Troubleshooting
This option is not available.
Make certain that the In-service Training Management Module has been enabled (see Enable the In-Service Training
Management Module). Only the System Administrator can turn on the module.
An error message appears when Confirm is clicked.
Make certain that all required fields have been completed. Fill in any missing fields (outlined in red) and try saving
again. If you do not want to add the training funder after all, click Return (do not save changes).
The country, district or county name is not available for selection.
Under the "Geographical Location" menu, click Add New and add the country, district or county (only the HR
Manager can do this). Then click Administer Database and follow the steps above to enter the training funder. You
will have to re-enter any information that you previously entered for the training funder.
Add a Continuing Education Course
Continuing education courses provide official continuing education units (CEUs) for employees, which may be
needed to renew a license or obtain professional registration. A training course can be associated with more than one
continuing education course. Using CEUs is optional.
1. From the home page or left menu, click Administer Database under Configure System.
2. In the "Training Course Information" section, select Continuing Education Course.
3. Either select Add New Continuing Education Course and click the Add button, or select an existing course to
edit from the menu and click the View button, then click Update This Information.
4. Enter the Name of the continuing education course.
5. Enter the number of Credit Hours earned by completing the course.
6. Click Confirm and confirm that the information entered is correct. If it is not correct, click Edit to change it.
If it is, click Save to save it.
Troubleshooting
This option is not available.
Make certain that the In-service Training Management Module has been enabled (see Enable the In-Service Training
Management Module{linkID=650}). Only the System Administrator can turn on the module.
An error message appears when Confirm is clicked.
Make certain that all required fields have been completed. Fill in any missing fields (outlined in red) and try saving
again. If you do not want to add the continuing education course after all, click Return (do not save
changes).
43
iHRIS:Create a Job Structure
iHRIS:Create a Job Structure
iHRIS Manage enables HR Managers and Staff to design and manage a job structure for the organization. Jobs may
be categorized by health professional cadre, job classification and salary grade, and may be assigned standard titles,
codes and job descriptions. Click Administer Database under Configure System to create the job structure, add new
positions that may be filled by employees or applicants and manage existing positions.
Add Cadres
A cadre is a broad category of health workers characterized by the specific training, certification or other
qualifications required to practice or be licensed in that field. Examples of cadres include Nurse, Physician and
Pharmacist. Each job can be linked to one cadre for reporting purposes. You may add new cadres or edit any cadre
that was previously added. Only the HR Manager or System Administrator can update the cadres.
Cadres should only be used to categorize health professionals. Other job categories should be added as job
classifications. If your organization does not employ health professionals, you can skip this step.
From the home page or left menu, click Administer Database under Configure System.
Under the "Create Job Structure" section, select Cadres.
The Cadre page opens, showing all cadres entered in the database. Either click Add New Cadre
or select an existing cadre and then click Update This Information to edit it.
The Cadre form opens. Enter the Name of the cadre. Click Confirm and confirm that the
name entered is correct. If it is not correct, click Edit to change it. If it is, click Save to save
it.
Troubleshooting
An error message appears when the Confirm button is clicked.
Make sure the name of the cadre has not already been entered. Change the name and try saving again. If you do not
want to add the cadre after all, click Return (do not save changes).
Add Job Classifications
A job classification is a broad category used to organize jobs. Each job can be optionally linked to one job
classification for organization and reporting purposes. Examples of job classifications include Manager,
Professional, Technician, Service Worker and Clerical Worker.
You should add all the job classifications in use in your organization to the system; you may also edit any job
classification previously added. If your organization does not use job classifications to organize jobs, you can skip
this step. Only the HR Manager or System Administrator can update job classifications.
44
iHRIS:Create a Job Structure
From the home page or left menu, click Administer Database under Configure System.
Under the "Create Job Structure" section, select Job Classifications.
The Job Classification page opens, showing all job classifications entered in the database.
Either click Add New Job Classification or select an existing job classification and then click
Update This Information to edit it.
The Job Classification form opens.
Enter the Name of the job classification.
Enter a brief Description of the job classification (optional).
Enter a Code for the job classification (optional).
Click Confirm and confirm that the name entered is correct. If it is not correct, click Edit
to change it. If it is, click Save to save it.
Troubleshooting
An error message appears when the Confirm button is clicked.
Make sure the name of the job classification has not already been entered. Change the name and try saving again. If
you do not want to add the cadre after all, click Return (do not save changes).
Add Salary Grades
If your organization defines salary grades or bands -- pay ranges for one or more jobs -- add those grades to the
system. (If your organization does not define salary grades, you can skip this step.) A job can then be linked to its
corresponding salary grade. Only the HR Manager or System Administrator can add or edit salary grades.
From the home page or left menu, click Administer Database under Configure System.
Under the "Create Job Structure" section, select Salary Grades.
The Salary Grades page opens, showing all salary grades entered in the database. Either click
Add New Salary Grade or select an existing salary grade and then click Update This
Information to edit it.
45
iHRIS:Create a Job Structure
The Salary Grades form opens.
Enter the Name, or identifier, of the salary grade.
Enter any Notes to record about the salary grade (optional).
Select a Currency for the starting salary and enter the amount of the Start salary (the lowest
salary in the band).
Select a Currency for the ending salary and enter the amount of the End salary (the highest
salary in the band).
Select a Currency for the midpoint salary and enter the amount of the Midpoint salary (the
midpoint is the average salary in the band offered to a new hire, which may or may not be the
equivalent of the true average of the starting and ending salaries). This is optional.
Click Confirm and confirm that the name entered is correct. If it is not correct, click Edit
to change it. If it is, click Save to save it.
Troubleshooting
An error message appears when the Confirm button is clicked.
Make sure that the salary grade name, starting salary and ending salary have been entered and that the salary grade
has not previously been entered. Required fields are outlined in red. Fill in any missing information or change the
name and try saving again. If you do not want to add the salary grade after all, click Return (do not save
changes).
The correct currency is not available for selection.
The currency must be added to the system by an HR Manager (see Add a currency).
Add Jobs
A job is a general set of qualifications, duties and responsibilities as specified in a job description. Each job has a
unique job code and may be linked to a cadre, job classification and salary grade.
There may be multiple instances of the same job within an organization. Each of these instances is filled by one
employee and is referred to as a position. Before a position can be created in the system, its generic job must be
added. After creating a generic job, it can be reused as needed for multiple positions that perform the same general
duties. For example, a Clinical Nurse, Pediatric Nurse and Intensive Care Nurse may all be positions with the same
generic job of Nurse. Only the HR Manager or System Administrator can add or edit jobs.
From the home page or left menu, click Administer Database under Configure System.
Under the "Create Job Structure" section, select Jobs.
The Job page opens, showing all jobs entered in the database. Either click Add New Job or
select an existing job and then click Update This Information to edit it.
46
iHRIS:Create a Job Structure
The Job form opens.
Enter a Title for the job.
Enter a Code for the job (optional).
Enter a Description for the job (optional).
Select the Salary Grade for the job (optional).
Select the Cadre for the job (optional). Only select a cadre for health professional jobs.
Select the Classification for the job (optional).
Click Confirm and confirm that the name entered is correct. If it is not correct, click Edit
to change it. If it is, click Save to save it.
Troubleshooting
An error message displays when the Confirm button is clicked.
Make sure that the job has not already been added. Change the name and try saving again. If you do not want to add
the job after all, click Return (do not save changes).
The correct salary grade is not available for selection.
The salary grade must be added to the system before adding the job (see Add salary grades).
The correct cadre is not available for selection.
The cadre must be added to the system before adding the job (see Add cadres).
The correct classification is not available for selection.
The job classification must be added to the system before adding the job (see Add job classifications).
iHRIS:Administer Positions
Add Salary Sources
If your organization tracks multiple monetary sources of salaries and/or special payments, add those to the system so
the source can be linked to a salary or special payment. Only the HR Manager or System Administrator can add or
edit salary sources.
From the home page or left menu, click Administer Database under Configure System.
Under the "Manage Positions" section, select Salary Sources.
The Salary Source page opens. Either click Add New Salary Source or select an existing salary
source and then click Update This Information to edit it.
The Salary Source form opens. Enter the Name of the salary source. Click Confirm and
confirm that the name entered is correct. If it is not correct, click Edit to change it. If it is,
click Save to save it.
47
iHRIS:Administer Positions
Troubleshooting
An error message appears when Confirm is clicked.
Make sure that the salary source has not already been entered. Change the name and try saving again. If you do not
want to add the salary source after all, click Return (do not save changes).
Add Position Types
To classify positions by a category or type, add those position types to the system. Examples of position types
include Permanent, Temporary, Consultant, Part-time and the like. Only the HR Manager or System Administrator
can add or edit position types.
From the home page or left menu, click Administer Database under Configure System.
Under the "Manage Positions" section, select Position Types.
The Position Type page opens, showing all position types entered in the database. Either click
Add New Position Type or select an existing position type and then click Update This
Information to edit it.
The Position Type form opens. Enter the Name of the position type. Click Confirm and
confirm that the name entered is correct. If it is not correct, click Edit to change it. If it is,
click Save to save it.
Troubleshooting
An error message appears when Confirm is clicked.
Make sure that the position type has been already been entered. Change the name and try saving again. If you do not
want to add the position type after all, click Return (do not save changes).
Add Positions
Adding a position creates a new position in the organization that a single employee will fill. The position must be
created before it can be assigned to an existing employee or applications can be accepted for the position. A position
that is not linked to an employee but for which you intend to hire someone to fill it is called an open position. A
position that is not linked to an employee and for which you are not intending to hire someone is called a
discontinued position. A position that is filled by an employee is called a closed position. Either an HR Staff person
or an HR Manager can add a new position or update an existing position.
48
iHRIS:Administer Positions
From the home page or left menu, click Administer Database under Configure System.
Under the "Manage Positions" section, select Positions (by Facility).
The Position page opens. Click Add New Position.
The Position form opens.
Select the Job for the new position.
Enter the Position Title (this may be the same as the job title).
Enter a Position Description as an addendum to the job description (optional).
Select a Currency for the salary and enter the Proposed Salary amount for the position; this
amount will be changed to the actual salary when the position is filled (optional).
If there are one or more salary sources to track for the position, select them in the Source box;
to select more than one salary source, hold down the CTRL key while clicking the name of each
salary source (optional).
Today's date displays for the Date Posted, the date the position was opened. If this is incorrect,
change the date.
Enter any comments or notes about the position in the Position Comments box (optional).
Enter the Position Code.
Either type or select the code and title of the position that will supervise this position under
Supervisor (optional).
Select the office or facility where the position is located in the Facility menu.
Select the Department where the position is located (optional).
Select the Position Type (optional).
Select the Proposed Hiring Date for the position (optional).
If the position is short-term, select the Proposed End Date for the position (optional).
Select the Status of the position: Open or Discontinued. Select Open if you want the position to
be available for assignment to an employee.
If an interview has been held for the position, enter any comments or notes about it in the
Interview Comments box (optional).
Click Confirm and confirm that the name entered is correct. If it is not correct, click Edit
to change it. If it is, click Save to save it.
49
iHRIS:Administer Positions
Troubleshooting
Instead of creating a new position, you want to use a position that was previously created but was
discontinued.
Under the "Manage Positions" section, select Positions (by Status). Select "Discontinued" from the Status menu and
click the View button; all discontinued positions will display. Select the position to re-open and click Open This
Position. Then click Update This Information to edit any of the position's fields.
An error message displays when Confirm is clicked.
Make certain that you have completed all required fields. Required fields are outlined in red. Fill in all missing
information and try saving again. Also make certain that the position code is unique; the system will not save two
positions with the same code. If you do not want to create the position after all, click Return (do not save
changes).
The correct job for the position is not available for selection.
The HR Manager must create the new job before the position can be added (see Add jobs). Click Add New beside
the Job selection menu to add the job and then follow the steps above to add the position (you will have to re-enter
any position information that was previously entered).
The supervisor's position is not available for selection.
The supervisor's position must be added to the system before it can be selected. Repeat these steps to add the
supervisor's position, then edit the current position to select the correct supervisor (see Edit a position).
The correct currency is not available for selection.
The currency must be added to the system by an HR Manager (see Add a currency).
The correct salary source is not available for selection.
The salary source must be added to the system by an HR Manager (see Add salary sources).
The office or facility for the position is not available for selection.
The office or facility must be added to the system by an HR Manager (see Add an office or facility).
The department is not available for selection.
The department must be added to the system by an HR Manager (see Add a department).
The position type is not available for selection.
The position type must be added to the system by an HR Manager (see Add position types).
Edit a Position
Once a position has been created in the system, an HR Staff person or an HR Manager can change any of the
information for the position.
50
iHRIS:Administer Positions
From the home page or left menu, click Administer Database under Configure System.
Under the "Manage Positions" section, select Positions (by Facility) add or edit a position based on the
facility where it is located or select Positions (by Status) to add or edit a position based on its status as
open, closed or discontinued.
The Position page opens. If you chose Positions (by Facility), select the name of the facility where the
position is located from the Facility menu. If you chose Positions (by Status), select the status of the
position from the Status menu. Click the View button to display all the positions entered for that
facility or status.
A list of positions already entered in the database appears. Click the name of the position to edit.
The position information displays. Click Update This Information.
The Position form opens, showing the position information that was previously entered. Change any
field.
Click Confirm and confirm that the changed information is correct. If it is not correct, click Edit
to change it. If it is, click Save to save it.
Troubleshooting
An error message displays when Confirm is clicked.
Make certain that you have completed all required fields. Required fields are outlined in red. Fill in all missing
information and try saving again. Also make certain that the position code is unique; the system will not save two
positions with the same code. If you do not want to update the position after all, click Return (do not save
changes).
51
iHRIS:Administer Positions
Discontinue a Position
If a position is no longer needed and is not filled by an employee, it can be discontinued. This will prevent the
position from displaying in open position lists. The position can be re-opened at any time. Either an HR Staff person
or an HR Manager can discontinue a position.
From the home page or left menu, click Administer Database under Configure System.
Under the "Manage Positions" section, select Positions (by Status).
The Position page opens. Select Open from the Status menu and click the View button. All of
the open positions will display. Click the name of the position to edit.
The position information displays. Click Discontinue This Position to mark the position as
discontinued.
To re-open a discontinued position, repeat the steps above but select Discontinued from the Status menu. Then click
Open This Position beside the position information.
Troubleshooting
The position is not displayed in the selection menu.
Make certain the position has not been filled by an employee. To see all filled positions, select Closed in the Status
menu; all closed positions will display underneath. You will need to remove the employee from the position before
you can discontinue the position (see Record a departure and Record a position change).
}
52
53
Managing Employee Records
iHRIS:Manage People
Click Manage People to add a new employee or applicant record to the system. If you are using the job application
module, you can also complete applications for open positions, review completed applications and assign a position
to the successful applicant.
Add Person
To track a person in the database, whether an employee or a job applicant, add a record for that person by clicking
the Add Person option. Certain information is required to start a new record. Once the record is generated, additional
options for adding data about the person will become available. Either an HR Staff person or an HR Manager can
add a new person to the system.
On the Home page or in the left side menu, click Manage People. Click Add Person.
The Add Person form opens. Enter the person's Surname, First Name and any Other Names
in the appropriate fields.
Select the person's Nationality from the menu.
Type or select the name of the person's country, region and district of residence under
Residence.
Click Confirm.
The data that you just entered will appear. Confirm that the information entered is correct. If it
is not correct, click Edit to change it. If it is, click Save to save it.
The person's new record opens with options to add additional information divided into sections.
Note that you can click the Hide/Expand option at the top of any section to hide or display that
section. You can edit or update a person's record at any time by searching for the record (see
Search Records).
Troubleshooting
An error message displays when the Confirm button is clicked.
Make sure all required fields have been completed. Required fields will be outlined in red. Fill in the missing
information and try saving again. If you do not want to add a new record after all, click Return (do not save
changes).
An error message appears when the name is entered.
There may be another record in the system with the same first name and surname. The system will provide a link to
the matching record to review. If the records are for the same person, the original record may be updated with any
new information by clicking that link. If the records are for different people, check the box to ignore the error and
confirm the new record.
The nationality is not available for selection.
iHRIS:Manage People
The HR Manager must add the nationality as a country (see Add a country).
The correct residence is not available for selection.
The HR Manager must add the country, region and district before they can be selected (see Add geographical areas).
Set Position
Immediately after an employee has been added to the system, the employee's record displays. The next step is to set
the position that the employee will fill. Until the position has been set, the employee will not appear in any current
employee lists. The employee's position must have been created in the system and have been designated as open (the
position is not filled by another employee or discontinued).
If an employee leaves a position and is not assigned a new one, that employee is considered an "old employee" who
has left the organization. However, the employee may return to work in a new position. In that case, also follow
these steps to set a position for the old employee.
From the employee's record, click Set Position under the "Individual Information" section.
The Make a Job Offer form opens.
Under Position, either type or select the position code and title of the open position that the
employee will fill.
The Start Date, the date that the employee started work in that position, is set to today's date by
default. Select a new date from the menu if the start date is different.
Under Salary, select the currency that the employee is paid in and enter the salary that the
employee is paid.
Click Confirm and confirm that the information entered is correct. If it is not correct, click
Edit to change it. If it is, click Save to save it.
The new position information will appear in the employee's record in the "Position Information"
section. Click the position title to view information about that position.
Troubleshooting
The Set Position option does not appear for an old employee.
The Job Application module is enabled. Complete an application form for the employee (see Add an Application)
and then make a job offer for that employee to set the position (see Make a Job Offer). Alternatively, the System
Administrator can disable the Application module, and the Set Position option will become available (see Disable the
Application Module).
An error message appears when Confirm is clicked.
Make certain that a position has been selected and the salary has been entered. All required fields are outlined in red.
Fill in the missing information and try saving again. If you do not want to set a position after all, click Return
(do not save changes).
There is no open position to set for the employee.
54
iHRIS:Manage People
The position must be created in the system and marked open before it can be assigned to an employee (see Add a
position).
The correct currency is not available for selection.
The currency must be added to the system by an HR Manager (see Add a currency).
iHRIS:Add Employee Information
Add Identifications
Your organization may require one or more identifications from employees and job applicants. Add this
identification information to the person's record. Multiple identifications may be added for a single person.
In the person's record under the "Individual Information" section, click Add Identification.
The Identification form opens.
Select the Identification Type.
Enter the number or other identifier for the identification in the Identification Number box.
Click Confirm and confirm that the information entered is correct. If it is not correct, click
Edit to change it. If it is, click Save to save it.
The identification information that you just entered displays in the employee's record.
Additional identifications can now be added. For each identification, click Add Identification
and add the new identification. If any of the identification information needs to be changed,
click Update This information beside the incorrect identification to edit it.
Troubleshooting
An error message appears when the Confirm button is clicked.
Make certain that all required fields have been completed. Required fields are outlined in red. Fill in the missing
information and try saving again. If you do not want to add an identification after all, click Return (do not
save changes).
The identification type is not available for selection.
Only the HR Manager can add new identification types to the system (see Add an identification type).
Add Demographic Information
Add demographic information about the employee for reporting purposes. Demographic information includes date of
birth, gender, marital status and number of dependents. All demographic information is optional.
55
iHRIS:Add Employee Information
In the person's record under the "Individual Information" section, click Add Demographic
Information.
The Demographic Information form opens.
Set the employee's Date of Birth.
Select the employee's Gender.
Select the employee's Marital Status.
Enter the Number of Dependents for the employee.
Click Confirm and confirm that the information entered is correct. If it is not correct, click
Edit to change it. If it is, click Save to save it.
The demographic information that you just entered displays in the employee's record. If any of
the information needs to be changed, click Update This information to edit it.
Troubleshooting
The correct marital status is not available for selection.
Only the HR Manager can add new marital statuses to the system (see Add a marital status).
Add Contact Information
For each person in the system, whether an employee or a job applicant, four types of contact information may be
added: personal, or home, contact; work contact; emergency contact; and other contact. Only one contact may be
added for each type. Contact information may be added at any time after the record is created. All contact fields are
optional.
In the employee's record, click Contact Information in the side menu to jump to the "Contact
Information" section of the record. Click the link for the type of contact information to add.
The Contact Information form opens.
Enter the full Mailing Address.
Enter a primary Telephone Number.
Enter an Alternate Telephone Number, such as a mobile phone.
Enter a Fax Number.
Enter an Email Address.
Enter any Notes, such as the name of an emergency contact.
Click Confirm and confirm that the information entered is correct. If it is not correct, click
Edit to change it. If it is, click Save to save it.
The contact information that you just entered displays in the employee's record.
Repeat these steps for each type of contact to add for the person.
If any of the information needs to be changed, click Update This information beside the
incorrect contact information to edit it.
56
iHRIS:Add Employee Information
Troubleshooting
The correct Add Contact link doesn't appear.
Make certain that contact information hasn't already been added. For example, if the Add Personal Contact link
doesn't appear, check the "Contact Information" section of the employee's record for a "Personal Contact" section.
You can then change the previously entered contact information.
iHRIS:Add Position Information
Add a Benefit or Special Payment
If an employee receives an irregular or one-time benefit or special payment -- such as an allowance, travel advance
or relocation payment -- in addition to the regular salary, that can be noted in the employee's record under the
employee's Position Information.
In the employee's record, click Position Information in the side menu to jump to the "Position
Information" section. Click Add Benefit/Special Payment.
The Benefits form opens.
Select the Benefit Type.
Select the Source of the payment.
Select the Currency for the payment and enter the Amount.
Select the Start Date of the payment.
Select the End Date of the payment.
Select the Recurrence Frequency of the payment: once, weekly, monthly or yearly. If the
frequency is set to "once," the start date and end date should be the same or the end date may
not be entered.
Click Confirm and confirm that the information entered is correct. If it is not correct, click
Edit to change it. If it is, click Save to save it.
The information that you just entered displays in the employee's record under the "Position
Information" section. Additional benefits or special payments can now be added. For each new
benefit, click Add Add Benefit/Special Payment and follow these same steps. If any of the
benefits information needs to be changed, click Update This information beside the incorrect
benefit to edit it.
Troubleshooting
An error message displays when the Confirm button is clicked.
Make sure that all of the required fields have been completed. The required fields are outlined in red. Fill in the
missing information and try saving again. If you do not want to add a special payment after all, click Return (do
not save changes).
The correct benefit type is not available for selection.
The benefit type must be added to the system by an HR Manager (see Add benefit type).
The correct source is not available for selection.
The source must be added to the system by an HR Manager (see Add salary sources).
The correct currency is not available for selection.
57
iHRIS:Add Position Information
The currency must be added to the system by an HR Manager (see Add a currency).
Record a Departure
When an employee leaves the employment of the organization, the date of and reason for departure should be
recorded in the employee's record. The employee will become an inactive (or "old") employee in the system, but the
employee's data will still be available for historical reporting.
In the employee's record, click Position Information in the side menu to jump to the "Position
Information" section. Under the position, click Record a Departure.
The Record a Departure form opens.
The End Date for employment is set to today's date by default. If that is not correct, change the
date.
Select the Reason for Departure.
Select the New Status for the position: Open or Discontinued; if the position is marked "Open,"
it will be available for assignment to another employee or applicant.
Click Confirm and confirm that the information entered is correct. If it is not correct, click
Edit to change it. If it is, click Save to save it.
The information that you just entered displays in the employee's record under the "Position
Information" section.
Troubleshooting
An error message is displayed when the Confirm button is clicked.
Make sure that all the fields have been completed. Required fields are outlined in red. Fill in any missing information
and try saving again. If you do not want to record a departure after all, click Return (do not save
changes).
The reason for departure is not available for selection.
The HR Manager must add the reason for departure to the system (see Add a reason for departure).
Record a Position Change
When an employee changes from one position to another in the organization, the position change should be recorded
in the employee's record. All of the positions that the employee has held in the organization are saved to the
employee's Position History, which can be reviewed at any time.
In the employee's record, click Position Information in the side menu to jump to the "Position
Information" section. Under the position, click Change Position.
The Make a Job Offer form opens, showing the current position title and start date.
Either type or select the position code and title of the new Position.
The Start Date for the new position is set to today's date by default. If this is not correct,
change it. This will also be the end date for the employee's old position.
Select the Currency and enter the amount of the Salary for the new position; this may be the
same as the employee's previous salary.
Under Reason for Departure, select the reason for the position change.
Select the New Status for the position: Open or Discontinued; if the position is marked "Open,"
it will be available for assignment to another employee or applicant.
Click Confirm and confirm that the information entered is correct. If it is not correct, click
Edit to change it. If it is, click Save to save it.
The information that you just entered displays in the employee's record under the "Position
Information" section.
58
iHRIS:Add Position Information
Click View Position History under the "Position Information" section to view a list of all the
positions that the employee has held in the organization, their start dates and end dates, and the
reasons why the employee left each position.
Troubleshooting
An error message is displayed when the Confirm button is clicked.
Make sure that all the fields have been completed. Required fields are outlined in red. Fill in any missing information
and try saving again. If you do not want to change the position after all, click Return (do not save
changes).
The new position is not available for selection.
The position must be added first and marked as an open position (see Add a position).
The reason for the position change is not available for selection.
The HR Manager must add the reason to the system (see Add a reason for departure).
The correct currency is not available for selection.
The HR Manager must add the currency to the system (see Add a currency).
There is an error in any position.
Click Correct This Information beside the position in the "Position Information" section of the employee's record to
correct the error. Only the HR Manager can correct position errors.
Record a Salary Change
If an employee's salary changes, the new salary can be updated in the employee's record. The old salary will be saved
in the employee's Salary History, which may be reviewed at any time.
In the employee's record, click Position Information in the side menu to jump to the "Position
Information" section. Underneath the "Salary" section, click Salary Change.
The Salary Change form opens, showing the current salary information.
Select the Currency and enter the amount of the new Salary.
The Start Date when the new salary will become effective is set to today's date by default. If
that is not correct, change it.
Enter any Notes about the salary change (optional).
Click Confirm and confirm that the information entered is correct. If it is not correct, click
Edit to change it. If it is, click Save to save it.
The information that you just entered displays in the employee's record under the "Position
Information" section.
Click View Salary History beside the salary to review the employee's past and current salaries.
59
iHRIS:Add Position Information
Troubleshooting
An error message appears when Confirm is clicked.
Make certain that the required fields have been entered. Required fields are outlined in red. Fill in the missing
information and try saving again. If you do not want to change the salary after all, click Return (do not save
changes).
The correct currency is not available for selection.
The currency must be added to the system by an HR Manager (see Add a currency).
The salary is incorrect.
Click Correct This Information beside the salary in the "Position Information" section of the employee's record to
correct the error. Only the HR Manager can correct salary errors.
iHRIS:Add Qualifications
Add Registration
Many health workers are required to be registered or licensing by a professional licensing board or registration
council. Track your employees' registrations or licenses by adding a registration to employees' records.
In the person's record, click Qualifications in the side menu to jump to the "Qualifications"
section of the record. Click Add Registration.
The Registration form opens.
Select the Registration Council that issued the license or registration.
Enter the Registration Number or License Number.
For a registration, select the Registration Date. For a license, enter the License Expiration
Date.
Click Confirm and confirm that the information entered is correct. If it is not correct, click
Edit to change it. If it is, click Save to save it.
The registration or license information appears on the person's record under the "Qualifications"
section. Repeat these steps for each registration or license that the health worker holds.
Troubleshooting
An error message appears when Confirm is clicked.
Make certain that all fields have been completed. Required fields are outlined in red. Fill in the missing information
and try saving again. If you do not want to add the language after all, click Return (do not save
changes).
The correct registration council is not available for selection.
The registration council name must be added to the system by an HR Manager (see Add a registration council).
60
iHRIS:Add Qualifications
Add Language Proficiency
To track employees' and applicants' foreign language skills, add language proficiencies to a person's record.
Proficiency level in speaking, reading and writing each language can be recorded separately.
In the person's record, click Qualifications in the side menu to jump to the "Qualifications"
section of the record. Click Add Language Proficiency.
The Language form opens.
Select the Language to add.
Select the person's Speaking Proficiency in that language: Elementary, Limited Working,
Professional Working, Full Professional or Fluent.
Select the person's Reading Proficiency in that language.
Select the person's Writing Proficiency in that language.
Click Confirm and confirm that the information entered is correct. If it is not correct, click
Edit to change it. If it is, click Save to save it.
The language information appears on the person's record under the "Qualifications" section.
Repeat these steps for each language in which the person is proficient. If any of the language
information needs to be changed, click Update This information beside the language
proficiency to edit it.
Troubleshooting
An error message appears when Confirm is clicked.
Make certain that all fields have been completed. Required fields are outlined in red. Fill in the missing information
and try saving again. If you do not want to add the language after all, click Return (do not save
changes).
The correct language is not available for selection.
The language must be added to the system by an HR Manager (see Add a language).
Add a Competency
To track employees' and applicants' competencies--specific skills that may qualify that person for a particular
job--add competencies to a person's record. Each competency is grouped under a broad category, or competency
type. An employee's competencies can be evaluated, and evaluations can be updated and tracked in the employee's
evaluation history.
In the person's record, click Qualifications in the side menu to jump to the "Qualifications"
section of the record. Click Add Competency.
The Competency form opens.
Under Competency select or type the competency type and then the competency to add.
If the employee has been evaluated for the competency, select the Evaluation result (optional).
Select the date the person was Last Evaluated (optional).
Click Confirm and confirm that the information entered is correct. If it is not correct, click
Edit to change it. If it is, click Save to save it.
The competency appears on the person's record under the "Qualifications" section. Repeat these
steps for each competency that the person has. Update an evaluation by clicking Update This
Information beside the competency's name.
After adding the competency, you can review the evaluation history of a single competency by
clicking View Evaluation History beside the competency's name, or view all competency
evaluations for the employee by clicking Competency Evaluations at the top of the
"Qualifications" section.
61
iHRIS:Add Qualifications
Troubleshooting
An error message appears when Confirm is clicked.
Make certain that all fields have been completed. Required fields are outlined in red. Fill in the missing information
and try saving again. If you do not want to add the competency after all, click Return (do not save
changes).
The correct competency type is not available for selection.
The competency type must be added to the system by an HR Manager (see Add a competency type).
The correct competency is not available for selection.
The competency must be added to the system by an HR Manager (see Add a competency).
The evaluation result is not available for selection.
The competency evaluation must be added to the system by an HR Manager (see Add a competency evaluation).
iHRIS:Add Trainings
Please Note: The In-Service Training Management Module has not yet been updated for iHRIS Manage Version
4.0. It has been disabled by default in the current release, but an update is scheduled for release soon. This
documentation will also be updated when that release is available.
Schedule a Training Course
If an employee is going to take a training course, or the employee has completed a course and needs to be evaluated,
schedule the training course for the employee. The Training Manager, as well as HR Staff, can schedule training
courses.
1. In the person's record, click Training Courses in the side menu to jump to the "Training Courses" section of the
record.
2. Click Schedule Course.
3. Select the Course Name from the first menu.
4. The available classes for that course will display in the second menu. Select the Course to schedule for the
employee.
5. Select the Request Date, the date the employee was requested to attend the course (today's date is entered by
default).
6. Select the person or group who Requested that the employee take the training course.
7. Enter any Notes about the course request or scheduling.
8. Select whether the course is a Retraining for the employee.
9. Select whether the employee has Completed the course.
10. If the employee has been evaluated for the course, select the Evaluation result.
11. Click Confirm and confirm that the information entered is correct. If it is not correct, click Edit to change
it. If it is, click Save to save it.
62
iHRIS:Add Trainings
Troubleshooting
This option is not available.
Make certain that the In-service Training Management Module has been enabled (see Enable the In-Service Training
Management Module). Only the System Administrator can turn on the module.
An error message appears when Confirm is clicked.
Make certain that all fields have been completed. Required fields are outlined in red. Fill in the missing information
and try saving again. If you do not want to schedule the training course after all, click Return (do not save
changes).
The correct training course is not available for selection.
The training course must be added to the system by a Training Manager or HR Manager (see Add a Training
Course). At least one class must be scheduled for the training course as well (see Schedule a Course).
The requestor is not available for selection.
The requestor must be added to the system by a Training Manager or HR Manager (see Add Requestors of a
Training Course).
The correct evaluation is not available for selection.
The evaluation must be added to the system by a Training Manager or HR Manager (see Add an Evaluation of a
Training Course).
Evaluate Training Course Competencies
A training course may have competencies associated with it. If so, when an employee completes the training course,
the Training Manager or HR Staff may evaluate the employee in the associated competencies. The evaluated
competencies are then added to the list of the employee's qualifications.
1. In the person's record, click Training Courses in the side menu to jump to the "Training Courses" section of the
record.
2. Beside the course's name, click Course Competency Evaluations.
3. Under each competency associated with the training course, select the Evaluation result.
4. Select the Evaluation Date (today's date is entered by default).
5. Enter any Notes about the evaluation.
6. Click Confirm and confirm that the information entered is correct. If it is not correct, click Edit to change it.
If it is, click Save to save it.
Troubleshooting
This option is not available.
Make certain that the In-service Training Management Module has been enabled (see Enable the In-Service Training
Management Module). Only the System Administrator can turn on the module.
An error message appears when Confirm is clicked.
Make certain that all fields have been completed. Required fields are outlined in red. Fill in the missing information
and try saving again. If you do not want to evaluate the competency after all, click Return (do not save
changes).
The correct competency does not appear for the training course.
The HR Manager or Training Manager must associate the competency with the training course (see Add a Training
Course).
The correct evaluation is not available for selection.
63
iHRIS:Add Trainings
The evaluation must be added to the system by an HR Manager (see Add a Competency Evaluation).
iHRIS:Add an Application
Add Application
A job application can be added for any person in the system. Adding a job application puts the person in
consideration for any open position. Records with a completed job application but that do not already have a set
position are considered "applicants" rather than employees of the organization. Employees with a set position can
also have a job application on file for open positions, to manage internal hiring efforts. Until the applicant has
applied for an open position, the applicant will not appear in any applicant lists. The applicant may only apply for
positions that have been created in the system and have been designated as open (the position is not filled by another
employee or discontinued).
If your organization does not need to track job applications, the Application module can be disabled by the System
Administrator (see Disable the Application Module).
In the person's record, click Application in the left menu to jump to the "Application" section of
the record. Click Add Application.
The Application form opens.
Under Position(s), select the open position that the applicant is applying for; select more than
one position by holding down the CTRL key while clicking each position.
Complete as many of the other Applicant Questions as are applicable.
Click Confirm and confirm that the information entered is correct. If it is not correct, click
Edit to change it. If it is, click Save to save it.
The completed application displays in the person's record. Now managers and HR personnel
can review the application, make notes about the interview process and hiring decision, and
make a job offer to the applicant. The application will remain on file even after the position is
filled, but it can be updated at any time by clicking Update This Information.
Troubleshooting
The Add Application option does not appear.
The Application module may be disabled. Consult your System Administrator (see Disable the Application Module).
An error message appears when Confirm is clicked.
Make certain that a position has been selected for the application. The position is required. Other applicant questions
may also be required. All required fields are outlined in red. Fill in the missing information and try saving again. If
you do not want to add an application after all, click Return (do not save changes).
No positions are available.
There must be at least one open position that the applicant can apply for. To create an open position, add a new
position and mark it as open (see Add positions), open a previously discontinued position (see Discontinue a
position) or if the position is filled by another employee, record a position change (see Record a position change) or
departure (see Record a departure) for that employee.
64
iHRIS:Add an Application
Log Interview Details
While an applicant is under review, record details about any interviews with the applicant.
In the person's record, click Application in the left menu to jump to the "Application" section of
the record. Click Log Interview Details.
The Position Interview form opens.
The Date of Interview is set to today's date by default. If this is incorrect, change it.
Enter the names or titles of People Conducting Interview.
Enter any Comments about the interview (optional).
Click Confirm and confirm that the information entered is correct. If it is not correct, click
Edit to change it. If it is, click Save to save it.
The details of each interview are displayed in the person's record under the "Application"
section and can be reviewed at any time. Update these details by clicking Update This
Information.
Repeat the process for each additional interview.
Troubleshooting
This option is not available.
The Application module may be disabled. Consult your System Administrator (see Disable the Application Module).
An error message appears when Confirm is clicked.
Make certain that the required fields have been completed. All required fields are outlined in red. Fill in the missing
information and try saving again. If you do not want to log an interview after all, click Return (do not save
changes).
Log Hiring Decision
While an applicant is under review, log the details of the decision made concerning the job application. Note that if
the applicant is hired, the position will also need to be set for the applicant in addition to logging the decision (see
Make a job offer).
In the person's record, click Application in the left menu to jump to the "Application" section of
the record. Click Log Hiring Decision.
The Position Decision form opens.
The Date of Decision is set to today's date by default. If this is incorrect, change it.
Under Make a Job Offer? select Yes or No. This will not set the new position. That needs to
be done in a separate step (see Make a job offer).
Enter any Comments about the decision (optional).
Click Confirm and confirm that the information entered is correct. If it is not correct, click
Edit to change it. If it is, click Save to save it.
The hiring decision details are displayed in the person's record under the "Application" section
and can be reviewed at any time. Update these details by clicking Update This Information.
65
iHRIS:Add an Application
Troubleshooting
This option is not available.
The Application module may be disabled. Consult your System Administrator (see Disable the Application Module).
An error message appears when Confirm is clicked.
Make certain that all the required fields have been completed. All required fields are outlined in red. Fill in the
missing information and try saving again. If you do not want to log a decision after all, click Return (do not
save changes).
iHRIS:Add Employee History
Enter Employment History
As part of completing the job application, the applicant's employment history should be recorded. The employment
history can also be added to the record of any employee of the organization.
In the person's record, click Employment History in the left menu to jump to the "Employment
History" section. Click Add Employment.
The Employment History form opens.
In the "Company Information" section, enter the Company Name where the person previously
worked.
Enter the Company Address (optional).
Enter the Company Telephone (optional).
Enter the name of the applicant's Supervisor (optional).
Under OK to Contact? select Yes or No for whether it is OK to contact the applicant's former
employer.
Enter the Reason for Leaving the former employer (optional).
In the "Position Information" section, enter the Date Started at that employer.
Select the Currency for and enter the amount of the Starting Wage (optional).
Enter the title of the Starting Position (optional).
Enter the Date Ended; leave this field blank of the applicant is presently employed by the
company.
Select the Currency for and enter the amount of the Ending Wage (optional).
Enter the title of the Ending Position at the company (optional).
Enter the Job Responsibilities (optional).
Click Confirm and confirm that the information entered is correct. If it is not correct, click
Edit to change it. If it is, click Save to save it.
The past employment displays in the person's record under the "Employment History" section.
Click Update This Information beside the employer to edit any of the fields, if necessary.
Repeat this process for each former employer.
66
iHRIS:Add Employee History
Troubleshooting
An error message displays when the Confirm button is clicked.
Make certain that all required fields have been completed. Required fields are outlined in red. Fill in the missing
information and try saving again. If you do not want to enter a past employer after all, click Return (do not
save changes).
The correct currency is not available for selection.
The HR Manager needs to add the currency to the system (see Add a currency).
Enter Education History
As part of completing the job application, the applicant's education history should be recorded. The education history
can also be added to the record of any employee of the organization.
In the person's record, click Education History in the left menu to jump to the "Education
History" section. Click Add Education.
The Education History form opens.
Enter the Institution Name.
Enter the Institution Location (optional).
Select the Year of Graduation; leave this option blank if education is still in process.
Type or select the Degree earned.
Enter the Major (optional).
Click Confirm and confirm that the information entered is correct. If it is not correct, click
Edit to change it. If it is, click Save to save it.
The past education displays in the person's record under the "Education History" section. Click
Update This Information beside the employer to edit any of the fields, if necessary.
Repeat this process for each educational institution attended.
Troubleshooting
An error message displays when the Confirm button is clicked.
Make certain that all required fields have been completed. Required fields are outlined in red. Fill in the missing
information and try saving again. If you do not want to enter a degree after all, click Return (do not save
changes).
The correct degree is not available for selection.
The HR Manager must add the education type and degree to the system (see Add an education type and Add a
degree).
Add Notes
At any time, an HR Staff person or an HR Manager may add notes to a person's record. All notes are saved to a log
and may be reviewed as necessary.
67
iHRIS:Add Employee History
In the person's record, click Notes in the left menu to jump to the "Notes" section. Click Add
Note.
The Notes form opens.
Enter a Date Added for the note; if no date is entered, today's date is saved by default.
Enter the text of the Note.
Click Confirm and confirm that the information entered is correct. If it is not correct, click
Edit to change it. If it is, click Save to save it.
All notes will appear at the bottom of the person's record under the "Notes" section. Repeat
these steps to add additional notes.
Troubleshooting
An error message displays when the Confirm button is clicked.
Entering the note text is required. The required field is outlined in red. Try filling in the missing field and saving
again. If you do not want to enter a note after all, click Return (do not save changes).
iHRIS:Manage Job Applicants
Review Applicants
Once one or more applications have been recorded for an open position, an HR Staff person, HR Manager or
Executive Manager can review the applications for that position. HR Staff or the HR Manager can also record
interview details or the hiring decision while reviewing applicants (see Log interview details and Log hiring
decision). Click Review Applicants on the Manage People screen to review all of the applications for any open
position.
From the Home page or left menu, click Manage People. The Manage People page opens.
Click Review Applicants.
The Review Applicants page opens, listing all open positions for the organization. Click the
open position to review.
The names of all applicants for the position display. Click any applicant's name to review the
person's full record, including their application for the position, and to update the person's
information, if necessary.
68
iHRIS:Manage Job Applicants
Troubleshooting
This option is not available.
The Application module may be disabled. Consult your System Administrator (see Disable the Application Module).
Make a Job Offer
Once the decision has been made to offer an applicant a position and the applicant has accepted, the applicant should
be converted to an employee. This is done by assigning the position that the applicant has applied for to the
applicant. Either an HR Staff person or an HR Manager can set the position.
From the Home page or left menu, click Manage People. The Manage People page opens.
Click Review Applicants.
The Review Applicants page opens, listing all open positions for the organization. Click the
open position that you want to assign to the applicant.
The names of all applicants for the position display. Click Make a job offer beside the name of
the applicant who will be hired.
The Make a Job Offer form opens.
The Start Date for the new position is set to today's date by default. Enter a new date if it is
different.
Select the Currency that the employee is paid in and enter the Salary for the position.
Click Confirm and confirm that the information entered is correct. If it is not correct, click
Edit to change it. If it is, click Save to save it.
Troubleshooting
This option is not available.
The Application module may be disabled. Consult your System Administrator (see Disable the Application Module).
An error message appears when Confirm is clicked.
Make certain that a position has been selected for the application and other required fields have been completed. All
required fields are outlined in red. Fill in the missing information and try saving again. If you do not want to make
the job offer after all, click Return (do not save changes).
The correct currency is not available for selection.
The currency must be added to the system by an HR Manager (see Add a currency).
69
iHRIS:Search Records in iHRIS Manage
iHRIS:Search Records in iHRIS Manage
After entering an employee or position in the system, the record may be reviewed at any time. Click Search Records
to locate the record. From the record, additional information can be added or existing information can be updated.
Recent Changes
Follow these steps to locate a recent change made to a form or record, including recently added records. These
changes may not show up in other reports or searches for 20 minutes (after change made).
From the Home page or left menu, click Search Records. On the Search Records page, click
Recent Changes.
The Search form opens.
Select to view recent changes to Person or Position. If an option is not selected, all records will
be searched.
Click the View button to show all matching results.
A list of matching records with changes made Today will be displayed. You can also choose to
review changes made Yesterday or Last Week. Click on the record you want to review.
Troubleshooting
The record is not found.
No results will display. Select different options and click View to search again. Try reducing the number of options
selected for better results.
Search Positions
Follow these steps to locate a position's record in the system.
From the Home page or left menu, click Search Records. On the Search Records page, click
Search Positions.
The Search form opens.
Select from the options provided to limit the search by Cadre, Classification, Department,
Facility, Job or Status. If an option is not selected, all records will be searched.
Click the View button to show all matching results.
A list of matching positions displays. Click the title of the position you want to review.
To search again, select new options from the Search form and click View.
70
iHRIS:Search Records in iHRIS Manage
When you click the position title, the position record displays, showing all information about
the position and the name of the employee currently holding the position, if any. From this
screen, you can update the position information, select another position or view and update the
employee's record.
Troubleshooting
The record is not found.
No results will display. Select different options and click View to search again. Try reducing the number of options
selected for better results.
Search People
Follow these steps to locate an employee's record in the system.
From the Home page or left menu, click Search Records. On the Search Records page, click
Search People.
The Search form opens.
In the Employee Status menu, select the type of record to search for: Applicant, Employee,
Old Employee or Old Applicant. Leave blank to search all employees.
Limit the search to a particular facility by selecting that facility name from the Facility menu.
Leave blank to search all facilities.
Limit the search to a particular job by selecting that job title from the Job menu. Leave blank to
search all jobs.
Enter the person's Surname to find a single record or leave blank to find multiple records.
Click the View button to show all matching results.
A list of matching records displays. Click the name of the person whose record you want to
review.
To search again, select new options from the Search form and click View.
Troubleshooting
The record is not found.
No results will display. Select different options and click View to search again. Try reducing the number of options
selected for better results.
71
iHRIS:Run Reports in iHRIS Manage
iHRIS:Run Reports in iHRIS Manage
Report views for analyzing data entered in iHRIS are created by the Administrator or Manager for other users to
access (see The Customized Report Builder for more information). Several predefined report views are included
when iHRIS is installed.
To access the reports, click View Reports in the main menu or left navigation menu. All of the
saved report views are displayed.
Reports are organized by category depending on the type of data displayed. Pre-defined
categories include Facility Report, Position Reports, Search, and Staff Reports.
To run a report, click its name. Reports will display according to the set default view - either as
a table, pie chart, or bar chart. For table display, change the sort order by clicking any column
name. In most table reports, you can also click an employee's name, a position title or code, or a
facility name to display the full record for that person, position or facility.
Filtering Reports
Under "Choose options to limit results," there are filtering options to limit the data analyzed.
The filters differ depending on the type of report selected. For example, some reports can be
filtered by gender, so that only results for male or female health workers will be shown. Others
can be filtered by cadre, birth date, or facility, to limit the analyzed data to a particular location.
If no filters are selected, then the report will include all data entered in the system. Once you
have selected filters and other settings for the report, click the View button to display the
report with your selected changes.
Charting Reports
Table reports can be converted to charts, and charts can be displayed differently. First, select the charting
options by clicking Options under the Chart button. You can graph the data in pie chart, bar chart, column
chart or scatter plot form. You must also select whether to chart one or two fields and which fields to display
in the chart. Once the charting options are set, click the Chart button to display the report as a chart with
the selected options. Move the mouse over the chart to display aggregated totals. Print a chart by clicking the
Print option in the upper right corner.
72
iHRIS:Run Reports in iHRIS Manage
Exporting and Printing Reports
Click the Export button to export the report data for use in Excel spreadsheets and other
systems. The default is to export the data as a comma-separated values file suitable for
importing into Excel. To export in tab-delimited or HTML format, click Options under the
Export button.
Once you click Export, you will be prompted to save the file to a location on your computer.
To import the data into a spreadsheet, open Excel and choose Get External Data. You must
then choose the type of file you exported--comma- or tab-delimited--for Excel to display the
data correctly.
Finally, you can export the report as a formatted PDF file suitable for saving and printing by
clicking the Print button. Click Options under the Print button to change the paper size
and orientation.
73
74
About Windows iHRIS
iHRIS:Using Windows iHRIS
A Windows version of the iHRIS Suite has been developed for use in locations where there is no or limited Internet
access or where no Linux server is available. It installs a single-user instance of all three components of the iHRIS
Suite on the Windows desktop: iHRIS Manage, iHRIS Qualify and iHRIS Plan. Please note that iHRIS WINDOWS
IS BASED ON AN OLDER, OUT OF DATE VERSION OF iHRIS.
Choose the Windows version for installation in decentralized locations, such as a hospital, health facility or local
government office, where network connectivity and technical support may not be as reliable, understanding that
there are greater security and data quality risks associated with the Windows version. In that situation, it is
recommended that iHRIS be installed on a Windows computer that is physically secure from unauthorized access,
that is not used for any purpose other than running iHRIS and that access to iHRIS be limited to as few users as
practicable.
Windows iHRIS may also be installed with sample data as a demonstration of the program before installing the full
server-based version. Advanced users may export data from Windows iHRIS for import into a server-based version
of iHRIS using the PHP MyAdmin tool included with Windows iHRIS.
Install Windows iHRIS
You must download Windows iHRIS as a separate installer. Go to the Software Downloads page (http:/ / www.
capacityproject.org/hris/suite/ihris_software.php) on the HRIS Strengthening website to download the software.
Windows iHRIS requires Windows XP, 500MB hard disk space and 1GB RAM. A web browser is required to run
the software. Firefox 2+ or Internet Explorer 7+ is highly recommended.
Follow these steps to install the software:
Download the executable file (latest version) from Launchpad to a Windows XP computer. Quit
all running programs. Run the executable.
The installation wizard will start. Click Next when prompted.
When prompted, read and accept the license agreement, and click Next.
iHRIS:Using Windows iHRIS
Choose the directory where to install the program. The default directory is recommended for
fastest loading times. Click Next.
[1]
[2]
Select which of the iHRIS components to install: iHRIS Qualify , iHRIS Manage
and/or
[3]
iHRIS Plan .
[4]
Select whether to install PHP MyAdmin ; this tool will help you manage the database and
import or export data (advanced users). Click Next.
Specify an SMTP server and email address to use with the software. If unsure, keep the defaults
and click Next.
For each component installed, select whether to limit access to the local computer only or make
it available on a local area network.
Enter the appropriate ports for the Apache and MySQL servers. If unsure, keep the defaults.
Enter and re-enter a password for the MySQL database, and click Next. You cannot proceed
with the installation without entering a database password.
Specify whether to automatically launch Windows iHRIS once the installation is completed
(recommended).
Select whether to create a Quick Launch and/or a Desktop icon for Windows iHRIS, and click
Next.
Click Install and wait for Windows iHRIS to install.
Click Finish when the installation is complete.
Note: If you have installed Windows Firewall, you will be prompted to unblock the firewall for Windows iHRIS at
the end of installation. Select the option to unblock the firewall.
75
iHRIS:Using Windows iHRIS
Set Up Windows iHRIS
If Windows iHRIS does not launch immediately following installation, launch it from Programs on the Start menu,
or double-click the desktop icon. The iHRIS icon appears in the taskbar (lower right hand corner of your screen)
when Windows iHRIS is running.
1. The splash screen appears in your web browser with the components of the iHRIS suite that you installed. Click
on a component to load it.
2. The first time a component loads may take some seconds. Do not click Reload while the component is loading.
3. You will be prompted to change your password. Click "Change Password" on any page to do this. (For more
information, see the section Change Password.)
4. You will be prompted to create a non-administrator user for everyday use. Click "Configure System", then
"Administer Users" to do this. (For more information, see the section Add a User.)
5. You will be prompted to load modules and sample data. The choices are:
• Training Management module (iHRIS Manage only): This module enables you to set up a training program
and schedule training classes for employees.
• Base Data (iHRIS Manage and Qualify): Includes standard data lists such as marital status and countries;
recommended for most users. Base data can be edited after loading.
• Medical Base Data (iHRIS Manage and Qualify): Includes standard data lists for public health such as cadres
and facilities; recommended for public health (such as Ministry of Health) users. Medical base data can be edited
after loading.
• Sample Data (all components): A fictional dataset intended for demonstration purposes only. Not recommended
for users who intend to enter their own data in the system.
If you intend to use Windows iHRIS to enter and manage data, we recommend unchecking all sample data.
Note that enabling modules and sample data takes a few seconds. The system displays a message when the modules
and data are successfully loaded.
Using Windows iHRIS
While Windows iHRIS is running, the iHRIS icon appears in the taskbar in the lower right
corner of your screen.
To switch between any of the components or return to the main screen, left-click this icon.
You can also launch PHP MyAdmin, a tool for directly managing your databases and exporting
or importing data (advanced users only). For help with using PHP MyAdmin, see the PHP
MyAdmin website ([5]
To quit Windows iHRIS, right-click the taskbar icon and select Exit.
76
iHRIS:Using Windows iHRIS
References
[1]
[2]
[3]
[4]
[5]
http:/ / www. capacityproject. org/ hris/ suite/ ihris_qualify. php
http:/ / www. capacityproject. org/ hris/ suite/ ihris_manage. php
http:/ / www. capacityproject. org/ hris/ suite/ ihris_plan. php
http:/ / www. phpmyadmin. net/ home_page/ index. php
http:/ / www. phpmyadmin. net/ home_page/ index. php).
77
78
Back Matter
iHRIS:Data Dictionary
Field Name or
Value
Definition
2 character alpha The unique two-character code that identifies a
code
country established by the International Organization
for Standards (ISO).
Alternate Names
Data Type
Used In
alpha code
text entry
all
academic level
The highest level of formal education attained by a
person.
educational level
selection
iHRIS
Qualify
address in new
country
The mailing address given by a health worker who is
out migrating to a foreign country.
-
text entry
iHRIS
Qualify
administrator
A role that has full access to all functions in the
system; this role is responsible for configuring the
system and managing user accounts.
system administrator
value (Role)
all
cell phone number, mobile
number
text entry
iHRIS
Manage,
iHRIS
Qualify
The total amount of a benefit or special payment.
-
selection (from
Currency) + number
iHRIS
Manage
A person who has applied for an open position.
job applicant
value (from
Employee Status)
iHRIS
Manage
application date
The date a person applied to take an exam, to register
as a health worker or for an open position.
application
date
iHRIS
Qualify
available hours
The number and times of hours a person who is
applying for part-time employment is available to
work.
hours
text entry
iHRIS
Manage
average salary
The average annual salary paid to an employee in a
particular group, such as a cadre or pool of workers.
-
selection (from
Currency) + number
iHRIS Plan
A type of payment made to an employee that is
separate from the employee's salary; the payment may
be one-time or recurring.
benefit, special payment
selection
iHRIS
Manage
The geographical location where a person was born.
-
selection (Country +
Region + District)
iHRIS
Qualify
A broad category or subset of health workers
health cadre
characterized by the specific training, degree or other
qualifications required to practice or be licensed in that
field (i.e., nurse).
selection
all
A pool of health workers, composing part or all of a
pool
cadre, to which assumptions are applied in a workforce
projection.
selection
iHRIS Plan
alternate
A secondary phone number where a person or
telephone number organization can be reached.
amount
applicant
benefit type
birthplace
cadre
cadre pool
iHRIS:Data Dictionary
category
79
A broad subject area.
disciplinary action category,
selection or text entry
disruption category, projection
category, training course
category
iHRIS
Manage,
iHRIS
Qualify,
iHRIS Plan
Certifies that a particular academic level has been
achieved.
-
selection
iHRIS
Qualify
-
text entry
iHRIS
Qualify
A broad category used to organize jobs; the job
classification may or may not be equivalent to the
health cadre.
job classification
selection
iHRIS
Manage
Position status that designates a position that has been
filled by an employee; when a position is marked
closed, the organization is not actively hiring for the
position.
closed position
value (Position
Status)
iHRIS
Manage
Short identifier for an item, usually unique.
-
text entry
iHRIS
Manage,
iHRIS
Qualify
Notes about a position, job interview or job offer.
interview comments, position
comments
text entry
iHRIS
Manage
The address of a person's employer.
-
text entry
iHRIS
Manage
The name of a person's employer.
company, employer,
organization
text entry
iHRIS
Manage
The telephone number of a person's employer.
company phone, company
telephone number
text entry
iHRIS
Manage
A skill performed to a specific standard under specific
conditions.
competencies provided
selection
iHRIS
Manage
competency type
A broad category of related competencies.
-
selection
iHRIS
Manage
contact type
A preset category of contact information.
-
selection (preset
values)
iHRIS
Manage,
iHRIS
Qualify
continuing
education course
A course that is required for a health worker to renew
his/her license while practicing.
continuing education
selection
iHRIS
Manage,
iHRIS
Qualify
cost
The amount of money associated with a change in the
number of workers based on salary and other
associated costs, such as training costs or severance
pay.
average cost
selection (from
Currency) + number
iHRIS Plan
An annual increase in the cost associated with a
change in the number of workers expressed as a
percentage of the original cost.
-
number
iHRIS Plan
An independent nation state.
nation
selection
all
-
selection (from
Country)
iHRIS
Qualify
certificate
certificate number Identifies a particular certificate issued to a student.
classification
closed
code
comments
company address
company name
company
telephone
competency
cost increase
country
country trained in A foreign country where a health worker received
training.
iHRIS:Data Dictionary
county
selection
iHRIS
Manage,
iHRIS
Qualify
The amount of credit received for completing a
CEU, continuing education
continuing education course; health professionals must unit
typically complete a minimum number of credit hours
to renew their licenses.
number
iHRIS
Manage,
iHRIS
Qualify
currency
The medium of exchange of money used in a country
or other location.
-
selection
iHRIS
Manage,
iHRIS Plan
currency code
The unique three-letter code used to define a currency
established by the International Organization for
Standards (ISO).
-
text entry
iHRIS
Manage,
iHRIS Plan
currency symbol
The symbol used to identify a currency, such as
dollars.
symbol
text entry
iHRIS
Manage,
iHRIS Plan
date disciplinary
action occurred
The date a professional received a disciplinary notice.
disciplinary action date
date
iHRIS
Qualify
data operations
manager
A database management role that is responsible for
managing data entry, including verifying and
correcting data and updating standard lists in the
system.
-
value (Role)
iHRIS
Qualify
data source
The verifiable source of data entered in the system,
such as a census, survey or information system.
-
text entry
iHRIS Plan
date added
The date a note was added to a person's record.
-
date
iHRIS
Manage,
iHRIS
Qualify
A person's birthday.
birthdate
date
iHRIS
Manage,
iHRIS
Qualify
A role that runs reports in order to view and analyze
data, and make health workforce policy and planning
decisions.
-
value (Role)
iHRIS
Qualify
Certifies that a particular academic level has been
achieved, usually a higher education program.
-
selection
iHRIS
Manage
department
A division within an organization, typically around
similar job functions and following supervisory lines.
-
selection
iHRIS
Manage
dependent
A legal dependent, such as a spouse or child.
number of dependents
number
iHRIS
Manage
The date a person is employed in a health facility as a
licensed health worker.
deployment
date
iHRIS
Qualify
Additional information about or a definition of an item job description
used in selection menus.
text entry
iHRIS
Manage,
iHRIS Plan
The salary that an applicant for a job requests to
perform that job.
selection (from
Currency) + number
iHRIS
Manage
credit hours
date of birth
decision maker
degree
deployment date
description
desired wage
The smallest geographic subset, typically located
within a district.
80
sector
desired salary
iHRIS:Data Dictionary
did not sit for
exam
An incomplete or absent result on a qualifying
examination.
disciplinary action A warning or notice issued to a health professional or
reason
employee as a result of an infraction.
81
absent, incomplete
value (Exam Results) iHRIS
Qualify
disciplinary action,
disciplinary notice
selection
iHRIS
Qualify
discontinued
A position status that designates a position that is no
discontinued position
longer required by an organization; no employee fills it
and the organization is not soliciting applications for
the position.
value (Position
Status)
iHRIS
Manage
display name
The name of a report or other item that is shown to
users of the system.
-
text entry
iHRIS
Manage,
iHRIS
Qualify
The date a student left a training program.
-
date
iHRIS
Qualify
discontinuation, disruption,
training disruption
selection
iHRIS
Qualify
A smaller geographic unit within a region created by
the central government for easy administration.
province, state
selection
iHRIS
Manage,
iHRIS
Qualify
The number of years that a change affects a workforce
projection
-
number
iHRIS Plan
The type of qualification or degree a person has
received, such as college/university, continuing
education or informal.
-
selection
iHRIS
Manage
The first level of five in the Interagency Language
elementary proficiency, Level
Roundtable (ILR) scale of language proficiency; a
1, S-1
person at this level has a speaking vocabulary which is
inadequate to express anything but the most
elementary needs.
value (Speaking,
Reading or Writing
Proficiency)
iHRIS
Manage
An address where a person or organization can be
contacted by email.
text entry
iHRIS
Manage,
iHRIS
Qualify
The person to notify if there is an emergency involving an employee, including the person's contact
information.
value (Contact Type)
iHRIS
Manage,
iHRIS
Qualify
employee
A person who is paid by an organization to perform a
specific job.
-
value (from
Employee Status)
iHRIS
Manage
employee status
The status of an employee with the organization, such
as a current employee, old employee or job applicant.
-
selection (preset
values)
iHRIS
Manage
enabled
Refers to whether a pool change is calculated and
displayed in a projection.
-
yes/no
iHRIS Plan
end date
The date at which a position, training program,
licensing period, etc. ends.
date ended, expiration, license date
expiration date
iHRIS
Manage,
iHRIS
Qualify
The last position that a person held in an organization.
-
iHRIS
Manage
disruption date
disruption reason The reason why a student left a training program.
district
duration of
change
education type
elementary
email address
emergency
contact
ending position
email
text entry
iHRIS:Data Dictionary
82
ending salary
The salary that a person earned in the last position s/he end, end salary, ending wage,
held in an organization; also the highest salary in a
last salary
salary grade.
selection (from
Currency) + number
iHRIS
Manage
endorser date
The date a student is endorsed to take the national
examination.
-
date
iHRIS
Qualify
endorser name
A person who recommends a student graduating from
a training program to take the national examination.
endorser
text entry
iHRIS
Qualify
endorser
qualifications
The qualifications of a person recommending students
to take the national examination.
-
text entry
iHRIS
Qualify
evaluation
An official assessment of an employee's performance
in a class or competency.
competency evaluation,
training course evaluation
selection
iHRIS
Manage
exam date
The date that the qualifying examination is
administered to health profession students.
-
date
iHRIS
Qualify
exam number
The number that identifies a particular examination
administered to a student graduating from a health
training program.
-
text entry
iHRIS
Qualify
exam results
The grade received on the test that every student
exam, examination, national
graduating from a health training program must pass in examination, results
order to qualify for registration.
selection (preset
values)
iHRIS
Qualify
exam try
An attempt by a student to pass the qualifying
examination; students are limited to three tries.
-
selection (preset
values)
iHRIS
Qualify
executive
manager
A person who may manage the entire organization or
one district, department, office or facility within the
organization. The Executive Manager views reports
and analyzes data entered in the system in order to
make HR decisions and set organizational policy.
-
value (Role)
iHRIS
Manage
exit
A decrease in the supply of workers due to employees
leaving the workforce.
-
selection (preset
values)
iHRIS Plan
facility
A specific division within an organization that is
defined by having its own budget and often has a
unique facility code. Often a facility is responsible for
providing health care services.
duty center, health facility,
office, responsibility center
selection
iHRIS
Manage,
iHRIS
Qualify
facility agent
The owner of a health facility or training institution,
which also refers to the classification of the facility.
agent
selection
iHRIS
Qualify
facility type
A type of health facility.
-
selection
iHRIS
Manage,
iHRIS
Qualify
fax number
A number where a person or organization can be
contacted by fax.
fax
text entry
iHRIS
Manage,
iHRIS
Qualify
A failing grade on a qualifying examination.
-
value (Exam Results) iHRIS
Qualify
felony conviction
A conviction of a crime resulting in prison time.
-
yes/no
iHRIS
Manage
final try
The third and last attempt to pass the qualifying
examination.
-
value (Exam Try)
iHRIS
Qualify
A person's initial name.
Christian name, firstname,
given name, name
text entry
all
fail
first name
iHRIS:Data Dictionary
first try
83
The initial attempt to pass the qualifying examination.
-
Native of bilingual proficiency in a language.
bilingual proficiency, Level 5, value (Speaking,
native proficiency, S-5
Reading or Writing
Proficiency)
iHRIS
Manage
The fourth level of five in the Interagency Language
Roundtable (ILR) scale of language proficiency; a
person at this level is able to use the language fluently
and accurately on all levels normally pertinent to
professional needs.
full professional proficiency,
Level 4, S-4
value (Speaking,
Reading or Writing
Proficiency)
iHRIS
Manage
Employment for a standard number of hours of
working time.
full-time
yes/no
iHRIS
Manage
Indicates whether a person is male or female.
sex
female/male
iHRIS
Manage,
iHRIS
Qualify
grade obtained
A student's official grade upon completing a particular
academic level.
grade
text entry
iHRIS
Qualify
graduation date
Official date of completion of a training program or
other educational program.
graduation, year of graduation
date
iHRIS
Manage,
iHRIS
Qualify
health workforce
planner
A role that has access to the projection creation and
modeling functions but cannot configure the system or
access user accounts.
-
value (Role)
iHRIS Plan
The date on which an open position is filled.
filled date, hire date, hire year
TBD
iHRIS
Manage
hiring decision
The date at which an official decision is made whether
to offer a job to an applicant.
date of decision
date
iHRIS
Manage
home residence
The address or geographical location where a person
permanently lives, which may be different from the
person's current residence.
permanent residence
selection (Country +
Region + District)
iHRIS
Qualify
HR manager
A manager of human resources personnel who is
responsible for managing all system data and for
ensuring that data in the system are complete, correct
and up to date.
-
value (Role)
iHRIS
Manage
A data entry person in human resources who is
responsible for entering and updating data in the
system.
-
value (Role)
iHRIS
Manage
-
text entry
iHRIS
Qualify
-
text entry
iHRIS
Manage,
iHRIS
Qualify
selection
iHRIS
Manage,
iHRIS
Qualify
TBD
iHRIS
Qualify
fluent
full professional
full-time
employment
gender
hiring date
HR staff
identification code A unique code used to identify a facility or training
institution.
identification
number
The unique identifier -- usually a number -- that, when
combined with an Identification Type, is used to
identify a person.
identification type An official document (such as Social Security
identification
Number, national health insurance or passport) used to
identify a person.
index number
The number issued to a student when s/he enters a new index
pre-service training program.
value (Exam Try)
iHRIS
Qualify
iHRIS:Data Dictionary
initial year of
change
84
The first year in a projection that a pool change takes
effect; the initial year of change may be the same as
the start year of the projection.
initial year
year
iHRIS Plan
The date when an institution was last inspected.
-
date
iHRIS
Qualify
Certification that a health facility, private practice
clinic or training institution is qualified to provide
services.
inspection, institution
inspection
text entry
iHRIS
Qualify
The teacher of a training class.
teacher, trainer
text entry
iHRIS
Manage
An increase in the supply of workers due to employees entering the workforce.
selection (preset
values)
iHRIS Plan
The date a person enters a training program.
-
date
iHRIS
Qualify
The date at which a formal meeting to assess the
qualifications of a job applicant takes place.
date of interview, interview
date
iHRIS
Manage
ISCO
A unique code that identifies a job classification using
classification code a standard coding system established by the
International Standard Classification of Occupations
(ISCO) for classifying professions.
-
text entry
iHRIS
Qualify
ISO numeric code The unique numeric code that identifies a country
established by the International Organization for
Standards (ISO).
-
text entry
all
designation, post
selection (from Job
Title)
iHRIS
Manage,
iHRIS
Qualify
inspection date
inspection results
instructor
intake
intake date
interview date
job
A general set of qualifications, duties and
responsibilities that matches a particular job
description and has a unique job code. There may be
multiple instances of the same job within an
organization.
job code
A unique identifier associated with a particular job that post code
identifies it for the organization.
text entry
iHRIS
Manage,
iHRIS
Qualify
job offer
An offer to hire an applicant for a particular position
and salary.
make a job offer, offer
yes/no
iHRIS
Manage
job
responsibilities
The duties expected to be performed by a particular
job.
duties, responsibilities
text entry
iHRIS
Manage
job title
The label used to describe a job, or a specific set of
duties and responsibilities.
post title, title
text entry
iHRIS
Manage,
iHRIS
Qualify
language
A foreign language other than a person's native
language.
-
selection
iHRIS
Manage
The date at which a person last received an evaluation. -
date
iHRIS
Manage
The number issued with a license to practice as a
health worker; this number may or may not be
identical to the registration number.
number
iHRIS
Manage,
iHRIS
Qualify
last evaluated
license number
-
iHRIS:Data Dictionary
85
limited working
The second level of five in the Interagency Language
Roundtable (ILR) scale of language proficiency; a
person at this level is able to satisfy routine social
demands and limited work requirements.
Level 2, limited working
proficiency, S-2
value (Speaking,
Reading or Writing
Proficiency)
iHRIS
Manage
location
Refers to the country, region, district and (optionally)
county where an organization, institution or facility is
located.
geographical location,
institution location
selection (from
Country + Region +
District + County)
iHRIS
Manage,
iHRIS
Qualify
location selection
Designates a country that is used for determining
geographical location, in addition to selecting a
currency or nationality.
-
yes/no
iHRIS
Manage,
iHRIS
Qualify
mailing address
An address, including city, country and zip code,
where a person or organization can be contacted by
mail.
address
text entry
iHRIS
Manage,
iHRIS
Qualify
Primary field of study.
-
text entry
iHRIS
Manage
marital status
A person's legal status, such as single, married,
divorced or widowed.
-
selection
iHRIS
Manage,
iHRIS
Qualify
materials
approved
Approval of examination application materials.
-
yes/no
iHRIS
Qualify
-
yes/no
iHRIS
Qualify
number
iHRIS Plan
major
materials received Examination application materials submitted by an
applicant in advance of taking the exam.
maximum amount The maximum number of health workers that can enter of change
the workforce in a projection.
maximum
number of
students
The largest number of students accepted into a training course.
number
iHRIS
Manage
midpoint
The average salary offered to new hires in a salary
grade, which may not be equivalent to the true average
of the salary range within that grade.
selection (from
Currency) + number
iHRIS
Manage
monthly
An event that occurs once a month.
-
value (Recurrence
Frequency)
iHRIS
Manage
Refers to the value used to create an item for selection
menus.
-
text entry
all
The country where a person is a legal citizen.
citizenship
selection (from
Country)
iHRIS
Manage,
iHRIS
Qualify
A role that prevents a user from accessing the system,
or disables the user account.
-
value (Role)
all
General information added to a record to provide
additional information not accounted for by other
fields.
primary contact person
text entry
iHRIS
Manage,
iHRIS
Qualify
The actual number of workers available for
deployment.
supply
number
iHRIS Plan
name
nationality
no access
notes
number of
employed staff
iHRIS:Data Dictionary
86
number of
students
The maximum number of students that can attend a
specific training program.
-
number
iHRIS
Qualify
OK to contact
Specifies whether a person's past employers may be
contacted.
-
yes/no
iHRIS
Manage
old applicant
A person who previously applied for an open position,
but who has not applied for any positions that are
currently open.
-
value (from
Employee Status)
iHRIS
Manage
old employee
A person who previously worked for an organization
but has left the organization.
-
value (from
Employee Status)
iHRIS
Manage
once
An event that occurs only once, or does not recur.
-
value (Recurrence
Frequency)
iHRIS
Manage
open
A position status that designates a position that is
required for the organization to operate and that the
organization is actively hiring to fill.
open position
value (Position
Status)
iHRIS
Manage
The certifying board or professional council requesting the qualifications of a health worker who is applying
to work in a foreign country.
text entry
iHRIS
Qualify
Refers to all values other than those not explicitly
listed for selection.
other contact
value (Contact Type)
iHRIS
Manage,
iHRIS
Qualify
A person's names other than the first name and
surname, usually one or more middle names.
middle name, other name
text entry
all
The given by a health worker leaving the country
where s/he was trained in order to practice in a foreign
country.
out migration
selection
iHRIS
Qualify
A passing grade on a qualifying examination or on a
facility inspection.
passed
value (Exam Results) iHRIS
or yes/no
Qualify
A hidden phrase that provides secure access to the
system.
-
text entry
all
The names of the people who attend a job interview.
interviewers
text entry
iHRIS
Manage
number
iHRIS Plan
organization
requesting
verification
other
other names
out migration
reason
pass
password
people attending
percentage change An annual change in the number of workers based on a rate of change
percentage of the available number of workers leaving
or entering the workforce.
permanent
A registration type that does not expire.
-
value (Registration
Type)
iHRIS
Qualify
personal contact
Refers to a person's home mailing address, telephone
and other contact information.
home, personal
value (Contact Type)
iHRIS
Manage,
iHRIS
Qualify
pool change
A change applied to a cadre pool that calculates either
an increase or decrease in the number of available
health workers in that pool.
-
selection
iHRIS Plan
population
The total number of people inhabiting a specific area,
such as a country.
-
number
iHRIS Plan
number
iHRIS Plan
population growth The percentage by which the population of an area will growth rate, population
rate
grow annually.
growth
iHRIS:Data Dictionary
position
87
An instance of a job that can be filled by one employee in one facility and represents one box on an
organizational chart.
selection (from
Position Code +
Position Title)
iHRIS
Manage
A unique identifier associated with a particular
position that identifies it for the organization.
-
text entry
iHRIS
Manage
The specific responsibilities for a particular position in addition to the general responsibilities for the job.
text entry
iHRIS
Manage
The status of a position as open, closed (filled) or
discontinued.
status
selection (preset
values)
iHRIS
Manage
position title
A specific title different from the job title that defines
one particular position within an organization.
title
text entry
iHRIS
Manage
position type
A classification of a type of position.
-
selection
iHRIS
Manage
The date a position is opened for hiring.
date posted, posted date
date
iHRIS
Manage
The type of registration issued to a health worker.
-
selection (preset
values)
iHRIS
Qualify
The country that is selected as the primary location for
data in the system; more than one country may be set
as the primary country.
-
yes/no
all
The form, or related set of data entry fields, on which a report relationship is based.
selection
iHRIS
Manage,
iHRIS
Qualify
The third level of five in the Interagency Language
Roundtable (ILR) scale of language proficiency; a
person at this level is able to speak the language with
sufficient structural accuracy and vocabulary to
participate effectively in most conversations on
practical, social and professional topics.
value (Speaking,
Reading or Writing
Proficiency)
iHRIS
Manage
The number of years in a projection, usually between 5 duration
and 30 years. Also refers to the number of years that a
pool change affects the projection.
number
iHRIS Plan
A calculation of the workforce supply and required
workers over time based on workforce data and
assumptions made about future changes to the
workforce that compares the supply to the
requirements and shows the gap between the two.
graphical model, projection,
workforce projection
text entry
iHRIS Plan
-
date
iHRIS
Manage
position code
position
description
position status
post date
practice type
primary country
primary form
professional
working
projection
duration
projection name
proposed end date Date at which funding or the role for a position is
tentatively scheduled to end, as distinguished from the
end date.
Level 3, professional working
proficiency, S-3
proposed hiring
date
Date at which an organization would like to fill an
open position, as distinguished from the actual hiring
date.
-
date
iHRIS
Manage
proposed salary
The salary that is proposed for an open position before
it has been filled; does not refer to the actual salary for
the position.
-
selection (from
Currency) + number
iHRIS
Manage
qualification
Specific educational level, training, competency, skill
or experience that a person must have in order to enter
a training program, become registered in a cadre or
perform a job.
education, minimum
qualification required, skill
selection or text entry iHRIS
(job application)
Manage,
iHRIS
Qualify
iHRIS:Data Dictionary
rate amount of
change increases
each year
88
The percentage by which the annual change in the
number of health workers increases annually.
-
number
iHRIS Plan
reading
proficiency
A person's reading ability in a foreign language.
-
selection (preset
values)
iHRIS
Manage
reason for
departure
A reason given for leaving employment or changing
positions within the organization.
reason for leaving
selection; text entry
(past employment)
iHRIS
Manage
records officer
A role that is responsible for basic data entry,
including initial indexing and upgrades of health
professional students entering training programs,
tracking out migration verifications and demographic
data entry.
-
value (Role)
iHRIS
Qualify
A regular repetition of a special payment, such as
monthly or annually.
recurrence
selection (preset
values)
iHRIS
Manage
A major subdivision of a country containing districts.
-
selection
iHRIS
Manage,
iHRIS
Qualify
An organization that registers or licenses health
workers to practice in a country.
council, licensing board
selection
iHRIS
Manage
The date at which a health worker is issued a
registration number.
-
date
iHRIS
Manage,
iHRIS
Qualify
registration
number
A number that is issued when a health worker enters
the profession within a particular cadre; the health
worker retains the registration number as the primary
identification number as long as s/he is licensed to
practice in that cadre in the country.
-
number
iHRIS
Manage,
iHRIS
Qualify
registration
supervisor
A role that is responsible for data entry related to
licensing updates, including entering initial
registration, issuing new licenses and license renewals,
issuing and renewing private practice licenses, and
registering and licensing foreign-trained health care
professionals applying to work in the country.
value (Role)
iHRIS
Qualify
The date a license is reissued to a health worker after a reinstatement
suspension due to a disciplinary action.
date
iHRIS
Qualify
Display of data from the system as a table or graphical
chart; typically, filters can be set on a report to
determine the range of data displayed.
selection
iHRIS
Manage,
iHRIS
Qualify
report
relationship
A defined relationship between system forms on which form relationship, relationship selection
a report is based.
iHRIS
Manage,
iHRIS
Qualify
request date
The date that official documentation is requested.
-
date
iHRIS
Qualify
The location where a person is currently living; this
may be different than the person's home residence.
current residence
selection (from
Country + Region +
District)
iHRIS
Manage,
iHRIS
Qualify
recurrence
frequency
region
registration
council
registration date
reinstatement
date
report
residence
-
iHRIS:Data Dictionary
resumption date
re-try
role
salary
salary grade
salary increase
salary source
secondary school
name
shortname
site
speaking
proficiency
The date a student returned to a training program that
was previously disrupted.
89
resumption
date
iHRIS
Qualify
The second attempt to pass the qualifying examination. -
value (Exam Try)
iHRIS
Qualify
Determines the activities that a user can perform
within the system.
-
selection (preset
values)
all
The amount an employee is paid per year for a
particular job.
current salary, wage
selection (from
Currency) + number
iHRIS
Manage
Defines pay ranges for one or more jobs.
band, grade, salary band
selection
iHRIS
Manage
The amount that a salary is increased each year,
expressed as a percentage of the salary.
-
number
iHRIS Plan
A monetary source for an employee's salary or special
payments that is not the employing organization, such
as a donor or nonprofit.
source
selection
iHRIS
Manage
The school attended before entering a training
institution.
high school
TBD
iHRIS
Qualify
A unique name used to refer to a report.
relationship short name
text entry
iHRIS
Manage,
iHRIS
Qualify
The location where a training class is given.
-
text entry
iHRIS
Manage
A person's speaking ability in a foreign language.
-
selection (preset
values)
iHRIS
Manage
start date
The date at which a training program, position, license, date started
etc. begins.
date
iHRIS
Manage,
iHRIS
Qualify
start year
The year in which a projection of the workforce
begins, for which there is known workforce data.
year
iHRIS Plan
The position that a person held when first employed by an organization.
text entry
iHRIS
Manage
The salary that a person earned when first employed
by an organization; also the lowest salary in a salary
grade.
selection (from
Currency) + number
iHRIS
Manage
An annual change in the number of workers based on a amount of change
specific number of workers leaving or entering the
workforce.
number
iHRIS Plan
status
The current state of an institution, facility or training
course (typically open or closed).
facility status, training course
status
selection
iHRIS
Manage,
iHRIS
Qualify
supervisor
A person who manages one or more employees of a
lower grade.
manager
text entry (for past
iHRIS
employers); selection Manage
(from Position Code
+ Position Title)
A family name or last name.
last name
text entry
starting position
starting salary
static change
surname
base year
first salary, start, start salary,
starting wage
all
iHRIS:Data Dictionary
suspend license
To revoke a health worker's license as a result of a
disciplinary notice.
90
suspend, suspension
yes/no
iHRIS
Qualify
targeted goals for A goal or proposed outcome for workforce plans or
the workforce
projections, such as to meet a specific need or staff up
to a certain level.
goals
text entry
iHRIS Plan
targeted number
of positions
The number of health workers necessary to meet the
health service need.
need, requirements, target
number
iHRIS Plan
targeted ratio of
positions
A targeted number of health workers based on a ratio
of one health worker per a certain number of people to
be served.
health worker-to-population
ratio, targeted ratio
number
iHRIS Plan
phone number, telephone
text entry
iHRIS
Manage,
iHRIS
Qualify
A registration type that does expire.
-
value (Registration
Type)
iHRIS
Qualify
The specific subject of a training course.
subject
text entry
iHRIS
Manage
training course
An in-service program offered by a training institution
that enables an employee to update or add to skills
necessary for performing a job.
course, in-service training,
training
selection
iHRIS
Manage,
iHRIS
Qualify
training funder
A nonprofit or other funding organization that pays for funder
employees to take a training course.
selection
iHRIS
Manage
A school that offers one or more programs to train
employees, especially health workers.
institution, institution name,
school
selection; text entry
(for educational
history or foreign
training)
iHRIS
Manage,
iHRIS
Qualify
training manager A person who is responsible for managing in-service
training programs for employees and updating
employee competencies gained by training.
-
value (Role)
iHRIS
Manage
training program A pre-service, multi-year educational program offered
by a training institution that, when completed,
qualifies a person to be registered or licensed in a
particular cadre.
pre-service training, training
selection
iHRIS
Qualify
training requestor The person or group who requests that an employee
complete a training course.
requestor
selection
iHRIS
Manage
-
text entry
all
The type of change made to a health worker's record as changes made, verification
a result of verifying the record with an outside source.
selection
iHRIS
Qualify
The date a change was made to a record as a result of
verifying the record with an outside source.
date
iHRIS
Qualify
A display of data as a table or chart that shows specific report view
fields sorted or aggregated in a pre-specified way;
filters may be selected to limit the data displayed in the
report view.
text entry
iHRIS
Manage,
iHRIS
Qualify
An event that occurs once a week.
value (Recurrence
Frequency)
iHRIS
Manage
telephone number A number where a person or organization can be
contacted by telephone.
temporary
topic
training
institution
username
verification
change
verification date
view
weekly
A unique name used by a user to access the system.
-
-
iHRIS:Data Dictionary
work contact
writing
proficiency
year
yearly
91
Refers to a person's work mailing address, telephone
number and other contact information.
work
value (Contact Type)
iHRIS
Manage,
iHRIS
Qualify
A person's writing ability in a foreign language.
-
selection (preset
values)
iHRIS
Manage
The year for which known data are being entered.
supply year, target year
year
iHRIS Plan
An event that occurs once a year.
annually
value (Recurrence
Frequency)
iHRIS
Manage
iHRIS:Copyright
Copyright (c) 2007-2009 IntraHealth International, Inc. [1]
Permission is granted to copy, distribute and/or modify this document under the terms of the GNU Free
Documentation License, Version 1.2 or any later version published by the Free Software Foundation; with no
Invariant Sections, no Front-Cover Texts, and no Back-Cover Texts.
If you have a question, feedback on our software, or a suggestion for a new feature or improvement, or if you would
like to discuss initiating HRIS strengthening activities, please contact the HRIS Development team. You may do so
in any of the following ways:
• Click the Feedback button at any point in the iHRIS software.
• Visit the HRIS Strengthening Website at http://www.capacityproject.org/hris/and click "Contact Us."
• Send us an email at: [email protected]
• Write us at:
HRIS Strengthening Information
IntraHealth International, Inc.
6340 Quadrangle Drive Suite 200
Chapel Hill, NC 27517
References
[1] http:/ / www. intrahealth. org/
Article Sources and Contributors
Article Sources and Contributors
iHRIS:Understanding iHRIS Manage Source: http://open.intrahealth.org/w/index.php?oldid=14754 Contributors: Cbales, Sturlington
iHRIS:Before Installing iHRIS Manage Source: http://open.intrahealth.org/w/index.php?oldid=14753 Contributors: Cbales, Sturlington
iHRIS:Administer the System Source: http://open.intrahealth.org/w/index.php?oldid=14735 Contributors: Cbales, Sturlington
iHRIS:Administer Users Source: http://open.intrahealth.org/w/index.php?oldid=14734 Contributors: Cbales, Sturlington
iHRIS:Create Reports Source: http://open.intrahealth.org/w/index.php?oldid=14736 Contributors: Cbales, Sturlington
iHRIS:User Access Source: http://open.intrahealth.org/w/index.php?oldid=14737 Contributors: Cbales, Sturlington
iHRIS:Add Geographical Areas Source: http://open.intrahealth.org/w/index.php?oldid=14755 Contributors: Cbales, Sturlington
iHRIS:Administer Database for iHRIS Manage Source: http://open.intrahealth.org/w/index.php?oldid=14757 Contributors: Cbales, Sturlington
iHRIS:In- service Training Management Module Source: http://open.intrahealth.org/w/index.php?oldid=14758 Contributors: Cbales, Sturlington
iHRIS:Create a Job Structure Source: http://open.intrahealth.org/w/index.php?oldid=14759 Contributors: Cbales, Sturlington
iHRIS:Administer Positions Source: http://open.intrahealth.org/w/index.php?oldid=14760 Contributors: Cbales, Sturlington
iHRIS:Manage People Source: http://open.intrahealth.org/w/index.php?oldid=14761 Contributors: Cbales, Sturlington
iHRIS:Add Employee Information Source: http://open.intrahealth.org/w/index.php?oldid=14762 Contributors: Cbales, Sturlington
iHRIS:Add Position Information Source: http://open.intrahealth.org/w/index.php?oldid=14763 Contributors: Cbales, Sturlington
iHRIS:Add Qualifications Source: http://open.intrahealth.org/w/index.php?oldid=14764 Contributors: Cbales, Sturlington
iHRIS:Add Trainings Source: http://open.intrahealth.org/w/index.php?oldid=14765 Contributors: Cbales, Sturlington
iHRIS:Add an Application Source: http://open.intrahealth.org/w/index.php?oldid=14766 Contributors: Cbales, Sturlington
iHRIS:Add Employee History Source: http://open.intrahealth.org/w/index.php?oldid=14767 Contributors: Cbales, Sturlington
iHRIS:Manage Job Applicants Source: http://open.intrahealth.org/w/index.php?oldid=14768 Contributors: Cbales, Sturlington
iHRIS:Search Records in iHRIS Manage Source: http://open.intrahealth.org/w/index.php?oldid=14769 Contributors: Cbales, Sturlington
iHRIS:Run Reports in iHRIS Manage Source: http://open.intrahealth.org/w/index.php?oldid=14770 Contributors: Cbales
iHRIS:Using Windows iHRIS Source: http://open.intrahealth.org/w/index.php?oldid=11930 Contributors: Cbales, Sturlington
iHRIS:Data Dictionary Source: http://open.intrahealth.org/w/index.php?oldid=14738 Contributors: Cbales, Sturlington
iHRIS:Copyright Source: http://open.intrahealth.org/w/index.php?oldid=14739 Contributors: Cbales, Sturlington
92
Image Sources, Licenses and Contributors
Image Sources, Licenses and Contributors
Image:Workflow_Map.jpg Source: http://open.intrahealth.org/w/index.php?title=File:Workflow_Map.jpg License: unknown Contributors: Sturlington
Image:Geographical_locations.jpg Source: http://open.intrahealth.org/w/index.php?title=File:Geographical_locations.jpg License: unknown Contributors: Sturlington
Image:Job_structure_generic.jpg Source: http://open.intrahealth.org/w/index.php?title=File:Job_structure_generic.jpg License: unknown Contributors: Sturlington
Image:Job_structure_example.jpg Source: http://open.intrahealth.org/w/index.php?title=File:Job_structure_example.jpg License: unknown Contributors: Sturlington
File:Configure_system.png Source: http://open.intrahealth.org/w/index.php?title=File:Configure_system.png License: unknown Contributors: Cbales
Image:ConfigureSystem2.png Source: http://open.intrahealth.org/w/index.php?title=File:ConfigureSystem2.png License: unknown Contributors: Cbales, Sturlington
File:Disable_record_verify.png Source: http://open.intrahealth.org/w/index.php?title=File:Disable_record_verify.png License: unknown Contributors: Cbales
Image:AddUser1.jpg Source: http://open.intrahealth.org/w/index.php?title=File:AddUser1.jpg License: unknown Contributors: Sturlington
Image:AddUser2.jpg Source: http://open.intrahealth.org/w/index.php?title=File:AddUser2.jpg License: unknown Contributors: Sturlington
File:UpdateUser2.jpg Source: http://open.intrahealth.org/w/index.php?title=File:UpdateUser2.jpg License: unknown Contributors: Cbales, Sturlington
File:UpdateUser3.png Source: http://open.intrahealth.org/w/index.php?title=File:UpdateUser3.png License: unknown Contributors: Cbales
Image:LogIn.png Source: http://open.intrahealth.org/w/index.php?title=File:LogIn.png License: unknown Contributors: Sturlington
File:IHRIS_Qualify_home_page.png Source: http://open.intrahealth.org/w/index.php?title=File:IHRIS_Qualify_home_page.png License: unknown Contributors: Cbales
Image:ForgotPassword.png Source: http://open.intrahealth.org/w/index.php?title=File:ForgotPassword.png License: unknown Contributors: Sturlington
File:IHRIS_Qualify_home_page_bottom.png Source: http://open.intrahealth.org/w/index.php?title=File:IHRIS_Qualify_home_page_bottom.png License: unknown Contributors: Cbales
Image:ChangePassword2.png Source: http://open.intrahealth.org/w/index.php?title=File:ChangePassword2.png License: unknown Contributors: Sturlington
File:IHRIS_Qualify_logout.png Source: http://open.intrahealth.org/w/index.php?title=File:IHRIS_Qualify_logout.png License: unknown Contributors: Cbales
Image:AddCountry1.png Source: http://open.intrahealth.org/w/index.php?title=File:AddCountry1.png License: unknown Contributors: Sturlington
Image:AddCountry2.png Source: http://open.intrahealth.org/w/index.php?title=File:AddCountry2.png License: unknown Contributors: Sturlington
Image:AddCountry3.png Source: http://open.intrahealth.org/w/index.php?title=File:AddCountry3.png License: unknown Contributors: Sturlington
File:Manage_Admin_Database.png Source: http://open.intrahealth.org/w/index.php?title=File:Manage_Admin_Database.png License: unknown Contributors: Cbales
File:Manage_Admin_Database2.png Source: http://open.intrahealth.org/w/index.php?title=File:Manage_Admin_Database2.png License: unknown Contributors: Cbales
Image:AddDistrict1.png Source: http://open.intrahealth.org/w/index.php?title=File:AddDistrict1.png License: unknown Contributors: Sturlington
Image:AddDistrict2.png Source: http://open.intrahealth.org/w/index.php?title=File:AddDistrict2.png License: unknown Contributors: Sturlington
Image:Add District3.png Source: http://open.intrahealth.org/w/index.php?title=File:Add_District3.png License: unknown Contributors: Sturlington
Image:AddCounty1.png Source: http://open.intrahealth.org/w/index.php?title=File:AddCounty1.png License: unknown Contributors: Sturlington
Image:AddCounty2.png Source: http://open.intrahealth.org/w/index.php?title=File:AddCounty2.png License: unknown Contributors: Sturlington
Image:AddCurrency1.png Source: http://open.intrahealth.org/w/index.php?title=File:AddCurrency1.png License: unknown Contributors: Sturlington
Image:AddCurrency2.png Source: http://open.intrahealth.org/w/index.php?title=File:AddCurrency2.png License: unknown Contributors: Sturlington
Image:OrgLists.png Source: http://open.intrahealth.org/w/index.php?title=File:OrgLists.png License: unknown Contributors: Sturlington
Image:FacilityType1.png Source: http://open.intrahealth.org/w/index.php?title=File:FacilityType1.png License: unknown Contributors: Sturlington
Image:FacilityType2.png Source: http://open.intrahealth.org/w/index.php?title=File:FacilityType2.png License: unknown Contributors: Sturlington
Image:Offices1.png Source: http://open.intrahealth.org/w/index.php?title=File:Offices1.png License: unknown Contributors: Sturlington
Image:Offices2.png Source: http://open.intrahealth.org/w/index.php?title=File:Offices2.png License: unknown Contributors: Sturlington
Image:Offices3.png Source: http://open.intrahealth.org/w/index.php?title=File:Offices3.png License: unknown Contributors: Sturlington
Image:Departments1.png Source: http://open.intrahealth.org/w/index.php?title=File:Departments1.png License: unknown Contributors: Sturlington
Image:Departments2.png Source: http://open.intrahealth.org/w/index.php?title=File:Departments2.png License: unknown Contributors: Sturlington
Image:Councils1.png Source: http://open.intrahealth.org/w/index.php?title=File:Councils1.png License: unknown Contributors: Sturlington
Image:Councils2.png Source: http://open.intrahealth.org/w/index.php?title=File:Councils2.png License: unknown Contributors: Sturlington
Image:EmployeeLists.png Source: http://open.intrahealth.org/w/index.php?title=File:EmployeeLists.png License: unknown Contributors: Sturlington
Image:EducationType1.png Source: http://open.intrahealth.org/w/index.php?title=File:EducationType1.png License: unknown Contributors: Sturlington
Image:EducationType2.png Source: http://open.intrahealth.org/w/index.php?title=File:EducationType2.png License: unknown Contributors: Sturlington
Image:Degrees1.png Source: http://open.intrahealth.org/w/index.php?title=File:Degrees1.png License: unknown Contributors: Sturlington
Image:Degrees2.png Source: http://open.intrahealth.org/w/index.php?title=File:Degrees2.png License: unknown Contributors: Sturlington
Image:Languages1.png Source: http://open.intrahealth.org/w/index.php?title=File:Languages1.png License: unknown Contributors: Sturlington
Image:Languages2.png Source: http://open.intrahealth.org/w/index.php?title=File:Languages2.png License: unknown Contributors: Sturlington
Image:CompetencyType1.png Source: http://open.intrahealth.org/w/index.php?title=File:CompetencyType1.png License: unknown Contributors: Sturlington
Image:CompetencyType2.png Source: http://open.intrahealth.org/w/index.php?title=File:CompetencyType2.png License: unknown Contributors: Sturlington
Image:Competency1.png Source: http://open.intrahealth.org/w/index.php?title=File:Competency1.png License: unknown Contributors: Sturlington
Image:Competency2.png Source: http://open.intrahealth.org/w/index.php?title=File:Competency2.png License: unknown Contributors: Sturlington
Image:CompetencyEvaluation1.png Source: http://open.intrahealth.org/w/index.php?title=File:CompetencyEvaluation1.png License: unknown Contributors: Sturlington
Image:CompetencyEvaluation2.png Source: http://open.intrahealth.org/w/index.php?title=File:CompetencyEvaluation2.png License: unknown Contributors: Sturlington
Image:Identification1.png Source: http://open.intrahealth.org/w/index.php?title=File:Identification1.png License: unknown Contributors: Sturlington
Image:Identification2.png Source: http://open.intrahealth.org/w/index.php?title=File:Identification2.png License: unknown Contributors: Sturlington
Image:Benefit1.png Source: http://open.intrahealth.org/w/index.php?title=File:Benefit1.png License: unknown Contributors: Sturlington
Image:Benefit2.png Source: http://open.intrahealth.org/w/index.php?title=File:Benefit2.png License: unknown Contributors: Sturlington
Image:MaritalStatus1.png Source: http://open.intrahealth.org/w/index.php?title=File:MaritalStatus1.png License: unknown Contributors: Sturlington
Image:MaritalStatus2.png Source: http://open.intrahealth.org/w/index.php?title=File:MaritalStatus2.png License: unknown Contributors: Sturlington
Image:Departure1.png Source: http://open.intrahealth.org/w/index.php?title=File:Departure1.png License: unknown Contributors: Sturlington
Image:Departure2.png Source: http://open.intrahealth.org/w/index.php?title=File:Departure2.png License: unknown Contributors: Sturlington
Image:JobStructure.png Source: http://open.intrahealth.org/w/index.php?title=File:JobStructure.png License: unknown Contributors: Sturlington
Image:Cadres1.png Source: http://open.intrahealth.org/w/index.php?title=File:Cadres1.png License: unknown Contributors: Sturlington
Image:Cadres2.png Source: http://open.intrahealth.org/w/index.php?title=File:Cadres2.png License: unknown Contributors: Sturlington
Image:Classification1.png Source: http://open.intrahealth.org/w/index.php?title=File:Classification1.png License: unknown Contributors: Sturlington
Image:Classification2.png Source: http://open.intrahealth.org/w/index.php?title=File:Classification2.png License: unknown Contributors: Sturlington
Image:SalaryGrade1.png Source: http://open.intrahealth.org/w/index.php?title=File:SalaryGrade1.png License: unknown Contributors: Sturlington
Image:SalaryGrade2.png Source: http://open.intrahealth.org/w/index.php?title=File:SalaryGrade2.png License: unknown Contributors: Sturlington
Image:Job1.png Source: http://open.intrahealth.org/w/index.php?title=File:Job1.png License: unknown Contributors: Sturlington
93
Image Sources, Licenses and Contributors
Image:Job2.png Source: http://open.intrahealth.org/w/index.php?title=File:Job2.png License: unknown Contributors: Sturlington
Image:Positions.png Source: http://open.intrahealth.org/w/index.php?title=File:Positions.png License: unknown Contributors: Sturlington
Image:SalarySource1.png Source: http://open.intrahealth.org/w/index.php?title=File:SalarySource1.png License: unknown Contributors: Sturlington
Image:SalarySource2.png Source: http://open.intrahealth.org/w/index.php?title=File:SalarySource2.png License: unknown Contributors: Sturlington
Image:PositionType1.png Source: http://open.intrahealth.org/w/index.php?title=File:PositionType1.png License: unknown Contributors: Sturlington
Image:PositionType2.png Source: http://open.intrahealth.org/w/index.php?title=File:PositionType2.png License: unknown Contributors: Sturlington
Image:Position1.png Source: http://open.intrahealth.org/w/index.php?title=File:Position1.png License: unknown Contributors: Sturlington
Image:Position2.png Source: http://open.intrahealth.org/w/index.php?title=File:Position2.png License: unknown Contributors: Sturlington
Image:Position3.png Source: http://open.intrahealth.org/w/index.php?title=File:Position3.png License: unknown Contributors: Sturlington
Image:Position4.png Source: http://open.intrahealth.org/w/index.php?title=File:Position4.png License: unknown Contributors: Sturlington
Image:Position5.png Source: http://open.intrahealth.org/w/index.php?title=File:Position5.png License: unknown Contributors: Sturlington
Image:Position6.png Source: http://open.intrahealth.org/w/index.php?title=File:Position6.png License: unknown Contributors: Sturlington
Image:Position7.png Source: http://open.intrahealth.org/w/index.php?title=File:Position7.png License: unknown Contributors: Sturlington
Image:AddPerson.png Source: http://open.intrahealth.org/w/index.php?title=File:AddPerson.png License: unknown Contributors: Sturlington
Image:AddPerson2.png Source: http://open.intrahealth.org/w/index.php?title=File:AddPerson2.png License: unknown Contributors: Cbales, Sturlington
Image:AddPerson3.png Source: http://open.intrahealth.org/w/index.php?title=File:AddPerson3.png License: unknown Contributors: Cbales, Sturlington
Image:AddPerson4.png Source: http://open.intrahealth.org/w/index.php?title=File:AddPerson4.png License: unknown Contributors: Cbales, Sturlington
File:Manage_set_position_1.png Source: http://open.intrahealth.org/w/index.php?title=File:Manage_set_position_1.png License: unknown Contributors: Cbales
File:Make_a_job_offer.png Source: http://open.intrahealth.org/w/index.php?title=File:Make_a_job_offer.png License: unknown Contributors: Cbales
File:Manage_person_record.png Source: http://open.intrahealth.org/w/index.php?title=File:Manage_person_record.png License: unknown Contributors: Cbales
Image:AddIdentification1.png Source: http://open.intrahealth.org/w/index.php?title=File:AddIdentification1.png License: unknown Contributors: Sturlington
Image:AddIdentification2.png Source: http://open.intrahealth.org/w/index.php?title=File:AddIdentification2.png License: unknown Contributors: Sturlington
Image:AddIdentification3.png Source: http://open.intrahealth.org/w/index.php?title=File:AddIdentification3.png License: unknown Contributors: Sturlington
Image:Demographic1.png Source: http://open.intrahealth.org/w/index.php?title=File:Demographic1.png License: unknown Contributors: Sturlington
Image:Demographic2.png Source: http://open.intrahealth.org/w/index.php?title=File:Demographic2.png License: unknown Contributors: Sturlington
Image:Demographic3.png Source: http://open.intrahealth.org/w/index.php?title=File:Demographic3.png License: unknown Contributors: Sturlington
Image:AddContact1.png Source: http://open.intrahealth.org/w/index.php?title=File:AddContact1.png License: unknown Contributors: Sturlington
Image:AddContact2.png Source: http://open.intrahealth.org/w/index.php?title=File:AddContact2.png License: unknown Contributors: Sturlington
Image:AddContact3.png Source: http://open.intrahealth.org/w/index.php?title=File:AddContact3.png License: unknown Contributors: Sturlington
Image:AddBenefit1.png Source: http://open.intrahealth.org/w/index.php?title=File:AddBenefit1.png License: unknown Contributors: Sturlington
Image:AddBenefit2.png Source: http://open.intrahealth.org/w/index.php?title=File:AddBenefit2.png License: unknown Contributors: Sturlington
Image:AddBenefit3.png Source: http://open.intrahealth.org/w/index.php?title=File:AddBenefit3.png License: unknown Contributors: Sturlington
Image:RecordDeparture1.png Source: http://open.intrahealth.org/w/index.php?title=File:RecordDeparture1.png License: unknown Contributors: Sturlington
Image:RecordDeparture2.png Source: http://open.intrahealth.org/w/index.php?title=File:RecordDeparture2.png License: unknown Contributors: Sturlington
Image:ChangePosition1.png Source: http://open.intrahealth.org/w/index.php?title=File:ChangePosition1.png License: unknown Contributors: Sturlington
Image:ChangePosition2.png Source: http://open.intrahealth.org/w/index.php?title=File:ChangePosition2.png License: unknown Contributors: Sturlington
Image:PositionHistory.png Source: http://open.intrahealth.org/w/index.php?title=File:PositionHistory.png License: unknown Contributors: Sturlington
Image:SalaryChange1.png Source: http://open.intrahealth.org/w/index.php?title=File:SalaryChange1.png License: unknown Contributors: Sturlington
Image:SalaryChange2.png Source: http://open.intrahealth.org/w/index.php?title=File:SalaryChange2.png License: unknown Contributors: Sturlington
Image:AddLanguage1.png Source: http://open.intrahealth.org/w/index.php?title=File:AddLanguage1.png License: unknown Contributors: Sturlington
Image:AddRegistration1.png Source: http://open.intrahealth.org/w/index.php?title=File:AddRegistration1.png License: unknown Contributors: Sturlington
Image:AddRegistration2.png Source: http://open.intrahealth.org/w/index.php?title=File:AddRegistration2.png License: unknown Contributors: Sturlington
Image:AddLanguage2.png Source: http://open.intrahealth.org/w/index.php?title=File:AddLanguage2.png License: unknown Contributors: Sturlington
Image:AddLanguage3.png Source: http://open.intrahealth.org/w/index.php?title=File:AddLanguage3.png License: unknown Contributors: Sturlington
Image:AddCompetency1.png Source: http://open.intrahealth.org/w/index.php?title=File:AddCompetency1.png License: unknown Contributors: Sturlington
Image:AddCompetency2.png Source: http://open.intrahealth.org/w/index.php?title=File:AddCompetency2.png License: unknown Contributors: Sturlington
Image:AddCompetency3.png Source: http://open.intrahealth.org/w/index.php?title=File:AddCompetency3.png License: unknown Contributors: Sturlington
Image:AddApplication1.png Source: http://open.intrahealth.org/w/index.php?title=File:AddApplication1.png License: unknown Contributors: Sturlington
Image:AddApplication2.png Source: http://open.intrahealth.org/w/index.php?title=File:AddApplication2.png License: unknown Contributors: Sturlington
Image:AddApplication3.png Source: http://open.intrahealth.org/w/index.php?title=File:AddApplication3.png License: unknown Contributors: Sturlington
Image:Interview1.png Source: http://open.intrahealth.org/w/index.php?title=File:Interview1.png License: unknown Contributors: Sturlington
Image:Interview2.png Source: http://open.intrahealth.org/w/index.php?title=File:Interview2.png License: unknown Contributors: Sturlington
Image:Decision1.png Source: http://open.intrahealth.org/w/index.php?title=File:Decision1.png License: unknown Contributors: Sturlington
Image:Decision2.png Source: http://open.intrahealth.org/w/index.php?title=File:Decision2.png License: unknown Contributors: Sturlington
Image:Employment1.png Source: http://open.intrahealth.org/w/index.php?title=File:Employment1.png License: unknown Contributors: Sturlington
Image:Employment2.png Source: http://open.intrahealth.org/w/index.php?title=File:Employment2.png License: unknown Contributors: Sturlington
Image:Employment3.png Source: http://open.intrahealth.org/w/index.php?title=File:Employment3.png License: unknown Contributors: Sturlington
Image:Education1.png Source: http://open.intrahealth.org/w/index.php?title=File:Education1.png License: unknown Contributors: Sturlington
Image:Education2.png Source: http://open.intrahealth.org/w/index.php?title=File:Education2.png License: unknown Contributors: Sturlington
Image:Education3.png Source: http://open.intrahealth.org/w/index.php?title=File:Education3.png License: unknown Contributors: Sturlington
Image:Notes1.png Source: http://open.intrahealth.org/w/index.php?title=File:Notes1.png License: unknown Contributors: Sturlington
Image:Notes2.png Source: http://open.intrahealth.org/w/index.php?title=File:Notes2.png License: unknown Contributors: Sturlington
Image:Notes3.png Source: http://open.intrahealth.org/w/index.php?title=File:Notes3.png License: unknown Contributors: Sturlington
Image:ReviewApplicants.png Source: http://open.intrahealth.org/w/index.php?title=File:ReviewApplicants.png License: unknown Contributors: Sturlington
Image:ReviewApplicants2.png Source: http://open.intrahealth.org/w/index.php?title=File:ReviewApplicants2.png License: unknown Contributors: Sturlington
Image:ReviewApplicants3.png Source: http://open.intrahealth.org/w/index.php?title=File:ReviewApplicants3.png License: unknown Contributors: Sturlington
Image:SetPosition2.png Source: http://open.intrahealth.org/w/index.php?title=File:SetPosition2.png License: unknown Contributors: Sturlington
Image:SearchRecords.png Source: http://open.intrahealth.org/w/index.php?title=File:SearchRecords.png License: unknown Contributors: Cbales, Sturlington
File:Manage_search_recentchanges.png Source: http://open.intrahealth.org/w/index.php?title=File:Manage_search_recentchanges.png License: unknown Contributors: Cbales
File:Manage_search_recentchanges2.png Source: http://open.intrahealth.org/w/index.php?title=File:Manage_search_recentchanges2.png License: unknown Contributors: Cbales
Image:SearchPositions1.png Source: http://open.intrahealth.org/w/index.php?title=File:SearchPositions1.png License: unknown Contributors: Cbales, Sturlington
94
Image Sources, Licenses and Contributors
Image:SearchPositions2.png Source: http://open.intrahealth.org/w/index.php?title=File:SearchPositions2.png License: unknown Contributors: Cbales, Sturlington
Image:SearchPositions3.png Source: http://open.intrahealth.org/w/index.php?title=File:SearchPositions3.png License: unknown Contributors: Sturlington
Image:SearchPeople1.png Source: http://open.intrahealth.org/w/index.php?title=File:SearchPeople1.png License: unknown Contributors: Cbales, Sturlington
Image:SearchPeople2.png Source: http://open.intrahealth.org/w/index.php?title=File:SearchPeople2.png License: unknown Contributors: Cbales, Sturlington
File:Manage_report_views.png Source: http://open.intrahealth.org/w/index.php?title=File:Manage_report_views.png License: unknown Contributors: Cbales
File:Facility_list.png Source: http://open.intrahealth.org/w/index.php?title=File:Facility_list.png License: unknown Contributors: Cbales
File:Manage_filter.png Source: http://open.intrahealth.org/w/index.php?title=File:Manage_filter.png License: unknown Contributors: Cbales
File:Manage_changing_reports.png Source: http://open.intrahealth.org/w/index.php?title=File:Manage_changing_reports.png License: unknown Contributors: Cbales
File:Manage_export_report.png Source: http://open.intrahealth.org/w/index.php?title=File:Manage_export_report.png License: unknown Contributors: Cbales
File:Manage_print_report.png Source: http://open.intrahealth.org/w/index.php?title=File:Manage_print_report.png License: unknown Contributors: Cbales
Image:Offline_welcome.gif Source: http://open.intrahealth.org/w/index.php?title=File:Offline_welcome.gif License: unknown Contributors: Litlfred
Image:Offline_license.gif Source: http://open.intrahealth.org/w/index.php?title=File:Offline_license.gif License: unknown Contributors: Litlfred
Image:Offline_location.gif Source: http://open.intrahealth.org/w/index.php?title=File:Offline_location.gif License: unknown Contributors: Litlfred
Image:Offline_components.gif Source: http://open.intrahealth.org/w/index.php?title=File:Offline_components.gif License: unknown Contributors: Litlfred
Image:Offline_email.gif Source: http://open.intrahealth.org/w/index.php?title=File:Offline_email.gif License: unknown Contributors: Litlfred
Image:Offline_access_restrictions.gif Source: http://open.intrahealth.org/w/index.php?title=File:Offline_access_restrictions.gif License: unknown Contributors: Litlfred
Image:Offline_additional_components.gif Source: http://open.intrahealth.org/w/index.php?title=File:Offline_additional_components.gif License: unknown Contributors: Litlfred
Image:Offline_finish.gif Source: http://open.intrahealth.org/w/index.php?title=File:Offline_finish.gif License: unknown Contributors: Litlfred
Image:Offline_toolbar.gif Source: http://open.intrahealth.org/w/index.php?title=File:Offline_toolbar.gif License: unknown Contributors: Litlfred
Image:Offline_toolbar_left.gif Source: http://open.intrahealth.org/w/index.php?title=File:Offline_toolbar_left.gif License: unknown Contributors: Litlfred
Image:Offline_toolbar_right.gif Source: http://open.intrahealth.org/w/index.php?title=File:Offline_toolbar_right.gif License: unknown Contributors: Litlfred
95
License
License
GNU Free Documentation License 1.2
http:/ / www. gnu. org/ copyleft/ fdl. html
96