1
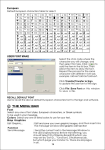
USER'S MANUAL REV.1.0
TIME ZONE DISPLAY
PLEASE READ BEFORE STARTING
This manual contains three overall sections:
Software Section
Programming your Multi Time Zone sign using the included
Software
!
Quick Reference Section
Corresponding Codes
?
Help Section
Most commonly asked questions, troubleshooting.
TABLE OF CONTENTS
SOFTWARE SECTION
System Requirements and Running the setup...................................1-3
The Software Screen...........................................................4
The menu bar.................................................................5
Set communication
? HELP SECTION...................................................5
ID
ID SWITCH DESCRIPTION TABLE............................6
SPECIFICATIONS...............................................7
PRODUCT FEATURES
* User friendly, easy to use.
* Display multiple zone messages and time
* time display format
24 hour or 12 hour.
* Compact design
Rugged construction, reliable solid-state electronics.
* RS485 Communication Interface
* Use GPS(Global Positioning System) receiver to get accurate time, and then
the Multi-Time Zone time is adjusted automatically every hour when receiving
data from GPS is valid .
HARDWARE INSTALLATION FOR MODEL: AM09260
Connect Individual Module To PC
3 4 5 6 7 8
DC 12V
ID Switch
ON
AC
Power Adaptor
司公限 SULPMA
有业实
飞佳
RS485
RS232
Connect Multi Module To PC
D+
DAM P LUS 公司
业有限
佳飞实
RS485
RS232
ON
ON
Power Adaptor
3 4 5 6 7 8
DC 12V
3 4 5 6 7 8
AC
Connect Multi Module To PC
AC
ON
GND
+5V
D+
RS232
D-
RS485 PINASSIGNMENT
S 公司
A MP L U有
限
佳 飞实业
RS485
PIN1-D+
PIN2-DPIN5-GND
PIN9-+5V
GPS RECEIVER
RS232 PIN ASSIGNMENT
PIN2-GPS RX
PIN3-GPS TX
PIN5-GND
PIN9-+5V
Note: Only Use factory supplied special RS232/485 Converter for supplying power for GPS Receiver.
Module Data port Pin Assignment
PIN1. No Connection
PIN2. GND
PIN3. RS485 D+
PIN4. RS485 DPIN5. No Use
PIN6. +5V output
1
2
3
4
5
6
Data port
3 4 5 6 7 8
Power Adaptor
ON
3 4 5 6 7 8
DC 12V
SOFTWARE SECTION
PC system required
Operating System: Win98/Win me/Win NT/ Win 2000/Win XP
CPU: Intel Pentium 166 or above
RAM: 32M or above
Monitor: VGA or higher
Serial Output: RS232 port
Software installation instructions
Insert the Multi Time Zone System disk into your CD-ROM
drive. That will auto-run and the first screen comes up.
Click INSTALL to go installation. EXIT will quit the installation.
Click INSTALL to go ahead the installation and continue the
Choose Next to continue, Click BROWSE to select the directory to install the
program. The system preset is C:\Program Files\Multi Time Zone.
1
Click NEXT to keep on installation
Choose NEXT to run the file installation to copy
the file to your PC hard disk. Choose CANCEL to quit installation
program or BACK to change the directory setting.
sign
After copying the file is complete, click on Finish.
Finish the installation, and shortcut icon for quick
start will be on the desktop screen. And simultaneously create
MULTI TIME ZONE directory in your PC program group.
TimeZone
Module
2
Multi Time Zone
If you want to uninstall the system, just double-click the unwise.exe at the Program
Group\ Multi Time Zone.
sign
Select Automatic and click NEXT. The program will automatically
uninstall.
3
SOFTWARE SCREEN
1) Set every module ID by ID Switch. Refer to ID Switch Description Table.
ID no. will be displayed when the module is powered on.
2) To transfer display messages and time format, Daylight Saving Time setting,
connect PC COM port to Multi Time Zone with RS485 data cable through
RS232/485 Converter.
3) Type your message in the Message area.
4) Select Move Speed.
Speed at which message will scroll from right to left
5) Select time format from drop-down list. the default is 24 hour.
6) Set time zone of selected sign ID, and the beginning and ending of Daylight
saving time in current year.
7) Click the Transfer button, a window will appear notifying you of the transmission
completion when done.
8) To adjust the display time automatically every hour using GPS signals, Unplug
the RS232 cable from Multi Time Zone, and then Connect the GPS RECEIVER
to the Multi Time Zone.
4
CONFIGURE SOFTWARE
1. Set Communication
Select the Com Port
2.
Click on OK when your settings are complete.
! QUICK REFERENCE SECTION
Moving speed
A FASTEST
B FAST
C NORMAL
D SLOW
E SLOWEST
? HELP SECTION
Most Commonly Asked Questions
How much text can l program onto message sign?
You can program up to 300 characters.
Will l lose my messages if l remove the power to the sign?
No, The messages is saved in SRAM.
I plugged the sign in but nothing comes ON?
Unplug the power to the sign and plug it in again.
Make sure the power adaptor plug is plugged into the sign and AC connect
firmly. Try using another wall outlet.
5
? HELP SECTION - SOFTWARE
Troubleshooting
"OPEN COM ERROR" .
If the error message is "OPEN COM ERROR", this means the Com Port you
have selected is not available for your use or is being used by an internal
device in your computer. A computer normally has 4 COM PORTS. Two external
ports which are available to connect external devices to the computer and two
Internal ports which are available, in most cases, for computer use only. Please
check the back of your computer to see if it is labeled COM1 or COM2. lf not,
please refer to your computer user' s manual or contact the computer manufactuer for more information.
My laptop does not have any Com Ports and only has support for USB
devices.
Some newer laptops do not have Com Ports and only support USB devices
(please reference your Laptop User's Manual to verify this). For this situation
you will need to purchase a USB Serial Adapter This device will convert one of
your Available USB ports to a working Com Port Please contact the
manufacturers support center directly for questions regarding installation
operation.
ID
ID SWITCH DESCRIPTION TABLE
Bit 1,2,3,4 is used to set the tens digit of ID number. Bit 5,6,7,8 is used to set the ones
digit of ID number. ID number is in the range from 00 to 99.
Bit 1,2,3,4 setting table:
ON
ON
3 4
3 4
0
ON
ON
3 4
1
ON
3 4
ON
3 4
3
4
ON
3 4
6
ON
3 4
2
3 4
5
ON
ON
3 4
7
3 4
8
9
Bit 5,6,7,8 setting table:
ON
ON
ON
ON
ON
5 6 7 8
5 6 7 8
5 6 7 8
5 6 7 8
0
1
2
3
ON
ON
ON
5 6 7 8
4
ON
ON
5 6 7 8
5 6 7 8
5 6 7 8
5 6 7 8
5 6 7 8
5
6
7
8
9
6
SPECIFICATIONS
*
*
*
*
*
*
*
MODULE INPUT POWER: DC12V
MODULE CONSUMING POWER:<8 Watts
VIEWING DISTANCE:>165 Feet
TIME ACCURACY: Within 0.5 sec per day.
DIMENSION: 13.4"(Width)* 6.3"(Height)* 0.6"(Depth)
WEIGHT: 1.1 Lbs (Approx.)
FCC TEST APPROVAL
THIS DEVICE HAS BEEN TESTED AND FOUND TO COMPLY WITH THE
LIMITS FOR CLASS B DIGITAL DEVICE, PURSUANT TO PART 15 OF THE
FCC RULE.
Cautions
For indoor use only. Avoid outdoor storage.
Keep away from high temperatures, humidity, dew, water and direct
sunlight.
Always disconnect power cord and other cables by holding plug.
Clean with damp cloth only.
GPS receiver requires an unobstructed view of the sky, so it is used only
outdoors and it often does not perform well within forested areas or near
tall buildings.
7