1
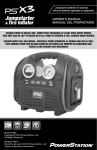
22Ah
6-in-1 HEAVY DUTY 1,000 AMP POWER PACK
FOR JUMPSTARTING CAR & TRUCK BATTERIES AND PROVIDING 110V AC & 12V DC POWER
!WARNING:
Read carefully and understand all INSTRUCTIONS before operating.
Failure to follow the safety rules and other basic safety precautions may
result in serious persoal injury.
USER MANUAL
© Copyright 2010, NPower
All rights reserved
ITEM # 149214
!"#$%#$&
Warning Information
1–3
Introduction
4
Features
4
Getting to Know Your Power Pack
Operation
5-6
7
Charging before initial use
7
Standard recharging of the Power Pack
7
12V DC recharging of the Power Pack
8
Use of the Power Pack
Jumpstarting precautions
Using the jumpstart
Using the integrated work lamp
Using the compressor
9-15
9-10
10-11
11
11–12
Inflating a tire or object
11
Inflating other objects
12
Operating AC appliances
12-14
Operating DC appliances
14-15
Replacement Parts
16
Notes
17
NOTICE:
If you experience any problems with the Power Pack, please DO NOT
return the unit to the place of purchase. Please call Northern Tool’s
customer service department at 800-317-1260.
'()#*#+,*#-").($*"#
This manual contains information regarding safety, operation, maintenance
and storage of this product.
Please carefully read and understand this manual before using this product
to avoid possible injury or property damage.
Keep this manual for future reference.
WARNING
Risk of personal injury. ALWAYS wear approved eye
protection when using this equipment.
WARNING
Shock Hazard. Keep Away from Children. Do not insert foreign
objects into the DC power socket, AC power socket or the
ventilation slots. Do not expose the unit to water, snow, spray
or excessive moisture.
WARNING
Risk of fire, explosion or burns. This unit has no userserviceable parts within the housing. Have a qualified
technician complete any service work.
WARNING
Fire Hazard. Never allow the jumpstart’s red and black cable
clamps to touch each other or a common metal conductor.
Such contact could cause damage to the unit and/or create
a sparking/explosion hazard.
WARNING
Fire Hazard. Connect red clamp to the positive (+) battery
terminal. The black clamp should be attached to the engine
block of stalled vehicle. Do not connect black clamp to the
negative (-) battery terminal. Doing so could cause damage
to the unit and/or create a sparking/explosion hazard.
WARNING
Fire Hazard. Do not try to jumpstart a battery for more than
six seconds. Before repeating the jump starting cycle, allow the
unit to cool for three minutes.
WARNING
Risk of fire, explosion, or burns. The jumpstarting cable
connection has enough energy to cause a spark, create an
explosion hazard or cause burns if a metal object contacts both
terminals. Do not turn on the jumpstarting function without
having cables properly attached to the vehicle’s battery.
061410
6-in-1 POWER PACK Owners Manual Page 1
'()#*#+,*#-").($*"#,/01231456
WARNING
Fire Hazard. Do not leave the compressor unattended while
operating. The compressor must be allowed to cool for ten
minutes following each ten minutes of continuous use.
CAUTION
Do not expose the Power Pack to temperatures greater
than 104°F (40°C).
WARNING
Explosion Hazard: Do not use this unit where there are
combustible fumes or gases. Do not use in an enclosure
containing automotive-style lead acid batteries.
WARNING
Risk of personal injury or death: Make sure the
jumpstart is safely secured when transporting. If the unit is not
properly secured during an accident the unit could hit the driver
or passengers.
WARNING
Risk of personal injury or damage to equipment: Do not
exceed recommended air pressure of object being inflated.
Do not exceed a pressure of 260 PSI.
CAUTION
Caution: Contains a sealed lead acid battery. Keep dry.
Do not drop. Do not charge battery if frozen. See owners guide
for proper charging procedures. Dispose of battery according to
local regulations.
WARNING
Warning: The output of the inverter is non-sinusoidal.
Do not use the inverter with the following equipment:
- Small battery-operated products such as rechargeable
flashlights, some rechargeable shavers, and night-lights
that are plugged directly into an AC receptacle to
recharge.
- Certain battery chargers for battery packs used in
powered-hand tools. These chargers will have warning
labels stating that dangerous voltages are present at the
charger’s battery terminals.
If you are uncertain that non-sinusoidal power will cause
damage to an item, check with the item’s manufacturer before
using with the AC inverter.
061410
6-in-1 POWER PACK Owners Manual Page 2
'()#*#+,*#-").($*"#,/01231456
CAUTION
To avoid possible damage and/or a shortening of the unit’s
working life, protect the unit from direct sunlight, direct heat,
and/or moisture.
CAUTION
The jumpstart function is designed to be used only on vehicles
or boats with 12V electrical systems.
CAUTION
This unit is not designed to be used in the place
of a vehicle battery.
CAUTION
This unit is not designed to be used as a battery charger.
CAUTION
CAUTION
061410
Never attempt to jumpstart a frozen battery. Gradually
warm the frozen battery to a minimum of 40°F (4°C)
before jumpstarting.
Always turn inverter OFF after each use; battery can drain
quickly when inverter is left in ON position.
6-in-1 POWER PACK Owners Manual Page 3
*#$)"78!$*"#
Thank you for purchasing the NPower 6-in-1 Power Pack. The Power Pack is
a user-friendly & versatile product designed to instantly jumpstart vehicles,
address inflation needs and provide portable 110V AC and 12V DC power.
The Power Pack also brings light to any situation with an integrated work lamp.
The Power Pack is an ideal companion to accompany all your jumpstarting,
inflation and portable power needs.
-%($8)%&
•
High current EHP battery provides 1,000 Amps peak power, 400 Amps
starting power.
•
Starts cars, trucks, recreational vehicles, and boats without the need of a
host vehicle or an AC power source.
•
110V AC outlet powers various appliances anywhere.
•
2-12V DC power outlets provide power for appliances designed to plug into
a vehicle or boat 12V cigarette lighter socket.
•
Solid-state, integrated charger allows for re-charging of the Power Pack
battery from any 120V AC source. The Power Pack integrated charger
automatically stops charging when the battery has acquired a full charge
and keeps your Power Pack battery in peak condition.
•
Sealed, maintenance-free heavy duty battery is safe to use, transport and
store.
•
46in. heavy duty, 6-gauge industrial-grade welding cables carry more
amperage for maximum starting power.
•
Battery gauge for quick assessment of Power Pack battery state of charge.
•
High-impact molded case provides durability and convenient transport.
•
Integrated light for roadside repairs or emergency situations.
•
260 PSI air compressor and air inlet adapters can address a wide range of
inflation needs.
•
Pressure gauge displays actual air pressure in PSI.
061410
6-in-1 POWER PACK Owners Manual Page 4
+%$$*#+,$",9#"',:"8),;0<5=,;>/?
B.
D.
A.
C.
E.
I.
Figure 1
A. Jumper cable ON/OFF
switch
B. Battery test switch
C. Voltmeter
D. Air compressor ON/OFF
switch
E. Air compressor gauge
F. Cables reversed indicator
G. Battery charging indicator
H. Full charge indicator
I. Air compressor accessory
and hose storage
F.
G.
H.
J.
K.
M.
L.
Figure 2
J. Integrated work lamp
ON/OFF switch
K. Integrated work lamp
L. Inverter ON/OFF switch
M. Inverter ON LED
N. 110V AC outlet
N.
061410
6-in-1 POWER PACK Owners Manual Page 5
+%$$*#+,$",9#"',:"8),;0<5=,;>/?
/01231456
O.
O.
P.
Q.
S.
R.
T.
U.
Figure 3
O. 12V DC power socket
P. Solid-state, integrated AC charger port
Q. Positive clamp
R. Negative clamp
S. 12V DC power cable
T. 120V AC charger cable
U. Air inlet adaptors
061410
6-in-1 POWER PACK Owners Manual Page 6
";%)($*"#
CAUTION
Read all operating instructions before using your Power Pack.
This section will guide you through:
• Charging the Power Pack before initial use
• Standard recharging of the Power Pack
• Jumpstarting a vehicle
• Using the integrated work lamp
• Using the compressor
• Operating 12V DC outlet
Charging the Power Pack before initial use
Your Power Pack will need to be charged until the Green Full Charge LED
illuminates before initial use. The initial charge could take up to 72 hours.
CAUTION
Do not use the Power Pack as a power source while recharging.
Use the following step-by step guide to recharging your unit.
Standard Recharging of the Power Pack
We recommend leaving the AC charger connected to a 120V AC outlet when the
Power Pack is not in use to obtain maximum battery life. This charger can be left
plugged in all of the time when not in use.
To recharge the Power Pack internal battery using AC power:
1. Ensure that all elements of the unit are off and that nothing is
connected to the 12V DC outlet.
2. Plug the AC charger cable into a standard wall AC outlet.
3. Plug the AC charger cable into the AC charger access point on the unit.
At this time the red “Battery Charging” indicator will illuminate.
4. Allow unit to charge until the red “Battery Charging” indicator turns off
and the green “Full Charge” indicator is illuminated.
Note: The Power Pack can stay connected to a 120V power source
and will charge automatically.
5. The charge level can be checked by first disconnecting the AC charger
cable from the wall outlet and pressing the battery test button.
Charge your Power Pack after each use.
Note: If the battery is fully discharged, up to 72 hours may be needed to
completely recharge. If you store your Power Pack for extended periods of
time without use, completely recharge at least once every three months.
The Power Pack is equipped with a sensor that prevents overcharging.
061410
6-in-1 POWER PACK Owners Manual Page 7
";%)($*"#,/01231456
To Recharge using a 12V DC power source:
(Do not exceed 2 hours)
Note: Only use the DC charging option when an AC power source
is not available.
1.
Insert the DC charging cord into the cigarette lighter receptacle on
the boat or vehicle.
2.
Insert the other end of the DC charging cord into either one of the
12V DC power outlets on the side of the unit.
Note: The jumpstart on/off switch can be left in the off position.
CAUTION
It is possible to over charge the battery when re-charging using
the DC outlet. Over charging the battery can cause permanent
damage and decrease battery performance. Only charge using
DC supply if a 120V AC outlet is not available.
V.
Figure 4
V. 12V DC to DC cable
O. 12V DC outlet
W. Location of cooling vents
O.
W.
061410
O.
W.
6-in-1 POWER PACK Owners Manual Page 8
8&%,"-,$@%,;0<5=,;>/?
The following section will guide you through the use
of your Power Pack.
Please note that while using various features of the Power Pack simultaneously
is permissible, this will increase the load on the battery, thereby reducing
run-time before recharging is necessary.
Jumpstarting precautions
WARNING
Risk of personal injury. ALWAYS wear approved eye
protection when using this equipment.
WARNING
Risk of Fire, explosion, or burns. Electrolyte inside lead acid
batteries contains sulfuric acid which can burn skin and harm
or destroy clothing. Wear eye protection any time you are
jumpstarting a battery and keep baking soda mixed with water
available to neutralize acid. Make sure that long hair is put
up securely, do not wear loose fitting clothing or jewelry, these
could become caught in moving engine parts or create a short
circuit resulting in personal injury or loss of life.
WARNING
Fire Hazard. Never allow the jumpstart’s red and black cable
clamps to touch each other or a common metal conductor.
Such contact could cause damage to the unit and/or create
a sparking/explosion hazard.
WARNING
Fire Hazard. Connect red clamp to the positive (+) battery
terminal. The black clamp should be attached to the engine
block or other non-moving metal part of stalled vehicle. Do not
connect black clamp to the negative (-) battery terminal. Doing
so could cause damage to the unit and/or create a sparking/
explosion hazard.
WARNING
Fire Hazard. Do not try to jumpstart a battery for more than six
seconds. Allow the unit to cool for three minutes after each six
second jumpstart.
WARNING
Risk of Fire, explosion, or burns. The jumpstarting cable
connection has enough energy to cause a spark, create an
explosion hazard, or cause burns if a metal object contacts
both terminals. Keep the jumpstart switch in the OFF position,
except when executing the jump start procedure. Do not turn
on the jumpstarting function without having cables securely
attached.
061410
6-in-1 POWER PACK Owners Manual Page 9
8&%,"-,$@%,;0<5=,;>/?,/01231456
CAUTION
Before connecting the jumpstart cables check the
jumper cables power switch to confirm that it is in the
OFF position. The reverse polarity warning function does
not protect the Power Pack or your vehicle from damage
if the cables are not correctly connected and the jumper
cables power switch is in the ON position. If the red
“cables reversed” LED illuminates and the warning
buzzer sounds when the cables are attached to the
vehicle battery, STOP! Make certain the Red positive
clamp on the jump start is connected to the Positive
battery terminal in the vehicle and the Black negative
clamp is grounded to the vehicle.
Using the Jumpstart
The Power Pack can be used to jumpstart any standard size vehicle or boat with
a single 12V starting battery. If you have any questions regarding how to jump
start your vehicle, consult the vehicle owners manual or the vehicle manufacturer before using the Power Pack jump start function.
The following steps should be read completely before starting this
procedure and then carefully followed throughout the procedure:
1.
Be sure that the Power Pack jumpstart power switch is in the
OFF position.
2.
Ensure safety of immediate area. See warnings at the beginning
of this manual for further details.
3.
Turn off the vehicle or boat, as well as all attached accessories such
as lights, radios, et cetera.
4.
Be sure that the emergency brake is engaged. Manual transmission
vehicles should be in neutral. Automatic transmission vehicles
should be in park.
5.
If jumpstarting a boat engine, purge the engine compartment and
vent fumes per boat manufacturer instructions before proceeding.
6.
Position the Power Pack on a secure, level surface in reach of the
battery but away from all electrical and moving parts of the engine.
Please note, some engine components may be hot enough to cause
severe burns or damage the Power Pack.
Connect the red positive (+) clamp of the Power Pack to the positive
(+) terminal of the battery (never lean over the battery when making
connections to jumpstart) .
Connect the black negative (-) clamp of the Power Pack to the engine
block, cylinder head, or other heavy yet stationary metal engine part.
7.
8.
061410
6-in-1 POWER PACK Owners Manual Page 10
8&%,"-,$@%,;0<5=,;>/?,/01231456
If cables are attached to the incorrect battery terminal the
Cables Reversed LED will switch on and a warning tone will
sound. If this occurs, correct the connection before
WARNING
proceeding to the next step. Failure to do so may cause
sparking, personal injury and/or harm to the vehicle or
jumpstart unit. Check to be sure that the cables are clear
of all moving engine parts.
9.
Turn the jumper cables power switch to the “ON” position
(see Figure 1 on page 5 for location A). Crank the engine.
Do not crank for more than six seconds. Allow the Power Pack
to cool for at least 3 minutes between six second jumpstart cycles.
10. After successfully starting the engine, turn the jumper cables power
switch back to the “OFF” position.
11. Remove the black negative (-) clamp and return to its stored position.
12. Remove the red positive (+) clamp from the battery and return to its
stored position.
Using the integrated work lamp
To use the integrated work lamp, simply press the work lamp power button
located directly above the work lamp (see Figure 2 on page 5 for location J).
Using the compressor
The air compressor in the Power Pack is designed as a convenient portable
inflation device. After ten minutes of continuous use, turn off the compressor
and allow it to cool for ten minutes. Continue use, if necessary, following this
ten minutes on / ten minutes off cycle (see Figure 1 on page 5 for location I).
Allowing the compressor to run in excess of 10 minutes can
result in permanent damage to the compressor, jump start
WARNING
unit, property or personal injury. Make sure the compressor
ventilation slots are free of debris and air can circulate around
the compressor motor while in use.
Inflating a tire or object using the compressor
1.
Secure the inflator nozzle to the valve stem using the thumb latch.
2.
Switch on the compressor via the switch on the front of the Power Pack
(see Figure 1 on page 5 for location D).
3.
Check the pressure gauge on the front of the Power Pack, once desired
4.
Turn off compressor via the switch on the front of the Power Pack .
PSI is reached remove the valve connector by releasing the thumb latch.
061410
6-in-1 POWER PACK Owners Manual Page 11
8&%,"-,$@%,;0<5=,;>/?,/01231456
Inflating other objects
1.
Place the appropriate inflation accessory nozzle on the valve
2.
Insert the accessory into the deflated object.
connector and secure with the thumb latch.
3.
Turn on compressor via the switch on the front of the Power Pack,
once desired PSI is reached remove the valve connector by releasing
the thumb latch.
4.
Turn off compressor via the switch on the front of the Power Pack.
Note: If the maximum pressure of the item being inflated is not known,
then allow the compressor to run only until the desired fullness is reached.
Overinflating an item could result in damage to the Power Pack or the item being
inflated. Never leave the compressor running unattended.
Operating AC appliances
WARNING
The output of the inverter is non-sinusoidal. If you are uncertain
that non-sinusoidal power will cause damage to a device, check
with the device’s manufacturer before proceeding.
WARNING
TURN INVERTER SWITCH OFF AFTER EACH USE or battery
could be drained very quickly.
To power a 110V AC appliance with your Power Pack please follow these steps:
1.
Turn on the power inverter (see Figure 2 on page 5 location L).
2.
Plug in appliance.
3.
Turn on appliance.
4.
After use is completed, turn off appliance, unplug appliance from the
5.
Re-charge the Power Pack after each use.
unit and turn off the power inverter.
Note: To avoid unnecessary draining of your Power Pack’s battery, turn off the
power inverter when not in use.
Low Battery Shutoff
This time period will vary according to the wattage of the of the appliance in use,
state of Power Pack battery charge and temperature. This auto shut-off prevents
the Power Pack battery from becoming completely discharged and overheating of
the inverter which can cause permanent damage.
Do not operate AC appliances while charging your Power Pack. Doing so may
damage the unit and/or your AC appliance.
061410
6-in-1 POWER PACK Owners Manual Page 12
8&%,"-,$@%,;0<5=,;>/?,/01231456
The AC inverter inside your Power Pack will shut off automatically when the
battery reaches 10.7-10.5 volts. An audible alarm will switch on at 11 volts to
indicate the internal battery is low on power.
AC appliances vary greatly according to the amount of power they consume.
The Power Pack is rated to produce 400 watts of power for 5 minutes and 320
watts continuously which allows for safe operation of most appliances falling
within this range of power consumption. (Not all AC appliances are compatible
with non-sinusoidal AC inverters. If you have a question regarding compatibility,
consult with the manufacturer of that device.)
In order to handle momentary power fluctuations the Power Pack power inverter
has a surge capacity of 800 Watts.
The wattage consumed by an AC appliance will impact the length of time the
Power Pack will operate the appliance before the need to recharge. The greater
the wattage consumed, the faster the Power Pack battery will discharge.
Please see list of appliances in table below for typical 110V AC appliances used
with portable power units and the approximate number of hours the appliance
can be used before recharging of the unit is necessary.
AC Appliance Operating Times
AC Appliance
Wattage
(approx.)
Hours
(approx.)
Mobile Telephone (stand-by)
4
40
Clock Radio
8
22
Portable stereo/ CD player
10
17
Laptop Computer
25
6
Table lamp
40
3
13in. Color TV
60
2.5
3/8in. Drill
190
.3
Typical 110V AC appliances used with portable power units.
Note:
Operating times assume a completely charged Power Pack battery. Actual
operating times may vary according to appliance specifications, level of use,
outside temperature, and other environmental variables.
Some appliances are considered high surge appliances. All wattage ratings
are averages. Products such as televisions and devices with motors consume
power on a varying basis, often consuming a larger wattage when first turned
061410
6-in-1 POWER PACK Owners Manual Page 13
8&%,"-,$@%,;0<5=,;>/?,/01231456
on or when operated in certain modes. Please be aware that the Power Pack is
rated at 320 watts of continuous power with a surge capacity of 800 watts.
Some appliances rated under this threshold may actually consume more than
320 Watts, thereby triggering the safety overload shutdown circuit.
If this occurs, the inverter will shut down and then reset itself. Do not repeatedly
attempt to use a device with the inverter if it continues to trigger the shutdown
circuit as this could damage the inverter.
The Power Pack has one 110V AC outlet. Be sure that the continuous load does
not exceed 320 watts. Operating multiple appliances will, naturally, decrease
battery run-time as more power will be consumed.
Take care not to block the cooling vents on the front and back of the Power Pack
when using the inverter (These vents are illustrated in figure 4 on page 8 as
location W). Blocking these vents could cause the unit to overheat, which may
cause personal injury and/or damage to appliances and the Power Pack.
The output of the Power Pack is non-sinusoidal. Some sensitive equipment may
be damaged by the inverter’s modified sine wave output or may not operate
correctly. If you are uncertain that non-sinusoidal power will cause damage
to a device, check with the device’s manufacturer before proceeding.
These devices may include but are not limited to:
• Electronics that modulate RF signals on the AC line;
• Speed controllers in some fans, power tools, kitchen appliances,
and other motors;
• Some chargers for re-chargeable batteries
• Metal Halide lights
Operating 12V DC appliances
To power a 12V DC appliance with your Power Pack please follow these steps:
• Plug in appliance to the 12V outlet
• Turn on appliance
• After use is completed, turn off appliance, unplug appliance from the unit
• Re-charge the Power Pack as soon after use as possible
Notes:
The 12V DC outlet is always on. No other switches need to be on to use this outlet.
The combined load should not exceed 15 Amps. Outlet will switch off
automatically if overloaded.
061410
6-in-1 POWER PACK Owners Manual Page 14
8&%,"-,$@%,;0<5=,;>/?,/01231456
Notes:
The Power Pack will NOT automatically turn off power to the DC outlet.
Continuing to use 12V DC appliances after the battery has been depleted can
permanently damage the unit.
Do not operate 12V DC appliances while charging your Power Pack. Doing so
may damage the unit and/or your DC appliance.
12V DC appliances vary greatly according to the amount of power they
consume. The wattage consumed by a 12V DC appliance will impact the length
of time the Power Pack will operate the appliance before the need to recharge
the Power Pack. The greater the wattage consumed, the lesser the duration of
the Power Pack battery charge. The 12V DC outlets are equipped with an
internal circuit breaker which will automatically cut power to the outlet if: the DC
appliance causes a direct short or if the appliance draws excessive amperage.
This circuit breaker is designed to automatically reset once the fault has been
corrected and the breaker has cooled to a normal operating temperature.
061410
6-in-1 POWER PACK Owners Manual Page 15
)%;A(!%.%#$,;()$&
The following replacement parts are available for the Power Pack:
PART
NUMBER
DESCRIPTION
RSPS151
110V AC power cord
RSPS152
12V DC power cord
RSPS205
Inflation accessories
Only parts identified by part number are available for purchase.
If you experience any problems with the Power Pack, please DO NOT
return the unit to the place of purchase. Please call the customer
service department at 800-317-1260.
061410
6-in-1 POWER PACK Owners Manual Page 16
#"$%&
061410
6-in-1 POWER PACK Owners Manual Page 17
Distributed by
Northern Tool & Equipment Co., Inc.
Burnsville, MN 55306
NorthernTool.com 1-800-317-1260