1
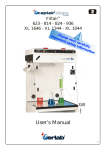
INSTRUCTION
MANUAL
Contents
Welcome . . . . . . . . . . . . . . . . . . . . . . . . . . . . . . . . . . . . . . . . . . . . . 3
About the Join-A-Jig™ . . . . . . . . . . . . . . . . . . . . . . . . . . . . . . . . . . 3
Why read this manual . . . . . . . . . . . . . . . . . . . . . . . . . . . . . . . . . . 3
Support . . . . . . . . . . . . . . . . . . . . . . . . . . . . . . . . . . . . . . . . . . . . . 3
Safety. . . . . . . . . . . . . . . . . . . . . . . . . . . . . . . . . . . . . . . . . . . . . . . . 4
Safety first!. . . . . . . . . . . . . . . . . . . . . . . . . . . . . . . . . . . . . . . . . . . 4
Work area safety. . . . . . . . . . . . . . . . . . . . . . . . . . . . . . . . . . . . . . 4
Personal safety . . . . . . . . . . . . . . . . . . . . . . . . . . . . . . . . . . . . . . . 5
Dust safety. . . . . . . . . . . . . . . . . . . . . . . . . . . . . . . . . . . . . . . . . . . 5
Power tool use and care . . . . . . . . . . . . . . . . . . . . . . . . . . . . . . . . 6
What’s Included . . . . . . . . . . . . . . . . . . . . . . . . . . . . . . . . . . . . . . . 7
What’s in the kit. . . . . . . . . . . . . . . . . . . . . . . . . . . . . . . . . . . . . . . 7
Parts of the Join-A-Jig™. . . . . . . . . . . . . . . . . . . . . . . . . . . . . . . . . 8
About Join-A-Jig™ Screws . . . . . . . . . . . . . . . . . . . . . . . . . . . . . . 9
About Join-A-Jig™ Plastic Plugs . . . . . . . . . . . . . . . . . . . . . . . . . 10
Using the Join-A-Jig™. . . . . . . . . . . . . . . . . . . . . . . . . . . . . . . . . . . 11
Overview. . . . . . . . . . . . . . . . . . . . . . . . . . . . . . . . . . . . . . . . . . . 11
Securing the Join-A-Jig™ to the workbench. . . . . . . . . . . . . . . . . 11
Selecting the correct screw. . . . . . . . . . . . . . . . . . . . . . . . . . . . . 12
Setting the Depth Collar . . . . . . . . . . . . . . . . . . . . . . . . . . . . . . . 14
Setting the Drill Guide Height . . . . . . . . . . . . . . . . . . . . . . . . . . . 15
Securing the workpiece. . . . . . . . . . . . . . . . . . . . . . . . . . . . . . . . 16
Drilling the workpiece . . . . . . . . . . . . . . . . . . . . . . . . . . . . . . . . . 17
Joining workpieces . . . . . . . . . . . . . . . . . . . . . . . . . . . . . . . . . . . 18
Hiding the pocket holes. . . . . . . . . . . . . . . . . . . . . . . . . . . . . . . . 19
Using the Mini Join-A-Jig™. . . . . . . . . . . . . . . . . . . . . . . . . . . . 19
Making repairs. . . . . . . . . . . . . . . . . . . . . . . . . . . . . . . . . . . . . . . 21
Using a spacer block. . . . . . . . . . . . . . . . . . . . . . . . . . . . . . . . . . 22
Join-A-Jig™ User Manual
Page 1
Creating Wood Joints . . . . . . . . . . . . . . . . . . . . . . . . . . . . . . . . . 23
Types of wood joints . . . . . . . . . . . . . . . . . . . . . . . . . . . . . . . . . . 23
Creating a butt joint. . . . . . . . . . . . . . . . . . . . . . . . . . . . . . . . . . . 24
Creating a mitre joint. . . . . . . . . . . . . . . . . . . . . . . . . . . . . . . . . . 25
Creating a leg and rail joint . . . . . . . . . . . . . . . . . . . . . . . . . . . . . 26
Creating a set-back joint . . . . . . . . . . . . . . . . . . . . . . . . . . . . . . . 27
Creating a 90-degree panel joint. . . . . . . . . . . . . . . . . . . . . . . . . 28
Creating edge joins. . . . . . . . . . . . . . . . . . . . . . . . . . . . . . . . . . . 29
Tips and troubleshooting . . . . . . . . . . . . . . . . . . . . . . . . . . . . . . 30
Using the Join-A-Jig™ for the first time . . . . . . . . . . . . . . . . . . . . 30
Drilling tips. . . . . . . . . . . . . . . . . . . . . . . . . . . . . . . . . . . . . . . . . . 30
Gluing your work. . . . . . . . . . . . . . . . . . . . . . . . . . . . . . . . . . . . . 30
Reducing wood splitting. . . . . . . . . . . . . . . . . . . . . . . . . . . . . . . . 31
Warranty . . . . . . . . . . . . . . . . . . . . . . . . . . . . . . . . . . . . . . . . . . . . 32
One (1) year limited replacement warranty statement. . . . . . . . . 32
Warranty conditions. . . . . . . . . . . . . . . . . . . . . . . . . . . . . . . . . . . 32
What’s not covered by warranty . . . . . . . . . . . . . . . . . . . . . . . . . 32
Warranty notes . . . . . . . . . . . . . . . . . . . . . . . . . . . . . . . . . . . . . . 33
Page 2
Join-A-Jig™ User Manual
About the Join-A-Jig™
The Join-A-Jig™ Wood Joining System enables you to create professional
joins without the need for glue, dowels or biscuit joiners, eliminating the
need to do time-consuming measurements and realignment.
View from underneath
(2) Screw into place
(1) Angle Drilled Holes
Why read this manual
Take the time to read this manual so you can create craftsman-like joins.
Following a few simple pointers will help you to avoid common mistakes that
can spoil your project.
Support
If you experience problems with the Join-A-Jig™ or its performance, please
call our Customer Service Team for assistance:
✔✔ 1800 890 840 in Australia
✔✔ 0800 002 999 in New Zealand
✔✔ 1800 200 3111 in United States
Or scan this QR code to go straight to the
Join-A-Jig™ website.
Join-A-Jig™ User Manual
Page 3
Welcome
Welcome
Safety
Safety
Safety first!
Your Join-A-Jig™ is a professional tool. Your enjoyment will rely on observing
a high level of personal safety as well as protecting the safety of others.
This section sets out important safety guidelines for using your Join-A-Jig™.
Work area safety
Follow the guidelines below to ensure your work area is safe to use the
Join-A-Jig™.
Safety guidelines
• Keep work area clean and well lit. Cluttered or dark areas invite
accidents.
• Do not operate power tools in explosive atmospheres, such as in
the presence of flammable liquids, gases or dust. Power tools create
sparks which may ignite the dust or fumes.
• Keep children and bystanders away while operating a power tool.
Distractions can cause you to mishandle the tool.
Page 4
Join-A-Jig™ User Manual
Safety
Personal safety
Follow the guidelines below to ensure your personal safety while operating
the Join-A-Jig™.
Safety guidelines
• Stay alert, watch what you are doing and use common sense when
using the Join-A-Jig™. Do not use the Join-A-Jig™ while you are tired
or under the influence of drugs, alcohol or medication.
• Use personal protective equipment. Always wear eye protection
and ear protection. If operating in a dusty environment, wear a dusk
mask (see next page).
• Do not overreach. Keep proper footing and balance at all times.
• Keep your hands clear of the work area and always dress properly.
Dust safety
Some dust created by the Join-A-Jig™ from drilling and other construction
activities on certain materials may contain chemicals known to cause
cancer, birth defects or other harm.
These chemicals include arsenic, boron and chromium from chemically
treated timber.
Follow the guidelines below to ensure your personal safety from dust while
operating the Join-A-Jig™.
Join-A-Jig™ User Manual
Page 5
Safety
Safety guidelines
• Always work in a well-ventilated area.
• Use dust masks specifically designed to filter microscopic particles
as well as other approved safety equipment.
• Avoid long periods of exposure to dust from sanding, sawing,
grinding, drilling and other construction activities.
• Wear protective clothing and wash exposed areas with soap and
water.
• Do not allow dust to get into your mouth, eyes or on exposed skin.
This may promote the absorption of harmful chemicals.
• Direct dust particles away from your face and body.
Power tool use and care
Follow the guidelines below when using your Join-A-Jig™.
Safety guidelines
• Keep cutting tools sharp and clean. Properly maintained cutting tools
with sharp cutting edges are less likely to bind and are easier to
control.
• Use clamps or another practical way to secure and support the
workpiece to a stable platform. Holding the work by your hand or
against the body leaves it unstable and may lead to loss of control.
• Only use accessories that are recommended for the Join-A-Jig™.
• Never use the Join-A-Jig™ around flammable or volatile substances,
or use any volatile substances to clean the Join-A-Jig™.
Page 6
Join-A-Jig™ User Manual
What’s Included
What’s Included
What’s in the kit
This table list the components included in your retail kit.
Component
Quantity
Jig-A-Jig™ Wood Joining System
1
Square Driver
1
Step Drill Bit
1
Collar (for Step Drill Bit)
1
Join-A-Jig™ Screws (3.9x32mm Zinc)
600
Join-A-Jig™ Screws (3.9x51mm Zinc)
100
Join-A-Jig™ Plastic Plugs
10
Allen Key
1
DVD
1
Manual
1
Join-A-Jig™ DIY Project Plans
50
Mini Join-A-Jig™
1
5mm Spacer Block
1
Join-A-Jig™ User Manual
Page 7
What’s Included
Parts of the Join-A-Jig™
This table describes the parts of the Join-A-Jig™.
Part
Description
Clamp Handle
Squeezing the Clamp Handle grips holds the
workpiece securely in place.
Quick Release Trigger Releases the workpiece.
Clamp Pad
Prevents the timber from being dented when you
tighten the Clamp Handle.
Drill Guide
The hardened zinc drill guides are the “core” of
the Join-A-Jig™. As you drill the pocket holes the
Step Drill Bit follows these guides at a precise
angle calculated to provide optimal joint strength.
The Drill Guide can be used in the Join-A-Jig™ or
can be removed and used for repairing existing
joints.
Drill Guide Locking
Pin
Locks the Drill Guide into place while you adjust
its height for different workpiece thicknesses.
Screw Fixing Holes (4) Used to permanently secure the Join-A-Jig™ to
your workbench.
Tip: Remember to remove the rubber grip pads
from the underside o`f the Join-A-Jig™ and keep
them in a safe place.
Clamping Recess
Used to temporarily clamp the Join-A-Jig™ to your
workbench.
Drill Guide Adjustment Indicate the Drill Guide’s height setting.
Markings
Depth Collar
Sets the maximum plunge depth of the drill.
Depth Setting Gauge
Helps you find the correct Depth Collar setting for
varying workpiece thicknesses.
5 mm Spacer Block
For repairs. Compensates for an addition 5mm
increase in workpiece thickness
Page 8
Join-A-Jig™ User Manual
What’s Included
Clamp
Handle
Drill Guide
Clamp Pad
Quick Release
Trigger
Drill Guide
Adjustment
Markings
Drill Guide
Locking Pin
Depth
Collar
Depth Setting
Gauge
Screw Fixing
Holes (4)
Clamping
Recess
About Join-A-Jig™ Screws
Join-A-Jig™ Screws are made from coated zinc and are
engineered to not break or split the timber.
The large washer head is designed to sit firmly in the bottom of
the pocket hole for maximum joint strength.
The half-threaded shank ensures that the threads sit primarily
in the second workpiece, preventing the threads from working
against each other and pushing the joint apart as the screw is
driven.
The self-tapping tip eliminates the need to pre-drill holes in the
second workpiece. The self-tapping tip of each screw drills its
own hole as it is driven, so even the hardest wood, such as
hickory and oak, does not split.
Call our Customer Service Team on 0800 002 999 in New
Zealand, or 1800 890 840 in Australia for information about
ordering Join-A-Jig™ Screws.
Join-A-Jig™ User Manual
Page 9
What’s Included
About Join-A-Jig™ Plastic Plugs
Ten white Join-A-Jig™ Plastic Plugs for hiding pocket holes are included with
the kit.
Call our Customer Service Team on 0800 002 999 in New Zealand, 1800
890 840 in Australia, or 1800 200 3111 in United States for information
about ordering Join-A-Jig™ Plastic Plugs.
If you require wooden plugs, we recommend contacting your local hardware
dealer.
Page 10
Join-A-Jig™ User Manual
Overview
Using your Join-A-Jig™ involves the following steps:
✔✔ Making sure the Join-A-Jig™ is secured to the workbench.
✔✔ Selecting the correct screw for the job.
✔✔ Setting the depth at which your workpiece will be drilled using the
Depth Collar and the Drill Guide.
✔✔ Securing the workpiece in the Join-A-Jig™.
✔✔ Drilling the workpiece.
✔✔ Joining workpieces together.
✔✔ Hiding the pocket holes.
Securing the Join-A-Jig™ to the workbench
Before using the Join-A-Jig™ you need to make sure that it is secured to the
workbench. You can secure it either permanently or temporarily.
If you want to …
Then…
Permanently attach the Join-A-Jig to the
workbench
™
Secure it using the four
Screw Fixing Holes
Tip: Remember to
remove the rubber grip
pads from the underside
of the Join-A-Jig™ and
keep them in a safe
place
Temporarily attach the Join-A-Jig™ to the
workbench so that you can take it off-site
Join-A-Jig™ User Manual
Clamp it firmly using the
Clamping Recess
Page 11
Using the Join-A-Jig™
Using the Join-A-Jig™
Using the Join-A-Jig™
Selecting the correct screw
When selecting the Join-A-Jig™ Screw for your workpiece you need to
choose the correct screw length and the correct thread.
Selecting the correct screw length
Use this table to find the correct screw length for your workpiece.
Workpiece Thickness
Recommended
Screw Length
Join-A-Jig™ Setting
16mm
32mm
16mm Marking
19mm
32mm
19mm Marking
22mm
32mm
22mm Marking
25mm
32mm
25mm Marking
29mm
51mm
29mm Marking
32mm
51mm
32mm Marking
35mm
51mm
35mm Marking
38mm
51mm
38mm Marking
Page 12
Join-A-Jig™ User Manual
Using the Join-A-Jig™
Choosing a thread
Use this table to select the correct thread for the timber you are using.
Type of thread…
Description
Coarse
Softwood, such as:
•
•
•
•
•
•
•
•
•
•
Fine
Pine
Cedar
Plywood
MDF
Particle board
Melamine
Kahikatea
Matai
Totara
Kauri
Hardwoods, such as:
•
•
•
•
•
•
•
•
•
•
Mahogany
Teak
Oak
Macrocarpa
Rimu
Tawa
Silver & Red Beech
Jarrah
Australian Red Cedar
Eucalyptus/Gum
Note: Call our Customer Service Team on 0800 002 999 in New Zealand,
1800 890 840 in Australia, or 1800 200 3111 in United States for information
about ordering Join-A-Jig™ Screws.
Join-A-Jig™ User Manual
Page 13
Using the Join-A-Jig™
Setting the Depth Collar
For optimal joint strength you need to set your Join-A-Jig™ Depth Collar so
that the pocket holes are drilled at the correct depth for your workpiece.
Setting the correct drill depth means that the self-tapping screw will exit at
the centre of the first workpiece.
Follow the instructions below to set the maximum plunge depth of the Step
Drill Bit using the Depth Collar.
Step
Action
1
Loosen the Depth Collar using the Allen Key.
2
Align the tip of the Step Drill Bit with the measurement on
the Depth Setting Gauge that best matches the thickness of
the workpiece.
3
Fasten the Depth Collar using the Allen Key.
Example: For a 35mm workpiece align the Step Drill Bit tip with the 35mm
mark on the Depth Setting Gauge.
Depth Collar
Adjust to size
Page 14
Join-A-Jig™ User Manual
Using the Join-A-Jig™
Setting the Drill Guide Height
The height of the Drill Guide can be adjusted for varying workpiece
thicknesses.
Follow the instructions below to set the Drill Guide to the correct thickness.
Step
Action
1
Retract the drill guide locking pin.
2
Raise or lower the Drill Guide to match the workpiece
thickness with the correct Drill Guide Adjustment Marking.
3
Release the drill guide locking pin
Join-A-Jig™ User Manual
Page 15
Using the Join-A-Jig™
Securing the workpiece
Follow these instructions to secure your workpiece in the Join-A-Jig™.
Step
Action
1
Place the workpiece in the Join-A-Jig™.
2
Slide the Clamp Handle up to the workpiece.
3
Lock the workpiece in place by squeezing the Clamp Handle
grips.
Page 16
Join-A-Jig™ User Manual
Using the Join-A-Jig™
Drilling the workpiece
The Join-A-Jig™ Step Drill Bit drills a flat-bottomed pocket hole and the
stepped tip drills down further to create a pilot hole for the Join-A-Jig™
Screws.
To drill pocket and pilot holes in the workpiece, secure the Step Drill Bit in
your drill and then drill the holes using the Drill Guide.
Placing pocket holes
When planning where to place the pocket holes keep these rules in mind.
1. All workpieces require at least two screws along any one side to stop
them from twisting.
2. Allow at least 65mm of facing material to drill the pocket hole. Anything
less and the Step Drill Bit will cut into the top edge of the workpiece as
well as the facing side.
3. Drill a pocket hole at each end of the workpiece and add further holes
to add strength where necessary.
4. Positioning screws in areas where more than two workpieces meet
requires careful planning. Mark out the pocket-hole positions before
drilling.
Join-A-Jig™ User Manual
Page 17
Using the Join-A-Jig™
Joining workpieces
Once you have drilled pocket holes in your workpiece you can join it to
another workpiece.
Refer to Creating wood joints for more information on the types of joints
you can create using the Join-A-Jig™.
Follow these instructions to join two workpieces together.
Step
Action
1
Release the workpiece from the Join-A-Jig™ by squeezing
the Quick Release Trigger and sliding back the Clamp
Handle.
2
Align the two workpieces and clamp them together securely.
3
Use the Square Drive to insert a self-tapping screw in each
pocket hole and drive the screw to join the two pieces
together.
There is no need to drill a pilot hole in the second workpiece. As you drive
the screw the screw shank follows the pilot hole in the first workpiece. The
self-tapping screw then drills its own hole in the second workpiece.
Tip: To ensure square joins we recommend clamping your work.
Page 18
Join-A-Jig™ User Manual
Using the Join-A-Jig™
Hiding the pocket holes
You can finish the job by hiding the pocket holes using the Join-A-Jig™
Plastic Plugs.
Plastic Plugs allow you to quickly fill all pocket holes.
Tips:
✔✔ Be sure the screws are tightened all the way into the pocket hole to
get the best fit before you fill the hole.
✔✔ Make sure the clutch on your drill is set low enough to avoid over-
driving the screws.
Wooden plugs
To fill pocket holes using wooden plugs, insert the plug into the pocket hole
and firmly tap the plug until it is tight in the pocket hole.
Note: Wooden plugs are not supplied with the Join-A-Jig™ and will need to
be purchased from a hardware store or made.
Using the Mini Join-A-Jig™
Note: The Mini Join-A-Jig™ can only be used on timber 16mm thick and up.
The Mini Join-A-Jig™ can be used when you need to create pocket holes offsite or make repairs in hard-to-reach places.
The Positioning Slides let you adjust the Mini Join-A-Jig™ to nine different
settings for correct jig and screw placement.
Join-A-Jig™ User Manual
Page 19
Using the Join-A-Jig™
Follow these instructions to drill pocket holes using the Mini Join-A-Jig™.
Step
Action
1
Set the Positioning Sliding Arms on the Mini Join-A-Jig™
and Depth Collar on the Drill Bit to match the workpiece
thickness.
2
Do one of the following.
If…
Then…
The area to be drilled is easy
to reach
Use a clamp to attach the
Mini Join-A-Jig™ to the
workpiece.
The area to be drilled is
difficult to reach
Reverse the Positioning
Sliding Arms and screw
the Mini Join-A-Jig™ into
place.
(See Screw Hole in picture
below)
3
Drill the pocket holes.
Temporary Screw Hole
Clamping Location
Reversible Positioning
Sliding Arms
Drill Guide
Page 20
Push Here to Slide
Join-A-Jig™ User Manual
Using the Join-A-Jig™
Making repairs
Note: The Mini Join-A-Jig™ can only be used on timber 16mm thick and up.
You can use your Join-A-Jig™ to make repairs to existing furniture and
cabinetry.
Follow these instructions to make repairs.
Step Action
1
Remove the Drill Guide from
the Join-A-Jig™ and align the
bottom edge of the Drill Guide
with the edge of the joint being
repaired.
2
Clamp the Drill Guide in place.
Note: You need to make
your own spacer for timber
thicknesses 20mm and up.
3
Drill the pocket holes.
4
Use the Square Drive to insert
a self-tapping screw in each
pocket hole and drive the
screw to join the two pieces
together.
Join-A-Jig™ User Manual
Page 21
Using the Join-A-Jig™
Using a spacer block
The Drill Guide is set to centre a screw in 16mm - 19mm material. The Drill
Guide also comes with a 5mm spacer block (already attached) to centre a
screw in 20mm - 23mm material. You will need to make your own spacer
blocks to compensate for thicker material.
If your workpiece is… Then…
16mm - 19mm
No spacer blocks are required.
20mm – 23mm
Attach the 5mm spacer block supplied to the
bottom of the Drill Guide.
Note: When new, this is already attached.
24mm and up
Create your own spacer block. As a general rule
use a 5mm spacer block to compensate for each
5mm increase in workpiece thickness.
Call our Customer Service Team on 0800 002 999 in New Zealand, 1800
890 840 in Australia, or 1800 200 3111 in United States for information
about ordering Join-A-Jig™ spacer blocks.
Drill Guide
Spacer Blocks
Page 22
Join-A-Jig™ User Manual
Creating Wood Joints
Creating Wood Joints
Types of wood joints
The Join-A-Jig™ allows you to create a range of joints, including:
✔✔ Butt joints
✔✔ Mitre joints
✔✔ Leg and rail joints
✔✔ 90-degree panel joints
Creating these joints will help you build projects from the Join-A-Jig™
Ready-to-Build plans that came with your Join-A-Jig™.
Join-A-Jig™ User Manual
Page 23
Creating Wood Joints
Creating a butt joint
Butt joints are commonly used when making frames and cabinets.
Frames are made on a flat plane and include a horizontal rail into which the
pocket-holes are drilled. These are connected to a vertical piece called a
style.
Follow these instructions to make a butt joint.
Step
Action
1
Drill at least two pocket-holes on the back of the rail to make
sure the joint will not twist.
2
Clamp the joint.
3
Use the Square Drive to drive in the screws.
Note: The Drill Guide lets you drill two pocket holes at the same time,
without having to move your workpiece.
Page 24
Join-A-Jig™ User Manual
Creating Wood Joints
Creating a mitre joint
Mitre joints are commonly used on picture frames because no end grain
shows.
Follow these instructions to make a mitre joint.
Step
Action
1
Cut your workpieces at exactly 45 degrees.
2
Place the 45-degree edge flat in the Join-A-Jig™.
Tip: Position the workpiece so that the pocket hole will not
go through the edge of the workpiece.
3
Drill two pocket holes.
4
Align your pieces and clamp with a face clamp.
5
Use the Square Drive to drive in the screws.
Join-A-Jig™ User Manual
Page 25
Creating Wood Joints
Creating a leg and rail joint
Leg and rail joints are used when building tables, chairs and similar
furniture. There are generally two types of leg and rail joints: Flush rail and
set-back.
Creating a flush rail joint
Follow these instructions to make a flush rail joint.
Step
Action
1
Clamp the leg to the workbench.
2
In the rail, drill the pocket holes required.
3
Use the Square Drive to drive screws through the rail to the
leg
Leg
Rail
Page 26
Join-A-Jig™ User Manual
Creating Wood Joints
Creating a set-back joint
Follow these instructions to make a set-back joint.
Step
Action
1
Clamp the leg to the workbench.
2
Use a spacer the same width as the desired set-back and
clamp the spacer to the leg.
3
In the rail, drill the pocket holes required.
4
Use the Square Drive to drive in the screws.
Leg
Spacer
Join-A-Jig™ User Manual
Page 27
Creating Wood Joints
Creating a 90-degree panel joint
90-degree panel joints are commonly used when building bookshelves and
cabinetry.
Follow these instructions to make a 90-degree panel joint.
Step
Action
1
Using a square, draw a line then clamp a straight edge
spacer to the line.
2
Butt the shelf up against the spacer edge.
3
Drill the pocket holes where required on the shelf.
4
Use the Square Drive to drive in the screws.
Note: As you drive the screws, the shelf will be pulled firmly
against the spacer edge.
Shelf
Spacer
Page 28
Join-A-Jig™ User Manual
Creating Wood Joints
Creating edge joins
Edge joining is used to join workpieces edge-to-edge, such as when making
a table top.
Tip: For best results join workpieces that are no wider than 150mm. This
helps prevent the finished piece from bowing.
Follow these instructions to join workpieces edge-to-edge.
Note: You may choose to only drill pocket holes on 1 edge of each
workpiece.
Step
Action
1
Drill a pocket hole 50mm in from each end of the workpieces.
2
Drill the remaining pocket holes every 100mm to 200mm.
3
Clamp the workpieces to keep them flush.
4
Use the Square Drive to drive in the screws.
Join-A-Jig™ User Manual
Page 29
Tips and troubleshooting
Tips and troubleshooting
Using the Join-A-Jig™ for the first time
Before you use your Join-A-Jig™ for the first time, we recommend you make
a few test joints on scrap material.
Drilling tips
Here are some tips when drilling pocket holes:
✔✔ Keep the Join-A-Jig™ free from sawdust, especially around the Step
Drill Guide. Build-up of sawdust in and around the Drill Guide can
misalign the pocket holes you are attempting to drill.
✔✔ When drilling pocket holes into long or wide pieces of timber use a
35mm high packer aligned to the Join-A-Jig™ to help support the far
end of the workpiece.
Gluing your work
You can add extra strength to your joins if needed by applying wood glue
between the workpieces you are joining together.
After applying the glue you can immediately carry on with your job, as there
should be no need to wait for the glue to dry before using the Join-A-Jig™.
Page 30
Join-A-Jig™ User Manual
Tips and troubleshooting
Reducing wood splitting
Here are some tips on how to reduce the chances of wood splitting:
✔✔ Always clamp your work securely to reduce the chance of movement
and vibration.
✔✔ Always use Join-A-Jig™ Screws. Screws are designed to reduce
splitting and to give you the strongest joint.
✔✔ Always use fine thread screws in hardwood. A fine thread displaces
less timber when being driven, reducing the chance of splitting.
✔✔ Lubricate the screw with paraffin or bees wax to reduce friction when
driving.
✔✔ Before you drive a screw home, screw it part way out then back in
again. This removes any wood shavings or sawdust from the hole,
reducing the chance of splitting.
Join-A-Jig™ User Manual
Page 31
Warranty
Warranty
One (1) year limited replacement warranty statement
If your product becomes defective due to faulty material or workmanship
within a period of 1 year from the date of purchase, we warrant to do the
following:
• For New Zealand Consumers: We will replace the product with a new
product, free of charge, or repair the product at our cost, at our discretion.
• For Australian Consumers: Our goods come with guarantees that cannot
be excluded under the Australian Consumer Law. You are entitled to a
replacement or refund for a major failure and for compensation for any
other reasonably foreseeable loss or damage. You are also entitled to
have the goods repaired or replaced if the goods fail to be of acceptable
quality and the failure does not amount to a major failure.
Warranty conditions
Your warranty is subject to the following conditions:
• The item has not been misused, abused, neglected, altered, modified or
repaired by anyone.
• The item has been subjected to fair wear and tear.
• The item has not been used for trade, professional or hire purposes.
• The item has not sustained damage through foreign objects, substances
or accident.
What’s not covered by warranty
Your warranty does not cover:
• Components that are subject to natural wear and tear caused by normal
use in accordance with operating instructions.
• Unauthorised/improper maintenance/handling or overload is excluded
from this warranty.
Page 32
Join-A-Jig™ User Manual
Warranty notes
• For guarantee claims, you will need to submit a proof of purchase in the
form of a valid receipt that displays the date and place of purchase.
• This warranty does not replace but is in addition to your statutory rights.
• This warranty does not apply to accessories supplied with the item.
• This warranty applies only to the original purchaser and may not be
transferred.
• Replacement items will be covered by the limited warranty for the
balance of the warranty period from the date of the original purchase.
• Only the defective product or parts returned to the place of purchase will
be replaced under this warranty.
New Zealand Contact
Brand Developers Limited
Unit H, 686 Rosebank Road,
Avondale 1026,
Auckland, New Zealand
Private Bag 93204,
Parnell, Auckland 1151
NZ Customer Care: 0800 002 999
Australia Contact
Brand Developers Aust Pty Ltd
461 Plummer Street,
Port Melbourne, VIC 3207
AUST Customer Care: 1800 890 840
United States Contact
Brand Developers USA, LLC
2440 Clements Ferry Road,
Charleston, South Carolina 29492, USA
USA Customer Care: 1800 200 3111
Join-A-Jig™ User Manual
Page 33
Exclusively Distributed by:
Brand Developers
Australia • New Zealand • United States
Brand Developers Aust Pty Ltd
461 Plummer Street,
Port Melbourne, VIC 3207, AUSTRALIA
AUST Customer Care: 1800 890 840
Brand Developers Limited
Unit H, 686 Rosebank Road, Avondale, 1026 Auckland, NEW ZEALAND
NZ Customer Care: 0800 002 999
Brand Developers USA LLC
2440 Clements Ferry Road, Charleston,
South Carolina 29492, USA
USA Customer Care: 1800 200 3111
P_JAJ_MAN
BDIV2