1
Children’s Health System
iConnect101: Orders and Results
STUDENT MANUAL
© 2010 Children’s Health System
Written by Information Systems iConnect Education
http://www.chsys.org
http://iteducation.chsys.org
This training documentation is for CHS USE ONLY and
is not for public use or distribution. There are no actual
patients referenced in this training material.
iConnect101: Orders and Results
Getting Started ......................................................................................................... 3 Objectives .............................................................................................................. 4 For Your Information .............................................................................................. 5 Clarification of terms............................................................................................... 6 Getting Familiar........................................................................................................ 7 Making Patient Assignments for RNs and Therapists ............................................ 7 The Refresh Button ................................................................................................ 7 Entering Height/Weight and Allergy Info................................................................. 8 RN Allergy Review ................................................................................................. 9 Placing orders ...................................................................................................... 10 Entering Diets ....................................................................................................... 12 Entering Consults ................................................................................................. 13 Entering Labs Orders ........................................................................................... 13 Lab Priorities ..................................................................................................... 13 Ordering Labs ................................................................................................... 14 Using the Copy Function on the OEW .............................................................. 15 Allergy Status Unknown Alert ............................................................................... 16 Don’t Delete That Comment! ................................................................................ 17 Deleting or Editing Orders Before They are Submitted ........................................ 17 Updating Allergy Info ............................................................................................ 19 Viewing Allergy Details & History ......................................................................... 19 Allergy Alert for Radiology Studies with Contrast ................................................. 20 Discontinuing an Order ......................................................................................... 21 Orders for Equipment/Central Transport .............................................................. 22 Duplicate Diet Alert............................................................................................... 24 Orders Tab ........................................................................................................... 25 Filtering the Orders Tab .................................................................................... 25 Orders Tab Icons .............................................................................................. 27 Entering RVUs and Charges ................................................................................ 28 Department Charges ........................................................................................ 28 Ordering a One-Time Meal ................................................................................... 29 Issuing Floor Stock ............................................................................................... 30 Reordering a Previous Order................................................................................ 31 Discontinuing and Reordering an Order ............................................................... 31 Adding a Specimen .............................................................................................. 33 Order Sets and Quick Picks ................................................................................. 35 Acknowledging orders .......................................................................................... 36 Viewing Order/Order Set Details .......................................................................... 37 History Æ Status ............................................................................................... 37 View Æ All Orders in This Set ........................................................................... 37 View Æ Set Details ........................................................................................... 37 View Æ Details ................................................................................................. 38 Statuses Seen on the Orders tab for Lab, Blood Bank and Radiology ................. 38 Status of Lab Orders......................................................................................... 38 Status of Blood Bank Orders ............................................................................ 39 Status of Radiology Orders ............................................................................... 39 1
iConnect101: Orders and Results
Results - Lab ........................................................................................................ 40 Advanced Look at Results .................................................................................... 43 Results - Radiology .............................................................................................. 46 Patient Info Tab .................................................................................................... 47 Summary Views: Alerts ..................................................................................... 47 Summary Views: Allergies/Comments .............................................................. 47 Summary Views: Care Providers ...................................................................... 47 Summary View – Visit History ........................................................................... 47 Printing Reports.................................................................................................... 48 Current List Reports (by Patient) ...................................................................... 48 Pending Nurse Collects Report......................................................................... 48 Documents Tab .................................................................................................... 50 Setting Document Tab Preferences .................................................................. 51 Printing a Medication Reconciliation Document ................................................ 52 External CHS Data Tab ........................................................................................ 53 Patient List Tab – Change it Up............................................................................ 54 How to Add a Column ....................................................................................... 54 Toolbar Buttons to Remember .......................................................................... 54 Talk to Me Tab ..................................................................................................... 55 Important Things to Remember ............................................................................ 56 Toolbar Buttons .................................................................................................... 57 Icons Seen During Order Entry ............................................................................ 57 Questions? ........................................................................................................... 58 2
iConnect101: Orders and Results
GETTING STARTED
This student manual is yours to keep. Feel free to make notes in the manual and
take it back with you to your work area. We will follow this student manual during
class using fictitious patients in a training environment, but the outlined steps should
prove helpful to you when working with your patient’s information in the production
environment.
3
iConnect101: Orders and Results
OBJECTIVES
The following topics will be covered in this class:
1. Enter Basic Patient Info for ordering
2. Enter Physician Orders
3. DC Physician Orders
4. Document RN & Therapist Assignments
5. Document Specimens Collected
6. Use COPY Function
7. Use REORDER Function
8. Take a closer look at Orders on the Orders tab
9. Enter Charges
10. Request Supplies
11. Issue Floor Stock
12. Handle Alerts
13. View Results
14. Print Reports & Documents
4
iConnect101: Orders and Results
FOR YOUR INFORMATION
This is a general class for users and you may not perform all of the tasks included in
this course when you return to your area of work.
There will be a computerized assessment at the end of the class. It is open
book/notes.
5
iConnect101: Orders and Results
CLARIFICATION OF TERMS
1) iConnect – Name of a large project that involves several phases, spanning
several years that involves multiple software package installations. The
purpose/goal is to migrate clinical functionality to a best of suite approach using
Allscripts (Eclipsys) SCM and Allscripts (Eclipsys) Pharmacy to facilitate
improved access to clinical information and infrastructure of CPOE.
2) Allscripts (Eclipsys) –The name of the software company
3) SCM – Sunrise Clinical Manager – An Allscripts (Eclipsys) product. (similar to
MS Office Suite)
4) Sunrise Acute Care – Part of Sunrise Clinical Manager. Used for orders, results,
clinical documentation, and eMAR (similar to Word, PP – a part of MS Office
Suite)
5) SMM – Sunrise Medication Management – An Allscripts (Eclipsys) product. The
pharmacy system that is integrated with SCM.
6
iConnect101: Orders and Results
GETTING FAMILIAR
MAKING PATIENT ASSIGNMENTS FOR RNS AND THERAPISTS
While on the Patient List tab, double-click in the Nurse Assignment or Therapist
Assignment field on the line for that patient.
A pop-up box will appear. Type the name of the nurse or therapist in the appropriate
box. This is a free-text field.
This column may not be used in every unit or area. It WILL appear on the Tracker
Board screens located on the unit if there is text there. Use professional names –
parents and patients may be able to see the tracker board in your area.
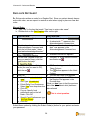
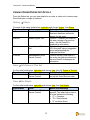
This is a test question.
THE REFRESH BUTTON
To make sure you are always looking at the most current information in the system,
on the toolbar to update the screen. iConnect Acute Care
use the Refresh button
is a very dynamic system. We recommend using the refresh button frequently.
7
iConnect101: Orders and Results
ENTERING HEIGHT/WEIGHT AND ALLERGY INFO
To enter height, weight, and allergy information, click on the Enter Document button:
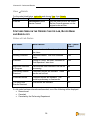
This is a test question.
1. Use the drop-down to select Start of Browse if necessary
2. Click on Patient Profile under the Nursing sub-heading
3. Double-click on Patient Profile in the box below Document Name or select
Patient Profile in the box below Document Name and click Open.
4. Enter Weight: 51kg
5. Enter height: 153cm which is roughly 60” or 5 ft. (Inches * 2.54)
6. Weight Estimated: No (assume you weighed the patient)
7. BSA (body surface area) and BMI (body mass index) are calculated for you
8. Isolation Precautions: Choose Contact
9. Use Red Itchy Man
to document allergy info: choose Allergy Status
Unknown and click OK
10. Click Save
and enter your password.
Once you enter new height, weight or allergy information, remember to use the
to update the screen.
Refresh button
•
•
•
Points to Remember:
Height, weight and allergies can also be entered on the Inpatient Nursing
Admission Assessment
Radiology must have allergies documented when placing order for any study
involving contrast
Pharmacy must have weight and allergy information documented before any
orders can be placed
8
iConnect101: Orders and Results
RN ALLERGY REVIEW
While on the Patient List screen, notice the red text “Unreviewed Allergies” in the
Patient Header.
Reviewing allergies is an RN Task that has to be performed one time per patient
visit.
To “review” allergies:
1. While on the Patient List tab, click on the “Red Itchy Man”
toolbar once your patient is selected
2. Click the Mark as Reviewed
button in the
button
Now that you’ve reviewed the allergies, notice:
•
no longer appears on the patient header
9
iConnect101: Orders and Results
PLACING ORDERS
Even though Dr. Yu is the Attending, he has asked Dr. Steven Baldwin to stop by
and see your patient. Dr. Baldwin has written orders for a diet, consults, and
some labs.
Click the Enter Order button on the Patient Header
.
The Requested By box will appear. This box allows you to tell iConnect Acute Care
who wrote the order(s) you are about to submit. Do not just use the Attending
Physician for every order. It is important that you always use the correct ordering
provider, as this is part of the patient’s record. If the physician you are looking for is
not listed under Current Providers, you will need to select other and then perform a
name search for the physician. We will practice this now.
In the Requested By pop-up box we are going to add Dr. Steven Baldwin.
1. Click the radio button for
2. In the white box below Other, type in “baldwin”
3. Highlight “Baldwin, Steven Todd” (you may have to scroll down in the list)
4. We will leave the Source as “written.” Click OK.
5. The Order Entry Worksheet (OEW) appears
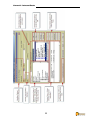
The Order Entry Worksheet: (maximize your screen for best results)
1. Top Left is patient name and who is the ordering physician.
2. Allergy information is listed next
3. Requested By (if this is not the correct physician, you can click the
radio
button which will bring up the “Requested by” pop-up)
4. Session type is always “Standard”
5. Start of Browse vs. Manual Entry: Start of Browse lists all available choices in
categories, but Manual Entry will just look at the characters you type to find
orders that start with those characters
6. “Preview” area: Orders are “held” here until they are submitted. You can edit,
delete or copy orders before they are submitted
7. Notice the Submit button (which includes your patient’s name). You will have to
enter your password when submitting orders
Keep in mind that there are certain orders that will require that weight and allergy
info be documented in the system.
10
iConnect101: Orders and Results
11
iConnect101: Orders and Results
ENTERING DIETS
Dr. Baldwin has written an order for a 1600 calorie ADA diet with 3 snacks (diabetic
diet.)
Most order forms in iConnect Acute Care look the same but with different options.
An asterisk (*) denotes a required field; you must supply information in that field. We
will start by looking at a diet order form.
You should still be on the OEW.
Start of Browse:
a. Click the plus sign next to Nutrition (you may need to scroll down)
b. Click the plus sign next to Food Services
c. On the right, double-click the Diet – Diabetic order form ( - Note the order
form icon)
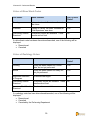
This is a test question.
i. Start Date: Today
ii. Start Meal: Choose next scheduled meal
iii. Diet Type: ADA with 3 snacks
iv. Ethnic/Relig Food Preference: Yes
v. Calories/Day: 1600
vi. Specify Food Preferences: No pork please
vii. Notice the other options on the form, especially FLUID RESTRICTION.
If a physician writes for fluid restriction, the only way food services will know about
the restriction is for you to enter it on the diet order form.
You will notice as you tab or click in another field on this form, occasionally
additional fields appear on the screen. The fields appear only when necessary,
based on your selections in various fields on the form. If you are ever unsure if there
is a hidden field, you can click in any blank white space on the form (the comments
box is usually a good choice.) Should you try to click OK on an order form without
completing a required hidden field, you will be returned to the form to enter the
information.
Click the OK button. The diet order appears in the Preview Area at the bottom of the
OEW. Don’t submit your order yet. We are going to place several orders into the
Preview Area and submit them all at one time.
12
iConnect101: Orders and Results
ENTERING CONSULTS
Dr. Baldwin has also written orders for:
• PT Evaluate & Treat
• Social Service DC planning for Visiting Nurses for wound care
You should still be on the OEW.
Start of Browse:
a. Click the plus sign next to Consults
b. Double-click on the Consult order form on the right; if you look at the
individual departments, most of the available consults are here except for
the following:
• Swallowing Function Study with OT (on the OT and/or PT Consult
menu)
• Swallowing Function Study (on the Speech Language Path menu)
NOTE: you will need to create a separate order for a PT consult and an
OT consult – they cannot be ordered from the same form
c. Click the box next to PT Evaluate and Treat
d. Date Requested: type “t” – the system will automatically enter today’s date
e. Priority: Routine
f. Don’t pick any options as we are going to edit them later. Click OK
g. Click the box next to Social Service Discharge Planning
h. Start Date: today’s date
i. Priority/Time: Routine
j. Reason: select VNA from the drop-down
k. Instructions: type “wound care”
l. Click OK; click OK again on the Consult order form and you will be
returned to the OEW; we are still not ready to submit our orders
ENTERING LABS ORDERS
Lab Priorities
Lab Collects:
• Routine
• Clinic Timed Lab Collect
Staff
•
•
•
•
Other Than Lab Collect
ED-ASAP
STAT
Critical
Timed
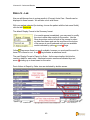
This is a test question.
13
iConnect101: Orders and Results
Ordering Labs
Dr. Baldwin has written an order for a CBC w/diff in the AM x 3 days. Let’s say the
patient had a CBC in the ER; the first CBC we order will be for tomorrow morning.
Start of Browse:
a. Click the plus sign next to Laboratory
b. Click the plus sign next to Hematology
c. Double-click the CBC/PLT with Auto Diff order on the right side
• Collection Date: (Type “t+1” for tomorrow’s date)
• Collection Priority/Time: Routine (lab to collect)
• Collection Time: 06:00
• Comments/Instructions : “Draw from left only”
d. Click OK
•
•
•
•
Points to Remember:
The priority selected will define if test is a “lab” or “nurse” to collect.
Lab or Nurse to collect will appear on the summary line for the order
For routine lab tests you will have to supply a time
Critical labs should be ordered using the Critical Tests order set. We’ll look at
that a later
14
iConnect101: Orders and Results
Using the Copy Function on the OEW
To save time, we will use the Copy Function to order the other two tests.
This is a test question.
Use the copy
button to create two additional orders for the next two
days after tomorrow as routine at 06:00.
While still on the Order Entry Worksheet, select the order you want to copy from the
preview area at the bottom of the screen, in this case, the CBC/PLT with Auto Diff
order. You MUST select the order or the Copy button will not be active.
Click the Copy Button:
a. Choose the correct dates by clicking on the days in the calendar. They
will turn red when selected
b. Priority: choose Routine
c. Time: you must supply a time for a Routine order; enter 06:00
d. Click the Add button (you must do this or the OK button will not be active)
e. Click OK
You should now see a total of three CBC orders in the preview area for three
consecutive days. We still are not ready to submit our orders.
15
iConnect101: Orders and Results
While still in Start of Browse, notice the following:
•
•
Referred Testing: This is a sub-category of Laboratory. Some of these
orders are sent out and some are done in house
Procedure Outside CHS: This is its own category in the Start of Browse.
Patient physically leaves the hospital for these procedures. Open message by
clicking on the Message
button
ALLERGY STATUS UNKNOWN ALERT
Let’s take a look at an alert you will receive if you try to place a radiology order for
your patient. You can expect to receive an alert because we listed our patient’s
allergy status as “Unknown,” and we have to document why the status is Unknown.
A system of rules called MLMs (Medical Logic Modules) enforces rules like this.
This is a test question.
You should still be on the OEW.
Manual Entry:
• Select Manual Entry from the drop down on the OEW or just start typing “ct
ab” in the box that reads, “Type here to enter order name”
• Matching orders will appear; double-click the “CT Abdomen with Contrast”
order
• Review the NPO Protocol warning message and click OK
• The Allergy Status Unknown Alert appears; There is no stop sign and the
Proceed button is active, but we must acknowledge this alert. Click the
•
•
•
Acknowledge
button
In the Acknowledgement Comment box with the asterisk, type the reason why
the allergy status is unknown (i.e. “parents not available”)
Click the Proceed
button
Complete order form using the following:
o Requested For Date: tomorrow (t+1)
o Requested for Priority/Time: Routine
o Transport Method: Wheelchair
o Pregnancy Status: If your patient is female you will be required to choose
a pregnancy status (this field does not appear for males); choose “no”
o Reason for Exam: Rule out obstruction
o Click OK
Do not submit your orders yet.
16
iConnect101: Orders and Results
DON’T DELETE THAT COMMENT!
In order to review an important “don’t” in iConnect Acute Care, let’s pretend we have
an order for a few TRH Stimulation tests.
You should still be on the OEW.
Manual Entry:
a. Select Manual Entry from the drop down on the OEW or just start typing
“trh” in the box that reads, “Type here to enter order name”
b. Matching orders will appear; double-click the “TRH Stimulation Test 0
Minutes (OSET)” order (Notice the Linked Order Set icon
next to the
order. This means there are multiple orders on this order form that relate
to one another or “go together”)
c.
d.
e.
f.
g.
h.
This is a test question.
Review the Warning Message; it just means the T3 test found on the
following screen is only performed three days per week. Click OK
Collection Date: today’s date
Collection Priority/Time: Timed; enter the next hour
Click the box next to the following TRH OrderSet Items: T3, TSH, and T4.
IMPORTANT: Notice that a comment is already present in the
Comments/Instructions box. DO NOT delete that comment. ANY time
you encounter text already entered in this box, you want to be careful not
to delete it. If you need to add an additional comment, type it next to or
below the existing comment. This will be important later when you
complete the Add Specimen task for these tests.
Click OK
Don’t submit the orders yet. We are now going to make some changes.
DELETING OR EDITING ORDERS BEFORE THEY ARE SUBMITTED
Let’s look at deleting orders first.
• Select the T3 order in the Preview Area at the bottom of the OEW and click
•
•
the Delete
button
The original order form appears; uncheck the box next to the T3 order in the
TRH OrderSet Items list
Click OK; Notice the T3 disappears from the Preview Area. No one will ever
know that test was ordered because it wasn’t officially submitted. As long as
an order is still in the Preview Area and not submitted using the Submit Order
button for your patient, NO ONE will know about the order.
17
iConnect101: Orders and Results
•
Select the bold order line in the Preview Area for the TRH Stimulation Test 0
Minutes (OSET) and click the Delete
button. Click OK when
prompted. Notice the entire Order Set disappears from the Preview Area.
You can delete one specific item from an Order Set or you can delete the
entire Order Set.
Now let’s edit the PT Evaluate & Treat order.
• Select the PT Evaluate and Treat order from the Preview Area at the bottom
•
•
of the OEW and click the Edit
button
Check the box next to Transfer Training and in the drop-down next to Weight
Bearing as Tolerated, select Left
Click OK; you will return to the original Consult order form. Notice there is an
exclamation point ! next to the PT Evaluate and Treat order on the Consult
order form. This just signifies that this order was edited. Click OK
This is a simulation test question.
Now submit all of the orders in the Preview Area by clicking on the Submit Order(s)
button for your patient and entering your
password.
To review the orders you have submitted so far, with your patient selected on the
Patient List, click on the Orders tab.
18
iConnect101: Orders and Results
UPDATING ALLERGY INFO
Dr. Yu has now provided allergy info on our patient. The patient is allergic to
penicillin with an anaphylactic reaction. We currently have Allergy Status Unknown
listed for our patient. Let’s update this information in iConnect Acute Care.
With the correct patient selected, click on the “Red Itchy Man”
icon on the
toolbar. Click the Add New
button.
• Select New Allergy
• Type: Drug – these categories/types help us find the allergen we are looking
for more easily (for instance, a latex allergy is found under the Contact type; a
contrast allergy is found under the Drug Category type)
• Allergen: click the drop-down and choose Penicillin OR start typing “penicillin”
in the box (if typing, you must type quickly!)
• The Reaction Details box appears; choose Anaphylaxis (notice there is an
unknown selection if needed)
•
When entering multiple allergies you can click the Apply
ahead and click OK
button; go
Notice the screen updated to show the allergy info you just added; Click the box next
to Show Inactive to see any previous allergy information
.
VIEWING ALLERGY DETAILS & HISTORY
In the Allergies Summary box, select “Allergy Status Unknown” and click the Details
•
•
•
button.
The Entered box shows who entered the info and when
The Last Modified box shows who last modified that allergy and when
Click OK
Select “Penicillin” and click the Details
•
•
•
button.
button for this allergy is active meaning you can
The Discontinue
discontinue or inactivate the allergy if necessary (CAREFUL! One click on this
button and the allergy WILL be discontinued; to reinstate, click on details and
click the Reinstate
Click OK
Click Close
button)
19
iConnect101: Orders and Results
ALLERGY ALERT FOR RADIOLOGY STUDIES WITH CONTRAST
iConnect Acute Care will not allow you to place an order for a radiology item with
contrast if allergy information has not been documented. Let’s take a look at what
that alert looks like.
This is a test question.
Click the Enter Order button on the Patient Header
if necessary.
Select Dr. Yu; leave the Source as “Written” and click OK.
Using Start of Browse:
a. Select the plus sign next to Pediatric Imaging
b. Select CT (Notice the other sub-menus, especially Diagnostic Radiology)
c. Double-click on the Abdomen with Contrast CT order
Review the NPO protocol message, and then press OK.
You will get the “hard stop” for Error in Allergy Check. The stop sign
is your first
indication that this is a “hard stop” alert, meaning you cannot proceed. The other
indication is that the Go Back button
is the only button that is active.
You would need to go back and document allergy info for your patient and then
place the order.
20
iConnect101: Orders and Results
DISCONTINUING AN ORDER
Dr. Yu has now written an order to discontinue the Social Service Discharge
Planning consult order we submitted earlier.
There are two options for discontinuing orders. The first option is optimal if you are
discontinuing several orders at one time. While on the Orders tab, click on the
button. You may have to select the physician who
DC/Cancel
requested that the order be discontinued if the Requested By box appears. All of the
active orders for your patient will appear on the next screen. To discontinue orders,
simply check the boxes next to the orders you want to DC and click the OK button.
Be sure to double-check the “By” field at the bottom of the screen and make sure the
correct physician is displayed. If not, click Other.
Don’t discontinue anything from this screen now. Click cancel.
This is a test question.
The second option for discontinuing an order is to select the order from the Orders
Tab and right-click on the order.
• Select the Social Service Discharge Planning order and right-click on it
• In the box that appears, choose Discontinue/Cancel
• If the Requested By box appears, select the provider who requested that the
order be discontinued (in the case, Dr. Yu) and click OK
• If you did not see the Requested By box, verify that the Requested By on the
DC/Cancel screen has the correct provider listed; if not, click Other and
choose the correct provider
• You must supply a Reason when discontinuing an order; use the drop-down
to select “Order Canceled per Physician Order”
• Click OK
Notice on the Orders tab that the Social Service Discharge Planning order is now
italicized and the Status is “discontinued.”
•
•
Points to Remember:
Pharmacy will discontinue all medication orders
Crediting a charge is done by discontinuing/canceling the order; be sure to
choose “Crediting charge” as the reason
21
iConnect101: Orders and Results
ORDERS FOR EQUIPMENT/CENTRAL TRANSPORT
Dr. Yu has written some orders for a Surgery Tray and a K-Thermia Machine (and
K-Thermia Pad). Now we will enter some orders for equipment and sterile supplies.
. If the Requested By box
Click the Enter Order button on the Patient Header
appears, select Dr. Yu. If it does not, make sure the correct provider is listed at the
top of the OEW.
Start of Browse:
a. Click the plus sign next to Sterile Processing
b. Double-click the Sterile Processing Supplies CHRG order on the right
c. Date of Service: type “t” for today
d. Cart Location: leave blank (cart location is only needed if the item is not
being ordered for a specific patient
e. Check the box next to Surgery Tray
f. Click OK
Now that we have an order for a Surgery Tray, we need to create a Central
Transport Request in iConnect Acute Care to have the tray brought up to the nurse’s
station.
Manual Entry:
a. Type “central” in the box that reads “Type here to enter order name”
b. Double-click on the Central Transport Request order
c. Transport Type: Pick-up
d. Number of Escorts: 1
e. Move from: Sterile Processing
f. Move to: type “your unit name”
g. Transport Method: carried (Notice the option to check Transport with IV
and Transport with O2 if you are completing a Central Transport request
for a patient to be transported)
h. Comments: type “surgery tray”
i. Click OK
We’ll order the K-Thermia Machine and pad now.
Start of Browse:
a. Click the plus sign next to Central Distribution
b. Click the plus sign next to Equipment
c. Double-click the Equipment Charges – Central Dist. order on the right
d. Date of Service: type “t” for today
e. Cart Location: leave blank
f. Click the box next to Central Transport Request
g. Most of the info is completed for you; Number of Escorts: 1
22
iConnect101: Orders and Results
h.
i.
j.
k.
l.
Move to: type “your unit name”
Comments: type ”K-Thermia”
Click OK
Check the box next to K-Thermia Machine (under Equipment)
Click OK
Now we will order the K-Thermia Pad.
Start of Browse:
a. Click the plus sign next to Central Distribution
b. Click the plus sign next to Supplies
c. Double-click the Supply Charges – Central Dist. order on the right
d. Date of Service: type “t” for today
e. Cart Location: leave blank
f. Click the box next to Pad, K-Thermia
g. Click OK
•
•
•
•
Points to Remember:
A Central Transport Request is required for all patient-related requests.
Invision Messaging can be used to send messages that are not specific to a
particular patient. (For example: changing a light bulb or replenishing oral
syringes that are kept in the med room)
If Cart Location is blank, items are brought up for a specific patient.
If Cart location is specified, it is considered floor stock that is replenished to a
specific location.
Let’s not submit our orders yet.
23
iConnect101: Orders and Results
DUPLICATE DIET ALERT
Dr. Yu has also written an order for a Regular Diet. Since our patient already has an
active diet order, we can expect to receive an alert when trying to place our new diet
order.
Manual Entry:
a. Type “diet” in the box that reads “Type here to enter order name”
b. Double-click on the Diet-Regular order on the right
You do this:
You see this:
1
Click
2
Use the drop down box next to
Acknowledgment Comment and
click the box that reads “I have
read and acknowledge this alert.”
3
4
5
6
7
button
Click
button
For the Diet- Regular order (the
one you want to keep), click the
radio button that says
For the Existing Diet – Diabetic
order (the one you want to DC),
click the red
Click OK
• Start Meal: next scheduled
meal
• Diet Type: Unrestricted
• Ethnic/Relig Food Preference:
Select Yes from drop-down box
• Click OK
• Pop-up: Specify food
preference may not be left
blank. Click OK
• Specify Food Preferences: type
“No Pork Please”
• Click OK
•
•
•
That button changes to
A red asterisk “*” appears in the
Acknowledgment comment box
“I have read and acknowledge this
alert” now appears in the
Acknowledgement Comment box
•
Available Actions box appears
•
The grey “X” in the Actions Column
becomes a red
•
DC/Canceled appears in the Action
Taken Column
•
The
button appears in the Undo
Column
• The new diet order form appears
• You are returned to the OEW and
the Regular Diet appears in the
Preview Area
What you don’t see is that the previous
diet order (the diabetic diet) has been
discontinued
This is a test question.
Submit these orders by clicking the Submit Order(s) button for your patient and enter
your password.
24
iConnect101: Orders and Results
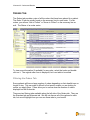
ORDERS TAB
The Orders tab provides a view of all the orders that have been placed for a patient.
The Order ID can be quickly found on the summary line for each order. For lab
orders, you will see “Lab to Collect” or “Nurse to Collect” on the summary line as
well. The Status of an order varies.
To view more information (if available) for any order, select that order and doubleclick on it. The original order form is displayed, but is not able to be edited.
Filtering the Orders Tab
Some patients will have a large number of orders depending on their health issue or
length of stay. This can make it difficult to find specific orders you are looking for
unless you apply filters. Filters allow you to narrow down the number of orders
displayed on the Orders tab.
There are two filtering tabs available along the left side of the Orders tab. They are
the Standard tab and Alternate tab. We will not discuss all of the options for each
tab, but we will highlight how you can use these tabs to your benefit.
25
iConnect101: Orders and Results
Standard Tab
• Display Format: allows you to display ALL orders but groups them together
based on your selection; examples below
o By Department: groups all orders based on the specific department they
belong to
o Requested by: groups all orders based on who the ordering provider is
• Sort Sequence
o Date/Time: displays all orders based on the date and time they are
entered for
o Order Name: additionally sorts your current view based on the order
name
Note: the Status, Order Selection and Display format options on the Standard tab
can be customized using Preferences > Order Review on the Menu bar at the top of
the screen. Instructions for customizing preferences can be found in the iConnect
Orders and Results user manual on the Intranet.
Alternate Tab
• Priority: narrows down the list of orders based on the priority or priorities you
select
• Status: narrows down the list of orders based on the status or statuses you
select (i.e. only Active orders or only Pending Collection orders)
• Department: narrows down the list of orders based on the department(s) you
select (i.e. only Laboratory orders)
When filters are applied and not all orders are being shown on the Orders tab, you
will see a message that reads, “Not all orders are being shown” at the top of the
orders list.
This is a test question.
To clear filters, you must select the [All] option at the top of each filter.
26
iConnect101: Orders and Results
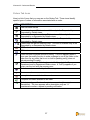
Orders Tab Icons
Here is a list of icons that you may see on the Orders Tab. These icons identify
specific types of orders or information associated with an order.
ICON
DESCRIPTION
View has been filtered
Standard order set. This icon is available only in the Requested by or
Requested by Details views.
Order set with an order set form. This icon is available only in the
Requested by or Requested by Details views.
Linked order set. This icon is available only in the Requested by or
Requested by Details views.
Linked order set with an order set form. This icon is available only in the
Requested by or Requested by Details views.
STAT order
PRN order
Order has been modified and has a history. This icon appears when a
user uses the modify function to make a change to one of the fields on the
order form for any order that is not on hold or pending verify (does not
include pending Rx verify).
Order is a member of a linked orders set. Visible only in the By
Department and by Department/Status views. A ToolTip appears if you
hover over the icon with the mouse cursor
Order has not been verified by the Pharmacy
Alert on an order
Incomplete document attached to an order
Complete document attached to an order
Order is pending verification of a maintenance action (for example:
discontinue). The icon appears with a description such as: “A
<maintenance action> request is pending verification.”
27
iConnect101: Orders and Results
ENTERING RVUS AND CHARGES
iConnect Acute Care treats everything like an order. This means that charges and
RVUs will be entered the same way that all other orders are entered. RVUs and
charges will not have an ordering provider because we do not receive written orders
for these. You may, however, see the Requested By box when entering RVUs or
charges. We recommend selecting the Attending Physician for any RVU entries or
charges. In this example, Dr. Yu is our attending.
Click the Enter Order button on the Patient Header
. If the Requested By box
appears, select Dr. Yu from the list of Current Providers. If it does not, make sure
he is listed at the top of the OEW.
Start of Browse:
a. Click the plus sign next to Nursing Charges, Admitting & RVU. Notice the
additional categories that appear
b. Click the plus sign next to Acute Care
c. Double-click the 4 East Charges form on the right
d. Date of Service: today’s date
e. RVU Quantity: type “99” (assume all charge sheets received by clerk have
been tallied and this is the total for the patient)
f. Press the <Tab> key on the keyboard
g. The RVU box and the appropriate category is automatically selected for you
h. Click OK
Department Charges
Department Charges are entered in a similar way, but they are in their own category
under Start of Browse.
Start of Browse:
a. Click the plus sign next to Department Charges
b. Click the plus sign next to Hearing & Speech
c. Click the plus sign next to CHS – Clinic 2 – Hearing & Speech
d. Double-click the Speech Charges form on the right
e. Date of Service: today’s date
f. Staff/Therapist: type your initials
g. Click the box next to S/L Therapy Simple 15 min
h. Click OK
28
iConnect101: Orders and Results
ORDERING A ONE-TIME MEAL
Since our patient still has not had anything to eat and is now on a Regular diet, let’s
order some chicken fingers and fries. It is not yet time for the next meal, so we will
place a One-Time Meal diet order. As there is no written order for a one-time meal
(the patient is hungry and requesting it), we will use the Attending as the “Requested
by” provider.
Manual Entry:
a. Type “diet” in the box that reads “Type here to enter order name”
b. Double-click on the Diet-One Time Meal order
c. Start Meal should be blank; we want this order asap
d. Ethnic/Relig Food Preference: let’s just select “no” here
e. Click the box next to Chicken Fingers and French Fries
f. Comments/Other choices: type your favorite condiments for dipping your
chicken fingers and french fries (ex. Honey mustard and ranch dressing or
ketchup)
Points to Remember:
You will also notice a Diet - Replacement Tray order in the list of diet orders. This
order should be used in instances where the meal tray was dropped, the child
refused the food that was originally delivered, the child has eaten the original tray
and is still hungry, the tray is missing from the meal cart, or something is “wrong”
with the food on the tray.
29
iConnect101: Orders and Results
ISSUING FLOOR STOCK
Some areas will issue floor stock. Floor stock items are items that are not pulled
from the Pyxis. When using Manual Entry to place an order in iConnect Acute Care
for an item, you must use a three-letter prefix before typing the number for that item.
In the table below, you will see that based on the color of the
label or sticker that you found on the floor stock item, there is
a unique prefix for that color.
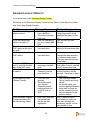
LABEL COLOR
Blue
Yellow
Orange
PREFIX
PHA
CSR
SPT
This is a test question.
For our example, let’s say we’ve borrowed three of the same item from Clinic 1 with
a yellow label/sticker that contains the number 3020304. We need to issue floor
stock back to Clinic 1 to replace what we’ve borrowed. As with any “order” where
there is no accompanying written order from a provider, we will select the Attending
Physician (in this case, Dr. Yu.)
Manual Entry:
a. Type “CSR3020304” in the box that reads “Type here to enter order name”
b. Double-click on the CSR3020304 (Dressing, Tegaderm) order
c. Cart Location: select “Clinic 1” so the items will be replaced to their cart
d. Quantity: 3
e. Click OK
Now, submit these orders by clicking on the Submit Order(s) button and entering
your password.
30
iConnect101: Orders and Results
REORDERING A PREVIOUS ORDER
Dr. Yu has spoken to the family again and they now agree to the Social Service
Consult. Let’s reorder the Social Service Consult.
From the Orders tab, with your patient selected, highlight the Social Service
Discharge Planning Consult order (it should be in italics and the status should read
discontinued)
a. Right-click on the selected order and choose Reorder
b. The Retain Original Requested By Provider box appears. The name of the
provider who requested the original order is listed. If the provider who
requested the reorder is not the original requestor, click the No radio button
and click OK. Otherwise, click Yes and say OK. In our case, Dr. Yu wrote
the new order, so we will click No
c. Click OK
d. Click the Current Providers radio button and choose Dr. Yu
e. Click OK
The order now appears in the Preview Area with all the same characteristics as the
original order.
Submit the order using the Submit Order(s) button for your patient and enter your
password.
DISCONTINUING AND REORDERING AN ORDER
Let’s say Dr. Yu has now written for a Fluid Restriction of 1500cc/day. For Food
Services to know about the fluid restriction, it has to be on the diet order. As we
already have an active diet order, we can use DC/Reorder to add the Fluid
Restriction.
While on the Orders tab for your patient, select the Diet – Regular order.
a. Right-click the order and click DC/Reorder
b. Make sure the Requested By box has the correct provider (Dr. Yu); if not,
click Other and select the correct provider
c. Reason: use the drop-down to select “Order Canceled Per Physician Order”
d. Click OK
e. The Retain Original Requested By Provider box appears. The name of the
provider who requested the original order is listed. If the provider who
requested the reorder is not the original requestor, click the No radio button
and click OK. Otherwise, click Yes and say OK. In our case, Dr. Yu wrote
the new order, so we will click Yes
31
iConnect101: Orders and Results
f.
g.
h.
i.
j.
Click OK
A message appears stating the Start Meal cannot be left blank; click OK
Start Meal: select the next scheduled meal
Fluid Restriction: type “1500”
Click OK
Notice that even though “no pork please” was not on the diet order screen, it DOES
appear in the summary line of the order in the Preview Area. The system
remembered that information from the original order.
Submit the order by clicking on the Submit Order(s) button for your patient and
entering your password.
32
iConnect101: Orders and Results
ADDING A SPECIMEN
When an order is placed that requires a specimen to be collected, it is either nurse
to collect or lab to collect based on the priority. You must perform a task called
“Add Specimen” for ALL orders that are nurse to collect. This is very important.
If an Add Specimen is not performed, the order will NOT make it to the lab, so they
will not know what to do with the specimen once it arrives in the lab.
In most cases, an order that requires a specimen is entered into the system at the
time it is collected and the Add Specimen is performed immediately following the
submission of the order(s). We will use this process for our training.
While Dr. Baldwin was in earlier, he ordered a Stool for C Diff. The specimen has
now been collected. We are also going to place an order for a STAT Type and
Screen for one unit of cross-matched PRBCs (Packed Red Blood Cells) written by
Dr. Baldwin. We will place the orders and perform the Add Specimen task for both
now. First, we will order the Stool for C Diff.
Click the Enter Order Button on the Patient Header
. If the Requested By box
appears, select Dr. Baldwin from the list of Current Providers. If it does not, make
sure he is listed at the top of the OEW. Use the Other option if necessary.
Manual Entry
a. Type “c diff” in the box that reads “Type here to enter order name”
b. Double-click the C Diff Toxin order
c. Collection Priority/Time: next half hour/Timed
d. Source Description: Stool – Random
e. Click OK
Now we’ll place our Blood Bank orders.
Start of Browse
a) Click the plus sign next to Blood Bank
b) Double-click the Blood Bank Orders order on the right; the form opens;
notice the various options are categorized in boxes
c) Collection Priority/Time: STAT
d) List all patient known antibiotics: type “Cipro”
¾ Check the box next to Blood Bank Specimen, Type and Screen
and PRBC Unit – Crossmatched
¾ Number of units: 1
¾ Click OK
Submit the orders by clicking on the Submit Order(s) button for your patient and
entering your password.
33
iConnect101: Orders and Results
Now we will perform an Add Specimen for our C Diff and Blood Bank orders.
You must be on the Orders tab. Click the Add Specimen
the bottom of the screen.
button at
If you did not have an order selected, the Specimen Type will be blank when the
screen appears. This is not a problem. Simply select the Specimen Type for the
specimen that has been obtained, in this case, choose Stool from the drop-down.
This is a test question.
Only one order will appear because there is only one stool specimen waiting to be
added. Check the Specimen Collected by box at the bottom of the screen. The
name defaults to the user who is logged in. IF YOU DID NOT COLLECT THE
SPECIMEN, you should delete your name and type in the name of the person who
did collect the specimen.
Because we also have Blood Bank specimens to add, we will click the Apply
button. (If you are only adding one specimen, you would click OK.)
Notice the Stool for C Diff order disappears when you click Apply.
Now choose the Blood Specimen type from the drop-down. We need to Add
Specimen for the nurse to collect orders we have obtained specimens for. Check
the box next to Type and Screen and Blood Bank Specimen. Double-check the
name in the Specimen Collected by box and click OK. You will be returned to the
Orders tab. Notice the Status for the Type and Screen, Blood Bank Specimen and
Clostridium Toxin, Stool orders is now “Collected.” This is because you performed
the Add Specimen.
Points to Remember:
•
All specimens should be labeled with the LAST FOUR characters of the
OrderID for that order from the Orders tab. This is the official OrderID.
•
We strongly encourage you to only label specimens with the OrderID AFTER
you have submitted the order to prevent mislabeling of specimens.
•
Add Specimen does not need to be used for items ordered with ED-ASAP
priority (ED only) or for Critical Tests for ED Patients.
34
iConnect101: Orders and Results
ORDER SETS AND QUICK PICKS
Order Sets and quick picks were designed to group together orders that are ordered
together on a regular basis. They function the same; however, Quick Picks are
typically geared toward the clinics.
Click the Enter Order button on the Patient Header
.
Start of Browse:
a)
Order Sets appear first in the Start of Browse; Click the plus sign
b) Pay close attention to the Critical Tests order set listed under this category
a. Critical Tests MUST be ordered from this order set
b. A physician phone number is required on the order form
c. An Add Specimen task is required for any Nurse to Collect priority
orders (except for ED, as previously mentioned)
c)
Quick Picks appear second in the Start of Browse; Click the plus sign
next to Quick picks and double-click the Primary Care Quick Pick from the list
on the right
d) Notice the green check marks next to the Collection Date and
Collection/Priority Time fields. Click on the green check mark next to
Collection/Priority Time. Notice all of the blue fields that are highlighted –
those fields will inherit whatever you put in that box
e) Collection/Priority Time: Clinic-timed Lab Collect
f) Time: next hour
g) Check the box next to CBC/PLT with Auto Diff and Comprehensive Metabolic
Panel
h) Check the box next to Culture-Urine, Clean Catch (under Urine Orders near
the bottom of the screen
i) The order form appears for just the clean catch order; change the Collection
Priority/Time to Timed and change the time to the next half hour (a red X
will appear – we will discuss that in a moment)
j) Medication Info: use the drop-down to select No Antibiotics
k) Click OK
Notice the green check that was next to Collection/Priority Time at the top of the
screen is now a red X. That is not a problem – it means that something on this
form has a different collection priority or time than the one located on this screen.
Click on the red X and you will see that the order that is different is highlighted in
pink. This is because we changed the priority and time of the clean catch order.
Click OK.
This is a test question.
35
iConnect101: Orders and Results
Your three orders are now listed in the Preview Area. Rather than searching for
each order individually, you were able to quickly select them and had we not
changed the priority for the clean catch, you would have entered the date, time and
priority for these orders once instead of entering the same info for each order three
times.
Submit the orders by clicking on the Submit Order(s) button for your patient and
entering your password.
(We will not go through the steps now, but because the clean catch order was
entered with a priority of Timed (nurse to collect) we would need to perform an Add
Specimen if/when the urine is collected.)
ACKNOWLEDGING ORDERS
After you have submitted orders, you may be required to Acknowledge your orders
based on your unit’s workflow.
On the Patient List tab, if your Flag New column is turned on (you will see an if it
is – Go to Actions>Flag New-On), a green flag or a red flag will appear in the
Check Orders column for the patient you just placed orders for. Double-click on the
green or red flag.
The Orders to be Acknowledged box will appear. Check the box next to the orders
button at the bottom
you wish to Acknowledge and click the Acknowledge
of the screen.
If there are no other orders to be acknowledged for that patient, the screen will close
automatically. Otherwise, click close.
Points to Remember:
•
You learned about the Flag New column in the iConnect100 CBT. Please
refer back to it or the iConnect User Manual available on the Intranet for more
information.
36
iConnect101: Orders and Results
VIEWING ORDER/ORDER SET DETAILS
From the Orders tab, you can view details for an order or order set in various ways.
We will discuss a couple of methods.
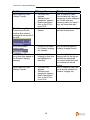
History Æ Status
For each of the orders listed below, right-click and choose History, then Status
Department
Order
Notice the following:
Lab
Stool for C Diff
Status /Function – Collected; Add
Specimen has been performed
already for this order
Nutrition
Active Regular Diet
Function – Reorder (old OrderID):
this was a reorder of a previous
order – the old OrderID is
displayed as information
Nutrition
Discontinued Diabetic
Reason – Suggested action: we
Diet
DC’d this order using a suggested
action while handling the
Duplicate Diet Alert
Consults
Discontinued Social
Function column (new OrderID):
Service Consult
this order was later reordered and
the new OrderID is displayed as
information
View Æ All Orders in This Set
For the order listed below, right-click and choose View, then All Orders in This Set
Department
Order
Notice the following:
Consults
Discontinued Social
Lists all orders in the order set,
Service Consult
not just the Social Service order
View Æ Set Details
For the order listed below, right-click and choose View, then Set Details
Department
Order
Notice the following:
Consults
Discontinued Social
The original order set form
Service Consult
appears; The letters below next to
an order indicate the following:
• “C” = Complete
• “D” = Discontinued
• “A” would be Active
37
iConnect101: Orders and Results
View Æ Details
For the order listed below, right-click and choose View, then Details
Department
Order
Point out
Consults
Discontinued Social
Only the order form for the Social
Service Consult
Service Consult appears, not the
original order set form
STATUSES SEEN ON THE ORDERS TAB FOR LAB, BLOOD BANK
AND RADIOLOGY
Status of Lab Orders
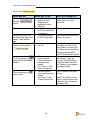
Lab Status
What It Means
Can I Cancel
Order?
Pending
Lab work ordered. Due to be collected in
the future.
Yes
Pending Collection
Lab work ordered. Due to be collected
today.
Yes
Collected
“Nurse to Collect” lab order. Indicates an
“Add Specimen” was done.
Yes
Specimen Received/
In Progress
Lab work has been received in the lab for
processing.
No
Preliminary Results
Received
Preliminary results are available. These
results are not final.
No
Corrected Results
Corrected results are available. This
could be preliminary or final results.
No
1 or more Final
Results Received
Final results are available.
No
If a lab order has been discontinued/canceled, one of the following will be displayed:
• Discontinued
• Canceled
• Canceled by the Performing Department
38
iConnect101: Orders and Results
Status of Blood Bank Orders
Lab Status
What It Means
Can I Cancel
Order?
Pending
Lab work ordered. Due to be collected in
the future.
Yes
Collected
“Nurse to Collect” lab order. Indicates an
“Add Specimen” was done.
Yes
Preliminary Results
Received
Preliminary results are available. These
results are not final.
No
If a blood bank order has been discontinued/canceled, one of the following will be
displayed:
• Discontinued
• Canceled
Status of Radiology Orders
Lab Status
What It Means
Can I Cancel
Order?
Pending
Study has been ordered for a future
date, but not yet performed.
Yes
Active
Study has been ordered for today, but
not yet performed.
Yes
Specimen Received /
In Progress
Procedure has begun.
No
Preliminary Results
Received
Preliminary results are available. These
results are not final.
No
1 or more Final Results
Received
Final results are available.
No
If a radiology order has been discontinued/canceled, one of the following will be
displayed:
• Discontinued
• Canceled
• Canceled by the Performing Department
39
iConnect101: Orders and Results
RESULTS - LAB
Now we will discuss how to review results in iConnect Acute Care. Results can be
displayed in three formats. We will take a look at all three.
With your patient selected (for training, choose the patient with the last name Smith),
click on the Results tab.
The default Display Format is the Summary format.
If no results appear immediately, you may need to modify
the view to show older results on the screen. Use the
Since drop-down on the left side of the screen to select
an older time-frame and use the scroll bar at the bottom
of the screen to scroll backward until you see available
results indicated by yellow or red flags.
Yellow flags mean there is a result available, however you must read the result to
know if it is normal or not. A red flag indicates an abnormal result.
The next Display Format is Report by Order. As the name implies, this lists the
results in detail for each order. Abnormal numeric results are indicated by a red
arrow pointing up or down based on the value.
Panic Values in Report by Order view are indicated by double arrows.
40
iConnect101: Orders and Results
Corrected Results in Report By Order view are indicated by an “H” icon.
The final Display Format is Trend View. This format shows you trends for results
that have been taken multiple times over a period of time.
Panic Values in Trend View are indicated by double arrows.
41
iConnect101: Orders and Results
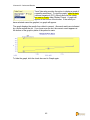
Trend View also provides the option to display a graph of
a specific result trend. To view the graph, select a result
(choose Hematocrit (PCV), Blood) and click the check
box next to Graph under Display Format. A graph will
appear at the bottom of the screen. If the result you
have selected cannot be graphed, no graph will appear.
The graph displays the results from oldest to newest. Abnormal results are indicated
by a circle around the dot. If you hover over the dot, the numeric result appears at
the bottom of the graph in place of the patient’s name.
To hide the graph, click the check box next to Graph again.
42
iConnect101: Orders and Results
ADVANCED LOOK AT RESULTS
Let’s return back to the Summary Display Format.
Selections on the Summary Display Format act like “filters” for the Report by Order
and Trend View Display Formats.
Do this:
What you’ll see:
What just happened:
Click the Hematology
label to select it
o Hematology label
turns dark blue
o The entire row turns
dark blue
o Now the Hematology
row is no longer dark
blue
o The entire column
turns dark blue
We just selected all the
Hematology results since
(whatever the date is at the
top)
Now, we have no rows
selected
o That entire column
turns dark blue
By clicking the date we’ve
changed the date selection.
So, selecting dates works
differently than the selection
of row labels
By using the <SHIFT> +
Click method, we’ve selected
these 3 consecutive days
Now, for those 3 days, we’ve
got the Chemistry results
selected. There are no flags
on those days
o The Filter icon means
“Not all results are being
shown”
o No results match your
request appears because
there were no flags (no
results available) on the
days we selected in the
previous screen
Now, in addition to the 3
blank chemistry cells, we
have also selected the
hematology results for that
same period of time.
Click the Hematology
label to de-select it
Click the first day of the
CBC results at the top of
the grid
Click the last day of the
CBC results
Press the <SHIFT> key,
hold it, and click the first
day of the CBC result
Click the Chemistry label
to select it
o The columns for all
three days turn dark
blue
o Three boxes in the
Chemistry row are
now dark blue
Click Report by Order
(Display Format)
o The Filter icon
appears
o No results match
your request
o Chemistry results
performed from xxxx-2010 to xx-xx2010
Click Summary (Display
Format) and then click
the Hematology Label
o Now, the 3 cells with
the hematology
results are also
highlighted
43
Now, we’ve selected all
results for this particular date
iConnect101: Orders and Results
Do this:
What you’ll see:
What just happened:
Click Report by Order
(Display Format)
o The Filter icon
appears
o “Multiple result
categories” appears
o Results performed
from xx-xx-2010 to
xx-xx-2010
o All selections are
cleared
Now, in Report by Order
view we have the 3 days of
hematology results displayed
and if there were any
chemistry results for those 3
days, we’d see them also.
o All cells for all dates
for Pediatric Imaging
are selected
Now we have selected all
Pediatric Imaging Results
Click Summary (Display
Format) and click the
medium blue colored
rectangle at the top left of
the grid:
Click the Pediatric
Imaging label
Click the date where the
o All cells in Pediatric
two yellow flags appear in
Imaging for that date
the Pediatric Imaging
are highlighted in
category
dark blue
Click Report by Order
(Display Format)
o The Filter icon
appears
o “Multiple result
categories” appears
o Results performed
from xx-xx-2010 to
xx-xx-2010
44
Clicking the blue box easily
removed all selections
Note that all Pediatric
Imaging cells for the day we
selected are highlighted
The column stops and does
not continue into the lab
section
Now, in Report by Order we
see all results available for
Pediatric Imaging only
iConnect101: Orders and Results
Click on the Patient List tab
What you do:
What you’ll see:
What just happened:
Click the Select All
o All Patients on the
patient lists are
selected and
highlighted with a
dark blue
o All Results since xxxx-2010 (results from
1 week ago)
o All Results since xxxx-2010 (new date)
We’ve selected all the
patients on our current
patient list
o A check appears in
the box
Checking this box means
that when we scroll to the
next patient, our setting will
be saved, and we should be
looking at three month’s
worth of that patient’s results
Now, we’ve scrolled to the
next patient. When we
scrolled, the Since setting
stayed the same because
our “Retain for next patient”
box was checked
Patients
button
Click the Results Tab
In Summary View, Use
the Since drop down and
select “Three months
ago”
Check the box next to
Retain for next patient
Click the right arrow
button above the patient
header
Click the right arrow
button again
o The next patient
name from the
current patient list
appears in the
header
o The “Since” is “still
three months ago”
o The next patient
name appears in the
header
o The “Since” is still
“Three months ago”
45
The default settings appear
Now we are looking at three
months of results
We’ve scrolled to the next
patient.
Note: The “Retain for next
patient” option works in any
display format, not just the
Summary view
iConnect101: Orders and Results
RESULTS - RADIOLOGY
Now we will take a brief look at how to view results for Radiology orders. You
should be on the Summary Display Format
For the Pediatric Imaging department, there are results available. Because the
results are indicated by a yellow flag, we cannot be sure if they are normal or
abnormal. We will open each result to get more information.
Double-click the flag for the CT order.
Double-clicking brings up the Report by Order Display Format, but ONLY the CT
result is displayed. Notice the plus sign on the Head CT row. This indicates a
written report is available for this order. Click on the plus sign to view the report.
The Expanded Result box appears and the report is displayed. When you are
finished reading the report, click the Close button at the bottom right of the box.
appears. This
Notice at the top of the results screen that
means it is possible there are more results available for this patient. Click on
Summary in the Display Format box to return to the Summary view and see the
remaining results.
This is a test question.
Double-click the flag for the MRA & MRI order. Notice the camera icon. To view the
available radiology image, click on the camera icon.
Syngo Viewer must be installed on the workstation for the image to display. If you
are on a workstation that has Syngo installed, you will be able to view the digital
image. If the workstation does not have Syngo installed you will see this screen:
46
iConnect101: Orders and Results
PATIENT INFO TAB
The Patient Info tab provides various details about your patient’s visit. We will briefly
discuss a few of the items you can find on this tab. With your patient selected, click
on the Patient Info tab.
Summary Views: Alerts
The Alerts summary view displays any alerts that you or others have handled for the
patient. For example, the duplicate diet order alert we handled earlier would appear
as “Existing Diet Order” in the list.
To view the details of an alert, select the alert and click on the Details
button at the bottom right of the screen. Click the Close button to return to the list of
alerts.
Summary Views: Allergies/Comments
The Allergies/Comments summary view displays all allergy information for your
patient and comments that have been entered into iConnect Acute Care regarding
the patient.
To view ALL patient allergies, including the inactive allergies, check the Show
Inactive box
.
To view the modification history of an allergy, select the allergy (let’s choose Allergy
Status Unknown) and click the History
button.
Summary Views: Care Providers
The Care Provider summary view displays all of the care providers for a patient that
have been entered into the system, as well as their role and date they were entered.
To view ALL care providers, including the inactive providers, check the Show
Inactive box
.
Summary View – Visit History
The Visit History summary view displays high-level information about a patient’s
current and previous visits. The list can be filtered using the Filter
at the bottom of the screen.
The Details
button
button providers a few more details about a specific visit, and
the Open Visit(s)
tab as a Temporary List.
button will open the selected visit(s) in the Patient List
47
iConnect101: Orders and Results
PRINTING REPORTS
There are many reports that can be created by iConnect Acute Care. Some reports
will gather information across the entire system. Other reports will be based on
specific criteria. Still others are based on the current list the user is displaying,
whether it is a criteria-based, personal or temporary list.
We won’t discuss all of the available reports, but we will take a look at a couple to
give you an idea of how to access and print them.
Current List Reports (by Patient)
This report displays a list of the patients in your current list displayed in order, by
location and room number. An alphabetical list can be obtained by using Detailed
Patient list (by Patient). Using the instructions below, the information on this report
will be: Primary Provider, any comments, all care providers, all diagnosis types, and
all allergies.
1) From the Patient List tab, click the Print Reports
button on the toolbar
at the top of the screen
2) Select Patient Lists from the Report Category drop-down list
3) From the list of available reports, choose Current Patient List (by Patient)
4) Click the Options
button
5) There’s only one option, Print Primary Provider, which is already checked
6) Click the Preview
button
7) If you are satisfied with the report that is generated on the screen, you can
button
click the Print
8) To close the report screen, click the X
button in the top right corner
Pending Nurse Collects Report
This report displays a list of patients and their respective orders that were entered
with a Nurse to Collect priority, but an Add Specimen task has not yet been
performed
1) From the Patient List tab, click the Print Reports
button on the toolbar
at the top of the screen
2) Select Orders from the Report Category drop-down list
3) From the list of available reports, choose Pending Nurse Collects Report
4) Click Options
button
5) Choose your unit(s) and choose Department: <ALL>
6) Click Preview
button
48
iConnect101: Orders and Results
7) If you are satisfied with the report that is generated on the screen, you can
click the Print
button
8) To close the report screen, click the X
button in the top right corner
Points to Remember:
•
button to see if you can
Don’t just click print. Click the Options
customize or specify criteria for the selected report and then click Preview.
This not only saves paper if the wrong report is printed, but prevents us from
having patient information needlessly laying around and accessible.
49
iConnect101: Orders and Results
DOCUMENTS TAB
The Documents tab provides access to patient documentation. This includes any
nursing documentation, as well as documents like History & Physical, Operative
Reports, and documents that have been scanned into ChartMaxx.
With your patient selected (for training, choose the patient with the last name Smith)
click on the Documents tab.
We will discuss two of the views available for the Documents Tab. The default view
is the Summary View. This view is a graph format with check marks in the columns
and rows where documents are available.
Here are a few ways to filter the Documents tab:
•
•
•
•
By clicking on the Time Interval
button, you can choose to view
documents from a specific time frame (i.e. yesterday, one week ago, three
months ago)
If you select a Time Interval, you will notice the Clear Filtered View
button appears at the top of the Documents list. This means
that all documents are not being shown and clicking on the button will return
the view to its default setting
A very helpful feature is the Hide empty rows and columns check box at the
bottom left of the screen; checking this box clears all empty boxes and only
shows columns/rows that have documents available
The filter tab on the left side of the screen allows you to make some custom
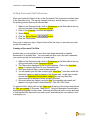
selections for your Documents tab. (This Filter tab will open and close as you
mouse over it; if you want it to stay put, click the Tack in the top right corner.)
o The Include Flowsheets check box will add flowsheets to the list of
documents displayed
o If you check any of the options on the tab, you must click the Apply
button for them to take effect. Check “Include Flowsheets” and
click the Apply
button now.
The other view for the Documents tab we will look at is Report View. Click on the
Views
button and choose Report View.
•
The Group By
button provides options for how the documents are
grouped in this view (i.e. Author, Date, Category)
50
iConnect101: Orders and Results
Setting Document Tab Preferences
Most users prefer the Report View on the Documents Tab, however the default view
is the Summary View. This can be changed one time, and will save you a step in
the printing process that we will discuss later.
1. While on the Documents tab, click on Preferences in the Menu Bar at the top
of the screen and choose Document Review
2. Click on the View tab in the box that appears
3. Select Report
4. Click the Set as Default
5. Click the Close button
button
From now on when you log in, Report View will be the view you see when you click
on the Documents tab.
Creating a Document Tab Filter
Another task you can perform to save time later when searching for specific
documents is to create a filter. You can create the filter once, and use it whenever
you need to quickly find a document of a certain type.
1. While on the Documents tab, click on Preferences in the Menu Bar at the top
of the screen and choose Document Review
2. The Filters tab is displayed in the box that appears. Click on the Add New
button to create a new filter for your Documents tab
3. Once you click Add New, a new screen appears
4. You will need to give the filter a name (type “Med Recs”), and then select the
document types you want to appear in the filtered view. In this case, we will
choose the Medication Reconciliation category so that only Med Rec
documents will be displayed when we apply this filter
5. Once you select the category and click Add, the matching documents will
appear in the right column under Selected. Click OK; Click Close
To apply the filter, simply click on the Filters icon at the top of the screen and choose
the filter you created (in this case, “Med Recs”). Only the Medication Reconciliation
documents will appear on the screen. Selecting this filter will make it quick and easy
to find the Med Rec document you wish to print, especially when your patient’s visit
is a lengthy one.
51
iConnect101: Orders and Results
Printing a Medication Reconciliation Document
Select the Medication Reconciliation Transfer Report you want to print from the
Documents tab.
1. Click the Printer
button on the toolbar at the top of the screen
2. The Document Reports should appear; select the Admission, Discharge or
Transfer Summary depending on which one you want to print
3. Click the Preview
button
4. Verify the correct report is being displayed on the screen; if you are happy
with it, click the Printer
button at the top of the screen
5. Click the X
button to close the window
This is a test question.
•
•
Points to Remember:
The Medication Reconciliation documents do not appear on the Documents
tab and cannot be printed until someone first creates them using the Enter
Document button
Nurses typically create the Medication Reconciliation document, but on some
units the Clerk may create them (this is covered in ClinDoc class or on the
unit); Nurse Practitioners can also create these documents
52
iConnect101: Orders and Results
EXTERNAL CHS DATA TAB
This tab provides specific information for your patient that was originally entered in
CodoniX - ED, Allscripts (Eclipsys) - inpatient/iConnect, Logician - outpatient, and
SIS - surgery. The only information pulled from those systems is: recorded allergies,
medications and prescriptions, and ICD9 diagnosis.
1) With patient selected (use the SMITH patient for training), CLICK the External
CHS Data
tab
2) A report will run that will check the CodoniX, Logician, SIS and the Allscripts
(Eclipsys) systems
3) The available systems are listed at the top of the screen under Select a
System. Check the box next to a system if you only want to see info from that
system (wait a few seconds for the screen to refresh after you check a box)
4) The source of the data is color coded, but to view the Key, you may need to
use the scroll bars to see it – it is on the right side of the screen
5) To view the CCD (Medicaid Report) for the patient, look for the image below:
Click the link to open the report. If no report is available, you will see “No
CCD is available for this patient”
You can also create a printable version of this document by click the Print to PDF
button.
53
iConnect101: Orders and Results
PATIENT LIST TAB – CHANGE IT UP
Let’s take a look at a couple things you can do to change the view of your patient
lists.
•
•
Sorting Columns: By clicking on a column heading you will sort the column in
ascending or descending order; you can also go to the File menu at the top of the
screen and click on Sort List. You can sort the current patient list using three
levels of criteria using this method.
Locking/unlocking Columns: If you right-click and select Lock Columns for any
column heading this will lock that columns and all columns to the left on the
screen; now when you scroll to the right, those columns will remain in view.
This is a test question.
How to Add a Column
Occasionally you may need to add a column that is not already shown on your
patient list.
To add a column:
1. Go to the View menu at the top of the screen and click on Column Selection
2. Find the Msg For Nsg (Message for Nursing) column in Available Columns list
and select it
3. Click the Add button
4. Under the Displayed Columns, highlight the new column and use the Move
Up and Move Down buttons to move the column where you like would it to
appear in the column order; move “Msg for Nsg” right about RN Assignment
5. Click OK
Notice the Msg for Nsg column now appears in the Patient List tab. If Pharmacy
sends a message related to this patient, you will see a notification in that column.
Another helpful column is the New Document Flag column. This column will help
you know when Pharmacy has created an Intervention or Clarification Document.
Toolbar Buttons to Remember
Emergency
Meds
Handbook
McKesson
Medication
History
ChartMaxx
Navigator
Used to print the Code Sheet for patient
Used to access the Lab Tests Online Handbook
Used to display past medication history for patient
Used to link to the patient’s medical record
54
iConnect101: Orders and Results
TALK TO ME TAB
This tab only appears in the Production environment next to the External CHS Data
tab; you will not see it in training. When you submit an issue using this tab, a ticket
is automatically created in the Customer Support Desk’s ticket system. A
representative will quickly troubleshoot your issues and take appropriate steps to
resolve your problem.
Simply fill in the requested information and click the GO button in the bottom right
corner.
55
iConnect101: Orders and Results
IMPORTANT THINGS TO REMEMBER
• Make sure you have selected the physician who wrote the order when entering orders! If you open an Order Entry Worksheet and have the wrong provider, you can click which will open the “Requested by” pop‐up box. • iConnect Acute Care treats everything as an order. All charges, RVUs, floor stock, sterile supply requests and Central Transport requests are entered using the Order Entry Worksheet. • Info on Alerts, Allergies and Care Providers can be viewed using the Patient Info tab. • Invision can be used to send messages that are NOT patient‐related. • Critical Tests must be ordered from the Critical Tests Order Set. • On the Orders tab, RIGHT‐clicking and selecting History > Status will show “who” did “what” related to that order. • On the Orders tab, RIGHT‐clicking and selecting the View option will provide details on the order and if applicable, the order set. • The easiest way to discontinue a single order is to select the order, RIGHT‐CLICK and select DC/Cancel. • To discontinue multiple orders on the Orders tab, click . • To document that therapy is no longer working with a patient, go to the Orders tab, select the order, RIGHT‐click and select Complete. • To print documents, go to the Documents tab . • To make an RN or Therapist Assignment, select the patient(s) and double‐click in the RN Assignment or Therapist Assignment column. • When looking at Orders or Results, always check to see if filtering is limiting what you see. . Look for this at the top of the screen: • Always use the Order ID on the summary line of the Orders tab. Specimens need to be labeled with the last four characters of the Order ID. 56
iConnect101: Orders and Results
TOOLBAR BUTTONS
Description Add Care Provider Button Description McKesson Medication History Allergies Next Patient ChartMaxx Navigator Emergency Medications Enter Order Lab Handbook Print Reports Refresh Find Patient Patient List Previous Patient Enter Document Button Task Viewer Worklist Manager Logoff ICONS SEEN DURING ORDER ENTRY
Description Icon Notes Order Set
Order Form
Linked Order Set
Message
A group of orders arranged together for convenience. Examples of Order Sets seen today: Consults and Primary Care Clinic Quick Pick
More information is needed on this order form (for example, required fields)
A group of orders that “go together.” (for example, the TRH test shown in class)
Indicates there is an important message related to this order
57
iConnect101: Orders and Results
QUESTIONS?
Contact the Customer Service Desk at 939‐6568 or [email protected] Visit http://iteducation.chsys.org/iconnect 58
10/10