1
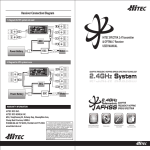
Author/ Photographs: Mark Danek
Hitec Aurora 9
I
Mark Danek takes an in-depth look at this feature-packed radio system
n this review, I evaluate Hitec’s flagship radio system – the 2.4 GHz, AFHSS (Adaptive FrequencyHopping Spread-Spectrum), telemetry-capable Aurora 9, concentrating on the basic features. In a followup article I will examine the complete range of AFHSS telemetry accessories in detail.
The Aurora 9 can be purchased as a combo with either a 7 or 9-channel Optima receiver. My combo came
with the top-of-the-line Optima 9 receiver, but I also obtained an Optima 7 separately as this is a very
popular option. No servos are supplied with either combo, but some useful accessories are included.
Who is this combo aimed at? Clearly, a 9-channel system is not aimed at complete beginners but,
at this price-point, it needn’t be just for the experts either. I think a closer look will be required
before we can answer that question.
Restrained styling
and a purposeful look
means this set won’t
appear dated too soon
What Do You Get?
The box contains an Aurora transmitter; a 9-channel (or
7-channel) Optima receiver; large user manual; a creditcard-size aide-memoire for binding, fail-safe setting and
range-checking; battery-box; switched heavy-duty power
lead; a decent sized sheet of Hitec stickers plus a tag;
and a foam mat with a nice Velcro™ strap for protecting
the receiver. Also included is a JP-branded wall-charger
suitable for the transmitter’s 6-cell (7.2 V) NiMH pack
and traditional 4.8 V receiver packs. Hitec seem to
have gone out of their way to include a few goodies.
User Manual
The large user manual has good English and
extensive use of easy on the eye graphics. At 132
pages, the manual cannot cover every aspect of
the Aurora’s programming and operation and it
acknowledges this and encourages experimentation
based on the wide-ranging examples presented. I
dare say this approach will appeal to many modellers.
Where the manual does fall down a little is in the
provision of detail, for example, changing stick mode
and tension. I also found some uses of non-standard
terms but nothing I couldn’t work out for myself. Hitec
suggest that additional information can be found in
online forums.
LHS auxiliary controls: four switches, a rotary/slider
and two nudge buttons (LT, CT)
48 AUGUST 2012
Aurora9_RCMW_Aug12.indd 48
|
RHS auxiliary controls: four switches, a rotary/
slider and one nudge button (RT)
The scary-looking control sticks are actually
comfortable in use and easily adjusted
www.rcmodelworld.com
2/7/12 09:09:44
PRODUCT REVIEW
Rear view showing battery compartment flanked by charging
socket and trainer/data port; a Spectra 2.4 module with
external aerial lead is fitted to the Aurora 9; note the contoured
rubber grips that provide a very comfortable grip, and a useful
screwdriver/stylus is clipped to the carry handle
The Aurora 9 can be connected to 6-cell Optic transmitters using a simple 3.5 mm
audio-plug lead (available separately); Hitec transmitters using 8-cells and DIN
connectors will require the adapters available in the full-package cable set seen here
The Transmitter
Other Controls And Switches
First impressions of the transmitter are very favourable. Two
aspects stand out immediately: the imposing array of (13)
switches and controls around the top, and the large touch
screen display along the bottom. Between these, a pair of
control sticks with chromed surrounds completes the picture of
a compact and attractively understated transmitter.
The upper part of the transmitter contains 13 freely-assignable
input controls. These comprise: two-position switches (6),
three-position switches (2), nudge buttons – similar to trims (3),
and a rotary/slider control each side. The switches and controls
are all within a reasonable stretch for average fingers, and the
switches towards the back and centre of the transmitter have
longer toggles for ease of use. Even so, I did need to change my
grip slightly to reach the very top row and I felt that a neck-strap
would be a wise addition.
Regarding switch locations, I had two very slight reservations
from a purely personal point of view. The sprung ‘dead man’s
switch’ (H), usually used for trainer mode, is on the opposite side
to the Optic range. I also felt that the three-position switch (C)
should be positioned at (D) or (G) as its current location makes it
less easy to operate accurately.
These are minor points and far outweighed by the sheer
number and variety of the switches and controls. They can be
freely assigned to any output channel (not just for flap or landing
gear control); mixed in to modify other controls; or used to
enable a function such as a mixer, rate/expo or timer.
Control Sticks And Trims
One of the first things I do with a new transmitter is to adjust
the stick length and reduce the spring tension slightly. I also like
to see how easy it is to change stick modes. The Aurora 9 allows
this without removal of the back of the transmitter case, which,
in theory, should make things a bit easier. In practice, because
I couldn’t see what was going on inside, I ended up messing
around for a while until the penny dropped. A few helpful words
in the manual would have been appreciated.
Once adjusted to taste, the 4-bearing control sticks are
smooth and centre well. The control-stick trims are digital, with
an audible tone as they pass centre, making them easy to use
without looking away from a model in flight.
Touch Screen Operation
The standard 6-cell 1300 mAh NiMH can
provide over 8.5 hours of operation if the LCD
backlight is not left on
After removing the rubber grips, stick mode, tension
and friction adjustments can be made without
opening the transmitter case
The Aurora 9 simply has a large, backlit,
touch-sensitive LCD panel at the bottom of
the transmitter face. There are no buttons,
switches or jog wheels to worry about, just
a nice, clear display. The screen works
perfectly well with the end of a finger but, if
preferred, a stylus (which can double as a
screwdriver) is supplied clipped to the carry
handle.
Now, you may think that a touch screen is
a gimmick, but think again! It is a truly userfriendly interface because there’s no need
to remember which button does what,
you just touch what you want to change.
www.rcmodelworld.com | AUGUST 2012
Aurora9_RCMW_Aug12.indd 49
49
2/7/12 09:13:47
Hitec Aurora 9
A battery box and
heavy-duty switched
lead are also provided
You have a choice of the dual-BODA Optima 9 and the single-BODA
Optima 7; each receiver comes with an SPC power lead and BODA
mounting kit
on. The Aurora will run the NiMH pack flat rather than shut off.
The Aurora 9 can also run from a 2S LiPo, which can provide
a huge capacity increase as well as reducing transmitter weight.
The Aurora can be set to detect a preset low-voltage value (6.0
V-6.6 V) to prevent over-discharge of LiPo packs.
Hitec recommend that LiPo batteries should be removed for
charging and I would also stick a warning label over the charging
port when a LiPo is used.
The compact Optima 9 has all the connections at one end and the data
connection on the side
The slim line Optima 7 has five servo connections on one end and two
more share the other end with the SPC and data connections
As a result, within minutes of switching on the Aurora 9 for the
first time, I was confidently exploring the menu system and had
worked out how to set-up some advanced features. I must say
that, for a sophisticated system like the Aurora 9, touch screen
seems by far the best way to go.
External Connections
The back of the transmitter case has some important
connections. The 3.5 mm trainer port and the 7.2 V smalldiameter battery charging port can be found on either side of
the battery bay. The trainer port also doubles as a data link
and is used to connect Hitec’s optional HPP22 PC interface
for firmware upgrading of the touch screen menu software. My
Aurora 9 was up to date, but new features or accessories will
require new firmware in future.
Spectra 2.4 Module
Also found at the rear of the transmitter is the Spectra 2.4 GHz
AFHSS radio module. Although manufacturers are increasingly
moving away from modules, they have their advantages, and
Hitec say that the connection to this module is digital so there is
no performance loss.
With the latest firmware, the Spectra 2.4 module is compatible
with all AFHSS receivers: the Optima 7 or 9, which have full
telemetry support; the Optima 6 range, which only has receiver
voltage reporting; and the tiny, non-telemetry Minima 6T or 6E.
A feature of the Spectra 2.4 module is that it can optionally
scan the 2.4 GHz bandwidth and map out any busy channels to
maintain performance. The only downside is that all receivers
have to be re-bound after this operation as the hopping codes
change. Still, if it rescues a day’s flying it’s a small price to pay
– though it would be nice to be able to reset the module to a
default state after using this feature.
The module has two LEDs, a multi-function ‘Link’ button and
a data port. Pressing the ‘Link’ button can perform receiver
binding; select ‘power-down’ mode for a range check; initiate
the scan function, and switch between Optima and Minima
binding protocols. There is also a 3-pin data port for connecting
telemetry accessories or the HPP22 PC interface for upgrades of
the module firmware.
Optima 9 And 7 Receivers
The Aurora 9 combo is supplied with one of two high-end
Optima receivers, 9-channel or 7-channel, and these receivers
share some noteworthy features:
Battery Options
Telemetry Data
The Aurora 9 comes fitted with a 6-cell 1300 mAh NiMH
as standard. This doesn’t sound like much, but a somewhat
unscientific test revealed that the transmitter ran for over 8.5
hours provided that the LCD backlight was not left permanently
Both receivers support full telemetry but, in order to provide
this feature, a sensor-station with appropriate sensors has to
be connected to the receiver’s data port. Without the sensor
station, just the receiver operating voltage is reported to the
50 AUGUST 2012
Aurora9_RCMW_Aug12.indd 50
|
www.rcmodelworld.com
2/7/12 09:14:39
PRODUCT REVIEW
From the model tab the DR&EXP function calls
up a graph and allows flexible setting of rates
and expo; a further screen allows the choice of a
switch to activate the function; using a 3-position
switch allows a choice of multiple settings
As the transmitter starts up it shows an
initial screen then (optionally) asks if you
wish to transmit (you might not want to while
programming) before displaying the main status
screen
transmitter. The receiver data port can also
be used with the HPP22 PC interface to
upgrade the firmware as required.
Power Handling
An example of the basic receiver voltage
monitoring – available from the system tab’s
sensor function; more information is available if a
sensor station with suitable telemetry sensors is
connected
Either receiver can be conventionally powered from the
servo side using 4 or 5-cell Nickel packs or 2S LiPo (using
HV servos like Hitec’s HS-430BH). There is also an SPC port
(Supplementary Power Connector), which is used to isolate
the receiver power from the servos.
Using the SPC port to power the receiver circuit separately
prevents brownouts from heavy servo loads as the servo
side of the receiver uses a separate power supply. As the
SPC supports voltages up to 35 V, the receiver power source
could be anything from a 4-cell NiMH to an 8S LiPo (an EP
motor pack, for example). A short SPC power lead is supplied
with each receiver.
BODA
The most unusual feature of the receivers is the antenna
design, which has a single lead with a thick section preceding
the antenna section itself. Hitec state that: a single BODA
(Boosted Omni-Directional Antenna), as on the Optima 7, is
equivalent to the twin antennas we are used to seeing; and that
a BODA pair, as on the Optima 9, is equivalent to a set-up with
a satellite receiver. Hitec provide suitable brackets to mount
the antenna ends securely in the model in any convenient
orientation.
Binding And Fail-Safe
Each receiver has two LEDs and a multi-function ‘Link’ button,
rather like the Spectra 2.4 module. The ‘Link’ button can be
used for initiating binding with the transmitter module and for
setting fail-safe or hold mode. The two LEDs indicate progress
and status.
AFHSS In Action
One of the most important parts of the system (the radio link)
is invisible so the only real way to find out how well it works and
how well it copes with problems is to try it out.
In practice, the initial receiver binding process is reliably quick
and simple. Once bound, receivers link to the transmitter within
a fraction of a second on power-up or after a power interruption
at the receiver. A power interruption at the transmitter takes
longer to recover, as the system has to re-boot, and this was
around 5 seconds on my system – better
make sure that fail-safe is set! Finally, a
power-down range check easily exceeded
the 100 ft/30 m requirement by a large
margin – all very reassuring.
TRANSMITTER PROGRAMMING
There isn’t the space to cover system and model programming
in a review like this but I hope that the pictures and captions give
a flavour of just how easy the Aurora 9 is to set up and use. The
user manual is also available on Hitec’s website if you’d like to
find out more.
On power-up, the Aurora 9 presents the main status screen.
From here, touching almost any screen item will select it, change
it or act as a shortcut to a new screen; in fact, this is true of all
the screens. When you’ve finished (or if you’ve gone astray) then
every screen has an ‘open door’ icon in the top right corner that
exits back to the previous screen – all very simple and intuitive.
There are three main programming modes: System, Model or
Custom. There are several ways to select these options but they
all go to a tabbed interface where we can swap between the
three easily.
System Tab
This tab contains the functions for configuring the transmitter
as well as for defining and managing a model’s physical
characteristics. All the usual functions are there: stick mode (6
in all), timers (2), touch screen settings, trainer mode, transmitter
channel assignments, and more.
Two model management functions are also available: one
to create, copy or select up to 30 models; and one to edit the
current model. The Aurora has intelligent programming support
for aeroplanes, gliders or helicopters. The nice thing about this
programming is that you just run through a series of simple
questions, such as: model type, wing type, tail type, number of
engines, retracts, spoiler, fuel mixture and so on. After this, the
transmitter is ready to go, which saves a lot of programming
effort and can be checked and modified later using the channel
assignment and monitor functions.
Model Tab
This tab contains several pages of the usual programming
options such as servo reversing, servo monitoring, mixing,
rates, exponential, aileron differential, in fact, far too many to
list here. The number of pages available depends on the model
www.rcmodelworld.com | AUGUST 2012
Aurora9_RCMW_Aug12.indd 51
51
2/7/12 09:15:24
SILENCE
HITEC
AURORA
TWISTER
9
additional receivers. This is a
significant element of the cost
involved in adopting a particular
2.4 GHz manufacturer’s products.
Hitec have provided a wide range of
AFHSS receivers to cater for different
applications and have kept their
prices competitive. In addition Hitec
are offering further deals on receiver
‘triple-packs’, all of which will help
to get your fleet converted without
breaking the bank.
CONCLUSION
I began by asking who this radio
would
appeal to.
A representative sample of screens
The model tab can have more than the two pages shown here
If
we
go
by ease of use, then the
seen
during
a
model
programming
depending on set-up; selecting the monitor function shows
answer would be almost anyone
sequence; this one is for a simple
how servos respond to control inputs – very useful for checking
TwinJet EP flying wing – the channel
control assignments and mixing. In this picture the test mode is
who is ready for their first decent
screen confirms the final control
active and the transmitter is cycling all active channels – useful
computer radio. If we go by price, this
assignments
for testing control travel
combo is a super alternative to an
8-channel set or even some 6-channel sets. If we go by features,
it can be ‘all things to all men’. For existing Hitec AFHSS users,
configuration. The important thing is that they are all easily
if you’re trading up from an Optic 6 system, it’s a ‘no-brainer’ as
adjusted and set with the touch of a finger.
you can continue to use your existing receivers and accessories.
I think that Hitec have managed to hit that sweetspot regarding
CUSTOM TAB
price and features. If you are thinking of buying a good computer
If you have a few often-used screens that you call up frequently
radio, stop and ask yourself if you would prefer one that you
from either the system or model tabs, you can add them to the
can’t grow out of anytime soon. Now divide the cost by the
custom tab so that you can keep them all in one place and find
lifespan increase – looking good, eh? RCMW
them quickly.
SUPPORT AND ACCESSORIES
Hitec radios are imported and distributed by J. Perkins
Distribution Ltd. in the UK so you have the reassurance of
support from a large, established company.
Although they don’t sell direct to the public, J. Perkins
do have a fast and well-organised website showcasing the
extensive Hitec AFHSS range complete with links to the latest
documentation and downloads on Hitec’s own website. It’s well
worth a look and will even direct you to your local retailer.
If you have any Hitec AFHSS system, I would strongly
recommend that you get the inexpensive HPP22 PC interface to
make sure that you can keep it up to date. In addition the HPP22
allows the Aurora 9 to save and reload model data to and from a
PC – very useful.
Using the extended power handling abilities of the Optima and
Minima receivers you may wish to upgrade to HV servos capable
of taking 2S voltages. Hitec servos have a great reputation and
enthusiastic following and the analogue range has recently been
expanded to include the HV dual-ball-bearing HS-430BH at
around a tenner.
As previously mentioned, a neck strap is a sensible investment
and Hitec have a nice one in their range of accessories. There is
even a dedicated transmitter tray for the Aurora 9.
Hitec provide a trainer lead, which caters for all instruction
eventualities. The lead
between 6-cell systems uses
CONTACTS
3.5 mm stereo jacks (also
J PERKINS DISTRIBUTION
LTD.
available separately), with
WWW.JPERKINSDISTRIBUTION.
DIN adapters for both ends to
CO.UK
cater for 8-cell sets.
01622 854300
Finally, we come to
52 AUGUST 2012
Aurora9_RCMW_Aug12.indd 52
|
SPECIFICATION
INFORMATION
NAME:
MANUFACTURER:
DISTRIBUTOR:
PRICE UK WITH OPTIMA 9:
WITH OPTIMA 7:
RADIO TYPE:
NO OF CHANNELS:
PROGRAMMABLE:
TELEMETRY:
FAIL-SAFE:
SERVOS:
ACCESSORIES:
Aurora 9 Combo
Hitec RCD
J. Perkins Distribution Ltd.
£329.99
£314.99
2.4 GHz (AFHSS)
9
Yes
Yes
Yes
No
Yes
ACCESSORIES
HPP22:
NECK STRAP:
TRAINER LEAD (6-CELL):
TRAINER LEAD (FULL):
£16.99
£4.99
£3.99
£11.50
R/C FUNCTIONS
1-9, fully-assignable
DISLIKES
• Minor documentation niggles
LIKES
• Touch screen operation
• Programming flexibility
• Overall quality
• Wide range of accessories
• Pricing
WWW.RCMODELWORLD.COM
2/7/12 09:16:16