1
10
ELECTRONIC SETTINGS
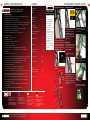
TRIGGER ADJUSTMENT
Trigger adjustment
The trigger system has four adjustable points:
back stop, front stop, magnetic return strength
control and activation point.
Magnet return strength
When adjusting the trigger it is advisable
to set both the front and back stop positions
before you proceed to set the return strength
or activation point.
Clockwise = makes magnet return strength
stronger.
Counter-clockwise = makes magnet return
strength weaker.
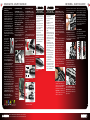
Back stop
Counter-clockwise = moves the point
at which the trigger stops - backwards,
towards the grip cheek
Clockwise = moves the point at which
the trigger stops - forwards, away from
the grip cheek.
Note: It is important not to over adjust this
portion of the trigger as it will negate the
position of the front stop set screw. For this
reason it is advisable that during the setup of
the trigger you should wind the magnetic return
strength adjuster screw counter-clockwise
several turns so that it does not interfere with
the adjustment of the front stop set screw.
Note: It is important not to over adjust the back
stop position set screw in this direction as it will
result in not enough travel for a trigger pull to
activate the micro switch.
Front stop
Counter-clockwise = moves the point from
which the trigger-pull starts forwards, away
from the grip cheek.
Using the Electronic Settings
Settings and information are available
through an easy to use menu tree, making
use of the full colour screen built into the
circuit board.
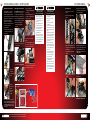
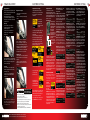
To enter the menus,
press the navigation
wheel inwards for a
second. You will see the
screen left.
Once in the menu, navigate using the scroll
wheel and select options by pushing the
wheel inwards.
If you need to change a setting a long way
from its current setting, hold navigation
wheel in the desired direction for a while
and the setting will increase or decrease
automatically, saving you from repeatedly
pushing the wheel up or down.
Clockwise = moves the point at which the
trigger will activate closer to the start of the
trigger pull.
Some options enter submenus.
To get out of the menus
scroll to the “Back”
option and select it.
To exit the menus and
return to the home screen,
scroll to the “Exit Menu”
option in the main menu.
ADHERE STRICTLY TO THESE
AND ALL OTHER SAFETY INSTRUCTIONS AND GUIDELINES
Note: It is important not to over adjust the front
stop position set screw in this direction as it will
result in not enough return travel for the trigger
to reset the micro switch.
lways follow instructions, warnings and guidelines given with any first stage
· Aregulator
you use with the Angel FLY Sb.
air/nitrogen gas only DO NOT USE CO2.
·· UOsenlycompressed
use a paintball regulator that has been designed for air or nitrogen gas.
exceed 850 psi (58bar) input pressure to the Angel FLY Sb.
·· TDakeo notsuitable
precautions when using sharp cutting instruments.
Macro Line hose must be cut back cleanly and square prior to attachment
· Torhere-attachment
to ensure secure fitment.
· SHOULD YOU BE UNSURE AT ANY STAGE YOU MUST SEEK EXPERT ADVICE.
READ ALL WARNINGS BEFORE ATTEMPTING ANY WORK ON YOUR ANGEL.
SHOULD YOU BE UNSURE AT ANY STAGE YOU MUST SEEK EXPERT ADVICE.
Turning the Marker off
To turn the marker off, hold the
navigation wheel inwards to enter the
menu, and then push again to select the
first item in the Main Menu, “Power Off.”
The marker will shut down when this
function is selected.
Tournament Lock
The marker features
a tournament lock
function which allows
certain settings, which
could affect how
the marker fires,
to be disabled.
This ensures that once
a marker has been set
up within the rules of
a tournament, it cannot
be modified
to increase velocity,
rate of fire, or engage
enhanced fire modes,
without the use
of tools.
Mode
locked
Activation point
Counter-clockwise = moves the point at which
the trigger will activate closer to the end of the
trigger pull.
Clockwise = moves the point from which
the trigger-pull starts backwards, towards
the grip cheek.
ELECTRONIC SETTINGS
When the tournament lock is engaged, some
functions will appear in grey with a padlock
symbol, and cannot be selected, although
their current settings can be viewed.
To make changes to these settings, turn off
the tournament lock (see next column)
To change the setting of the tournament
lock, first remove the right-hand side
grip panel to expose the circuit board.
With the board switched on, press the
small button on the board below the
navigation wheel. A “Tourney Lock”
menu will appear on the screen, which
allows you to turn the lock on or off.
Choose and confirm your selection with
the navigation wheel.
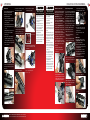
FUNCTION DESCRIPTIONS
Note: depending on the software version
running on your marker, some options
may be different. See the documentation
accompanying the software release for
further information.
Power Off:
switches off the
marker, to prevent
unwanted firing
and stop the
battery from being drained.
Fire Mode: enters the menu containing
settings affecting how the marker fires.
This includes fire preset (displayed in the
menu item when highlighted) as well
as maximum rate of fire and custom
ramping parameters. This menu groups
together the settings which may need
to be changed for particular field or
tournament rules.
Modes available: Custom, Auto,
Demo, Semi (Default Mode),
Millennium, PSP
Settings: enters the menu containing
basic marker settings, including Dwell
and Debounce parameters, and other
preferences. These are settings which
should not need changing once the
marker is correctly set up,
Info: provides some information about
the software and hardware versions,
of the electronics, and some status
information which can be useful when
diagnosing problems.
Exit Menu: leaves the menu system
and returns to the home screen. Each
submenu also has a “Back” option
which returns to the previous menu.
Preset: sets the fire mode used.
Note: that selecting a preset does not
affect other settings such as Max ROF, so
you must also set Max ROF correctly to
ensure that the marker is tournament legal.
Max ROF: sets the maximum rate of
fire of the marker. When the ROF Cap
is in effect (or the eyes are not in use),
the marker will never fire faster than
this rate.
Range:8-25 balls per second (BPS)
Adjustable in increments of 0.1 m/s
Default setting: 12m/s
ROF Cap: sets whether the rate of fire
is capped according to the Max ROF
setting. If this is off, then the marker will
fire as fast as the loader can feed it, as
long as the eyes are in use. When the
eyes are disabled, the rate of fire will
always be limited by the Eye Off ROF
setting (or Max ROF, if set lower).
Default is ON
Start Delay: sets the number of shots
which must be fired in Semi Automatic
mode before ramping may start, when
using the Ramp preset (other modes
such as PSP and Millennium are not
affected by these settings).
Range
1-6 shots
Adjustable in increments of 1 shot
Default setting
3 shots
Kick In: sets the minimum rate of fire
which must be achieved for ramping
to start, when using the Ramp preset
(other modes such as PSP and
Millennium are not affected by these
settings).
Range
1-12 BPS
Adjustable in increments of 1 BPS
Default setting
5 BPS
Drop Out: sets the minimum rate of fire
which must be maintained for ramping
to continue, when using the Ramp
preset (other modes such as PSP and
Millennium are not affected by these
settings).
Range
1-12 BPS
Adjustable in increments of 1 BPS
Default setting
5 BPS
Ramp Reset: sets the rate of fire
below which ramping will cease and
further safety shots will be required to
restart ramping, when using the Ramp
preset (other modes such as PSP and
Millennium are not affected by these
settings).
Range
1-12 BPS
Adjustable in increments of 1 BPS
Default setting
1 BPS
Max Burst: sets the maximum number
of shots discharged for each trigger pull
when ramping is active, when using
the Ramp preset (other modes such as
PSP and Millennium are not affected by
these settings).
Range
2-6 shots per trigger pull
Adjustable in increments of 1 shot
Default setting
3 shots
Dwell: sets the length of time the
solenoid valve is held open to actuate
the firing cycle. If set too low, shot
velocity will be low or inconsistent, or
the marker may not cycle fully; if set too
high then air efficiency will suffer.
Range
0.5m/s to 25 m/s
Adjustable in increments of 0.1 m/s
Default setting
8 m/s
Debounce: sets the length of time
that must pass after the trigger is
released before another trigger pull
may be registered. Increase this value
to eliminate unwanted “trigger bounce”
or switch noise which may cause
unwanted additional shots to be fired.
Range
0.5m/s to 25 m/s
Adjustable in increments of 0.1 m/s
Default setting
5 m/s
Eye Delay: sets the amount of time that
a ball must block the eyes before the
marker is allowed to fire. Increase this
setting when using a gravity-fed loader
and paint breakage is a problem.
Range
0.5m/s to 25 m/s
Adjustable in increments of 0.1 m/s
Default setting
3 m/s
Eye Sensitivity: sets the sensitivity
of the eye sensor (higher means more
sensitive). Adjust this if the eyes are
dirty and not reliably detecting balls,
or if ambient light is interfering with the
operation of the eyes.
Range 1-20
Adjustable in increments of 1
Default setting
10
Bolt Delay: sets the length of time that
the bolt is ignored for as it travels past
the eyes to help clearly distinguish
between the bolt and a ball bouncing
in the breech.
Range
0.5m/s to 25 m/s
Adjustable in increments of 0.1 m/s
Default setting
8 m/s
Clearing Shot: sets whether holding
the trigger for a second will cause
the marker to fire, even if a ball is not
detected. This is useful to “kick-start”
sound-activated loaders. If a ball is
detected and fired before the one
second delay, no additional clearing
shot will be fired.
Default is ON.
FSDO Time: allows an option to
increase the dwell on the first shot
after an idle period. This can be useful
particularly in very cold conditions, or
if the marker’s internals are in need
of servicing, and the first shot after an
idle period is at a lower velocity (“First
Shot Drop Off”). If reduced to zero, this
option is disabled; otherwise the setting
determines how long must pass without
a shot before the next shot is corrected.
NOTE: FSDO correction may increase
the velocity of the first shot over the limits
set by the field or tournament, so use this
option with care, and only if necessary.
Range
0 to 300 secs
Adjustable in increments of 10 secs
Default setting
disabled
FSDO Dwell: sets how much time is
added to the dwell of the first shot after
the idle period above. If the FSDO Time
is set to “Disabled”, this option will have
no effect. NOTE: FSDO correction may
increase the velocity of the first shot over
the limits set by the field or tournament,
so use this option with care, and only if
necessary.
Range
0.1m/s to 5m/s
Adjustable in increments of 0.1 m/s
Default setting
1 m/s
READ ALL WARNINGS BEFORE ATTEMPTING ANY WORK ON YOUR ANGEL.
SHOULD YOU BE UNSURE AT ANY STAGE YOU MUST SEEK EXPERT ADVICE.
11