1
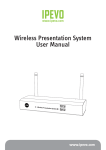
Wireless Presentation System
WGA-310 User’s Manual
(Model Name: WPS-Interactive)
Transmissor WPS AVLIFE (SBWPS2)
Versão 2015.04
Version: 2.0
Date: Jan. 15, 2013
Table of Contents
Table of Contents
2
1.
Overview ............................................................................................................... 4
2.
Quick Start ............................................................................................................ 5
3.
Windows Client Utility...................................................................................... 8
3.1
Starting Program ................................................................................................ 8
3.2
Login ....................................................................................................................... 9
3.3
Main User Interface ........................................................................................... 9
3.4
Screen Projection .............................................................................................10
3.5
Audio Projection ..............................................................................................10
3.6
Quick Connect...................................................................................................11
3.7
Menu Description ............................................................................................11
3.7.1
Show Receiver Information ..........................................................................12
3.7.2
Web Admin.........................................................................................................12
3.7.3
Search Receiver Device ..................................................................................13
3.7.4
Select Projection Desktop ...........................................................................13
3.7.5
Projection Quality ............................................................................................14
3.7.6
Projection Mode ...............................................................................................14
3.7.7
Projection Aspect Ratio .................................................................................15
3.7.8
Advanced Screen Capture ............................................................................15
3.7.9
Send Audio to Display ....................................................................................16
3.7.10
Auto Power Manager ......................................................................................17
3.7.11
Auto WiFi Connect ...........................................................................................17
3.7.12
Make Plug&Show Token ................................................................................18
3.7.13
Copy Application to desktop .......................................................................19
3.7.14
About....................................................................................................................19
3.7.15
Exit .........................................................................................................................20
4.
Mac Client Utility ..............................................................................................20
4.1
Launch Application .........................................................................................20
4.2
Main User Interface .........................................................................................22
4.3
Screen Projection .............................................................................................22
Table of Contents
4.4
MAC Audio Projection ....................................................................................23
5.
Web Management ...........................................................................................23
5.1
Home Page .........................................................................................................23
5.2
Download Software ........................................................................................24
5.3
Conference Control .........................................................................................25
5.4
Login Web Admin ............................................................................................26
5.4.1
System Status ....................................................................................................26
5.4.2
Device Setup......................................................................................................27
5.4.3
Network Setup ..................................................................................................28
5.4.4
OSD Setup ..........................................................................................................30
5.4.5
Change Passwords...........................................................................................31
5.4.6
Reset to Default ................................................................................................31
5.4.7
Firmware Upgrade ...........................................................................................32
5.4.8
Reboot System ..................................................................................................33
5.4.9
Logout..................................................................................................................33
6.
Appendix ............................................................................................................34
Wall-mount Instructions................................................................................34
3
WPS
by AVLIFE
UserManual
Manual
WGA-310
User
1. Overview
WPS is a must-have device for your meeting room! It turns your existing “wired”
projector into a “high-end wireless” projector. With the revolutionary Plug-andShow wireless projection features, WPS makes every of your presentation and
meeting efficient and successful.
• HighPerformanceWirelessProjection&AudioProjection
With the revolutionary high performance wireless projection with audio, you can easily
share the multimedia on the big monitor with friends without cable hassle.
• Plug&Show
With the accompanied Plug & Show USB Token, wireless presentation becomes easy! Just
link your PC/Laptop to WPS (through WLAN or Ethernet), plug the token into a USB port,
and in seconds, your screen will be wireless projected to the connected projector!
• 4-to-1SplitScreenProjection
With this 4-to-1 split screen feature, up to four PCs can be projected out to one projector
screen at the same time. Thus you can easily do side-by-side comparison from four PCs /
PDAs to increase meeting productivity!
• Macintosh(Mac)wirelessProjection
WPS supports Mac client connected and projected wirelessly. By launching the Mac client
software that stored in accompanied USB token, WPS provide the same experience to
Mac user to utilize the wireless presentation feature.
• Smartphonewirelessprojection
WPS supports MobiShow function for iOS/Android/Blackberry/Windows Mobile 5/6
system. By launching MobiShow utility, you can play photos and PtG files stored in your
mobile phone for presentation.
• WiFi-Docprojection
WPS supports WiFi-Doc function for iOS/Android, You can download the WiFi-Doc app
from Google/Play, App store, and easy to present the .doc .ppt .pdf .jpg file that stored in
your device.
• SNMPManager
By enabling SNMP (Simple Network Management Protocol Version 2c) Manager, you can
manage devices for each or batch. No need to login device’s Web page each by each for
changing device settings anymore.
• ChangeStandbyScreen
You can use JPG Files to change the Splash Screen. Design the image with message you
would like to present, upload it through web control page, and you could have customized
starting page.
• APClientMode
You can enable the AP-Client Mode function to let WPS join the existing Access Point
through Wi-Fi. This feature provides the flexibility of wireless network deployment in
enterprise environment.
4
→Back
WPS
by AVLIFE
UserManual
Manual
WGA-310
User
•Features
▪ Support Windows Win8, 7, Vista, XP
▪ Support Macintosh(Mac) version 10.5 and above.
▪ Supportive for iOS/Android/Blackberry/Windows Mobile 5/6 handheld devices
▪ Plug and Show! No installation required … just plug in the accompanied token to
a USB port, and hassle free presentation can be started in seconds.
▪ 4-to-1 split screen projection! Turn one projector into four, increase meeting
productivity right away.
▪ Smartphone wireless projection! PC-less stylish presentation becomes possible!
▪ Conference control! Allows moderators to streamline grand meetings.
▪ Provide session security login, wireless WEP/WPA key and Gatekeeper function
to protect presentation contents and keep good security to office networks.
▪ Support High Performance screen projection with audio.
▪ Changeable Splash Screen image!
▪ SNMP Manager! To manage the devices easily
▪ AP-Client Mode! Deploy wireless network in enterprise environment easily
▪ WiFi-Doc easy present Office files from your device
2. QuickStart
1) Connect projector VGA/HDMI cable to WPS box VGA/HDMI connector and turn
on projector power.
5
→Back
WPS
by AVLIFE
UserManual
Manual
WGA-310
User
2) Turn on WPS box.
• When Projector shows the default menu on the screen as below, it indicates
the WPS box is ready now.
3) Make sure your PC WLAN is enabled already, and connect your PC with WPS
box.
4) Open your browser and enter the IP address to access the WPS web home
page.
• The default IP address of WPS is 192.168.100.10 or refers to the IP address
shown on the left corner of projector screen.
6
→Back
WPS
by AVLIFE
UserManual
Manual
WGA-310
User
5) Download the client software. Please select the “ Win8 / 7 / Windows Vista
/ XP ” or ”MacBook 10.5 and above” and execute the installation program.
After installing the program, you will see the WPS shortcut on the PC screen.
6) Make sure your personal firewall allows WPS software to pass through.
7) Select device that your want to projection
7
→Back
WPS
by AVLIFE
UserManual
Manual
WGA-310
User
8) Enter the LOGINCODE and You can see the login code on the projector screen
9) Click the “Play” button to start projection!
3. WindowsClientUtility
3.1StartingProgram
After you download WPS Windows program via web page successfully, then follow
below steps to start.
1) Click WPS icon to execute the program.
2) Program start to search for WPS box automatically,
3) If WPS box founded then “Login Code” dialog box will be pop up on the PC screen.
• SearchingforWPSbox
8
→Back
WPS
by AVLIFE
UserManual
Manual
WGA-310
User
• WPSboxisfoundedandenterlogincodetostart.
3.2Login
1) After “Login Code” dialog box shown, enter login code to start presentation.
2) You can see the login code shown on the projector screen.
3.3MainUserInterface
Menu Area
Control Area for Screen Projection Feature
Status Indicator
9
→Back
WPS
by AVLIFE
UserManual
Manual
WGA-310
User
3.4ScreenProjection
Click the “Play” button for full or split screen, you can project the main screen on
to the display immediately, click the “Pause” button, you can freeze you projection
screen, click the “Stop” button to stop projecting your screen, by clicking speedy
mode button, the projection will enter speedy mode for faster projection.
Button
Description
Full Screen projection
Project to Split #1
Project to Split #2
Project to Split #3
Project to Split #4
Stop projecting
Pause projecting
3.5AudioProjection
First, before starting the Audio Projection, please install the “VAC.exe” (Virtual Audio
Control) on your computer which is Windows XP. Please find the software in USB
Token. (Windows Vista and Win7/8 don’t need to install VAC)
Second, it applies only under “Normal” option of the “Projection Quality”.
Make sure these two steps, and you can hear the audio from device when projecting.
10
→Back
WPS
by AVLIFE
UserManual
Manual
WGA-310
User
3.6QuickConnect
The WPS client can save the information of last connection, including IP address and
AP SSID, once you execute WPS utility next time, it displayed directly to let user can
connect to WPS quickly, also, you can click “Rescan” to research all available device to
connect.
3.7MenuDescription
Login Code
Menu
Exit
Minimize
11
→Back
WPS
by AVLIFE
UserManual
Manual
WGA-310
User
3.7.1ShowReceiverInformation
Click “Show Receiver Information”, it will display the Receiver Information, such as
WiFi Name, IP Address and code on the upper of desktop, it will close automatically
after 30 seconds.
3.7.2WebAdmin
Click “Web Admin”, it will open the browser and connect to the receiver web admin
page automatically.
(You can find the details of web admin page from another chapter.)
12
→Back
WPS
by AVLIFE
UserManual
Manual
WGA-310
User
3.7.3SearchReceiverDevice
Click “Search Receiver Device”, it will disconnect from current receiver and search the
receiver again.
3.7.4SelectProjectionDesktop(WinXP/Vista/7/8)
Click the “Select Projection Source” then you can select to project the main screen of
desktop or the virtual extended screen.
13
Note: For Windows XP system, you need to install “VDD.exe” driver first, you can find
it from USB token.
For Windows 7/ Vista Starter edition, it can’t support extended screen.
→Back
WPS
by AVLIFE
UserManual
Manual
WGA-310
User
3.7.5ProjectionQuality
Click the “Projection Quality”, choose “Normal” for faster projection speed with lower
screen image quality, and “Best” for clear screen image quality but slower projection
speed.
3.7.6ProjectionMode
1) The Projection Mode provides the option to support “Presentation Mode” and
“Video Mode”.
2) For the “Video mode”, it will trigger the longer latency but much smooth
performance when you are watching video, meanwhile it will change PC resolution
to 1024x768 and gray some option, and change back to Presentation mode when
it detect you are moving the mouse cursor.
3) For the “Presentation Mode”, it will always keep the shortest latency to provide
the most responsive operation performance.
14
→Back
WPS
by AVLIFE
UserManual
Manual
WGA-310
User
3.7.7ProjectionAspectRatio
It can provide the projection screen ratio setting of “Keep Aspect Ratio” and “Fit Full
Screen”.
3.7.8AdvancedScreenCapture
Click the “Advanced Screen Capture”, you will be able to see tip windows
and other layered windows (include the main UI) on the connected display.
However, the mouse cursor may blink from time to time when you are projecting your
PC screen!
15
→Back
WPS
by AVLIFE
UserManual
Manual
WGA-310
User
• Disable “Advanced Screen Capture”.
•
Tip windows is not
shown in projector
• Enable “Advanced Screen Capture”.
Tip windows is shown
in projector
3.7.9SendAudiotoDisplay
Click “Send Audio to Display” to start the audio projection feature. It will mute your
local speaker during the projection and restore it when it closes the application.
Note: For Windows XP system, you have to install the Audio driver. (VAC.exe) You can
find the driver from USB token.
16
→Back
WPS
by AVLIFE
UserManual
Manual
WGA-310
User
3.7.10AutoPowerManager
To make the highest projection performance, application will turn the PC’s windows
power scheme from current settings to “highest performance”, however, you can click
the “Auto Power Manage” to enable or disable this function and restore you power
scheme immediately.
3.7.11AutoWiFiConnect
Click “Auto WiFi Connect” to enable the WiFi connect feature through WPS
application.
17
→Back
WPS
by AVLIFE
UserManual
Manual
WGA-310
User
3.7.12MakePlug&ShowToken
Click “Make Plug&Show Token” to make a USB WPS Token, you can insert a USB
thumb drive and follows the wizard to make the Token.
18
→Back
WPS
by AVLIFE
UserManual
Manual
WGA-310
User
3.7.13CopyApplicationtodesktop
Click the “Copy Application to desktop”, it will copy the application to your desktop
immediately even you don’t have the system privilege
3.7.14About
Click “About” to show system information. It includes product model name, Client
version, IP address and other information.
19
→Back
WPS
by AVLIFE
UserManual
Manual
WGA-310
User
3.7.15Exit
Click “Exit” to exit this application. It will stop current playing status and close the
application immediate.
4. MacClientUtility
4.1LaunchApplication
1) Enable your WiFi and connect to WPS device.
2) Execute WPS client software for Mac.
20
→Back
WPS
by AVLIFE
UserManual
Manual
WGA-310
User
3) Launch WPS software and enter the login code.
4) Start Projection.
21
→Back
WPS
by AVLIFE
UserManual
Manual
WGA-310
User
4.2MainUserInterface
Menu Area
Control Area for Screen
Projection Feature
Status Indicator
4.3ScreenProjection
Click the “Play” button for full or split screen, you can project the main screen on
to the display immediately, click the “Pause” button, you can freeze you projection
screen, and click the “Stop” button to stop projecting your screen.
Button
Description
Full Screen projection
Project to Split #1
Project to Split #2
Project to Split #3
Project to Split #4
Stop projecting
Pause projecting
22
→Back
WPS
by AVLIFE
UserManual
Manual
WGA-310
User
4.4MACAudioProjection
First, before starting Audio Projection, please install the “Soundflower.mpkg” (MAC
system extension for audio using) on your computer. Please find the software in USB
Token.
Second, click menu to open function list and enable Audio Projection, then you can
hear the audio from device when projecting.
5. WebManagement
5.1HomePage
1) Make sure your PC connect to WPS box successfully.
2) Open your browser, it will enter WPS home page automatically.
3) If not, enter your IP address on the browser, you can see the IP on the projector
screen.
4) The default IP is 192.168.100.10
23
→Back
WPS
by AVLIFE
UserManual
Manual
WGA-310
User
5.2DownloadSoftware
1) Select “Download software” function.
2) Please select the “Win 8 / 7 / Windows Vista / XP ” or “Mac Utility” and execute
the installation program.
♦ F oriOS/Androidsmartphoneuser,pleasedownloadmobishowclientfrom
Appstore/AndroidMarket.
3) Follow Installation Wizard instructions to proceed till the installation process
complete.
4) If pop up “WindowsSecurityAlert” because Windows firewall block this program.
You just press “Unblock” button to continue installation.
5) Once installation complete, a utility shortcut come out on the screen.
24
→Back
WPS
by AVLIFE
UserManual
Manual
WGA-310
User
5.3ConferenceControl
1) This function allows you to host a meeting smoothly without projector cable
swapping and each participant can show their presentation easily.
2) Select “Conference Control” function.
3) Enter password, the default value is “moderator”, and then press [Login].
4) After login, you can see a User List on the screen which indicates all of users
connected to WPS box.
5) There are three columns, “ComputerName”, “PlayControl” and “IPAddress”.
6) Play Control. There are six buttons, including Play(Full)
and Stop .
Split #2 ,Play Split #3 , Play Split #4
, Play Split #1
, Play
7) User List
25
→Back
WPS
by AVLIFE
UserManual
Manual
WGA-310
User
5.4LoginWebAdmin
1) Click [Admin] and then enter password to login web page.
2) The password default value is “admin”.
5.4.1SystemStatus
26
Click [SystemStatus], shows current system status.
ModelName: Product model name
Versions:
1.Firmware version no.: Product firmware version number.
NetworkStatus:
1.IPaddress:IP address of WPS device.
2.SubnetMask:subnet mask
3.DefaultGateway:default gateway
4.WirelessMACaddress:wireless MAC address
5.WireMACaddress:wire MAC address
ConnectionStatus:
1.Projectingstatus: which is “Waiting for projecting” or “Projecting”
2.TotalUsers: It shows how many users login into WPS box.
→Back
WPS
by AVLIFE
UserManual
Manual
WGA-310
User
5.4.2DeviceSetup
Click [ProjectionSetup]button
♦ <Resolution>:
VGA: SVGA(800*600), XGA(1024*768), WXGA (1280*768),
WXGA(1280x800), WXGA+(1440*900). The default value is XGA.
HDMI: 720p(1280*720)
♦ <Code>: You can select “Disable”, “Random”, or “Use the following code” to set
a specified 4-characters Number.
♦ <Apply>: Confirmation and Save modifications
♦ <Cancel>: Cancel all the modifications
27
→Back
WPS
by AVLIFE
UserManual
Manual
WGA-310
User
5.4.3NetworkSetup
There are many kinds of operating configurations as below.
28
→Back
WPS
by AVLIFE
UserManual
Manual
WGA-310
User
29
< Auto-Configuration Network Setup>
The default setting of the WPS box is DHCP client. When the WPS box is connected
to a LAN that already has a DHCP server present, the WPS box takes an IP address
assigned to it by the server. When the WPS box is connected to a LAN that does
not have a DHCP server, the WPS box becomes the DHCP server in the network.
<IPSetup>
♦ You can select “obtain IP address automatically” or “Use the following IP
address”
♦ IP Address: The default value is 192.168.100.10.
♦ Subnet Mask: The default value is 255.255.255.0
♦ Default Gateway: The default value is 192.168.100.10
♦ DNS Server: The default value is 192.168.100.10
<DHCPServerSetup>
♦ You can select “auto(Enable/Disable DHCP Server)” or “Disable”)
♦ Start IP: The start IP address of DHCP Server.
♦ End IP: The end IP address of DHCP Server
♦ Subnet Mask: The default value is 255.255.255.0
♦ Default Gateway: The default value is 192.168.100.10
♦ DNS Server: The default value is 192.168.100.10
<WirelessSetup>
♦ Wireless LAN: The default value is “Enable”.
♦ Embedded AP SSID:SSID string ,max. Length is 32 bytes.
♦ ConnecttoExistingAP: This is “AP client” mode feature. By this feature you
can let you WPS device to join others Access Point via wireless.
♦ First, enter the existing AP SSID and required security key in “ExistingAPSSID”
and “Key”, then reboot your system. After these steps, WPS will connect to this
AP by wireless automatically.
♦ Note: The default value of AP client mode is “Disable”, also, LAN function will
be disabled during AP client mode.
♦ Region: default value is “Worldwide”.
♦ SSID Broadcast: The default value is “Enable”
♦ Channel: to set fixed channel or Auto. The “Auto” means after power on WPS,
it will scan all of wireless channel and select clear one channel automatically.
♦ Encryption: you can select “Disable” or one of WEP/WPA/WPA2 64bit or 128bit
in ASCII or HEX string.
♦ Key: If Encryption is enabled, you have to set key value according to the
encryption mode you selected.
<Gatekeeper>
Gatekeeper is designed for ensuring the enterprise network security within WPS box
♦ All Block can block Guest Users(through wireless) to access all office
network(LAN),
→Back
WPS
by AVLIFE
UserManual
Manual
WGA-310
User
♦ All Allow can pass Guest Users(through wireless) to access all office network
♦ Internet Only can block Guest Users (through wireless) from office network
(LAN) but still reserve internet connection capability.
<SNMP>: You can select “Enable” or “Disable” to control SNMP function,
<Apply>: press button to select this mode.
<Cancel>: press button to abort action.
5.4.4OSDSetup
Click [OSD Setup] button, to change OSD standby image or set splash screen
information.
Change Logo Image
♦ <LogoImage>: file name of OSD, default setting is “default”.
♦ <ImageFileUpload>: Upload the customized OSD standby image. (JPG file,
maximum file size is 510K. Recommended image resolution: 1024*768))
ScreenInformation
♦ <Enable>: Default value, Show server IP, Resolution, Firmware version, SSID,
channel and security on the screen.
♦ <Disable>: User can see quick guide on splash screen only, server IP, SSID, login
code….won’t be displayed.
♦ <SomeInformation>: Show server IP and SSID on the screen only.
30
→Back
WPS
by AVLIFE
UserManual
Manual
WGA-310
User
5.4.5ChangePasswords
Click [ChangePassword] button, to change password value.
The length of password is up to 8 characters.
♦ <EnterNewPassword>: enter new password you want to change for each
category.
♦ <ConfirmNewPassword>: double confirm new password.
♦ <Apply>: Confirmation and Save modifications.
5.4.6ResettoDefault
Click [ResettoDefault]button to restore factory default settings.
<Apply>: Confirmation and action.
31
→Back
WPS
by AVLIFE
UserManual
Manual
WGA-310
User
5.4.7FirmwareUpgrade
Click [SystemConfiguration] button to save your configuration of this device, and you
could import back when you finished the Firmware Upgraded
Click [FirmwareUpgrade]button to upgrade firmware.
1. Firstly, you have to get latest firmware image file from your vendor.
2. Click <Browse> to specify file name you want to upgrade.
3. Click <Upgrade> to start.
4. A warning message shown and count down counter on the screen.
5. After a few minutes, a complete message shown on the screen.
6. Restart WPS box to take effect.
32
Warning: Don’t power off WPS while firmware upgrade in progress, otherwise will cause your
Box doesn’t work and have to return device to your vendor for fixing.
→Back
WPS
by AVLIFE
UserManual
Manual
WGA-310
User
5.4.8RebootSystem
Click [RebootSystem]button, to restart system
♦ <Reboot>: reboot system automatically.
5.4.9Logout
33
→Back
WPS
by AVLIFE
UserManual
Manual
WGA-310
User
6. Appendix
▪ Wall-mount Instructions
Mounting Screw X 2
Mounting
Bracket
Bracket Fix Screw X 4
Wall
34
→Back