Transcript
Air Compressor/Tank Set Up Tips
Before assembling the system, decide w here you are going to locate the air tank and how it w ill be mounted. The tank should be secured to a
structural component of the car and should never be used w hen not properly secured. The tank can be mounted at any angle EXCEPT
vertically. The input/output port cannot be at the bottom of the tank.
Some air tanks w ill have tw o ports, some w ill have four and some w ill have six. Packages that include the 2 and 4-port tanks w ill also include
a t-manifold that w ill give you the extra outlets you need.
Always use Teflon thread tape when attaching air fittings!
The Com pressor
Install the compressor according to the instructions in the user’s manual. The manufacturer inspects every compressor before it leaves the
factory and also inspects every compressor sent back for w arranty service. If the compressor w as installed incorrectly, the manufacturer
w ill not service it under w arranty. They're very particular about this, so be sure to follow the instructions in detail. The air outlet from the
compressor should be threaded into one of the ports on the tank, preferably on the opposite side of the tank from the pressure sw itch. If you
are installing the compressor in a location that can get dirty or w et, be sure to relocate the air intake to a clean location.
The Pressure Sw itch
The pressure sw itch turns the compressor on and off automatically, based on the air pressure in the tank.
On 2 and 4-port tanks, the pressure sw itch is installed into the t-manifold, in the threaded port that is smaller
than the others. The pressure switch should never be installed at the bottom of an air tank where
condensation could accumulate and interfere with the operation of the switch.
There are tw o w ires on the pressure sw itch. One of them (it doesn't matter w hich one) gets connected to the red pow er w ire on the
compressor. The other w ire from the pressure sw itch should be connected to a sw itched +12v pow er source in your car.
Pressure Safety Valve
The safety valve w ill prevent excess air pressure from building up in the tank. In 2 and 4-port systems, install it an open
port on the manifold. On 6-port systems install it directly on the tank. The safety valve should never be installed at
the bottom of an air tank where condensation could accumulate. This will interfere with the operation of
the valve.
Connection to the Air Horn
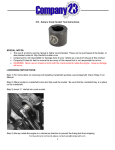
The supplied air hose connects to the compressor and air horn w ith a compression fitting. To attach the hose, remove
the threaded collar from the compression fitting and slide the collar onto the hose. Push the end of the hose onto
receptacle on the compression fitting. Once the hose is pushed all the w ay to the base of the fitting, thread the collar
back on and tighten w ith a w rench. The compression fitting w ith the air hose should be attached to the T-manifold (2
and 4-port systems).
KLEINN HORN
CAR HORN
