1
USER GUIDE
CueStation 4 Command Reference
Matrix3 Audio Show Control System
Edition: 2007-09-05 for CueStation 4.6.0
LCS SERIES
Meyer Sound Laboratories Inc
2832 San Pablo Avenue
Berkeley, CA 94702
www.meyersound.com
T: +1 510 486.1166
F: +1 510 486.8356
© 2007
Meyer Sound Laboratories Inc.
© 2007 Meyer Sound. All rights reserved.
CueStation 4 Command Reference
The contents of this manual are furnished for informational purposes only, are subject to change without notice, and
should not be construed as a commitment by Meyer Sound Laboratories Inc. Meyer Sound assumes no responsibility or liability for any errors or inaccuracies that may appear in this manual. Except as permitted by applicable
copyright law, no part of this publication may be reproduced, stored in a retrieval system, or transmitted, in any form
or by any means, electronic, mechanical, recording or otherwise, without prior written permission from Meyer Sound.
CueStation, CueConsole, LCS Series, Matrix3, Wild Tracks, VRAS and all alphanumeric product names are trademarks
of Meyer Sound. Meyer Sound and SpaceMap are registered trademarks of Meyer Sound Laboratories Inc. (Reg.
U.S. Pat. & TM. Off.). All third-party trademarks mentioned herein are the property of their respective trademark
holders.
Printed in the U.S.A.
Part Number: 05.164.073.01 rev.A
Table of Contents
Command Reference
7
All Windows
System Level Window
Inputs Window
Input, Output, and Aux Processing Windows
Bus Masters Window
Matrix Window
Output Masters Window
Aux Masters Window
Virtual Groups Window
Subcue Library Window
Cue Library Window
Cue List Window
Capture Window
SpaceMap® Window
Transport Window
Frame Control Window
System Status Window
Chat Window
Log Window
Input and Output Meters Window
Aux Meters Window
Wild Tracks™ Window
VRAS™ Window
Support Files Window
Script Execution Window
Key Mappings Window
Project Notes Window
Mixer Configuration Window
Access Policies Window
Externals Reference
21
ALC
Client Control
CobraNet
CommSync
CueConsole2™
CueMixer™ RIF-108
EtherTracks
External Control
Flash Memory
Hardware Control
Hardware Status
MIDI
MMC
MSC
5
CueStation 4 Command Reference
Open Sound Control
Python Control
SpaceMap
Voice Detect
Wild Tracks
Control Point Indices
53
Control Point Value Types
Input Control Points
Bus and Matrix Control Points
Output and Aux Control Points
VGroup Control Points
Metering Control Points
Automation Control Points
SpaceMap Control Points
Wild Tracks Control Points
VRAS Control Points
Frame Control Points
Miscellaneous Control Points
Wild Tracks Reference
67
Cables and Connectors
Telnet
CSDO
71
Setup
Commands
Python
75
Learning Python
Integrating Python Scripts
Python API
Open Sound Control
Lemur
OSC Address Patterns
OCS Reply Packets
Example OSC Packets
Example OSC Reply Packets
6
79
Command Reference
All Windows
System Level Window
Inputs Window
Input, Output, and Aux Processing Windows
Bus Masters Window
Matrix Window
Output Masters Window
Aux Masters Window
Virtual Groups Window
Subcue Library Window
Cue Library Window
Cue List Window
Capture Window
SpaceMap® Window
Transport Window
Frame Control Window
System Status Window
Chat Window
Log Window
Input and Output Meters Window
Aux Meters Window
Wild Tracks™ Window
VRAS™ Window
Support Files Window
Script Execution Window
Key Mappings Window
Project Notes Window
Mixer Configuration Window
Access Policies Window
7
10
10
10
11
11
11
12
12
12
13
13
14
14
15
15
15
15
16
16
16
16
17
17
18
18
18
18
19
CueStation™ is a complex application with many available commands. This section provides a command breakdown
according to the CueStation window and menu under which they appear.
All Windows
All CueStation windows share the following set of menus, shortcuts, mouse commands, and status information:
Network Menu
Select Server > [Frame name] [Frame IP]
Select Server > This Window Only > [Frame name] [Frame IP]
Select Server > Specify Servers...
Disconnect
Reconnect All
Use UDP Metering
Projects Menu
Clear Project
Open Default Project...
7
All Windows
Open Project... [Cmd+O]
Merge Project...
Backup Project [Cmd+B]
Save Project... [Cmd+S]
Save Project As... [Cmd+Shift+S]
Save Project As Default
Open Project From Flash
Save Project To Flash
Set Project Title...
Generate Project Report...
Save ELC Troubleshooting Info
Edit Menu
Undo [Cmd+Z]
Redo [Cmd+Y]
Clear Undo History
New [Cmd+N]
Duplicate [Cmd+D]
Delete [Cmd+Del]
Cut [Cmd+X]
Copy [Cmd+C]
Paste [Cmd+V]
Select All [Cmd+A]
Select... [Cmd+F]
Lock [Cmd+Shift+>]
Unlock [Cmd+Shift+<]
Enable [Cmd+,]
Disable [Cmd+.]
Individualize Subcues [Cmd+Shift+I]
Optimize Subcues [Cmd+Shift+O]
Batch Modify Control Point Entries... [Cmd+Shift+C]
Mixer Menu
Pause Fades [Cmd+P]
Resume Fades [Cmd+Shift+P]
Finish Fades [Cmd+;]
Cancel Fades [Cmd+/]
Cancel Trajectories [Cmd+\]
Stop All Cue List Players [Cmd+Shift+/]
Follow Channel Selects
Time Code Processing Enabled
Track from Top [Cmd+Option+Shift+T]
Silence! [Cmd+Option+Shift+S]
8
All Windows
Master Stop [Cmd+Option+Shift+M]
Layout Menu
ToolTips Enabled
Open Layout... [Cmd+-]
Open More Layout... [Cmd+Shift+-]
Save Layout...
Save Layout As...
Save Layout As Default
Add Custom Utility Button... [Cmd+']
Launch Windows in Separate Processes
Use Dark Color Scheme
Windows Menu
Clone Window
Rename Window...
Close Window [Cmd+W]
Reset Window [Cmd+Shift+W]
Minimize Window [Cmd+M]
Zoom Window [Cmd+Shift+M]
Full Screen Mode [Cmd+Shift+F]
System Level [Cmd+1]
Inputs [Cmd+2]
Input Processing [Cmd+3]
Bus Masters [Cmd+4]
Matrix [Cmd+5]
Output Masters [Cmd+6]
Output Processing [Cmd+7]
Aux Masters [Cmd+8]
Aux Processing [Cmd+9]
Virtual Groups [Cmd+0]
Subcue Library [Option+1]
Cue Library [Option+2]
Cue List [Option+3]
Capture [Option+4]
SpaceMap [Option+5]
Transport [Option+6]
Frame Control [Option+7]
System Status [Option+8]
Chat [Option+9]
Log [Option+0]
Input Meters [Cmd+Option+1]
Output Meters [Cmd+Option+2]
9
System Level Window
Aux Meters [Cmd+Option+3]
Wild Tracks [Cmd+Option+4]
VRAS [Cmd+Option+5]
Support Files [Cmd+Option+6]
Script Execution [Cmd+Option+7]
Key Mappings [Cmd+Option+8]
Project Notes [Cmd+Option+9]
Mixer Configuration [Cmd+Option+0]
Access Policies [Cmd+Option+-]
System Level Window
See All Windows (p. 7), above.
Inputs Window
Has the standard All Windows (p. 7) menus, plus:
Display Menu
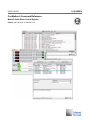
The display commands show or hide various control components. The Fader window will resize itself automatically
to fit any changes in display. This command is particularly useful when you have limited screen space or when you
need to simplify the user interface.
Show Aux Sends
Show Phantom Power
Show Analog Scale
Show Trims
Show Bus Assigns
Show Pans
Show Pan Wait/Fades
Show Buttons
Show Extra Labels
Show Faders
Show Levels
Show Level Wait/Fades
Show Meters
Show Compression
Show Peak Hold
Set Peak Hold Duration...
Show Page Group Controls
Input, Output, and Aux Processing Windows
Has the standard All Windows (p. 7) menus, plus:
Display Menu
Show EQ Graph
10
Bus Masters Window
Show EQ Phase
Show EQ Band Settings
Show Delay Settings
Show Delay Distances
Show Dynamics Settings
Show Meters
Show Peak Hold
Set Peak Hold Duration...
Show User CSV Traces
User CSV Trace Settings...
Show Page Group Controls
Bus Masters Window
Has the standard All Windows (p. 7) menus, plus:
Display Menu
Show Trims
Show Buttons
Show Faders
Show Levels
Show Level Wait/Fades
Show Page Group Controls
Matrix Window
Has the standard All Windows (p. 7) menus, plus:
Display Menu
Show Levels [Cmd+L]
Show Waits [Cmd+J]
Show Fades [Cmd+K]
Show Page Group Controls
Matrix Menu
Clear Matrix
Clear Displayed Region
Set Diagonal
Set Diagonal, Buses, Outputs
Output Masters Window
Has the standard All Windows (p. 7) menus, plus:
Display Menu
Show Analog Scale
11
Aux Masters Window
Show Trims
Show Buttons
Show Faders
Show Levels
Show Level Wait/Fades
Show Meters
Show Compression
Show Peak Hold
Set Peak Hold Duration...
Show Page Group Controls
Aux Masters Window
Has the standard All Windows (p. 7) menus, plus:
Display Menu
Show Analog Scale
Show Trims
Show Buttons
Show Faders
Show Levels
Show Level Wait/Fades
Show Meters
Show Compression
Show Peak Hold
Set Peak Hold Duration...
Show Page Group Controls
Virtual Groups Window
Has the standard All Windows (p. 7) menus, plus:
Display Menu
Show Trims
Show Buttons
Show Faders
Show Levels
Show Level Wait/Fades
Show Page Group Controls
Subcue Library Window
Has the standard All Windows (p. 7) menus, plus:
Subcues Menu
Recall Subcue [Cmd+R]
12
Cue Library Window
Instant Recall Subcue [Cmd+T]
New Subcue > [subcue types]
Duplicate Subcue
Delete Subcue
Cue Library Window
Has the standard All Windows (p. 7) menus, plus:
Cues Menu
Recall Cue [Cmd+Shift+R]
Instant Recall Cue [Cmd+Shift+T]
New Cue
Duplicate Cue
Delete Cue
Subcue Entries Menu
Recall Subcue Entry [Cmd+R]
Instant Recall Subcue Entry [Cmd+T]
New Subcue Entry
Duplicate Subcue Entry
Delete Subcue Entry
Capture Differences [Cmd+I]
Update Subcues [Cmd+U]
Cue List Window
Has the standard All Windows (p. 7) menus, plus:
Cue Entries Menu
Recall Cue Entry [Cmd+Shift+R]
Instant Recall Cue Entry [Cmd+Shift+T]
New Cue Entry
Duplicate Cue Entry
Delete Cue Entry
Stab Time Code [Cmd+G]
Subcue Entries Menu
Recall Subcue Entry [Cmd+R]
Instant Recall Subcue Entry [Cmd+T]
New Subcue Entry
Duplicate Subcue Entry
Delete Subcue Entry
Capture Differences [Cmd+I]
Update Subcues [Cmd+U]
13
Capture Window
Capture Window
Has the standard All Windows (p. 7) menus, plus:
Display Menu
Cue Sort Order > Sort Cues By ID
Cue Sort Order > Sort Cues By Name
Cue Sort Order > Sort Cues By Comment
Cue Sort Order > Sort Cues By Creation Date
Cue Sort Order > Sort Cues By Modification Date
Show 'Inputs' Category
Show 'trim' Category
Show 'bus/matrix' Category
Show 'outputs' Category
Show 'system' Category
Note
The categories listed may vary depending on the subcue categories defined in the Subcue Types tab of the Capture
window.
SpaceMap Window
Has the standard All Windows (p. 7) menus, plus:
Display Menu
Show Matrix Rows
Show SpaceMaps
Show Transport Buttons
Show Trajectory Editor
Show Playback Settings
Show Playback Details
Show Mouse Coordinates
Show All Bus Positions
Show Bus Labels
Show Labels
Show Links
Show Nodes
Show Trajectories
Show Trisets
Show Images
Fill Trisets
Show Cartesian Grid
Snap to Cartesian Grid [Cmd+G]
14
Transport Window
Set Cartesian Grid Spacing...
Show Polar Grid
Snap to Polar Grid [Cmd+Shift+G]
Set Polar Grid Spacing...
Show Page Group Controls
Transport Window
Has the standard All Windows (p. 7) menus, plus:
Display Menu
Show Cue List Name
Show Cue List
Show Cue Index Prefixes
Show Master Stop
Show Time Code
Show/Enable Transport Controls
Show Active Cue Display
Enlarge Active Cue Display
Color Active Cue Display
Show Cue-On-Deck Display
Enlarge Cue-On-Deck Display
Color Cue-On-Deck Display
Show Page Group Controls
Frame Control Window
Has the standard All Windows (p. 7) menus, as described above.
System Status Window
Has the standard All Windows (p. 7) menus, plus:
Display Menu
Show DSPs
Show Wild Tracks
Show Server
Chat Window
Has the standard All Windows (p. 7) menus, plus:
Chat Menu
Clear Chat
Save Chat As...
Save Chat...
15
Log Window
Log Window
Has the standard All Windows (p. 7) menus, plus:
Log Menu
Clear Log
Save Log As...
Save Log...
Input and Output Meters Window
Has the standard All Windows (p. 7) menus, plus:
Display Menu
Show Meter Levels
Show Compression
Show Labels
Show Peak Hold
Show Peak Hold Text
Set Peak Hold Duration...
Show Tablet Controls
Show Page Group Controls
Aux Meters Window
Has the standard All Windows (p. 7) menus, plus:
Display Menu
Show Aux Meters
Show PFL/AFL Meters
Show Meter Levels
Show Compression
Show Labels
Show Peak Hold
Show Peak Hold Text
Set Peak Hold Duration...
Show Tablet Controls
Show Page Group Controls
Wild Tracks Window
Has the standard All Windows (p. 7) menus, plus:
Display Menu
Make Bars Shorter [Cmd+[]
Make Bars Taller [Cmd+]]
16
VRAS™ Window
Reset to Default Bar Height [Cmd+=]
Browse .lcsDisk File... [Cmd+L]
Show Per-Track Display Mode
Show Track IDs
Show Track Labels
Show Level Envelopes
Show Level Envelope Handles
Show Deck Info
Show Deck Graphics
Show File Search Path
Enable Track Position Dragging
Show Meters
Show Meter Levels
Show Compression
Show Meter Labels
Show Peak Hold
Set Peak Hold Duration...
Time Code Display Format > 24 fps
Time Code Display Format > 25 fps
Time Code Display Format > 29.97 fps
Time Code Display Format > 29.97 fps (drop frame)
Time Code Display Format > 30 fps
Time Code Display Format > 30 fps (drop frame)
Time Code Display Format > Samples
Show Page Group Controls
VRAS Window
Has the standard All Windows (p. 7) menus, plus:
Display Menu
Show Graphs
Show Channel Assignments
Show ER Delays
Support Files Window
Has the standard All Windows (p. 7) menus, plus:
Files Menu
Import Files... [Cmd+I]
Export Selected Files... [Cmd+E]
Duplicate File
Delete File
17
Script Execution Window
Script Execution Window
Has the standard All Windows (p. 7) menus, as described above.
Key Mappings Window
Has the standard All Windows (p. 7) menus, plus:
Mappings Menu
New Mapping
Duplicate Mapping
Delete Mapping
Project Notes Window
Has the standard All Windows (p. 7) menus, plus:
Notes Menu
Clear Notes
Save Notes As...
Save Notes...
Mixer Configuration Window
Has the standard All Windows (p. 7) menus, plus:
Display Menu
Show Resource Usage
Show Global Controls
Configuration Menu
Open Configuration File
Save Configuration File As...
Save Configuration File...
Generate Mixer Config Report...
Send Configuration to Frames
Retrieve Configuration from Server
Query Hardware for Configuration...
Frame Templates > Empty Frame Template [Cmd+Option+E]
Frame Templates > Primary Frame Template [Cmd+Option+P]
Frame Templates > VRAS Frame Template [Cmd+Option+V]
Frame Templates > 8x16 Expansion Frame Template [Cmd+Option+X]
Frame Templates > 16x8 Expansion Frame Template [Cmd+Option+Y]
Renumber All Channels (by Frame)
Renumber All Channels (by Type)
Load Balance...
18
Access Policies Window
Show Delays Table...
LX-300 Auto Start...
Test Network Performance...
Force Daemon Migration...
Go to Backup Communication Method...
Upload Firmware...
Upload HTML Archive...
Access Policies Window
Has the standard All Windows (p. 7) menus, plus:
Access Policies Menu
New Access Policy
Duplicate Access Policy
Delete Access Policy
Invoke Selected Access Policies [Cmd+I]
Rescind Selected Access Policies [Cmd+R]
Reset Selected Access Policies [Cmd+Shift+R]
Reset All Access Policies
Recover Lost Password...
19
20
Externals Reference
ALC
Client Control
CobraNet
CommSync
CueConsole2™
CueMixer™ RIF-108
EtherTracks
External Control
Flash Memory
Hardware Control
Hardware Status
MIDI
MMC
MSC
Open Sound Control
Python Control
SpaceMap
Voice Detect
Wild Tracks
21
22
24
26
27
34
37
38
41
41
43
44
45
46
47
49
49
50
51
Externals are grouped in categories, and are used both to create and edit Externals Subcue command entries and
Frame Control command entries.
ALC
Automatic Level Control (ALC) provides the ability to map a change in average input or output levels to a control
point over a desired range. This can be used, for instance, to automatically adjust background music to be louder
as the ambient level gets louder. The mapping is defined with the ALC Setup command. The parameter adjustment
is made with the ALC Start command.
ALC Setup
Defines ALC mapping.
Parameters
ID: (0-7)
Enable: checkbox
Source channel type: menu (Input, Output)
Source Channel: (1-512)
Sample duration: (0-4095 seconds, 0=off)
Print Period (seconds): checkbox, (1-4095)
Source minimum: (0-127 dB)
Source maximum: (0-127 dB)
Calibration offset: (-64 to +63 dB)
Destination Category: menu (Level, Trim, Dynamics Threshold, Dynamics Gain)
Destination Item: menu (Automated System Level, Manual System Level, Input Level, Bus Level, Output Level,
Aux Output Level, Matrix Crosspoint Level, Aux Send Level, Virtual Group Level)
Destination Channel: (1-512)
21
Client Control
Destination minimum: (-100 to +27 dB)
Destination maximum: (-100 to +27 dB)
Start ALC
Applies the ALC mapping.
Parameters
ID: (0-7)
Enable: checkbox
Change target parameter: checkbox
Print: menu
Seconds: (1-4095)
Client Control
These commands are used to control CueStation 4 software connected to the system.
Modify Custom Utility Button
Modifies custom utility buttons.
Parameters
Any Client: checkbox specifies if only the first client should be affected, or the client at the specified IP.
Client IP: IP address to specify the particular instance of CueStation to be controlled.
Window Name: Name of window where the utility button is located.
Button Key String: Key string of targeted utility button(s).
Action: menu (Put Button, Update Button(s), Remove Button(s))
Button Label: checkbox enables a text box to add a new label.
Active Label: checkbox enables a text box to add a new active label.
On Click: checkbox enables you to enter the on-click behavior.
On Click Value(s): checkbox enables you to enter a value when On Click is set to Set Value.
On Release: checkbox enables you to enter the on-release behavior.
On Release Value(s): checkbox enables you to enter a value when On Release is set to Set Value.
Button Color: checkbox enables text box with a color specifying string.
Active Color: checkbox enables text box with a color specifying string for when the button is active.
Control Address: checkbox enables text box to enter a control address.
Target Values: checkbox enables a text box to enter one or more control point values.
Active When: checkbox enables options for when the button should be active.
Change Key String: checkbox enables a text box to enter a new Button Key String.
Open Layout
Opens any layout file that has been added as a Support File.
Parameters
Any Client: checkbox specifies if only the first client should be affected, or the client at the specified IP.
Client IP: IP address to specify the particular instance of CueStation to be controlled.
Layout File Name: Name of the layout file to be opened. The layout file must be added to the Support Files
window.
22
Client Control
Close Existing Windows First: If this box is checked, the new layout will completely replace the current layout.
If not checked, the new layout will be added to the existing layout. This is similar to the Open More Layout...
menu command.
Load Port Settings: checkbox specifies whether port settings are loaded.
Set Automation Selects
Deprecated version of Set Channel Selects, included for backwards compatibility with older projects.
Set Channel Selects
Used to turn on or off channel (automation) selects in any window.
Parameters
Any Client: checkbox specifies if only the first client should be affected, or the client at the specified IP.
Client IP: IP address to specify the particular instance of CueStation to be controlled.
Action: menu (Set, Add, Remove) specifies whether to turn on only designated selects, turn on designated sets
in addition to those active, or turn off designated selects.
Category: menu (Inputs, Outputs, AuxOuts, VGroups, Buses, VRAS, Wild Tracks Units, Wild Tracks Decks,
Scripts)
Indices: text string specifies one or more channels. Commas and hyphens may be used, such as “1-3,5-7” to
specify channels 1,2,3,5,6,7.
Set Client Address Aliases
Enter an alias name for one or more client IP addresses.
Set Selected Subcue Types
Used to turn on or off subcue types in the Capture window.
Parameters
Any Client: checkbox specifies if only the first client should be affected, or the client at the specified IP.
Client IP: IP address to specify the particular instance of CueStation to be controlled.
Action: menu (Set, Add, Remove) specifies whether to turn on only designated subcue types, turn on designated
types in addition to those active, or turn off designated types.
Set Subcue Types: string specifying which types to affect. Commas and asterisks may be used, such as “Input*,
Output*” to affect all subcue types beginning with the strings “Input” or “Output”.
Select Capture Mode: checkbox, menu (Capture New (F4), Capture New (F3), Capture Differences (F2), Update
Subcues (F1))
Select Cue List: checkbox, Cue List index (0-16382)
Set AutoHide Window: checkbox, Enable checkbox
Set Persistent Subcue Select: checkbox, Enable checkbox
Set Share Existing Subcues: checkbox, Enable checkbox
Select Cue List Player: checkbox, Cue List Player index (1-127)
Set Use Channel Selects: checkbox, Enable checkbox
Set Capture Isolated Channels: checkbox, Enable checkbox
Select Capture Operator: menu (New Control Points Only, Intersection, Union, Old Control Points Only)
Select Capture Precedence: menu (New Values Preferred, Old Values Preferred, New Values Always)
Show Window By Type
Show, hide, create, or close specified window(s) by type.
23
CobraNet
Parameters
Any Client: checkbox specifies if only the first client should be affected, or the client at the specified IP.
Client IP: IP address to specify the particular instance of CueStation to be controlled.
Action: menu (Show, Hide, Create, Show or Create, Close) specifies the action to be performed for the designated
Window Type.
Window Type: menu (Inputs, Input Processing, Bus Masters, Matrix, Output Masters, Output Processing, Aux
Masters, Aux Processing, Virtual Groups, Subcue Library, Cue Library, Cue List, Capture, SpaceMap, Transport,
Frame Control, System Status, Chat, Log, Input Meters, Output Meters, Aux Meters, Wild Tracks, VRAS, Key
Mappings, Project Notes, Support Files, Script Execution, Mixer Configuration)
Set First Column: Enable checkbox, index range (1-512)
Set First Row: Enable checkbox, index range (1-512)
Set Flip Row: Enable checkbox, index range (1-512)
Editing Mode: Enable checkbox, menu (Select Items, Add Speaker Nodes, Add Virtual Nodes, Add Derived
Nodes, Add Silent Nodes, Add Trisets, Test Bus, Local Record, Bus Record)
Show Windows By Name
Show, hide, create, or close specified window(s) by name.
Parameters
Any Client: checkbox specifies if only the first client should be affected, or the client at the specified IP.
Client IP: IP address to specify the particular instance of CueStation to be controlled.
Action: menu (Show, Hide, Create, Show or Create, Close) specifies the action to be performed for the designated
Window Type.
Window Name: Enter the name of the window to be controlled.
Set First Column: Enable checkbox, index range (1-512)
Set First Row: Enable checkbox, index range (1-512)
Set Flip Row: Enable checkbox, index range (1-512)
CobraNet
These commands control the behavior of CobraNet modules.
List CobraNet Parameter
Parameters
Parameter Type: menu (Bundle for CobraNet Inputs 1-8, Bundle for CobraNet Inputs 9-16, Bundle for CobraNet
Outputs 1-8, Bundle for CobraNet Outputs 9-16, Conductor Priority, IP address)
List Error Parameter
Parameters
CobraNet Rx module: menu (Error Indicators, Error Code, Error Count, Error Display)
List Latency Status
No parameters.
List Number of Audio Channels
Parameters
CobraNet Tx module: menu (CobraNet Outputs 1-8, CobraNet Outputs 9-16)
24
CobraNet
List Number of Unicast Receivers
Parameters
CobraNet Tx module: menu (CobraNet Outputs 1-8, CobraNet Outputs 9-16)
List Number of Unique Audio Channels
Parameters
Currently: menu (Received from the network, Transmitted to the network)
List Rx Parameter
Parameters
CobraNet Rx module: menu (CobraNet Inputs 1-8, CobraNet Inputs 9-16)
Rx Parameter: menu (RX Dropouts, RX Delay)
List ifInErrors
No parameters.
Set Bundle ID
Parameters
Channel Range: menu (CobraNet Inputs 1-8, CobraNet Inputs 9-16, CobraNet Outputs 1-8, CobraNet Outputs
9-16)
Bundle ID: ID range (0-65279)
Set CobraNet Conductor Priority
Parameters
Priority: range (0-255)
Set CobraNet IP
Parameters
IP: (IP Address)
Set Diagnostic Reporting Level
Parameters
Diagnostic Reporting Level: menu (Basic Status, Details, Verbose)
Set Latency Mode
Parameters
Latency Mode: menu (5 1/3 ms latency, 48kHz sample rate; 2 2/3 ms latency, 48kHz sample rate; 1 1/3 ms
latency, 48kHz sample rate)
Set Number of Audio Channels
Parameters
CobraNet Tx module: menu (CobraNet Outputs 1-8, CobraNet Outputs 9-16)
# of audio channels for this transmitter: (0-8)
25
CommSync
Set Number of Unicast Receivers
Parameters
CobraNet Tx module: menu (CobraNet Outputs 1-8, CobraNet Outputs 9-16)
Max # of receivers for this transmitter: (0-4)
CommSync
Monitor Serial Ports
Parameters
Serial Port: menu (MIDI, RS-232, RS-422A, RS-422B, All Ports)
Outgoing Data Monitoring: menu (Disable Monitoring of Outgoing Serial Data, Print a Brief Summary of Outgoing Serial Data Messages, Print All Outgoing Serial Bytes to the Log)
Incoming Data Monitoring: menu (Disable Monitoring of Incoming Serial Data, Print a Brief Summary of Incoming
Serial Data Messages, Print All Incoming Serial Bytes to the Log)
Print Serial Port Transfer Tallies
Parameters
Serial Port: menu (MIDI, RS-232, RS-422A, RS-422B, All Ports)
Print Transfer Tallies: checkbox
Clear Transfer Tallies: checkbox
Clear Total Transfer Tallies: checkbox
Receive MTC
Parameters
Action: menu (Enable Receive, Disable Receive)
SMPTE Generator
Parameters
Frame Rate: menu (24 fps, 25 fps, 29.97 fps Drop Frame, 30 fps Non-Drop)
SMPTE Time: (SMPTE time value)
Set Dropout
Parameters
Dropouts: (1-127)
Set Freewheel Convert Stripe Mode
Parameters
SMPTE Mode: menu (Start Generator / Reset Reader, Start Reader / Regenerator, Start Generator to SMPTE
output only, Start Generator to SMPTE output and LX300)
Regen/Freewheel Mode: menu (Regenerate SMPTE In to SMPTE Out, 1 Frame, 2 Frames, 4 Frames, 6
Frames, 8 Frames, 10 Frames, 12 Frames, 14 Frames, 16 Frames, 18 Frames, 20 Frames, 32 Frames, 64
Frames, 128 Frames, 256 Frames)
Frame Rate: menu (24 fps, 25 fps, 29.97 fps, 30 fps)
SMPTE Level: (0-99)
SMPTE Time: (SMPTE time value)
26
CueConsole2™
Set Regenerator Enabled
Parameters
Action: menu (Enable Regenerator, Disable Regenerator)
Set SMPTE Frame Rate Logic
Parameters
Time Code Rate: menu (Best Guess, Use NTSC 29.97fps, Use 30fps)
Drop Frame: menu (Detect from Time Code Stream, Force Drop Frame, Force Non-Drop)
Set SMPTE Generator Level
Parameters
SMPTE Level: (0-99)
Set Serial Port Enabled
Parameters
Serial Port: menu (MIDI, RS-232, RS-422A, RS-422B, All Ports)
Enable Transmit: checkbox
Enable Receive: checkbox
Set Shuttle
Parameters
Shuttle: (1-127)
Stop Striping SMPTE or MTC
No parameters.
CueConsole2
Adjust Brightness
Parameters
Brightness Adjustment: menu (Very Dark, Dark, Normal, Bright, Very Bright)
Action: menu (Absolute Set, Relative Change)
Bind Module To Client
Parameters
Client IP: (IP Address)
Bind Type: menu (Bind Listed Modules to One Specified Client IP, Bind Listed Modules to Any Client IP, Bind
Listed Modules to Another Specified Client IP, Unbind Listed Modules)
Module IP: (IP Address)
Change Page
Parameters
Page Group: (1-128)
Action: menu (Relative Move, Absolute Set)
27
CueConsole2™
Column Page: (-512 to 512)
Enable Change: checkbox
Allow Wrap: checkbox
Row Page: (-512 to 512)
Enable Change: checkbox
Allow Wrap: checkbox
Enable Transporter Update Columns
Parameters
Module IP: (IP Address)
Column 1 Action: menu (Enable Column, Disable Column, Leave Column as is)
Column 2 Action: menu (Enable Column, Disable Column, Leave Column as is)
Column 3 Action: menu (Enable Column, Disable Column, Leave Column as is)
Column 4 Action: menu (Enable Column, Disable Column, Leave Column as is)
Lock Console
Parameters
Action: menu (Unlock Console, Lock Console, Toggle Locked/Unlocked)
Log Module Error Counts
Parameters
Log Cumulative/Global Stats: checkbox
Log Stats for All Modules: checkbox
Module IP: (IP Address)
Print UDP Event Log(s): checkbox
Clear UDP Event Log(s): checkbox
Map Editor Controls To Cues
Parameters
Module IP: (IP Address)
Add New Mapping: button
Mapping: menu (Press, Release)
[Button]: (click to select)
[Action]: menu (to Recall, to Update, Unmap)
[Target]: menu (Cue, Subcue)
[ID]: (0-16383)
on player #: (Cue List Player ID)
Remove: button
Map Editor Module
Parameters
Module IP: (IP Address)
Editor Group: (1-128)
Main Channel: menu (Input, Aux Master, Output, Bus, VGroup, System Level, Don't Change)
28
CueConsole2™
Set Index: checkbox
Index: (1-400)
Alt Channel: menu (Input, Aux Master, Output, Bus, VGroup, System Level, Don't Change)
Set Index: checkbox
Index: (1-400)
Left Listen Meter: menu (Input, Aux Master, Output, Unmap, Don't Change)
Set Index: checkbox
Index: (1-400)
Right Listen Meter: menu (Input, Aux Master, Output, Unmap, Don't Change)
Set Index: checkbox
Index: (1-400)
Stereo Mode: menu (Set to Normal Mode, Set to Stereo Mode, Leave Unchanged)
Map Fader Controls To Cues
Parameters
Module IP: (IP Address)
Add New Mapping: button
Mapping: menu (Press, Release)
[Button]: (click to select Fader button)
[Action]: menu (to Recall, to Update, Unmap)
[Target]: menu (Cue, Subcue)
[ID]: (0-16383)
on player #: (Cue List Player ID)
Remove: button
Map Fader Module
Parameters
Module IP: (IP Address)
Page Group: (1-128)
Editor Group: (1-128)
Fader Type: menu (Input, Output, AuxMaster, VGroup, Bus, Trajectory, System, VRAS, Matrix, AuxSend, Disable,
Don't Change)
menu: (dependent on Fader Type)
LCD Button Type: menu (Mute, Invert, Solo, Isolate, Channel Enable, Dynamics Bypass (Band 1), Dynamics
Bypass (Band 2), EQ Bypass, Delay Bypass, Disable)
Direction: menu (Across a Row, Down a Column)
First Column: (1-16)
Last Column: (1-16)
CS4 Column: (1-400)
CS Row: (1-400)
Use Custom Fader Range: checkbox
Minimum Level (dB): (-90 to +10)
Maximum Level (dB): (-90 to +10)
29
CueConsole2™
Map Meter Controls To Cues
Parameters
Module IP: (IP Address)
Add New Mapping: button
Mapping: menu (Press, Release)
[Button]: (click to select)
[Action]: menu (to Recall, to Update, Unmap)
[Target]: menu (Cue, Subcue)
[ID]: (0-16383)
on player #: (Cue List Player ID)
Remove: button
Map Meter Module
Parameters
Module IP: (IP Address)
Page Group: (1-128)
Editor Group: (1-128)
Control Type: menu (Input, Output, Aux, Disable)
Input Mute Type: menu (Input Channel On/Off, Input Mute)
First Column: (1-16)
Last Column: (1-16)
CS4 Column: (1-400)
Enable EQ Editing: checkbox
Meter Mode: menu (Level, Dynamics, Level and Dynamics)
Initial Edit Mode: menu (Don't Change, Scale, VGroup A, VGroup B, Fader, Trim, Delay, Pan, Aux Send)
Button Press Edit Mode: menu (Don't Change, Scale, VGroup A, VGroup B, Fader, Trim, Delay, Pan, Aux
Send)
Encoder Press Edit Mode: menu (Don't Change, Scale, VGroup A, VGroup B, Fader, Trim, Delay, Pan, Aux
Send)
Map Transporter Controls To Cues
Parameters
Module IP: (IP Address)
Add New Mapping: button
Mapping: menu (Press, Release)
[Button]: (click to select)
[Action]: menu (to Recall, to Update, Unmap)
[Target]: menu (Cue, Subcue)
[ID]: (0-16383)
on player #: (Cue List Player ID)
Remove: button
Map Transporter Module
Parameters
30
CueConsole2™
Module IP: (IP Address)
Stop Mode: menu (Pressing the Stop Button Sends a 'Master Stop', Pressing the Stop Button Stops the Associated Cue List Player Only)
Cue List Player #: (1-127)
Cue List Player Group: (1-128)
Fader Type: menu (Input, Output, AuxMaster, VGroup, Bus, Trajectory, System, VRAS, Matrix, AuxSend, Disable,
Don't Change)
LCD Button Type: menu (Mute, Invert, Solo, Isolate, Disable)
Direction: menu (Across a Row, Down a Column)
CS4 Column: (1-400)
CS4 Row: (1-400)
Use Custom Fader Range: checkbox
Minimum Level (dB): (-90 to +10)
Maximum Level (dB): (-90 to +10)
Fader Page Group: (1-128)
Show Cue List Indices: checkbox
Add New Mapping: button
Override Editor Labels
Parameters
Module IP: (IP Address)
Add New Label: button
Label: (click to select Editor button)
[Label Type]: menu (Text, Go, Stop, Top, Prev, Next, LCS, Blank)
[Label Text]: text
[Color 1]: menu (No Preference, Dim Red, Medium Red, Bright Red, Dim Green, Medium Green, Bright Green,
Dim Yellow, Medium Yellow, Bright Yellow, Dim Orange, Medium Orange, Bright Orange, Dim Puce, Medium
Puce, Bright Puce)
[Color 2]: menu (No Preference, Dim Red, Medium Red, Bright Red, Dim Green, Medium Green, Bright Green,
Dim Yellow, Medium Yellow, Bright Yellow, Dim Orange, Medium Orange, Bright Orange, Dim Puce, Medium
Puce, Bright Puce)
Remove: button
Override Fader Labels
Parameters
Module IP: (IP Address)
Add New Label: button
Label: (click to select Fader button)
[Label Type]: menu (Text, Go, Stop, Top, Prev, Next, LCS, Blank)
[Label Text]: text
[Color 1]: menu (No Preference, Dim Red, Medium Red, Bright Red, Dim Green, Medium Green, Bright Green,
Dim Yellow, Medium Yellow, Bright Yellow, Dim Orange, Medium Orange, Bright Orange, Dim Puce, Medium
Puce, Bright Puce)
[Color 2]: menu (No Preference, Dim Red, Medium Red, Bright Red, Dim Green, Medium Green, Bright Green,
Dim Yellow, Medium Yellow, Bright Yellow, Dim Orange, Medium Orange, Bright Orange, Dim Puce, Medium
Puce, Bright Puce)
31
CueConsole2™
Remove: button
Override Meter Labels
Parameters
Module IP: (IP Address)
Add New Label: button
Label: (click to select Meter button)
[Label Type]: menu (Text, Go, Stop, Top, Prev, Next, LCS, Blank)
[Label Text]: text
[Color 1]: menu (No Preference, Dim Red, Medium Red, Bright Red, Dim Green, Medium Green, Bright Green,
Dim Yellow, Medium Yellow, Bright Yellow, Dim Orange, Medium Orange, Bright Orange, Dim Puce, Medium
Puce, Bright Puce)
[Color 2]: menu (No Preference, Dim Red, Medium Red, Bright Red, Dim Green, Medium Green, Bright Green,
Dim Yellow, Medium Yellow, Bright Yellow, Dim Orange, Medium Orange, Bright Orange, Dim Puce, Medium
Puce, Bright Puce)
Remove: button
Override Transporter Labels
Parameters
Module IP: (IP Address)
Add New Label: button
Label: (click to select Editor button)
[Label Type]: menu (Text, Go, Stop, Top, Prev, Next, LCS, Blank)
[Label Text]: text
[Color 1]: menu (No Preference, Dim Red, Medium Red, Bright Red, Dim Green, Medium Green, Bright Green,
Dim Yellow, Medium Yellow, Bright Yellow, Dim Orange, Medium Orange, Bright Orange, Dim Puce, Medium
Puce, Bright Puce)
[Color 2]: menu (No Preference, Dim Red, Medium Red, Bright Red, Dim Green, Medium Green, Bright Green,
Dim Yellow, Medium Yellow, Bright Yellow, Dim Orange, Medium Orange, Bright Orange, Dim Puce, Medium
Puce, Bright Puce)
Remove: button
Reset Module
Parameters
Affect All Modules: checkbox
Module IP: (IP Address)
Remove Module: checkbox
Clear Module Mappings: checkbox
Clear Cue Mappings: checkbox
Clear Label Overrides: checkbox
Set Clip Indicator Parameters
Parameters
Clip Threshold (dB below FS): (0-127)
Indicator Timeout (tenths of a second): checkbox, (1-1630)
32
CueConsole2™
Set Communication Method
Parameters
Affect All Modules: checkbox
Module IP: (IP Address)
Enable Send UDP to Module(s): checkbox
Enable Receive UDP from Module(s): checkbox
Make these settings the default: checkbox
Set DLI Debounce Period
Parameters
Module IP: (IP Address)
Module Type: menu (Fader Pack, Meter Module, Transporter, Editor)
Control: menu (Digital Input #1, Digital Input #2)
Button Debounce Period (ms): (0-10000)
Set Editor Controls Debounce Periods
Parameters
Module IP: (IP Address)
Add New Mapping: button
Mapping: (click to select Editor button)
[Debounce Period]: (0-10000) ms
Remove: button
Set Fader Active Menu Row
Parameters
Module IP: (IP Address)
Action: menu (Set Active row Index to, Increase Active Row Index by, Decrease Active Row Index by) (1-4)
Set Fader Controls Debounce Periods
Parameters
Module IP: (IP Address)
Add New Mapping: button
Mapping: (click to select Fader button)
[Debounce Period]: (0-10000) ms
Remove: button
Set Global Debounce Period
Parameters
Button Debounce Period (ms): (0-10000)
Set Meter Controls Debounce Periods
Parameters
Module IP: (IP Address)
Add New Mapping: button
33
CueMixer™ RIF-108
Mapping: (click to select Meter button)
[Debounce Period]: (0-10000) ms
Remove: button
Set Module Address Aliases
Parameters
Add New Module Address Alias: button
Delete Any Preexisting Aliases: checkbox
[Alias name]: Enter alias name
is an alias for: [IP Address(es)]
Remove: button
Set Page Limits
Parameters
Page Group: (1-128)
Min Column Page: (-512 to 512)
Max Column Page: (-512 to 512)
Column Page Size: (-512 to 512)
Min Row Page: (-512 to 512)
Max Row Page: (-512 to 512)
Row Page Size: (-512 to 512)
Set Peak Hold Indicator Duration
Parameters
Affect All Modules: checkbox
Module IP: (IP Address)
Peak Hold Indicator Duration (ms): (0-604800000)
Make this setting the default: checkbox
Set Transporter Controls Debounce Periods
Parameters
Module IP: (IP Address)
Add New Mapping: button
Mapping: (click to select Transporter button)
[Debounce Period]: (0-10000) ms
Remove: button
CueMixer RIF-108
Disable RIF
No Parameters.
Enable RIF
No Parameters.
34
CueMixer™ RIF-108
Print User A Cues
Parameters
Page: (1-16)
Set Button Cue Overlay
Parameters
Affect all Buttons: checkbox
Button Index: (0-31)
Unassign Cue: checkbox
Cue ID: (0-16382)
Set Button Debounce Period
Parameters
Affect all Buttons: checkbox
Button Index: (0-31)
Debounce interval: (0-16383) ms
Set Communication Port
Parameters
Port: menu (Port A, Port B)
Set Control Enabled
Parameters
Affect all Controls: checkbox
Control Index: (0-39)
Enabled: checkbox
Set Cue List Player
Parameters
Cue List Player #: (1-127)
Set CueMixer Mode
Parameters
Mode: menu (System Master, Input Levels, Bus Levels, Output Levels, Aux Levels, Virtual Group Levels, User
A, Input EQs, Output EQs, Aux EQs, Input Trims, Bus Trims, Output Trims, Aux Trims, Virtual Group Trims)
Set Page: (1-64)
Enable: checkbox
Set Enabled Console Modes
Parameters
Enable Masters: menu (Disable, Don't Change, Enable)
Enable Console Faders: menu (Disable, Don't Change, Enable)
Enable Bus Levels: menu (Disable, Don't Change, Enable)
Enable Outputs: menu (Disable, Don't Change, Enable)
35
CueMixer™ RIF-108
Enable Aux Outputs: menu (Disable, Don't Change, Enable)
Enable Virtual Groups: menu (Disable, Don't Change, Enable)
Enable User A Cues: menu (Disable, Don't Change, Enable)
Set Enabled EQ Trim Modes
Parameters
Enable Input EQ/Delay: menu (Disable, Don't Change, Enable)
Enable Output EQ/Delay: menu (Disable, Don't Change, Enable)
Enable Aux Out EQ/Delay: menu (Disable, Don't Change, Enable)
Enable Input Trims: menu (Disable, Don't Change, Enable)
Enable Bus Level Trims: menu (Disable, Don't Change, Enable)
Enable Output Trims: menu (Disable, Don't Change, Enable)
Enable Aux Out Trims: menu (Disable, Don't Change, Enable)
Enable VGroup Trims: menu (Disable, Don't Change, Enable)
Set Enabled Other Modes
Parameters
Enable Transport: menu (Disable, Don't Change, Enable)
Enable Stop: menu (Disable, Don't Change, Enable (Master Stop), Enable (Stop Associated Cue List Only))
Enable Editing: menu (Disable, Don't Change, Enable)
Enable User A and B Buttons: menu (Disable, Don't Change, Enable)
Set LED State
Parameters
Affect all Buttons: checkbox
Button Index: (0-31)
LED State: menu (Force LED Off, Force LED On, Resume normal LED Behaviour)
Set User A B Button
Parameters
Mode: menu (User A, User B)
Unassign Cue: checkbox
Cue ID: (0-16382)
Set User A Faders
Parameters
User A Faders Mode: menu (Disabled, System Master, Input Levels, Bus Levels, Output Levels, Aux Levels,
Virtual Group Levels, Input Trims, Bus Trims, Output Trims, Aux Trims, Virtual Group Trims)
Page: (1-64)
Set User A Mode Cue
Parameters
Page: (1-16)
Button: (1-16)
36
EtherTracks
Unassign Cue: checkbox
Cue ID: (0-16382)
Set User A Page
Parameters
Page: (1-16)
EtherTracks
Check EtherTracks Firmware Version
No Parameters.
Close Connection Group
Parameters
Connection Group ID: (0-16383)
List EtherTracks IP Address
No Parameters.
List EtherTracks MAC Address
No Parameters.
List EtherTracks Network Statistics
Parameters
Log Output Level: menu (None, Info, Warning, Error, Critical)
Open TCP Cue Connection
Parameters
IP: (IP Address)
Port: (0-65535)
Connection ID: (0-16383)
Group ID: (0-16383)
Recall Cue on Connection Group
Parameters
Recall: menu (Cue, Subcue)
Group ID: (0-16383)
Cue ID: (0-16383)
Send Raw Data
Parameters
Target Device IP: (IP Address)
Protocol: menu (TCP, UDP, Lemur TCP)
Send Port: (1-65535)
8-Bit Hex Data: text
37
External Control
Send Support File
Parameters
Target Device IP: (IP Address)
Protocol: menu (TCP, UDP, Lemur TCP)
Support File Name: (file name)
Send Port: (1-65535)
On Lemur Reboot: menu (Do Nothing, Recall Cue, Recall Subcue, Leave Unchanged) [Cue/Subcue ID]
External Control
Capture Differences
Parameters
Effect Current Cue: checkbox
Cue ID: (0-16382)
Cue List Player #: (1-127)
Overwrite Subcues: checkbox
GO Next Cue in Cue List
Parameters
Affect All Cue List Players: checkbox
Cue List Player #: (1-127)
Log Debug Message
Parameters
Log Message Text: text
Recall Cue
Parameters
Cue ID: (0-16383)
Cue List Player: (1-127)
Recall Subcue
Parameters
Subcue ID: (0-16383)
Cue List Player: (1-127)
STOP
Parameters
Master Stop: checkbox
Cue List Player #: (1-127)
Select Cue List
Parameters
Affect All Cue List Players: checkbox
38
External Control
Cue List ID: (0-16383)
Cue List Player #: (1-127)
Set MIDI Program Change Channel
Parameters
Action: menu (Disable, Use Channel 1, Use Channel 2, Use Channel 3, Use Channel 4, Use Channel 5, Use
Channel 6, Use Channel 7, Use Channel 8, Use Channel 9, Use Channel 10, Use Channel 11, Use Channel
12, Use Channel 13, Use Channel 14, Use Channel 15, Use Channel 16)
Port: menu (MIDI, RS232, RS422-A, RS422-B, Any Port)
Set Trigger Cues Via Time Code Enabled
Parameters
Enable: menu (Enable, Disable)
Skip Entries in Cue List
Parameters
Affect All Cue List Players: checkbox
Cue List Player #: (1-127)
Skip Count: (1-8191)
Skip Backwards: checkbox
Skip To Top of Cue List
Parameters
Affect All Cue List Players: checkbox
Cue List Player #: (1-127)
Stop Fades
Parameters
Finish Type: menu (Cancel Fades (stop faders at their current position), Finish Fades (force faders to their final
state))
Affect All Cue List Players: checkbox
Cue List Player #: (1-127)
Track From Top
Parameters
Cue List Player #: (1-127)
Destination Cue List ID: (0-16382)
Use Active Value: checkbox
Destination Cue Entry Index: (0-16382)
Use Active Value: checkbox
Trigger 4 Cues via Digital Logic Input Closures
Parameters
Logic Input 1 Close (ID=5): menu (Disable, Recall Cue, Recall Subcue) [ID]
Cue List Player #: (1-127)
39
External Control
Logic Input 2 Close (ID=6): menu (Disable, Recall Cue, Recall Subcue) [ID]
Cue List Player #: (1-127)
Logic Input 3 Close (ID=7): menu (Disable, Recall Cue, Recall Subcue) [ID]
Cue List Player #: (1-127)
Logic Input 4 Close (ID=8): menu (Disable, Recall Cue, Recall Subcue) [ID]
Cue List Player #: (1-127)
Trigger 4 Cues via Digital Logic Input Releases
Parameters
Logic Input 1 Release (ID=1): menu (Disable, Recall Cue, Recall Subcue) [ID]
Cue List Player #: (1-127)
Logic Input 2 Release (ID=2): menu (Disable, Recall Cue, Recall Subcue) [ID]
Cue List Player #: (1-127)
Logic Input 3 Release (ID=3): menu (Disable, Recall Cue, Recall Subcue) [ID]
Cue List Player #: (1-127)
Logic Input 4 Release (ID=4): menu (Disable, Recall Cue, Recall Subcue) [ID]
Cue List Player #: (1-127)
Trigger Cue via Digital Logic Input
Parameters
Trigger ID: (1-128)
Action: (Disable, Recall Cue, Recall Subcue)
Trigger Source: menu (Digital Logic Input 1 Release, Digital Logic Input 2 Release, Digital Logic Input 3 Release,
Digital Logic Input 4 Release, Digital Logic Input 1 Close, Digital Logic Input 2 Close, Digital Logic Input 3 Close,
Digital Logic Input 4 Close)
Recall Cue ID: (0-16383)
Cue List Player #: (1-127)
Trigger Cue via MIDI
Parameters
Trigger ID: (1-128)
Expect MIDI on Port: menu (MIDI, RS232, RS422-A, RS422-B, Any Port)
Source MIDI Event Type: menu (Note On, Note Off, Controller)
MIDI Channel: (1-16)
Note/Controller #: (0-127)
Velocity/Controller Value: (0-127)
Action: menu (Disable, Recall Cue, Recall Subcue)
Recall Cue ID: (0-16382)
Cue List Player #: (1-127)
Trigger Transport Action via Digital Logic Input
Parameters
Trigger ID: (1-128)
Action: menu (Enable, Disable)
40
Flash Memory
Trigger Source: menu (Digital Logic Input 1 Release, Digital Logic Input 2 Release, Digital Logic Input 3 Release,
Digital Logic Input 4 Release, Digital Logic Input 1 Close, Digital Logic Input 2 Close, Digital Logic Input 3 Close,
Digital Logic Input 4 Close)
Transport Action: menu (Go Next, Skip to First, Skip Previous, Skip to Next, Master Stop, Stop)
Affect All Cue List Players: checkbox
Cue List Player #: (1-127)
Trigger Transport Action via MIDI
Parameters
Trigger ID: (1-128)
Expect MIDI on Port: menu (MIDI, RS232, RS422-A, RS422-B, Any Port)
Action: menu (Enable, Disable)
Source MIDI Event Type: menu (Note On, Note Off, Controller)
MIDI Channel: (1-16)
Note/Controller #: (0-127)
Velocity/Controller Value: (0-127)
Transport Action: menu (Go Next, Skip to First, Skip Previous, Skip to Next, Master Stop, Stop)
Affect All Cue List Players: checkbox
Cue List Player #: (1-127)
Update Cue
Parameters
Cue ID: (0-16383)
Overwrite Subcues: checkbox
Update Subcue
Parameters
Subcue ID: (0-16383)
Flash Memory
Erase Flash
Parameters
Flash Area to Erase: menu (Main DSP Flash, User Flash, EtherTracks Flash, EXP Flash)
Load Project From Flash
No Parameters.
Save Project To Flash
No Parameters.
Hardware Control
Analog IO dBu FS
Parameters
41
Hardware Control
Slot: menu (A, B, C)
Channel: (1-8)
Scale: menu (+6 dBu FS, +16 dBu FS, +26 dBu FS)
Raw Data
Parameters
7-Bit Hex Bytes: text
Add LCS Header & Footer: checkbox
Set Fader Taper
Parameters
Fader Category: menu (Aux Out Level, Aux Out Trim, Aux Send Level, Bus Level, Bus Trim, Input Level, Input
Trim, Manual System Level, Matrix Level, Output Level, Output Trim, System Level, VGroup Level, VGroup
Trim)
Taper Type: menu (Standard Taper, Linear Taper, Alternate Taper)
Set Front Panel Message
Parameters
Message Text: text
Set Meter Update Rate Limit
Parameters
Max Meter Update Rate (Hz): (1-100)
Set Mix Point Limit
Parameters
Mix Point Limit: (0-2048)
Set Relay
Parameters
Relay Select: menu (Relay 1, Relay 2, Relay 3, Relay 4)
Action: menu (Open, Close)
Set Stereo Compressor
Parameters
Channel Type: menu (Input, Output, Aux Out)
Left Channel: (1-400)
Right Channel: (1-400)
Mode: menu (Independent, Stereo)
Set Temperature Limits
Parameters
Yellow threshold (C): (0-127)
Red threshold (C): (0-127)
42
Hardware Status
Set Time And Date
Parameters
Hour: (0-23)
Minute: (0-59)
Second: (0-59)
Date: menu (Sunday, Monday, Tuesday, Wednesday, Thursday, Friday, Saturday)
[Month]: menu (January, February, March, April, May, June, July, August, September, October, November,
December)
[Day]: (1-31)
[Year]: (2003-2107)
Hardware Status
Check DSP Utilization
No Parameters.
Check Firmware Version
No Parameters.
Check Flash Memory Utilization
No Parameters.
Check SDRAM Memory Utilization
No Parameters.
Check Temperature
No Parameters.
Check Voltage
No Parameters.
Display Raw Matrix
No Parameters.
Display VRAS Params
No Parameters.
Enable Digital Test
Parameters
Enable Digital Test: checkbox
Get Digital Test Status
No Parameters.
Get LX300 Time and Date
No Parameters.
43
MIDI
IOPoints Diagnostics Display
No Parameters.
IOPoints Diagnostics Enable
No Parameters.
Link Diagnostics Display
No Parameters.
Link Diagnostics Enable
No Parameters.
List Debug Messages
No Parameters.
Request CASL Report
No Parameters.
Reset Debug Messages Memory
No Parameters.
MIDI
Channel Pressure
Parameters
Channel: (1-16)
Pressure: (0-127)
Control Change
Parameters
Channel: (1-16)
Controller #: (0-127)
Value: (0-127)
Note
Parameters
Channel: (1-16)
Note #: (0-127)
Velocity: (0-127)
Note Off
Parameters
Channel: (1-16)
Note #: (0-127)
Velocity: (0-127)
44
MMC
Note On
Parameters
Channel: (1-16)
Note #: (0-127)
Velocity: (0-127)
Pitch Bend
Parameters
Channel: (1-16)
Value: (-8192 to +8191)
Polyphonic Key Pressure
Parameters
Channel: (1-16)
Note #: (0-127)
Pressure: (0-127)
Program Change
Parameters
Channel: (1-16)
Program: (0-127)
MMC
Eject
Parameters
Device ID: (0-127)
Fast Forward
Parameters
Device ID: (0-127)
Locate
Parameters
Device ID: (0-127)
Rate: (0-3)
Time: (Time Code value)
Pause
Parameters
Device ID: (0-127)
Play
Parameters
45
MSC
Device ID: (0-127)
Play Deferred
Parameters
Device ID: (0-127)
Record Exit
Parameters
Device ID: (0-127)
Record Pause
Parameters
Device ID: (0-127)
Record Strobe
Parameters
Device ID: (0-127)
Rewind
Parameters
Device ID: (0-127)
Stop
Parameters
Device ID: (0-127)
MSC
Fire
Parameters
Device ID: (0-127)
Command Format: (0-127)
Macro Number: (0-127)
Go Cue
Parameters
Device ID: (0-127)
Command Format: (0-127)
Cue Number: (max 64 characters): text
Go Next
Parameters
Device ID: (0-127)
Command Format: (0-127)
46
Open Sound Control
Load Cue
Parameters
Device ID: (0-127)
Command Format: (0-127)
Cue Number: (max 64 characters): text
MSC Stop
Parameters
Device ID: (0-127)
Command Format: (0-127)
Receive MSC
Parameters
Enable MSC Reception: checkbox
Respond to Device ID: (0-126) checkbox
Respond to Command Format: (0-126) checkbox
Resume
Parameters
Device ID: (0-127)
Command Format: (0-127)
Resume Cue
Parameters
Device ID: (0-127)
Command Format: (0-127)
Cue Number: (max 64 characters): text
Open Sound Control
Map OSC Controls
OSC mapping externals are explained in more detail in Open Sound Control (p. 79).
Parameters
OSC Device IP: (IP Address)
OSC Device Port: (1-65535)
Existing Mappings: menu (Don't Clear Any Existing Mappings, Clear Any Existing Mappings for this device,
Clear All Existing Mappings)
Add New Mapping: button
OSC Name #1: text
[Mapping behaviour]: menu (Float Range Behaviour, Int32 Range Behaviour, Bool Range Behaviour, String
Behaviour, Button Behaviour, Unmap)
Remove: button
LCS Address: text
Time Avg: (time value) sec, (1-50) Hz
47
Open Sound Control
Value Range: Min (value) Max (value)
OSC Mapping:
Time Avg: (time value) sec, (1-50) Hz
Value Range: Min (value) Max (value)
Resend OSC State
Parameters
Resend All Mappings: checkbox
OSC Device IP: IP Address or alias
Resend to All Ports: checkbox
OSC Device UDP Port: (1-65535)
Send Lemur Project
Parameters
Lemur Device IP: (IP Address)
Lemur XML Support File Name: (file name)
On Lemur Reboot: menu (Do Nothing, Recall Cue, Recall Subcue, Leave Unchanged) [Cue/Subcue ID]
Send OSC Command
Parameters
OSC Device IP: (IP Address)
OSC Device Port: (1-65535)
OSC Method Name: text
Add New Argument: button
OSC Arg #1: menu (Int32, Float32, String, Blob, Int64, TimeTag, Float64, Boolean True, Boolean False, Nil,
Infinitum)
[Argument value]: (depends on argument type)
Remove: button
Set OSC Address Aliases
Parameters
Add New OSC Address Alias: button
Delete Any Preexisting Aliases: checkbox
[Alias name]: text
is an alias for: (IP Address)
Remove: button
Set OSC Control Name Aliases
Parameters
Add New OSC Address Alias: button
Delete Any Preexisting Aliases: checkbox
[Alias name]: text
is an alias for: (IP Address)
Remove: button
48
Python Control
Set OSC Warnings Level
Parameters
OSC Warnings: menu (Disable OpenSoundControl unknown-controls warnings, Enable OpenSoundControl
unknown-controls warnings)
Python Control
Run Background Python Script
Parameters
Script Source: menu (Support File, Inline Python, Support File plus Command)
Support File Name: (file name)
Script Arguments: text
Python Source: text
Send Command To Python Script
Parameters
Send To: menu (Script with Specified Script Execution ID, All Executing Foreground Scripts, All Executing
Background Scripts, All Executing Scripts)
Script ID: (1-32)
Command Text: text
SpaceMap
AutoDraw Trajectory
Parameters
Clear Existing Trajectory Nodes First: checkbox
Trajectory ID: (0-16383)
Log Debug Output While Generating: checkbox
Initial value for parametric argument (t): (number value)
Final value for parametric argument (t): (number value)
Number of Trajectory Points: (1-1000)
X Generator Function [-1000,+1000]: (function)
Y Generator Function [-1000,+1000]: (function)
Duration Generator Function (ms): (function)
Pan Generator Function [-100,100]: (function)
Divergence Generator Function [0,100]: (function)
Level Generator Function [0,100]: (function)
Enable or Disable SyncMaps
Parameters
Group ID of First SyncMap: (0-16382)
Number of SyncMap Group: (0-16383)
Action: menu (Enable, Disable)
49
Voice Detect
Pause Trajectory
Parameters
First Bus: (1-256)
Number of Buses: (1-256)
Stop Trajectory
Parameters
First Bus: (1-256)
Number of Buses: (1-256)
Unpause Trajectory
Parameters
First Bus: (1-256)
Number of Buses: (1-256)
Voice Detect
Save Voice Detect Matrix To Subcue
Parameters
Matrix Type(s) to Save: menu (All Types, Speech and Music Only, Speech Only, Music Only, Silence Only)
External Subcue to Save To: (0-16383)
Set Voice Detect Debug Printing Enabled
Parameters
Detection Mode: menu (Voice Detect, Train Speech, Train Music, Train Silence)
Enable Printing: checkbox
Set Voice Detect Hysteresis
Parameters
Target Mode: menu (All Modes, Speech, Music, Silence)
Hysteresis Count: (1-20)
Interpret Silence As: menu (Speech, Music, Silence, Same as Previous Result)
Set Voice Detect Matrix Values
Parameters
Matrix Type: menu (Speech, Music, Silence)
Matrix Values: (values)
Set Voice Detect Recall Action
Parameters
Event Type: menu (Switch to Speech, Switch to Music, Switch to Silence, Detected Speech, Detected Music,
Detected Silence, Detector is Unsure)
Action Type: menu (Do Nothing, Recall Cue, Recall Subcue)
Cue/Subcue ID: (0-16383)
50
Wild Tracks
Set Voice Detect Sample Size
Parameters
Sample Duration: (208ms-2000ms)
Wild Tracks
Adjust WildTracks Media Path
Parameters
Path to Modify: menu (File Search Path, File Record Path)
Action: menu (Set Path Clauses, Add Path Clauses, Remove Path Clauses)
Path Clauses: (paths)
Backup WildTracks Drive
Parameters
Source Drive SCSI ID: (0-15)
Destination Drive SCSI ID: (0-15)
Control Decks by Key
Parameters
Deck Key: (key name)
Action: menu (No Action, Pause, Play, Record, Reset Deck, Clear Deck, Skip Backward, Skip Forward, Enable
Deck or Tracks, Disable Deck or Tracks, Hold Deck, Un-Hold Deck, Isolate Deck, Un-Isolate Deck, Set Track
Loop Count)
New Loops Left: (0-100000)
Infinite Loops: checkbox
Target Track: (1-127)
Affect All Tracks: checkbox
Set Deck Position: checkbox, time value
Match Only These Decks: checkbox, decks
Create Virtual Drive File
Parameters
Drive SCSI ID: (0-15)
Display SCSI Drive Diagnostics
Parameters
SCSI Drive ID: (0-15)
Diagnostic Type: menu (Pass/Fail Only, Print Detailed Info, Run Quick Self-Test, Run Extended Self-Test)
Format WildTracks Drive
Parameters
Drive SCSI ID: (0-15)
51
Wild Tracks
Mount WildTracks Drives
No Parameters.
Repair WildTracks Drive
Parameters
Drive SCSI ID: (0-15)
Rescan SCSI
No Parameters.
Warning
Rescan SCSI is deprecated and should not be used. Mount WildTracks Drives should be used instead.
Run Shell Command
Parameters
Log Output Level: menu (None, Info, Warning, Error, Critical)
Shell Command: text
Set Loop Counter
Parameters
Target Deck: (1-32)
Affect All Decks: checkbox
Target Track: (1-127)
Affect All Tracks: checkbox
New Loops Left: (0-100000)
Infinite Loops: checkbox
Set Time Code Sync Logic
Parameters
Enable Resynchronization: menu (Disable Resynchronization, Enable Resynchronization (during preroll only),
Enable Resynchronization (all the time))
Maximum Allowed Lock Error (ms): (1-2000)
Re-Sync deck after (ms): (0-10000)
Unmount WildTracks Drives
No Parameters.
Verify WildTracks Subcues
No Parameters.
52
Control Point Indices
Control Point Value Types
Input Control Points
Bus and Matrix Control Points
Output and Aux Control Points
VGroup Control Points
Metering Control Points
Automation Control Points
SpaceMap Control Points
Wild Tracks Control Points
VRAS Control Points
Frame Control Points
Miscellaneous Control Points
53
54
55
56
58
59
59
60
61
62
63
64
This chapter provides a reference list of all control points used to create subcues.
Control Point Value Types
This section provides a list of all types of values used in control points.
cvt_bool
Value is a boolean: true or false.
cvt_count
Value is an int32 representing the number of something in a set (0 or higher).
cvt_dbid
Value is an int32 indicating the ID of an item in the automation database.
cvt_dynamicstype
Value is an int32; one of the enumerated dynamics types.
cvt_eqtype
Value is an int32; one of the enumerated EQ types.
cvt_float
Value is a float (any float is permissible).
cvt_freq
Value is a float that represents a frequency in Hz.
cvt_gain
Value is a float that represents a decibel gain value.
cvt_index
Value is an int32 representing an index into an ordered set (or -1 if invalid).
cvt_label
Value is a human-readable string.
cvt_linklight
A value between 0 and 3, inclusive, indicating "off", "red", "green", and "orange".
cvt_meters
Value is a float representing a physical distance or offset in meters.
cvt_position
Value is a Point (2 floats) representing a location in a SpaceMap.
cvt_ms
Value is an int32 representing milliseconds.
53
Input Control Points
cvt_6ms
Value is an int32 representing sixths-of-milliseconds.... i.e. 1=166us, 2=333us, 3=500us, etc.
cvt_nfloat
Value is a normalized float. Must be between 0.0f and 1.0f, inclusive.
cvt_q
Value is a float representing 'q'.
cvt_temperature
A floating point value indicating a temperature in degrees Celsius.
cvt_timecode
Value is an int32 representing a bit-packed time code value according to the MTC spec.
cvt_traceString
A string encodes a set of control points along a signal path, e.g. "I1-25,36,47,50-50;B1-5;1-10".
cvt_voltage
A floating point value indicating a voltage (in volts).
Input Control Points
Input Aux Level
Input inputIndex Aux auxIndex Level: cvt_gain
Input Aux Pan
Input inputIndex Aux auxIndex Pan: cvt_nfloat
Input Aux Pre/Post
Input inputIndex Aux auxIndex AffectPost: cvt_bool
Input Bus Assign Enable
Input inputIndex Assign assignIndex Enable: cvt_bool
Input Bus Assign Index
Input inputIndex Assign assignIndex Index: cvt_index
Input Channel Enable
Input inputIndex Channel Enable: cvt_bool
Input Delay Enable
Input inputIndex Delay Enable: cvt_bool
Input Delay Time
Input inputIndex Delay: cvt_ms
Input Dynamics Enable
Input inputIndex Dynamics bandIndex BandEnabled: cvt_bool
Input Dynamics Type
Input inputIndex Dynamics bandIndex Type: cvt_dynamicstype
Input Dynamics Threshold
Input inputIndex Dynamics bandIndex Threshold: cvt_gain
Input Dynamics Hold Time
Input inputIndex Dynamics bandIndex Hold: cvt_6ms
Input Dynamics Attack Time
Input inputIndex Dynamics bandIndex AttackTime: cvt_6ms
Input Dynamics Release Time
Input inputIndex Dynamics bandIndex ReleaseTime: cvt_6ms
Input Dynamics Ratio
Input inputIndex Dynamics bandIndex Ratio: cvt_float
Input Dynamics Output Gain
Input inputIndex Dynamics bandIndex Level: cvt_gain
Input Dynamics Link Channel
Input inputIndex Dynamics Link Channel: cvt_index
54
Bus and Matrix Control Points
Input Dynamics Link Enable
Input inputIndex Dynamics Link Enable: cvt_bool
Input EQ Band Bypass
Input inputIndex EQ bandIndex BandEnabled: cvt_bool
Input EQ Enable
Input inputIndex EQ Enable: cvt_bool
Input EQ Freq
Input inputIndex EQ bandIndex Frequency: cvt_freq
Input EQ Gain
Input inputIndex EQ bandIndex Level: cvt_gain
Input EQ Q
Input inputIndex EQ bandIndex Q: cvt_q
Input EQ Status
Input inputIndex EQ Status: cvt_int32 (read-only)
Input EQ Type
Input inputIndex EQ bandIndex Type: cvt_eqtype
Input EQ Label
Input inputIndex EQ bandIndex Label: cvt_string
Input Invert
Input inputIndex Invert: cvt_bool
Input Isolate
Input inputIndex Isolate [isoType]: cvt_int32 (>0 means isolated)
Input Label
Input inputIndex Label: cvt_string
Input Level
Input inputIndex Level: cvt_gain
Input Pan
Input inputIndex Pan: cvt_nfloat
Input Phantom Power
Analog Input inputIndex Phantom Enable: cvt_bool
Input Mute
Input inputIndex Mute: cvt_bool
Input Scale
Analog Input inputIndex Scale: cvt_dB
Input Solo
Input inputIndex Solo: cvt_bool
Input Trim
Input inputIndex Trim: cvt_gain
Input VGroup A Assign
Input inputIndex VGroup 1: cvt_index
Input VGroup B Assign
Input inputIndex VGroup 2: cvt_index
Bus and Matrix Control Points
Bus Invert
Bus busIndex Invert: cvt_bool
Bus Isolate
Bus busIndex Isolate isoType: cvt_int32 (>0 means isolated)
Bus Label
Bus busIndex Label: cvt_string
55
Output and Aux Control Points
Bus Level
Bus busIndex Level: cvt_gain
Bus Matrix Level
Bus busIndex Output outputIndex Level: cvt_gain
Bus Mute
Bus busIndex Mute: cvt_bool
Bus Solo
Bus busIndex Solo: cvt_bool
Bus Trim
Bus busIndex Trim: cvt_gain
Bus VGroup A Assign
Bus busIndex VGroup 1: cvt_index
Bus VGroup B Assign
Bus busIndex VGroup 2: cvt_index
Output and Aux Control Points
Output Channel Enable
Output outputIndex Channel Enable: cvt_bool
Output Delay Enable
Output outputIndex Delay Enable: cvt_bool
Output Delay Time
Output outputIndex Delay: cvt_ms
Output Dynamics Attack Time
Output outputIndex Dynamics bandIndex AttackTime: cvt_6ms
Output Dynamics Enable
Output outputIndex Dynamics bandIndex Band Enabled: cvt_bool
Output Dynamics Gain
Output outputIndex Dynamics bandIndex Level: cvt_gain
Output Dynamics Hold Time
Output outputIndex Dynamics bandIndex Hold: cvt_6ms
Output Dynamics Link Channel
Output outputIndex Dynamics Link Channel: cvt_index
Output Dynamics Link Enable
Output outputIndex Dynamics Link Enable: cvt_bool
Output Dynamics Ratio
Output outputIndex Dynamics bandIndex Ratio: cvt_float
Output Dynamics Release Time
Output outputIndex Dynamics bandIndex ReleaseTime: cvt_6ms
Output Dynamics Threshold
Output outputIndex Dynamics bandIndex Threshold: cvt_gain
Output Dynamics Type
Output outputIndex Dynamics bandIndex Type: cvt_dynamicstype
Output EQ Bypass
Output outputIndex EQ Enable: cvt_bool
Output EQ Band Bypass
Output outputIndex EQ bandIndex BandEnabled: cvt_bool
Output EQ Freq
Output outputIndex EQ bandIndex Frequency: cvt_freq
Output EQ Gain
Output outputIndex EQ bandIndex Level: cvt_gain
56
Output and Aux Control Points
Output EQ Q
Output outputIndex EQ bandIndex Q: cvt_q
Output EQ Status
Output EQ Status: cvt_int32 (read only)
Output EQ Type
Output outputIndex EQ bandIndex Type: cvt_eqtype
Output EQ Label
Output outputIndex EQ bandIndex Label: cvt_string
Output Invert
Output outputIndex Invert: cvt_bool
Output Isolate
Output outputIndex Isolate isoType: cvt_int32 (>0 means isolated)
Output Label
Output outputIndex Label: cvt_string
Output Level
Output outputIndex Level: cvt_gain
Output Mute
Output outputIndex Mute: cvt_bool
Output Scale
Analog Output outputIndex Scale: cvt_dB
Output Solo
Output outputIndex Solo: cvt_bool
Output Trim
Output outputIndex Trim: cvt_gain
Output VGroup A Assign
Output outputIndex VGroup 1: cvt_index
Output VGroup B Assign
Output outputIndex VGroup 2: cvt_index
Aux Channel Enable
Aux auxIndex Channel Enable: cvt_bool
Aux Delay Enable
Aux auxIndex Delay Enable: cvt_bool
Aux Delay Time
Aux auxIndex Delay: cvt_ms
Aux Dynamics Attack Time
Aux auxIndex Dynamics bandIndex AttackTime: cvt_6ms
Aux Dynamics Enable
Aux auxIndex Dynamics bandIndex Band Enabled: cvt_bool
Aux Dynamics Gain
Aux auxIndex Dynamics bandIndex Level: cvt_gain
Aux Dynamics Hold Time
Aux auxIndex Dynamics bandIndex Hold: cvt_6ms
Aux Dynamics Link Channel
Aux auxIndex Dynamics Link Channel: cvt_index
Aux Dynamics Link Enable
Aux auxIndex Dynamics Link Enable: cvt_bool
Aux Dynamics Ratio
Aux auxIndex Dynamics bandIndex Ratio: cvt_float
Aux Dynamics Release Time
Aux auxIndex Dynamics bandIndex ReleaseTime: cvt_6ms
57
VGroup Control Points
Aux Dynamics Threshold
Aux auxIndex Dynamics bandIndex Threshold: cvt_gain
Aux Dynamics Type
Aux auxIndex Dynamics bandIndex Type: cvt_dynamicstype
Aux EQ Bypass
Aux auxIndex EQ Enable: cvt_bool
Aux EQ Band Bypass
Aux auxIndex EQ bandIndex BandEnabled: cvt_bool
Aux EQ Freq
Aux auxIndex EQ bandIndex Frequency: cvt_freq
Aux EQ Gain
Aux auxIndex EQ bandIndex Level: cvt_gain
Aux EQ Q
Aux auxIndex EQ bandIndex Q: cvt_q
Aux EQ Status
Aux EQ Status: cvt_int32 (read only)
Aux EQ Type
Aux auxIndex EQ bandIndex Type: cvt_eqtype
Aux EQ Label
Aux auxIndex EQ bandIndex Label: cvt_string
Aux Invert
Aux auxIndex Invert: cvt_bool
Aux Isolate
Aux auxIndex Isolate isoType: cvt_int32 (>0 means isolated)
Aux Label
Aux auxIndex Label: cvt_string
Aux Level
Aux auxIndex Level: cvt_gain
Aux Mute
Aux auxIndex Mute: cvt_bool
Aux Scale
Analog Aux auxIndex Scale: cvt_dB
Aux Solo
Aux auxIndex Solo: cvt_bool
Aux Trim
Aux auxIndex Trim: cvt_gain
Aux VGroup A Assign
Aux auxIndex VGroup 1: cvt_index
Aux VGroup B Assign
Aux auxIndex VGroup 2: cvt_index
System Aux Mute
System Aux Mute: cvt_bool
VGroup Control Points
VGroup Invert
VGroup vgroupIndex Invert: cvt_bool
VGroup Isolate
VGroup vgroupIndex Isolate isoType: cvt_int32 (>0 means isolated)
VGroup Label
VGroup vgroupIndex Label: cvt_string
58
Metering Control Points
VGroup Level
VGroup vgroupIndex Level: cvt_gain
VGroup Mute
VGroup vgroupIndex Mute: cvt_bool
VGroup PFL
VGroup vgroupIndex Listen Enable: cvt_bool
VGroup PFL Hold
VGroup Listen Hold: cvt_bool
VGroup Solo
VGroup vgroupIndex Solo: cvt_bool
VGroup Trim
VGroup vgroupIndex Trim: cvt_gain
Metering Control Points
Aux Clipping Indicator
Aux auxIndex Clip: cvt_bool
Aux Dynamics Meter
Aux auxIndex Dynamics Meter: cvt_gain
Aux Meter Level
Aux auxIndex Meter: cvt_gain
Input Clipping Indicator
Input inputIndex Clip: cvt_bool
Input Dynamics Meter
Input inputIndex Dynamics Meter: cvt_gain
Input Meter Level
Input inputIndex Meter: cvt_gain
Output Clipping Indicator
Output outputIndex Clip: cvt_bool
Output Dynamics Meter
Output outputIndex Dynamics Meter: cvt_gain
Output Meter Level
Output outputIndex Meter: cvt_gain
Automation Control Points
Active Cue Entry ID
Automation playerID Active CueEntry ID
Active Cue ID
Automation playerID Active Cue ID: cvt_index
Active Cue Index
Automation playerID Active CueEntry Index: cvt_index
Active Cue List Length
Automation playerID Active CueList Size: cvt_index
Active Cue List ID
Automation playerID Active CueList ID: cvt_index
Active Subcue ID
Automation playerID Active Subcue ID: cvt_index
Cue-On-Deck Cue Entry ID
Automation playerID Status CueEntry ID
59
SpaceMap Control Points
Fades Paused Status
Automation playerID Enable: cvt_bool
MTC Status
TimeCode MTC: cvt_timecode
Next Cue Entry ID
Automation playerID Next CueEntry ID
Next Cue Index
Automation playerID Next CueEntry Index: cvt_index
Recall Time Remaining
Automation Active Duration: cvt_int (seconds)
Time Code Enabled
System Time Code Enable: cvt_bool
Time Code Enabled
Automation TimeCode Enable: cvt_bool
SpaceMap Control Points
Bus SpaceMap A ID
Bus busIndex SpaceMap A: cvt_dbid
Bus SpaceMap B ID
Bus busIndex SpaceMap B: cvt_dbid
SpaceMap Bus Position
Bus busIndex Position: cvt_position
SpaceMap Bus Trajectory Divergence
Bus busIndex Trajectory Divergence: cvt_float
SpaceMap Bus Trajectory Enable
Bus busIndex Trajectory Enable: cvt_bool
SpaceMap Bus Trajectory Hold
Bus busIndex Trajectory Hold: cvt_bool
SpaceMap Bus Trajectory ID
Bus busIndex Trajectory ID: cvt_dbid
SpaceMap Bus Trajectory Isolate
Bus busIndex Trajectory Isolate: cvt_int32 (>0 means isolated)
SpaceMap Bus Trajectory Level
Bus busIndex Trajectory Level: cvt_gain
SpaceMap Bus Trajectory Loop Count
Bus busIndex Trajectory Repetitions: cvt_float
SpaceMap Bus Trajectory Offset
Bus busIndex Trajectory Offset X: cvt_float
Bus busIndex Trajectory Offset Y: cvt_float
SpaceMap Bus Trajectory Pan
Bus busIndex Trajectory Pan: cvt_float
SpaceMap Bus Trajectory Playback Rate
Bus busIndex Trajectory Rate: cvt_float
SpaceMap Bus Trajectory Position
Bus busIndex Trajectory PositionPercent: cvt_float
SpaceMap Bus Trajectory Rotation
Bus busIndex Trajectory Rotation: cvt_degrees
SpaceMap Bus Trajectory Scale
Bus busIndex Trajectory Scale X: cvt_float
60
Wild Tracks Control Points
Bus busIndex Trajectory Scale Y: cvt_float
SpaceMap Bus Trajectory Time
Bus busIndex Trajectory Duration: cvt_ms
SpaceMap Bus Trajectory Time Position
Bus busIndex Trajectory Position: cvt_ms
Wild Tracks Control Points
Wild Tracks Batch File Name
WildTracks wtUnit Track TrackID Path Media: (string)
Wild Tracks Channel Deck
WildTracks wtUnit Channel channelIndex Deck: cvt_index (int32)
Wild Tracks Channel Status
WildTracks wtUnit Channel channelIndex Status: cvt_int
Wild Tracks Deck Hold
WildTracks wtUnit Deck deckID Hold: cvt_int32
Wild Tracks Deck Isolate
WildTracks wtUnit Deck deckID Isolate: cvt_int32
Wild Tracks Deck Label
WildTracks wtUnit Deck deckID Label: (string)
Wild Tracks Deck Length
WildTracks wtUnit Deck deckID Duration: (int64)
Wild Tracks Deck Media
WildTracks wtUnit Deck deckID Media: (Message)
Wild Tracks Deck Position
WildTracks wtUnit Deck deckID Position: (int64) (in samples)
Wild Tracks Deck Status
WildTracks wtUnit Deck deckID Status: (int32)
Wild Tracks Dropped Sample Status
WildTracks wtUnit ShapeFactor Status: (int32)
Wild Tracks DSP Usage Percentage
WildTracks wtUnit DSP: cvt_norm
Wild Tracks Master Deck Hold
Master WildTracks wtUnit Deck Hold: cvt_int32
Wild Tracks Master Deck Isolate
Master WildTracks wtUnit Deck Isolate: cvt_int32
Wild Tracks Maximum Memory
WildTracks wtUnit Maximum Memory: cvt_int
Wild Tracks Media Path
WildTracks wtUnit Media Path: (String)
Wild Tracks Memory Usage
WildTracks wtUnit Memory: (uint32)
Wild Tracks Recording Path
WildTracks wtUnit Recording Path: (String)
Wild Tracks TimeCode Enable
WildTracks wtUnit TimeCode Enable: cvt_bool
61
VRAS Control Points
Note
For Wild Tracks control points, TrackID is determined by the following function:
TrackID = (deckID x 128) + trackNumber
Wild Tracks Track Label
WildTracks wtUnit Track TrackID Label: (string)
Wild Tracks Track Length
WildTracks wtUnit Track TrackID Duration: (int64) (in samples)
Wild Tracks Track Loop Count
WildTracks wtUnit Track TrackID Loopback: (int64)
Wild Tracks Track Stream Count
WildTracks wtUnit Track TrackID Count: (uint32)
VRAS Control Points
VRAS Algorithm Type
VRAS vrasID Type: (int32)
VRAS Damping Frequency
VRAS vrasID Reverb damperID Damping Frequency: (float)(0.02f-20.0f KHz)
VRAS Damping Percentage
VRAS vrasID Reverb damperID Damping Level: (float)(0.0f-1.0f percent)
VRAS Damping Type (mid/low/high)
VRAS vrasID Reverb damperID Damping Type (damper #)
VRAS Delta Maximum
VRAS vrasID Reverb diffusion DeltaMax: (float)(0.7f-0.9f ???)
VRAS ER Cutoff Frequency
VRAS vrasID EarlyReflections Frequency: (float)(0.2f-20.0f KHz)
VRAS ER Delay
VRAS vrasID EarlyReflections bandID Delay: (float)(0.0f-0.5f seconds)
VRAN ER High-frequency Attenuation Percentage
VRAS vrasID EarlyReflections Attenuation: (float)(0.0f-1.0f percent)
VRAS ER Input Configuration Matrix
VRAS vrasID EarlyReflections Input Config: (MessageRef) (matrix spec)
VRAS ER Output Configuration Matrix
VRAS vrasID EarlyReflections Output Config: (MessageRef) (matrix spec)
VRAS Input Channel Mapping
VRAS vrasID Channel bandID Input: (float)(0.0f-0.5f seconds)
VRAS Input Channel Mute
VRAS vrasID Channel bandID Mute: cvt_bool
VRAS Input Configuration Matrix
VRAS vrasID Reverb Input Config: (MessageRef) (matrix spec)
VRAS Input Delay
VRAS vrasID Channel bandID Delay: (float)(0.0f-??? seconds)
VRAS Input Level
VRAS vrasID Channel bandID Attenuation: cvt_gain
VRAS Input VGroup
VRAS vrasID Channel bandID VGroup vgroupLayer: cvt_index
62
Frame Control Points
VRAS Reverberation Time
VRAS vrasID Reverb Duration: (float)(0.2f-10.0f seconds)
VRAS Reverb Diffusion Count
VRAS vrasID Reverb Channel Count: (int32) (0-14)
VRAS Shape Factor
VRAS vrasID Reverb diffusion ShapeFactor: (float)(2.0f-20.0f ???)
VRAS Unitary/Direct Level
VRAS vrasID Reverb Level: (float)(0.0f-1.0f percent)
Frame Control Points
Channel to Frame/Slot/Position Mapping
Input inputIndex Channel Position: cvt_int
Output outputIndex Channel Position: cvt_int
AuxOut auxIndex Channel Position: cvt_int
DSP Online Status
Frame dspID Enable: cvt_bool
Ethertracks CPU Load Percentage
Server DSP: cvt_nfloat
Ethertracks Memory Usage Percentage
Server Memory: cvt_nfloat
Frame Session ID
Frame dspID ID: int32
Frame Voltage Sensors
Frame dspID LowLevel sensorID Voltage: cvt_voltage
Frame Relays
Frame dspID LowLevel relayID Output
Frame Digital Logic Inputs
Frame dspID LowLevel inputID Input
Front Panel Display Value
DSP dspID Status Label: cvt_string
Link Light
Frame frameID Link lightID: cvt_int
Project Checksum
DSP dspID Checksum: cvt_int
STATUS_FIELD_DSP_PERCENTAGE
Frame dspID DSP: cvt_nfloat
STATUS_FIELD_MEMORY_PERCENTAGE
Frame dspID Memory: cvt_nfloat
STATUS_FIELD_CONTROL_LATENCY
Frame dspID ControlLag: cvt_ms
STATUS_FIELD_NUM_MIX_POINTS
Frame dspID MixPoints: cvt_count
STATUS_FIELD_TEMPERATURE_FRONT
Frame dspID Temperature 0: cvt_temperature
STATUS_FIELD_TEMPERATURE_BACK
Frame dspID Temperature 1: cvt_temperature
STATUS_FIELD_ANALOG_FIVE_VOLTS
Frame dspID Voltage 0: cvt_voltage
63
Miscellaneous Control Points
STATUS_FIELD_ANALOG_FIFTEEN_VOLTS
Frame dspID Voltage 1: cvt_voltage
STATUS_FIELD_ANALOG_NEGATIVE_FIFTEEN_VOLTS
Frame dspID Voltage 2: cvt_voltage
STATUS_FIELD_DIGITAL_FIVE_VOLTS
Frame dspID Voltage 3: cvt_voltage
STATUS_FIELD_DIGITAL_THREE_POINT_THREE_VOLTS
Frame dspID Voltage 4: cvt_voltage
STATUS_FIELD_SUBSCRIPTION_COUNT
Frame frameID Subscription Count: cvs_int
System LowLevel Meter Server
System LowLevel Meter Server: cvt_ipaddr
System Setup Type
System Type: cvt_int (0==simulator only 1==EtherNet 2=ELC 3=serial)
Track-From-Top Status
DSP dspID Track Count: cvt_int
Miscellaneous Control Points
System Level
System Level: cvt_gain
System Trim
System Trim: cvt_gain
System Mute
System Mute: cvt_bool
System Isolate
System Isolate 0 (isoType): cvt_int32 (>0 means isolated)
LowLevel Fade Time
System LowLevel FadeTime: cvt_ms
PFL Hold
Input Listen Hold: cvt_bool
Input PFL Enable
Input inputIndex Listen listenIndex Enable: cvt_bool
Output AFL Enable
Output outputIndex Listen listenIndex Enable: cvt_bool
Aux AFL Enable
Aux auxIndex Listen listenIndex Enable: cvt_bool
Aux Signal-Path Channel Set
Aux auxIndex Active Channel Set: cvt_traceString
Input Signal-Path Channel Set
Input inputIndex Active Channel Set: cvt_traceString
Bus Signal-Path Channel Set
Bus Active Channel Set: cvt_traceString
Output Signal-Path Channel Set
Output outputIndex Active Channel Set: cvt_traceString
Page Group Page Number
PageGroup groupID Position axisID: cvt_int32
Page Group Page Size
PageGroup groupID Size axisID: cvt_int32
Python Script Status
Script scriptID Status: cvt_int (0==stopped 1==running 2==restart)
64
Miscellaneous Control Points
Python Script Launch Command
Script scriptID Command: cvt_string
Python Script Label
Script scriptID Label: cvt_string
65
66
Wild Tracks Reference
Cables and Connectors
Telnet
67
67
Cables and Connectors
Ethernet
Ethernet cables are wired to the EIA/TIA 568 standard. All network wiring must support IEEE 802.3 standard.
SCSI
The LX-ELC Ethertracks Module uses a VHDCI SCSI Connector. The current model WTX-HD Wild Tracks Hard
Drives all use this same connector. The manufacturer part numbers are AMP 787254-1.
The VHDCI 0.8mm 68-pin connector has 68 pins arranged in two rows. The each row has 34 pins. This connector
has also been called SCSI-5 as well as Ultra 2 SCSI, AMP champ 0.8mm, and VHDCI-68.
Caution
All Wild Tracks disks attached to a single LX-ELC module must have a unique SCSI ID. The ID must be in the range
0 to 6, or 8 to 15. Do not use SCSI ID 7. SCSI ID 7 is the ID of the LX-ELC module.
Telnet
A telnet session to an LX-ELC Ethertracks module can be used for troubleshooting and diagnosis as well as general
information.
From a terminal window type "telnet" followed by the IP address of the LX-ELC module. In this example, the IP address
is 192.168.1.101.
telnet 192.168.1.101
After you press the enter key, the following text appears:
Trying 192.168.1.121...
Connected to 192.168.1.121.
Escape character is '^]'.
etrx login:
Type "root" for your login and press the Enter key.
etrx login: root
BusyBox v1.00-pre5 (2004.01.15-15:21+0000) Built-in shell (ash)
Enter 'help' for a list of built-in commands.
#
To end the telnet session, type "exit" at the # prompt.
67
Telnet
Check Linux Version
"ELC" is an acronym for "Embedded Linux Computer". To check the Linux version, type "cat /proc/version" at the #
prompt, and the following information (or similar) appears:
# cat /proc/version
Linux version 2.4.23-lcs (lcsaudio@lcslinuxbuild) (gcc version 3.3.3
(DENX ELDK 3.1.1 3.3.3-9)) #1 Wed Mar 28 01:10:56 PST 2007
#
Check CIFS Configuration
If you get an error code –50 when trying to do a Samba mount of a drive connected to an LX-ELC module, check
to see if the CIFS configuration file is present and lists the drive. Enter the following command:
# cat /samba/lib/smb.conf
And the contents of the configuration file will appear. Here is an example configuration from an ELC module that
has two Wild Tracks drives mounted:
[global]
workgroup = WILDTRACKS
netbios name = ELC1-101
server string = Ethertracks Samba Server
security = user
null passwords = yes
log file = /tmp/samba.log
max log size = 0
log level = 2
guest account = etrx
map to guest = Bad User
max smbd processes = 10
remote announce =
remote browse sync =
local master = yes
[1-101-scsi0]
comment = Mounted Wild Tracks Disk
path = /mnt/scsi0
guest ok = yes
writeable = yes
printable = no
[1-101-scsi1]
comment = Mounted Wild Tracks Disk
path = /mnt/scsi1
guest ok = yes
writeable = yes
printable = no
Other Telnet Commands
cat /proc/kmsg
Lists out all the debug messages generated by the Linux kernel so far.
cat /proc/scsi/scsi
List out info about any connected SCSI drives.
/root/lxelcd mem
Show memory usage by all processes on the LX-ELC module.
68
Telnet
top -d 1
Show CPU usage for all processes running on the LX-ELC module.
ps -aux
List all processes running on the LX-ELC module.
/root/lxelcd listallawedclients
Show which client IP addresses are allowed to connect to mixerd and cued on this CPU.
/root/lxelcd setallowedclients [ip addresses]
Tell mixerd and cued only to accept connections from the specified IP addresses.
/root/lxelcd trace
Watch the background process's most recent checkpoint tags update.
69
70
CSDO
Setup
Commands
71
72
The CueStation installation directory contains a separate program called csdo. Csdo is a command line tool for
controlling a Matrix3 server, without using CueStation.
Setup
To use csdo, you will need to use a command line-capable program on your computer. The following instructions
cover the default command line programs that are included with each operating system, but feel free to use a different
one.
Mac OS X
1. Open the Terminal application. By default, it is located in Applications/Utilities. When you open the program,
you will see something like the following:
Last login: Mon Jul 30 17:12:02 on ttyp2
Welcome to Darwin!
computer-name:~ user-name$
2. Using the command line, navigate to the directory where CueStation (and csdo) is installed. For instance, if
CueStation is installed in your Applications folder, you might type something like:
computer-name:~ user-name$ cd /Applications/CueStation-4.6.0/
and then type the Return key. You will then see the command line prompt change to the following:
computer-name:/Applications/CueStation-4.6.0 user-name$
3. Enter the command you would like to use, starting with "./csdo" and the server's IP address. For instance, if
you wanted to recall cue 3 on a server located at 192.168.0.101, you would enter the following:
computer-name:/Applications/CueStation-4.6.0 user-name$ ./csdo 192.168.0.101 recall cue 3
See the next section, Commands (p. 72), for a list of all possible commands. Or, just enter "./csdo" and type the
Return key.
Windows XP
1. Open the MS-DOS Prompt. Click on the Start menu, then select Run... Enter "cmd" into the text box, and click
OK. You will see a window with the following text:
Microsoft Windows XP [Version 5.1.2600]
(C) Copyright 1985-2001 Microsoft Corp.
C:\Documents and Settings\Administrator>
2. Using the command line, navigate to the directory where CueStation (and csdo) is installed. For instance, if
CueStation is installed in the Program Files folder, you might type something like:
C:\Documents and Settings\Administrator> cd "\Program Files\CueStation-4.6.0"
71
Commands
and then type the Return key. You will then see the command line prompt change to the following:
C:\Program Files\CueStation-4.6.0>
3. Enter the command you would like to use, starting with "csdo.exe" and the server's IP address. For instance,
if you wanted to recall cue 3 on a server located at 192.168.0.101, you would enter the following:
C:\Program Files\CueStation-4.6.0> csdo.exe 192.168.0.101 recall cue 3
See the next section, Commands (p. 72), for a list of all possible commands. Or, just enter "csdo.exe" and type the
Return key.
SuSE Linux
1. Open a shell window. Click on the green SuSE icon in the bottom left, and select Run Command... Enter
"konsole" into the text box, and click OK. When you open the program, you will see something like the following:
username@computer-name:~>
2. Using the command line, navigate to the directory where CueStation (and csdo) is installed. For instance, if
CueStation is installed in your Applications folder, you might type something like:
username@computer-name:~> cd /Applications/CueStation-4.6.0/
and then type the Return key. You will then see the command line prompt change to the following:
username@computer-name:/Applications/CueStation-4.6.0>
3. Enter the command you would like to use, starting with "./csdo" and the server's IP address. For instance, if
you wanted to recall cue 3 on a server located at 192.168.0.101, you would enter the following:
username@computer-name:/Applications/CueStation-4.6.0> ./csdo 192.168.0.101 recall cue 3
See the next section, Commands (p. 72), for a list of all possible commands. Or, just enter "./csdo" and type the
Return key.
Commands
Parameters listed in [brackets] are optional. Parameters listed in (parenthesis) are required.
go [cuelistplayer]
Sends a "GO" command to the cue list player, if one is specified. If not, the command is sent to cue list player
1.
stop [cuelistplayer]
Sends a "Stop" command to the cue list player, if one is specified. If not, the command is sent to cue list player
1.
top [cuelistplayer]
Moves the cue-on-deck pointer to the top of the cue list, on the cue list player specified. If not, the command is
sent to cue list player 1.
bottom [cuelistplayer]
Moves the cue-on-deck pointer to the bottom of the cue list, on the cue list player specified. If not, the command
is sent to cue list player 1.
prev [cuelistplayer]
Moves the cue-on-deck pointer back one cue, on the cue list player specified. If not, the command is sent to
cue list player 1.
72
Commands
next [cuelistplayer]
Moves the cue-on-deck pointer forward one cue, on the cue list player specified. If not, the command is sent to
cue list player 1.
moveby (count) [cuelistplayer]
Moves the cue-on-deck pointer by the number (count), on the cue list player specified. If not, the command is
sent to cue list player 1.
recall (subcue|cue) (id) [cuelistplayer]
Recalls the selected cue or subcue, on the cue list player specified. If not, the command is sent to cue list
player 1.
update (subcue|cue) (id)
Updates the selected cue or subcue.
create (logentry|subcue|cue|cuelist|spacemap|trajectory|etc) (id=-1) (args...)
Create a new item of the selected type, with the specified arguments.
duplicate (subcue|cue|cuelist|spacemap|trajectory|etc) (id)
Duplicates the selected item.
delete (subcue|cue|cuelist|spacemap|trajectory) (id)
Deletes the selected item.
set (controlpointaddresses) = (controlpointvalue)
Sets the selected control point to the specified value.
copyset (controlpointaddresses) = (controlpointaddresses)
Copies the values from one set of control points to another set of control points.
blackbox [shellcommand]
Runs the command on the LX-ELC module, and outputs the results to a text file.
73
74
Python
Learning Python
Integrating Python Scripts
Python API
75
75
75
Learning Python
Python is a powerful scripting language that can also be used to write full applications. CueStation includes a Script
Execution window, which can run a Python script that will interface with CueStation and the Matrix3™ audio show
control system. The Python language is not difficult to learn, and there are many resources available in print and
online for anyone who is interested in learning.
You can download Python at http://www.python.org/ which also has many other resources for Python users, including a tutorial and documentation.
Learning Python by Mark Lutz and David Ascher is published by O'Reilly, and describes everything from installing
Python on your computer to creating graphical user interfaces.
If you already have some experience with other programming languages, http://www.diveintopython.org is a free
online book aimed at those who are interested in skipping past the basics of programming into the details of Python.
If you are new to programming, How to Think Like a Computer Scientist, located at http://www.ibiblio.org/obp/thinkCSpy/ is another free online book that will introduce you to the Python language with many examples and exercises.
Integrating Python Scripts
Python scripts can be added to any project file, and can be triggered to run automatically with a subcue. The Python
API for CueStation is described in the next section, Python API (p. 75).
To add a python script to your project, follow these steps:
1. Add the python file(s) to the Support Files window.
2. In the Script Execution window, type the name of the file you wish to run under the :label:`Command` column.
3. Use the buttons in the Status column to Restart, Run, or Stop the script.
If you want the script execution to be triggered by a cue, follow the steps above and then:
1. Make sure the script is running, by clicking on the Run button.
2. Click on the number to the left of the file name to select that script.
3. Open the Capture window, and select the box next to Python Script, then click on the Click to Capture New
button to capture the cue.
When the cue is recalled, the script will be run.
Python API
The following files are included with CueStation. If you are using windows, they can be found in the templates directory,
under _lcs, _muscle, _python, _scripts, or _support. If you are using Mac OS, right-click on the CueStation executable
and select Show Package Contents. The templates directory can be found under Contents/Resources/templates.
This chapter is a very brief description of the current state of the Python client API. It is not intended to be complete
documentation; unfortunately you will need to look at or adapt the pythonclient.py example code to see how things
work, for now.
75
Python API
ControlPointAddress Class
A ControlPointAddress object is an 8-item list that holds a single control point address. For example, to create a
ControlPointAddress that specified the first input meter, you could do this:
a = ControlPointAddress(ciInput, ciMeter, 0)
The last 5 of the 8 tokens are implicitly zero in this case. Note that in programmer-land, ControlPointAddresses keep
all the identifier tokens (e.g. ciInput and ciMeter) at the front of the address, and all the numeric indices at the end
of the address. This is different from how they addresses are typically displayed to the user in CueStation: you can
use the ToUserFriendly() and FromUserFriendly() methods of the ControlPointAddress class to convert to the user
friendly ordering before displaying them to the user. Also note that numeric indices are internally numbered counting
from zero, but 1 is added to them before displaying them to the user, since users prefer it that way.
ControlPointValue Class
A ControlPointValue object is a variant object that can hold a single value -- but that value may be any of the following
types:
VALUE_TYPE_NULL (No value present)
VALUE_TYPE_BOOL (boolean value)
VALUE_TYPE_FLOAT (floating point)
VALUE_TYPE_INT32 (32-bit signed integer)
VALUE_TYPE_STRING (character string)
VALUE_TYPE_POINT (Point, a.k.a. two floating point values)
VALUE_TYPE_MESSAGE (MUSCLE Message)
VALUE_TYPE_CONFIG (CS4 System configuration object)
VALUE_TYPE_ADDRESS (ControlPointAddress)
VALUE_TYPE_INT64 (64-bit signed integer)
When calling SetValue() on the ControlPointValue object you will need to provide one of the above VALUE_TYPE_*
tokens along with the actual value, so that the ControlPointValue knows which value type to tag the data with.
ControlPointAddressSet Classes
There are several types of ControlPointAddressSet, but they all do the same thing: specify an ordered set of ControlPointAddresses. Each class specifies its set in a different way, however, and different types of set are appropriate
to use in different situations. The currently implemented ControlPointAddressSet classes are:
ListAddressSet
Each address in the set is explicitly specified.
SingleAddressSet
Exactly one address is explicitly specified.
TableAddressSet
Equivalent to ListAddressSet, for our purposes.
MultiAddressSet
Concatenates multiple subsets into a single set.
BlockAddressSet
Specifies all addresses in a rectangular block.
These address sets are used to succinctly specify the addresses that you wish to subscribe to, unsubscribe from,
query, set the values of, etc.
ControlPointValueSet Classes
These are similar to the ControlPointAddressSet classes, except that instead of holding an ordered set of ControlPointAddresses, they hold an ordered set of ControlPointValues. One important distinction to note, however, is that
unlike ControlPointAddressSets which always have a finite size, the number of number of values held in a ControlPointValueSet is undefined. When you ask a ControlPointValueSet for the next value in the set, it will always give
76
Python API
you one, no matter what! (The semantics regarding what value it will give you are determined by the particular type
of ControlPointValueSet you are dealing with). So don't try to iterate over all values in a ControlPointValueSet, or
you will enter an infinite loop.
The currently implemented ControlPointValueSets are:
ListValueSet
Each ControlPointValue is specified explicitly.
SingleValueSet
A single ControlPointValue is specified explicitly.
MultiValueSet
Concatenates multiple subsets into a single set.
QNetProtocol Constant Definitions
This file (QNetProtocol.py) defines the many constants used in the CS4 communications protocol. Most of them
aren't necessary for anything you are likely to do, but here are a few useful ones:
CUEMIXER_COMMAND_SUBSCRIBE
CUEMIXER_COMMAND_UNSUBSCRIBE
CUEMIXER_COMMAND_UNSUBSCRIBEALL
CUEMIXER_COMMAND_SETVALUES
CUEMIXER_COMMAND_GETVALUES
Sending command Messages with these values as the Message's command code will cause mixerd to do useful
things. The best way to create these command Messages is by calling the MakeMixerCommand() function that is
defined in ControlPointUtilities.py -- it will take a command code, a ControlPointAddressSet, and/or a ControlPointValueSet as arguments, and return a Message object that you can then send to the server by calling mtt.SendOutgoingMessage() (see pythonclient.py for examples of this).
LX300Protocol Constant Definitions
This file (LX300Protocol.py) defines all the LX-300 specific token values that you can use in your ControlPointAddresses (e.g. ciInput, ciOutput, ciLevel, ciMeter, etc). It also provides a couple of utility functions that you can use
to convert between the tokens numeric representation (numbers between -128 and -1) and their string representation
(e.g. "input").
Last but not least, the files in the muscle/python folder are also used as part of the client/server communications
path. These files are as follows:
77
78
Open Sound Control
Lemur
OSC Address Patterns
OCS Reply Packets
Example OSC Packets
Example OSC Reply Packets
79
81
87
88
89
This chapter describes the OpenSoundControl protocol implemented in CueStation 4.6.0.
OpenSoundControl is a method for sending control messages to or from any device that supports it. Read more
about OpenSoundControl here: http://www.cnmat.berkeley.edu/OpenSoundControl/.
Lemur
This section describes functions in CueStation for mapping Matrix3 control points to controls on a Lemur or other
OSC devices.
Lemur Setup
At the time of this writing, the current version of firmware for the Lemur is 1.6.3. This firmware can be downloaded
from the JazzMutant website (http://jazzmutant.com). To create a Lemur interface project, you'll also need to
download version 1.6.3 of the JazzEditor program. Procedures for uploading firmware and creating projects are
described in the Lemur User Manual.
CueStation Setup
Once you have uploaded the correct Lemur firmware and created a project file, the next step is to create a few Externals subcues, to facilitate communication with the Lemur from CueStation.
1. First, create an IP alias for your Lemur. In the Subcue Library, create a new Externals subcue, and name it
"Lemur: Set Alias". Add an entry, change the Type to OpenSoundControl, and change the Command to Set
OSC Address Aliases.
2. In the first text box, enter a "nickname" for the Lemur (it can even be as simple as just "L"). In the second text
box, enter the IP address of the Lemur. The IP address of the Lemur can be found by pressing the left-most
button, with the gear-shaped icon. It is a good idea to set your Lemur to a specific static IP address, otherwise
it may change without warning.
3. Recall the subcue. Now, whenever there is a text box to enter the Lemur IP, you can enter the nickname instead
of looking up the IP address.
4. The next step is to add the Lemur project to the CueStation project. In CueStation, open the Support Files
window. You can drag the Lemur project file directly into the Support Files window. The Lemur project file should
have a .xml or .jzml file extension.
5. Once the Lemur project has been added to the Support Files, you can create a Send Project external. In the
Subcue Library, create another Externals subcue, and name it "Lemur: Send Project". Add an OpenSoundControl
entry, with the Send Lemur Project command.
6. For the Lemur Device IP: field, you can enter the alias name you created in the "Lemur: Set Alias" subcue (such
as "L"). The Lemur XML Support File Name: should be the name of the file you dragged into the Support Files
window (including the file extension).
7. For the "On Lemur Reboot" options, you can set it to automatically recall this subcue when the Lemur has been
power-cycled. Change "Do Nothing" to "Recall Subcue", and then enter the ID of the "Lemur: Send Project"
subcue.
8. Power-cycle the Lemur, and then recall the "Lemur: Send Project" subcue. Your should see your Lemur project
appear on the Lemur screen.
79
Lemur
You are now ready to start mapping Lemur controls to LCS control points.
Note
If you edit your Lemur project file, you will need to re-import it into CueStation. Simply drag the file into the Support
Files window, and the previous version will be replaced. You do not need to edit the Send Project subcue, unless
the file name of the Lemur project changes.
Global Mapping Options
The mapping of Lemur controls to Matrix3 control points is done entirely through the Map OSC Controls external.
The first three items are not dependent on the type of objects being mapped.
OSC Device IP
Enter the IP address of the Lemur, or the alias name you created in CueStation Setup (p. 79).
OSC Device Port
This field defaults to 8000, which is the port the Lemur uses. Other OSC devices may use a different port.
Existing Mappings
This field tells the system what to do with any pre-existing OpenSoundControl mappings when this external is
executed. The options are: Don't Clear any Existing Mappings, Clear Any Existing Mappings for this Device,
and Clear all Existing Mappings.
The individual mapping controls are dependent on the type of Lemur objects. Click on Add New Mapping to map
each Lemur object to a control point, or set of control points. The mapping subcue must be recalled before the
mappings will be applied.
Mapping Fader Objects
Use the following settings for Faders, Knobs, and MultiSlider objects.
OSC Name
All OSC names should start with a "/". Then enter the name of the control object on the Lemur, followed by "/x".
For instance, if you have a Fader object named "MicInput", you would enter "/MicInput/x".
Object Behaviour
For Fader objects, select "Float Range Behaviour".
LCS Address
Enter the name of the control point to which the Lemur object will be mapped, such as "Input 1 Level".
For MultiSlider objects with more than one slider, set the LCS Address to a range, such as "Input 1-4 Level".
Time Avg (LCS Address)
Check the top Time Avg box if you want the Matrix3 control point to take its value from an average over time of
the Lemur object's value. Enter the time and rate for the average to be calculated.
Time Avg (OSC Address)
Check the lower Time Avg box if you want the Lemur object to take its value from an average over time of the
Matrix3 control point's value. Enter the time and rate for the average to be calculated.
Value Range (LCS Address)
Check top Value Range box if you want to constrain the Matrix3 control point's value to fall within a certain
custom range. By default, the range is set to the possible values of the control point.
Value Range (OSC Address)
Check the lower Value Range box if you want to constrain the Lemur object's value to fall within a custom range.
Typical values are between 0 and 1.
80
OSC Address Patterns
Note
For Lemur objects containing a set of controls, you can address each one individually. For instance, if you have a
MultiSlider object named "Inputs", you would enter "/Inputs/x:0" for the OSC Name in the first mapping, "/Inputs/x:1"
for the second mapping, and so on. This applies to Button and MultiBall objects as well.
Mapping Button Objects
Use the following settings for Pads, Switches, and other button objects.
OSC Name
Enter the name of the control object on the Lemur, followed by "/x". For instance, if you have a Pads object
named "Cue1", you would enter "/Cue1/x".
Object Behaviour
For button objects, select "Button Behaviour".
Button Recalls
Set an "On Press" action, an "On Release" action, or both. Choose whether to update or recall a cue or subcue,
and enter the cue or subcue ID.
Mapping SpaceMap Objects
Use the following settings for the MultiBall object.
OSC Name
For MultiBall objects, you will need to create two mappings: one mapping for the X coordinate, and another for
the Y coordinate. So set the first mapping to "/Multiball/x", and the second to "/Multiball/y".
Object Behaviour
Select "Float Range Behaviour".
LCS Address
Enter the name of the control point to which the Lemur object will be mapped, such as "Bus 1 Position X" or
"Bus 1 Position Y".
Time Avg (LCS Address)
Check the top Time Avg box if you want the Matrix3 control point to take its value from an average over time of
the Lemur object's value. Enter the time and rate for the average to be calculated.
Time Avg (OSC Address)
Check the lower Time Avg box if you want the Lemur object to take its value from an average over time of the
Matrix3 control point's value. Enter the time and rate for the average to be calculated.
Value Range (LCS Address)
Check top Value Range box if you want to constrain the Matrix3 control point's value to fall within a certain
custom range. For instance, you may want to constrain it to the size of your SpaceMap.
Value Range (OSC Address)
Check the lower Value Range box if you want to constrain the Lemur object's value to fall within a custom range.
Lemur objects typically produce values are between 0 and 1, which by default are mapped to the minimum and
maximum value of the Matrix3 control point.
OSC Address Patterns
You can also send OSC commands to a Matrix3 server from other OSC devices or software programs.
The CueStation server "mixerd" listens for incoming OpenSoundControl commands on port 14005 (port 14055 in
the demo version). mixerd listens for both UDP packets and TCP connections on that port. If a TCP connection is
received, the expected protocol is the standard one for OpenSoundControl-over-TCP: a 4-byte big-endian length
field, followed by an OpenSoundControl packet of that length, then repeat as necessary.
81
OSC Address Patterns
Below are descriptions of the method commands that clients can send to mixerd in their OSC packets:
/go
Arguments: Cue List Player ID (optional)
Equivalent to pressing the "go" button in the Transport window. This command takes zero or one arguments. It
causes the current cue-on-deck in the current Cue List to be recalled, and the cue-on-deck pointer to be advanced.
If an integer argument is specified, it is taken to be the Cue List Player index (0-126). If it isn't specified, player #1
is assumed (for backwards compatibility)
Cue List Player Example: "Go" on Cue List Player 4.
/go ,i 5
/stop
Arguments: Cue List Player ID (optional)
Equivalent to pressing the "stop" button in the Transport window. This command takes zero or one arguments. If
zero arguments are provided, /stop causes all current automation activity (including cue list autofollows, SpaceMap
trajectory playback, Wild Tracks audio playback, fader fades, etc) to be immediately stopped.
If an integer argument is specified, it is taken to be a Cue List Player index (0-126), and only that Cue List Player
will be stopped. If the index is 127, this is interpreted as a special case meaning "all Cue List Players in the current
config".
/moveby
Arguments: ,i + N
Arguments: ,ii
Move the "on deck cue" in the cue list up or down by N steps.This command takes a single integer argument which
indicates the number of entries that the "on deck cue pointer" should move forward in the current cue list. So for
example, +1 is equivalent to pressing the "next" button in the Transport window once, and -1 is equivalent to
pressing the "previous" button in the Transport window once.
If you wish to move immediately to the top or bottom of the cue list, you can do so by passing a very large positive
or negative value as the argument here. (this works because the cue-on-deck pointer's position will be constrained
to keep it from moving "off the ends" of the cue list)
If a second integer argument is specified, it is taken to be the Cue List Player index (0-126). If it isn't specified,
player #0 is assumed (for backwards compatibility). If 127 is specified, all cue list players will be affected.
Example: Move forward by 3 cues.
/moveby ,i 3
/recall
Arguments: ,iii + X + Y + Z
Recall a cue or subcue.
This command takes two or three integer arguments. The first argument should either be zero (to indicate a cue
recall) or one (to indicate a subcue recall). The second argument is the ID of the cue (or subcue) to be recalled.
If a third argument is specified, it will be parsed as the index of the Cue List Player that should do the cue/subcue
recall. If the third argument is not specified, Cue List Player #0 (aka the first one) will be used by default.
Example: Recall cue 14 on Cue List Player 3.
/recall ,iii 1 14 3
/set
Arguments: ,s* + [ControlPointValues]
82
OSC Address Patterns
Set one or more control points to one or more values, using a string.
Arguments: ,b** + [OSC blob]
Set one or more control points to one or more values, using address "blobs".
This command is quite flexible in that its arguments can be sent in several forms. In any form, however, the arguments
indicate a set of one or more ControlPointAddresses, followed by a list of one or more ControlPointValues. The
specified ControlPointValues will be assigned to the specified ControlPointAddresses, in the order they are listed.
The easy way to specify the set of ControlPointAddresses is as a string. In this case, the string takes uses the exact
same human-readable format as is seen in the Subcue Library window. Here are a few example address strings
that you could use:
"Input 1 Mute" "Bus 1,4,9 Invert" "Output 1-8 Level" "Bus 1-3 Output 5,7,15-20 Level"
You can even specify several sets in a single string if you prefer, by separating the sets with semicolons, like this:
"Input 1-4 Mute; Output 1-8 Level; System Level"
A less user-friendly but more server-CPU-efficient way to specify the set of ControlPointAddresses is as a set of
one or more "address blobs". An "address blob" represents a ControlPointAddress using OpenSoundControl's "blob"
data type. In this case contents of each blob should be a series of between one and eight (16-bit, big-endian) numbers,
encoded as two bytes each. Negative numbers have special meanings as tokens, as documented in cpindices.py.
For example, -114 is the token for "Input", and -113 is the token for "Output", and so on. Therefore, if you wanted
to express "Input 1 Mute" as a blob, the array of int16s would look like this:
{-114, -91, 0} // i.e. (ciInput, ciMute, 0)
Note that the "0" indicates input 1 (indices are always numbered starting from zero in this format) and that the numeric indices should always appear after the negative token values. (Also note that trailing zeroes are optional and
may be omitted -- i.e. in this case {-114, 91} would mean the same thing) As another example, here is "Bus 5 Output
7 Level" expressed as an address-blob: {-110, -113, -94, 4, 6} // i.e. (ciBus, ciOutput, ciLevel, 4, 6) You can specify
as many address-blobs as you like in this command; each address-blob specifies one address to set to the values
that are specified next.
Next, you should specify one or more value arguments. These arguments may be any of the following OpenSoundControl argument types:
i - 32-bit integer
f - 32-bit floating point
s - OSC string
F - boolean false
T - boolean true
h - 64-bit integer
P - Point (a non-standard, propietary type which consists of 2 32-bit big-endian floats)
The number of value arguments included in your /set command should be less than or equal to the number of addresses specified in the address arguments -- if there are more values than addresses, the surplus values will be
ignored.
If the number of ControlPointValues specified is less than the number of ControlPointAddresses specified, the last
ControlPointValue in the values list will be re-used for the remaining ControlPointAddresses. This behavior is useful
when you wish to set a large number of control points to the same value.
Example: Clear an entire 64x64 Matrix. /set ,sf 'Bus 1-64 Output 1-64 Level' -90.0
/setwf
Arguments: ,s*ff* + [ControlPoints] + [WaitTime] + [FadeTime] + [ControlPointValues]
Set one or more control points, with a wait and fade time as well.
This command is similar to /set, except that after the address argument(s) (but before the value argument(s)) you
must specify two floating point arguments: a wait time and then a fade time. Both arguments should be expressed
in seconds, and should range between 0.0 and 1000.0.
83
OSC Address Patterns
Note that the LX-300 firmware only supports doing waits and fades on certain control points (e.g. Matrix Levels). If
you specify control points for which wait and fade times are not supported, the wait and fade times will be ignored
and those control points will be set to the specified value immediately.
Also note that due to the more complex semantics of this command, feedback from the server is not suppressed.
So for example if you send a /setwf command to set Input 1 Level to unity, and you are subscribed to Input 1 Level,
you will soon receive a /got OSC message indicating that Input 1 Level has been set to unity.
Example: Wait 3 seconds, then fade up the first row of a 64x64 Matrix over 5 seconds. /setwf ,sfff 'Bus 1 Output 164 Level' 3.0 5.0 0.0
/setblock
Arguments: ,s* + [FirstControlPointAddress] + [SecondControlPointAddress] + [ControlPointValues]
Sets a block of control points to a specified value.
Arguments: ,sb** + [FirstAddressBlob] + [SecondAddressBlob] + [ControlPointValues]
Sets a block of control points to a specified value, using address "blobs".
When used with a string address, this command behaves identically to `/set`. When used with "blob-addressing",
however, the blobs are interpreted differently. Each pair of specified blobs is presumed to indicate a "block" of
ControlPointAddresses. The server will iterate through all addresses in the block in order. So, for example, if you
specified two "blob-address" arguments, say (Input 1 Level) and (Input 8 Level), they would be interpreted as indicating inputs levels 1 through 8 inclusive.
{-114, -94, 0} (i.e. first address = ciInput, ciLevel, 0) {-114, -94, 7} (i.e. last address = ciInput, ciLevel, 7)
A block can be multi-dimensional. For example, if you wanted to specify Outputs 1-8 of Buses 2-4 in the matrix, you
could add these two blobs:
{-110, -113, -94} (i.e. first address = ciBus, ciOutput, ciLevel, 1, 0) {-110, -113, -94} (i.e. last address = ciBus,
ciOutput, ciLevel, 3, 7)
You can add more than one pair of blob-addresses, if you wish to specify more than one block of addresses. For
example, if you wanted to specify Input Mutes 3-8 _and_ Input Levels 10-20, you could add these:
{-114, -91, 2} (i.e. first address = ciInput, ciMute, 3) {-114, -91, 7} (i.e. last address = ciInput, ciMute, 8) {-114, -94,
9} (i.e. first address = ciInput, ciLevel, 10) {-114, -94, 19} (i.e. last address = ciInput, ciLevel, 20)
If there are an odd number of address-blobs, the last address-blob is interpreted as a single address.
After the blobs, the control point value field(s) should then be specified as described in the `/set` documentation
above.
/setblockwf
Arguments: ,sff* + [FirstAddress] + [SecondAddress] + [WaitTime] + [FadeTime] + [ControlPointValues]
Similar to /setblock, except that you can also specify a wait and fade time.
Arguments: ,b*ff* + [FirstAddressBlob] + [SecondAddressBlob] + [WaitTime] + [FadeTime] + [ControlPointValues]
Set a block of control points with a wait and fade time, using address blobs.
This command is similar to /setblock, except that after the address argument(s) (but before the value argument(s))
you must specify two floating point arguments: a wait time and then a fade time. Both arguments should be expressed
in seconds, and should range between 0.0 and 1000.0.
Note that the LX-300 firmware only supports doing waits and fades on certain control points (e.g. Matrix Levels). If
you specify control points for which wait and fade times are not supported, the wait and fade times will be ignored
and those control points will be set to the specified value immediately.
Also note that due to the more complex semantics of this command, feedback from the server is not suppressed.
So for example if you send a /setblockwf command to set Input 1 Level to unity, and you are subscribed to Input 1
Level, you will soon receive a /got OSC message indicating that Input 1 Level has been set to unity.
Example: Wait 3 seconds, then fade up rows 1-3 of a 64x64 Matrix over 5 seconds. /setblockwf ,bbfff {ciBus,
ciOutput, ciLevel, 0, 0} {ciBus, ciOutput, ciLevel, 2, 63} 3.0 5.0 0.0
84
OSC Address Patterns
/get
Arguments: ,s + [ControlPointAddresses]
Retrieve the current value of one or more control points.
Arguments: ,ss + [ControlPointAddresses] + [TagString]
Retrieve the current values of one or more control points, and include a tag string.
This command lets you query the server for the current state of one or more control points. The control point addresses
should be specified either via a human-readable string or via a series of one or more address-blobs, exactly as described in the `/set` documentation.
Values are not specified in this command, of course, since you are requesting values, not sending them.
You may, however, optionally specify a string argument after the address argument(s). This string may be any string
you like. It will be used as a tag for your request, and will be sent back to you in the reply packet(s). This is useful
to help determine which reply packets are associated with which requests.
If you do not include a tag string, a unique tag string will be chosen for you by the server.
The server will send back the requested data as a series of one or more `/got` OSC packets. If the `/get` command
was received on from a TCP stream, the `/got` packets will be sent back to that TCP stream; if the `/get` command
was received in the form of UDP packets, the `/got` packets will be sent back to the IP address and port that the
`/get` packet was sent from.
For info on the `/got` packet's format, see the section on `/got` at the bottom of this document.
/getblock
Arguments: ,b* + [AddressBlob]
Retrieve the current values of a set of control points, using an address blob.
Arguments: ,b*s + [AddressBlob] + [TagString]
Retrieve the current values of a set of control point, using an address blob, and specifying a tag string.
This command is the same as /get, except that any included address-blobs will be interpreted in pairs instead of as
individual addresses. See /setblock for information on how this is done.
/ping
Arguments: (none)
Causes a `/pong` packet with the same data to be sent back to the client (any argument types may be used).
This command's packet will be immediately sent back to the client, with the only difference being that the method
name string will be changed from `/ping` to `/pong`.
/python
Arguments: ,is + [ScriptID] + [CommandString]
Send a command string to a currently running Python script: ",is"
This command lets you specify a string that will be sent to a currently executing Python script (as seen in CueStation's
Script Execution window). Assuming that the Python script is based on the BasicClient.py base class, the string will
be passed to the UserCommandReceived() callback method. The default implementation of that method executes
the string as Python source code; customized scripts are free to override it to handle the string differently, of course.
The first argument is the index of the script execution slot that the command should be sent to. This integer should
be a value between 0 (the first execution slot, at the top of the Script Execution window) and 31 (the last execution
slot). The string may be any string you like, although it does need to be short enough to fit into an OSC packet.
/subscribe
Arguments: ,s + [ControlPointAddresses]
Subscribe to a set of control point addresses: ",s" ",b*"
Arguments: ,b* + [AddressBlob]
85
OSC Address Patterns
Subscribe to a set of control point addresses, specified by an address blob.
This command has syntax similar to /get, except that the specified control point addresses are remembered by the
server, which will continue to send `/got` updates to your client whenever any of the addresses change. This allowed
your client to keep track of the current state of the specified addresses at all times, without having to constantly poll
their state via /get packets.
Unlike `/get`, no request-tag can be specified in a /subscribe command. The `/got` packets returned by subscriptions
will always have an empty string ("") as their tag value.
Note that subscriptions are handled per control point address, so it is possible to "build up your subscription set" via
multiple /subscribe commands, and likewise you can unsubscribe from any arbitrary sub-portion of your subscription
set at any time.
Trying to subscribe again to control points that you are already subscribed to will cause the server to immediately
re-send you those control points' current values, but otherwise will have no effect. (i.e. a client can't have two simultaneous subscriptions to the same control point)
For TCP clients, the subscriptions will remain active until they are countermanded by a /unsubscribe, /unsubscribeblock
or /unsubscribeall command, or until the client's TCP connection is broken.
For UDP clients, the subscriptions will remain active until they are countermanded by a /unsubscribe, /unsubscribeblock
or /unsubscribeall command, or until at least 30 seconds have passed without the server receiving any UDP packets
from your client. For this reason, it is important to be sure that your UDP client sends an OSC packet to the server
at least once every 30 seconds, to avoid losing your subscriptions. An empty `/ping` packet will be sufficient.
/subscribeblock
Arguments: ,b* + [AddressBlob]
Similar to `/subscribe`, but with addresses specified as a block: ",b*"
`/subscribeblock` works the same as `/subscribe`, except that any address-blob pairs will be interpreted as blocks
of addresses, rather than as separate single addresses. See the `/setblock` documentation for syntax details.
/unsubscribe
Arguments: ,s + [ControlPointAddresses]
Unsubscribe from a set of control point addresses.
Arguments: ,b* + [AddressBlob]
Unsubscribe from a set of control point addresses, by specifying an address blob.
This command has the same syntax as `/subscribe`, but the opposite effect. Any control point addresses specified
by this command that are currently subscribed to by this client will have their subscription-records removed from the
server, so that in the future when those control point addresses change, your client will no longer be notified. For
control points that your client is not currently subscribed to, this command will have no effect.
/unsubscribeblock
Arguments: ,b + [FirstAddress] + [EndAddress]
Unsubscribe to a block of addresses, specified as a blob
`/unsubscribeblock` works the same as `/unsubscribe`, except that any address-blob pairs will be interpreted as
blocks of addresses, rather than as separate single addresses. See the `/setblock` documentation for syntax details.
/unsubscribeall
Arguments: (none)
Cancel all current subscriptions for this client
This command takes no arguments. It causes any and all current subscriptions for this client to be cancelled. This
command is useful for returning your client the default "completely-unsubscribed" state without having to specify all
the control points your client is currently subscribed to.
86
OCS Reply Packets
It's recommended that UDP clients always send this packet on startup, just so that they can be guaranteed a known
state on the server (otherwise the server might still have subscriptions in your client's name, from a previous session).
/log
Arguments: ,s + [LogMessage]
Sends the specified log message to the system log.
Arguments: ,is + [Level] + [LogMessage]
Sends the log message to the system log, at the specified level.
This command sends the message you specify to the system log (as shown in the CueStation Log window). The
first argument is an integer indicating the "severity level" of the message, and it should be one of the following values:
1 = Critical Error
This message indicates a critical system failure.
2 = Error
This message indicates an error condition.
3 = Warning
This message indicates a warning.
4 = Info
This message is a normal informational message.
5 = Debug
This message contains debugging information only.
6 = Trace
This message is being used to trace program execution.
If you skip the first argument (i.e. include only a string argument), then the message will default to level 4 (info).
The second argument is the string that you want to have added to the log.
OCS Reply Packets
/got
Contains control point value data previously requested by a `/get` or `/subscribe` packet: ",s((b*)*)"
The /got packet should not be sent by clients -- rather, it is sent by the server back to the clients in response to a
`/get` or `/subscribe` packet. The /got packet contains as its first argument the tag string that was passed in to the
`/get` command. If no tag string was passed in to `/get`, the server will generate a unique string for the `/got` packets.
If the `/got` packet is being sent in response to a `/subscribe` packet, the response tag string will always be empty
(i.e. "").
After the tag string, the remainder of the packet will consist of one or more (address-blob, value) pairs. The addressblob format and value formats are the same as the ones described in the `/set` command documentation. Each pair
indicates that the current value for (that address) is (the provided value).
A single /get command may result in more than one /got reply, if there is too much data to fit into a single packet.
You can use the tag string to determine whether or not two different /got packets correspond to the same `/get`
command.
If you need to know whether or not you have received all the /got packets corresponding to your request yet, or
whether more are coming, you can find out by sending a second `/get` command immediately after your first one.
The second `/get` command can be trivial; just make sure it has a different tag-string from the first one. Once you
receive a packet with the second command's tag string, you can assume that the first request has been fully handled
(requests are handled in FIFO order). (Note that you can't use the `/ping` command for this purpose, since `/ping`
short-circuits the data path that `/get` uses and so you would likely receive the `/pong` reply before you received all
of your `/got` replies)
87
Example OSC Packets
/pong
Response to the `/ping` command.
When the server receives a `/ping` command, it will send back a `/pong` reply that is otherwise byte-for-byte
identical to the `/ping` packet. This command is useful for network testing and as a keep-alive for UDP subscriptions
(see the `/subscribe` documentation for details)
Example OSC Packets
Below are hex dumps showing the contents of various UDP packets that represent valid Matrix3/OSC commands
and replies. These same byte sequences are valid for sending over TCP to a Matrix3 system, but when using TCP
you must preface them with a 4-byte, big-endian byte-count field, so that the TCP OSC parse can know where the
packet ends and the next packet begins.
/go
Equivalent to pressing the "go" button in the Transport window:
2f 67 6f 00 2c 00 00 00
/stop
Equivalent to pressing the "stop" button in the Transport window:
2f 73 74 6f 70 00 00 00 2c 00 00 00
/moveby 1
Equivalent to pressing the "next" button in the Transport window:
2f 6d 6f 76 65 62 79 00 2c 69 00 00 00 00 00 01
/moveby -1
Equivalent to pressing the "previous" button in the Transport window:
2f 6d 6f 76 65 62 79 00 2c 69 00 00 ff ff ff ff
/recall cue 5
Tell the system to recall Cue #5:
2f 72 65 63 61 6c 6c 00 2c 69 69 00 00 00 00 00 00 00 00 05
/recall subcue 5
Tell the system to recall Subcue #58:
2f 72 65 63 61 6c 6c 00 2c 69 69 00 00 00 00 01 00 00 00 3a
/set input 1 mute enabled
2f 73 65 74 00 00 00 00 2c 73 54 00 69 6e 70 75 74 20 31 20 6d 75 74 65 00 00 00 00
/set output 5 level to +5.5dB
2f 73 65 74 00 00 00 00 2c 73 66 00 6f 75 74 70 75 74 20 35 20 6c 65 76 65 6c 00 00 40 b0 00 00
/get input 1-8 level
2f 67 65 74 00 00 00 00 2c 73 00 00 69 6e 70 75 74 20 31 2d 38 20 6c 65 76 65 6c 20 00 00 00 00
/ping HelloSailor
2f 70 69 6e 67 00 00 00 2c 73 00 00 48 65 6c 6c 6f 53 61 69 6c 6f 72 00
/python 1 "print Hello"
Send the command "print Hello" to python script ID 1:
2f 70 79 74 68 6f 6e 00 2c 69 73 00 00 00 00 00 70 72 69 6e 74 20 22 48 65 6c 6c 6f 22 00 00 00
/subscribe input 1-8 level
2f 73 75 62 73 63 72 69 62 65 00 00 2c 73 00 00 69 6e 70 75 74 20 31 2d 38 20 6c 65 76 65 6c 20 00 00 00
00
/unsubscribe input 1-8 level
2f 75 6e 73 75 62 73 63 72 69 62 65 00 00 00 00 2c 73 00 00 69 6e 70 75 74 20 33 2c 35 2c 37 20 6d 75 74
65 20 00 00 00
/unsubscribe all
Cancel all current subscriptions for this client:
88
Example OSC Reply Packets
2f 75 6e 73 75 62 73 63 72 69 62 65 61 6c 6c 00 2c 00 00 00
Example OSC Reply Packets
/got
From a subscription to "input 1-2 level":
2f 67 6f 74 00 00 00 00 2c 73 62 66 62 66 00 00 72 65 71 2d 30 00 00 00 00 00 00 04 ff 8e ff a2 c2 b4 00 00
00 00 00 06 ff 8e ff a2 00 01 7f 08 c2 b4 00 00
/pong
From a `/ping HelloSailor`:
2f 70 6f 6e 67 00 00 00 2c 73 00 00 48 65 6c 6c 6f 53 61 69 6c 6f 72 00
89
90


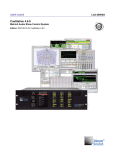


![SPARK Examiner User Manual – Release 7.3 [NT]](http://vs1.manualzilla.com/store/data/006881620_1-d7cb5afdd9ed8db40217375e4b5222ba-150x150.png)