1
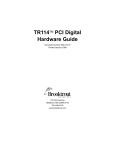
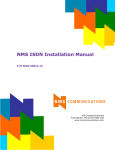
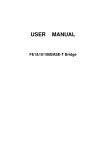
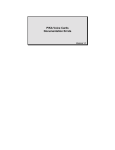
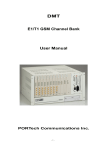
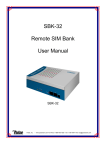
STDP
STUN & Dial-peer
User Manual
PORTech Communications Inc.
【Content】
1. Introduction .......................................................................................1
2. Parts list.............................................................................................1
3. Dimension: 14.5cm x 17cm x 3.9cm.................................................2
4. STDP Panel description....................................................................2
5. CABLING............................................................................................4
6. Web Page Setting..............................................................................5
7. System Information...........................................................................6
8. Dial Peer.............................................................................................7
8.1 Dial Status......................................................................................7
8.2 MvIP Setting...................................................................................8
9. Network............................................................................................11
10. Settings..........................................................................................14
11. Update............................................................................................15
12. Reboot............................................................................................17
1. Introduction
STDP is the external box combined with STUN Server, Dial-peer Server
and NAT function all in one that can handle all MV-37X, total volume up
to 8 ports each. User can forward the traffic to STDP Box‘s IP and Ports;
the calls will automatically switches from a busy line to available line via
couples MV-37X‘s GSM line. In that case, you won’t be trouble with lots
IP and ports created by several MV-370, MV-372 and MV-374. Also, in
NAT Trans, it requires STUN server to avoid one way audio which
caused and blocked by Firewall. STDP BOX is just like mini size STUN
Server and can accommodate and resolve the issue of NAT instead of
other PC unit.
2. Parts list
Please check the parts for any missing parts. If do, please contact
our agents:
3.1 「STDP」main body
3.2 Power adaptor AC-DC (110V AC – 12V DC) or (220V AC – 12V DC)
3.3 Network cable
3.4 User Manual
(3.1) STDP
(3.2)
(3.3)
-1-
3. Dimension: 14.5cm x 17cm x 3.9cm
3.9cm
14.5cm
4. STDP Panel description
(4.3) (4.5)
(4.1)
(4.2) (4.4)
(4.6)
-2-
17cm
4.1 DC 12V:Power socket.
4.2 LAN LED: LAN indicator light, green light. Light continues on
when LAN network is connected. Light flashes when LAN is
transmit/receive data.
4.3 LAN: Standard RJ-45 socket.
4.4 WAN LED: WAN indicator light, green light. Light continues on
when WAN network is connected. Light flashes when WAN is
transmit/receive data.
4.5 WAN: Standard RJ-45 socket, connecting to HUB.
4.6 PWR LED: Power indicator light, red light. Light is on when
system’s power supply is normal.
-3-
5. CABLING
5.1 Application
Connect the network cable from HUB to the ‘WAN’ of the STDP and
MV-37x are same way.
*If you need to stack up more MV-37x, you can stack up as follows.
5.2 STDP Reset Button
When you need reset the system or reset to Default Settings
IP (192.168.0.100), please open the slide cover on the back
side of STDP BOX , like below diagram for two button function:
-4-
(5.21)
(5.22)
5.21: Press RESET button to run the system
5.22: Click IP-RESET button for 7~8 seconds, it will restore
Reset IP: 92.168.0.100 and other settings as wells.
6. Web Page Setting
When the IP setting is done, the operator may setup all the rest
parameters via web page. Browse the IP address from Internet
Explorer (e.g. http://192.168.0.100). The following page shows up:
-5-
Enter the username and password for authentication. (default
username=voip, password=1234). The page follows when the
username and password are correct.
7. System Information.
7.1 When you login the web page, you can see the demo system current
system information like firmware version, company… etc in this
page.
7.2 Also you can see the function lists in the left side. You can use
mouse to click the function you want to set up.
-6-
8. Dial Peer.
8.1 Dial Status
Description:
1. Ring/0: ring back
2. Busy/0: connecting
3. Listen/0: busy mode
4. Ending/0: Hang up
5. INT/0: module: initialize
6. IDEL/0: not registered
7. IDEL/1: Registered
-7-
8.2 MvIP Setting
MvIP setting
Position: It can set up to 8 ports, Number 0 to 7.
E.g. MV-370*8 / MV-372*4 / MV-374*2 / MV-378*1
Comment: The item name of connected device
URL: Port: The MV-37X’s IP and ports which connect to STDP
378*1
-8-
374*2
-9-
372*4
-10-
9. Network
In Network you can check the Network status, configure the WAN
Settings and SNTP settings.
9.1 Network Status: You can check the current Network setting in this
page.
9.2 WAN Settings: You can check the current Network setting in this
page.
(1) The TCP/IP Configuration item is to setup the WAN port’s network
environment. You may refer to your current network environment to
configure the system properly.
-11-
(2) The PPPoE Configuration item is to setup the PPPoE Username and
Password. If you have the PPPoE account from your Service
Provider, please input the Username and the Password correctly.
(3) When you finished the setting, please click the Submit button.
-12-
9.3 SNTP Settings:
SNTP Setting function: you can setup the primary and second SNTP
Server IP Address, to get the date/time information. Also you can base
on your location to set the Time Zone, and how long need to synchronize
again. When you finished the setting, please click the Submit button.
-13-
10. Settings
10.1 Port Settings
Dial Peer SIP: To setup Dial Peer’s port. (Default: 5060)
Build-in STUN: STDP Box represents “Stun server”, so it can setup Stun
Server’s port in this blank. (Default: 3478)
-14-
11. Update
You can update the system’s firmware to the new one or make the
factory reset to let the system back to default setting.
11.1 Update firmware
(1) In New Firmware function you can update new firmware via HTTP in
this page. You can upgrade the firmware by the following steps:
(2)Select the firmware code type, Risc code.
(3)Click the “Browse” button in the right side of the File Location or you
can type the correct path and the filename in File Location blank.
(4)Select the correct file you want to download to the system then click
the Update button.
(5) Please click update/default setting after update firmware
-15-
11.2 Restore Default Settings
In this page: Update/ Default Settings, you could restore the factory
default settings to the system. All setting will restore default setting.
IP will retain original IP as usual not default IP.
-16-
12. Reboot
Reboot function you can restart the system. If you want to restart the
system, you can just click the Reboot button, and then the system will
automatically.
-17-