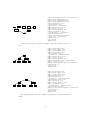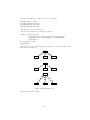
1
The
metaobj tutorial and reference manual∗
Denis Roegel
LORIA, Nancy (France)
([email protected])
June 14, 2001
metafont is in some ways an incredible programming language —
it basically consists of object-oriented macros.
Donald E. Knuth, Questions and Answers, III, 1996,
reprinted in [10], page 632.
c
c
a
c
hexagon
b
a
b
Double box with green shadow
Contents
1 Introduction
1.1
Low-level metapost . . . . . . . . . . . . . . . . . . . . . . .
1.2
metaobj requirements . . . . . . . . . . . . . . . . . . . . . .
1.3
An appetizer . . . . . . . . . . . . . . . . . . . . . . . . . . . .
∗ This
document describes
metaobj version 0.80.
1
5
5
6
7
1.4
1.5
What is an object? . . .
1.4.1 A name . . . . . .
1.4.2 Points . . . . . . .
1.4.3 Equations . . . . .
1.4.4 Pictures . . . . . .
1.4.5 Paths . . . . . . .
1.4.6 Subobjects . . . .
1.4.7 Other components
Transformations . . . .
.
.
.
.
.
.
.
.
.
.
.
.
.
.
.
.
.
.
.
.
.
.
.
.
.
.
.
.
.
.
.
.
.
.
.
.
.
.
.
.
.
.
.
.
.
.
.
.
.
.
.
.
.
.
.
.
.
.
.
.
.
.
.
.
.
.
.
.
.
.
.
.
.
.
.
.
.
.
.
.
.
.
.
.
.
.
.
.
.
.
.
.
.
.
.
.
.
.
.
.
.
.
.
.
.
.
.
.
.
.
.
.
.
.
.
.
.
.
.
.
.
.
.
.
.
.
.
.
.
.
.
.
.
.
.
.
.
.
.
.
.
.
.
.
.
.
.
.
.
.
.
.
.
.
.
.
.
.
.
.
.
.
.
.
.
.
.
.
.
.
.
.
.
.
.
.
.
.
.
.
.
.
.
.
.
.
.
.
.
.
.
.
.
.
.
.
.
.
8
8
9
9
10
10
11
11
11
2 A first object
12
2.1
A segment . . . . . . . . . . . . . . . . . . . . . . . . . . . . . 12
2.2
Connecting two objects . . . . . . . . . . . . . . . . . . . . . . 14
2.3
Creating an object containing objects . . . . . . . . . . . . . . 16
3 Interfaces and reusability
21
3.1
Standard points . . . . . . . . . . . . . . . . . . . . . . . . . . 21
3.2
Standard equations . . . . . . . . . . . . . . . . . . . . . . . . 22
4 Real examples
27
5 Advanced operations
5.1
Streamlined constructors . . . . .
5.2
Cloning . . . . . . . . . . . . . . .
5.3
Fiddling with the bounding box .
5.3.1 BB: a new bounding box layer
5.3.2 Rebinding an object . . . . .
5.4
Unattaching an object . . . . . . .
5.5
Options . . . . . . . . . . . . . . .
5.5.1 Syntax . . . . . . . . . . . . .
5.5.2 Option types . . . . . . . . .
5.5.3 Option definition . . . . . . .
5.5.4 Option names . . . . . . . . .
5.6
Adding paths to objects . . . . . .
5.7
Connections . . . . . . . . . . . .
5.7.1 ncline . . . . . . . . . . . .
5.7.2 nccurve . . . . . . . . . . . .
5.7.3 ncarc . . . . . . . . . . . . .
5.7.4 ncbar . . . . . . . . . . . . .
5.7.5 ncangle . . . . . . . . . . . .
5.7.6 ncangles . . . . . . . . . . .
5.7.7 ncdiag . . . . . . . . . . . .
5.7.8 ncdiagg . . . . . . . . . . . .
5.7.9 ncloop . . . . . . . . . . . .
5.7.10 nccircle . . . . . . . . . . .
5.7.11 ncbox . . . . . . . . . . . . .
5.7.12 ncarcbox . . . . . . . . . . .
5.7.13 nczigzag and nccoil . . . .
5.7.14 Tree and matrix variants . .
5.8
Adding labels . . . . . . . . . . . .
2
.
.
.
.
.
.
.
.
.
.
.
.
.
.
.
.
.
.
.
.
.
.
.
.
.
.
.
.
.
.
.
.
.
.
.
.
.
.
.
.
.
.
.
.
.
.
.
.
.
.
.
.
.
.
.
.
.
.
.
.
.
.
.
.
.
.
.
.
.
.
.
.
.
.
.
.
.
.
.
.
.
.
.
.
.
.
.
.
.
.
.
.
.
.
.
.
.
.
.
.
.
.
.
.
.
.
.
.
.
.
.
.
.
.
.
.
.
.
.
.
.
.
.
.
.
.
.
.
.
.
.
.
.
.
.
.
.
.
.
.
.
.
.
.
.
.
.
.
.
.
.
.
.
.
.
.
.
.
.
.
.
.
.
.
.
.
.
.
.
.
.
.
.
.
.
.
.
.
.
.
.
.
.
.
.
.
.
.
.
.
.
.
.
.
.
.
.
.
.
.
.
.
.
.
.
.
.
.
.
.
.
.
.
.
.
.
.
.
.
.
.
.
.
.
.
.
.
.
.
.
.
.
.
.
.
.
.
.
.
.
.
.
.
.
.
.
.
.
.
.
.
.
.
.
.
.
.
.
.
.
.
.
.
.
.
.
.
.
.
.
.
.
.
.
.
.
.
.
.
.
.
.
.
.
.
.
.
.
.
.
.
.
.
.
.
.
.
.
.
.
.
.
.
.
.
.
.
.
.
.
.
.
.
.
.
.
.
.
.
.
.
.
.
.
.
.
.
.
.
.
.
.
.
.
.
.
.
.
.
.
.
.
.
.
.
.
.
.
.
.
.
.
.
.
.
.
.
.
.
.
.
.
.
.
.
.
.
.
.
.
.
.
.
.
.
.
.
.
.
.
.
.
.
.
.
.
.
.
.
.
.
.
.
.
.
.
.
.
.
.
.
.
.
.
.
.
.
.
.
.
.
.
.
.
.
.
.
.
.
.
.
.
.
.
.
.
.
.
.
.
.
.
.
.
.
.
.
.
.
.
.
.
.
.
.
.
.
.
32
32
33
33
34
34
35
35
35
36
37
37
37
39
42
44
45
45
46
46
47
48
48
50
50
51
52
53
54
6 The object structure
56
7 Standard Library – Gallery
7.1
Basic objects . . . . . . . . . . . . . . . . .
7.1.1 EmptyBox . . . . . . . . . . . . . . . .
7.1.2 HRazor . . . . . . . . . . . . . . . . .
7.1.3 RandomBox . . . . . . . . . . . . . . .
7.2
Basic containers . . . . . . . . . . . . . . .
7.2.1 Box . . . . . . . . . . . . . . . . . . .
7.2.2 Polygon . . . . . . . . . . . . . . . . .
7.2.3 Ellipse . . . . . . . . . . . . . . . . .
7.2.4 Circle . . . . . . . . . . . . . . . . .
7.2.5 DBox . . . . . . . . . . . . . . . . . . .
7.2.6 DEllipse . . . . . . . . . . . . . . . .
7.3
Box alignment constructors . . . . . . . . .
7.3.1 HBox . . . . . . . . . . . . . . . . . . .
7.3.2 VBox . . . . . . . . . . . . . . . . . . .
7.4
Recursive objects and fractals . . . . . . .
7.4.1 RecursiveBox . . . . . . . . . . . . .
7.4.2 VonKochFlake . . . . . . . . . . . . .
7.5
Trees . . . . . . . . . . . . . . . . . . . . .
7.5.1 Tree . . . . . . . . . . . . . . . . . . .
7.5.2 PTree . . . . . . . . . . . . . . . . . .
7.6
Matrices . . . . . . . . . . . . . . . . . . .
7.6.1 Experimental constructions . . . . . .
7.6.2 Matrices with brackets (experimental)
7.6.3 Matrix with labels . . . . . . . . . . .
7.6.4 Matrix options . . . . . . . . . . . . .
7.7
PSTricks/metaobj gallery . . . . . . . . .
.
.
.
.
.
.
.
.
.
.
.
.
.
.
.
.
.
.
.
.
.
.
.
.
.
.
.
.
.
.
.
.
.
.
.
.
.
.
.
.
.
.
.
.
.
.
.
.
.
.
.
.
.
.
.
.
.
.
.
.
.
.
.
.
.
.
.
.
.
.
.
.
.
.
.
.
.
.
.
.
.
.
.
.
.
.
.
.
.
.
.
.
.
.
.
.
.
.
.
.
.
.
.
.
.
.
.
.
.
.
.
.
.
.
.
.
.
.
.
.
.
.
.
.
.
.
.
.
.
.
.
.
.
.
.
.
.
.
.
.
.
.
.
.
.
.
.
.
.
.
.
.
.
.
.
.
.
.
.
.
.
.
.
.
.
.
.
.
.
.
.
.
.
.
.
.
.
.
.
.
.
.
.
.
.
.
.
.
.
.
.
.
.
.
.
.
.
.
.
.
.
.
.
.
.
.
.
.
.
.
.
.
.
.
.
.
.
.
.
.
.
.
.
.
.
.
.
.
.
.
.
.
.
.
.
.
.
.
.
.
.
.
.
.
.
.
.
.
.
.
.
.
.
.
.
.
.
.
.
.
.
.
.
.
.
.
.
.
.
.
.
.
.
.
.
.
.
.
.
.
.
.
.
.
.
.
59
59
59
60
60
61
61
62
63
64
65
66
67
67
69
71
71
72
73
73
82
89
90
91
92
92
93
8 Class builder manual
8.1
Components of a class . . . . .
8.1.1 Constructor . . . . . . . .
8.1.2 Streamlined constructor .
8.1.3 Bounding path . . . . . .
8.1.4 Drawing function . . . . .
8.1.5 Alternate constructors . .
8.1.6 Additional functions . . .
8.1.7 Option declarations . . .
8.1.8 Default values for options
8.2
Design rules . . . . . . . . . .
.
.
.
.
.
.
.
.
.
.
.
.
.
.
.
.
.
.
.
.
.
.
.
.
.
.
.
.
.
.
.
.
.
.
.
.
.
.
.
.
.
.
.
.
.
.
.
.
.
.
.
.
.
.
.
.
.
.
.
.
.
.
.
.
.
.
.
.
.
.
.
.
.
.
.
.
.
.
.
.
.
.
.
.
.
.
.
.
.
.
.
.
.
.
.
.
.
.
.
.
.
.
.
.
.
.
.
.
.
.
114
114
114
116
116
116
116
117
117
118
118
9 Non-linear transformations on objects
9.1
Simple transformations which do not change the layout
9.1.1 Example 1: changing the frame color . . . . . . . .
9.1.2 Example 2: changing the content of a label . . . .
9.2
Transformations that change the layout . . . . . . . . .
.
.
.
.
.
.
.
.
.
.
.
.
.
.
.
.
119
119
119
120
120
3
.
.
.
.
.
.
.
.
.
.
.
.
.
.
.
.
.
.
.
.
.
.
.
.
.
.
.
.
.
.
.
.
.
.
.
.
.
.
.
.
.
.
.
.
.
.
.
.
.
.
.
.
.
.
.
.
.
.
.
.
.
.
.
.
.
.
.
.
.
.
10 Comparison with other packages
10.1
Compatibility with boxes.mp . . . . . . . . . . . . . . . . . . .
10.2
fancybox package . . . . . . . . . . . . . . . . . . . . . . . . .
10.3
PSTricks . . . . . . . . . . . . . . . . . . . . . . . . . . . . . .
11 Memory requirements –
12 Using
metapost bug
metaobj from within TEX
122
122
122
122
123
124
Conclusion
124
Acknowledgments
125
References
126
Index
128
4
1
Introduction
This manual describes metaobj, a system for high-level object-oriented drawing based on metapost. The name metaobj is short for “metapost Objects.”
metapost [5, 6, 2] is a programming language for drawings. It was created
by John Hobby as an adaptation of Donald Knuth’s metafont system [9].
This manual is not an introduction to metapost and some familiarity with
metapost is assumed.
This section gives a general introduction to metaobj and to the motivations
that led us to create it. We will first try to show that metaobj is a useful
approach for complex structural drawing.
1.1
Low-level
metapost
In “low-level” metapost, complex drawings can be simplified by well chosen
definitions and definitions that are well parameterized. For instance, a general
square can be defined with
def Square(expr p,l,a)=
(p--(p+l*dir(a))--(p+l*dir(a)+l*dir(a+90))
--(p+l*dir(a+90))--cycle)
enddef;
and it can then be drawn with
draw Square(origin,1cm,50);
This definition introduces an important constraint: Square returns a path,
because draw expects a path. If we now want to draw a double framed square,
we can not merely modify Square, because the double frame is not a simple
path and draw can only draw simple paths. The double framed square must be
drawn in more than one stroke. One way out is to define a special drawSquare
function:
def drawSquare(expr p,l,a)=
draw Square(p,l,a);
draw Square(p-.5mm*dir(a+45),l+1mm,a);
enddef;
If we now want a picture in the middle of the square, we can add it as a
parameter to drawSquare, and so on.
Objects can be built up, for instance using pictures. Some of these pictures
might have been created with the image function. That way, one can even use
the boxes package to put frames around frames, etc.
The boxes package is interesting because it provides a first step towards
structures, and each box has a standard interface : a bounding path, as well as
special cardinal points such as n (North), e (East), etc.
There are however problems with the boxes package. Assume we want to
draw something like
5
where all the rectangles are boxes created with the boxit function from the
boxes package, and assume we want to connect point e of one subbox to point
w of the other, and obtain something like:
e
w
We would like to use boxes or something similar because it provides a very
simple way to frame a picture. We do not want to have to place four corners
every time we have to frame something. boxes instead provides a functional
approach.
If we decide to make pictures of each subbox, and then somehow stuff them
inside a boxit, we can’t achieve our task, because the positions of the points
of interest to us have been lost. We could of course build the connection first
and put everything inside the larger box. That would work, but only because
there is no connection from a subbox to another box outside our big box. So,
no matter what we are doing, merely making a picture out of something freezes
and anonymizes what is inside.
Achieving the previous drawing with the boxes package is as a matter of
fact tricky. One would like to use this package, but it doesn’t suit the task well.
With boxes.mp we can put frames (rectangular or elliptic) around a picture,
but we can’t go further without losing the structure.
1.2
metaobj requirements
The motivation that led to our work was exactly this: when we have several
objects, such as boxes, and certain objects are inside others, we still want to
have access to the individual structures; we want to be able to reach any point,
anything that’s inside.
Rather quickly, this apparently simple task became a more ambitious one,
where we set ourselves to provide means to manipulate general structures in
the plane. At the same time, we want to keep the declarative features of the
language, as well as the functional approach of the boxes package. After many
experiments, we found it desirable to meet the following requirements:
• our system should provide a notion of object and objects should be instances of classes so that several identical objects can easily be created;
6
• an object should be similar in behavior to a point, in that an object can
be put anywhere, and objects may or may not be completely defined, just
like points;
• in order to achieve the above, considering only the points constituting an
object, we have to define equations between these points;
• the objects should by default be rigid, with only two degrees of freedom
(as in boxes), in the sense that the position of one point will determine
all the other ones;
• it is interesting to have a boxes.mp-like interface, where an object o can
be positionned with something like o.c=origin;
• the objects should accept all linear transformations by default, that is, we
must be able to move, rotate, slant, etc., our objects, and yet keep the
equations defining the objects, so that after any such linear transformation, the object can still be put anywhere with a mere o.c=...
• we must have composition, that is, it must be possible to put objects
inside objects;
• paths and pictures must be able to be part of an object;
• when an object contains another object, the subobject should be replacable by any other object; that is, the class of an object should not, if
possible, influence its use.
• all constituents should be reachable;
• the objects should be customizable, for instance through options;
• a library of classes should be provided and the creation of new classes
should be made simple
The
1.3
metaobj package addresses all these issues and many others.
An appetizer
Before going in the details of the machinery, let us give an example of the
capabilities of metaobj. The package provides a library of objects which can
be composed very easily. For instance, the following tree is obtained with the
code on the right:
def G_=new_Tree enddef;
def B_=new_Box enddef;
def P_=new_Polygon_ enddef;
tree=G_(P_(btex root etex,7)("fit(false)"))
(B_(btex leaf 1 etex),
B_(btex leaf 2 etex));
Obj(tree).c=origin;
draw_Obj(tree);
root
leaf 1
leaf 2
In this example, there are a total of four objects, and three different kinds
of objects are used: a rectangular box (Box class, here called with new Box), a
heptagon (Polygon class, here called with newPolygon ) and a tree (Tree class,
7
called with new Tree). We have defined a few shortcuts (G_, B_ and P_) and
the tree was built recursively.
new Box, newPolygon (the fact that this one has a trailing _ and not the
others will be explained later) and new Tree are “constructors.” The new Box
constructor takes a picture and frames it. The new Tree constructor takes a
root object and a list of leaves. In this case, we added an option to the root
node in order to have a regular heptagon. The default is to have these objects
fit the picture, and this is the case with the boxes. They appear as rectangles,
not squares.
Another example is the Von Koch flake:
newVonKochFlake.flake(3);
scaleObj(flake,0.5);
1/3(flake.A+flake.B+flake.C)=origin;
flake.c=origin;
drawObj(flake);
The newVonKochFlake constructor takes an integer which represents the
depth of the flake. This constructor starts by building a triangle and then calls
another constructor to make the sides. There are therefore two different kinds
of objects. After the object was built, we scale it to half its size. This can be
done with any object.
1.4
What is an object?
We provide here a first overview of what can be found inside an object.
1.4.1
A name
First, an object is something that has a name and belongs to a certain category.
When an object is created, we need at least to give it a name and we ought
to say of which kind the object is. The names that can be used for an object
are exactly those that are acceptable in the boxes package. That is, we can use
almost1 any “suffix,” that is, almost any name which would be acceptable for
a variable. For instance, an object can be named ‘n’, or ‘b2’, or ‘my.object3’,
or even #&@$$$#$, etc. (It is better to stick to simple names, though...) The
1 Names that are forbidden are names of macros, including z (which is a vardef), as well
as names of components of boxes; for instance, a1c cannot be used if a1 is an object with
a standard interface, because it represents point c of object a1; in that case, a1d, or even
a1c1 works. Which names can or cannot be accepted actually depends on the features of the
objects.
8
precise rules for suffixes are given in the metafontbook [9]. The name of an
object is used to access its components, as it is done in boxes.
1.4.2
Points
The main components of an object are its points. An object can be seen as a
set of points. For instance, one of the simplest object is EmptyBox and when we
draw its bounding box (which normally is not visible), it looks like:
It would seem then that such an object is made of only four points. Even
though it seems unnecessary, there are actually more points. First, we have
exactly the same points as those provided in the boxes package for a rectangle:
nw
n
w
sw
ne
c
s
e
se
Having all these points is useful, because one can use them for connections
with other objects, without having to recompute them all the time.
This simple box still contains more points, and we will see them in a moment.
The points of an object can be accessed with the standard boxes notation:
n.c, n.sw, etc. These points are pairs and can be used like any other pair.
1.4.3
Equations
An object need not be fixed in the plane. It can be “floating.” For instance,
if we had an object ‘n’ representing a segment with two points ‘a’ and ‘b’ such
that
n.b-n.a=(1cm,2cm);
it would be floating. The segment cannot be drawn yet. Larger sets of points
can also be “floating.”
At a first sight, equations hence belong to the points. The value of a point
can be an equation, or a dependency linking it to other points of that object,
or even to points that are not part of that object.
But when an object is created, we will usually provide equations defining it.
We might have a “segment” object and define the relations between its points as
above. More complex objects have more complex equations. But in every case,
the aim is to define all points relative to each other. No point should be defined
in an absolute way. We will see later that it is possible to “attach” points and
“detach” them later, but we consider this a lack of elegance.
9
1.4.4
Pictures
An object can naturally contain pictures. The boxes package provides two
functions, boxit and circleit, which frame pictures. However, there is a big
difference between points and pictures: a point can be floating, a picture can
not. A picture is always at some place and an equation will not move it. You
can assign it to another place, but not just hope it will move alone. The boxes
package always puts the pictures at the origin, and so do we. In order to give the
feeling of “floatness,” we will have a floating point corresponding to the location
of the picture, and everytime we need to draw the picture, we can merely move
it to its location.
1.4.5
Paths
An object usually contains lines, arrows, etc., in addition to pictures or labels.
When the lines are straight and connect two or more points of an object, the
only thing to do is to keep track of the instruction drawing the line. Everything
else is already there.
However, certain connections are more complex. Consider for instance:
nw
ne
Here, there is a connection between the two points nw and ne, but the first
point is left with an angle of 30 degrees with respect to the horizontal. This
seems fine, and one would think that it is sufficient to record the appropriate
drawing instruction in the object. Unfortunately, this is not convenient, because
the application of linear transformations to the object will produce strange
results if the hardwired angle of 30 degrees is kept. For instance, if we turn this
object by 50 degrees counterclockwise, we get:
ne
nw
One could think of computing the correct angle, but even if one does, the
angle is actually not enough to specify the right path (even if metapost draws
a path, it is probably not the one we want). This is obvious if one considers the
control points of a path.
A first problem is one similar as with the pictures: we cannot have paths
connecting undefined points. Therefore, when an object is “floating”, we could
either store a fixed path and move it, but this may not always be convenient if
we want to change the size of the object as we will see later.
One way out of this dilemma is to store inside the object all the points
defining the path, including its control points. Then, we can forget about the
angles, and just let the points move according to the transformations that are
applied to the objects, and then reconstruct the path from its points and control
points.
10
1.4.6
Subobjects
An object can refer to other objects that are its constituents. Each object will
have the names of the objects it contains, but those objects will be usable outside
the main object. The constituents could either be objects created beforehand,
or objects created by the object which will contain them.
Among the equations defining an object, there will be equations defining
how a given subobject is positionned with respect to the main object.
1.4.7
Other components
In addition to points, pictures, paths and subobjects, objects can contain other
common types, such as numerics, strings, etc., as well as arrays of such types.
They are described in section 8.1.1.
1.5
Transformations
metaobj
provides functions to apply linear transformations to objects. The
basic function is transformObj which takes an object and a transformation:
transformObj(n,t);
Usually however, one uses the more familiar versions for rotations, scales,
slants or reflections. There is of course no translation, because translating a
floating object does not make sense. (If for some reason, one wants to translate
a fixed object, we will see later that it is possible, but this facility is seldom
needed.) For instance,
rotateObj(n,30);
rotates the object ‘n’ by an angle of 30 degrees. It is equivalent to
transformObj(n,identity rotated 30);
Assuming ‘n’ has the two points given above (see page 9), this operation
would result in the new equation:
n.b-n.a=(1cm,2cm) rotated 30;
However, as anybody can convince him- or herself, you can’t just write the
previous equation after the first one to get the right result, because n.b-n.a
has two different values and we are using only equations. And we can also not
write
n.b-n.a:=(1cm,2cm) rotated 30;
for it is not a correct assignment.
So, how does rotateObj achieve the desired result? It actually first memorizes all relative positions of the points. For instance, it would first do something
like:
pair p[];
p1=n.a;p2=n.b-n-a;
11
then, it would “refresh” ‘n.a’ and ‘n.b.’ metapost makes it possible to refresh
variables using the whatever construct. whatever is a new yet undefined and
unnamed numerical variable. It is unnamed because whatever is not the name
of a variable, but it expands into a variable. Basically, we now refresh the
variables with:
n.a:=whatever;
n.b:=whatever;
Then, it is possible to achieve the result by merely saying:
n.b-n.a=(p2-p1) rotated 30;
It is along this scheme that all linear transformations are applied on floating
objects. Of course, we might have positionned the object at a fixed location,
and then done assignments, and finally untied the object, but this would’nt have
been simpler.
2
A first object
2.1
A segment
We are now ready to create our first object! We will start with the ‘Segment’
object. This object will contain two points, ‘a’ and ‘b’, and they will be located
as in the initial example.
vardef newSegment@#=
assignObj(@#,"Segment");
ObjPoint a,b;
ObjCode "@#b-@#a=(1cm,2cm)";
enddef;
The definition of the segment is pretty straightforward. Everytime we want
to create such a segment, we write something like:
newSegment.s;
meaning that ‘s’ is a new object of class ‘Segment.’ The @# is the definition
represents the name of the object.
newSegment is the constructor of the Segment class and all constructors have
a name like newhclassi, though this is only a metaobj convention.
The first instruction of the class, assignObj(@#,"Segment"), memorizes
that the object belongs to the Segment class and does various other initializations.
Points are declared with ObjPoint. This instruction defines @#a and @#b as
pairs, but it also does more, as we will see later.
The last instruction declares the equation of the segment. This equation is
given as a string because it makes it easier to store it for later use. ObjCode
not only applies the equations, it also memorizes them. Several equations can
be given as a list of strings where the name of the object is always represented
by @#. (This is done for convenience and we might have represented the object
12
in the string by something else, even though @# can be used elsewhere in the
constructor.)
When an object is created, we can display all its points (as well as other
informations that we do not describe here) with
showObj s;
This produces:
s.a=(xpart s.b-28.34645,ypart s.b-56.6929)
s.b=(xpart s.b,ypart s.b)
As you can see, ‘s.a’ is defined with respect to ‘s.b’. Only one point is
unknown.
If we write
s.a=origin;
we get:
s.a=(0,0)
s.b=(28.34645,56.6929)
Now, we can apply a rotation:
rotateObj(s,30);
and we have:
s.a=(xpart s.a,ypart s.a)
s.b=(xpart s.a-3.79764,ypart s.a+63.27086)
Notice that the object is now no longer attached. This is a choice we made,
because you usually seldom want to rotate an object around a point and keep
it there. You want to rotate an object and build something with it. The final
location of an object will then depend on the other objects, and even if you can
fix one object, you will not be able to do so with all objects. However, one could
still write a small function doing a rotation and fixing a given point. This is left
as a trivial exercise.
When we are done with the transformations of the object, we want to draw
it. We can of course write
draw s.a--s.b;
but for complex objects, it would become very cumbersome. So, whenever an
object is defined, one also defines a drawing function. In this case, it is very
simple:
def drawSegment(suffix n)=
draw n.a--n.b;
enddef;
The initial segment is drawn with
13
drawSegment(s);
and this produces
It is also possible to write
drawObj(s);
and drawObj will call drawSegment. It is actually a good idea to always use
drawObj, because it makes a program easier to maintain. If you wanted to define
another kind of segment, such as:
vardef newLongSegment@#=
assignObj(@#,"LongSegment");
ObjPoint a,b;
ObjCode "@#b-@#a=2*(1cm,2cm)";
enddef;
you could just replace
newSegment.s;
by
newLongSegment.s;
and there would be no need to change anything else. Of course, in this case,
drawSegment and drawLongSegment are probably identical, but usually, this is
not so.
2.2
Connecting two objects
Let us now create two new objects, each being a triangle:
vardef newMyTriangle@#=
assignObj(@#,"MyTriangle");
ObjPoint a,b,c;
ObjCode "@#b-@#a=(2cm,0cm)",
"@#c-@#b=(@#b-@#a) rotated 120";
enddef;
def drawMyTriangle(suffix n_)=
draw n_.a--n_.b--n_.c--n_.a;
enddef;
We create two of them and we rotate the second one by 180 degrees:
14
newMyTriangle.t1;
newMyTriangle.t2;
rotateObj(t2,180);
t1.a=origin;
t2.a-t1.a=(4cm,1cm);
drawObj(t1,t2);
This produces
a
a
The second triangle was positionned with respect to the first one. Even
though we first positionned t1, we could have written
t2.a-t1.a=(4cm,1cm);
t1.a=origin;
and would have obtained the same result.
Before any of these two equations are given, we have two floating objects.
If we write t2.a-t1.a=(4cm,1cm);, the two objects behave like one object.
However, the bond can be broken if needed, using the untieObj function. For
instance, if we want to detach the second triangle, to rotate it 20 degrees more,
and to place it a bit further to the right and up, we can do it with:
newMyTriangle.t1;
newMyTriangle.t2;
rotateObj(t2,180);
t2.a-t1.a=(4cm,1cm);
t1.a=origin;
drawObj(t1,t2);
untieObj(t2);
rotateObj(t2,20);
t2.a-t1.a=(7cm,2cm);
drawObj(t2);
and the result is
a
a
a
15
The second triangle appears twice because we have drawn it at its first
position and at its second position.
This feature can be convenient when it is necessary to use a same component
in several places in a figure. It is also possible to define several objects, or even
to clone an existing object. We could have written:
duplicateObj(t3,t2);
rotateObj(t3,20);
t3.a-t1.a=(7cm,2cm);
drawObj(t3);
and the result would still had been the same, because the duplication implicitely
unties an object.
It is important to realize that if one wants to have two identical drawings at
two different places, it is either necessary to draw an object at a first position
and then move it, or have two different objects. But a given object can’t be
located at more than one place at a given time.
The previous example showed how to create several objects and to tie them
together. But something like t3.a-t1.a=(7cm,2cm) can be accepted only when
at least one of the two objects is floating. Otherwise, there will be an error, most
likely about an inconsistent equation, because you are trying to move something
that can’t be moved by a mere equation. In this case, untying or duplicating
are options to consider.
Once a number of objects are at precise locations, they can be drawn, using
their draw functions through drawObj, or by additional draw instructions. For
instance, if one wants to connect point ‘b’ of the first triangle with point ‘b’ of
the second triangle, it is sufficient to write:
draw t1.b--t2.b;
giving:
2.3
Creating an object containing objects
Let us consider the previous drawing and assume we somehow need two copies
of it, one being rotated by 90 degrees. This looks more tricky, because what we
really have are three objects and we do not have a means to move them in a
whole. We could of course rotate each object, but then they would have to be
placed again at the right positions. This is rather cumbersome! The solution is
to create a new object containing the three previous ones. One trivial way is to
write:
16
vardef newThreeTriangles@#=
assignObj(@#,"ThreeTriangles");
newMyTriangle.t1;
newMyTriangle.t2;
rotateObj(t2,180);
duplicateObj(t3,t2);
rotateObj(t3,20);
ObjCode "t2.a-t1.a=(4cm,1cm)",
"t3.a-t1.a=(7cm,2cm)";
enddef;
def drawThreeTriangles(suffix n)=
drawObj(t1,t2,t3);
drawarrow t1.b--t2.b;
enddef;
newThreeTriangles.tt;
t1.a=origin;
drawObj(tt);
This does indeed produce the expected drawing, but there are problems
with what we have done. The objects t1, t2, and t3 are not really marked as
subobjects of tt and it won’t be possible to rotate tt. The object tt is virtually
empty. It contains nothing. As a general rule, all objects should contain at least
one point. All the objects provided in the standard library have at least the
cardinal points, which are useful to make use of the object in other contexts.
A better construction could be the following, where we add one point (c),
and three subobjects:
vardef newThreeTriangles@#=
assignObj(@#,"ThreeTriangles");
ObjPoint c;
newMyTriangle.t1;
newMyTriangle.t2;
rotateObj(t2,180);
duplicateObj(t3,t2);
rotateObj(t3,20);
SubObject(suba,t1);
SubObject(subb,t2);
SubObject(subc,t3);
ObjCode "obj(@#subb).a-obj(@#suba).a=(4cm,1cm)",
"obj(@#subc).a-obj(@#suba).a=(7cm,2cm)";
StandardTies;
enddef;
The three subobjects are here called suba, subb, and subc. The SubObject
function marks an object as a subobject of the current object. In the equations,
subobjects are shown with constructions like obj(@#suba). The last line of
the constructor is the command StandardTies. This command memorizes the
connection between one point of the object (hence the need to have at least
17
one point) and a point of each subobject. It indicates how a subobject must be
transformed when a transformation is applied to the object. Usually, the same
transformation is applied to both, but the user could provide his or her own
version of StandardTies and achieve other effects.
With the previous definition, we can apply various transformations to the
object. However, if we want to make a copy, we must use duplicateObj. We
can’t just call the constructor twice, like in:
newThreeTriangles.tt1;
newThreeTriangles.tt2;
The reason is that each call tries to define the three objects t1, t2, and t3.
But all the constructors only work if the object to define is currently undefined.
This can be enforced with clearObj and one should therefore write2 :
newThreeTriangles.tt1;
clearObj t;
newThreeTriangles.tt2;
The previous procedure is of course not acceptable, because it means one
has to know what is inside the object. A solution is to create fresh names
within the newThreeTriangles function. We can do that with the function
newobjstring . This function returns a string representing a new object name.
It constructs the string using a prefix that should not be used by the user. (This
prefix can be changed by the user if needed, but it is his or her responsibility
to ensure that it does not conflict with other variables.) In order to access the
object corresponding to the string, one uses the obj function.
vardef newThreeTriangles@#=
assignObj(@#,"ThreeTriangles");
ObjPoint c;
save sa,sb,sc;
string sa,sb,sc;
sa=newobjstring_;
sb=newobjstring_;
sc=newobjstring_;
newMyTriangle.obj(sa);
newMyTriangle.obj(sb);
rotateObj(obj(sb),180);
duplicateObj(obj(sc),obj(sb));
rotateObj(obj(sc),20);
SubObject(suba,obj(sa));
SubObject(subb,obj(sb));
SubObject(subc,obj(sc));
ObjCode "obj(@#subb).a-obj(@#suba).a=(4cm,1cm)",
"obj(@#subc).a-obj(@#suba).a=(7cm,2cm)";
StandardTies;
enddef;
2 The
clearObj function can currently only be applied to isolated objects (which are not
part of arrays) or arrays, but not to individual objects in an array. t1, t2 and t3 are three
objects in the t[] array and they are all undefined by the clearObj t call.
18
With the current definition, the constructor can be used several times, and
we can also duplicate the objects that were created, apply transformations, etc.
An alternative to the previous definition can be a parameterized definition,
where the three objects are passed to the constructors as parameters. In this
case, the objects must have been created beforehand. The definition is now:
vardef newThreeTriangles@#(suffix sa,sb,sc)=
assignObj(@#,"ThreeTriangles");
ObjPoint c;
SubObject(suba,sa);
SubObject(subb,sb);
SubObject(subc,sc);
ObjCode "obj(@#subb).a-obj(@#suba).a=(4cm,1cm)",
"obj(@#subc).a-obj(@#suba).a=(7cm,2cm)";
StandardTies;
enddef;
This shows that objects are normally manipulated as suffixes. However, we
will see later that there is a special way to use numbers for objects when the
objects are “streamlined.”
The newThreeTriangles constructor is called with:
newMyTriangle.t1;
newMyTriangle.t2;
rotateObj(t2,180);
duplicateObj(t3,t2);
rotateObj(t3,20);
newThreeTriangles.tta(t1,t2,t3);
The constructor newThreeTriangles can be called several times, with the
same objects. That means actually that the subobjects are shared between two
objects. So, whenever changes are made to one object, it will result in changes
for the other object. This may or may not be the desired behavior. If one wishes
to have two independent objects, one should either use different parameters
in the constructors, or merely duplicate an object with duplicateObj. This
function makes a deep copy of an object.
If we want now a rotated copy of the three triangles by 90 degrees, we can
simply write:
duplicateObj(ttb,tta);
rotateObj(ttb,90);
obj(tta.suba).a=origin;
obj(ttb.suba).a=origin+(10cm,-2cm);
drawObj(tta,ttb);
The result is shown here:
19
The previous coding is still unsatisfactory, in the way we have to access subobject points such as obj(tta.suba).a. This is so because our group of three
triangles does not have a point with significance besides those of the subobjects.
The ‘c’ point is not used (except internally when memorizing equations) and
remains undefined. What we could do is to decide that the ‘c’ point is one of
the three triangle’s points. In order to say that ‘c’ is the point ‘a’ of the first
triangle, it is sufficient to add the string "obj(@#suba).a=@#c" to the equations
of newThreeTriangles:
ObjCode "obj(@#subb).a-obj(@#suba).a=(4cm,1cm)",
"obj(@#subc).a-obj(@#suba).a=(7cm,2cm)",
"obj(@#suba).a=@#c";
Then, the objects tta and ttb can be simply positionned with:
tta.c=origin;
ttb.c=origin+(10cm,-2cm);
This is about the simplest we can get.
We now have a complex construction, with two objects tta and ttb, each
being made of three subobjects. Each of these eight objects are accessible in
isolation. They all have names. The three triangles of the first object are t1,
t2, and t3. The big objects are tta and ttb. And the three other triangles
have names that were generated automatically at the time of the duplication. It
is possible to get these names, but we can also reach these objects logically. For
instance, the second triangle of ttb is the object obj(ttb.subb). If we desire
it, we can draw this object by calling drawObj(obj(ttb.subb)). This shows
that it is better to use drawObj instead of drawMyTriangle, even though the
latter will eventually be called.
All the objects are accessible and so are the points of these objects. We can
connect point ‘a’ of subobject ‘subb’ of object ‘tta’ to point ‘c’ of subobject
‘suba’ of object ‘ttb’ by writing
20
draw obj(tta.subb).a--obj(ttb.suba).c;
More complex structures can be built and we will still be able to access the
complete internal structure.
3
Interfaces and reusability
As long as objects are built in isolation, for a unique use, there are few constraints on their construction. But when one builds a library of objects, there
are important issues which must be addressed. The main issue is the reusability. It is desirable to have objects that can be used like black boxes. When an
object contains a subobject, this subobject should be replaceable by any other
object meeting certain standards. This will make the construction of objects
much easier since an object will not have to know the inside of the objects it
contains.
3.1
Standard points
In order to achieve such a modularity, we take as a convention that all objects
have a minimal set of points that can be used from the outside. Two objects
may have different points, but they will at least have this minimal set. This
minimal set is called the “standard interface” of an object. It is what an object
of the library can assume of a subobject. This of course is only a convention
of our library and the objects we have created so far didn’t have this standard
interface, and they were anyway quite usable.
The purpose of the standard interface is to help plug in the object in a variety
of contexts. It won’t work for all contexts and sometimes it will be necessary to
use more information than the mere standard interface, but such an interface
provides already quite interesting facilities.
The standard interface should also serve to define the bounding box of an
object.
We therefore decided to take as the standard interface points all the points
defined in boxes such as those provided by boxes.mp. All the objects of our
library will contain the points n, s, e, w, ne, nw, se, sw and c. We stress that
this is only a convention and that one can define objects that do not have that
interface, but then the user may have more work to do when plugging objects
into one another.
However, this is not the whole story! The previous nine points are actually
only the “external standard interface.” There is also an “internal standard
interface” made of the nine points in, is, ie, iw, ine, inw, ise, isw and ic.
Initially, the internal interface is identical to the external one, that is, for each
object, points n and in, points s and is, etc., are at the same location. But
certain operations to the objects can break these identities as we will see later.
The external interface is what should be used from outside the object. The
internal interface is what should be used from the inside. This distinction does
prove quite useful in certain cases.
In order to declare an object with a standard interface, it is sufficient to
write
StandardInterface;
21
as part of the constructor, right after the assignObj call.
3.2
Standard equations
The standard points are initially connected according to equations that are
called the standard equations. These equations are divided in the pure standard
equations and the inner standard equations. The metaobj package defines the
pure standard equations with:
def PureStandardEquations=
("@#se-@#sw=@#ne-@#nw;" &
"xpart(@#se-@#ne)=0;" &
"ypart(@#se-@#sw)=0;" &
"@#n=.5[@#ne,@#nw];" &
"@#s=.5[@#se,@#sw];" &
"@#e=.5[@#ne,@#se];" &
"@#w=.5[@#nw,@#sw];" &
"@#c=.5[@#n,@#s];" )
enddef;
% parallelogram equation
%
%
%
%
%
North
South
East
West
Center
These equations are given as string constants so that they can be used within
the ObjCode section of a constructor. They define a rectangular shape.
The standard internal equations are defined with:
def StandardInnerEquations=
("@#ine=@#ne;@#inw=@#nw;@#isw=@#sw;@#ise=@#se;" &
"@#in=@#n;@#is=@#s;@#ie=@#e;@#iw=@#w;@#ic=@#c;")
enddef;
Finally, all the standard equations are defined by:
def StandardEquations=
(PureStandardEquations & StandardInnerEquations)
enddef;
In order to define the newThreeTriangles constructor with both a standard
interface and standard equations, we can write:
vardef newThreeTriangles@#(suffix sa,sb,sc)=
assignObj(@#,"ThreeTriangles");
StandardInterface;
SubObject(suba,sa);
SubObject(subb,sb);
SubObject(subc,sc);
ObjCode StandardEquations,
"obj(@#subb).a-obj(@#suba).a=(4cm,1cm)",
"obj(@#subc).a-obj(@#suba).a=(7cm,2cm)",
"obj(@#suba).a=@#c";
StandardTies;
enddef;
22
Here, the previous explicit definition of point ‘c’ is now part of the standard
interface and this is now the ‘c’ to which refers the last equation.
It is however not sufficient to declare the standard interface and the standard
equations. They still have to be defined. Having undefined points is not a
problem per se, but because these points may be used by the context of the
object. It is therefore the responsibility of the constructor to attach the points
so that all points and subobjects are tied together. However, the attachment
must only be relative. If it were not, we would have the (light) burden to have
to unattach the object after it is created.
The definition of the points involves additional equations, which tie the
interface to the subobjects. The new equations must take care not to violate
the standard equations. That means that the standard equations must be a
rectangle.
One possible solution is to add "@#ne=obj(@#subc).a". This is sufficient to
define all the points of the interface, because of the constraints of the standard
equations. We can now draw the interface (by adding a suitable draw function
to the drawThreeTriangles definition):
nw
ne
c
sw
se
This may not be what we want for a bounding box, but it is what we asked
for! Point c is the middle of [sw,ne] as a consequence of the standard equations.
It is the responsibility of the constructor to define the standard interface so
that the content of the object is inside. In certain cases, one may want to have
objects protrude or take only some of the space to achieve special effects. The
current interface will have the effect that the object will behave, at least with
the standard library, as if it were larger than it really is.
We can get a better result with different equations:
ObjCode StandardEquations,
"obj(@#subb).a-obj(@#suba).a=(4cm,1cm)",
"obj(@#subc).a-obj(@#suba).a=(7cm,2cm)",
"@#sw=(xpart(obj(@#suba).a),ypart(obj(@#subb).c))",
"@#ne=obj(@#subc).a";
23
nw
ne
sw
se
Here we defined the ‘sw’ point as having the same xpart as point ‘a’ of
subobject suba and the same ypart as point ‘c’ of subobject subb.
Incidentally, we would have obtained the same result with the function
rebindVisibleObj, even with an inappropriate definition of the cardinal points.
This function takes an object and moves the (outside) cardinal points so that
they encloses the visible part tightly. However, in order for this to work, the
cardinal points must be attached to the object.
If we now apply transformations to the object, the interface will follow the
transformations. The previous object rotated clockwise by 30 degrees produces:
Then, if we scale it with scaleObj(tta,0.5) we get:
Notice that the scale operation does not apply to the thickness of the lines.
It would be possible to have the transformation operate on the thickness of the
lines, but it is not the default behavior.
We can even reflect it, for instance with reflectObj(tta)(origin,(0,1))
which is a reflection about a vertical axis:
24
Since every linear transformation unties the objet to which it is applied (because, presumably the object is likely to be put elsewhere), there is no rotation
around a point or a reflection with respect to a certain line. There are only
absolute rotations and reflections with respect to directions. Writing
reflectObj(tta)(origin,(0,1))
or
reflectObj(tta)(origin+(3cm,2cm),(0,1)+(3cm,2cm))
amounts to the same result.
Now that we have an object with a good interface, we can try to add a picture
inside. This can be done by declaring an ObjPicture variable and defining it.
We will center the picture in the middle of the second triangle. This is done as
follows:
vardef newThreeTriangles@#(suffix sa,sb,sc)(expr p)=
assignObj(@#,"ThreeTriangles");
StandardInterface;
ObjPoint pic.off;
ObjPicture pic;
setPicture(pic)(p);
SubObject(suba,sa);
SubObject(subb,sb);
SubObject(subc,sc);
ObjCode StandardEquations,
"obj(@#subb).a-obj(@#suba).a=(4cm,1cm)",
"obj(@#subc).a-obj(@#suba).a=(7cm,2cm)",
"@#sw=(xpart(obj(@#suba).a),ypart(obj(@#subb).c))",
"@#ne=obj(@#subc).a",
"@#pic.off=1/3(obj(@#subb).a+obj(@#subb).b+obj(@#subb).c)";
StandardTies;
enddef;
The picture is the p parameter and it is stored in the pic variable of
the object. Each picture variable must also have an associated point called
hpicturei.off, hence the line ObjPoint pic.off. As we said earlier, a picture
cannot be floating and instead we move the point where the picture will be
centered. (The boxes package does the same.) We add therefore the equation
"@#pic.off=1/3(obj(@#subb).a+obj(@#subb).b+obj(@#subb).c)"
25
which defines the center of the picture as the center of the second triangle.
In order to draw the picture, the drawThreeTriangles function must be
augmented with a call to drawPicture. This function automatically uses the
location of the picture.
def drawThreeTriangles(suffix n)=
drawObj(obj(n.suba),obj(n.subb),obj(n.subc));
drawarrow obj(n.suba).b--obj(n.subb).b;
drawPicture.n(pic);
enddef;
And since drawPicture uses the picturecolor option to find out which color
it should use, we have to specify a default picture color for the ThreeTriangles
class:
setObjectDefaultOption("ThreeTriangles")("picturecolor")(black);
Finally, the constructor is merely called with an additional parameter, for
instance:
newThreeTriangles.tta(t1,t2,t3)(btex pic! etex);
The result then is:
nw
ne
pic!
sw
se
and this can be transformed, say by a reflection, and the picture follows the
transformation:
!ci
p
26
We can also slant it:
!cip
Now, the ne point is actually on the North-West and the new bounding box
is cumbersome. We have already mentionned one way of providing a standard
tight bounding box with rebindVisibleObj. In this case, it would produce:
nw
ne
!cip
sw
se
We will see later that there is also a special object BB which encapsulates an
object in a “bounding box” object.
4
Real examples
We are now ready to look at some real, albeit simple, examples from the library
of objects provided by metaobj.
The simplest of all classes is the EmptyBox. An EmptyBox is an empty rectangle, normally with no frame. Its only purpose is to take some space. For
instance, it is useful to change the spacing between leaves of a tree, when the
spacings are not all identical. The constructor looks like:
27
vardef newEmptyBox@#(expr dx,dy) text options=
ExecuteOptions(options);
assignObj(@#,"EmptyBox");
StandardInterface;
ObjCode StandardEquations,
"@#ise-@#isw=(" & decimal dx & ",0)",
"@#ine-@#ise=(0," & decimal dy & ")";
enddef;
It is called with two dimensions, which are the sides of the rectangle. It
should be noticed that the values of dx and dy can be negative and this makes
up for some special effects as we will see later.
This function also exhibits some features related to the options mechanism. Every constructor can have options modifying its behavior. The options
are given as the last parameters of the constructor and are used in a call to
ExecuteOptions. Each object decides which option it honors and how. The
EmptyBox doesn’t have many options, but it is still possible to draw its frame
with a different thickness or even to fill the box. Therefore, the drawEmptyBox
function actually is (with slight simplifications):
def drawEmptyBox(suffix n)=
if show_empty_boxes:
drawFramedOrFilledObject_(n);
fi;
drawMemorizedPaths_(n);
enddef;
This function is simple: depending on the global variable show_empty_boxes
(often used for debugging), the empty boxes are shown or not. If they are shown,
they are either filled or merely drawn. The drawFramedOrFilledObject takes
care of the various cases. If they are filled, they are filled with a color that can
be given as an option.
If the object is filled, the “bounding path” of the object is used, and it is
given by the function BpathEmptyBox. Like drawObj which calls drawEmptyBox,
BpathObj calls BpathEmptyBox. Each object must declare its “bounding path”
function. For EmptyBox, we have
def BpathEmptyBox(suffix n)=StandardBpath(n) enddef;
The standard bouding path provided by StandardBpath is merely the path
n.inw--n.isw--n.ise--n.ine--cycle. This path uses the inner interface so
that the drawing of the object does not depend on artificial changes to its
bounding box.
A more elaborate class is the RecursiveBox. An object of this class contains either no object or one object, and in this case, the subobject is also a
RecursiveBox. As can be seen, a constructor can call another constructor. We
need to give a fresh name to the subobject and we call newobjstring . And
we also call StandardTies in order to ensure that the whole structure can be
manipulated easily. This function memorizes a connection between the main
object and the subobjects.
28
vardef newRecursiveBox@#(expr n) text options=
ExecuteOptions(@#)(options);
assignObj(@#,"RecursiveBox");
StandardInterface;
% we create a subobject only when |n|>0
if n>0:
% we find a name for the subobject:
SubObject(sub,obj(newobjstring_));
% and we continue to create the hierarchy:
newRecursiveBox.obj(@#sub)(n-1);
rotateObj(obj(@#sub),OptionValue@#("rotangle"));
% the equations are slightly adapted from |newBB|:
ObjCode StandardEquations,
"save lftmost,rtmost,topmost,botmost;",
"string lftmost,rtmost,topmost,botmost;",
"lftmost=find_lft_most.obj(@#sub);",
"rtmost =find_rt_most.obj(@#sub);",
"topmost=find_top_most.obj(@#sub);",
"botmost=find_bot_most.obj(@#sub);",
"xpart(@#inw)=xpart(obj(@#sub).obj(lftmost));",
"xpart(@#ine)=xpart(obj(@#sub).obj(rtmost));",
"ypart(@#inw)=ypart(obj(@#sub).obj(topmost));",
"ypart(@#isw)=ypart(obj(@#sub).obj(botmost));";
else:
ObjCode StandardEquations,
"@#ise-@#isw=(" & decimal (OptionValue@#("dx")) & ",0)",
"@#ine-@#ise=(0," & decimal (OptionValue@#("dy")) & ")";
fi;
StandardTies;
enddef;
Figure 1: RecursiveBox constructor
The equations are not the same whether there is a subobject or not. If there
is no subobject, the object is actually quite similar to an empty box. When there
is a subobject, this one is created with newRecursiveBox. It is then rotated
with rotateObj. The equations handle the positionning of the subobject with
respect to the main object. First, the bounds of the subobject are computed.
Since the subobject has been rotated, we can’t be sure that the nw point is
really the left and top most point. The extreme values are computed with the
find lft most, find rt most, find top most and find bot most functions.
They are used to specify the constraints on the main object’s inner interface.
One should also notice that equations that are too long to fit on a line can
be split like strings are split. One should not write two strings separated by a
comma, because internally a semicolon is added at the end of each string.
def BpathRecursiveBox(suffix n)=StandardBpath(n) enddef;
The drawRecursiveBox function is interesting, because it shows that one
can check if a given object has some features. Here, we call drawObj on a
subobject only when there is a subobject. We could of course have resorted to
other ways, like storing the depth of the object within the object. This could
have been done with an ObjNumeric declaration.
def drawRecursiveBox(suffix n)=
29
drawFramedOrFilledObject_(n);
if known n.sub:
drawObj(obj(n.sub));
fi;
drawMemorizedPaths_(n);
enddef;
The call to drawMemorizedPaths makes it possible to draw additional paths
that may have been added to the object by the user.
Let’s now study newBox. This object is very similar to the rectangle boxes
from the boxes package, but it can not only frame a picture, but also any other
standard object. It can also put round corners. This explains why the code is
somewhat lengthy. The v parameter is either a picture, or a string, or a numeric.
If it is a numeric, the number is the internal number of an object.
vardef newBox@#(expr v) text options=
ExecuteOptions(@#)(options);
assignObj(@#,"Box");
StandardInterface;
StandardObjectOrPictureContainerSetup(v);
if OptionValue@#("rbox_radius")>0:
ObjPoint ene,ese,sse,ssw,wsw,wnw,nnw,nne;
% we use paths for the rounded corners if necessary
addPathVariables@#(_spath_);
fi;
if not OptionValue@#("fit"):
@#a:=max(@#a,@#b);@#b:=@#a; % square
fi;
ObjCode StandardEquations,
if numeric v:
".5[@#isw,@#ine]=.5[obj(@#sub)ne,obj(@#sub)sw]", % object
elseif (picture v) or (string v):
".5[@#isw,@#ine]=@#p.off", % picture offset
fi
if OptionValue@#("rbox_radius")>0:
"@#ine-@#nne=@#ise-@#sse=@#nnw-@#inw=@#ssw-@#isw=(" &
decimal (OptionValue@#("rbox_radius")) & ",0)",
"@#ine-@#ene=@#ese-@#ise=@#inw-@#wnw=@#wsw-@#isw=(0," &
decimal (OptionValue@#("rbox_radius")) & ")",
fi
"@#ise-@#isw=(" & decimal (2@#a+2*OptionValue@#("dx")) & ",0)",
"@#ine-@#ise=(0," & decimal (2@#b+2*OptionValue@#("dy")) & ")";
StandardTies;
if OptionValue@#("rbox_radius")>0:
addPath@#(_spath_,1,
@#nnw{left}..{down}@#wnw--@#wsw{down}
..{right}@#ssw--@#sse{right}..{up}@#ese--@#ene{up}
..{left}@#nne--cycle
);
defineBox_pathparameters(@#);
fi;
enddef;
Figure 2: Box constructor
Let us first see what happens when v is a TEX picture entered with btex
. . . etex. The call to StandardObjectOrPictureContainerSetup defines the
30
picture as a part of the object (with ObjPicture), it defines a point p.off
which is used in one of the equations, and it computes the half diagonal of the
object as vector stored into (a_,b_).
When v is a string, the text is set in the current font, without calling TEX.
When v is an object, this vector is computed too. Afterwards, we work with
this vector, and this simplifies the equations. The constructor then modifies the
vector in case the rectangle must not fit. If it fits, its size adapts to the size of
the object. Otherwise, the rectangle is a square. Therefore, if the fit option is
not set to true, a_ and b_ are defined to be equal to their maximum.
The newBox constructor distinguishes one special case: if the corners are
rounded (rbox radius> 0), eight new points are defined with ObjPoint; the
rounded frame will pass through these eight points; this frame is defined at the
end of the constructor with a call to addPath.
All the points are linked through the equations defined with ObjCode. A
first part of the code defines either the relative position of the contained object,
or the picture offset if it is a picture which is boxed. A second part of the code
defines the additional points depending on the values of the options. The last
two equations involve two dimensions, dx and dy, which have default values but
can be given different values as options. They represent a clearance between
the picture or the object and the frame.
The frame is only memorized in the case of round corners. Otherwise, it is
sufficient to use the corner points in order to draw the frame with drawBox. This
function (see below) calls drawFramedOrFilledObject if the corners are not
rounded. If they are rounded, the frame is drawn with drawMemorizedPaths .
A shadow is drawn when the shadow and framed options are true, the shadow
being the shadow of the frame. drawFramedOrFilledObject does also check
if a shadow needs to be drawn.
def drawBox(suffix n)=
if OptionValue.n("rbox_radius")=0:
drawFramedOrFilledObject_(n);
else:
if OptionValue.n("framed"):
if OptionValue.n("shadow"):
fill (BpathObj(n) shifted (1mm,-1mm))
withcolor OptionValue.n("shadowcolor");
fi;
unfill BpathObj(n);
fi;
if OptionValue.n("filled"):
fill BpathObj(n) withcolor OptionValue.n("fillcolor");
fi;
fi;
drawPictureOrObject(n);
drawMemorizedPaths_(n);
enddef;
We won’t study in detail the other objects, but the interested reader should
study the code which is extensively commented.
31
5
Advanced operations
5.1
Streamlined constructors
There are two ways to build an object with metaobj. The object can be
built by calls to the various constructors and all the objects involved can get a
name. This forces the user to devise names. Of course, arrays of names can be
used in order to overcome this burden. But sometimes, we may wish a more
“structural” construction of an object, where an object is built and immediately
plugged into another one which is built, and so on.
This requires a change in the constructors. For instance, in order to create
a box ‘b’, one can write
newBox.b(btex a test box etex);
This is a function call which returns no value. It only modifies the box to
which b refers. Since this call does not return a value, it is not well suited for a
plugin. For instance, we can’t write
newBox.b2(newBox.b1(btex an inner box etex));
In order to overcome this problem, we can use a “streamlined” constructor
and use “streamlined” constructions. The “streamlined” version of the previous
— failed — attempt is
b=new_Box(new_Box(btex an inner box etex));
Here, new Box returns an integer corresponding to a box which was created.
new Box can also take a object as parameter when the number of the object
is passed. The outer call to new Box returns a value which must be stored.
Then, a special version of drawObj called draw Obj must be used to draw the
construction:
draw_Obj(b);
This can of course be done only after b has been positionned. This however
can’t be done by simply writing b.c=..., because b is not the name of an
object. The real object name can be obtained with a call to the Obj function.
One should therefore write:
Obj(b).c=...
in order to define point c of the object represented by the integer b.
All the standard objects have a streamlined version. This version was defined
with a call to streamline. Here is the call for the EmptyBox class:
streamline("EmptyBox")("(expr dx,dy)","(dx,dy)");
What this says is that the streamlined version will take two parameters
which are expressions and will pass them to the non streamlined version. When
certain arguments are not expressions, for instance if they are lists, the call to
streamline is different. For the Tree class, it is:
32
streamline("Tree")("(expr theroot)(text subtrees)",
"suffixpar(theroot)suffixlist(subtrees)");
This means that the streamlined version will receive a root number and a
list of subtrees numbers. But these parameters can’t be passed like that to the
non-streamlined version. The numbers must be converted into suffixes and this
is what suffixpar and suffixlist do.
In addition to the constructors, several operations have streamlined versions,
so that they can operate in a streamlined context. For instance, the streamlined
version of rotateObj is rotate Obj. In order to create a first box with the text
“abc,” to rotate it counterclockwise by 24 degrees and to frame it again, we can
simply write:
b=new_Box(rotate_Obj(new_Box(btex abc etex),24));
If this seems too complex, the user is advised to define shortcuts. This was
done in one of the first examples, when we showed that trees could be built.
The streamlined versions however are incompatible with the options mechanism for non-streamlined constructors. Therefore, we provide two streamlined
versions of each constructor: the normal one, and a streamlined version which
supports options. This version has a trailing _. This explains why the first
polygon was defined with new Polygon . The second form of streamlined constructors has a mandatory additional parameter which is a list of options. The
list can be empty, but the opening and closing parentheses must be there.
In the tree example, the option given to the polygon was "fit(false)",
meaning that the polygon must not fit.
5.2
Cloning
Objects can be cloned with duplicateObj, or duplicate Obj which is its
streamlined version. This creates a deep copy which is completely independant of the original object. A duplicated object is not attached, whether the
original object was attached or not, because most likely the copy will be put
elsewhere than the original object.
5.3
Fiddling with the bounding box
The bounding box of an object is its outer interface. It is what is used by other
metaobj functions, and especially those honoring the standard interfaces, in
order to decide how an object is positionned. There are however cases where
the automatic computation is inadequate. For instance, certain functions only
function appropriately when the bounding boxes are rectangles with horizontal
and vertical sides, and with the cardinal points (nw, ne, etc.) located where
one expects them. This, alas, is not always the case when transformations are
applied. There are two major remedies to that:
• an additionnal layer can be added to an object, hiding the idiosyncrasies
of the object and making sure the object “behaves” correctly;
• an object can be coerced to have a normal interface, without the introduction of an additional layer.
33
5.3.1
BB: a new bounding box layer
A new layer can be added to an object with the newBB constructor. This is a
class taking an object and enclosing it in a standard interface. The standard
interface tightly encloses the four corners of the object. newBB only looks at the
four corners and there is no guarantee that the “enclosed” object lies entirely
inside the new object interface. Rebinding the object (next section) may be
more appropriate in certain cases.
newBB is similar to rebindObj, but the latter function doesn’t add a layer.
BB options
Option
filled
fillcolor
framed
framewidth
framecolor
framestyle
shadow
shadowcolor
5.3.2
Type
boolean
color
boolean
numeric
color
string
boolean
color
Default
false
black
false
.5bp
black
""
false
black
Rebinding an object
metaobj provides two ways to rebind an object without adding a layer:
• the rebindObj and its variants move the corner points of an object in such
a way that they are arranged according to a standard initial interface; the
points are only moved with respect to their former positions, and not with
respect to other components of the object;
– rebindObj(n) is the basic call; it rebinds the object n;
– rebindrelativeObj(dyn,dys,dxe,dxw ): this function is called by the
rebindObj function (with the four parameters equal to 0) and rebinds
and adds shifts in the four directions; dyn is positive when the top
corners must be extended to the top, and negative otherwise; dys is
positive when the bottom corners must be extended to the top, and
negative otherwise; dxe is positive when the right corners must be
extended to the right, and negative otherwise; and dxw is positive
when the left corners must be extended to the right, and negative
otherwise; that way, one can obtain any rectangular bounding box
(with horizontal and vertical sides) one may wish;
– extendObjRight.n(wd ) specializes rebindrelativeObj and moves
the bounding box of n on the right side so that its width is wd ;
– similarly, extendObjLeft, extendObjUp and extendObjDown adjust
the bounding box on the other sides.
• the rebindVisibleObj also moves the corner points of an object, but it
takes into account all visible parts of an object; this function is useful in
order to ensure that no part of an object protrudes its bounding box; an
example of its use is given in section 7.5.1.
34
5.4
Unattaching an object
When an object is created with a constructor, it is “floating.” For instance,
newBox.a(btex hello! etex);
is a box which is not located at a precise point and an attempt to draw it would
produce an error.
Before drawing an object, it must be attached. We could write for instance:
a.c=origin;
Now the object can be drawn, but it can no longer be used at other locations
because it is attached. In certain cases, it is useful to be able to unattach an
object and it can be done with untieObj:
untieObj(a);
After this operation, an object can be put elsewhere. The untieObj is used
internally when paths are added to “floating” objects. In that case, the object
is first fixed, the path is added, and then the object is again untied.
If untieObj is called on an already unattached object, the object is not
changed.
5.5
Options
Many of the objects of the standard metaobj library are parameterized. For
instance, a Box is parameterized by its content, which is an explicit parameter,
but also by other parameters that can be implicit. We call such parameters
“options.” An option is therefore an information that can be passed to a constructor, but which has a default value otherwise. This mechanisme gives us a
lot of flexibility and avoids providing a long list of parameters that are mostly
not used.
5.5.1
Syntax
The way an option is provided differs according to whether the constructor is
used in its normal or streamlined form. When a normal constructor is called,
the options are given as lists of strings after the constructor. Each string has
the syntax "name(value)" where value does not contain quotes. The strings
are comma-separated. Here are a few examples:
newEmptyBox.a(2cm,1cm) "framed(true)";
newRandomBox.a(2cm,1cm,2mm,-1mm)
"framed(true)", "framewidth(1mm)";
newHBox.c(b,a)
"hbsep(1cm)", "framed(true)", "align(center)",
"dx(5mm)", "dy(5mm)";
The list of options ends with the semi-colon.
When a streamlined constructor is used, the same construction cannot be
used, because the semi-colon usually lies beyond the scope of the constructor.
35
Therefore, there are two versions of the streamlined constructors, one with options, and one with no options. For the HBox class, the two constructors are
new_HBox_ (with options) and new_HBox (no options). In addition to the normal
parameters of the constructor, the option-streamlined version has an additionnal parameter which is the list of options. Hence, the three previous examples
would be written:
new_EmptyBox_(2cm,1cm)("framed(true)")
new_RandomBox_(2cm,1cm,2mm,-1mm)
("framed(true)", "framewidth(1mm)")
new_HBox_(b,a)("hbsep(1cm)", "framed(true)", "align(center)",
"dx(5mm)", "dy(5mm)")
These streamlined constructors returns numbers and are usually used as
parameters to other constructors.
5.5.2
Option types
A given option, such as framed , has a type. The type is always the same for
a given option, and it is not possible to have options with the same name, but
different types in different objects. For instance, the type of framed is boolean.
Its value can be true, false, or some expression returning a boolean. Many
options have a numerical type and they usually correspond to some dimension
in an object. In all cases but one, the value between parentheses is of the type
the option awaits. There is one exception, when the type of the option is a
string. In this case, quotes are implicitely added to the value between parentheses. For instance, the align option takes a string as parameter and somehow
align(center) should be understood as align("center"). The standard library reference (section 7) gives the list of all options of all objects, as well as
their type.
Moreover, options can be either local or global. Local and global options
are used with exactly the same syntax, but in the first case, the option can only
be used within the constructor of the object, and therefore doesn’t need to be
stored inside the object, whereas in the second case, the option value may be
used beyond the constructor, for instance when the object is drawn. An option
of a given name is either local or global, but can’t be local to one object and
global to another.
Finally, each option has a default value. This default value depends on
the class and can be changed by the user with setObjectDefaultOption. For
instance, the treemode default value for a Tree object is "D" which means that
by default a tree is drawn with the root at the top and the leaves going down.
This is declared in metaobj with:
setObjectDefaultOption("Tree")("treemode")("D");
The value can be changed at any time and it will affect all future calls to the
newTree constructor. Of course, the same effect can be obtained by passing an
option such as "treemode(U)" to a constructor, but in the latter case, it needs
to be done for all calls to the constructor.
36
5.5.3
Option definition
Options can be defined easily. Here is how the filled and treemode options are
defined:
define_global_boolean_option("filled");
define_local_string_option("treemode");
The first is global because the information is used when the object is drawn,
and the second is local because it is only used at the time of the object construction.
OptionValue.t(v) returns the value of option v of object t. For instance,
in order to find out if an object should be filled or not, one could write:
if OptionValue.t("filled"):
...
fi;
There are many such examples in the
5.5.4
metaobj source code.
Option names
All the options recognized by an object are shown in section 7. In addition to
the options given there, it is possible to use a name option. This option makes
it possible to provide an explicit name to an object. This is of course useful
only in case one uses the streamlined version of a constructor. The name given
to an object can then be used later, for instance in connection commands.
5.6
Adding paths to objects
The easiest way to add some line to an object is to add an instruction such
as draw in the function drawing an object. In that case, the line drawn is not
really part of the object, but part a command belonging to the class. However,
it is also possible to include lines, and more generally paths, to the structure
representing an object.
More precisely, objects can contain one or more path arrays. Each array can
contain several paths and each path is stored as an array of points. This makes
it possible to have “floating paths” which is not possible when using the path
type of metapost.
A path array has a name and must be declared with addPathVariables.
This function takes two parameters, the first being an immediate suffix. The
first parameter is the object to which the path array is added, and the second
parameter is the name of the array. Currently, two names of arrays have a
special meaning:
• _spath_ is the array of standard paths of an object; standard paths represent paths that normally come with the object; for instance, in the case
of trees, the node connections from a node to its children are considered
standard;
• _upath_ is the array of user paths; this array is for paths added by the
user, but which could not be devised automatically.
37
Each path array keeps track of many parameters and options and the appropriate structures are defined with addPathVariables. As an example, the
newBox constructor does (@# is the box object):
addPathVariables@#(_spath_);
when there are round corners. In this case, the newBox constructor will
memorize the frame as a path, because it is not a simple path made of straight
lines.
The path is then memorized with addPath. newBox does the following:
addPath@#(_spath_,1,
@#nnw{left}..{down}@#wnw--@#wsw{down}
..{right}@#ssw--@#sse{right}..{up}@#ese--@#ene{up}
..{left}@#nne--cycle
);
This means that the path @#nnw{left} ... --cycle is stored at index 1 of
the _spath_ array in the current box object.
In addition to storing the path, various options are also recorded after the
addPath call. For instance, the number of stored paths has to be incremented.
The memorized path is drawn in the drawBox function when the function
drawMemorizedPaths is called.
Usually, the user does not need to use addPath directly because there are
higher level functions, such as ncline, nccurve, adapted from PSTricks. These
functions take various parameters and feed them into addPath.
However, there are also higher-level functions which make it easy to add standard or user paths. These functions are addStandardPath and addUserPath
and take an object as suffix, a path, and options. We give here two examples,
many details of which will only be explained in section 5.7:
newBox.a("") "dx(5cm)", "dy(2cm)",
"framecolor(blue)";
addUserPath.a(a.nw--a.se);
addUserPath.a(a.nw{right}..a.se)
"linecolor(red)";
addUserPath.a(fullcircle scaled 1cm shifted a.c)
"arrows(-)";
addUserPath.a(fullcircle scaled 1cm shifted a.ne)
"arrows(-)","pathfilled(true)",
"pathfillcolor((1,0,1))";
addUserPath.a(fullcircle scaled 1cm shifted a.sw)
"arrows(-)","linecolor((1,0,1))",
"pathfilled(true)","pathfillcolor((1,0,1))";
a.c=origin;
drawObj(a);
The paths that have been added follow all linear transformations:
38
xscaleObj(a,.5);
a.c=origin-(0,6cm);
drawObj(a);
A simplified version of addStandardPath can also be used in constructors:
ObjPath (see section 8.1.1).
A path can be added to an object at the time an object is created (i.e., in
the constructor) or afterwards. In any case, the object is first attached in case it
was floating, and the path is dismantled and all its points (including the control
points) are stored.
Most of the standard classes do not store paths, because the paths are very
simple and can be reconstructed easily from a few points. For instance, when
a box is not rounded, no path is stored, because the corners of the box are
sufficient to draw it. Sometimes, a path can be obtained by taking advantage of
the current transformation of an object. This is for instance the case for a circle,
where the circle path (BpathCircle which is used by drawCircle) is defined as
follows:
vardef circle@#(expr a_,b_,c_,d_)=
(fullcircle
scaled 2(@#a+@#cdx)
transformed @#ctransform_
shifted ((a_+c_)/2)
)
enddef;
def BpathCircle(suffix n)=
circle.n(n.isw,n.ise,n.ine,n.inw)
enddef;
The circle is drawn from a fullcircle which is scaled to the initial size of
the circle (before any transformation) and then transformed with the current
transformation (@#ctransform_) which may turn the circle into an ellipse, and
finally shifted to the center of the transformed circle. In this case, the path
was not memorized in the object, but object points, the initial size and the
current transformation were used. In certain cases, it is easier to add a path
with addPath.
5.7
Connections
A connection is a high-level means to connect several objects or points of an
object. metaobj implements all the connections available in PSTricks and
39
our description borrows a lot from PSTricks. There is not however an identity
of behaviors and sometimes metaobj interprets a parameter in a way different to the one used by PSTricks, because it suits better the metaobj model.
The PSTricks connection commands are \ncline, \nccurve, etc., and metaobj uses exactly the same names. In addition to these standard connection
commands, metaobj provides special variants such as tcline and mcline for
ncline, etc.
All the connection commands except nccircle connect two points or two
objects. They can therefore take as parameters either objects or points. Points
must be given as pair variables. Objects can be given by their name, or by a
shortcut given to an object with the name option. If an object is given by its
number and not its name, the Obj command can be used to produce the object
name from the object number. For instance, if a and b are objects, we can write
either ncline(a)(b) or:
an=a;
bn=b;
ncline(Obj(an))(Obj(bn));
Moreover, a connection is either immediate or deferred. An immediate connection is a connection which is not part of an object and is drawn immediately. A deferred connection is a connection which is memorized in an object
and drawn later. The syntax for both cases is the same, except that the object name, when present, is given as a suffix to the connection command. For
instance, ncline.A(a)(b) is a deferred connection command connecting the
objects a and b (assuming these are objects) and the connection is memorized
within the object A. If we write ncline(a)(b), we get an immediate connection
between a and b.
Each of the connection commands has many options. These options make it
possible to change the style of the connection, the thickness of the line, where
the line starts, etc. The options have types and default values, but the default
values are not bound to a class. The complete set of options is the following:
The types and default values of the options are summarized in table 1.
The default values can be changed with setCurveDefaultOption. For instance, the default value for arrows is "drawarrow" and it can be changed to
"draw" with:
setCurveDefaultOption("arrows","draw");
Incidentally, we might also have written
setCurveDefaultOption("arrows","-");
because metaobj provides several shortcuts for the kind of arrows. Currently
the following shortcuts are implemented, but others will probably be added:
Shortcut
->
<-
Full function name
draw
drawarrow
rdrawarrow
40
Option
posA
posB
name
linestyle
Type
string
string
string
string
Default
linewidth
linecolor
arrows
numeric
color
string
.5bp
black
"drawarrow"
angleA
angleB
arcangleA
arcangleB
border
bordercolor
nodesepA
nodesepB
loopsize
boxsize
boxheight
boxdepth
linearc
linetensionA
linetensionB
armA
armB
doubleline
doublesep
numeric
numeric
numeric
numeric
boolean
color
numeric
numeric
numeric
numeric
numeric
numeric
numeric
numeric
numeric
numeric
numeric
boolean
numeric
10
10
0pt
white
0pt
0pt
0.25cm
5mm
-1pt
-1pt
0cm
1
1
5mm
5mm
false
1pt
visible
offsetA
offsetB
coilarmA
coilarmB
coilwidth
coilheight
coilaspect
coilinc
pathfilled
boolean
pair
pair
numeric
numeric
numeric
numeric
numeric
numeric
boolean
true
(0, 0)
(0, 0)
5mm
5mm
1cm
1
45
90
false
pathfillcolor
cdraw
color
string
black
"cdraw default"
"ic"
"ic"
""
Description
where the connection starts
where the connection ends
connection name
connection style; this should be an acceptable value such as “dashed evenly,” “dashed
withdots” etc.
line thickness
line color
name of a draw command such as draw,
drawarrow, etc., or the shortcut of such a command
angle
angle
angle
angle
true if there is a border around the connection
color of the border
node separation at start
node separation at end
parameter for ncloop
parameter for ncbox and ncarcbox
parameter for ncbox and ncarcbox
parameter for ncbox and ncarcbox
rounding of corners in connections
line tension used by nccurve
line tension used by nccurve
connection arm at start
connection arm at end
true if the line is doubled
separation between the two lines if doubleline
is true
true if the connection is visible
offset at the start of a connection
offset at the end of a connection
parameter for coils and zigzags
parameter for coils and zigzags
parameter for coils and zigzags
parameter for coils and zigzags
parameter for coils and zigzags
parameter for coils and zigzags
true if the path must be filled (none of the
standard connections uses this option)
path filling color
metaoption
Table 1: Connection options (shortcuts are not shown)
41
An unsupported sequence of symbols will be equivalent to the “-” value.
The cdraw option defines how the other options are used. This option is
very seldom used and is not described in this manual.
Several of the options come in two flavors, one for each end of the connection.
This is for instance the case for posA and posB . In this case, special shortcuts
are provided. pos is a shortcut option setting both posA and posB . For instance,
ncline(a)(b) "pos(s)";
is equivalent to
ncline(a)(b) "posA(s)","posB(s)";
These shortcuts can also be used with setCurveDefaultOption and when
passed to a Tree constructor.
The shortcuts currently supported are pos, coilarm, linetension, offset, arm,
angle, arcangle and nodesep.
In all the examples below, the two circled objects are produced with:
newCircle.a(btex start etex);
newCircle.b(btex end etex);
a.c=origin;
b.c-a.c=(3cm,2cm);
drawObj(a,b);
Some of the descriptions borrow from the PSTricks documentation [16].
5.7.1
ncline
ncline is the simplest of all connection commands. It connects either two points
or two objects by a straight line. If two objects are connected, the line is cut
before the bounding path of the first object and after the bounding path of the
second object.
end
ncline(a)(b);
start
If ncline is used to connect two object points (such as a.c and b.c), the
bounding paths of the objects are not taken into account:
end
ncline(a.c)(b.c);
start
42
The thickness and the style of the line can easily be changed with the
linewidth and linestyle options.
end
ncline(a)(b)
"linewidth(1mm)",
"linestyle(dashed evenly)";
start
The position where the line starts can be set with the posA option. Similarly,
the position where the line ends can be set with the posB option. It must be a
point of the object. The default positions are the ic points. It is important not
to use the c point, because c is not always at the center of an object, in case
the bounding box is changed. In the next example, posA(n) causes the line to
start at a.n.
end
ncline(a)(b) "posA(n)";
start
The starting point can also be offset by a vector with the offsetA option.
There is also a similar offsetB option. These options differ from those of
PSTricks where offsetA and offsetB are numerical values, and not vectors.
end
ncline(a)(b) "offsetA((1cm,0))";
start
A line can be doubled with doubleline and the arrow style of the line can be
changed with the arrows option. This option takes a name of a draw function
such as draw, drawarrow, etc. as parameter.
end
ncline(a)(b)
"doubleline(true)", "arrows(draw)";
start
A gap can be introduced at either ends of the connection with the nodesepA
and nodesepB options.
43
end
ncline(a)(b)
"nodesepB(10mm)", "arrows(draw)";
start
5.7.2
nccurve
nccurve draws a Bezier curve between the nodes. The default angles at which
the curve leaves or reaches the nodes are those obtained when a straight line
connects the nodes. Hence, without options, nccurve behaves like ncline. The
two angles can be changed with the angleA and angleB options.
end
nccurve(a)(b) "angleA(0)";
start
More parameters can be modified, for instance the linecolor , the linewidth,
the style with linestyle and the fact that the line is drawn double with doubleline.
end
nccurve(a)(b)
"angleA(-30)", "angleB(80)",
"linecolor(red)","linewidth(1mm)",
"doubleline(true)",
"linestyle(dashed withdots)";
start
The tension of the line (in metapost’s sense) can be modified with the
linetensionA and linetensionB options (or with the linetension shortcut). This
allows a control similar to the one provided with PSTricks’ ncurvA and ncurvB
parameters. The default tensions are 1.
end
nccurve(a)(b)
"angleA(-30)", "angleB(80)",
"linecolor(red)","linewidth(3pt)",
"linestyle(dashed withdots)",
"linetension(2)";
start
44
5.7.3
ncarc
ncarc connects the two nodes with an arc. The angle between the arc and the
line between the two nodes is arcangleA at the beginning and arcangleB at the
end. There are default values that draw a curved connection as shown below.
end
ncarc(a)(b);
start
end
ncarc(a)(b);
ncarc(b)(a);
start
end
ncarc(a)(b) "arcangleA(50)";
ncarc(b)(a);
start
5.7.4
ncbar
ncbar draws a line from the first node leaving at angle angleA. The line reaches
the second node with the same angle (angleB is ignored). These two lines are
connected with a line at right angles and each end line is at least as long as
armA or armB (the length being counted until the center of the objects). In
this example, we also set the color with linecolor .
end
ncbar(a)(b) "angleA(-50)", "linecolor(blue)",
"linewidth(1pt)","armB(2cm)";
start
45
end
ncbar(a)(b) "angleA(90)", "linecolor(blue)",
"linewidth(1pt)","armB(2cm)";
start
5.7.5
ncangle
ncangle usually draws three segments, but in certain cases there are only two.
The two extreme segments are at angles defined by the angleA and angleB
options. The point on the last segment at a distance armB from the node is
connected to node A with a right angle. armA is not taken into account. In the
next example, the first segment is of length 0.
end
ncangle(a)(b) "angleA(90)", "angleB(80)",
"linecolor(blue)","linewidth(1pt)","armB(2cm)";
start
end
ncangle(a)(b) "angleA(0)", "angleB(50)",
"linecolor(blue)","linewidth(1pt)",
"armA(3cm)","armB(2cm)";
start
5.7.6
ncangles
ncangles is similar to ncangle, but the length of arm A (measured from the
node) is fixed by the armA option. Arm A is connected to arm B by two
line segments that meet arm A and each other at right angles. The angle at
which they join arm B, and the length of the connecting segments, depends on
the positions of the two arms. ncangles generally draws a total of four line
segments.
46
end
ncangles(a)(b) "angleA(0)", "angleB(50)",
"linecolor(blue)","linewidth(1pt)",
"armA(3cm)","armB(2cm)";
start
In the next example, the start of the line is offset by (0, 1cm):
end
ncangles(a)(b) "angleA(0)", "angleB(50)",
"linecolor(blue)","linewidth(1pt)",
"armA(3cm)","armB(2cm)","offsetA((0,1cm))";
start
end
ncangles(a)(b) "angleA(90)", "angleB(50)",
"linecolor(blue)","linewidth(1pt)",
"armA(3cm)","armB(2cm)";
start
5.7.7
ncdiag
ncdiag draws an arm at each node, joining at angle angleA or angleB , and with
a length of armA or armB (from the centers of the nodes). Then the two arms
are connected by a straight line, so that the whole line has three line segments.
end
ncdiag(a)(b) "angleA(90)", "angleB(50)",
"linecolor(blue)","linewidth(1pt)",
"armA(3cm)","armB(2cm)";
start
end
ncdiag(a)(b) "angleA(0)", "angleB(90)",
"linecolor(blue)","linewidth(1pt)",
"armA(2cm)","armB(2cm)";
start
47
5.7.8
ncdiagg
ncdiagg is similar to ncdiag, but only the arm for node A is drawn. The end
of this arm is then connected directly to node B. armB is not used.
end
ncdiagg(a)(b) "angleA(90)", "angleB(50)",
"linecolor(blue)","linewidth(1pt)",
"armA(3cm)";
start
end
ncdiagg(a)(b) "angleA(0)", "angleB(90)",
"linecolor(blue)","linewidth(1pt)",
"armA(2cm)";
start
5.7.9
ncloop
ncloop is also in the same family as ncangle and ncangles, but now typically
five line segments are drawn. Hence, ncloop can reach around to opposite sides
of the nodes. The lengths of the arms (from the centers of the nodes) are fixed
by armA and armB . Starting at arm A, ncloop makes a 90 degrees turn to the
left, drawing a segment of length loopsize. This segment connects to arm B the
way arm A connects to arm B with ncangles; that is, two more segments are
drawn, which join the first segment and each other at right angles, and then
join arm B.
(The next two examples seem buggy, but I think I have correctly implemented the specification from PSTricks. In the first case, the value given to
armB is too large.)
end
ncloop(a)(b) "angleA(0)", "angleB(90)",
"linecolor(blue)","linewidth(1pt)",
"armA(2cm)","armB(2cm)";
start
48
end
ncloop(a)(a) "angleA(0)", "angleB(90)",
"linecolor(blue)","linewidth(1pt)",
"armA(2cm)","armB(2cm)";
start
This is like the first example, but the value of armB is smaller:
end
ncloop(a)(b) "angleA(0)", "angleB(90)",
"linecolor(blue)","linewidth(1pt)",
"armA(2cm)","armB(1cm)";
start
Here are two more examples:
end
ncloop(a)(b) "angleA(0)", "angleB(180)",
"linecolor(blue)","linewidth(1pt)",
"armA(2cm)","armB(1cm)";
start
end
ncloop(a)(b) "angleA(0)", "angleB(-100)",
"linecolor(blue)","linewidth(1pt)",
"armA(2cm)","armB(1cm)";
start
and two last ones with only one node:
end
ncloop(a)(a) "angleA(0)", "angleB(0)",
"linecolor(blue)","linewidth(1pt)",
"armA(1cm)","armB(1cm)",
"loopsize(1cm)";
start
49
end
ncloop(a)(a) "angleA(0)", "angleB(0)",
"linecolor(blue)","linewidth(1pt)",
"armA(1cm)","armB(1cm)","loopsize(1cm)",
"offsetA((0,2mm))","offsetB((0,-3mm))";
start
5.7.10
nccircle
nccircle draws a circle, or part of a circle, that if complete, would pass through
the center of the node counterclockwise, at an angle of angleA. The angleB
option is not used.
end
nccircle(a) "angleA(0)",
"linecolor(blue)","linewidth(1pt)";
start
5.7.11
ncbox
ncbox and ncarcbox do not connect the nodes with an open curve, but they
enclose the nodes in a box or curved box. The half of the width of the box is
boxsize. The dimensions of the box can also be given with the boxheight and
boxdepth options. The ends of the boxes extend beyond the nodes by nodesepA
and nodesepB . This hence gives two different meanings to these two options.
Two of the sides of the ncbox box are parallel to the line connecting the two
node centers. No angle is taken into account by ncbox.
end
ncbox(a)(b)
"linecolor(blue)","linewidth(1pt)",
"nodesepA(1cm)","nodesepB(1cm)";
start
50
end
ncbox(a)(b)
"linecolor(blue)","linewidth(1pt)",
"nodesepA(1cm)","nodesepB(1cm)",
"boxsize(1cm)";
start
The corners can be rounded with the linearc option:
end
ncbox(a)(b)
"linecolor(blue)","linewidth(1pt)",
"nodesepA(1cm)","nodesepB(1cm)",
"boxsize(1cm)","linearc(3mm)";
start
5.7.12
ncarcbox
ncarcbox is similar to ncbox. It encloses the nodes in a curved box that is
arcangleA away from the line connecting the two nodes. PSTricks seems to
count that angle clockwise, whereas it is counted counterclockwise in ncarc.
We decided for consistency to count the angle counterclockwise in both cases.
The arcangleB option is not used.
end
ncarcbox(a)(b) "arcangleA(0)",
"linecolor(blue)","linewidth(1pt)",
"nodesepA(1cm)","nodesepB(1cm)";
start
51
end
ncarcbox(a)(b) "arcangleA(-30)",
"linecolor(blue)","linewidth(1pt)",
"nodesepA(1cm)","nodesepB(1cm)",
"boxsize(1cm)";
start
5.7.13
nczigzag and nccoil
All coil and zigzag connections draw a coil or zigzag whose width (diameter) is
coilwidth, and with the distance along the axes for each period (360 degrees)
equal to coilheight × coilwidth. nccoil draws a “3D” coil, projected onto the
xz-axes. The center of the “3D” coil lies on the yz-plane at angle coilaspect to
the z-axis. The coil is drawn by joining points that lie at angle coilinc from
each other along the coil. The coil is drawn as a Bezier curve (and not as
a succession of segments as PSTricks does), and it should always be smooth.
However, decreasing coilinc may produce a better looking coil, especially when
coilaspect is near 0.
nczigzag does not use the coilaspect and coilinc parameters.
nczigzag and nccoil connect two points or two objects starting and ending
with straight line segments of length coilarmA and coilarmB .
All the usual connection modifiers can be used on coils or zigzags. However,
in certain cases, strange effects can be produced, for instance if coilwidth is too
small with respect to linearc.
It should be emphasized that the path_size parameter of metapost might
overflow if coilinc is small and the coils have many turns. In that case, you
should increase coilinc or enlarge the dimensions of the coil.
end
nczigzag(a)(b);
start
52
end
nczigzag(a)(b) "angleA(-90)","angleB(120)",
"linetension(0.8)",
"coilwidth(2mm)","linearc(.1mm)";
start
end
nccoil(a)(b);
start
The next example shows various combinations of options, including the use
of symbolic shortcuts for the kind of arrow.
end
nccoil(a)(b) "doubleline(true)","coilwidth(2mm)",
"angleA(0)", "arrows(-)",
"linewidth(1pt)";
start
5.7.14
Tree and matrix variants
When tree nodes or matrix nodes have to be connected, it is cumbersome to
access the nodes, even though they are accessible. Therefore, we provide variants
of all the connection commands for trees and matrices. The variants have a “t”
and a “m” instead of the leading “n” in the names of the connection commands.
Instead of an object, they take as parameters the position of the object within
the tree or within the matrix. For instance, a curve connection between the
roots of the second an third subtrees of tree gt can be drawn with:
tccurve.gt(2)(3) "posA(e)","posB(n)",
"angleA(0)","angleB(-90)",
"linecolor(red)", "linetension(1.75)";
The second and third parameters (after gt, the name of the tree) are lists
of integers. If we had written:
tccurve.gt(2,1)(3,2) "posA(e)","posB(n)",
"angleA(0)","angleB(-90)",
"linecolor(red)", "linetension(1.75)";
53
we would have connected the node at position 2,1 (first subtree of second subtree
of gt) with the node at position 3,2 (second subtree of third subtree of gt).
All other connection commands are similarly adapted: tcline, tcangle,
tcangles, tcarc, tccurve, tcdiag, tcdiagg, tcloop, tccircle, tcbox and
tcarcbox.
Variants for matrices are also available with the names mcline, mcarc,
mccurve, mcangle, mcangles, mcdiag, mcdiagg, mcloop, mccircle, mcbox,
mcarcbox, mczigzag and mccoil.
Instead of an object identification, these commands take a pair of integers
representing the position of the object within the matrix. For instance, a dashed
line can be drawn between the objects at positions (1, 1) and (2, 2) in matrix
mat2 with:
mcline.mat2(1,1)(2,2) "linestyle(dashed evenly)";
If a component of a matrix is itself a matrix, this notation can not be used
and special access commands can be used, such as matpos (or mpos).
There are also “reverse” variants of certain connection commands. These
reverse variants can be useful for tree connections. See for instance figure 35.
The reverse connections are rncline, rnccurve, rncangle, rncangles,
rncarc, rncdiag, rncdiagg, rncbar, rncloop, rncbox, rncarcbox, rnczigzag
and rnccoil.
There are no “reverse” variants of the tree and matrix variants of the connection commands. If needed, they can be easily supplied.
5.8
Adding labels
Labels can be added to an object. The main command is ObjLabel. This
command takes an object as parameter, a label and then a list of options. Let
us first look at a first example (also as figure 41):
t:=T_(Tc)(TC,TC,Tc)
("treemode(R)","arrows(draw)",
"hsep(2cm)");
Obj(t).c=origin;
ObjLabel.Obj(t)(btex below etex)
"labpathid(1)", "labdir(bot)";
ObjLabel.Obj(t)(btex above etex)
"labpathid(2)", "labdir(top)";
ObjLabel.Obj(t)(btex above etex)
"labpathid(3)", "labdir(top)";
draw_Obj(t);
above
above
below
In this example, three labels have been added to the tree t. This tree is
given by a number and the real tree object is obtained when Obj is called on t.
ObjLabel takes Obj(t) as its first (suffix) parameter and the labels are given
as TEX pictures. The options decide where the labels will be put. It is the
labpathid option which decides on which connection the label goes. In a tree,
each standard connection has a number, from 1 until n, the number of subtrees.
This value can be given as parameter to labpathid . If this had been the only
option, the labels would have come out over the connections. The labdir option
54
is used to shift the label with respect to the normal point where it would have
been positionned. labdir takes options similar to those taken by the standard
metapost label command.
The table 2 shows the list of all options recognized by the ObjLabel command:
Option name
labpathid
labdir
labrotate
labangle
labpos
labshift
labcolor
laberase
labpoint
labcard
labpathname
Type
numeric
string
numeric
numeric
numeric
pair
color
boolean
string
string
string
Default
/
/
0
/
0.5
(0, 0)
black
false
"ic"
/
/
Table 2: Label options (“/” means that there are no default values)
ObjLabel puts a label either somewhere along a path or somewhere near a
point of an object. Two options help specifying the relevant path:
• labpathid : this option takes a path number as parameter; it is seldom
used, except in cases where the path numbers are well known, for instance
in the example given previously or in figure 39;
• labpathname: when a path is created (with a connection command such
as ncline, ...), the path can be given a name (with the name option); this
name can be given as parameter to labpathname; examples are given in
figure 10.
On a given path, a position can be specified with labpos. This option is a
numerical value between 0 and 1. 0 represents the beginning of the path (if the
path starts at the bounding path of an object, this is also the 0 position) and 1
the end of the path. The default value is 0.5.
By default, a label is set horizontally, no matter what is the slope of the
path at the label position. The label can be set parallel to the path direction by
specifying the labangle option with the value 0. Other values rotate the label
with respect to the path tangent.
A label can also be set with respect to an object point with the labpoint
option. For instance,
ObjLabel.g(btex hello! etex) "labpoint(po1)";
writes “hello!” over point po1 of object g.
A label can also be set in an object, with respect to a cardinal point with the
labcard option. Like labpoint, labcard takes an object point as parameter, but
the label is not put over the point, but beyond the label point, in a direction
55
determined by the line joining the center of the object and the point. For
instance, in order to put the label (−10, 10. − 10) below (south) of the object
at position (2, 1, 1) of the tree Obj(t), we can write:
ObjLabel.ntreepos(Obj(t))(2,1,1)(btex $(-10,10.-10)$ etex)
"labcard(s)";
(ntreepos is a command taking an object and a tree position as parameters,
and returning the node at that position.)
There are four additional options which apply in both cases (labels on a path
or next to a point):
• labrotate: with this option, a label can be rotated with respect to its
normal position;
• labshift: with this option, a label can be shifted, in a way similar to the
offsetA and offsetB connection options;
• labcolor : this option determines the color of the label;
• laberase: this option determines if the label erases what lies beneath it or
not.
6
The object structure
Figures 3, 4, 5 and 6 are the result of showObj on a PTree object called ptre,
slightly rearranged and simplified to make it more readable.
An object has a name and all its direct components form a tree of variables,
all starting with the object name. There is unfortunately no easy way to traverse
such a tree of variables in metapost, and there are therefore special variables
which keep track of what is in an object. We call these variables attributes of
an object. The complete list of attributes is given in table 3.
ptre=100
ptre.numericlist_="dx,dy,nst"
ptre.nst=2
ptre.ctransform_=(0,0,1,0,0,1)
Figure 3: Object structure: general data
As shown in the first figure, an object has a number. Here, it is 100. It has
points, the list of which is given in the string pointlist which is a standard
attribute of the object. It has a list of subobject references, the list of which is
given as a string sublist . Each subobject is actually only given as a string.
The subobject is not really part of the object (and as we said earlier, an object
can be part of several other objects).
The ptre object belongs to the PTree class and it contains four subobjects.
Each subobject has a corresponding string: conc (conclusion), subt (subtrees),
lr (left rule), rr (right rule). The value of the string was generated automatically by newobjstring .
The structure of ptre was obtained with
56
Attribute
pointlist
pairlist
pointarraylist
subarraylist
stringarraylist
colorarraylist
picturearraylist
transformarraylist
booleanarraylist
numericarraylist
pairarraylist
points in arrayslist
Type
string
string
string
string
string
string
string
string
string
string
string
string
Default
""
""
""
""
""
""
""
""
""
""
""
""
picturelist
numericlist
sublist
subobjties
nsubobjties
code
extra code
ctransform
string
string
string
string array
numeric
string
string
transform
""
""
""
0
""
""
identity
Description
list of points
list of pairs (non movable points)
list of arrays of points
list of arrays of subobjects
list of arrays of strings
list of arrays of colors
list of arrays of pictures
list of arrays of transforms
list of arrays of booleans
list of arrays of numerics
list of arrays of pairs (non movable points)
enumeration of all (movable) points of all arrays (of movable points)
list of pictures
list of numerics
list of subobjects
subobj tying equations (1 string/subobject)
number of subobjties
code of an object
extra code of an object
current transform of that object
Table 3: Standard attributes of an object
ptre.pointlist_="ne,nw,sw,se,n,s,e,w,c,
ine,inw,isw,ise,in,is,ie,iw,ic,ledge,redge,lstart,lend"
ptre.c=(0,287.17845)
ptre.n=(0,312.73784)
ptre.s=(0,261.61906)
ptre.e=(95.02467,287.17845)
ptre.w=(-95.02467,287.17845)
ptre.ne=(95.02467,312.73784)
ptre.se=(95.02467,261.61906)
ptre.nw=(-95.02467,312.73784)
ptre.sw=(-95.02467,261.61906)
ptre.ic=(0,283.46451)
ptre.in=(0,308.30998)
ptre.is=(0,258.61905)
ptre.ie=(98.02467,283.46451)
ptre.iw=(-98.02469,283.46451)
ptre.ine=(98.02467,308.30998)
ptre.ise=(98.02467,258.61905)
ptre.inw=(-98.02469,308.30998)
ptre.isw=(-98.02469,258.61905)
ptre.ledge=(-72.57094,258.61905)
ptre.redge=(92.90178,258.61905)
ptre.lstart=(-51.91089,292.35118)
ptre.lend=(65.57219,292.35118)
Figure 4: Object structure (cont’d): points
57
ptre.sublist_="subt,lr,rr,conc"
ptre.conc="_______zu"
ptre.subt="_______zh"
ptre.lr="_______zs"
ptre.rr="_______zt"
ptre.nsubobjties_=4
ptre.subobjties_1="vardef tie_function_@#(expr $)=q_1=obj(@#subt).ne;
transformObj(obj(@#subt))($);
@#ne-obj(@#subt).ne=(p_1-q_1) transformed $;enddef;"
ptre.subobjties_2="vardef tie_function_@#(expr $)=q_2=obj(@#lr).ne;
transformObj(obj(@#lr))($);
@#ne-obj(@#lr).ne=(p_1-q_2) transformed $;enddef;"
ptre.subobjties_3="vardef tie_function_@#(expr $)=q_3=obj(@#rr).ne;
transformObj(obj(@#rr))($);
@#ne-obj(@#rr).ne=(p_1-q_3) transformed $;enddef;"
ptre.subobjties_4="vardef tie_function_@#(expr $)=q_4=obj(@#conc).ne;
transformObj(obj(@#conc))($);
@#ne-obj(@#conc).ne=(p_1-q_4) transformed $;enddef;"
Figure 5: Object structure (cont’d): subobjects
ptre.code_="@#se-@#sw=@#ne-@#nw;xpart(@#se-@#ne)=0;ypart(@#se-@#sw)=0;
@#n=.5[@#ne,@#nw];@#s=.5[@#se,@#sw];@#e=.5[@#ne,@#se];
@#w=.5[@#nw,@#sw];@#c=.5[@#n,@#s];@#ine=@#ne;@#inw=@#nw;
@#isw=@#sw;@#ise=@#se;@#in=@#n;@#is=@#s;@#ie=@#e;@#iw=@#w;
@#ic=@#c;
xpart(.5[obj(@#conc).ledge,obj(@#conc).redge])=
.5[xpart(obj(@#subt).s)-62.07625,xpart(obj(@#subt).s)+55.40683];
ypart(obj(@#subt).s-obj(@#conc).n)=5.66928;
ypart(@#n-obj(@#subt).n)=0;ypart(obj(@#conc).s-@#s)=0;
@#ledge=obj(@#conc).sw;@#redge=obj(@#conc).se;
ypart(@#lstart)=ypart(@#lend)=ypart(obj(@#conc).n)+2.83464;
xpart(@#lstart)=xpart(obj(@#subt).c)-62.07625+0;
xpart(@#lend)=xpart(obj(@#subt).c)+55.40683+0;
xpart(@#e)-xpart(obj(@#subt).e)=+0;
xpart(obj(@#subt).w)-xpart(@#w)=+20.33072;
@#lstart-(rdistl,0)=obj(@#lr).e;"
Figure 6: Object structure (cont’d): equations
showObj ptre;
but this does not show the structure of all subobjects. We could define a function
showing recursively the whole structure of an object, but currently the user must
call showObj on each subobject _______zu, etc.
It is possible to go to great depth in an object. Even when there are
pictures, we can find what is inside using the for ... within construct.
Each subobject has an associated tying function. We have therefore four such
functions, subobjties 1, subobjties 2, subobjties 3 and subobjties 4.
Each object can store numerical values. There are three here, but only one
is defined. It is nst which is the number of subtrees.
58
ctransform records the current transform of the object.
And finally, all the equations defining the initial state of the object are stored
in the code string.
An object can contain more information, but every time there is some variable, the name of this variable must also appear in some list, because this is the
only way to achieve duplication. We can only know what is inside an object if
we constantly keep track of it. This also explains why special functions should
be used to define variables. “pair” would not be enough to record the name of
a pair. Instead, “ObjPoint” should be used.
7
Standard Library – Gallery
This section shows all the objects contained in the standard metaobj library.
Many options are common to all the objects, for instance framed , shadow , etc.
The shadow of an object is actually the shadow of its frame. It can’t be
drawn when the object is not framed. Shadows will have the color shadowcolor .
It should also be noted that transformations do not apply to shadows, since
shadows are not built from additional points in an object. If one wishes shadows
that follow the object and recognize the various transformations, a special object
with new points should be created.
7.1
Basic objects
We call “basic objects,” objects that are not containers and appear at the leaves
of a structure hierarchy.
7.1.1
EmptyBox
An empty box is a rectangle with a given size. It can be framed or not. However,
the frame is only visible when show empty boxes is set to true. An empty box
cannot contain something. It is only a frame.
show_empty_boxes:=true;
newEmptyBox.a(2cm,1cm) "framed(true)";
a.c=origin;
drawObj(a);
nw
ne
(bounding box)
sw
se
metaobj defines Tn as a shortcut for new_EmptyBox(0,0) for compatibility
with PSTricks.
EmptyBox options
59
Option
filled
fillcolor
framed
framewidth
framecolor
framestyle
shadow
shadowcolor
7.1.2
Type
boolean
color
boolean
numeric
color
string
boolean
color
Default
false
black
false
.5bp
black
""
false
black
HRazor
An HRazor object is a degenerated empty box, where the height is 0. There is
therefore only one size parameter. An HRazor is really an EmptyBox. The object
can be framed or not, and the frame is only visible when show_empty_boxes is
set to true.
When not visible, an HRazor can be used as an horizontal strut in a variety
of contexts. The width can also be negative.
newHRazor.a(3cm) "framed(true)";
a.c=origin;
drawObj(a);
nw
sw
ne
se
(bounding box)
There is also a similar newVRazor constructor. A VRazor is also a EmptyBox.
7.1.3
RandomBox
A RandomBox is also an empty object, but the frame is slightly random. There
are four parameters. The first two are the normal frame and are similar to
the parameters of EmptyBox. The last two parameters are maximum horizontal
and vertical deviations. The deviations are computed randomly using a uniform
random generator.
show_empty_boxes:=true;
newRandomBox.a(2cm,1cm,2mm,-1mm)
"framed(true)";
a.c=origin;
drawObj(a);
The cardinal points are now no longer identical to a rectangular bounding
box.
nw
ne
(bounding box)
sw
se
The thickness of the frame can be modified as shown in:
newRandomBox.a(2cm,1cm,2mm,-1mm)
"framed(true)", "linewidth(1mm)";
a.c=origin;
drawObj(a);
60
A random box can also be filled, with a given color:
newRandomBox.a(1cm,5mm,2mm,-1mm)
"framed(true)", "filled(true)",
"fillcolor(red)","framewidth(1mm)",
"framecolor(green)";
a.c=origin;
drawObj(a);
RandomBox options
Option
filled
fillcolor
framed
framewidth
framecolor
framestyle
shadow
shadowcolor
7.2
Type
boolean
color
boolean
numeric
color
string
boolean
color
Default
false
black
true
.5bp
black
""
false
black
Basic containers
All the basic containers take a picture or an object and provide a frame for
it. A picture can be one given in the TEX notation (btex...etex) or a picture
obtained in other ways, for instance with the image command of metapost.
7.2.1
Box
Box is the simplest of the containers. It is similar to EmptyBox, but it is a
container and by default the frame is visible. The size of the box is adapted to
its contents.
newBox.a(btex some text etex);
a.c=origin;
drawObj(a);
some text
nw
ne
(bounding box)
some text
sw
se
By default, the frame fits the contents. With the fit(false) option, it no
longer does. The frame is then a square.
newBox.a(btex some text etex)
"fit(false)";
a.c=origin;
drawObj(a);
some text
In addition, it is possible to specify horizontal and vertical margins to the
contents with the dx and dy options. If the contents is empty and we want a
4mm×4mm square, and if that square must be filled, we can write:
61
newBox.a("") "filled(true)",
"dx(2mm)", "dy(2mm)";
a.c=origin;
drawObj(a);
Round corners can be obtained by specifying a radius. If the radius is too
large, the clearance (dx and dy) may have to be increased.
newBox.a(btex This is an ovalbox etex)
"rbox_radius(2mm)";
a.c=origin;
drawObj(a);
This is an ovalbox
It is also possible to call the newRBox constructor which is a Box with a
default value of 1mm for rbox radius.
newBox.a(btex This is a shadowbox etex)
"shadow(true)";
a.c=origin;
drawObj(a);
This is a shadowbox
Box options
Option
dx
dy
filled
fillcolor
framed
shadow
shadowcolor
fit
framewidth
framecolor
framestyle
picturecolor
rbox radius
Type
numeric
numeric
boolean
color
boolean
boolean
color
boolean
numeric
color
string
color
numeric
Default
3bp
3bp
false
black
true
false
black
true
.5bp
black
""
black
0
We might add more options for the shadows in the future.
Box shortcuts
metaobj defines a few shortcuts for PSTricks compatibility:
• Tr (p) is equivalent to new_Box_(p)("framed(false)");
• Tf is equivalent to new_Box_("")("filled(true)").
7.2.2
Polygon
The newPolygon constructor builds polygons. Polygons are containers. The
number of sides can be specified, and we can decide if the polygon fits the
contents. By default it does. Here is a pentagon:
newPolygon.a(btex some text etex,5);
a.c=origin;
drawObj(a);
some text
62
Some clearance can be added by changing the polymargin option.
newPolygon.a(btex some text etex,5)
"polymargin(3mm)";
a.c=origin;
drawObj(a);
some text
The cardinal points are those of the rectangle bounding the ellipse on which
the vertices are located. The cardinal points of the previous example are:
nw
ne
(bounding box)
some text
sw
se
A heptagon which does not fit its contents is:
newPolygon.a(btex some text etex,7)
"fit(false)", "polymargin(3mm)";
a.c=origin;
drawObj(a);
some text
A Polygon can also be rotated. See for instance figure 35.
Polygon options
Option
polymargin
angle
filled
fillcolor
framed
fit
framewidth
framecolor
picturecolor
framestyle
shadow
shadowcolor
7.2.3
Type
numeric
numeric
boolean
color
boolean
boolean
numeric
color
color
string
boolean
color
Default
2mm
0
false
black
true
true
.5bp
black
black
""
false
black
Ellipse
The newEllipse constructor builds an ellipse which is a container. The ellipse
can contain text and by default it fits the text. The following ellipse
newEllipse.a(btex some text etex);
a.c=origin;
drawObj(a);
some text
nw
ne
(bounding box)
some text
sw
se
63
When the option "fit(false)" is given, the ellipse doesn’t fit the contents
vertically, but only horizontally and we get a circle:
newEllipse.a(btex some text etex)
"fit(false)";
a.c=origin;
drawObj(a);
some text
It is possible to build an ellipse with no content and to specify a “margin” with the circmargin option. Moreover, the ellipse can be filled with the
filled(true) option. The following example shows a disk with a 2mm radius:
newEllipse.a("")
"filled(true)","circmargin(2mm)";
a.c=origin;
drawObj(a);
metaobj provides Toval (p) as a shortcut for new_Ellipse(p) for compatibility with PSTricks.
Ellipse options
Option
circmargin
filled
fillcolor
framed
fit
framewidth
framecolor
framestyle
picturecolor
shadow
shadowcolor
7.2.4
Type
numeric
boolean
color
boolean
boolean
numeric
color
string
color
boolean
color
Default
2bp
false
black
true
true
.5bp
black
""
black
false
black
Circle
The newCircle constructor produces a circle. The circmargin option can also
be used to change its size.
newCircle.a(btex some text etex);
a.c=origin;
drawObj(a);
some text
Circle shortcuts The following shortcuts to streamlined objects are provided, partly for (some) compatibility with PSTricks:
• Tcircle (p) is equivalent to new_Circle(p);
• Tc is an empty circle with a radius of 1mm;
64
• Tc (r) is an empty circle with a radius of r;
• TC is an filled circle with a radius of 1mm;
• TC (r) is an filled circle with a radius of r;
• TCs is a filled circle of the default size.
Circle options
Option
circmargin
filled
fillcolor
framed
framewidth
framecolor
framestyle
picturecolor
shadow
shadowcolor
7.2.5
Type
numeric
boolean
color
boolean
numeric
color
string
color
boolean
color
Default
2bp
false
black
true
.5bp
black
""
black
false
black
DBox
A DBox is similar to a Box, but the frame is doubled. By default, it fits its
contents. For instance,
newDBox.a(btex some text etex);
a.c=origin;
drawObj(a);
some text
The cardinal points are located on the outside frame:
nw
ne
(bounding box)
some text
sw
se
We get the next figure when we ask the box not to fit its contents.
newDBox.a(btex some text etex)
"fit(false)";
a.c=origin;
drawObj(a);
some text
Empty double boxes can also be defined and the dimensions can be specified
with the dx and dy options. In order to have a 2cm×2cm internal box, we can
for example write:
newDBox.a("") "dx(1cm)", "dy(1cm)";
a.c=origin;
drawObj(a);
65
DBox options
dx
Option
Type
numeric
Default
3bp
dy
numeric
3bp
filled
boolean
false
fillcolor
framed
fit
color
boolean
boolean
black
true
true
framewidth
framecolor
framestyle
picturecolor
numeric
color
string
color
.5bp
black
""
black
hsep
vsep
shadow
numeric
numeric
boolean
1mm
1mm
false
shadowcolor
color
black
7.2.6
Description
horizontal clearance on each side of the content and inside the inner frame
vertical clearance on each side of the content
and inside the inner frame
true if the object is filled (in which case the
double frame is not very useful)
filling color
true if the object is framed
true if the box fits its content, both horizontally and vertically; if false, the contents only
fits horizontally
width of the frame
color of the frame
style of the frame (dashed, etc.)
color of the picture if there is a picture inside
the object
horizontal separation between the two frames
vertical separation between the two frames
true if there is a shadow (framed too must be
true)
shadow color
DEllipse
The newDEllipse constructor is to newEllipse what the newDBox constructor
is to newBox.
newDEllipse.a(btex some text etex);
a.c=origin;
drawObj(a);
some text
nw
ne
(bounding box)
some text
sw
se
nw
ne
newDEllipse.a(btex some text etex)
"fit(false)";
a.c=origin;
drawObj(a);
some text
sw
se
newDEllipse.a("")
"filled(true)","circmargin(2mm)";
a.c=origin;
drawObj(a);
66
In the following example, the double ellipse is scaled and rotated and we can
see that the frames, the contents and the cardinal points follow the operations.
se
newDEllipse.a(btex some text etex);
scaleObj(a,2);
rotateObj(a,45);
a.c=origin;
drawObj(a);
nw
so
m
e
te
xt
ne
sw
DEllipse options
Option
circmargin
filled
fillcolor
framed
fit
framewidth
framecolor
framestyle
picturecolor
hsep
vsep
shadow
shadowcolor
7.3
Type
numeric
boolean
color
boolean
boolean
numeric
color
string
color
numeric
numeric
boolean
color
Default
2bp
false
black
true
true
.5bp
black
""
black
1mm
1mm
false
black
Box alignment constructors
There are two basic box building constructors, HBox and VBox. Their names
have been chosen with analogy to the \hbox and \vbox primitives of TEX.
7.3.1
HBox
The newHBox constructor provides an horizontal alignment of objects. By default, the objects are aligned on the bottom and they appear from left to right.
In the following example, we have three boxes (created with newBox) of different sizes and contents. The boxes are put in one larger box which can then be
manipulated like a simple object.
Box A
newBox.a(btex Box A etex);
newBox.b(btex Box B etex scaled \magstep3);
newBox.c(btex Box C etex scaled \magstep2);
newHBox.h(a,b,c);
h.c=origin;
drawObj(h);
Box B Box C
67
The cardinal points show the bounding box of the HBox. They are not
compulsory on an object. In the next example, they happen to coincide with
the bottom left and right corners of two boxes, but that is only because the boxes
are aligned on the bottom, and because the component objects are rectangular
boxes.
nw
ne
Box A
sw
Box B Box C
(bounding box)
se
In order to change the alignment, the align option can be given, with either
bot, top, or center. Here is an alignment at the top, with the same objects:
Box A
newBox.a(btex Box A etex);
newBox.b(btex Box B etex scaled \magstep3);
newBox.c(btex Box C etex scaled \magstep2);
newHBox.h(a,b,c) "align(top)";
h.c=origin;
drawObj(h);
Box B Box C
The next example shows objects that are centered vertically:
Box A
newBox.a(btex Box A etex);
newBox.b(btex Box B etex scaled \magstep3);
newBox.c(btex Box C etex scaled \magstep2);
newHBox.h(a,b,c) "align(center)";
h.c=origin;
drawObj(h);
Box B Box C
There is a default horizontal separation between objects, but it can be
changed with the hsep option:
Box A
newBox.a(btex Box A etex);
newBox.b(btex Box B etex scaled \magstep3);
newBox.c(btex Box C etex scaled \magstep2);
newHBox.h(a,b,c)
"align(center)","hsep(3mm)";
h.c=origin;
drawObj(h);
Box B Box C
In the following example, the components are now not all boxes, but polygons, a box and a razor. The razor’s function is to create a wide horizontal gap.
It is similar to a \kern in TEX.
Box A
Box B
newPolygon.a(btex Box A etex,5)
"fit(false)","polymargin(5mm)";
newBox.b(btex Box B etex scaled \magstep3);
newHRazor.ba(1cm);
newPolygon.c(btex Box C etex scaled \magstep2,11)
"polymargin(3mm)";
newHBox.h(a,b,ba,c) "align(center)","hsep(3mm)";
h.c=origin;
drawObj(h);
Box C
68
HBox options
Option
dx
dy
hbsep
elementsize
Type
numeric
numeric
numeric
numeric
Default
0
0
1mm
−1pt
align
string
"bot"
framed
filled
fillcolor
framewidth
framecolor
framestyle
flip
shadow
boolean
boolean
color
numeric
color
string
boolean
boolean
false
false
black
.5bp
black
""
false
false
shadowcolor
color
black
7.3.2
Description
horizontal clearance around the object
vertical clearance around the object
horizontal separation between elements
if non-negative, all the objects are assumed to
have this width
"top" and "center" are the other possible
values
true if the object is framed
true if the box is filled
filling color
width of the frame
color of the frame
style of the frame (dashed, etc.)
if true, reverses the order of the components
true if there is a shadow (framed too must be
true)
shadow color
VBox
A VBox is the vertical equivalent of an HBox. The boxes are piled up from bottom
to top, which is unlike the behavior of \vbox in TEX, where the components
would start at the top. By default, the components are aligned to the left, as
in \vbox:
newBox.a(btex Box A etex);
newBox.b(btex Box B etex scaled \magstep3);
newBox.c(btex Box C etex scaled \magstep2);
newVBox.h(a,b,c);
h.c=origin;
drawObj(h);
Box C
Box B
Box A
The cardinal points are as follows:
nw
ne
Box C
Box B
(bounding box)
Box A
sw
se
A right alignment is obtained with the align(right) option:
newBox.a(btex Box A etex);
newBox.b(btex Box B etex scaled \magstep3);
newBox.c(btex Box C etex scaled \magstep2);
newVBox.h(a,b,c) "align(right)";
h.c=origin;
drawObj(h);
Box C
Box B
Box A
The components can be centered:
69
newBox.a(btex Box A etex);
newBox.b(btex Box B etex scaled \magstep3);
newBox.c(btex Box C etex scaled \magstep2);
newVBox.h(a,b,c) "align(center)";
h.c=origin;
drawObj(h);
Box C
Box B
Box A
As for HBox, the vertical separation between components can be changed
with the vsep option:
newBox.a(btex Box A etex);
newBox.b(btex Box B etex scaled \magstep3);
newBox.c(btex Box C etex scaled \magstep2);
newVBox.h(a,b,c)
"align(center)","vsep(3mm)";
h.c=origin;
drawObj(h);
Box C
Box B
Box A
And it is possible to put any kind of object instead of mere boxes:
Box C
newPolygon.a(btex Box A etex,5)
"fit(false)","polymargin(5mm)";
newBox.b(btex Box B etex scaled \magstep3);
newVRazor.ba(1cm);
newPolygon.c(btex Box C etex scaled \magstep2,11)
"polymargin(3mm)";
newVBox.h(a,b,ba,c)
"align(center)","vsep(3mm)";
h.c=origin;
drawObj(h);
Box B
Box A
VBox options
Option
dx
dy
vbsep
elementsize
Type
numeric
numeric
numeric
numeric
Default
0
0
1mm
−1pt
align
string
"left"
framed
filled
fillcolor
framewidth
framecolor
framestyle
flip
shadow
boolean
boolean
color
numeric
color
string
boolean
boolean
false
false
black
.5bp
black
""
false
false
shadowcolor
color
black
Description
horizontal clearance around the object
vertical clearance around the object
vertical separation between elements
if non-negative, all the objects are assumed to
have this height
"center" and "right" are the other possible
values
true if the object is framed
true if the box is filled
filling color
width of the frame
color of the frame
style of the frame (dashed, etc.)
if true, reverses the order of the components
true if there is a shadow (framed too must be
true)
shadow color
70
7.4
Recursive objects and fractals
metaobj provides several standard objects whose purpose is to show how recursive objects can be defined.
7.4.1
RecursiveBox
This is one of the simplest kind of recursive object. It is a box which contains
a box slightly rotated, which itself contains such a box, etc. The depth of the
box is a parameter of the constructor.
newRecursiveBox.a(10);
scaleObj(a,.3);
a.c=origin;
drawObj(a);
The bounding box has no surprises:
nw
ne
(bounding box)
sw
se
RecursiveBox options The options recognized by the RecursiveBox objects
are shown in table 4.
71
Option
filled
fillcolor
framed
framewidth
framecolor
framestyle
dx
dy
rotangle
Type
boolean
color
boolean
numeric
color
string
numeric
numeric
numeric
Default
false
black
true
.5bp
black
""
5cm
5cm
10
shadow
boolean
false
shadowcolor
color
black
Description
true if the object is filled
filling color
true if the object is framed
thickness of the frame
frame color
frame style
object width
object height
angle by which an internal object is rotated
before inserting it into an outer object
true if there is a shadow (framed too must be
true)
shadow color
Table 4: RecursiveBox options
7.4.2
VonKochFlake
A Von Koch flake of a given depth can easily be obtained with the VonKochFlake
object.
newVonKochFlake.a(3);
scaleObj(a,.5);
a.c=origin;
drawObj(a);
We can produce some technicolor effects if we assign random colors to all
the sides. We modify the drawVonKochSide function which is used to draw four
segments :
72
def randomcolor=
withcolor (uniformedviate 1,
uniformedviate 1,
uniformedviate 1)
enddef;
def drawVonKochSide(suffix n)=
if known n.suba:drawObj(obj(n.suba));
else: draw n.A--n.B randomcolor;fi;
if known n.subb:drawObj(obj(n.subb));
else: draw n.B--n.C randomcolor;fi;
if known n.subc:drawObj(obj(n.subc));
else: draw n.C--n.D randomcolor;fi;
if known n.subd:drawObj(obj(n.subd));
else: draw n.D--n.E randomcolor;fi;
drawMemorizedPaths_(n);
enddef;
newVonKochFlake.a(3);
scaleObj(a,.5);
a.c=origin;
drawObj(a);
This class has currently no options.
7.5
Trees
The standard library provides a general tree constructor, newTree, and a more
specialized one for proof trees, newPTree.
7.5.1
Tree
Trees are generic and the constructor takes a root and a list of subtrees. The
root and the subtrees can be any objects having a standard interface. The tree
is built recursively, so that the root and the subtrees given as arguments are
no longer changed. They are only assembled by the Tree constructor. This of
course is not always adequate and can leave a lot of unnecessary blank space,
but it is the default behavior. Since the whole Tree object is memorized and can
be traversed, it is actually possible to reformat such an object completely and
implement any tree layout algorithm. The reader who is interested in pursuing
such an endeavor is encouraged to study the structure of an object (section 6),
functions such as duplicateObj that do a complete traversal of an object, as
well as special transformation functions (section 9).
Here is a first tree. By default, a tree is constructed with the root at the
top.
73
newBox.a(btex apples etex);
newBox.b(btex oranges etex);
newBox.c(btex bananas etex);
newBox.f(btex fruits etex);
newTree.fruits(f)(a,b,c);
newBox.d(btex potatoes etex);
newBox.e(btex peas etex);
newBox.v(btex vegetables etex);
newTree.vegetables(v)(d,e);
newBox.fo(btex food etex);
newTree.food(fo)(fruits,vegetables);
scaleObj(food,.5);
food.c=origin;
drawObj(food);
food
fruits
apples
oranges
vegetables
bananas
potatoes
peas
nw
ne
food
fruits
apples
oranges
(bounding box)
vegetables
bananas
potatoes
peas
sw
se
In the previous example, the leaves are aligned on the top, and the baselines
of the labels are not aligned, because the labels have different heights. In the
next example, the left subtree is aligned on the bottom with the Dalign option, but this was not sufficient to align all the baselines, for “bananas” has no
descenders. That is why we added a \strut in the TEX part of the labels.
newBox.a(btex apples\strut etex);
newBox.b(btex oranges\strut etex);
newBox.c(btex bananas\strut etex);
newBox.f(btex fruits etex);
newTree.fruits(f)(a,b,c) "Dalign(bot)";
newBox.d(btex potatoes etex);
newBox.e(btex peas etex);
newBox.v(btex vegetables etex);
newTree.vegetables(v)(d,e)
"Dalign(center)";
newBox.fo(btex food etex);
newTree.food(fo)(fruits,vegetables)
"hbsep(1cm)";
scaleObj(food,.5);
food.c=origin;
drawObj(food);
food
vegetables
fruits
apples
oranges
bananas
potatoes
peas
74
newBox.a(btex apples etex);
newBox.b(btex oranges etex);
newBox.c(btex bananas etex);
newBox.f(btex fruits etex);
newTree.fruits(f)(a,b,c)
"Lalign(left)", "treemode(L)";
newBox.d(btex potatoes etex);
newBox.e(btex peas etex);
newBox.v(btex vegetables etex);
newTree.vegetables(v)(d,e)
"Lalign(center)", "treemode(L)";
newBox.fo(btex food etex);
newTree.food(fo)(fruits,vegetables)
"hsep(1cm)", "treemode(L)";
scaleObj(food,.5);
food.c=origin;
drawObj(food);
peas
vegetables
potatoes
bananas
oranges
food
fruits
apples
In the next tree, all five boxes on the left are extended to the right so that
their width is 3cm. This is done with extendObjRight. This is not sufficient to
get the five boxes aligned. We also need to make sure that the “fruits” are as
large as the “vegetables.” Therefore, the “fruits” box was extended to the left so
that its width is exactly that of the “vegetables” box, with rebindrelativeObj.
We might also have called extendObjLeft with the appropriate value.
newBox.a(btex apples etex);
newBox.b(btex oranges etex);
newBox.c(btex bananas etex);
newBox.d(btex potatoes etex);
newBox.e(btex peas etex);
extendObjRight.a(3cm);
extendObjRight.b(3cm);
extendObjRight.c(3cm);
extendObjRight.d(3cm);
extendObjRight.e(3cm);
peas
vegetables
potatoes
bananas
oranges
newBox.f(btex fruits etex);
newBox.v(btex vegetables etex);
rebindrelativeObj(f)(0,0,0,-xpart(v.e-v.w-f.e+f.w));
newTree.fruits(f)(a,b,c)
"Lalign(left)", "treemode(L)";
newTree.vegetables(v)(d,e)
"Lalign(center)", "treemode(L)";
newBox.fo(btex food etex);
newTree.food(fo)(fruits,vegetables)
"hsep(1cm)", "treemode(L)";
scaleObj(food,.5);
food.c=origin;
drawObj(food);
food
fruits
apples
75
newBox.a(btex apples etex);
newBox.b(btex oranges etex);
newBox.c(btex bananas etex);
newBox.f(btex fruits etex);
newTree.fruits(f)(a,b,c)
"Ralign(right)", "treemode(R)";
newBox.d(btex potatoes etex);
newBox.e(btex peas etex);
newBox.v(btex vegetables etex);
newTree.vegetables(v)(d,e)
"Ralign(center)", "treemode(R)";
newBox.fo(btex food etex);
newTree.food(fo)(fruits,vegetables)
"hsep(1cm)", "treemode(R)";
scaleObj(food,.5);
food.c=origin;
drawObj(food);
peas
vegetables
potatoes
bananas
food
oranges
fruits
apples
For the next tree, the “fruits” box was extended to the right with rebindrelativeObj
and its width now matches the width of the “vegetables” box. We could also
have used extendObjRight. This is sufficient to align the five leaves on the left.
newBox.a(btex apples etex);
newBox.b(btex oranges etex);
newBox.c(btex bananas etex);
newBox.f(btex fruits etex);
newBox.d(btex potatoes etex);
newBox.e(btex peas etex);
newBox.v(btex vegetables etex);
rebindrelativeObj(f)(0,0,xpart(v.e-v.w-f.e+f.w),0);
newTree.fruits(f)(a,b,c)
"Ralign(right)", "treemode(R)";
newTree.vegetables(v)(d,e)
"Ralign(center)", "treemode(R)";
newBox.fo(btex food etex);
newTree.food(fo)(fruits,vegetables)
"hsep(1cm)", "treemode(R)";
scaleObj(food,.5);
food.c=origin;
drawObj(food);
peas
vegetables
potatoes
bananas
food
oranges
fruits
apples
apples
oranges
bananas
potatoes
newBox.a(btex apples\strut etex);
newBox.b(btex oranges\strut etex);
newBox.c(btex bananas\strut etex);
newBox.f(btex fruits etex);
newTree.fruits(f)(a,b,c)
"Ualign(bot)", "treemode(U)";
newBox.d(btex potatoes etex);
newBox.e(btex peas etex);
newBox.v(btex vegetables etex);
newTree.vegetables(v)(d,e)
"Ualign(center)", "treemode(U)";
newBox.fo(btex food etex);
newTree.food(fo)(fruits,vegetables)
"hsep(1cm)", "treemode(U)";
scaleObj(food,.5);
food.c=origin;
drawObj(food);
peas
vegetables
fruits
food
In the following example, the treeflip option is set to true and the order of
all subtrees is reversed.
76
peas
potatoes
bananas
oranges
vegetables
setObjectDefaultOption("Tree")("treeflip")(true);
newBox.a(btex apples\strut etex);
newBox.b(btex oranges\strut etex);
newBox.c(btex bananas\strut etex);
newBox.f(btex fruits etex);
newTree.fruits(f)(a,b,c)
"Ualign(bot)", "treemode(U)";
newBox.d(btex potatoes etex);
newBox.e(btex peas etex);
newBox.v(btex vegetables etex);
newTree.vegetables(v)(d,e)
"Ualign(center)", "treemode(U)";
newBox.fo(btex food etex);
newTree.food(fo)(fruits,vegetables)
"hsep(1cm)", "treemode(U)";
scaleObj(food,.5);
food.c=origin;
drawObj(food);
apples
fruits
food
In the next tree, the two subtrees overlap because the hideleaves was set to
true.
newBox.a(btex apples etex);
newBox.b(btex oranges etex);
newBox.c(btex bananas etex);
newBox.f(btex fruits etex);
newTree.fruits(f)(a,b,c)
"Dalign(bot)", "hideleaves(true)";
newBox.d(btex potatoes etex);
newBox.e(btex peas etex);
newBox.v(btex vegetables etex);
newTree.vegetables(v)(d,e) "Dalign(center)";
newBox.fo(btex food etex);
newTree.food(fo)(fruits,vegetables) "hsep(1cm)";
scaleObj(food,.5);
food.c=origin;
drawObj(food);
food
fruits
apples
oranges
vegetables
peas
potatoes
bananas
newBox.a(btex apples etex);
newBox.b(btex oranges etex);
newBox.c(btex bananas etex);
newBox.f(btex fruits etex);
newTree.fruits(f)(a,b,c)
"Dalign(bot)", "hideleaves(true)";
newBox.d(btex potatoes etex);
newBox.e(btex peas etex);
newBox.v(btex vegetables etex);
newTree.vegetables(v)(d,e)
"Dalign(center)", "hideleaves(true)";
newBox.fo(btex food etex);
newTree.food(fo)(fruits,vegetables) "hbsep(5cm)";
scaleObj(food,.5);
food.c=origin;
drawObj(food);
food
fruits
apples
oranges
vegetables
bananas
potatoes
peas
Two different directions can be mixed. In this case, we have hidden the
fruits.
77
newBox.a(btex apples etex);
newBox.b(btex oranges etex);
newBox.c(btex bananas etex);
newBox.f(btex fruits etex);
newTree.fruits(f)(a,b,c)
"Dalign(bot)", "hideleaves(true)";
newBox.d(btex potatoes etex);
newBox.e(btex peas etex);
newBox.v(btex vegetables etex);
newTree.vegetables(v)(d,e)
"Ralign(center)", "hideleaves(true)", "treemode(R)";
newBox.fo(btex food etex);
newTree.food(fo)(fruits,vegetables) "hbsep(1cm)";
scaleObj(food,.5);
food.c=origin;
drawObj(food);
food
peas
fruits
vegetables
potatoes
apples
oranges
bananas
We can of course mix three different directions:
bananas
newBox.a(btex apples etex);
newBox.b(btex oranges etex);
newBox.c(btex bananas etex);
newBox.f(btex fruits etex);
newTree.fruits(f)(a,b,c)
"Lalign(left)", "hideleaves(true)",
"treemode(L)", "vsep(3mm)";
newBox.d(btex potatoes etex);
newBox.e(btex peas etex);
newBox.v(btex vegetables etex);
newTree.vegetables(v)(d,e)
"Ralign(center)", "hideleaves(true)", "treemode(R)";
newBox.fo(btex food etex);
newTree.food(fo)(fruits,vegetables) "hbsep(1cm)";
scaleObj(food,.5);
food.c=origin;
drawObj(food);
food
peas
oranges
fruits
vegetables
potatoes
apples
The same construction can be made with different objects. The fact that
we use standard interfaces allows us to plug in any other object in place of a
standard rectangular box. We don’t have to worry about what might happen.
bananas
newPolygon.a(btex apples etex,5);
newPolygon.b(btex oranges etex,6);
newPolygon.c(btex bananas etex,7);
newPolygon.f(btex fruits etex,8);
newTree.fruits(f)(a,b,c) "Lalign(left)",
"hideleaves(true)", "treemode(L)", "vsep(3mm)";
newEllipse.d(btex potatoes etex);
newDEllipse.e(btex peas etex);
newDBox.v(btex vegetables etex);
newTree.vegetables(v)(d,e)
"Ralign(center)", "hideleaves(true)", "treemode(R)";
newPolygon.fo(btex food etex,12);
newTree.food(fo)(fruits,vegetables) "hsep(1cm)";
scaleObj(food,.5);
food.c=origin;
drawObj(food);
food
peas
oranges
fruits
vegetables
potatoes
apples
When we frame the tree, we get a frame that only extends to the root and
the two leaves of the root, not to the other nodes, because the bounding box of
the tree was changed when the hideleaves option was given.
78
bananas
food
newDEllipse.ff(food);
ff.c=origin;
drawObj(ff);
peas
oranges
fruits
vegetables
potatoes
apples
In order to frame the whole tree, we can change the bounding box and set
it to the visible part of the tree with rebindVisibleObj:
bananas
food
peas
oranges
rebindVisibleObj(food);
newDEllipse.ff(food);
drawObj(ff);
vegetables
fruits
potatoes
apples
The next example shows that we can build a new tree having as a leaf the
object with a double elliptic frame. The root of the tree is typeset larger because
it is not in the scope of scaleObj.
This is a new root
bananas
newEllipse.xx(btex This is a new root etex);
newTree.x(xx)(ff);
drawObj(x);
food
peas
oranges
fruits
vegetables
potatoes
apples
Tree options Table 5 shows which options are supported by a Tree.
A Tree constructor also accepts connection options (see section 5.7 and
figure 30 for an example) which are useful to modify the way standard tree
connections are displayed.
Other options might be defined in the future.
Tree shortcuts
metaobj defines a few useful shortcuts:
• T for new Tree;
• T for newTree;
79
Option
treemode
Type
string
Default
"D"
treeflip
treenodehsize
boolean
numeric
false
−1pt
treenodevsize
numeric
−1pt
dx
dy
hsep
numeric
numeric
numeric
0
0
1cm
vsep
numeric
1cm
hbsep
numeric
1cm
vbsep
numeric
1cm
hideleaves
boolean
false
edge
framed
filled
fillcolor
framewidth
framecolor
framestyle
Dalign
string
boolean
boolean
color
numeric
color
string
string
"ncline"
false
false
black
.5bp
black
""
"top"
Ualign
string
"bot"
Lalign
string
"right"
Ralign
string
"left"
shadow
boolean
false
shadowcolor
color
black
Description
direction in which the tree develops; there are
four different possible values: "D" (default),
"U", "L" and "R"
if true, reverses the order of the subtrees
if non-negative, all the nodes are assumed to
have this width
if non-negative, all the nodes are assumed to
have this height
horizontal clearance around the tree
vertical clearance around the tree
for a horizontal tree, this is the separation between the root and the subtrees
for a vertical tree, this is the separation between the root and the subtrees
for a vertical tree, this is the horizontal separation between subtrees; the subtrees are actually put in a HBox and the value of this option
is passed to the HBox constructor
for an horizontal tree, this is the vertical separation between subtrees; the subtrees are actually put in a VBox and the value of this option
is passed to the VBox constructor
if true, the subtrees are not taken into account
in the bounding box
name of a connection command
true if the tree is framed
true of the tree is filled
filling color
thickness of the frame
color of the frame
style of the frame
vertical alignment of subtrees for trees that go
down (the root on the top); the other possible
values are "center" and "bot"
vertical alignment of subtrees for trees that go
up (the root on the bottom); the other possible
values are "center" and "top"
horizontal alignment of subtrees for trees that
go left (the root on the right); the other possible values are "center" and "left"
horizontal alignment of subtrees for trees that
go right (the root on the left); the other possible values are "center" and "right"
true if there is a shadow (framed too must be
true)
shadow color
Table 5: Tree options
80
• T for new Tree .
Several examples of their use can be found in section 7.7.
HFan and VFan components When we introduced the Tree class, we said
that the root and the subtrees can be any objects. Most of these objects can
also be used in a non-tree context. For instance, we can use a circle as a leaf of
a tree, but also elsewhere, outside a tree. There are however two objects that
are meant to be used only as part of a Tree structure. These classes are the
HFan and VFan classes. They were borrowed from PSTricks. HFan represents an
horizontal fan, where one of the fan segments is horizontal. VFan represents a
vertical fan.
Both HFan and VFan objects take a width and a height, as well as options.
The height of a HFan (and the width of a VFan) will usually be small, often 0.
These two classes are quite similar to HRazor and VRazor, but they are classes
on their own. They differ from ordinary boxes in the way they are connected
to the root node. The connection takes the appearance of a fan. Here is an
example inspired by a PSTricks example (page 36 of [16]):
setObjectDefaultOption("Tree")("hideleaves")(true);
t:=T_(new_Circle(btex foo etex))
(new_HFan_(1cm,0)("filled(true)"),
Tf,
_T(new_RBox(btex bar etex))
(new_HFan(1cm,0))
)
("Dalign(center)");
Obj(t).c=origin;
draw_Obj(t);
foo
bar
Here, we build a tree with a Circle root node and three subtrees. The first
subtree is a HFan of width 1cm and height 0. This fan is filled. The second
subtree is a black square obtained with Tf which is a shortcut for newBox with
certain options. The third subtree is a tree with a rounded corner box (newRBox)
at its root and with one leaf which is a HFan. All the leaves of the main tree are
vertically centered, and this causes the nice alignment, given that the leaf of the
third subtree is actually hidden, because hideleaves was set to true. The two
fans are “pointed,” which means that the top end reaches the bounding path.
If the pointedfan option is set to false, the top end of the fan is at the center
of the root node.
The color of a fan can be changed with the fillcolor option, its style can be
changed with the fanlinestyle option, and the rounding of its corners can be
modified with the fanlinearc option.
A root node can also be a fan, as demonstrated in the following example
(also adapted from page 36 of [16]):
81
t:=_T(new_Circle(btex foo etex))
(_T(new_HFan_(1cm,0)
("filled(true)",
"fillcolor(red)",
"fanlinearc(1mm)"
)
)
(TC,new_HFan_(1cm,0)
("fanlinestyle(dashed evenly)")));
Obj(t).c=origin;
draw_Obj(t);
foo
Here, the red fan is the root of a subtree. The top of the black disk is aligned
with the bottom of the fan, because descending trees are by default aligned on
the top, and the fan is considered an horizontal line and its top is the same
as its bottom. This wouldn’t have been the case if the second parameter of
new_HFan_ had been different to 0.
HFan and VFan options The two classes have exactly the same options:
Option
filled
fillcolor
edge
pointedfan
fanlinestyle
fanlinearc
Type
boolean
color
string
boolean
string
numeric
Default
false
black
"yes"
true
""
0
Most of these options have been explained. The edge option is a string which
by default is "yes". This means that the fan edges must be drawn. There are
certain cases where we want fans to skip levels and one way of achieving it is to
set edge to "none". A more elaborate example is given in figure 40.
Incremental construction of trees Two commands make it possible to
build a Tree incrementally, and even to replace a subtree by another and have
the tree adjust automatically. These commands are replaceTreeElement.exp
and deleteTreeElement.exp3 . They are experimental commands and are not
supported. They only work in certain cases and have side-effects.
The side-effect of the two experimental commands is that they reset the tree.
This means that if the tree had been transformed (rotated, scaled, ...), it will
be reset to a non-transformed stage. Moreover, all its components will have
the same fate, and this may reset the tree in a state different from the initial
state. metaobj currently doesn’t store enough information to properly reset
an object in all cases, and all the commands using the reset operation, such as
replaceTreeElement.exp and deleteTreeElement.exp can have unexpected
results.
7.5.2
PTree
The PTree object is designed for proof trees. It provides for either top-down
trees or bottom-up trees. Several other objects are associated to the PTree
object:
3 All
the experimental commands have a name ending in .exp.
82
• an Assumption is an object which starts a proof; it can be created with
newAssumption; it is actually a Box object with no frame;
• an Axiom is a proof tree with an empty assumption; it appears as a formula
with a line on the top (or the bottom if the proof is displayed in a bottomup style); an Axiom is built with newAxiom; this is actually a specialized
version of newPTree;
• a Conclusion is an object which ends a proof; it is also a Box object with
no frame and can be created with newConclusion;
• when a proof has only a right rule, newPTreeR can be used instead of
newPTree; similarly, there is a newPTreeL constructor for a proof which
has only a left rule.
The first example shows the modus ponens rule of classical logic:
newAssumption.a(btex $A$ etex);
newAssumption.b(btex $A\rightarrow B$ etex);
newConclusion.c(btex $B$ etex);
newPTree.proof(c)(a,b)("")("");
proof.c=origin;
drawObj(proof);
A A→B
B
The default is to build a proof from the top to the bottom. This means that
a conclusion is below the assumptions. It is also possible to do it the other way
when the treemode option is used. Only two values are recognized: “U” (up)
and “D” (down).
newAssumption.a(btex $A$ etex);
newAssumption.b(btex $A\rightarrow B$ etex);
newConclusion.c(btex $B$ etex);
newPTree.proof(c)(a,b)("")("") "treemode(U)";
proof.c=origin;
drawObj(proof);
B
A A→B
Rule names can be given:
(left rule)
newAssumption.a(btex $A$ etex);
newAssumption.b(btex $A\rightarrow B$ etex);
newConclusion.c(btex $B$ etex);
newPTree.proof(c)(a,b)
(btex (left rule) etex)(btex (right rule) etex);
proof.c=origin;
drawObj(proof);
A A→B
(right rule)
B
If the rule is only put at the right, we use an empty string for the left rule.
We could also have used newPTreeR.
newAssumption.a(btex $A$ etex);
newAssumption.b(btex $A\rightarrow B$ etex);
newConclusion.c(btex $B$ etex);
newPTree.proof(c)(a,b)("")(btex (MP) etex);
proof.c=origin;
drawObj(proof);
A A→B
(MP)
B
The horizontal line is by default built so that it covers the last formula
of what is above the line. However, there may be cases where the automatic
83
computation is not satisfactory and it is then possible to change the length of
the line, by extending its right or left ends. In order to lengthen the right end
by 1cm, we can pass 1cm to the lenddx option of newPTree (or its variants):
A A→B
B
newAssumption.a(btex $A$ etex);
newAssumption.b(btex $A\rightarrow B$ etex);
newConclusion.c(btex $B$ etex);
newPTreeR.proof(c)(a,b)(btex (MP) etex)
"lenddx(1cm)";
proof.c=origin;
drawObj(proof);
(MP)
Transformations can be applied to a proof, as for any other object:
A A→B
B
(MP)
scaleObj(proof,2);
slantObj(proof,1);
proof.c=origin;
drawObj(proof);
The next example shows that it is possible to have two overlapping proofs.
The first two lines are one proof, built top-down, and this proof is also the
conclusion of a second proof, built bottom-up and whose assumptions are the
two formulas on the last line.
newAssumption.a(btex $A$ etex);
newAssumption.b(btex $A\rightarrow B$ etex);
newConclusion.c(btex $B$ etex);
newAssumption.d(btex $D$ etex);
newAssumption.e(btex $E$ etex);
newPTreeR.proof1(c)(a,b)(btex (MP) etex);
newPTreeR.proof2(proof1)(d,e)("")
"treemode(U)";
proof2.c=origin;
drawObj(proof2);
A A→B
(MP)
B
D E
This is another such example where the intermediate formula is wider than
the others.
newAssumption.a(btex $A$ etex);
newAssumption.b(btex $A\rightarrow B$ etex);
newConclusion.c(btex $BBBBBBBBBBBBBB$ etex);
newAssumption.d(btex $D$ etex);
newAssumption.e(btex $E$ etex);
newPTreeR.proof1(c)(a,b)(btex (MP) etex);
newPTreeR.proof2(proof1)(d,e)("")
"treemode(U)";
proof2.c=origin;
drawObj(proof2);
A A→B
(MP)
BBBBBBBBBBBBBB
D E
A more elaborate proof tree is given in figure 7. The source file defines a
TEX command to obtain a column of n dots. The top-down proof is the default
and the bottom-up proof is obtained by specifying:
setObjectDefaultOption("PTree")("treemode")("U");
Though the result is quite acceptable, one must admit that writing such a
proof in metaobj directly is not that practical. In this case, a TEX interface
for metaobj would prove very useful and would allow a comparison with other
packages for proof trees.
PTree options Table 6 shows the options supported by the PTree class.
84
Option
treemode
Type
string
Default
"D"
dx
dy
hsep
vsep
numeric
numeric
numeric
numeric
0
0
3mm
2mm
lrsep
numeric
2mm
rrsep
numeric
2mm
lstartdx
numeric
0
lenddx
numeric
0
rule
framed
numeric
boolean
.5bp
false
filled
fillcolor
framewidth
framecolor
framestyle
shadow
boolean
color
numeric
color
string
boolean
false
black
.5bp
black
""
false
shadowcolor
color
black
Description
this option specifies whether the proof tree is
top-down (default) or bottom-up. The two
corresponding option values are "D" and "U".
horizontal clearance around the proof tree
vertical clearance around the proof tree
horizontal separation between two subtrees
vertical distance between the assumption(s)
and the conclusion; the rule is in the middle
of this space
separation between the horizontal line and the
left rule
separation between the horizontal line and the
right rule
how much the horizontal line is reduced (if
the option value is positive) or extended (if it
is negative) on the left side
how much the horizontal line is extended (if
the option value is positive) or reduced (if it
is negative) on the right side
rule thickness
if true, the proof tree is framed; this can be
useful to frame a part of a proof tree which is
also a proof tree
if true, the proof tree is filled
filling color
thickness of the frame, if applicable
frame color
frame style
true if there is a shadow (framed too must be
true)
shadow color
Table 6: PTree options
85
Π1
.
.
.
Π2
.
.
.
Γ, B ` ∆
Γ, C ` ∆
∨g
Γ, B ∨ C ` ∆
Π3
.
.
.
Γ0 ` B, C, ∆0
mix (1)
ΓA , Γ0 ` B, C, ∆, ∆0A
Π3
.
.
.
Π1
Π3
.
.
.
.
.
.
.
Π2
.
.
.
0
0
.
.
.
Γ ` B, C, ∆
.
.
∨
.
d
.
.
Γ, B ` ∆
Γ0 ` B ∨ C, ∆0
.
Γ0 ` B, C, ∆0
.
mix
(2)
∨d
.
ΓA , Γ0 , B ` ∆, ∆0A
Γ, C ` ∆
Γ0 ` B ∨ C, ∆0
mix
(3)
mix (4)
ΓA , Γ0 , ΓA , Γ0 ` C, ∆, ∆0A , ∆, ∆0A
ΓA , Γ0 , C ` ∆, ∆0A
mix (5)
ΓA , Γ0 , ΓA , Γ0 , ΓA , Γ0 ` ∆, ∆0A , ∆, ∆0A , ∆, ∆0A
contrg ,contrd
ΓA , Γ0 ` ∆, ∆0A
ΓA , Γ0 ` ∆, ∆0A
ΓA , Γ0 , ΓA , Γ0 , ΓA , Γ0 ` ∆, ∆0A , ∆, ∆0A , ∆, ∆0A
contrg ,contrd
mix (5)
ΓA , Γ0 , ΓA , Γ0 ` C, ∆, ∆0A , ∆, ∆0A
ΓA , Γ0 , C ` ∆, ∆0A
mix (3)
mix (4)
.
Γ, C ` ∆
ΓA , Γ0 , B ` ∆, ∆0A
Γ0 ` B ∨ C, ∆0
.
∨d
mix (2)
.
.
Γ0 ` B, C, ∆0
Γ, B ` ∆
Γ0 ` B ∨ C, ∆0
.
.
.
∨d
.
.
.
.
Γ0 ` B, C, ∆0
.
.
.
.
.
.
Π
2
.
.
.
.
.
Π3
Π1
.
.
Π3
ΓA , Γ0 ` B, C, ∆, ∆0A
mix (1)
Γ, B ∨ C ` ∆
Γ0 ` B, C, ∆0
∨g
.
Γ, B ` ∆
Γ, C ` ∆
.
.
.
.
.
.
.
.
Π3
Π1
Π2
Figure 7: Proofs in top-down and bottom-up mode (from David, Nour, Raffalli:
Introduction à la logique, Paris: Dunod, 2001, p. 197). The source is given in
figures 8 and 9.
86
input metaobj
verbatimtex
\newcount\pntcnt
\pntcnt=0
\def\npoints#1{\pntcnt=#1\vbox{\offinterlineskip\kern5pt\npointsa}}
\def\npointsa{\ifnum\pntcnt>0\hbox{$.$}\kern5pt\advance\pntcnt-1
\expandafter\npointsa\fi}
etex
%
setObjectDefaultOption("PTree")("treemode")("U");
% for bottom-up
newAssumption.pi1(btex $\Pi_1$ etex);
newConclusion.pi1c1(btex \npoints3 etex);
newPTreeR.pi1proof(pi1c1)(pi1)("") "rule(0)";
newConclusion.pi1c2(btex $\Gamma,B \vdash \Delta$ etex);
newPTreeR.a1(pi1c2)(pi1proof)("") "rule(0)";
newAssumption.pi2(btex $\Pi_2$ etex);
newConclusion.pi2c1(btex \npoints3 etex);
newPTreeR.pi2proof(pi2c1)(pi2)("") "rule(0)";
newConclusion.pi2c2(btex $\Gamma,C \vdash \Delta$ etex);
newPTreeR.a2(pi2c2)(pi2proof)("") "rule(0)";
newConclusion.c1(btex $\Gamma,B\lor C \vdash \Delta$ etex);
newPTreeR.proof1(c1)(a1,a2)(btex $\lor_g$ etex);
newAssumption.pi3(btex $\Pi_3$ etex);
newConclusion.pi3c1(btex \npoints3 etex);
newPTreeR.pi3proof(pi3c1)(pi3)("") "rule(0)";
newConclusion.pi3c2(btex $\Gamma’ \vdash B,C, \Delta’$ etex);
newPTreeR.a3(pi3c2)(pi3proof)("") "rule(0)";
newConclusion.c2
(btex \Gamma_A,\Gamma’\vdash B,C,\Delta,\Delta’_A etex);
newPTreeR.proof2(c2)(proof1,a3)(btex {\it mix\/}$(1)$ etex);
newConclusion.c2points
(btex \npoints{12} etex);
newPTreeR.proof2a(c2points)(proof2)("") "rule(0)";
duplicateObj(a4,a1);
duplicateObj(a5,a3);
newConclusion.c3(btex $\Gamma’ \vdash B\lor C, \Delta’$ etex);
newPTreeR.proof3(c3)(a5)(btex $\lor_d$ etex);
newConclusion.c4(btex $\Gamma_A,\Gamma’,B \vdash \Delta, \Delta’_A$ etex);
newPTreeR.proof4(c4)(a4,proof3)(btex {\it mix\/}$(2)$ etex);
newConclusion.c5(btex $\Gamma_A,\Gamma’,\Gamma_A,\Gamma’
\vdash C,\Delta, \Delta’_A,\Delta, \Delta’_A$ etex);
newHRazor.hr1(-4cm);
newPTreeR.proof5(c5)(proof2a,hr1,proof4)(btex {\it mix\/}$(3)$ etex);
Figure 8: Proof tree code for figure 7 (beginning)
87
duplicateObj(a6,a2);
duplicateObj(proof3a,proof3);
newConclusion.c7(btex $\Gamma_A,\Gamma’,C
\vdash \Delta, \Delta’_A$ etex);
newPTreeR.proof3b(c7)(a6,proof3a)(btex {\it mix\/}$(4)$ etex);
newConclusion.c8(btex $\Gamma_A,\Gamma’,\Gamma_A,\Gamma’,\Gamma_A,\Gamma’
\vdash \Delta, \Delta’_A,\Delta, \Delta’_A,\Delta, \Delta’_A$ etex);
newPTreeR.proof3d(c8)(proof5,proof3b)(btex {\it mix\/}$(5)$ etex)
"hsep(5mm)";
newConclusion.c9(btex $\Gamma_A,\Gamma’\vdash \Delta, \Delta’_A$ etex);
newPTreeR.proof3E(c9)(proof3d)(btex contr$_g$,contr$_d$ etex);
%yscaleObj(proof3E,2);
%reflectObj(proof3E,(0,0),(0,1));
%slantObj(proof3E,0.2);
proof3E.c=origin;
drawObj(proof3E);
Figure 9: Proof tree code for figure 7 (end)
88
7.6
Matrices
A special Matrix class provides a combination of horizontal and vertical boxes.
A matrix is constructed with newMatrix by specifying a number n of rows and
a number m of columns, and then a list of n × m objects. Here is a first matrix
with one row and one column. The matrix contains the object mela which is a
framed box.
newBox.mela(btex A etex);
newMatrix.mat(1,1)(mela);
mat.c=origin;
drawObj(mat);
A
The second matrix contains two rows and one column:
B
newBox.melb(btex B etex) "dx(1cm)";
newBox.melc(btex C etex) "dy(1cm)";
newMatrix.mata(2,1)(melb,melc);
mata.c=origin;
drawObj(mata);
C
The third matrix has three rows and two columns, but only five elements.
The last element of the first line is empty. This is shown in the newMatrix call
with a nb value. This is a special value meaning “null box.”
Matrix elements are by default centered, both horizontally and vertically. It
is possible to specify different alignments for each column and each line with the
halign and valign options. In this example, halign has a string of two letters as
argument and specifies that the left column is align to the right (e = east) and
the right column is aligned to the left (w = west). valign has a string of three
letters as parameters. The first and third letters are “s” (south) and mean that
the first (top) and last lines are aligned to the bottom; the second letter is “n”
(north) and means that the second line is aligned to the top.
newBox.melba(btex melba etex);
newBox.melda
(btex D$\displaystyle\int_0^\infty
{1\over 1+x^2}dx$ etex);
newBox.melbb(btex Bb etex);
newBox.melcb(btex C etex);
newBox.meldb(btex D etex);
newMatrix.matc(3,2)
(melba,nb,melda,melbb,melcb,meldb)
"halign(ew)", "valign(sns)";
matc.c=origin-(0,10cm);
drawObj(matc);
melba
Z
D
0
∞
Bb
1
dx
1 + x2
C D
The whole matrix can be duplicated, and we can see that the empty slot is
duplicated too. The matrix object can be scaled as well.
89
melba
∞
Z
D
0
Bb
1
dx
1 + x2
duplicateObj(matd,matc);
scaleObj(matd,2);
matd.c=origin-(0,15cm);
drawObj(matd);
C D
Multispan columns are not implemented. However, it is possible to obtain
multispan-like results by changing the bounding box of a component with the
BB wrapper.
7.6.1
Experimental constructions
Experimental commands on matrices are provided: deleteMatrixElement.exp
and replaceMatrixElement.exp. These commands are not supported. With
replaceMatrixElement.exp, it is possible to replace a matrix element by another, and have the matrix adapt its size to the contents. It is also possible to
build a Matrix incrementally, starting with a 1 × 1 matrix and adding elements
in the same row or in a new row. These two commands have the same problem
than the analog commands for the Tree class.
The next two figures show various replacements.
000000
Z
D
0
0
0
0
0
0
0
00000
∞
newBox.rep(btex Very Long Replacement etex);
replaceMatrixElement.exp.matd(1,1)(rep);
newBox.repc(btex court etex);
replaceMatrixElement.exp.matd(1,1)(repc);
newBox.repd(btex D etex yscaled 3 rotated 30);
replaceMatrixElement.exp.matd(3,2)(repd);
newBox.repe
(btex 00000000000000000 etex yscaled 3 rotated 30);
replaceMatrixElement.exp.matd(1,1)(repe);
newBox.repf(btex new line etex);
replaceMatrixElement.exp.matd(4,2)(repf);
matd.c=origin;
drawObj(matd);
Bb
1
dx
1 + x2
C
D
new line
90
0
0
0
0
0
0
0
00 00000
000
∞
Z
D
0
newBox.repg(btex new corner etex);
replaceMatrixElement.exp.matd(4,3)(repg);
matd.c=origin;
drawObj(matd);
Bb
1
dx
1 + x2
C
D
new line new corner
The last figure shows that elements of a matrix can be deleted, and that
lines or columns vanish if they contain no elements.
Z
D
0
∞
deleteMatrixElement.exp.matd(2,2);
deleteMatrixElement.exp.matd(4,2);
deleteMatrixElement.exp.matd(3,1);
deleteMatrixElement.exp.matd(3,2);
deleteMatrixElement.exp.matd(3,2);
deleteMatrixElement.exp.matd(1,1);
matd.c=origin;
drawObj(matd);
1
dx
1 + x2
7.6.2
Matrices with brackets (experimental)
metaobj contains a very experimental (and probably almost useless) function
to bracket an object. This function, bracketit.exp, actually adds two pictures
which can be brackets. Currently, it scales the pictures to the correct size and
adds them to the object as labels. This function serves mainly as an illustration
of the use of ObjLabel. Here is an example:
newBox.xa(btex
newBox.xb(btex
newBox.xc(btex
newBox.xd(btex
newBox.xe(btex
newBox.xf(btex
( )
A B
A
B
C
D
E
F
etex);
etex);
etex);
etex);
etex);
etex);
C D
newMatrix.mat(3,2)(xa,xb,xc,xd,xe,xf)
"halign(ee)", "valign(sns)";
E F
bracketit.exp(mat)(btex $($ etex,btex $)$ etex);
mat.c=origin;
drawObj(mat);
The parentheses are very bold because they were enlarged from their 10pt
versions. We can have lighter parentheses if we start with larger ones, but this
is cumbersome. An interesting solution would be to add a path which is a good
approximation of a parenthese, or a brace, etc., and filling it. This is currently
not implemented, but it could for instance use addUserPath with the pathfilled
option.
91
7.6.3
Matrix with labels
Figure 10 shows a matrix with labels and various connections. This figure is
adapted from a figure in the PSTricks documentation.
7.6.4
Matrix options
The table 7 shows all options supported by the Matrix class.
Option
dx
dy
hsep
vsep
matrixnodehsize
Type
numeric
numeric
numeric
numeric
numeric
Default
0
0
1mm
1mm
−1pt
matrixnodevsize
numeric
−1pt
halign
string
"c"
valign
string
"c"
framed
filled
fillcolor
framewidth
framecolor
framestyle
shadow
boolean
boolean
color
numeric
color
string
boolean
false
false
black
.5bp
black
""
false
shadowcolor
color
black
Description
horizontal clearance around the matrix
vertical clearance around the matrix
horizontal separation between columns
vertical separation between rows
if non-negative, all the nodes are assumed to
have this width
if non-negative, all the nodes are assumed to
have this height
a string where each character corresponds to
one column and specifies the horizontal alignment within that column
a string where each character corresponds to
one row and specifies the vertical alignment
within that row
true if the matrix is framed
true if the matrix is filled
filling color
frame thickness
frame color
frame style
true if there is a shadow (framed too must be
true)
shadow color
Table 7: Matrix options
92
7.7
PSTricks/metaobj gallery
metaobj started as a package implementing objects.
A basic tenet was that
the structure of an object had to be available. Then trees were implemented.
Then, I had to implement paths, especially for trees, because many examples
of trees I saw had additional paths. It seemed then interesting to have ways to
add PSTricks-like paths. I started to implement functions like ncline, ncbar,
etc., corresponding to PSTricks’ \ncline, \ncbar, etc. After some time, the
aim was to be able to get good approximations of the PSTricks constructions
involving node connections, trees and matrices. metaobj does not provide a
full compatibility, neither in the syntax, nor in the output, but it tries to get
as close as possible. One should keep in mind that metapost is not TEX,
and metapost does not have the same flexibility in its syntax as TEX. It is
not possible to change “catcodes” in metapost or to grab characters one by
one. Therefore, the metaobj code corresponding to the PSTricks drawings is
longer than the PSTricks’ one. However, it should still be high-level code and
understandable. It is high-level code written in a syntax less flexible than TEX.
What should now be done is to write a TEX front-end to metaobj, which would
hide the verbosity of metaobj, and still retain high-level code.
On the following pages, we present figures, similar to those found in the
PSTricks documentation. PSTricks and metaobj’s parameters do not always
have an exact correspondence and even if so, the default values are not always
the same. We tried to produce figures that were close to those produced by
PSTricks, but it would be possible to get even better results by better values
of the parameters. Producing exactly the same result is however not the aim
of this section. Our purpose is to show that most features concerning objects
and connections found in PSTricks can be reproduced in metaobj. When
the metaobj project started, its purpose was not to mimic PSTricks, and
PSTricks-like functionalities were only added at a later stage. metaobj has
some default way of constructing objects and PSTricks has another. Getting
the exact PSTricks output is possible, but it may need a lot of fiddling. And this
would certainly be the same if one wanted to mimic metaobj from PSTricks.
93
U
x
y
X ×Z Y
p
X
q
f
Y
g
Z
setObjectDefaultOption("Matrix")("hsep")(1cm);
setObjectDefaultOption("Matrix")("vsep")(1cm);
newBox.a(btex $U$ etex) "framed(false)";
newBox.b(btex $X\times_Z Y$ etex) "framed(false)";
newBox.c(btex $X$ etex) "framed(false)";
newBox.d(btex $Y$ etex) "framed(false)";
newBox.e(btex $Z$ etex) "framed(false)";
newMatrix.mat(3,3)(a,nb,nb,nb,b,c,nb,d,e);
mat.c=origin;
mcline.mat(1,1,2,2) "name(a)";
ObjLabel.mat(btex $y$ etex) "labpathname(a)","labdir(llft)";
mcline.mat(1,1,2,3) "doubleline(true)",
"arrows(draw)","linestyle(dashed evenly)", "name(b)";
ObjLabel.mat(btex $x$ etex) "labpathname(b)","labdir(urt)";
mcline.mat(2,2,2,3), "name(c)";
ObjLabel.mat(btex $p$ etex) "labpathname(c)","labdir(bot)";
mcline.mat(2,2,3,2), "name(d)";
ObjLabel.mat(btex $q$ etex) "labpathname(d)","labdir(lft)";
mcline.mat(3,2,3,3), "name(e)";
ObjLabel.mat(btex $g$ etex) "labpathname(e)","labdir(bot)";
mcline.mat(2,3,3,3), "name(f)";
ObjLabel.mat(btex $f$ etex) "labpathname(f)","labdir(rt)";
drawObj(mat);
Figure 10: Matrix example with labels (after page 26 of [16])
94
A
g
f
e
a
B
E
C
b
d
c
D
newCircle.a(btex A etex);
newCircle.b(btex B etex);
newCircle.c(btex C etex);
newCircle.d(btex D etex);
newCircle.e(btex E etex);
verbatimtex \small etex;
newMatrix.mat(3,3)(nb,a,nb,b,e,c,nb,d,nb) "hsep(2cm)", "vsep(2cm)";
mcline.mat(2,2,2,3) "name(a)";
ObjLabel.mat(btex a etex) "labpathname(a)","labpos(0.75)", "labdir(top)";
mcline.mat(2,2,2,1) "name(b)";
ObjLabel.mat(btex b etex) "labpathname(b)","labdir(bot)";
mcline.mat(3,2,2,1) "name(c)";
ObjLabel.mat(btex c etex) "labpathname(c)","labdir(llft)";
mcarc.mat(3,2,1,2)
"arcangleA(-40)","arcangleB(-40)", "border(3pt)", "name(d)";
ObjLabel.mat(btex d etex) "labpathname(d)","labdir(lrt)", "labpos(0.3)";
ObjLabel.mat(btex e etex) "labpathname(d)","labdir(llft)", "labpos(0.7)";
mcarc.mat(1,2,2,1) "arcangleA(12)","arcangleB(12)", "name(f)";
ObjLabel.mat(btex f etex) "labpathname(f)","labdir(lrt)";
mcarc.mat(2,1,1,2) "arcangleA(12)","arcangleB(12)", "name(g)";
ObjLabel.mat(btex g etex) "labpathname(g)","labdir(ulft)";
mat.c=origin;
drawObj(mat);
Figure 11: A complex matrix with connections and labels (after page 27 of [16])
95
X
Y
Z
newCircle.x(btex X etex);
newCircle.y(btex Y etex) "framed(false)";
newCircle.Z(btex Z etex) "framed(false)"; % |z| is reserved
newMatrix.mat(2,2)(nb,x,y,Z) "hsep(1cm)", "vsep(2cm)";
mcline.mat(1,2,2,1) "nodesepA(3pt)";
mcline.mat(1,2,2,2) "nodesepA(3pt)";
mcline.mat(2,1,2,2) "linestyle(dashed withdots)";
mat.c=origin;
drawObj(mat);
Figure 12: Another matrix (after page 28 of [16])
A
q
B
x+y
z
D
mat=new_Matrix_(2,2)(
new_Box_(btex A etex)("framed(false)"),
new_Box_(btex B etex)("framed(false)"),
new_Box_(btex $\sqrt{x+y\over z}$ etex)("framed(false)"),
new_Box_(btex D etex)("framed(false)"))("hsep(1cm)","vsep(1cm)"
);
mcline.Obj(mat)(1,1,1,2) "arrows(draw)";
mcline.Obj(mat)(1,1,2,1) "arrows(draw)";
mcline.Obj(mat)(1,2,2,2) "arrows(draw)";
mcline.Obj(mat)(2,1,2,2) "arrows(draw)";
Obj(mat).c=origin;
draw_Obj(mat);
Figure 13: Another matrix (after page 122 of [2])
96
firstly
A
B
lastly
q
next
x+y
z
D
then
setCurveDefaultOption("linestyle","dashed withdots")
mat:=new_Matrix_(2,2)(
new_Circle(btex A etex),
new_Circle(btex B etex),
new_Circle(btex $\sqrt{x+y\over z}$ etex),
new_Circle(btex D etex))("hsep(1cm)","vsep(1cm)"
);
mcline.Obj(mat)(1,1,1,2) "name(firstly)";
mcline.Obj(mat)(2,1,1,1) "name(lastly)";
mcline.Obj(mat)(1,2,2,2) "name(next)";
mcline.Obj(mat)(2,2,2,1) "name(then)";
ObjLabel.Obj(mat)(btex \it firstly\/ etex)
"labpathname(firstly)","labdir(top)";
ObjLabel.Obj(mat)(btex \it next\/ etex)
"labpathname(next)","labdir(rt)";
ObjLabel.Obj(mat)(btex \it then\/ etex)
"labpathname(then)","labdir(bot)";
ObjLabel.Obj(mat)(btex \it lastly\/ etex)
"labpathname(lastly)","labdir(lft)";
mccurve.Obj(mat)(1,1,2,2) "angleA(90)","angleB(180)","linestyle()",
"linetension(1.5)";
Obj(mat).c=origin;
draw_Obj(mat);
Figure 14: Another matrix (after page 123 of [2])
root
setCurveDefaultOption("arrows")("draw");
t=_T(new_Ellipse(btex root etex))(TCs,TCs,TCs,TCs);
Obj(t).c=origin;
draw_Obj(t);
Figure 15: A tree; TCs is the default filled disk (after page 33 of [16])
97
setCurveDefaultOption("arrows")("draw");
u=T_(Tn)(TCs,
T_(Tc)(TCs,TCs)("hbsep(5mm)","hideleaves(true)"),
TCs)("hbsep(5mm)");
Obj(u).c=origin-(0,5cm);
draw_Obj(u);
Figure 16: TCs is the default filled disk (after page 33 of [16])
X
˜
X̃
x
y
setCurveDefaultOption("arrows")("draw");
t:=_T(new_Circle(btex $X$ etex))
(new_Box_(btex $\tilde{\tilde{X}}$ etex)("framed(false)"),
new_Box_(btex $x$ etex)("framed(false)"),
new_Box_(btex $y$ etex)("framed(false)"));
Obj(t).c=origin;
draw_Obj(t);
Figure 17: Labels aligned on the top (after page 35 of [16])
X
˜
X̃
x
y
setCurveDefaultOption("arrows")("draw");
t:=_T(new_Circle(btex $X$ etex))
(new_Box_(btex \strut $\smash{\tilde{\tilde{X}}}$ etex)("framed(false)"),
new_Box_(btex \strut $x$ etex)("framed(false)"),
new_Box_(btex \strut $y$ etex)("framed(false)"));
Obj(t).c=origin-(0,5cm);
draw_Obj(t);
Figure 18: Forcing the alignment on the bottom with \struts and \smash (after
page 34 of [16])
98
setCurveDefaultOption("arrows")("draw");
setCurveDefaultOption("nodesepA")(3pt); % works
setCurveDefaultOption("nodesepB")(3pt); % works
setObjectDefaultOption("Tree")("hideleaves")(true);
t:=_T(TCs)
(_T(TCs)(TCs,Tn),
_T(TCs)(TCs,_T(TCs)(Tn,TCs))
);
Obj(t).c=origin;
draw_Obj(t);
Figure 19: Illustrating the nodesepA option (after page 35 of [16]); the empty
node (Tn) doesn’t have the same size as the black disks, and causes the leftmost
segment to have a slope slightly different to the two other segments going to the
right; this could be corrected with the treenodehsize option. TCs is the default
filled disk.
99
+
+
+
+
def Tdot(expr p)=
new_Circle_(p)("circmargin(-.2mm)")
enddef;
def Toplus=
Tdot(btex $+$ etex)
enddef;
setCurveDefaultOption("arrows")("draw");
setObjectDefaultOption("Tree")("hideleaves")(true);
setCurveDefaultOption("nodesepA")(3pt);
setCurveDefaultOption("nodesepB")(3pt);
setObjectDefaultOption("Tree")("Ualign")("center");
setObjectDefaultOption("Tree")("Lalign")("center");
setObjectDefaultOption("Tree")("hbsep")(5mm);
setObjectDefaultOption("Tree")("vbsep")(5mm);
setObjectDefaultOption("Tree")("hsep")(2cm);
setObjectDefaultOption("Tree")("vsep")(2cm);
t:=T_(Tc_(1.5mm))
(T_(Tc_(1.5mm))(Toplus,Toplus)("treemode(L)"),Toplus,Toplus)
("treemode(U)");
Obj(t).c=origin;
draw_Obj(t);
Figure 20: A tree with two different directions (after page 37 of [16])
root
B
A1
A2
setCurveDefaultOption("arrows")("draw");
setObjectDefaultOption("Tree")("hsep")(1cm);
setObjectDefaultOption("Tree")("vsep")(1cm);
% we draw two trees which share a root node:
t:=T_(new_Circle(btex root etex))(Tr_(btex B etex))("treemode(L)");
Obj(t).c=origin;
u:=_T(obj(Obj(t).root))(Tr_(btex A1 etex),Tr_(btex A2 etex));
draw_Obj(t);
draw_Obj(u);
Figure 21: Two trees sharing the same root node (after page 37 of [16]); there
are two draw Obj commands to draw them, and actually the root will be drawn
twice. The u tree is automatically positionned, because its root is already set
in the first tree.
100
setCurveDefaultOption("arrows")("draw");
setObjectDefaultOption("Tree")("Dalign")("center");
setObjectDefaultOption("Tree")("hbsep")(5mm);
t:=_T(Tc)(TCs,
T_(Tc)(new_Circle_("")("filled(true)","circmargin(15pt)"),TCs)
("treenodehsize(1cm)"),
TCs);
Obj(t).c=origin;
draw_Obj(t);
Figure 22: The large disk does not change the balance, because the treenodehsize
option pretends all subtrees are 1cm wide; it does however enlarge the tree
vertically, because we didn’t use the treenodevsize option; TCs is the default
filled disk (after page 38 of [16])
j
K4
x>y
setCurveDefaultOption("arrows")("draw");
t:=_T(Tc)(Tr_(btex $j$ etex),Tr_(btex $K_4$ etex),Tr_(btex $x>y$ etex));
Obj(t).c=origin;
draw_Obj(t);
Figure 23: Leaves with different widths (after page 38 of [16]); K4 is not centered.
101
j
K4
x>y
setCurveDefaultOption("arrows")("draw");
t:=T_(Tc)(Tr_(btex $j$ etex),Tr_(btex $K_4$ etex),Tr_(btex $x>y$ etex))
("treenodehsize(5mm)");
Obj(t).c=origin;
draw_Obj(t);
Figure 24: Leaves whose width was set with treenodehsize (after page 38
of [16]); K4 is now centered.
setCurveDefaultOption("arrows")("draw");
t:=_T(TCs)(Tc,_T(TCs)(_T(Tc)(Tc,Tc,Tc),TCs,TCs,TCs));
Obj(t).c=origin;
draw_Obj(t);
Figure 25: Tree with visible subtrees; TCs is the default filled disk. (after page
39 of [16])
setCurveDefaultOption("arrows")("draw");
setObjectDefaultOption("Tree")("hideleaves")(true);
t:=_T(TCs)(Tc,_T(TCs)(_T(Tc)(Tc,Tc,Tc),TCs,TCs,TCs));
Obj(t).c=origin;
draw_Obj(t);
Figure 26: Tree with hidden subtrees; TCs is the default filled disk. (after page
39 of [16])
102
setCurveDefaultOption("arrows")("draw");
t:=T_(TCs)(_T(TCs)(TCs,TCs),_T(TCs)(TCs,TCs))("vsep(.5cm)","hbsep(2cm)");
Obj(t).c=origin;
draw_Obj(t);
Figure 27: Illustrating different horizontal separations at different levels; TCs is
the default filled disk. (after page 39 of [16])
X2
X1
Y2
Y1
K2
K1
J2
J1
setCurveDefaultOption("arrows")("draw");
setObjectDefaultOption("Tree")("treemode")("R");
t:=_T(Tc)(
_T(TCs)(T_(TCs)(Tr_(btex $J_1$ etex),Tr_(btex
T_(TCs)(Tr_(btex $K_1$ etex),Tr_(btex
),
_T(TCs)(T_(TCs)(Tr_(btex $Y_1$ etex),Tr_(btex
T_(TCs)(Tr_(btex $X_1$ etex),Tr_(btex
)
);
Obj(t).c=origin;
draw_Obj(t);
$J_2$ etex))("hsep(3cm)"),
$K_2$ etex))("hsep(3cm)")
$Y_2$ etex))("hsep(3cm)"),
$X_2$ etex))("hsep(3cm)")
Figure 28: A complete tree; TCs is the default filled disk. (after page 40 of [16]).
We don’t have a hook for a given level as PSTricks does, so we have to give the
hsep option several times; however, we could avoid it by building the tree in a
non-streamlined way. Also, the labels are given in the opposite order, but the
order could be changed with the treeflip option.
103
N
K
H
L
setObjectDefaultOption("Tree")("treemode")("R");
t:=T_(new_Circle_("")("circmargin(3mm)"))
(Tcircle_(btex L etex),Tcircle_(btex H etex),
Tcircle_(btex K etex),Tcircle_(btex N etex))
("edge(ncdiag)", "angleB(0)",
"armA(0)","armB(1cm)","hsep(3.5cm)","posA(e)","arrows(draw)");
Obj(t).c=origin;
draw_Obj(t);
Figure 29: Illustrating the ncdiag connection in a tree (after page 41 of [16])
z1 ≤ y
z1 < y ≤ z2
z2 < y ≤ x
x<y
setObjectDefaultOption("Tree")("treemode")("R");
setObjectDefaultOption("Tree")("Ralign")("center");
t:=T_(new_Circle_("")("circmargin(1mm)","framewidth(1pt)"))
(Tr_(btex $x<y$ etex),Tr_(btex $z_2 < y\leq x$ etex),
Tr_(btex $z_1<y\leq z_2$ etex),Tr_(btex $z_1\leq y$ etex))
("edge(ncdiag)", "nodesepA(2mm)","angleB(0)",
"armA(0)","armB(3cm)","hsep(3.5cm)","arrows(draw)","vbsep(5mm)",
"linewidth(1pt)");
Obj(t).c=origin;
draw_Obj(t);
Figure 30: Illustrating the ncdiag connection in a tree; all the options, except
edge, passed to the tree, are connection options which will be used by ncdiag.
(after page 42 of [16])
104
setObjectDefaultOption("Tree")("treemode")("U");
setObjectDefaultOption("Tree")("hbsep")(5mm);
setObjectDefaultOption("Tree")("hideleaves")(true);
setCurveDefaultOption("arrows")("draw");
t:=_T(Tc)(TCs,_T(Tc)(TCs,TCs),TCs);
% changes to the edges:
setTreeEdge(Obj(t))(1)(linestyle)("dashed evenly");
setTreeEdge(treepos(Obj(t))(2))(1)(linestyle)("dashed evenly");
Obj(t).c=origin;
draw_Obj(t);
Figure 31: Changing the style of connections with setTreeEdge (after page 42
of [16])
nature
setCurveDefaultOption("arrows")("draw");
setCurveDefaultOption("nodesepA")(2mm);
setCurveDefaultOption("nodesepB")(2mm);
t:=_T(Toval_(btex nature etex))
(_T(new_Circle_("")("circmargin(1mm)","name(top)"))(TCs,TCs),
_T(new_Circle_("")("circmargin(1mm)","name(bot)"))(TCs,TCs));
Obj(t).c=origin;
ncline.Obj(t)("top")("bot")
"nodesepA(0)","nodesepB(0)","linestyle(dashed evenly)";
draw_Obj(t);
Figure 32: Connecting two named nodes in a tree (after page 43 of [16]); the
name option is used to give names to streamlined objects, and these names
are then used in the ncline connection command; TC is a filled circle of radius
1mm.
105
X
root
Y
Z
setCurveDefaultOption("arrows")("draw");
setObjectDefaultOption("Tree")("treemode")("R");
t:=T_(Toval_(btex root etex))
(Tr_(btex Z etex),Tr_(btex Y etex),Tr_(btex X etex))
("edge(nccurve)","angleA(0)","angleB(0)","hsep(3.5cm)",
"posA(e)");
Obj(t).c=origin;
draw_Obj(t);
Figure 33: nccurve connections in a tree (after page 43 of [16]); posA is used
to set the starting point on the right of the ellipse; Toval is a shortcut (so to
say) for new Ellipse.
root
x
y
z
setObjectDefaultOption("Tree")("treemode")("D");
t:=T_(new_Polygon_(btex root etex)(4)("name(top)"))
(new_Box_(btex x etex)("framed(false)","name(lx)"),
new_Box_(btex y etex)("framed(false)","name(ly)"),
new_Box_(btex z etex)("framed(false)","name(lz)"))
("edge(none)","vsep(1.5cm)");
ncbar.Obj(t)("top")("lx") "angleA(180)","armA(1cm)";
ncline.Obj(t)("top")("ly");
ncbar.Obj(t)("top")("lz") "angleA(0)","armA(1cm)";
Obj(t).c=origin;
draw_Obj(t);
Figure 34: Different tree connections in a same tree (after page 43 of [16]);
the middle line is not completely vertical because “x” is slightly larger than
“z.” This could be corrected by using the treenodehsize option and forcing all
subtrees to a same width.
106
root
setCurveDefaultOption("nodesepA")(2mm);
setCurveDefaultOption("nodesepB")(0);
setCurveDefaultOption("arrows")("rdrawarrow");
t:=T_(new_Polygon_(btex root etex,3)("angle(90)","polymargin(4mm)"))
(TCs,TCs,TCs,TCs)
("edge(rncangle)","angleA(90)","angleB(90)","armB(1cm)","vsep(2.5cm)");
Obj(t).c=origin;
draw_Obj(t);
Figure 35: Illustrating “reverse” connections in a tree (after page 43 of [16]);
in all trees, the parameter to edge (or its default value) represents a connection
from the root to the subtrees; this example shows that it is possible to pass a
connection which goes from the subtrees to the root, and angleA, armA, etc.,
then represent parameters for the start of the connections at the bottom; the
arrow style has to be changed so that the arrow appears at the beginning of the
line; rdrawarrow is a variant of drawarrow where the two ends are exchanged.
Idea2
Idea1
newBox.a(btex Idea1 etex);
newBox.b(btex Idea2 etex);
b.c-a.c=(5cm,3cm);
a.c=origin;
ncbox(a)(b) "linearc(1mm)","linestyle(dashed evenly)",
"boxsize(1cm)","nodesepA(1cm)","nodesepB(1cm)";
drawObj(a,b);
Figure 36: Illustrating ncbox (after page 16 of [16])
107
Idea2
Idea1
newBox.a(btex Idea1 etex);
newBox.b(btex Idea2 etex);
b.c-a.c=(5cm,3cm);
a.c=origin;
ncarcbox(a)(b) "doubleline(true)",
"linestyle(dashed evenly)",
"boxsize(7mm)","nodesepA(1cm)","nodesepB(1cm)","arcangleA(-50)";
drawObj(a,b);
Figure 37: Illustrating ncarcbox (after page 16 of [16])
108
N
(0, 0, 0)
Player 1
L
R
r
l
Player 2
l
r
Player 3
(−10, 10. − 10)
(10, −10.0)
c
d
(3, 8, −4)
(−8, 3, 4)
c
(4, 8, −3)
d
(0, −5, 0)
% the black disk is small, but its bounding box is extended so that we
% get a good alignment with the empty circles
% TCE=TC Extended
def TCE=
rebindrelative_Obj(new_Circle_("")("filled(true)","circmargin(.5mm)"))
(1.5mm,-1.5mm,1.5mm,-1.5mm)
enddef;
setCurveDefaultOption("arrows","draw");
setObjectDefaultOption("Tree")("vsep")(2cm);
setObjectDefaultOption("Tree")("hbsep")(2cm);
setObjectDefaultOption("Tree")("treenodevsize")(5mm);
t:=T_(Tn)(T_(Tr_(btex Player 1 etex))
(T_(Tr_(btex Player 2 etex))
(Tr_(btex Player 3 etex))("edge(none)"))("edge(none)"),
T_(Tc_(2mm))(
_T(Tc_(2mm))(TCE,T_(Tc_(2mm))(TCE,TCE)("hideleaves(true)")),
_T(Tc_(2mm))(TCE,T_(Tc_(2mm))(TCE,TCE)("hideleaves(true)"))
)("hbsep(2cm)"),
new_HRazor(-5cm),
TCE)("edge(none)");
Obj(t).c=origin;
Figure 38: An annotated tree: beginning of the code (after page 51 of [16]). Tc
builds a circle of a given radius. Tr builds an unframed box. The root of the
main tree is an empty node Tn.
109
ncbox.Obj(t)(treeroot(Obj(t))(2,1))
(treeroot(Obj(t))(2,2))
"linestyle(dashed evenly)", "boxsize(3mm)",
"nodesepA(5mm)", "nodesepB(5mm)", "linearc(3mm)";
ncarcbox.Obj(t)(treeroot(Obj(t))(2,1,2))
(treeroot(Obj(t))(2,2,2))
"linestyle(dashed evenly)", "arcangleA(30)",
"nodesepA(5mm)", "nodesepB(5mm)","boxsize(3mm)";
ncline.Obj(t)(treeroot(Obj(t))(2))(treeroot(Obj(t))(4)) "name(N)";
ObjLabel.Obj(t)(btex N etex) "labpathname(N)", "labdir(top)";
% we add labels on edges; the standard edges of a tree are numbered 1,2, ...
% and we use |labpathid|; we must take care to give the correct objet
% as first parameter of |ObjLabel|.
ObjLabel.treepos(Obj(t))(2)(btex L etex) "labpathid(1)", "labdir(lft)";
ObjLabel.treepos(Obj(t))(2)(btex R etex) "labpathid(2)", "labdir(rt)";
ObjLabel.ntreepos(Obj(t))(2,1)(btex l etex) "labpathid(1)", "labdir(lft)";
% The previous is a shorthand for
% ObjLabel.treepos(treepos(Obj(t))(2))(1)(btex l etex)
%
"labpathid(1)", "labdir(lft)";
ObjLabel.ntreepos(Obj(t))(2,1)(btex r etex) "labpathid(2)", "labdir(rt)";
ObjLabel.ntreepos(Obj(t))(2,2)(btex l etex) "labpathid(1)", "labdir(lft)";
ObjLabel.ntreepos(Obj(t))(2,2)(btex r etex) "labpathid(2)", "labdir(rt)";
ObjLabel.ntreepos(Obj(t))(2,1,2)(btex
ObjLabel.ntreepos(Obj(t))(2,1,2)(btex
ObjLabel.ntreepos(Obj(t))(2,2,2)(btex
ObjLabel.ntreepos(Obj(t))(2,2,2)(btex
c
d
c
d
etex)
etex)
etex)
etex)
"labpathid(1)",
"labpathid(2)",
"labpathid(1)",
"labpathid(2)",
"labdir(lft)";
"labdir(rt)";
"labdir(lft)";
"labdir(rt)";
% labels on nodes:
ObjLabel.ntreepos(Obj(t))(2,1,1)(btex $(-10,10.-10)$ etex) "labcard(s)";
% the distance between the node and the label is 1cm as defined in |ObjLabel|
ObjLabel.ntreepos(Obj(t))(2,2,1)(btex $(10,-10.0)$ etex) "labcard(s)";
ObjLabel.ntreepos(Obj(t))(2,1,2,1)(btex $(3,8,-4)$ etex) "labcard(s)";
ObjLabel.ntreepos(Obj(t))(2,1,2,2)(btex $(-8,3,4)$ etex) "labcard(s)";
ObjLabel.ntreepos(Obj(t))(2,2,2,1)(btex $(4,8,-3)$ etex) "labcard(s)";
ObjLabel.ntreepos(Obj(t))(2,2,2,2)(btex $(0,-5,0)$ etex) "labcard(s)";
ObjLabel.treepos(Obj(t))(4)(btex $(0,0,0)$ etex) "labcard(e)";
% 4, because the HRazor counts for one subtree
draw_Obj(t);
Figure 39: An annotated tree: end of the code.
110
def TCE=
rebindrelative_Obj(new_Circle_("")("filled(true)","circmargin(.5mm)"))
(.5mm,-.5mm,.5mm,-.5mm)
enddef;
setCurveDefaultOption("arrows","draw");
setObjectDefaultOption("Tree")("treemode")("R");
setObjectDefaultOption("Tree")("vbsep")(5mm);
setObjectDefaultOption("Tree")("treenodevsize")(-1);
setObjectDefaultOption("Tree")("treenodehsize")(5mm);
t:=T_(Tc)(
T_(Tc)(
_T(Tc)(TCE,TCE),
T_(Tn)(T_(Tn)(TCE)("edge(none)"))("edge(none)"),
T_(Tn)(T_(Tn)(_T(Tc)(TCE,TCE))("edge(none)"))("edge(none)"),
TCE
)("edge(none)"),
_T(Tn)(new_VFan_(2mm,1cm)("edge(none)"))
)("edge(none)","pointedfan(false)");
ncline.Obj(t)(treeroot(Obj(t))(1))(treeroot(Obj(t))(1,1));
ncline.Obj(t)(treeroot(Obj(t))(1))(treeroot(Obj(t))(1,2,1,1));
ncline.Obj(t)(treeroot(Obj(t))(1))(treeroot(Obj(t))(1,3,1,1));
ncline.Obj(t)(treeroot(Obj(t))(1))(ntreepos(Obj(t))(1,4));
ncline.Obj(t)(obj(Obj(t)root))
(treeroot(Obj(t))(1));
% we call |ncfan| because we draw a non-standard fan
ncfan.Obj(t)(obj(Obj(t)root))(ntreepos(Obj(t))(2,1))(2);
Obj(t).c=origin;
draw_Obj(t);
% we call |drawfan| because we draw a non-standard fan
drawfan.Obj(t)(ntreepos(Obj(t))(2,1))(2);
Figure 40: Skipping levels in a tree (after page 50 of [16]); we take great care
to have the circles properly aligned.
111
above
above
below
t:=T_(Tc)(TC,TC,Tc)("treemode(R)","arrows(draw)","hsep(2cm)");
Obj(t).c=origin;
ObjLabel.Obj(t)(btex below etex) "labpathid(1)", "labdir(bot)";
ObjLabel.Obj(t)(btex above etex) "labpathid(2)", "labdir(top)";
ObjLabel.Obj(t)(btex above etex) "labpathid(3)", "labdir(top)";
draw_Obj(t);
Figure 41: Positionning of labels with the labpathid and labdir options
ab
ove
above
bel
ow
t:=T_(Tc)(TC,TC,Tc)("treemode(R)","arrows(draw)","hsep(2cm)");
Obj(t).c=origin;
ObjLabel.Obj(t)(btex below etex)
"labpathid(1)", "labdir(bot)","labangle(0)","labpos(0.4)";
ObjLabel.Obj(t)(btex above etex) "labpathid(2)", "labdir(top)","labpos(0.6)";
ObjLabel.Obj(t)(btex above etex)
"labpathid(3)", "labdir(top)","labangle(0)","labpos(0.3)";
draw_Obj(t);
Figure 42: Alignment of labels on paths (after page 45 of [16])
112
c
c
a
c
hexagon
b
a
b
Double box with green shadow
newBox.a("a");
newEllipse.b("b");
newEllipse.c("c") "filled(true)", "fillcolor(red)","picturecolor(green)",
"framecolor(blue)","framewidth(2pt)";
newTree.t(c)(a,b) "linecolor((1,1,0))";
newBox.aa(t) "filled(true)", "fillcolor((0,1,1))","rbox_radius(2mm)";
aa.c=origin;
newHexagon.xa("hexagon") "fit(false)","filled(true)","fillcolor((1,0,1))";
newEllipse.xc("c") "filled(true)", "fillcolor(red)","picturecolor(green)",
"framecolor(blue)","framewidth(2pt)";
newTree.xt(xc)(xa,aa) "linecolor((1,1,0))";
newCircle.xaa(xt) "filled(true)", "fillcolor((.6,.8,.5))";
newDBox.db(btex Double box with green shadow etex)
"shadow(true)", "shadowcolor(green)",
"filled(true)","fillcolor(blue)","picturecolor((1,1,0))";
newTree.nt(xaa)(db);
drawObj(nt);
nccoil(xc)(db) "angleA(0)","angleB(180)",
"coilwidth(5mm)","linetension(0.8)","linecolor(red)",
"doubleline(true)","posB(e)";
duplicateObj(dt,aa);
reflectObj(dt,origin,up);
slantObj(dt,.5);
rotateObj(dt,30);
dt.c=nt.c-(6cm,-1cm);
drawObj(dt);
nczigzag(a)(treepos(obj(dt.sub))(1))
"angleA(-120)","coilwidth(7mm)","linecolor(.5green)","linearc(1mm)",
"border(2pt)";
Figure 43: Cover example. The standard Tree class draws the paths before the
components, because the junction with objects are then better, in case the node
frames are of a different color than the paths. This is why we drew the coil after
the main object. As a consequence, the coil is not part of the object and won’t
move with it. It is possible to see the path and still attach it to the object by
modifying the draw function of the object.
113
8
Class builder manual
8.1
Components of a class
A class hC i has a name which can’t begin or end with _. An object of such a
class is defined by a constructor and various other functions are associated to
it.
8.1.1
Constructor
The definition of a class hC i is:
vardef newhC i@#hparametersi text options =
ExecuteOptions(@#)(options);
assignObj(@#,"hC i");
StandardInterface;
hvariablesi
hcodei
hstandard pathsi
StandardTies;
enddef;
This constructor takes parameters, for instance a list of objects. It also
takes an optional list of options. The options are evaluated by ExecuteOptions
and some bookkeeping is done when assignObj is called. StandardInterface
defines the points and equations corresponding to the standard interface.
hvariablesi is a list of declarations of variables. These variables can be ordinary metapost variables (and save should be used to keep them local to
the constructor) or object attributes. The following simple object attribute
declarations are recognized:
• ObjNumeric hnumlisti: declares each element of hnumlisti as a numeric
for the current object; for instance: ObjNumeric a,b. These values do
not change when a linear transformation is applied to the object. A numerical value can be set in a constructor with setNumeric which takes
an ObjNumeric name and a numerical value as parameters, for instance:
setNumeric(num)(n). These numerical values can be used in the object
equations by prefixing them with @#.
• ObjPoint hpointlisti: declares each element of hpointlisti as a point for
the current object; for instance: ObjPoint a,b. These points move when
the object is transformed. They can be used in the object equations by
prefixing them with @#.
• ObjPair hpairlisti: declares each element of hpairlisti as a pair for the
current object; for instance: ObjPair a,b. A pair value can be set with
setPair which takes an ObjPair name and a pair value as parameters:
setPair(p)(v). These pairs do not move when the object is transformed.
They are like constant points. They can be used in the object equations
by prefixing them with @#.
114
• ObjPicture hpiclisti: declares each element of hpiclisti as a picture for the
current object; for instance: ObjPicture a,b. A picture can be set with
setPicture which takes an ObjPicture name and a picture as parameters: setPicture(pic)(p). To each picture hpi, ObjPicture associates a
point hp.off i which is the picture offset. The pictures can be used in the
object equations by prefixing them with @#.
• ObjColor, ObjBoolean, ObjString and ObjTransform are commands similar to ObjNumeric and ObjPair and they also have associated setColor,
setBoolean, setString and setTransform commands.
• SubObject(hnamei,hobjecti): declares hnamei as a string containing the
name of object hobjecti; for instance, SubObject(root,theroot). These
objects can be referred to in the equations by calling obj on their name
prefixed with @#.
There is also an ObjPath command which defines standard paths. However,
they must be defined in the hstandardpathsi section, once all equations are
defined.
It is also possible to declare arrays with ObjColorArray, ObjBooleanArray,
ObjNumericArray,
ObjPointArray,
ObjPairArray,
ObjStringArray,
ObjTransformArray and ObjSubArray.
These commands all have the same syntax. They take two parameters. The
first is the name of the array and the second is its size. The size of the array is
stored in the subcomponent n_ of the array. For instance,
ObjSubArray(sb)(Nx*Ny);
declares the array sb of size Nx×Ny as part of the current object and the size is
recorded in sb.n . This array is an array of subobject names, that is, an array of
strings. Arrays are numbered from 1. This is a convention in the duplicateObj
function, and if you go beyond the boundaries or use non-integer indices, the
duplication will forget things.
The metaobj source code has many examples of these commands.
hcodei is actually a list of strings representing equations. They are declared
with ObjCode. These strings can be constructed using other variables or options.
It is possible to embed low-level metapost code in these strings, and not only
equations. The concatenation of these strings is executed when the object is
created, and also when the object is reset (but this is an experimental and
unsupported function). Usually one of the strings is StandardEquations. The
equations must represent linear constraints. For instance, it is not possible to
specify a rotation by an unknown angle.
In the hstandardpathsi section, paths can be defined with ObjPath. This
command takes a path and can be followed by options. Here is an example:
ObjPath(obj(@#suba).b{dir(60)}..obj(@#subb).b)
"linecolor(green)";
Finally, StandardTies ties the subobjects to the main object.
115
8.1.2
Streamlined constructor
In order to be able to chain the objects, one should use “streamlined” versions of
the constructors. They can be created with appropriate calls to the streamline
command. For instance, the streamlined versions of newPolygon are obtained
with
streamline("Polygon")("(expr v,nsides)","(v,nsides)");
The parameters of streamline are explained in section 5.1.
8.1.3
Bounding path
Each class hC i should have a BpathhC i function defining the “bounding path.”
This path is used for instance when connections are drawn between two objects.
The function takes the name of the object as a parameter. This name can be
used to access points, or options, etc.
Here is the corresponding function for the Polygon class:
def BpathPolygon(suffix n)=
(for i:=1 upto n.po.n_: n.po[i]--endfor cycle)
enddef;
8.1.4
Drawing function
Each class hC i should also define a drawhC i function defining the way a hC i
object is drawn. The corresponding function for the Polygon class is:
def drawPolygon(suffix n)=
drawFramedOrFilledObject_(n);
drawPictureOrObject(n);
drawMemorizedPaths_(n);
enddef;
This function specifies that in order to draw a Polygon, the frame should
be drawn first (possibly filled), then the contents, then additional memorized
paths. Memorized paths are typically paths added with the connection commands (ncline, etc.).
8.1.5
Alternate constructors
Certain objects have alternate constructors, for instance for compatibility reasons with other packages.
metaobj defines the newPentagon constructor as a variant of newPolygon:
vardef newPentagon@#(expr v) text options=
newPolygon@#(v,5) options;
enddef;
116
8.1.6
Additional functions
A class can have associated functions which make its code simpler. These functions can use all the functions defined in metaobj. One interesting function
that can be used is the ishC i function which tests whether a given object belongs to a class or not. For instance, one of the internal functions associated to
the Tree class is the following:
def TreeRootObj_(suffix sb)=
(if isBB(sb): TreeRootObj_(obj(sb.sub))
elseif isTree(sb): TreeRootObj_(obj(sb.root))
else: sb
fi
)
enddef;
Given an object, this function unwraps all BB layers it may contain, and
when it reaches a Tree object, it calls itself on its root (which can itself be a
Tree), and so on. Only when the object is neither a Tree, nor a BB wrap, does
the function return the object itself.
These ishC i functions are defined automatically and do not need to be
defined by the user.
8.1.7
Option declarations
If the hC i class uses options that are not yet part of
defined with one of the following commands:
metaobj, they should be
• define local numeric option
• define local pair option
• define local string option
• define local color option
• define local boolean option
• define global numeric option
• define global pair option
• define global string option
• define global color option
• define global boolean option
The first five functions define local options, that is, options that are used
only at the time of the constructor. The last functions define global options,
that is, options that are used beyond the constructor, for instance when the
object is drawn. filled is such an option:
define_global_boolean_option("filled");
This option is used by many objects to decide whether the frame should be
filled or not.
117
8.1.8
Default values for options
All the options should have a default value. This default value depends on the
class. It can be set with setObjectDefaultOption. For instance, here is how
the Tree class defines the default orientation of trees:
setObjectDefaultOption("Tree")("treemode")("D");
8.2
Design rules
Several metaobj functions assume that objects are rigid. Such objects can be
floating, but the position of all the points should be determined by setting just
one point.
It is of course possible to define objects with less constraints, but then the
user will have to define new functions to manipulate them.
When creating an object, the implementer should first try to define caracteristic points which will be used to express the equations. These points should
be given names (different from those of the standard interfaces) and equations
between these points should be given. This will be sufficient for most objects
with straight lines.
The constraints on the points should be given as equations, never as assignments (except for intermediate computations), otherwise objects might no
longer be floating.
For certain objects, the difficult part is to find the good equations. For
instance, it is not that simple to find good equations for a triangle enclosing
a rectangular box such as text. However, in many cases, the equations are
simple, but there are many different cases to consider, depending on the values
of parameters and on the presence of certain subobjects.
Parameters should be introduced when necessary. These parameters should
be consistant with already existing parameters. When in doubt, new parameter
names should be created.
Consider for instance the following object:
abcdefg
XXXXXXX
Here, we want a rectangular box where XXXXXXX (an object or a picture)
is centered. In addition, we want some label at the top left. First, we should
identify the caracteristic points. It is natural to consider that the corners of
the outer rectangle are those of the standard interface, and we need no more
points for those. The corners of the inner XXXXXXX box are also those of its
standard interface. For the top left label, we add three points: lsw, lse and
118
lne. The top label and the main XXXXXXX box will be parameters to the
new constructor.
Now, we have to decide the layout. Will XXXXXXX be centered, no matter
the size of the top left label or will it take the top left label into account? These
are design decisions that must be taken. Let’s assume the top left label doesn’t
influence the position of XXXXXXX. Let’s also assume that the size of the top
left rectangle is exactly that of the label. Finally, let’s assume there is a DX
and DY clearance inside the box. This gives us the following equations (in plain
language):
let L=topleftlabel
X=center box
M=main box
xpart(M.e-X.e)=xpart(X.w-M.w)=DX
ypart(M.n-X.n)=xpart(X.s-M.s)=DY
M.nw=L.nw
M.lsw=L.sw
M.lse=L.se
M.lne=L.ne
and that’s it! Actually, we might even discard lsw, lse and lne, since they are
given by L’s cardinal points.
Things get more complex when the object contains lines that are not straight.
There are two cases: either it is easy to compute the line from certain points
(this is done with the Circle and Ellipse constructors, for instance), or it is
easier to memorize the line as a path. This is what is done for round boxes
(RBox).
9
Non-linear transformations on objects
The whole structure of an object is available and it is therefore possible to apply
various transformations to an object. metaobj provides the standard metapost linear transformations, but on objects: rotateObj, scaleObj, etc. There
are however many other possible transformations. We will give a few examples
here, by distinguishing two kinds of transformations.
9.1
Simple transformations which do not change the layout
The first kind of transformation does not change the positions of the points.
These transformations only change various attributes. For instance, we might
want to change the color of a frame when an object is duplicated, or maybe
change some of the labels, without changing the layout.
9.1.1
Example 1: changing the frame color
Several attributes of an object are stored in fields that can easily be changed.
This is for instance the case for the color of the frame. It is stored in the
option_framecolor_ field and it can be changed as shown here:
119
newEllipse.a(btex a framed text etex) "framecolor(red)";
a.c=origin;
drawObj(a);
duplicateObj(b,a);
b.option_framecolor_:=blue;
b.c=origin-(0,2cm);
drawObj(b);
9.1.2
Example 2: changing the content of a label
The label of a object such as an Ellipse is stored in its p field. We can give
a new value to this field and the next time the object is drawn, the new value
will be used. We have to be careful to center the label around the origin. The
frame of the object is unchanged and therefore it may be smaller or larger than
its contents.
newEllipse.a(btex bananas etex);
a.c=origin;
drawObj(a);
duplicateObj(b,a);
b.p:=btex apples etex;
b.p:=b.p shifted -.5[urcorner(b.p),llcorner(b.p)];
b.c=origin-(0,2cm);
drawObj(b);
9.2
Transformations that change the layout
It is also possible to change the layout of an object, for instance by dismantling
it. Let’s for instance build a tree:
newBox.r(btex root etex);
newBox.l1(btex leaf 1 etex);
newBox.l2(btex leaf 2 etex);
newBox.l3(btex leaf 3 etex);
newTree.t(r)(l1,l2,l3)
"edge(nccoil)","coilarm(2mm)","coilwidth(3mm)";
t.c=origin;
drawObj(t);
One way to dismantle it is to make independant copies of each subobject:
duplicateObj(r2,obj(t.root));
duplicateObj(l11,ntreepos(t)(1));
duplicateObj(l12,ntreepos(t)(2));
duplicateObj(l13,ntreepos(t)(3));
These objects can then be used to build a new tree:
newTree.t2(r2,l13,l12,l11) ;
t2.c=origin-(0,4cm);
drawObj(t2);
120
Another possibility is to “untie” the four components:
untieObj(obj(t.root));
untieObj(ntreepos(t)(1));
untieObj(ntreepos(t)(2));
untieObj(ntreepos(t)(3));
The main object is now a wreck...
But the components can be reused in a new tree:
newTree.t3(obj(t.root))
(ntreepos(t)(1),ntreepos(t)(2),ntreepos(t)(3))
"edge(nccoil)","coilarm(2mm)","coilwidth(5mm)",
"vsep(2cm)";
t3.c=origin-(0,7cm);
drawObj(t3);
The three trees are shown in figure 44. The second and third trees were
obtained from the first tree.
root
leaf 1
leaf 2
leaf 3
root
leaf 3
leaf 2
leaf 1
root
leaf 1
leaf 2
leaf 3
Figure 44: Dismantling a tree
The possibilities are endless.
121
10
10.1
Comparison with other packages
Compatibility with boxes.mp
metaobj can be used instead of
boxes.mp, but not together with boxes.mp.
It contains most of the functionalities found in John Hobby’s boxes and rboxes
packages. In particular, it uses the same syntax for accessing the cardinal points
of an object or setting an object position.
The newBox constructor can be used in place of boxit and we have actually redefined boxit to behave like newBox. Similarly, rboxit and circleit
have been redefined to refer to newRBox (which is a variant of newBox) and to
newEllipse.
However, there is one important difference. In metaobj, when an object is
created, it is rigid. Once the newBox constructor has been called, it is no longer
possible to (easily) change the values of dx and dy for instance. In the boxes
package, it is possible to define a box with a certain content, to put its center
somewhere after the call to boxit (this is also how it is done in metaobj), and
then to set the values of dx and dy. In metaobj, these values must be given
when newBox is called.
Nevertheless, it should be possible to reuse most of the figures written for
the boxes package with metaobj.
10.2
fancybox package
The fancybox package provides several ways to frame a box:
• \shadowbox : this can be achieved in metaobj with a Box and the shadow
option;
• \ovalbox, \Ovalbox: these two frames can be achieved with a Box (or
RBox), and the appropriate values for the corner radius and the thickness
of the lines;
• \doublebox: this command puts a double rectangular frame around an
object; it can be achieved in metaobj with a DBox object, except for
the fact that the two frames have the same thickness in metaobj; in
fancybox, they have different thicknesses; DBox could easily be extended
to take this into account.
10.3
PSTricks
metaobj
is not compatible with PSTricks, but it includes many functionalities that are similar to those provided by PSTricks. Many option names were
borrowed from PSTricks and all the node connections were implemented in
metaobj.
Section 7.7 shows how many examples from the PSTricks documentation can
be rendered in metaobj. The metaobj code is lengthier than the corresponding PSTricks code, but one should really compare a high-level TEX description
of a metaobj graphics with PSTricks code, and both would be very similar.
122
11
Memory requirements –
metapost bug
The metaobj package is very large. It uses a lot of strings and causes many
“string compactions” in metapost. When I started to write it, I quickly ran
into a strange error, which didn’t appear as a standard array overflow. None of
the numbers output when tracingstats is set to 1 had reached their limits, and
none was near its limits. However, the strange errors vanished when increasing
the value of pool_size. The error was observed on linux with a Web2C 7.3.1
installation and metapost 0.641 and on Solaris with the TEXlive 5 setup. It
is likely that the bug is still around in the TEXlive 6 setup. So far, I was unable
to get a small file demonstrating the bug, which might have something to do
with the “string compactions.”
Increasing pool_size should be attempted only when the limit is explicitely
reached, or it is not reached, but you are sure your source is correct and still
have a strange error. Other values may also need to be increased, but the bug
I suspect seems related with pool_size.
If you increase pool_size, you are on your own. I have no idea how much
it should be increased to avoid the bug.
If you can get a small file demonstrating the bug, let me know.
setObjectDefaultOption("Tree")("treemode")("D");
setCurveDefaultOption("arrows")("drawarrow");
t:=T_(new_Polygon_(btex root etex)(4)("name(top)"))
(new_Box_(btex x etex)("framed(false)","name(lx)"),
new_Box_(btex y etex)("framed(false)","name(ly)"),
new_Box_(btex z etex)("framed(false)","name(lz)"))
("edge(none)","vsep(1.5cm)");
ncbar.Obj(t)("top")("lx") "angleA(180)","armA(1cm)";
ncline.Obj(t)("top")("ly");
ncbar.Obj(t)("top")("lz") "angleA(0)","armA(1cm)";
Obj(t).c=origin;
draw_Obj(t);
\begin{metaobj}
\mosetO{Tree}{treemode=D}
\mosetC{arrows=drawarrow}
\setObj{t}{\Tree{\Polygon{root}{4}[name=top]}
{\Box{x}[framed=false,name=lx],
\Box{y}[framed=false,name=ly],
\Box{z}[framed=false,name=lz]}
[edge=none,vsep=1.5cm]}
\ncbar[t]{top}{lx}[angleA=180,armA=1cm]
\ncline[t]{top}{ly}
\ncbar[t]{top}{lz}[angleA=0,armA=1cm]
\pos{t.c}{origin}
\draw{t}
\end{metaobj}
Figure 45: Example of possible embedding of metaobj in LATEX; above, a
typical metaobj code; below, a possible TEX representation. (The TEX frontend does not yet exist and the commands shown here are imaginary.)
123
12
Using
metaobj from within TEX
metapost
code can be embedded in LATEX with the emp.sty package (on
CTAN) [13]. It should therefore be possible to embed metaobj code, though
this was not tested.
It should also be possible to use metaobj within ConTEXt [3, 4] where
metapost code is naturally included in the main TEX file.
However, if metaobj benefits from being embedded in LATEX or ConTEXt
code, it would benefit even more if a TEX layer were hiding the verbose syntax
of metaobj. No syntax for a TEX front-end to metaobj has been defined so
far, but an example of a possible syntax is the one provided by PSTricks. It is
possible to have both concise code, and to use metaobj behind the scenes. For
instance, in the future, we might input metaobj code as shown on figure 45.
Conclusion
metaobj
makes it possible to define and manipulate objects. The standard
functions consider that the objects are rigid and can be combined in various
ways. No matter how an object has been built, its structure is still easily
accessible and open to introspection. This is an important feature which has
almost been left aside in this manual.
It is of course easy to add new objects and we have only provided a few. It
is also easy for the programmer to write special packages manipulating special
graphical formalisms, such as UML, etc.
It should also be possible to extend the concept of interface to other kinds
of interfaces and to introduce objects that are not completely rigid. We have
already mentionned that it is possible to use the complete object structure to
implement tree layout algorithms. We could also have objects whose shape
depends on parameters and on their location in a drawing. More elaborate
operations could also be implemented if the history of an object was known.
This is currently not the case, and causes limitations in certain experimental
features such as the reset feature.
metaobj can be used as a replacement to boxes.mp and rboxes.mp, to
fancybox.sty and to many features found in PSTricks. Several features of
metaobj, for instance connections, can be used without a reference to objects.
metaobj was especially influenced by my earlier work on animations [14]
where an object notion was introduced. The 3D objects were very primitive,
but they provided many useful ideas. Several objects have been influenced from
their counterparts in various packages. This is especially true for rectangular
and elliptic boxes. PSTricks provided many ideas and the connection functions are entirely borrowed from that package. However, only PSTricks’s user
documentation was used, not the details of its implementation [18], though similarities can be observed. There has also been some work by Denis Girou on
high-level objects in PSTricks [1], but this work is not really relevant to what
we have done. Another work we didn’t use was Kristoffer Rose’s work on high
level 2-dimensional graphics [15]. The proof tree class was influenced by a LATEX
package I wrote in 1993 and which was never released.
There are several systems which share ideas with metaobj, though they
didn’t influence it. One is “Functional metapost” [11, 12], a system which
124
provides a Haskell layer to specify drawings more abstractly. The drawback of
that approach is that one needs a Haskell compiler and of course one needs to
learn some of this language. Nevertheless, this work shares many ideas with
metaobj in that objects are built by applying functions to already existing
structures. Another functional approach to picture drawing is FPIC [7] which
uses the ML language. A very popular system with many similar ideas is the
Java2D API [8]. It provides graphical objects which can be manipulated by
various transformations and modified in various ways.
The syntax of metaobj is admittedly verbose, but it is hoped that a TEX
interface will be provided and that it will alleviate a lot of the user’s burden.
Acknowledgments
I thank Denis Girou for some explanations on PSTricks’ \ncdiag, \ncdiagg
and \ncloop commands, Boguslaw Jackowski for helping me to find again the
quote on the first page, and Damien Wyart for some comments.
125
References
[1] Denis Girou. Building high level objects in PSTricks, 1995. Slides
presented at TUG’95, St Petersburg (Florida), http://www.tug.org/
applications/PSTricks/TUG95-PSTricks_4.ps.gz.
[2] Michel Goossens, Sebastian Rahtz, and Frank Mittelbach. The LATEX
Graphics Companion: Illustrating documents with TEX and PostScript.
Reading, MA: Addison-Wesley, 1997.
[3] Hans Hagen. ConTEXt: the manual, 2000. http://www.pragma-ade.com.
[4] Hans Hagen. MetaFun, 2000. http://www.pragma-ade.com.
[5] John D. Hobby. A User’s manual for MetaPost. Technical report, AT&T
Bell Laboratories, Murray Hill, New Jersey, 1992. Computing Science Technical Report 162.
[6] Alan Hoenig. TEX Unbound: LATEX & TEX Strategies for Fonts, Graphics,
& More. New York: Oxford University Press, 1998.
[7] Samuel N. Kamin and David Hyatt. A Special-Purpose Language for
Picture-Drawing. In USENIX Conf. on Domain-specific Languages, Santa
Barbara, pages 297–310, October 1997. http://www-sal.cs.uiuc.edu/
~kamin/fpic.
[8] Jonathan Knudsen. Java 2D Graphics. O’Reilly & Associates, 1999.
[9] Donald E. Knuth. The
1986.
metafontbook.
Reading, MA: Addison-Wesley,
[10] Donald E. Knuth. Digital Typography, volume 78 of CSLI Lecture Notes.
CSLI, 1999.
[11] Joachim Korittky.
Functional metapost. Eine Beschreibungssprache für Grafiken, 1998. Diplomarbeit an der Rheinischen FriedrichWilhelmsUniversität Bonn. http://tex.loria.fr.
[12] Marco Kuhlmann. Functional
loria.fr.
metapost for LATEX, 2001.
http://tex.
[13] Thorsten Ohl. EMP: Encapsulated metapost for LATEX, 1997. Technische
Hochschule Darmstadt. http://tex.loria.fr.
[14] Denis Roegel.
Creating 3D animations with metapost.
TUGboat, 18(4):274–283, 1997. ftp://ftp.loria.fr/pub/ctan/graphics/
metapost/macros/3d/tugboat/tb57roeg.pdf.
[15] Kristoffer Høgsbro Rose. “Very High Level 2-dimensional Graphics” with
TEX and XY-pic. TUGboat, 18(3):151–158, 1997. http://www.tug.org/
TUGboat/Articles/tb18-3/tb56rose.pdf.
[16] Timothy van Zandt. PSTree user’s guide, 1993. ftp://ftp.loria.fr/
pub/ctan/obsolete/pstricks/beta.
126
[17] Timothy van Zandt. PSTricks: PostScript macros for Generic TEX; User’s
Guide, 1993. http://tex.loria.fr.
[18] Timothy van Zandt and Denis Girou. Inside PSTricks. TUGboat, 15(3):239–
248, 1994. http://www.tug.org/TUGboat/Articles/tb15-3/tb44tvz.
ps.
127
Index
T (command), 79
transformarraylist , 57
Axiom (class), 83
addPath (command), 31, 38
addPathVariables (command), 37, 38
addStandardPath (command), 38, 39
addUserPath (command), 38, 91
align (class option), 36, 68–70
angle (class option), 63
angle (connection option), 42
angleA (connection option), 41, 44–
47, 50, 107
angleB (connection option), 41, 44–
47, 50
arcangle (connection option), 42
arcangleA (connection option), 41,
45, 51
arcangleB (connection option), 41,
45, 51
arm (connection option), 42
armA (connection option), 41, 45–
48, 107
armB (connection option), 41, 45–
49
arrows (connection option), 38, 40,
41, 43
assignObj (command), 12, 22, 114
Assumption (class), 83
Attributes
booleanarraylist , 57
code , 57, 59
colorarraylist , 57
ctransform , 57, 59
extra code , 57
nsubobjties , 57
numericarraylist , 57
numericlist , 57
pairarraylist , 57
pairlist , 57
picturearraylist , 57
picturelist , 57
pointarraylist , 57
pointlist , 56, 57
points in arrayslist , 57
stringarraylist , 57
subarraylist , 57
sublist , 56, 57
subobjties , 57, 58
BB (class), 27, 90, 117
booleanarraylist (attribute), 57
border (connection option), 41
bordercolor (connection option), 41
Box (class), 7, 61, 62, 65, 83
boxdepth (connection option), 41,
50
boxheight (connection option), 41,
50
boxit (command), 10
boxsize (connection option), 41, 50
BpathCircle (command), 39
BpathEmptyBox (command), 28
BpathObj (command), 28
bracketit.exp (command), 91
btex (command), 30
cdraw (connection option), 41, 42
Circle (class), 81, 119
circleit (command), 10
circmargin (class option), 64, 65, 67
Class options
align, 36, 68–70
angle, 63
circmargin, 64, 65, 67
Dalign, 74, 80
dx, 62, 65, 66, 69, 70, 72, 80,
85, 92
dy, 62, 65, 66, 69, 70, 72, 80,
85, 92
edge, 80, 82, 104, 107
elementsize, 69, 70
fanlinearc, 81, 82
fanlinestyle, 81, 82
fillcolor, 34, 60–67, 69, 70, 72,
80–82, 85, 92
filled, 34, 37, 60–67, 69, 70, 72,
80, 82, 85, 92, 117
fit, 31, 62–64, 66, 67
flip, 69, 70
framecolor, 34, 60–67, 69, 70,
72, 80, 85, 92
framed, 31, 34, 36, 59–67, 69,
70, 72, 80, 85, 92
128
framestyle, 34, 60–67, 69, 70,
72, 80, 85, 92
framewidth, 34, 60–67, 69, 70,
72, 80, 85, 92
halign, 89, 92
hbsep, 69, 80
hideleaves, 77, 78, 80, 81
hsep, 66–68, 80, 85, 92, 103
Lalign, 80
lenddx, 84, 85
lrsep, 85
lstartdx, 85
matrixnodehsize, 92
matrixnodevsize, 92
name, 37, 40, 105
picturecolor, 26, 62–67
pointedfan, 81, 82
polymargin, 63
Ralign, 80
rbox radius, 31, 62
rotangle, 72
rrsep, 85
rule, 85
shadow, 31, 34, 59–67, 69, 70,
72, 80, 85, 92
shadowcolor, 34, 59–67, 69, 70,
72, 80, 85, 92
treeflip, 76, 80, 103
treemode, 36, 37, 80, 83, 85
treenodehsize, 80, 99, 101, 106
treenodevsize, 80, 101
Ualign, 80
valign, 89, 92
vbsep, 70, 80
vsep, 66, 67, 70, 80, 85, 92
Classes
Assumption, 83
Axiom, 83
BB, 27, 34, 90, 117
Box, 7, 8, 30, 31, 38, 61, 62,
65–67, 81, 83, 122
Circle, 64, 81, 119
Conclusion, 83
DBox, 65, 66, 122
DEllipse, 66
Ellipse, 63, 66, 119, 120, 122
EmptyBox, 9, 27, 28, 32, 60, 61
HBox, 67–70, 80
HFan, 81
HRazor, 60, 81
Matrix, 89, 90, 92
Pentagon, 116
Polygon, 7, 62, 63, 116
PTree, 56, 73, 82–84
PTreeL, 83
PTreeR, 83
RandomBox, 60
RBox, 81, 119, 122
RecursiveBox, 28, 29, 71
Tree, 7, 8, 32, 36, 42, 73, 79,
81, 82, 90, 113, 117, 118
VBox, 67, 69, 80
VFan, 81
VonKochFlake, 8, 72
VRazor, 60, 81
clearObj (command), 18
code (attribute), 57, 59
coilarm (connection option), 42
coilarmA (connection option), 41, 52
coilarmB (connection option), 41, 52
coilaspect (connection option), 41,
52
coilheight (connection option), 41,
52
coilinc (connection option), 41, 52
coilwidth (connection option), 41, 52
colorarraylist (attribute), 57
Commands
T, 79
addPath, 31, 38
addPathVariables, 37, 38
addStandardPath, 38, 39
addUserPath, 38, 91
assignObj, 12, 22, 114
boxit, 10
BpathCircle, 39
BpathEmptyBox, 28
BpathObj, 28
bracketit.exp, 91
btex, 30
circleit, 10
clearObj, 18
define global boolean option, 117
define global color option, 117
define global numeric option, 117
define global pair option, 117
define global string option, 117
define local boolean option, 117
define local color option, 117
define local numeric option, 117
129
define local pair option, 117
define local string option, 117
deleteMatrixElement.exp, 90
deleteTreeElement.exp, 82
draw, 16, 23, 40, 43
draw Obj, 32, 100
drawarrow, 40, 43, 107
drawBox, 31, 38
drawCircle, 39
drawEmptyBox, 28
drawFramedOrFilledObject , 28,
31
drawMemorizedPaths , 30, 31,
38
drawObj, 14, 16, 20, 28, 29, 32
drawPicture, 26
drawRecursiveBox, 29
drawVonKochSide, 72
duplicate Obj, 33
duplicateObj, 18, 19, 33, 73, 115
etex, 30
ExecuteOptions, 28, 114
extendObjDown, 34
extendObjLeft, 34, 75
extendObjRight, 34, 75, 76
extendObjUp, 34
find bot most, 29
find lft most, 29
find rt most, 29
find top most, 29
image, 5, 61
label, 55
matpos, 54
mcangle, 54
mcangles, 54
mcarc, 54
mcarcbox, 54
mcbox, 54
mccircle, 54
mccoil, 54
mccurve, 54
mcdiag, 54
mcdiagg, 54
mcline, 40, 54
mcloop, 54
mczigzag, 54
mpos, 54
nb, 89
ncangle, 46, 48
ncangles, 46, 48
ncarc, 45, 51
ncarcbox, 41, 50, 51, 108
ncbar, 45, 93
ncbox, 41, 50, 51, 107
nccircle, 40, 50
nccoil, 52
nccurve, 38, 41, 44, 106
ncdiag, 47, 48, 104
ncdiagg, 48
ncline, 38, 40, 42, 44, 55, 93,
105, 116
ncloop, 41, 48
nczigzag, 52
new Box, 32
new Ellipse, 106
new Polygon , 33
new Tree, 79
new Tree , 81
newobjstring , 18, 28, 56
newRBox, 62
newTree, 79
ntreepos, 56
Obj, 32, 40, 54
obj, 18, 115
ObjBoolean, 115
ObjBooleanArray, 115
ObjCode, 12, 22, 31, 115
ObjColor, 115
ObjColorArray, 115
ObjLabel, 54, 55, 91
ObjNumeric, 29, 114, 115
ObjNumericArray, 115
ObjPair, 114, 115
ObjPairArray, 115
ObjPath, 39, 115
ObjPicture, 25, 31, 115
ObjPoint, 12, 31, 59, 114
ObjPointArray, 115
ObjString, 115
ObjStringArray, 115
ObjSubArray, 115
ObjTransform, 115
ObjTransformArray, 115
OptionValue, 37
rdrawarrow, 40, 107
rebindObj, 34
rebindrelativeObj, 34, 75, 76
rebindVisibleObj, 24, 27, 34, 79
replaceMatrixElement.exp, 90
replaceTreeElement.exp, 82
130
rncangle, 54
rncangles, 54
rncarc, 54
rncarcbox, 54
rncbar, 54
rncbox, 54
rnccoil, 54
rnccurve, 54
rncdiag, 54
rncdiagg, 54
rncline, 54
rncloop, 54
rnczigzag, 54
rotate Obj, 33
rotateObj, 11, 29, 33, 119
scaleObj, 24, 79, 119
setBoolean, 115
setColor, 115
setCurveDefaultOption, 40, 42
setNumeric, 114
setObjectDefaultOption, 118
setPair, 114
setPicture, 115
setString, 115
setTransform, 115
setTreeEdge, 105
show empty boxes, 59
showObj, 56, 58
StandardEquations, 115
StandardInterface, 114
StandardObjectOrPictureContainerSetup, 30
StandardTies, 17, 18, 28, 115
streamline, 32, 116
SubObject, 17, 115
suffixlist, 33
suffixpar, 33
T, 79
T , 81
TC, 65, 105
Tc, 64
TC , 65
Tc , 65, 109
tcangle, 54
tcangles, 54
tcarc, 54
tcarcbox, 54
tcbox, 54
tccircle, 54
tccurve, 54
131
tcdiag, 54
tcdiagg, 54
Tcircle , 64
tcline, 40, 54
tcloop, 54
TCs, 65, 97–99, 101–103
Tf, 62, 81
Tn, 59, 99, 109
Toval , 64, 106
Tr , 62, 106, 109
transformObj, 11
treenodehsize, 102
untieObj, 15, 35
vardef, 8
whatever, 12
Conclusion (class), 83
Connection options
angle, 42
angleA, 41, 44–47, 50, 107
angleB, 41, 44–47, 50
arcangle, 42
arcangleA, 41, 45, 51
arcangleB, 41, 45, 51
arm, 42
armA, 41, 45–48, 107
armB, 41, 45–49
arrows, 38, 40, 41, 43
border, 41
bordercolor, 41
boxdepth, 41, 50
boxheight, 41, 50
boxsize, 41, 50
cdraw, 41, 42
coilarm, 42
coilarmA, 41, 52
coilarmB, 41, 52
coilaspect, 41, 52
coilheight, 41, 52
coilinc, 41, 52
coilwidth, 41, 52
doubleline, 41, 43, 44
doublesep, 41
framecolor, 38
linearc, 41, 51, 52
linecolor, 38, 41, 44, 45
linestyle, 41, 43, 44
linetension, 42, 44
linetensionA, 41, 44
linetensionB, 41, 44
linewidth, 41, 43, 44
loopsize, 41, 48
name, 41, 55
nodesep, 42
nodesepA, 41, 43, 50, 99
nodesepB, 41, 43, 50
offset, 42
offsetA, 41, 43, 56
offsetB, 41, 43, 56
pathfillcolor, 38, 41
pathfilled, 38, 41, 91
pos, 42
posA, 41–43, 106
posB, 41–43
visible, 41
Constructors
new Box, 7, 8
new Tree, 8
newAssumption, 83
newAxiom, 83
newBB, 34
newBox, 30, 31, 38, 66, 67, 81,
122
newCircle, 64
newConclusion, 83
newDBox, 66
newDEllipse, 66
newEllipse, 63, 66, 122
newHBox, 67
newMatrix, 89
newPentagon, 116
newPolygon, 62, 116
newPolygon , 8
newPTree, 73, 83, 84
newPTreeL, 83
newPTreeR, 83
newRBox, 81, 122
newRecursiveBox, 29
newTree, 36, 73
newVonKochFlake, 8
newVRazor, 60
ctransform (attribute), 57, 59
Dalign (class option), 74, 80
DBox (class), 65, 122
define global boolean option (command),
117
define global color option (command),
117
define global numeric option (command), 117
132
define global pair option (command),
117
define global string option (command),
117
define local boolean option (command),
117
define local color option (command),
117
define local numeric option (command),
117
define local pair option (command),
117
define local string option (command),
117
deleteMatrixElement.exp (command),
90
deleteTreeElement.exp (command),
82
doubleline (connection option), 41,
43, 44
doublesep (connection option), 41
draw (command), 16, 23, 40, 43
draw Obj (command), 32, 100
drawarrow (command), 40, 43, 107
drawBox (command), 31, 38
drawCircle (command), 39
drawEmptyBox (command), 28
drawFramedOrFilledObject (command),
28, 31
drawMemorizedPaths (command),
30, 31, 38
drawObj (command), 14, 16, 20, 28,
29, 32
drawPicture (command), 26
drawRecursiveBox (command), 29
drawVonKochSide (command), 72
duplicate Obj (command), 33
duplicateObj (command), 18, 19, 33,
73, 115
dx (class option), 62, 65, 66, 69, 70,
72, 80, 85, 92
dy (class option), 62, 65, 66, 69, 70,
72, 80, 85, 92
edge (class option), 80, 82, 104, 107
elementsize (class option), 69, 70
Ellipse (class), 119, 120
EmptyBox (class), 9, 27, 28, 32, 60,
61
etex (command), 30
ExecuteOptions (command), 28, 114
extendObjDown (command), 34
extendObjLeft (command), 34, 75
extendObjRight (command), 34, 75,
76
extendObjUp (command), 34
extra code (attribute), 57
labdir (label option), 54, 55, 112
label (command), 55
Label options
labangle, 55
labcard, 55
labcolor, 55, 56
labdir, 54, 55, 112
laberase, 55, 56
labpathid, 54, 55, 112
labpathname, 55
labpoint, 55
labpos, 55
labrotate, 55, 56
labshift, 55, 56
laberase (label option), 55, 56
labpathid (label option), 54, 55, 112
labpathname (label option), 55
labpoint (label option), 55
labpos (label option), 55
labrotate (label option), 55, 56
labshift (label option), 55, 56
Lalign (class option), 80
lenddx (class option), 84, 85
linearc (connection option), 41, 51,
52
linecolor (connection option), 38, 41,
44, 45
linestyle (connection option), 41, 43,
44
linetension (connection option), 42,
44
linetensionA (connection option), 41,
44
linetensionB (connection option), 41,
44
linewidth (connection option), 41,
43, 44
loopsize (connection option), 41, 48
lrsep (class option), 85
lstartdx (class option), 85
fanlinearc (class option), 81, 82
fanlinestyle (class option), 81, 82
fillcolor (class option), 34, 60–67, 69,
70, 72, 80–82, 85, 92
filled (class option), 34, 37, 60–67,
69, 70, 72, 80, 82, 85, 92,
117
find bot most (command), 29
find lft most (command), 29
find rt most (command), 29
find top most (command), 29
fit (class option), 31, 62–64, 66, 67
flip (class option), 69, 70
framecolor (class option), 34, 60–67,
69, 70, 72, 80, 85, 92
framecolor (connection option), 38
framed (class option), 31, 34, 36,
59–67, 69, 70, 72, 80, 85,
92
framestyle (class option), 34, 60–67,
69, 70, 72, 80, 85, 92
framewidth (class option), 34, 60–
67, 69, 70, 72, 80, 85, 92
halign (class option), 89, 92
HBox (class), 67–70, 80
hbsep (class option), 69, 80
HFan (class), 81
hideleaves (class option), 77, 78, 80,
81
Hobby, John, 5
HRazor (class), 60, 81
hsep (class option), 66–68, 80, 85,
92, 103
matpos (command), 54
Matrix (class), 89, 90, 92
matrixnodehsize (class option), 92
matrixnodevsize (class option), 92
mcangle (command), 54
mcangles (command), 54
mcarc (command), 54
mcarcbox (command), 54
mcbox (command), 54
image (command), 5, 61
is..., 117
Knuth, Donald, 5
labangle (label option), 55
labcard (label option), 55
labcolor (label option), 55, 56
133
mccircle (command), 54
mccoil (command), 54
mccurve (command), 54
mcdiag (command), 54
mcdiagg (command), 54
mcline (command), 40, 54
mcloop (command), 54
mczigzag (command), 54
mpos (command), 54
newPolygon (constructor), 62, 116
newPolygon (constructor), 8
newPTree (constructor), 73, 83, 84
newPTreeL (constructor), 83
newPTreeR (constructor), 83
newRBox (command), 62
newRBox (constructor), 81, 122
newRecursiveBox (constructor), 29
newTree (command), 79
newTree (constructor), 36, 73
newVonKochFlake (constructor), 8
newVRazor (constructor), 60
nodesep (connection option), 42
nodesepA (connection option), 41,
43, 50, 99
nodesepB (connection option), 41,
43, 50
nsubobjties (attribute), 57
ntreepos (command), 56
numericarraylist (attribute), 57
numericlist (attribute), 57
name (class option), 37, 40, 105
name (connection option), 41, 55
nb (command), 89
ncangle (command), 46, 48
ncangles (command), 46, 48
ncarc (command), 45, 51
ncarcbox (command), 41, 50, 51, 108
ncbar (command), 45, 93
ncbox (command), 41, 50, 51, 107
nccircle (command), 40, 50
nccoil (command), 52
nccurve (command), 38, 41, 44, 106
ncdiag (command), 47, 48, 104
ncdiagg (command), 48
ncline (command), 38, 40, 42, 44,
55, 93, 105, 116
ncloop (command), 41, 48
nczigzag (command), 52
new Box (command), 32
new Box (constructor), 7, 8
new Ellipse (command), 106
new Polygon (command), 33
new Tree (command), 79
new Tree (constructor), 8
new Tree (command), 81
newAssumption (constructor), 83
newAxiom (constructor), 83
newBB (constructor), 34
newBox (constructor), 30, 31, 38,
66, 67, 81, 122
newCircle (constructor), 64
newConclusion (constructor), 83
newDBox (constructor), 66
newDEllipse (constructor), 66
newEllipse (constructor), 63, 66, 122
newHBox (constructor), 67
newMatrix (constructor), 89
newobjstring (command), 18, 28,
56
newPentagon (constructor), 116
Obj (command), 32, 40, 54
obj (command), 18, 115
ObjBoolean (command), 115
ObjBooleanArray (command), 115
ObjCode (command), 12, 22, 31, 115
ObjColor (command), 115
ObjColorArray (command), 115
ObjLabel (command), 54, 55, 91
ObjNumeric (command), 29, 114, 115
ObjNumericArray (command), 115
ObjPair (command), 114, 115
ObjPairArray (command), 115
ObjPath (command), 39, 115
ObjPicture (command), 25, 31, 115
ObjPoint (command), 12, 31, 59, 114
ObjPointArray (command), 115
ObjString (command), 115
ObjStringArray (command), 115
ObjSubArray (command), 115
ObjTransform (command), 115
ObjTransformArray (command), 115
offset (connection option), 42
offsetA (connection option), 41, 43,
56
offsetB (connection option), 41, 43,
56
OptionValue (command), 37
134
pairarraylist (attribute), 57
pairlist (attribute), 57
pathfillcolor (connection option), 38,
41
pathfilled (connection option), 38,
41, 91
picturearraylist (attribute), 57
picturecolor (class option), 26, 62–
67
picturelist (attribute), 57
pointarraylist (attribute), 57
pointedfan (class option), 81, 82
pointlist (attribute), 56, 57
points in arrayslist (attribute), 57
Polygon (class), 7, 63, 116
polymargin (class option), 63
pos (connection option), 42
posA (connection option), 41–43, 106
posB (connection option), 41–43
PTree (class), 56, 82, 84
rotate Obj (command), 33
rotateObj (command), 11, 29, 33,
119
rrsep (class option), 85
rule (class option), 85
Ralign (class option), 80
RandomBox (class), 60
RBox (class), 119
rbox radius (class option), 31, 62
rdrawarrow (command), 40, 107
rebindObj (command), 34
rebindrelativeObj (command), 34, 75,
76
rebindVisibleObj (command), 24, 27,
34, 79
RecursiveBox (class), 28, 71
replaceMatrixElement.exp (command),
90
replaceTreeElement.exp (command),
82
rncangle (command), 54
rncangles (command), 54
rncarc (command), 54
rncarcbox (command), 54
rncbar (command), 54
rncbox (command), 54
rnccoil (command), 54
rnccurve (command), 54
rncdiag (command), 54
rncdiagg (command), 54
rncline (command), 54
rncloop (command), 54
rnczigzag (command), 54
rotangle (class option), 72
135
scaleObj (command), 24, 79, 119
setBoolean (command), 115
setColor (command), 115
setCurveDefaultOption (command),
40, 42
setNumeric (command), 114
setObjectDefaultOption (command),
118
setPair (command), 114
setPicture (command), 115
setString (command), 115
setTransform (command), 115
setTreeEdge (command), 105
shadow (class option), 31, 34, 59–
67, 69, 70, 72, 80, 85, 92
shadowcolor (class option), 34, 59–
67, 69, 70, 72, 80, 85, 92
show empty boxes (command), 59
showObj (command), 56, 58
StandardEquations (command), 115
StandardInterface (command), 114
StandardObjectOrPictureContainerSetup
(command), 30
StandardTies (command), 17, 18, 28,
115
streamline (command), 32, 116
stringarraylist (attribute), 57
subarraylist (attribute), 57
sublist (attribute), 56, 57
SubObject (command), 17, 115
subobjties (attribute), 57, 58
suffixlist (command), 33
suffixpar (command), 33
T (command), 79
T (command), 81
TC (command), 65, 105
Tc (command), 64
TC (command), 65
Tc (command), 65, 109
tcangle (command), 54
tcangles (command), 54
tcarc (command), 54
tcarcbox (command), 54
tcbox (command), 54
tccircle (command), 54
tccurve (command), 54
tcdiag (command), 54
tcdiagg (command), 54
Tcircle (command), 64
tcline (command), 40, 54
tcloop (command), 54
TCs (command), 65, 97–99, 101–
103
Tf (command), 62, 81
Tn (command), 59, 99, 109
Toval (command), 64, 106
Tr (command), 62, 106, 109
transformarraylist (attribute), 57
transformObj (command), 11
Tree (class), 7, 32, 36, 42, 73, 79,
81, 82, 90, 113, 117, 118
treeflip (class option), 76, 80, 103
treemode (class option), 36, 37, 80,
83, 85
treenodehsize (class option), 80, 99,
101, 106
treenodehsize (command), 102
treenodevsize (class option), 80, 101
Ualign (class option), 80
untieObj (command), 15, 35
valign (class option), 89, 92
vardef (command), 8
VBox (class), 67, 69, 80
vbsep (class option), 70, 80
VFan (class), 81
visible (connection option), 41
Von Koch flake, 8
VonKochFlake (class), 72
VRazor (class), 60, 81
vsep (class option), 66, 67, 70, 80,
85, 92
whatever (command), 12
136