1
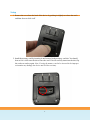
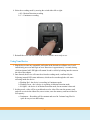
4. Select the recording mode by moving the switch either left or right:
a. M = Motion Detection recording
b. C = Continuous recording
5. Reinstall the cover onto the back of the device, which is now ready to use.
Using Your Device
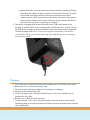
1. Plug the device into any compatible wall outlet in the desired surveillance area. It will
immediately power on and begin to boot. Boot time is approximately 3 seconds, during
which an internal red LED light will remain lit and is visible by looking into the vents on
the side of the adaptor.
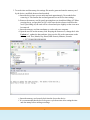
2. Once booted, the device will enter the selected recording mode, confirmed by the
following internal LED status indicators, which can be seen through the side vents
reflecting inside the device:
a. Flashing Red - the device is recording in Continuous mode
b. Flashing Green – the is device is recording in Motion Detection mode
c. No lights – the device is in Motion Detection mode, but no motion is detected
3. In either mode, video will be recorded and saved as video files onto the memory card
and will over-write the oldest files, one at a time, once the memory card has reached its
full capacity:
a. Continuous – Recording will be constant and saved in 5-minute long files for
quick & easy review and backup.
6