1
BridgeMaster Software User Manual
4.3
Creating a New Connector
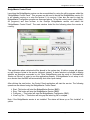
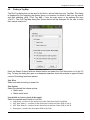
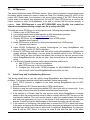
In Configure mode, a new connector can be created by selecting <Edit | Add New Connector...>
from the main menu or pressing the keys <Ctrl+P>. The Connector may then be configured by
double-clicking on it or by selecting it and then selecting <Edit | Properties…> from the main
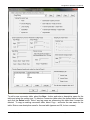
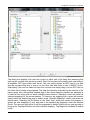
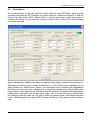
menu. Using the Connector Properties dialog box (shown below) you can define parameters for
Server ‘A’ and Server ‘B’. Server Redundancy is supported if the user selects the Use
Redundancy with this Server? checkbox and fills in the remote node information in the
respective Secondary Node edit box. Otherwise, the Secondary Node can be left blank or set to
“localhost” if server redundancy is not used or required.
Using the Connector Properties dialog box, select a meaningful name for the Connector or leave
it at the default. A text description box can be used to enter any desired comments about the
interface or it can be left blank. First, browse for or enter the host name(s) on which the OPC
Server(s) exist. Then select the OPC Server Name for the OPC Server ‘A’ side and the OPC
Server ‘B’ side for the new connector. To browse for an OPC Server click the Select… button.
To browse for a computer node select the Browse… button. If the interface is to use
redundancy, then select the Use Redundancy with this Server? checkbox. If so, then select the
desired secondary node and setup the redundancy settings by clicking the Settings… button.
Note, remote servers do not have to be installed locally in order to connect with them remotely.
The RoviSys Company
Version 1.5
Page 20 of 73