1
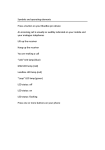
Point of Use
Temperature Control System
Model therMOstat 8.0
November 2009
User Manual
User Manual
therMOstat 8.0
Temperature Control System
A message to our customers:
Originally founded in 1985, our Company has grown into a recognized
leader in providing temperature control systems to the global semiconductor
industry.
Today, Noah Precision, LLC is a privately held, employee owned and
managed company. We are guided in our belief that prosperity in this
competitive industry stems from providing customers with highly
engineered new products and world class customer service.
We know that great products are often the result of great customer feedback
and the application of innovative technology. We strive to create value for
our customers through a process that lets the customer influence our goals,
objectives, product developments and business practices.
We embrace personal accountability and accept responsibility for prudent
risk taking. We encourage personal values, which guide us to consistently
meet the commitments we make and we endeavor to treat those with whom
we interact with respect as we wish to be treated ourselves.
Sincerely,
Peter Adams, President
Noah Precision, LLC
Noah Precision, LLC
COPYRIGHT
This manual and the information contained herein is the proprietary property of Noah
Precision, LLC.
No part of this manual may be reproduced or copied without the express written
permission of Noah Precision, LLC. Any unauthorized use of this manual or its contents
is strictly prohibited. Copyright © 2004-2007 Noah Precision, LLC. All Rights Reserved.
DISCLAIMER AND LIMITATION OF LIABILITY
The information contained in this manual is subject to change by Noah Precision, LLC
without prior notice. Noah Precision, LLC makes no warranty of any kind whatsoever,
either expressed or implied, with respect to the information contained herein. Noah
Precision, LLC shall not be liable in damages, of whatever kind, as a result of the reliance
on or use of the information contained herein
PRODUCT USAGE STATEMENT
DANGER:
Read this entire manual and all other publications pertaining to the work to be
performed before installing, operating, or maintaining this equipment. Practice
all plant and product safety instructions and precautions. Failure to follow
instructions can cause personal injury and/or property damage. If the
equipment is used in a manner not specified by the manufacturer, the
protection provided by the equipment may be impaired. All personnel who
work with or who are exposed to this equipment must take precautions to
protect themselves against serious or possibly fatal bodily injury.
Noah Precision, LLC, provides information on its products and associated
hazards, but it assumes no responsibility for the after-sale operation of the
equipment or the safety practices of the owner or user. This equipment
produces or uses potentially lethal high-voltage, high-current, electrical power.
NEVER DEFEAT INTERLOCKS OR GROUNDS.
iv
POU therMOstat 8.0
TRADEMARKS & PATENTS
logo is a registered trademark of Noah Precision, LLC
Noah Precision ® is a registered trademark of Noah Precision, LLC
Point of Use™ is a trademark of Noah Precision, LLC
therMOstat 8.0 is Patent Pending
CUSTOMER FEEDBACK
Noah Precision’s technical writing staff has carefully developed this manual using
research-based document design principles. However, improvement is ongoing, and the
writing staff welcomes and appreciates customer feedback. Please send any comments on
the content, organization, or format of this user manual to
•
[email protected]
To order a manual, please contact Noah Precision (see “Customer Support Locations” on
page 6-3 for contact information).
v
Noah Precision, LLC
Table of Contents
Chapter 1 - Components List
1-1
therMOstat 8.0............................................................................. Error! Bookmark not defined.
Power Supply Controller (PSCMO).......................................................................................... 1-2
Cable Assembly ....................................................................................................................... 1-3
Fill Canister .............................................................................................................................. 1-3
Part Numbers ........................................................................................................................... 1-4
Chapter 2 - Facility Requirements
2-1
General specifications .............................................................................................................. 2-1
PCW (Process Cooling Water)................................................................................................. 2-1
Mounting................................................................................................................................... 2-2
PSCMO ................................................................................... Error! Bookmark not defined.
therMOstat 8.0 ........................................................................ Error! Bookmark not defined.
Physical Dimensions ................................................................................................................ 2-3
PSCMO Dimensions ............................................................................................................ 2-3
TherMOstat 8.0 Dimensions ................................................................................................ 2-4
Chapter 3 - Canister and Fill Procedure
3-1
Bubbler Installation and Removal Procedure........................................................................... 3-1
Bubbler Installation .............................................................................................................. 3-1
Bubbler Removal ................................................................................................................. 3-2
Sizing Kits................................................................................................................................. 3-2
Sizing Kit Options................................................................................................................. 3-2
Sizing Kit Installation and Removal Procedure.................................................................... 3-2
Fill and Drain Procedure .......................................................................................................... 3-3
Fill Procedure....................................................................................................................... 3-3
Drain Procedure................................................................................................................... 3-4
Chapter 4 - Cable Connections
4-1
PSCMO to therMOstat 8.0 Connections .................................................................................. 4-1
Communication/DeviceNet....................................................................................................... 4-3
Chapter 5 - Operation
5-1
Front Panel Indicators .............................................................................................................. 5-1
Operational States.................................................................................................................... 5-2
Idle mode ............................................................................................................................. 5-2
Active mode ......................................................................................................................... 5-2
Front Panel Switches ............................................................................................................... 5-2
System Start-Up ....................................................................................................................... 5-2
Controller Setup/Operation ...................................................................................................... 5-3
Parameter Descriptions: ...................................................................................................... 5-4
Power Heat ...................................................................................................................... 5-4
Autotune .......................................................................................................................... 5-4
Calibration Offset............................................................................................................. 5-4
Heat Control Method ....................................................................................................... 5-5
Proportional Band Heat ................................................................................................... 5-5
vi
POU therMOstat 8.0
Reset Heat....................................................................................................................... 5-5
Rate Heat......................................................................................................................... 5-5
Power Cool ...................................................................................................................... 5-5
Cool Control Method........................................................................................................ 5-5
Proportional Band Cool ................................................................................................... 5-5
Reset Cool ....................................................................................................................... 5-5
Rate Cool......................................................................................................................... 5-5
Modbus Device Address.................................................................................................. 5-5
Baud Rate........................................................................................................................ 5-5
Manual Tuning Procedure for Controller .................................................................................. 5-6
Chapter 6 - Troubleshooting
6-1
Types of Alarms ....................................................................................................................... 6-1
Soft Alarm ............................................................................................................................ 6-1
Hard Alarm........................................................................................................................... 6-1
Troubleshooting........................................................................................................................ 6-1
Troubleshooting Guide......................................................................................................... 6-1
Noah Precision World Wide Web Site ................................................................................. 6-2
Noah Precision Customer Support........................................................................................... 6-2
Returning Units for Repair........................................................................................................ 6-4
Warranty................................................................................................................................... 6-4
Warranty Statement ............................................................................................................. 6-5
vii
Noah Precision, LLC
List of Figures
Figure 1-1. Front view of the therMOstat 8.0 module .................................................................. 1-1
Figure 1-2. Power Supply Controller (PSCMO)........................................................................... 1-2
Figure 1-3. Power/Signal cable assembly ................................................................................... 1-3
Figure 1-4. Fill Canister for the therMOstat 8.0 module .............................................................. 1-3
Figure 2-1. Rear of the therMOstat 8.0 with ½” Brass Hose Barb............................................... 2-2
Figure 2-2. Connectors for the PSCMO (left) and therMOstat 8.0 (right).................................... 2-2
Figure 2-3. Dimensions of the PSCMO ....................................................................................... 2-3
Figure 2-4. Dimensions of the therMOstat 8.0............................................................................. 2-4
Figure 3-1. O-ring clamp along with hex screws ......................................................................... 3-1
Figure 3-2. Fill/Drain coupling......................................................... Error! Bookmark not defined.
Figure 4-1. Rear view of PSCMO. ............................................................................................... 4-1
Figure 4-2. 19-pin therMOstat 8.0 electrical connector ............................................................... 4-1
Figure 4-3. Power/Signal cable connector from PSCMO to therMOstat ..................................... 4-3
Figure 4-4. DeviceNet cable connector from PSCMO to the host tool ........................................ 4-3
Figure 5-1. Front panel of the PSCMO........................................................................................ 5-1
Figure 5-2. Controller panel descriptions..................................................................................... 5-4
viii
POU therMOstat 8.0
List of Tables
Table 1-1. Part Numbers and Descriptions.................................................................................. 1-4
Table 2-1. General Specifications for the PSCMO ...................................................................... 2-1
Table 2-2. PCW (Process Cooling Water) Specifications ............................................................ 2-1
Table 3-1. Sizing Kit Options for POU therMOstat....................................................................... 3-2
Table 4-1. Pin out of Power/Signal Connector on PSCMO ......................................................... 4-2
Table 4-2. Pin out of 19-pin electrical connector on therMOstat 8.0............................................ 4-2
Table 5-1. LED Descriptors for PSCMO ...................................................................................... 5-1
Table 5-2. Parameter Descriptors ................................................................................................ 5-3
Table 6-1. Troubleshooting Guide................................................................................................ 6-2
Table 6-2. Customer Support locations ....................................................................................... 6-3
ix
POU therMOstat 8.0
Chapter 1 - Components List
THERMOSTAT 8.0
The therMOstat 8.0 module houses a thermoelectric (TE) chip array that provides
temperature control for a bubbler that is installed within the module. See Figure 1-1.
The module is space efficient; water cooled, and is connected to a Power Supply
Controller (PSCMO) through a power/signal cable assembly. An internal pump
circulates a 50/50 mixture of distilled water and glycol within the housing for optimum
heat transfer and temperature control.
The temperature range is -10 °C to 60 °C.
Figure 1-1. Front view of the therMOstat 8.0 module
Components List
1-1
Noah Precision, LLC
POWER SUPPLY CONTROLLER (PSCMO)
The PSCMO is comprised of a PID, microprocessor-based temperature controller and a
power supply. See Figure 1-2. The power supply sources current to a thermoelectric chip
array and sources voltage to a pump motor in the therMOstat POU module. The PSCMO
is connected to the therMOstat module through a power/signal control cable assembly.
The controller is also configured for DeviceNet communications, and a connector is
provided on the rear panel of the PSCMO for this purpose.
Figure 1-2. Power Supply Controller (PSCMO)
CAUTION:
This equipment is intended to be used in an Industrial environment such as a
semiconductor fabrication facility that has power distribution transformers
dedicated to the facility. This equipment should not be directly connected to
the low-voltage public distribution system outlets in a home or small office.
1-2
Components List
POU therMOstat 8.0
CABLE ASSEMBLY
The default power/signal cable assembly connecting the PSCMO to the therMOstat
module is 12 ft (3.66 m) long. See Figure 1-3.
Figure 1-3. Power/Signal cable assembly
FILL CANISTER
A manually pressurized fill canister is available for filling the therMOstat module with a
50/50 mixture of distilled water and glycol. See Figure 1-4.
Figure 1-4. Fill Canister for the therMOstat 8.0 module
Components List
1-3
Noah Precision, LLC
PART NUMBERS
Below is listed in Table 1-1 Part Numbers with Descriptions of the various components
for the therMOstat system.
Table 1-1. Part Numbers and Descriptions
1-4
Part Number
Description
900-POU-8.0
therMOstat 8.0 Module System
900-MO8.0-D3
D-3" Source Bubbler Temp. System
900-MO8.0-S4.5
S-4.5" Source Bubbler Temp System
900-MO8.0-S5
S-5" Source Bubbler Temp System
900-MO8.0-H4
Hyperquad Source Bubbler Temp System
900-PSCMO
MO Power Supply Controller - Analog / DeviceNet
13-3675
6 ft. (1.83 m) AC Power cable, 110 VAC
275-0012
12 ft. (3.66 m) Power/Signal cable assembly
275-0024
24 ft. (7.32 m) Power/Signal cable assembly
275-0030
30 ft. (9.144 m) Power/Signal cable assembly
900-FILLCAN-3
3 gal. Fill Canister for Water/Glycol mixture only
901-MO8.0-S3
therMOstat Bubbler Size, Single 3”
901-MO8.0-S4
therMOstat Bubbler Size, Single 4”
901-MO8.0-D2
MO Universal Sizing Kit, Dual 2”
901-MO8.0-T2
therMOstat Bubbler Size, Triple 2”
900-RACK-PSCMO
Rack for PSCMO
Components List
POU therMOstat 8.0
Chapter 2 - Facility Requirements
GENERAL SPECIFICATIONS
Table 2-1. General Specifications for the PSCMO
Description
Specification
Maximum AC Power
Power Line Frequency
550 Watts
50/60 Hz
Line Voltage
90 – 250 VAC, auto-ranging
Inlet Socket
According to IEC/EN 60320-1/C14
Power Cord
6 ft (1.83 m) long with NEMA 5-15 plug, Noah supplied
Cooling Capacity
250 watts @ 20 °C
Heating Capacity
250 watts @ 20 °C
Temperature Range
-10 °C to +60 °C
Temperature Tolerance
±0.1 °C
Comm. Interface
DeviceNet
Chiller Dimensions
10” dia. x 15” H
PSC Dimensions
4” W x 5” H x 15” D
Fluid Type
EG/H2O
MTBF Target
≥ 30,000 hrs.
PCW (PROCESS COOLING WATER)
Table 2-2. PCW (Process Cooling Water) Specifications
Description
Specification
Flow Rate
0.5 gpm (1.9 lpm), minimum
Temperature
25°C or less
50 to 80 psi (30 psi min delta)
344.7 to 551.6 kPa (206.8 kPa min delta)
5 micron particle filtered water recommended
Water Pressure
Filtering
Fittings
½” Brass Hose Barb
See Figure 2-1
Facility Requirements
2-1
Noah Precision, LLC
Figure 2-1. Rear of the therMOstat 8.0 with ½” Brass Hose Barb
MOUNTING
PSCMO
Install the PSCMO in an electrical rack or other appropriate location. Orient the PSCMO
so that the electrical connections and front panel are accessible and the display is visible.
The power/signal cable assembly connecting the PSCMO to the therMOstat module is 12
ft (3.66 m) long.
Note: The connectors on the therMOstat module end are different from the ones on the
PSCMO end. Route the cables accordingly. Refer to Figure 2-2.
Figure 2-2. Connectors for the PSCMO (left) and TherMOstat 8.0 (right)
2-2
Facility Requirements
POU therMOstat 8.0
therMOstat 8.0
Orientation:
Module must be upright.
Location:
Install in a location where the fittings and electrical connections are
accessible.
Clearance:
Minimum 4” surrounding module for water and electrical
connections.
PHYSICAL DIMENSIONS
PSCMO Dimensions
Below are the physical dimensions for the PSCMO, see Figure 2-3. Maximum
dimensions are: 4” W x 5.19” H x 17” D
Figure 2-3. Dimensions of the PSCMO
Facility Requirements
2-3
Noah Precision, LLC
therMOstat 8.0 Dimensions
Below are the physical dimensions for the therMOstat 8.0 with the handles folded down
and folded up, see Figure 2-4.
Note:
The figure below shows the height dimension with the handles up. The height
dimension with the handles down is 16 inches. The width dimension shows the
handles down.
Figure 2-4. Dimensions of the therMOstat 8.0
2-4
Facility Requirements
POU therMOstat 8.0
Chapter 3 - Canister and Fill
Procedure
BUBBLER INSTALLATION AND REMOVAL
PROCEDURE
Bubbler Installation
The therMOstat is configured from the factory to accommodate one 2 inch diameter
bubbler. Sizing kits are available to accommodate other sizes including 3 or 4 inch
diameter, or a dual 2 inch diameter bubblers. Refer to the Sizing Kits section of this
chapter for sizing kit installation instructions. Contact Noah Precision for other sizing kit
opportunities.
Follow the procedure below for basic bubbler installation:
1. Loosen the 4 hex screws (using a 3mm hex wrench) from the o-ring clamp to depress
the o-ring to allow for bubbler installation. See Figure 3-1.
2. Insert bubbler into the TherMOstat 8.0 chamber.
3. Adjust bubbler for proper height/location. The o-ring may temporarily hold it in
place.
4. Tighten the 4 hex screws evenly to secure the bubbler into its final place.
5. Connect gas lines to bubbler’s couplings. Refer to page 3-3 for Fill Procedure.
CAUTION:
Always use proper precaution when working with gases. This should be done
by a trained and qualified technician.
Figure 3-1. O-ring clamp along with hex screws
Canister and Fill Procedure
3-1
Noah Precision, LLC
Bubbler Removal
Follow the procedure below for basic bubbler removal:
Note:
If moving to a larger sizing kit or decommissioning, follow “Drain Procedure”
on page 3-3 before continuing.
1. Toggle the Active/Idle switch on the PSCMO front panel to the Idle position.
2. Disconnect the gas lines from the bubbler.
3. Loosen the 4 hex screws (using a 3mm hex wrench) from the o-ring clamp to depress
the o-ring to allow for bubbler removal. See Figure 3-1.
4. Remove the bubbler.
SIZING KITS
Sizing kits are available to accommodate other sizes including 3 or 4 inch diameter, or
dual 2 inch diameter bubblers. Below you will find Sizing Kit Options and Sizing Kit
Installation/Removal Procedure.
Sizing Kit Options
Table 3-1. Sizing Kit Options for POU therMOstat
Option
Standard
2 inch – dual
2 inch – triple
3 inch – single
4 inch - single
Custom
3 inch – dual
4.5 inch - single
5 inch - single
Hyperquad
Part Number
901-MO8.0-D2
901-MO8.0-T2
901-MO8.0-S3
901-MO8.0-S4
900-MO8.0-D3
900-MO8.0-S4.52
900-MO8.0-S5
900-MO8.0-H4
Sizing Kit Installation and Removal Procedure
Perform this procedure if a sizing kit different from the factory-installed 2 inch model is
required.
1.
2.
3.
4.
5.
6.
7.
8.
3-2
Turn the PSCMO off.
Remove the bubbler from the therMOstat (refer to procedure listed above).
Drain the therMOstat (Refer to Drain Procedure later in this chapter).
Remove the 4 screws (using a 3/32 hex wrench) that attaches the flange assembly to
the unit and set them aside.
Remove the flange and the sizing tube separator.
Install the required sizing tube, inserting it into the unit bottom end first.
Install the corresponding flange assembly for the tube, taking note of the orientation.
Hand tighten the 4 screws removed earlier to attach the flange to the unit.
Canister and Fill Procedure
POU therMOstat 8.0
The therMOstat is now ready to have a bubbler installed. Refer to the next section for the
fill procedure.
FILL AND DRAIN PROCEDURE
Fill Procedure
The required amount of fluid (50/50 distilled water/glycol mixture) needed to fill the therMOstat will
vary depending on the size of the bubbler and sizing kit installed. See the following steps for fill
capacity notification via the therMOstat.
Noah sells a fill canister with a capacity just over 3 gallons (11 liters).
Note: Only perform the following procedure with the controller in Idle mode or powered off (see
Chapter 5).
1. Verify that the PSCMO is connected to the therMOstat.
2. Toggle the Active/Idle switch on the PSCMO front panel to the Idle position.
3. Turn the PSCMO Power switch on. The Power LED should turn on.
4. Fill the fill canister to the 10 liter mark with 50/50 distilled water/glycol mixture.
5. Close the vent valve. Do not overfill!
6. Connect fill hose to the fill/drain coupling on the therMOstat. See Figure 1-1.
7. Pressurize canister with hand pump.
8. Press the canister trigger to pump the mixture into the therMOstat module.
9. Continue to slowly pump fluid into the therMOstat until the PSCMO Green Fill LED
lights up. See Figure 1-2.
CAUTION:
To prevent overflow, therMOstat must be filled slowly. When the
Green Fill LED lights up, STOP PUMPING and release fill canister
trigger locking mechanism
Canister and Fill Procedure
3-3
Noah Precision, LLC
Figure 1-1. Fill/Drain coupling
Figure 1-2. Illuminated Green Fill LED
Drain Procedure
1. Turn the PSCMO off.
2. Depressurize the fill canister first by opening the vent valve (turn clockwise until it
latches open) then connecting the fill tube to the drain coupling on the therMOstat
(See Figure 1-1).
3. Press the canister trigger to drain the fluid into the canister.
3-4
Canister and Fill Procedure
POU therMOstat 8.0
Chapter 4 - Cable Connections
PSCMO TO THERMOSTAT 8.0 CONNECTIONS
Figure 4-1. Rear view of PSCMO.
There are three connectors on the rear panel of the PSCMO as seen in Figure 4-1. The
PSCMO is connected to the therMOstat 8.0 through a 12 ft (3.66 m) long power/signal
cable assembly.
Figure 4-2. 19-pin therMOstat 8.0 electrical connector
Cable Connections
4-1
Noah Precision, LLC
Table 4-1. Pin out of Power/Signal Connector on PSCMO
Pin
Description
Pin
Description
1
RTD-A
20
RTD+
2
RTD-B
21
GROUND
3
HEAT LED
22
IDLE LED
4
COOL LED
23
ACTIVE LED
5
HARD ALARM INPUT
24
ALARM LED
6
GROUND
25
STATUS LED
7
SOFT ALARM IN
26
POWER LED
8
GROUND
27
+ 12
9
OPEN
28
EARTH GROUND
10
EARTH GROUND
29
PUMP+
11
PUMP+
30
OPEN
12
OPEN
31
PUMP-
13
PUMP-
32
OPEN
14
OPEN
33
TE2
15
TE2
34
TE2
16
TE2
35
OPEN
17
OPEN
36
TE1
18
TE1
37
TE1
19
TE1
Table 4-2. Pin out of 19-pin electrical connector on therMOstat 8.0
4-2
Pin
Description
Pin
Description
1
TE +
11
Common
2
TE -
12
+ Hard Alarm
3
TE +
13
Common
4
TE -
14
- RTD
5
Common
15
+ RTD
6
+12V/DC Pump
16
- RTD
7
-12V/DC Pump
17
N/A
8
N/A
18
N/A
9
N/A
19
N/A
10
+ Soft Alarm
Cable Connections
POU therMOstat 8.0
Figure 4-3. Power/Signal cable connector from PSCMO to therMOstat
COMMUNICATION/DEVICENET
A DeviceNet connector is located on the rear panel of the PSCMO. See Figure 4-4.
Figure 4-4. DeviceNet cable connector from PSCMO to the host tool
Cable Connections
4-3
POU therMOstat 8.0
Chapter 5 - Operation
FRONT PANEL INDICATORS
Table 5-1 lists the front panel indicators as indicated by each LED color.
Figure 5-1. Front panel of the PSCMO
Table 5-1. LED Descriptors for PSCMO
LED Status
Color
Description
Power LED
Green
Active LED
Green
Idle LED
Orange
Active at all times when power switch is on and a
power source is connected.
Active at all times when the pump and TE supply are
enabled.
Active during Idle state.
Heat LED
Orange
Active when TE is enabled in heat polarity.
Cool LED
Blue
Active when TE is enabled in cool polarity.
Status LED
Green
Active when there is no hard alarm.
Alarm LED
Red
Active when there is a hard or soft alarm.
Operation
5-1
Noah Precision, LLC
OPERATIONAL STATES
Upon power on, the system operates in either the Idle or Active mode.
Idle mode
Pump and TE supplies are disabled, but the controller is active and monitors temperature
and alarms. The system is put into the Idle state manually (through a switch) or goes into
it during a hard alarm condition.
Active mode
Pump and TE supplies are enabled, and the controller actively maintains temperature
setpoint.
FRONT PANEL SWITCHES
There are two switches on the front panel of the PSCMO (see Figure 5-1), these two
switches include:
•
•
Power – toggles the system on/off
Active/Idle – toggles the system between Idle and Active modes.
WARNING:
Before turning power “ON”, make sure the “ACTIVE/IDLE” switch is in “IDLE”
mode.
SYSTEM START-UP
Below are the step-by-step instructions for normal operation:
1.
2.
3.
4.
5.
6.
5-2
Turn the Power switch on. The green Power LED should turn on.
Program the temperature setpoint by using the Up and Down arrow keys on the
controller to set the value. This is shown on the lower display.
If using DeviceNet set the appropriate address and program the setpoint through the
host controller.
Toggle the Active/Idle switch to the Active position to enable temperature control.
The process fluid temperature is shown in the upper display.
If there are no alarm conditions, the green Status LED is lit.
If there is an alarm condition, the red Alarm LED will be lit. The corresponding
alarm LEDs on the PSCMO will indicate the type of alarm. Refer to Chapter 6 for
alarm definitions, such as liquid level, and how to clear them.
Operation
POU therMOstat 8.0
CONTROLLER SETUP/OPERATION
The controller is set up from the factory with the parameter values listed in Table 5-2. It
may become necessary to change some of these values in order to optimize temperature
control.
Press the Advance button to enter the Operations page and scroll through the parameters.
A parameter name will appear on the lower display, and its setting or value will appear in
the upper display.
Use the Up and Down arrow keys to change a parameter setting. After changing a
setting, continue to scroll through the other parameters using the Advance button or
press the Infinity button to return to the home page at any time. The home page shows
the actual temperature reading and the setpoint.
Table 5-2. Parameter Descriptors
Display
Parameter Name
Default Setting
Range
Power Heat
0 (info only)
0-100%
Aut
Autotune
Off
Off or On
CAL
Calibration Offset
0.0 ˚
-555 to 555 ˚C
ht.m
Heat Control Method
PID
Pb.ht
Proportional Band Heat
2.2
0.6 to 555 ˚C
re.ht
Reset Heat
0.2
0.00 to 99.99 rpm
ra.ht
Rate Heat
0.71
0.00 to 9.99 minutes
PO.cl
Power Cool
0 (info only)
0-100%
CL.m
Cool Control Method
PID
Pb.CL
Proportional Band Cool
1.2
0.6 to 555 ˚C
re.CL
Reset Cool
0.13
0.00 to 99.99 rpm
ra.CL
Rate Cool
1.11
0.00 to 9.99 minutes
Addr
Modbus Device Address
63
0 to 63
Baud
Baud Rate
125
PO.ht
Operation
5-3
Noah Precision, LLC
Figure 5-2. Controller panel descriptions
Parameter Descriptions:
Power Heat
Displays the current heat control power. This varies between 0-100% depending on the
control parameters and the temperature relative to the setpoint.
Autotune
If activated, this setting allows the controller to determine the PID control settings. Use
this only if the default settings or manually selected PID parameters cannot maintain
setpoint. Because autotuning is a time consuming process, it is recommended that
manual tuning be attempted first. Refer to the manual tuning procedure in the next
section of this chapter for instructions.
To initiate an autotune, set Autotune to On.
Calibration Offset
This is used to program in a temperature offset value to the therMOstat POU’s RTD
reading.
5-4
Operation
POU therMOstat 8.0
To calibrate the RTD to a reference temperature, record the difference between the RTD
reading and a reference sensor’s reading (the reference temperature). If the RTD reading
is lower than the reference sensor’s, enter the difference as a positive value into the
Calibration Offset parameter using the Up and Down keys. If the RTD reading is higher
than the reference sensor’s, enter the difference as a negative value. Range is -999 to
999.
Heat Control Method
This is used to set the control method for heating. This is set to PID control mode.
Proportional Band Heat
Sets proportional band for the heat output. Range is 1 to 999 ˚C. Default is 2.2 ˚C.
Reset Heat
Set the PID reset in repeats per minute for the heat output. Range is 0.00 to 99.99 repeats
per minute. Default is 0.2.
Rate Heat
Set the PID rate time in minutes for the heat output. Range is 0.00 to 9.99 minutes.
Default is 0.71.
Power Cool
Displays the current cool control power. This varies between 0-100% depending on the
control parameters and the temperature relative to the setpoint.
Cool Control Method
This is used to set the control method for cooling. This is set to PID control mode.
Proportional Band Cool
Sets proportional band for the cooling output. Range is 1 to 999 ˚C. Default is 1.2 ˚C.
Reset Cool
Set the PID reset in repeats per minute for the cool output. Range is 0.00 to 99.99 repeats
per minute. Default is 0.13.
Rate Cool
Set the PID rate time in minutes for the cool output. Range is 0.00 to 9.99 minutes.
Default is 1.11.
Modbus Device Address
Sets the controller address for DeviceNet communications. Range is 1 to 247. Default is
63.
Baud Rate
Sets the baud rate for DeviceNet communications. Default is 125.
Operation
5-5
Noah Precision, LLC
MANUAL TUNING PROCEDURE FOR
CONTROLLER
If the default PID parameters do not effectively maintain setpoint, the PIDs can be
adjusted to compensate. There are two sets of PID values, one for both heating and
cooling. One or both sets may need to be adjusted.
The PID parameters are accessed through the Operations page, described earlier in this
chapter.
To manually tune the controller, perform the following procedure:
1. Enter a setpoint.
2. Monitor the temperature response as setpoint is reached
Note: To adjust the heating PID response, enter a setpoint higher than the current
temperature. To adjust the cooling PIDs, enter a setpoint lower than the current
temperature.
3. If the temperature oscillates around the setpoint, increase the Proportional band
setting until it stabilizes or the oscillations are minimized.
4. When the temperature has stabilized, it may be at a point other than the setpoint.
Decrease the Integral setting until the temperature reaches setpoint. If the
temperature becomes unstable around setpoint, increase the Integral value until it
becomes stable.
5. Change the setpoint by 15 ˚C and monitor the temperature approach to setpoint. If
the temperature overshoots the setpoint and the overshoot value is undesirable,
increase the Derivative value. Go back to the original setpoint and try the new value,
if necessary. If this value is increased too much, the approach to setpoint may be too
sluggish. Repeat the adjustment as necessary until the temperature approaches
setpoint without sluggishness or excessive overshoot.
5-6
Operation
POU therMOstat 8.0
Chapter 6 - Troubleshooting
TYPES OF ALARMS
Soft Alarm
A soft alarm is informative only and does not affect the temperature control capability of
the system. However, it can flag the user to problems, such as low liquid level, that can
potentially lead to a system failure condition if not taken care of promptly.
A soft alarm is not latching and will clear itself once the alarm condition is taken care of.
Hard Alarm
A hard alarm will put the system into the Idle state by disabling the pump and TE voltage
outputs. Additionally, this type of alarm will cause the controller to signal the host tool
(if DeviceNet communications are active) that this condition is active.
A hard alarm is latching. After taking care of the alarm condition, the Idle/Active switch
will need to be toggled between Idle and Active in order to reset and restart the system.
TROUBLESHOOTING
This section discusses the following topics to help troubleshoot any problems that might
occur when operating either unit. A troubleshooting guide is provided in Table 6-1. If
following these procedures does not solve the problem, do not hesitate to call Noah
Precision Customer Support (displayed later on in this chapter).
Troubleshooting Guide
DANGER:
High voltage is active in the system. Safety covers provide protection for the
user and the machine. If bypassed, only authorized and qualified personnel
should repair or test the system.
Troubleshooting
6-1
Noah Precision, LLC
Table 6-1. Troubleshooting Guide
Problem
Probable Cause
Corrective Action
Soft Alarm.
Liquid Level 1 – fluid level is
low.
Hard Alarm.
1. Liquid Level 2 – fluid level is
too low for proper operation.
2. Over temperature – the PCW
flowrate is too low or its
temperature too high.
Add fluid until bubbler’s Fill
LED goes out. Page 3-3.
1. Add fluid until bubbler’s Fill
LED goes out. Page 3-3.
2. Check that PCW flowrate and
temperature is within
specifications. Page 2-1.
Cannot maintain
temperature setpoint.
1. PID parameters are not
properly tuned for the process.
2. Pump is inoperative.
System won’t reach
temperature setpoint.
1. System is in Idle mode.
2. PID parameters are not
optimized for the process.
3. TE array is inoperative
4. TE power supply controller is
inoperative.
System won’t power
up when Power switch
is toggled to ON.
1. Power source does not meet
specifications.
2. PSCMO power line fuse is
blown.
PSCMO won’t
communicate with host
system via DeviceNet.
1. Incorrect device address.
2. Faulty DeviceNet host card or
drivers
1. Manually tune PID
parameters. Page 5-6.
2. Replace therMOstat module.
1. Switch to Active mode.
2. Manually tune PID parameters.
Page 5-6.
3. Check TE impedance and
replace therMOstat module if not
within specifications.
4. Replace PSCMO
1. Check that power meets
requirements. Page 2-1.
2. Check PSCMO power line
fuse.
3. Replace PSCMO fuse.
1. Set correct address from host
controller.
2. Replace DeviceNet host card
or update/install drivers
Noah Precision World Wide Web Site
For additional product information, consult Noah Precision’s World Wide Web site at
http://www.noahprecision.com
NOAH PRECISION CUSTOMER SUPPORT
Please contact one of the following offices in Table 6-2 for technical support.
Note:
6-2
When calling Noah Precision Customer Support, make sure to have the unit
serial number and part number. These numbers are available on the individual
unit labels.
Troubleshooting
POU therMOstat 8.0
Table 6-2. Customer Support locations
Office
Contact
Noah Precision, LLC
2501 SE Columbia Way
Suite 140
Vancouver, WA 98661
Phone: +1 360 993 1395
Fax: +1 360 993 1399
Email: [email protected]
[email protected]
Web: www.noahprecision.com
Teltec SA
224 Boulevard John Kennedy
Batiment B1 - Room 401-403
91105 Corbeil-Essonnes
FRANCE
Phone: +33 1 60 88 73 00
Fax: +33 1 64 96 44 03
Teltec SA
Le Hameau du Parc - Batiment D
Rousset Parc Club
13790 Rousset
FRANCE
Phone: +33 4 42 53 23 82
Fax: +33 4 42 53 26 89
Teltec Gmbh
Am Moosbach 6
74535 Mainhardt
GERMANY
Phone: +49 7903 91 44-0
Fax: +49 7903 91 44-11
MCU
Via Borgazzi, 13
Monza (MI)
ITALY
Phone: +39 039 322351
Fax: +39 039 322351
Muramatsu Integrated Technology
102, 3-14-9, Aoki
Kawaguchi-shi, Saitamaken
332-0031
JAPAN
Phone: +81 48 259 1203
Fax: +81 48 259 1203
Challentech
No. 1, Lane 9, Pateh Road
Hsin-Chu
TAIWAN 300
Phone: +886 3 5614211
Fax: +886 3 5614210
APP Systems Services, PTE LTD
11 Toh Guan Road East #03-01
APP Enterprise Building
Singapore 608603
Phone: +65 6425 6611
Fax: +65 6560 6616
Troubleshooting
6-3
Noah Precision, LLC
RETURNING UNITS FOR REPAIR
Detailed information regarding returns, repairs and warranty can be found at:
http://www.noahprecision.com/support/RMA_info.shtml
An RMA Request Form can be completed at:
http://www.noahprecision.com/support/form_RMA.php
BEFORE returning any product for repair or adjustment, follow all troubleshooting
procedures. If, after following these procedures, the problem still exists, or if the procedure
instruction advises contacting Noah Precision Customer Support, call and discuss the problem
with a representative or visit the links listed above. Be prepared to give the model number and
serial number of the unit, as well as the reason for the proposed return. This consultation call
allows Noah Precision Customer Support to determine whether the problem can be corrected
in the field or if the unit must be returned. Such technical consultation is always free of
charge.
If a unit is returned without first getting authorization from Noah Precision Customer
Support and that unit is found to be functional, there is a re-test and calibration fee plus
shipping charges.
To ensure years of dependable service, Noah Precision products are thoroughly tested and
designed to be among the most reliable and highest quality systems available worldwide.
WARRANTY
Noah Precision, LLC products are warranted to be free from failures due to defects in
material and workmanship after they are shipped from the factory (please see warranty
statement below, for details) for the period of time defined in the purchase order.
To claim shipping or handling damage, inspect the delivered goods and report such
damage to Noah Precision within 30 days of receipt of the goods. Please note that failing
to report any damage within this period is the same as acknowledging that the goods were
received undamaged.
For a warranty claim to be valid, it must:
•
•
•
Be made within the applicable warranty period
Include the product serial number and a full description of the circumstances giving
rise to the claim
Have been assigned return material authorization number (see below) by Noah
Precision Customer Support
All warranty work will be performed at an authorized Noah Precision service center (see
list of contacts at the beginning of this chapter). You are responsible for obtaining
authorization to return any defective units, prepaying the freight costs, and ensuring that
the units are returned to an authorized Noah Precision service center.
6-4
Troubleshooting
POU therMOstat 8.0
Warranty Statement
The seller makes no express or implied warranty that the goods are merchantable
or fit for any particular purpose except as specifically stated in printed Noah
Precision specifications. The sole responsibility of the Seller shall be that it will
manufacture the goods in accordance with its published specifications and that the
goods will be free from defects in material and workmanship. The seller's liability
for breach of an expressed warranty shall exist only if the goods are installed,
started in operation, and tested in conformity with the seller's published
instructions. The seller expressly excludes any warranty whatsoever concerning
goods that have been subject to misuse, negligence, or accident, or that have been
altered or repaired by anyone other than the seller or the seller's duly authorized
agent. This warranty is expressly made in lieu of any and all other warranties,
express or implied, unless otherwise agreed to in writing. The warranty period is
defined in the purchase order and begins on the date the goods are shipped from
Noah Precision. In all cases, the seller has sole responsibility for determining the
cause and nature of the failure, and the seller's determination with regard thereto
shall be final. The Noah Precision Warranty Statement may be superseded by a
service agreement entered into between Noah Precision and the buyer.
Troubleshooting
6-5
POU therMOstat 8.0
Index
cool LED, 5-2
customer support
support locations, xiii, 6-5
1
19 pin connector
cable assembly, xii, xiii, 4-2, 4-3
electrical connector, xii, xiii, 4-2, 4-3
PSC connection, xii, xiii, 4-2, 4-3
D
DeviceNet connector, 4-5
display, xiii, 5-4
control panel descriptions, xii, 5-6
parameter descriptions, x, 5-6
A
active LED, 5-2
active mode, x, 5-2, 5-3, 6-3
advance key, 5-4
alarm LED, 5-2, 5-3
alarms
active mode, x, 5-2, 5-3, 6-3
hard alarm, x, 4-3, 5-2, 6-1, 6-3
idle mode, x, 3-3, 5-2, 6-3
soft alarm, x, 4-4, 5-2, 6-1, 6-3
autotune, x, 5-4, 5-6
F
facicilty requirements, ix, 2-1
fill canister, ix, xii, 1-4, 1-5
fill hose, 3-3
fill procedure, ix, 3-1
flow rate, 2-2, 6-3
fluid, 3-3, 3-4, 5-3, 6-3
front panel indicators, ix, xii, 5-1
front panel switches, x, 5-3
B
H
baud rate, x, 5-5, 5-8
bubbler
installation, 3-1
removal, 3-2
sizing kits, ix, 3-1, 3-2
hard alarm, x, 4-3, 5-2, 6-1, 6-3
heat control method, x, 5-4, 5-7
heat LED, 5-2
I
C
idle LED, 5-2
idle mode, x, 3-3, 5-2, 6-3
infinity button, 5-4
information only alarms, x, 4-4, 5-2, 6-1, 6-
cable assembly
19 pin connector, xii, xiii, 4-2, 4-3
cable assembly, ix, 1-4
DeviceNet connector, 4-5
signal cable connector, xii, 4-5
calibration offset, x, 5-4, 5-7
canister procedure, ix, 3-1
communication, ix, 4-5
DeviceNet, xii, 1-3, 2-1, 4-5, 5-3, 5-8, 61, 6-3
components list, ix, 1-1
control method
cool, x, 5-5, 5-7
heat, x, 5-4, 5-7
controller panel descriptions, xii, 5-6
controller setup/operation, x, 5-4
cool control method, x, 5-5, 5-7
3
installation
canister, ix, 3-1
safety warning, vii, 6-2
L
LED
active, 5-2
alarm, 5-2, 5-3
cool, 5-2
descriptors, xiii, 5-1
heat, 5-2
idle, 5-2
Index
Noah Precision, LLC
power, 3-3, 5-1, 5-3
status, 5-2, 5-3
LED descriptors, xiii, 5-1
liquid level
liquid level, 5-3, 6-1
liquid level 1, 6-3
liquid level 2, 6-3
LED descriptions, xiii, 5-1
operation, ix, x, 5-1, 5-4
operational states, x, 5-2
power supply controller, ix, xii, 1-1, 1-2,
1-3
system startup, x, 5-3
troubleshooting, x, xiii, 6-1, 6-2, 6-3
types of alarms, x, 6-1
power switch, 3-3, 5-1, 5-3, 6-3
process cooling water, xiii, 2-1
PCW, ix, xiii, 2-1
proportional band
cool, x, 5-5, 5-7
heat, x, 5-4, 5-7
PSCMO
canister procedure, ix, 3-1
communication, ix, 4-5
front panel switches, x, xii, 5-3, 5-6
LED descriptions, xiii, 5-1
operation, ix, x, 5-1, 5-4
operational states, x, 5-2
o-ring clamp, xii, 3-2
power supply controller, ix, xii, 1-1, 1-2,
M
manual tuning, x, 5-8
menu
parameter descriptions, x, xiii, 5-4, 5-6
parameter values, 5-4
modbus device address, x, 5-5, 5-8
mounting, ix, 2-3
O
operation, ix, 5-1
operational states, x, 5-2
o-ring clamp, xii, 3-2
P
1-3
system startup, x, 5-3
therMOstat POU module, 3, ix, xii, xiii, 1-1,
1-2, 1-4, 1-5, 2-3, 2-4, 3-1, 4-1, 4-2,
parameter
autotune, x, 5-4, 5-6
baud rate, x, 5-5, 5-8
calibration offset, x, 5-4, 5-7
cool control method, x, 5-5, 5-7
heat control method, x, 5-4, 5-7
modbus device address, x, 5-5, 5-8
parameter, x, xiii, 5-4, 5-6, 5-7
parameter descriptions, x, 5-6
parameter values, xiii, 5-4
power cool, x, 5-5, 5-7
power heat, x, 5-4, 5-6
proportional band cool, x, 5-5, 5-7
proportional band heat, x, 5-4, 5-7
parameter descriptions, x, xiii, 5-4, 5-6
PID, 1-2, 5-4, 5-5, 5-6, 5-7, 5-8, 6-3
TherMOstat 8.0, 3, ix, xii, xiii, 1-1, 1-2, 1-4,
1-5, 2-3, 2-4, 3-1, 4-1, 4-2, 4-3
power
cool, x, 5-5, 5-7
heat, x, 5-4, 5-6
power LED, 3-3, 5-1, 5-3
power supply controller
communication, ix, 4-5
front panel switches, x, xii, 5-3, 5-6
4-3
troubleshooting, x, xiii, 6-1, 6-2, 6-3
types of alarms, x, 6-1
pump
fluid, 3-3
motor, 1-2
pump, 1-1, 1-2, 3-3, 4-4, 5-2, 5-3, 6-1,
6-3
R
rack, 2-3
rear view of PSCMO, xii, 4-1
reset, x, 5-5, 5-7, 6-1
S
safety warning, vii, 6-2
setpoint, 5-3, 5-4, 5-6, 5-7, 5-8, 6-3
setup, ix, 5-1
signal cable, xii, 4-5
sizing kits, ix, 3-1, 3-2
soft alarm, x, 4-4, 5-2, 6-1, 6-3
Index
POU therMOstat 8.0
types of alarms, x, 6-1
hard alarm, x, 4-3, 5-2, 6-1, 6-3
soft alarm, x, 4-4, 5-2, 6-1, 6-3
specifications
process cooling water, ix, xiii, 2-1
specifications, ix, xiii, 2-1, 6-3, 6-7
status LED, 5-2, 5-3
support
support locations, xiii, 6-5
system start-up, x, 5-3
U
up and down keys, 5-3, 5-4, 5-7
T
W
technical support
support locations, xiii, 6-5
thermoelectric, 1-1, 1-2
troubleshooting, x, xiii, 6-1, 6-2, 6-3
troubleshooting guide, x, xiii, 6-2, 6-3
warranty
warranty statement, xi, 6-7
website for Noah Precision, LLC, x, 6-4
Index


![TSQ Series Hardware Manual Version B [FR]](http://vs1.manualzilla.com/store/data/006386365_1-1d6e58e0f9dfd5999f3a7964245edc10-150x150.png)