1
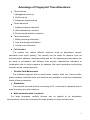
Preface
Honorable customers,
Thanks for choosing products of our company. The product with world cutting edge
technologies—fingerprint
recognition,
computer
communication,
as
well
as
microelectronics, is considered to be combination of three technologies: electronics,
optics and computer communication. It is no doubt that it has become the first choice of
standalone time & attendance for enterprises with its strong function and veracity.
New generation BioNano fingerprint identification algorithm, which undergoes
researching for 10 years, with TI 300MHz high speed processor, all self-owned
intellectual property rights, unique function of healing the broken fingerprint lines and
intelligent fingerprint template update, is one of the most efficient and stable fingerprint
algorithm in the world.
Bio-office is a sub brand of Anviz USA. Bio-office series fingerprint products
combine fingerprint and traditional RFID technology. All models come with powerful
background time attendance management software which can support all kinds of
complicated shift and generate various reports. It is versatile, convenient and
multi-functional.
Please read this user manual carefully to have an initial understanding of functions
and basic knowledge of installation, debugging, maintenance, application and
management to better use this product.
1
Advantage of Fingerprint Time Attendance
y
Three level-up
1. Management level-up
2. Profit level-up
3. Enterprise image level-up
y
Three reductions
1. Employee dispute reduction
2. Work redundancy reduction
3. Environmental pollution reduction
y
Three eliminations
1. Buddy punching elimination
2. Loss and damage elimination
3. Circular cost elimination
y
Full function
The system can realize different functions such as attendance remark,
calculation and report printing. The remark can be made for reasons such as
business leave, absence, marriage holiday and etc.; the checking and calculation can
be made in accordance with different time periods, departments, individual or
combination due to various reasons for absence; the report generation and printing
function can be realized perfectly.
y
Flexible Shift Maintenance
The software supports shift on week basis, rotation shifts etc. Various shifts,
public holidays, individual leave and overtime are available to meet the complicated
needs of every enterprise.
y
Standalone
The machine can work without connecting to PC, convenient in operation and no
need to occupy any extra resource.
y
Multi-communication in network
For large enterprise, multiple devices can be applied to do attendance
synchronously, which will convenient for large quantity of users and save time.
2
Contents
1
Product Introduction................................................................................................. 2
1.1
TC100 Introduction ........................................................................................... 2
1.1.1
2
Operation Guide ...................................................................................................... 4
2.1
Key Introduction................................................................................................ 4
2.2
Management Mode........................................................................................... 4
2.2.1
User Registration....................................................................................... 4
2.2.2
User Deletion............................................................................................. 5
2.2.3
Time Setting .............................................................................................. 5
2.2.4
Management Password Setting................................................................. 5
2.3
3
4
Initialization ....................................................................................................... 6
System Installation................................................................................................... 8
3.1
Operation Environment..................................................................................... 8
3.2
System Installation............................................................................................ 8
3.3
Uninstall the program.......................................................................................11
Data communication .............................................................................................. 13
4.1
Staff information.............................................................................................. 13
4.1.1
Department Management ........................................................................ 14
4.1.2
Staffers Management............................................................................... 15
4.1.3
Import Staffer’s Information...................................................................... 16
4.2
Basic Configuration......................................................................................... 16
4.2.1
Workday setting ....................................................................................... 17
4.2.2
Holiday setting ......................................................................................... 17
4.2.3
Work time setting ..................................................................................... 17
4.2.4
Stat Rule .................................................................................................. 18
4.3
T&A Management ........................................................................................... 19
4.3.1
Forget management ................................................................................ 19
4.3.2
Leave management................................................................................. 19
4.3.3
Report...................................................................................................... 19
4.4
5
Product feature .......................................................................................... 2
Communication Management ......................................................................... 20
Appendix................................................................................................................ 24
5.1
FAQ ................................................................................................................ 24
I
5.1.1
Fingerprint has been enrolled but often gets failure in identification ........ 24
5.1.2
No records found though staff have clocked in/out .................................. 24
5.1.3
T&A system can't be connected with PC ................................................. 24
5.1.4
Time is working fine, but scanner is off. Staffers can not clock in/out ...... 25
5.1.5
The ID+Fingerprint mode can’t pass........................................................ 25
5.1.6
The unit identify automatically when no one punches in/out.................... 25
5.2
Interface Illustration ........................................................................................ 25
5.3
Illustration for pressing fingerprint................................................................... 26
II
Chapter 1
Introduction
The main theme of this chapter is the feature of
this T & A, as well as function introduction.
1
1
Product Introduction
1.1
TC100 Introduction
Bio-series TC100 is the first desktop standalone time and attendance produced by
this company in 2009. With the use of Anviz optical fingerprint sensor and new
fingerprint recognition algorithm, TC100 can identify all difficult fingerprints and has
solved the long-lasting problem in fingerprint recognition field.
TC100 is a desktop (128×64 blue LCD) fingerprint T&A, can be used offline or
online.
TC100 Fingerprint T&A Machine
1.1.1
Product feature
y Office desktop fingerprint time attendance;
y USA TI 300MHz high speed processor;
y USA BioNano core fingerprint algorithm of high speed and stability;
y New generation fully sealed, waterproof, and dustproof fingerprint sensor;
y Real-time data transfer and WEB online tracking;
y Standard USB communication. Plug and play. Easy installation and operation;
y Identification method: ID + password, ID + fingerprint, fingerprint only;
y Fingerprint capacity: 1500;
Record capacity: 32000;
y Identification speed: <0.5 second;
y Size: 160mm (W) ×130mm (H) × 90mm(D);
2
Chapter 2
This
chapter
Operation Guide
is
mainly
about
appearance
illustration and relevant system settings such as how
to add and delete users etc.
3
2
Operation Guide
2.1
Key Introduction
3
1
4
5
2
6
TC100 Keypad
Key introduction:
1、[IN]/ [OUT]:In/Out convert key;
2、[0-9]:Number key;
3、[→]:Option convert key;
4、[M]:Menu Key;
5、[←ESC]:Esc/Cancel key;
6、[
2.2
OK ]:Power/OK Key;
Management Mode
Press firstly, enter the original password 9999 and press to enter into user
enrollment status. As follows:
Input Password:
* * * *
In operation mode, the default is user registration interface. Enable to do user
registration, deletion, time setting and password management through 【M】key.
2.2.1
User Registration
Systems will auto-start with default ID (Such as: 0001). Enter new ID (i.e. 1082),
st
press 【→】to select FP or password option (i.e.the 1 FP):
4
USER REG. FINGER 1
Input ID:
Press Finger!
Press 【OK】 to register FP. (place finger twice on sensor according to LCD
indication). If green LED indicator is on, it means registration successfully.
Prompt: Press 【→】to convert registration option, default is the 1
st
st
FP registration.
nd
The sequence is: 1. The 1 fingerprint 2. The 2 fingerprint 3. password.
USER REG. FINGER 2
USER REG.
Input ID:
Input ID:
Press Finger!
2.2.2
PW
Press Finger!
User Deletion
In management mode, press 【M】 to choose 【User deletion】 menu:
DEL. USER
Input ID:
Enter the user ID to be deleted and press【OK】 to confirm. If green LED indicator
is on, it means deletion successfully.
2.2.3
Time Setting
In management mode, press 【M】 to choose 【Time】:
Use number key to input date, time. Then press 【OK】 to save. If green LED
indicator is on, it means setting is successful.
2.2.4
Management Password Setting
In management mode, press 【M】 to choose【Setting】:
5
Input Password:
* * * *
Input new password with 4 digits. Press【OK】to confirm (Input password twice
according to LCD indication). If green LED indicator is on, it means registration
successfully.
2.3
Initialization
Enter 【user registration】 interface in management mode, input 0000, press 【OK】
to confirm and input management password(default is 9999). If green LED indicator is
on, it means initialization is successful.
USER REG. FINGER 1
Input ID :
Input PW :
*
*
*
*
Caution: initialization will resume to leaving factory status, which will delete all data
saved in device memory. Recommend to backup all data including staff info, fingerprints,
and records before this operation!
6
Chapter 3
System Installation
This chapter mainly discusses the installation and
un-installation of T&A software as well as the hardware and
operation system requirement.
7
3
System Installation
First we should install background management software on the computer. Please
refer to the following steps.
3.1
Operation Environment
Hardware requirement:
PentiumⅡ266 and above; PentiumⅢ500 and above is recommended;
128 Memory and above; Minimum 100M hardware space;
COM (USB Port);
CD-ROM (CD-ROM needed in installation);
VGA support 800*600 resolution and above;
Operation system:
Microsoft Windows 2000/XP (Recommended) ;
Microsoft Windows Vista;
3.2
System Installation
Please insert T&A disc into CD-ROM and the disc will automatically run the
installation program. If not, please run setup.exe in the root directory of the disc. The
following window will pop up:
Click 【Next】 to continue installation (see the picture below ):
8
Select the target directory to install the program and the default is “C:\TC100”. Click
【Next】 to continue installation (see the picture below):
Click 【Back】 and installation will return to the previous screen and re-select target
directory; Click 【Next】 and the installation will start as the following picture shows:
The installation will be done after seconds (see the picture below):
Choose the driver for your PC’s operating system, for example: Run driver
installation program for Windows XP, then the driver install wizard window will pop-up:
9
Click 【Next】 button, the interface will show as following:
Choose 【I accept the terms of the license agreement】 button,Click【Next >】
button to install driver. After installation completed, the following window will show as
below:
Click 【Finish】button and exit install interfaceClick 【 Finish】 to close the
installation program and an icon
will be added to the desktop. If you want to
install the driver, you should select the driver to fit your computer’s operating system
and then click 【Finish】 to install the driver.
Double click it and the T&A management system will be started. In addition,
10
【Bio-office Fingerprint Attendance System】 has been added to 【All Programs】.
Please see the picture below:
The shortcut of 【Bio-office Fingerprint Attendance System】 is included in 【All
Programs】.
3.3
Uninstall the program
Click 【Uninstall Bio-office Fingerprint Attendance System】 in the above picture,
click 【Next】 and the program will be uninstalled automatically.
Please note: All the files and data will be deleted after uninstalling the program so
please make sure before operation!
11
Chapter 4
Communication
The chapter is mainly about how to add, delete
and set communication between PC and terminal.
12
4
Data communication
The main functions in data management between attendance software and device
include, user management, device parameter setting, real-time attendance records
monitor, exception attendance dealing, summarize attendance records and generate
attendance statistic report.
Double click shortcut
or run attendance management program in 【Start】-
【All programs】-【Fingerprint T&A management system】. The main interface is as
following:
The main interface displays the current date, time, total staff, times passed, the
detail staff information that is the finally passed and whether the connection between
unit and computer is successful.
Clicking 【Function<<】 button to open 【Function management】as following
shows:
The function management interface includes 4 pages: Staff information, basic
configuration, T & A management and communication management. All management
operations of this software will be done through these 4 pages. For detail operations,
please refer to following.
4.1
Staff information
13
Choose 【Staff information】 page, mainly including adding, deleting and modifying
operation for department and staff.
4.1.1
Department Management
Add department: click 【Add] button under the department list and a window will
pop up as following:
Please enter the department name which needs to be added, click 【OK] to finish
and the newly added department will be displayed in the department list accordingly
Prompt: the adding department is sub-department of selected department. Default
is sub-department of head office.
Modify department: First select the department name that needs to be modified,
then click the department name and modify department information directly after the
cursor appears.
Delete department: First select the department name that needs to be deleted,
then click 【delete】 button and a confirmation window will pop up as following:
Click 【OK】 and the selected department will be deleted accordingly; if there’s
existing staff information in the deleted department, all those staff will be transferred to
14
the head office automatically.
Please note: The head office cannot be deleted.
4.1.2
Staffers Management
Add staff: Choose the right department that the staff belongs to, click 【Add】
button under the staff list, enter information of “Staff number, name, sex, Tel, photo” etc.,
then click 【Save】 button under staff list and the staff information will be saved
successfully.
(Note: “Staff number” is the sole number for differentiating each staff which can not
be in duplicate; if the staff number already exists, system will prompt that staff number
already exists when clicking 【Save】 button.
Modify staff information: First choose the right staff in the staff list that will be
modified, then directly modify information of “Name, Sex, Tel, and Photo” etc., and click
【Save】 button which will successfully save staff modification.
Please note: Photos of staff can be selected or deleted by clicking 【View】 and
【Clear】.
Delete Staff: First choose one or multi-staff that will be deleted from staff list, click
【Del】 button under the staff list and a confirmation window will pop up as following:
Click 【OK】 to delete staff.
Please note: It will delete the time attendance records and records of asking for
leave simultaneously with the deletion of staff.
Right click on the staff list and a short cut menu will pop up accordingly as
following:
15
【Import】: Import staff information from Excel files to software.
【Select all】: Select all staff in the staff list
【Cancel】: Cancel the selection of staff
【Transfer to】: Transfer the selected staff to the appointed department.;
4.1.3
Import Staffer’s Information
Click 【Import】 and a selection window will pop up as following:
Select the right Excel file which includes staff information and the software will start
to import staff information; finally the software will prompt the successfully imported staff
number and the total staff number after the import completes. See the same as
following:
Please note: The import requires fixed Excel file format. The first row should be
field information. Staff information comes from row 2. The field information of each list
should be in such order: Staff number, name, department, Tel and Sex. Please refer to
the following picture:
4.2
Basic Configuration
Select【Basic Configuration 】page main including workday, shift, statistic rule
setting:
16
4.2.1
Workday setting
Workday is managed by week cycles, easily to set which day is workday and which
day is rest day. You only need to select the corresponding workday and all setting will
be done simply!
4.2.2
Holiday setting
Click 【Holiday setting】 icon, following window pops up,
Add holiday: Enter holiday name, starting date, days and click 【Add】 to complete
Delete holiday: Select the holiday record from holiday list and click 【Del】 to
complete.
4.2.3
Work time setting
The setting of work time can be in two time ranges of AM and PM as well as in one
time range which can be done according to the real requirements of different
companies.
17
Please note: If there’s no work time setting, the time attendance reports will not
have the calculation of item “coming late, leaving early, working overtime, absent from
work”, it 19
will only calculate the overall work time according to time attendance records.
4.2.4
Stat Rule
Minutes after on duty calculated as late: Calculation unit is minute. This option
won’t be valid until the work time is set successfully. If it is set to 5 minutes and the
setting of on duty time in the timetable is 09:00, any on duty punch time which is after
09:05 will be calculated as coming late. If on duty punch time is 09:08, the calculation
will be counted as coming late for 8 minutes.
Minutes before off duty calculated as early: Calculation unit is minute. This option
won’t be valid until the work time is set successfully. If it is set to 5 minutes and the
setting of off duty time in the timetable is 17:00, any off duty punch time which is before
16:55 will be calculated as leaving early. If off duty punch time is 16:52, the calculation
will be counted as leaving early for 8 minutes.
Valid time range for clock in and clock out: Calculation unit is minute. This option
won’t be valid until the work time is set successfully. If it is set to 60 minutes, on duty
time is set to 09:00 and off duty time is set to 17:00, the records between 08:00 and
10:00 will be counted as on duty records and records between 16:00 and 18:00 will be
counted as off duty records. All other records will be counted as invalid records.
Deal with no clock in while on duty: If check box before “minutes calculated as late
if no clock-in” is selected, calculation for no clock in will be counted as the
corresponding late minutes. If the check box is not selected, calculation of no clock in
will be treated as absence from work.
Deal with no clock out while off duty: If check box “before minutes calculated as
early if no clock-out” is selected, calculation for no clock out will be counted as the
corresponding early minutes. If the check box is not selected, calculation of no clock out
will be treated as absence from work.
Minutes after off duty calculated as overtime: Calculation unit is minute. This option
won’t be valid until the work time is set successfully. If it is set to 60 minutes and off duty
time is set to 17:00, the records after 18:00 will be counted as overtime work records. If
the off duty punching is 18:20, the calculation will be counted as overtime work for 80
minutes.
Work time in day off calculated as overtime: If this option is selected, work time on
18
day off will be counted as overtime work time.
4.3
T&A Management
Select 【T&A Management】page, main including dealing with forgetting punch
in/out , asking for leave and report statistic:
4.3.1
Forget management
First choose the right department and staff, then select appropriate date, time and
clock status and click 【Add】 button to complete.
4.3.2
Leave management
Add leave record: First choose the right department and staff, then select the
starting date/ time and the ending date/time of leave, enter leave reasons, select leave
classes and click 【Add】 to complete. 21
Delete leave record: First choose the right department and staff, then select
records from list of leave, and click 【delete】 to complete.
4.3.3
Report
First choose the right department, either one staff or all staff, select the starting
date and the ending date of calculation, click 【Stat】 to complete. After calculation is
done, click one of the three buttons of【Preview daily report】,【Preview general report】,
【Export to Excel】 to preview the corresponding statistical information.
Daily report is as following:
19
【General report】is as following:
【Export to Excel】can export staff transaction records, daily T & A reports, T & A
general reports and reports of business leave/leave to Excel files。
4.4
Communication Management
If connection between unit and software is unsuccessful, it will pop up connection
window as following:
Before connection, please check if the hardware cable connection is ok and if the
unit is working normally. And then setup connection as above picture, select the right
Com, and click 【OK】. If COM is incorrect or the selected Com is occupied, the program
will prompt “Open com port fail!". If the machine cannot be connected, the program will
20
prompt “Connect to the machine overtime”
Please note: If the connection between unit and software is successful, the
connection window will not pop up again.
If the unit is successfully connected, unit information will be displayed such as:
Staff number, fingerprint template number, attendance record number, firmware version,
and serial number. Furthermore, function buttons such as 【Modify password】,
【Download new records】, 【Download all records】, 【Time synchronization】, 【Clear
transaction record】, 【Backup data】 and 【Restore data】 will be activated after
successful connection.
【Password】: Modify the management password of the unit.
【Language】: Modify the language display of the unit, which can make the 23
Chinese/English languages shift available.
【Dormancy time】: Modify the dormancy time of the unit. Default is 5 minutes.
【Match precision】: Modify the fingerprint match precision. Default is normal.
【Time synchronization】: Make the date and time of the unit the same with the
current date and time of the computer.
【Clear transaction record】: Clear all time attendance records stored on the
machine
【Initialize unit】: Restore the machine to factory default
【Download new records】: Download new attendance records from the unit that
haven’t been downloaded to the computer.
【Download all records】: Download all attendance records from the unit to
computer
【Backup data】: Download “Staff information” and “Staff fingerprint templates”
21
from machine to computers
【Restore data】: Upload “Staff information” and “Staff fingerprint templates” to the
unit
While it is communicating with machine, there will be information prompt in the
blank display box, moreover, there’s display of rate of progress while it is processing of
【Download new records】, 【Download all records】, 【Backup data】, 【Restore data】.
22
Chapter 5
Appendix
The main theme of this chapter is the additional
information of this T & A including FAQ, interface
illustration and way of pressing finger.
23
5
Appendix
5.1
FAQ
5.1.1
Fingerprint has been enrolled but often gets failure in identification
Reason
1.The
Solution
fingerprint
was
not
Enroll the finger again. Please refer
captured properly
to illustration of pressing finger.
2.Direct sun light or too bright
Avoid direct sun light or other bright
light
light
1.Touch the forehead to increase
3.The finger is too dry, wet or oily
oily level of the finger.
2.make you finger dry and clean
4.Low
fingerprint
quality
with
Enroll other fingers with better
callus or peeling
quality
5.Wrong way in placing fingers
Please
when punching in/out
pressing finger.
6..
Latent
fingerprint
on
the
surface of sensor
7.Not enough finger pressure
refer
to
illustration
of
Clean sensor surface ( adhesive
tapes recommended)
Place the finger evenly on the
sensor with moderate pressure
8.Influence by fingerprint image
Enroll fingerprint again. Please refer
change
to illustration of pressing finger.
5.1.2
No records found though staff have clocked in/out
Reason
1.Unit power break for a long time
(time turn to zero as default)
2.records have not download
3.the records space of device is
full
5.1.3
Solution
Please refer to synchronize the time
download records again
Clear the records in time
T&A system can't be connected with PC
Reason
Solution
1.Communication method not set
Select the correct communication
24
correctly
method
2.able not plugged firmly or cable
Plug the cable firmly or change
hardware problem
another cable
3.Not able to connect COM
(wrong COM No)
5.1.4
Please enter the right COM No
Time is working fine, but scanner is off. Staffers can not clock in/out
Reason
1.Unit in dormancy status
Solution
Press any key to activate.
1.refer to normally disconnect the
device in 【 Communication 】 ,if
2.the device is communicating
disconnecting not correctly, the
now or there is cable interference
device will recover automatically
every minute
2.eliminate the interference
3.Fingerprint scanner abnormal
5.1.5
Restart
unit
or
change
the
fingerprint module
The ID+Fingerprint mode can’t pass.
Reason
Solution
1.Wrong ID entered
Enter the right ID
2.This user has no right to use
Set permission of 1:1 identification
1:1 identification method
method for the user
5.1.6
The unit identify automatically when no one punches in/out
Reason
Solution
1.Direct sun light or too bright
Avoid direct sun light or other bright
light
light
2.Latent fingerprint on the surface
Clean sensor surface ( adhesive
of sensor
tapes recommended)
Note:Any problems ,send the compressed “Log” file to us by e-mail which is in the
installation path!
5.2
Interface Illustration
25
Port
5V
USB
5.3
Illustration for pressing fingerprint
Correct method:
Place the center of the finger on the center of scanner window)
Wrong method:
Too small valid area
left-of-center
right-of center
Defluxion
Too down
1. It is better for each user to register two finger prints in case of one finger can
not work.
2. Place finger flatly and the center of the finger is on the center of scanner
window and press a little hard on scanner so it can scan as large finger area as
possible to extract enough minutia.
3. Keep the angle and direction of finger the same each time placing on scanner.
4. If your finger has sweat or water, please make it dry first and then register .
5. If your finger is too dry, make it a little wet or touch the forehead to increase
oily of the finger, press a little hard on scanner.(the dry finger can cause the finger
image not clear .
6. Avoiding the callus , peeling or injury of the finger to ensure the register and
identification successful.
7. You’d better register the thumb first , then index finger or middle finger to
increase the precision.
26