1
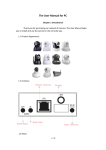
Camera user manual
Online CD Address: www.cdxxcamera.com
Chapter 1 Features
Chapter 2 Installation
Chapter 3 phone monitor
3.1 install software on your phone
3.2 Add Camera
3.3 Alarm phone calls
3.4 Function
Chapter 4 Camera setting
Base Info \ Alias setting\ Time and date \ Alarm
Mail Service Settings \FTP \network
4.10 WI-FI setting
4.11 PTZ
4.12 User and Password
4.13 TF card setting
Chapter 5 PC monitor
5.1 install software on your computer
5.2 Add Camera
Chapter 1 Features
NEW
P2P Camera is the latest model developed by xxcamera, Inc., it is suitable for family, offices and chain store
monitoring. It is the latest version.
●P2P (peer to peer) technology, without annoying IP settings simply fill out the ID number can be obtained
surveillance video.
●phone view allow you remote viewing from anywhere anytime
●Support iPhone、Android
●Wi-Fi compliant with wireless standards IEEE 802.11b/g;
●Support Pan/Tilt control up and down, rotation, auto-cruise from different angles (Pan:355°& Tilt:120°);
●Auto IR-LED illumination for night vision (up to 10 m);
●Nice blue indicator light ;
●Two-way audio, New voice technology, support phone intercom(distance:10m);
●Two-dimensional code scanning functions.
●Special models-support Detected motion or pir,the camera will Alarm phone calls.
Chapter 2 Installation
1) First: connect the camera with hub, switch or router by Cat.5 straight-through cable or cross-over cable
with standard RJ-45 interface.
2) Second: connect the camera with power supply by the adaptor supplied (DC5V, 2A).
Caution: Please ensure that the adaptor matches with the electricity (Input: AC 110V or 220V, Output: 5V
DC/2A).
Chapter 3
phone monitor
Phone muse be connected to the internet (WIFI/GPRS/3G)
This application supports iphone system that is higher than 4.3 released .
This application supports android system that is higher than 4.3 released .
3.1 install software on your phone
Android: enter www.cdxxcamera.com, download the software and install it.Iphone: acquire
“xxcamera" from APP Store.
3.2 Add Camera:
“Add Camera” click “+”
Enable users to edit
camera ID, user's name
and password setting
and the change of
equipment alias .
“Scan”Two-dimensional
code scanning acquire
camera ID.
Device list.
3.3 Alarm phone calls:(only for alarm camera)
Device list set (like the above picture) ----Alarm----Motion detection armed
1. Motion detection armed ( for models xxc53130-102/xxc52130-102)
2. PIR input armed(only for models xxc53130-103)
3. PIR+ Motion detection armed (only for models xxc53130-103: Prevent false positives)
3.4
Function:
Chapter 4 Camera setting
4.1 Login
Use of computers and cameras within a LAN
Download search tool, double-click to open the desktop search tool
Double-click the IP address, enter the URL of the page (for example, http: //192.168.2.108: 81) or by
the network camera tool to enter the home.
Enter your user name and password (the default user: admin, no password). Click "OK" to enter the
monitoring page (up to four users to simultaneously watch)
.
Languages available: Traditional and Simplified Chinese, English, etc.
Note: There are three modes available for different applications. Depending on your web browser,
select.
4.2 Base Info
4.3 Alias setting
4.4 Time and date
4.5 Record Path
4.6 Alarm
Motion Detect Armed: Moving objects trigger alarm;
Motion Detect Sensibility can be selected as 1~10 with sensitivity increasing;
Alarm input Armed: pir or Wireless alarm equipment trigger alarm;(only for pir/ Wireless alarm equipment
models)
Send alarm notification by Mail : snapshot and send email on alarm, for details, please refer to “mail service
settings”;
Upload Image on Alarm: Upload images to ftp server on alarm. Upload Internal can be set. For details,
Please refer to “Ftp Service Settings”;
4.7 Mail Service Settings
If the camera is connected to the Internet, set this function.
Sender: input a valid email address to send pictures when alarm triggered;
SMTP Server:
the website your mail(sender);;For example QQmail:smtp.qq.com
SMTP Port:the website Port your mail(sender)
SMTP User and Password: the user and password of the sender (email account and password).
Receiver: input a valid e-mail address to receive pictures when alarm triggered. Now it supports up to 4
receivers.
4.8 FTP
Ftp service is used to send the captured pictures when alarm triggered to ftp server and save them. If the
camera is not connected to the Internet, there is no need to set this function.
FTP Server: the website you want to upload the picture to;
FTP Port: 21
FTP User: user name to login ftp server;
FTP Password: password to login ftp server;
Upload Interval (Seconds): set the upload interval; unit: second.
4.9 Network
Set the subnet mask, gateway, and DNS server; following figure check DHCP, the device can automatically
obtain an IP address.
4.10 WI-FI setting
Please select Wireless Lan Settings and click“Scan”. Then the camera scans the WLAN nearby and lists the
results.
you can fill in the Keys according to the wireless network settings of your wireless router. Select None if no
encryption is set.
As it’s correctly set, please pull out the network cable and the camera will reboot.
4.11 PTZ
Singal lamp:open/close
Rotating speed
4.12 User and Password
Administrator: all permissions
Visitor: only view the video and switch the screen
Operator: in addition to not enter the interface of the device parameters, have other privileges.
4.13 TF card setting(For TF card ip camera only)
TF card video playback:
Double-click the video file:
Chapter 5
PC monitor
5.1 instruction
Find
Login www.cdxxcamera.com find
"Computer client setup" Click to
download andClick
run it"Browser"
like a left. to select
After the software is installed, the icon found in
the desktop, double-click to open the software
setup
path
Choose path(default
your language.
"C:\Program
then click "Next" like the
Files\object\Device
Client
left picture.
"),then click "Next" like
the left picture.
If the firewall is blocking the installation process, click the "Unblock" to continue.
Q: The Lost Files "mfc100u.dll xxx100d.dll"
Download page in the "Computer system disk repair procedure"
3. Add device
Method One: LAN Add Device
A. Click Search
B. Double-click to select the camera to be added IP
C. The device name any names
D. The factory default user name admin password is blank, uncheck P2P
Second method, add a remote device
E. The device name any names
F. The factory default user name admin password is blank, check the P2P
G. Enter the ID (base label on the camera)