1
TECHNICAL GUIDE FOR PROXIMITY SENSORS
DEFINITIONS
"Proximity sensor" includes all sensors that detect the presence of a metallic object approaching the sensing face or near the sensing face without mechanical contact.
The target object and sensor
form what appears to be
a transformer-like relationship.
There are detection systems that use the eddy currents that are generated in metallic target
objects by electromagnetic induction (most Yamatake proximity sensors), systems that detect
changes in electrical capacity when approaching the target object, etc. The Japanese Indus-
Target
object
trial Standards (JIS) define them as inductive and capacitive proximity sensors respectively.
Sensor
Detection principle of high-frequency oscillation proximity sensors
High-frequency oscillation proximity sensors detect magnetic loss due to eddy currents that
The transformer-like coupling condition is
replaced by impedance changes due to
eddy-current losses. The impedance
changes can be viewed as changes in the
resistance that is inserted in series with the
target object.
are generated on a conductive surface by an external magnetic field. An AC magnetic field is
generated on the detection coil, and changes in the impedance due to eddy currents generated on a metallic object are detected. Other systems include aluminum-detecting sensors,
which detect the phase component of the frequency, etc.
YAMATAKE PROXIMITY SENSOR CATEGORIES
Categorization by actuation method
Categorization by structure
Categorization by sensing head shape
Shielded
Unshielded
High-frequency oscillation
Built-in amplifier
Cylindrical
Square
High-frequency oscillation
Cylindrical
The sensor is turned ON and OFF when a metal object approaches
the sensing face (coil).
Most Yamatake proximity sensors are this type.
Round sensing face
DC2-wire
APT
DC2/3-wire
FL2R-V
DC3-wire
FL2
DC2-wire
FL2R/S
DC2-wire
FL2F
DC2/3-wire
APM
AC/DC2-wire
FL7M
DC2-wire
FL7M-A
DC3-wire
FL7M
Series name
DC2-wire
FL7M
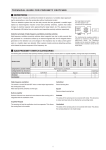
The following table summarizes Yamatake proximity sensors by actuation method, structure (built-in or separate amplifier), sensing head shape and shielding:
Amplifier-Relayed
Cyl./Sq
Square
Square-shaped sensing face
Built-in amplifier
Shielded
Resists influence from electrical noise because the sensing coil is
integrated with the oscillation circuit.
The sides of the sensing coil are covered with metal. This structure
is robust and less likely to be affected by surrounding metal.
Amplifier-Relayed
Unshielded
The sensing coil and the oscillation circuit are separate. This allows
the sensing face to be smaller.
The sides of the sensing coil are not covered with metal. This allows
the sensing distance to be made longer.
1
GLOSSARY
Standard target object
Perpendicular operation
A target object that is used for measuring the sensing distance. Normally, this is a square iron plate (cold-rolled steel sheet, SPCC) of standard size. Generally, the size of the standard target object is the minimum target object size so that a fixed sensing distance can be
achieved. Accordingly, the proximity sensor is actuated at approximately the rated sensing distance if the target object is larger than the standard target object and of the same material and thickness.
Reset (OFF)
Standard target object SPCC
Actuated (ON)
DT
Differential
travel
D Rated
sensing
distance
Return distance
Reference point
Proximity sensor
Standard target object
Generally, the sensing distance of a proximity sensor is measured
by this perpendicular actuation method.
Proximity sensor
Parallel operation
Ex.: FL7M DC 2-wire shielded sensor,
O.D. M8: Iron 8 x 8 mm, t=1 mm
Reset (OFF)
(Sensing distance)
(Differential travel)
Actuated (ON)
Differential travel
Standard target object SPCC
This is the difference between the distance (sensing distance) at
which a standard target object approaching perpendicular to the
sensing face actuates the proximity sensor and the distance (reset
distance) which the standard target object must move away for the
sensor to return to OFF. This is expressed as a percentage of the
sensing distance.
Reference axis
Reference point
Proximity sensor
OFF
Sensing
distance
Reset
distance
Rated sensing distance
Difference
travel
This is the distance to the target object from the sensing face at
which the proximity sensor is actuated when a standard target object approaches in a direction that is perpendicular to the sensing
face.
Ex.: FL7M DC 2-wire shielded sensor,
O.D. M8: 15 % max. of sensing distance
Mutual interference
This refers to the state in which performance and characteristics
(e.g. sensing distance) are influenced when two or more sensors
are positioned close to each other.
Usable sensing distance
This is the distance to the target object from the sensing face at
which the target object can be stably detected when it approaches
from a direction that is parallel to the sensing face.
Normally, this is 70 to 80 % of the rated sensing distance.
Off-state current
In the case of 2-wire proximity sensors, a slight current flows to activate internal circuits even when output is OFF. This is referred to as
off-state current. Since off-state current is present, a voltage equivalent to load resistance x off-state current is exerted on the load
even when the proximity sensor is OFF. Note that this will cause reset failure of the load if the off-state current exceeds the load reset
voltage.
Rated sensing distance
Usable sensing
distance
ON
Target object
Expressed as the measured distance from the reference point when
the standard target objects moved parallel to the sensing face. This
distance depends on the moving path (distance from the reference
point), so it can be expressed as an operating point locus (sensing
area diagram).
Note: Iron target of
standard target object
dimensions or more
Ex.: FL7M DC 2-wire shielded sensor,
O.D. M8: 0.55 mA max.
Switching current
This refers to the minimum current required by the proximity sensor
and the maximum current that the proximity sensor can switch.
Sensing face
Target object
switching current
•TheMaximum
maximum current that is allowed to flow to the output circuit
when the proximity sensor is ON. If the current is greater, the load
short-circuit protection circuit will be activated, or the proximity sensor will be damaged.
2
switching current
•TheMinimum
minimum required current that flows to the internal circuits
Temperature drift
This indicates how much (in %) the sensing distance changes
when the operating temperature differs from the standard 25 °C.
when the proximity sensor is ON. At a lower current, the sensor will
not operate. If the load resistance is too large and results in the
load current not satisfying this minimum switching current, connect
a bleeder resistor in parallel to the load to lower the total load resistance.
Ex.: FL7M DC 2-wire shielded sensor, O.D.
M8: ±10% max. of sensing distance for the -25 to +70°C range
Ex.: FL7M DC 2-wire shielded sensor, O.D. M8: 3 to 100 mA
Power voltage drift
drop
•ThisVoltage
is the voltage that is generated across the output and 0 V ter-
This indicates how much (in %) the sensing distance changes
when the power voltage differs from the rated power voltage.
minals (DC 3-wire proximity sensor) or the sensor output terminals
(DC 2-wire proximity sensor). Note that the load sometimes cannot
be actuated when output is ON as this voltage drop occurs.
Ex.: FL7M DC 2-wire shielded sensor,
O.D. M8: ±10% max. of sensing distance with a ±15% voltage fluctuation.
Ex.: FL7M DC 2-wire shielded sensor, O.D. M8: 3.0 V max.
Response time
Shielded
•
a shielded sensor, magnetic flux is concentrated in front of
•theWith
sensor and the sides of the sensor coil are covered with metal.
• The sensor can be mounted by embedding it into metal.
t1: The interval from the point when the standard target object
moves into the sensing area and the sensor activates, to the point
when the output turns ON
•
t2: The interval from the point when the standard target object
moves out of the sensor sensing area to the point when the sensor
output turns OFF
Within range
Sensing
area
Proximity sensor
Proximity sensor
Outside
of range
ON
Target object
OFF
t1
t2
Target object
Operating frequency
Unshielded
This is the maximum number of sensing per second in which output can be made proportional to repeated approaches of the target
object to the sensing face. Operating frequency expresses response speed.
With an unshielded sensor, magnetic flux is spread widely in front
of the sensor and the sides of the sensor coil are not covered with
metal.
This model is easily affected by surrounding metal objects (magnetic objects), so care must be taken in selecting the mounting location.
f=
•
•
1
t 1+ t 2
Proximity
sensor
t1
1/2
(Sensing distance)
2M
M
t2
Proximity sensor
t3
Standard target object
M
Target object
Non-metal
3
GENERAL CHARACTERISTICS
Below is a plot of the sensing range when the size of one side of
the target object is fixed and target thickness changes.
1. Sensing area diagram
This is a plot of points at which the proximity sensor is actuated
(measured from the edge of the standard target object) when a
standard target object approaches parallel to the sensing face.
Target object: Al
Sensing distance (mm)
(typical)
Thickness of target object and sensing distance (typical)
FL7M-15 6
Standard target object
Iron 30 x 30 x 1 mm
16
14
Standard
target object
FL7M-8 6
Standard target object
Iron 18 x 18 x 1 mm
Sensing distance Y (mm)
12
10
Thickness (mm)
8
If the target object is 1 mm or more thick, a standard sensing distance can be obtained which will hardly change regardless of the
thickness of the target object. If the target object is less than 1 mm
thick, the sensing distance will change according to the thickness
of the target object. Note particularly that if the target object is nonmagnetic metal (e.g. copper, aluminum), the sensing distance increases with decreased thickness and at about 0.01 mm thick is almost the same as for magnetic metal (e.g. iron).
FL7M-4 6
Standard target object
Iron 12 x 12 x 1 mm
6
4
2
0
-15
15
-10
-5
05
3. Voltage drop characteristics diagram
10
Sensing distance X (mm)
•
This indicates the output voltage (V) of the proximity sensor in
proportion to load current (A) when the proximity sensor is ON.
(This is called “output voltage drop.”)
It also indicates the output voltage (V) when the proximity sensor
is turned OFF in proportion to load current (A) when the proximity
sensor is ON. The value obtained by subtracting this output voltage
value from the power voltage is called “load voltage drop.”
•
2. Sensing distance according to material and size of object
The sensing distance varies according to the material and size of
the target object.
Voltage drop characteristics (typical)
Voltage drop (V)
Sensing distance X (mm)
Sensing distance according to material & size of object (typical)
Iron
SUS
Brass
Load current (mA)
Aluminum
4. Off-state current characteristics diagram
Copper
This indicates how off-state current (which flows when the proximity sensor is OFF) changes in proportion to changes in the power
voltage.
Size of one side of target object d (mm)
Off-state current characteristics (typical)
Off-state current (mA)
the sensing distance on non-iron targets is shorter
•thanGenerally,
that for iron targets.
• The sensing distance is almost the same if the target object is
made of iron and is larger than a standard target object.
If the target object is not made of iron, or its dimensions are
•smaller
than the standard target object, measure the actual sensing
distance with the target object while referring to the graph above,
and mount the proximity sensor so that the usable sensing distance
is 70 % or less of this value.
FL7
6H
FL7M-3 6H
FL7M-7 6H
FL7M-10 6H
Power voltage (V)
4
-2
SELECTION OF PROXIMITY SENSORS
The following introduces typical points to take into consideration when selecting a proximity sensor.
1. Operating conditions
3. Sensor body type
Sensing distance
The usable sensing distance is about 70 % of the rated sensing
distance. However, to ensure reliable sensing, it is advisable to
take factors such as drift in proximity sensor performance, meandering of target objects, and conveyor undulation, and allow a certain degree of margin when using the sensor. On the other hand,
for high resolution, using a model with a short sensing distance will
provide better results.
Select a body type that is suited to the location where the proximity
sensor is to be used.
4. Electrical conditions
Verify the electrical conditions of the control system to be used and
the electrical performance of the proximity sensor.
Proximity sensor
Output
Switching
element
Load
2.1 Surrounding metal
When there is a metal object other than the target object near the
sensing face of the proximity sensor, the sensing performance of
the proximity sensor will be affected, and the apparent sensing distance will increase and become unstable. When the proximity sensor is flush-mounted in metal, use a shielded sensor with a sensing
coil whose sides are covered with metal. If you use an unshielded
sensor, be sure to mount it away from surrounding metal by at least
the recommended distance.
Power
Load
DC (voltage fluctuation, maximum current)
AC (voltage fluctuation, frequency, etc.)
Resistive load: Non-contact control system
Inductive load: Relay, solenoid, etc.
• Steady-state current, inrush current
• Operating, reset voltage (current)
Lamp load
• Steady-state current, inrush current
Open/close frequency
Power
2. Environmental conditions
Selecting
the power supply type
DC
AC
Selecting
the power supply type
DC
AC
Output
Switching current
Off-state current
Voltage drop
5. Operating frequency
Target object
DC proximity sensors have a higher operating frequency than AC
ones. Use DC models if high-speed response is required.
Sensing
distance
6. Target object moving speed
Surrounding
metal
To select a sensor for a target object moving at high speed, use
the following calculation based on the operating frequency (operating time) of the proximity sensor, length of the target object, and
distance to the target object.
Proximity
sensor
2.2 Environment
The environmental resistance of the proximity sensor is better than
that of other types of sensors. However, investigate carefully before
using a proximity sensor under harsh temperatures or in special atmospheres.
Temperature
and
humidity
Atmosphere
Highest or
lowest values,
existence of
direct sunlight, etc.
Water, oil,
iron powder, or
other
special chemicals
1 < Ds + Dt
Rt
St
+ Db – Dt (sec)
St
Rt: Operating frequency (Hz)
Ds: Width of sensing area (mm)
Temperature influence,
high-temperature use,
low-temperature use,
need for shade, etc.
Dt: Length of target object (mm)
Db: Distance between target objects (mm)
St: Speed of target object (mm/s)
Need for water resistance
or oil resistance,
need for
explosion-proof structure.
Select a sensor that fits the characteristics of the target object.
St
Vibration
and
shock
Intensity,
duration
Need for durability,
mounting method
Target object
atmosphere
•DoExplosive
not use the sensor in atmospheres where there is a danger of
Proximity sensor
explosion. Use an explosion-proof sensor.
•
Aluminum or cast-iron chips
If aluminum or cast-iron chips accumulate on the sensing head,
use the FL7M-A series aluminum immunity proximity sensor.
• Spatter
If the proximity sensor is subject to spatter, use spatter-guarded
models.
5
PRECAUTIONS FOR USE
Example of DC 2-wire cylindrical long-distance no-polarity sensor
Design of load circuits
•
C
Load short circuit
If the proximity sensor is connected to an AC power supply without
passing through a load, the proximity sensor will be damaged. Be
sure to connect a load. If the sensor is connected to a DC load, it
will not be damaged as almost all models have a self-contained
load short-circuit protection circuit. However, in the case of DC 2wire proximity sensors, the sensor will be damaged if it is shortcircuited and also connected with the leads reversed, even though
the sensor has a self-contained load short-circuit protection circuit.
C
B
A
Catalog listing
• Series or parallel connection
Connection varies according to whether it is an AC 2-wire or DC 2wire type. Refer to the precautions for each of these types.
A (mm)
B (mm)
FL7M-4
6
2.5 (5.5)
12
9
FL7M-8
6
3.5 (6.5)
24
13.5
6 (10)
45
22.5
FL7M-15
• Preventing reset failure of the load
Off-state current from the proximity sensor causes a voltage equiv-
6
C (mm)
Shaded areas indicate surrounding metal other than the target object.
A: Distance from sensing face of proximity sensor to mounting surface
( ): Case of mounting included hexagonal nut in front
B: Distance from surface of iron plate to sensing face of proximity sensor
C: Distance from surface of iron plate to center of proximity switch when A=0
alent to load resistance x off-state current to be exerted on the
load. If this voltage exceeds the load reset voltage, a reset failure
will occur. Be sure to check that this voltage is lower than the load
reset voltage before using the proximity sensor, or to connect a
bleeder resistor in series to the load to lower the total load resistance.
Preventing mutual interference
•When
mounting proximity sensors in parallel or facing each other,
mutual interference may cause the sensor to malfunction. Maintain
at least the space indicated in the specifications.
• When switching of a relay load is not possible
Voltage drop occurs across sensor output terminals even if the
proximity sensor is OFF. For this reason, the load voltage may be
insufficient with some types of relays. For example, when the
FL7M DC 2-wire type proximity sensor is connected to a 12 V relay
load, the voltage drop will be 3.3 V, which may prevent the relay
from being switched.
Example of DC 2-wire cylindrical long-distance no-polarity sensor
A
•
When the load current is too small to actuate the proximity sensor
If the load current is smaller than the minimum switching current of
the proximity sensor, connect a bleeder resistor in series to the
load so that a current larger than the minimum switching current
flows to the sensor.
B
Catalog listing
•
Preventing proximity sensor damage from inrush current
When you connect a load such as a lamp or motor that has a large
inrush current, the switching element in the proximity sensor may
become damaged or deteriorate. Accordingly, connect such loads
via a relay.
A (mm)
B (mm)
FL7M-4
6
25
25
FL7M-8
6
40
50
90
110
FL7M-15
6
Overtightening of screws
•When
mounting proximity sensors, tighten screws, etc. at the al-
•
lowable tightening torque or lower. Be sure to use included toothed
washers when mounting cylindrical sensors.
Operation at power ON
After the power is turned ON, it takes a fixed delay time (tens of
milliseconds) until the proximity sensor is ready for sensing. If the
load and the proximity sensor use different power supplies, be sure
to turn the proximity sensor ON before turning the load ON.
pullout strength
•DoCable
not pull on the cable with excessive force. For details on pullout
strength, refer to the specifications.
• Protecting the sensing face of the proximity sensor
The sensing face of the proximity sensor is made of resin. For this
•DoLocation
not use proximity sensors outdoors or in locations where they
reason, contact with the target object or chips (etc.) hitting the
sensing face may cause sensor damage. Attach a protective cover
if there is a risk of chips hitting the sensing face.
will be splashed with oil or water or exposed to chemicals (e.g, organic solvents, acids, alkalis) or their vapors.
bend radius (R)
•DoCable
not bend the cable excessively. Since allowable cable bend ra-
•
Protecting lead-out wires
Cover lead-out wires with flexible tubing.
dius differs according to the model, be sure to check the precautions for each model.
• Recommended cable length
For cable extensions use at least 0.3mm wire and keep length to
2
within 100 m.
of wiring
•DoRouting
not run wires to the proximity sensor together with power lines.
•
Surge noise can cause damage or malfunction. Wire leads to the
proximity sensor independently or in a separate wiring duct.
Preventing influence from surrounding metal
Metal other than the target object near the proximity sensor influences sensing characteristics. Mount proximity sensors away from
surrounding metal by the recommended distances.
6
of switching regulator
•If Grounding
a commercially available switching regulator is being used,
roughness/smoothness
•DoSurface
not make the mounting surface excessively rough or exces-
ground the frame ground terminal to prevent sensor malfunction
due to switching noise.
sively smooth.
Recommended examples: Ra = 1.6, 3.2 or 6.3.
Noise
Countermeasures for noise depend on the path of noise entry,
frequency components, and wave heights.
Typical measures are as given in the following table:
Type of noise
Avoid application of too much oil, etc. on contact surfaces of
screw, nut, washer and mounting areas. It might change the friction coefficient of the surface, resulting in damage to the proximity
sensor or loosening of the screw.
Noise intrusion path and countermeasures
•In Washer
mounting cylindrical sensor, it is recommended to insert the too-
Before countermeasures
Noise enters from the noise source
through the frame (metal).
+V
Sensor
thed washer to the opposite side of the tightening nut. The toothed
washer does not scratch the nut or mounting panel, maintaining
stable tightening.
Inverter
motor
0V
IM
Common mode noise
(inverter noise)
Common mode
noise applied between the equipment frame and
the +V and 0 V
lines, respectively.
Recommended mounting hole sizes for cylindrical sensors
Size
M8
M12
M18
M30
Noise
Equipment
frame (metal)
After countermeasures
Ω or less).
1
Mounting hole shape
•When
mounting a cylindrical type sensor, avoid mounting it in an
n insulator (plastic, rubber, etc.)
the sensor
and the equipment frame (metal).
elongated hole or on a U-shaped bracket. Since some teeth on the
toothed washer would not be in contact with the surface, the sensor might come loose.
Insert an insulator.
Sensor
0V
3
Mounting hole
8.2 ± 0.1
12.2 ± 0.1
18.2 ± 0.1
30.2 ± 0.1
Inverter
motor
Noise
2
IM
Noise
Equipment
frame (metal)
1
Refer also to User’s Manual and Specifications of each model.
Before countermeasures
Noise propagates through the air
from the noise source
and directly enters the sensor.
Radiant noise
Ingress of highfrequency electromagnetic
waves directly
into sensor, from
power line, etc.
Noise
source
+V
Sensor
0V
After countermeasures
• Insert a shield (copper) plate between
the sensor and the noise source
(e.g. a switching power supply).
•
to a distance where noise does not affect operation.
Noise
source
+V
Sensor
0V
Before countermeasures
Noise enters from the power line.
Noise
+V
Normal mode noise
Sensor
Noise
0V
(Power line noise)
Ingress of electromagnetic induction
from high-voltage
wires and switching
noise from the
switching power
supply
After countermeasures
Insert a capacitor (e.g. a film capacitor),
noise filter
(e.g. ferrite core or isolation transformer),
or varistor in the power line.
Insert a capacitor, etc.
Sensor
No
Noise
+V
0V
1
7
2