1
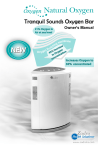
21% Oxygen in
Air at sea level
O x yge
n
nE
ri c
brane
mem
g
n
hi
Increases Oxygen to
30% concentrated
Tranquil Sounds
Oxygen
Bar
Tranquil
Sounds
Oxygen Bar
21% Oxygen in
Air at sea level
21% Oxygen in
Air at sea level
embrane
gm
n
i
ch
n ri
E
brane
n
mem
O x yge
g
hin
ri c
n
nE
Increases Oxygen to
O x yge
30% concentrated
Increases Oxygen to
30% concentrated
Table of Contents
Table
of Contents
Brief
Introduction
Product and accessories illustration
Brief Introduction
Precautions
accessories illustration
Product and Accessories
Illustration
Operation
Precautions
Maintenance
Operation
Troubleshooting
Maintenance
Specifications
Troubleshooting
Specifications
2
3
4
53
64
95
116
119
11
11
Introduction
Modeled after oxygen bars found in resorts and spas, Zadro’s Tranquil Sounds Oxygen Bar
increases the concentration of oxygen you breathe from 21% in the air* to about 30%** or
about a 43% increase in oxygen levels.
• There are many benefits to increasing the amount of oxygen you breathe as oxygen is vital
to our wellbeing and helps to heighten concentration, alertness, memory, and improves
energy and stamina levels.
• Increasing the supply of oxygen to the lungs increases the availability of oxygen to the cells
in our bodies. Oxygen is a key nutrient for the brain and body.
• Oxygen is important for the body to improve general wellbeing and facilitate relaxation.
• Low levels of oxygen result in lower energy production by the cells, making us feel sluggish
and drained of energy. Environmental pollution, stress, fatigue, and lack of exercise are key
factors which deplete our oxygen supply.
Tranquil Sounds Oxygen Bar Operation:
• The Oxygen Bar works by drawing ambient air into the compressor which forces air
through the Oxygen Enriching Nano Membrane Filter, blocking out larger air molecules
such as nitrogen allowing for a higher concentration of oxygen.
• Concentrated oxygen is then pumped into the headset--worn either over the head or
around the neck--where it exits through the flexible arm of the headset positioned near the
nose or mouth, allowing you to relax comfortably as you inhale.
• The Oxygen Bar is designed with your comfort in mind and provides gentle air flow from the
headset to avoid drying and discomfort within the nose while still delivering a concentrated
30% oxygen level. Harsh air flow can cause drying of the nasal membranes, therefore,
concentrated oxygen is delivered for your comfort with a soft, gentle airflow.
• After each session, the Oxygen Bar will cycle to purge excess water vapor and
impurities from the filter so there is no need to replace filters. ENJOY!
*At Sea level
** Exact concentration of Oxygen produced depends on the location of use and the local Oxygen concentration
Benefits of the Oxygen Bar
Oxygen creates life by converting fuel (carbohydrates, fats and proteins) into energy during aerobic
respiration. Low levels of oxygen result in lower energy production making us feel sluggish and
drained of energy. Additional oxygen can benefit people from every walk of life in virtually all that we
do. Studies have shown that there are multiple benefits to using concentrated oxygen. When adding
concentrated oxygen to your weekly routine, various improvements can result. Some of the benefits
Danger
of Oxygen:
• Improves general wellbeing *7
When the power cord is found
Checkconcentration,
the electricalalertness
rating onand
the memory *2
• Heightens
damaged
or broken,
to your
and90%
wallof
outlet
before comes from oxygen,
• Givesunit
youlabel
energy!
our energy
and only
10% fromsend
fooditand
dealer or authorized service center
the power cord.
waterconnecting
*4
for examination or repair.
• Helps sustain energy levels which allows longer exercise sessions, which helps with weight
loss *Infant,
1
Do not attempt to open cabinet. If
child, or disabled people
• Vital to
your immune
system,
memory,
thinking and sight
*3
service
is required, return unit to a
should
use under
the watch
of other
qualified dealer or an authorized
• Promotes
countersinjury.
aging *6
adulthealing
to avoidand
accidental
service
center. Opening or
• Strengthens your heart, reducing the risk of heart attacks
*2
tampering with the unit will void
• Calms your mind and stabilizes your nervous system *3warranty.
• Speeds up the body's recovery after physical exertion *5
• Provides a natural remedy for headaches, migraines and hangovers *2
• Relieves temporary altitude discomfort *6
• Relieves muscle stiffness, supports pre-athletic performance *1
• Lessens chronic fatigue and gives you better sleep patterns *6
References:
3
Diagram of Oxygen Bar and Control Panel
[ Control panel ]
Music Indicator (x4)
Time Indicator (x3)
Volume
Control
Exhaust Indicator
Operation Indicator
Music Selection Button
Start Timer Button
On/Off Button
[ Main body ]
Front of machine
Back of machine
Exhaust Vent
Speaker
Control Panel
Oxygen Outlet
Handle
Intake Filter Panel
Intake
Filter Panel
Air Intake
4
Heat Dispelling Vent
Power Switch
Power Cord
5
Please remove the plug from
electric outlet when not in use.
Product
Do notInformation
use while bathing or
Keep the unit and all electrical
cords away from heated surfaces
or appliances. The oxygen will
make the material flammable.
Do not reach for the unit in the event
the unit falls into water. Unplug the
unit immediately,
then send
to your
is generated mechanically
and naturally
byitfiltering.
dealer or authorized
Oxygen is generated instantly
when theservice center
for examination or repair.
with wet hands.
Principle
: Oxygen
• Physics
• Prompt Oxygen Supply :
machine is turned on.
• High efficiency and energy saving : Supplying oxygen at low cost.
• Time Setting : Time setting can be from 10 to 60 minutes.
• Relaxing Music : Nature sounds help
with the release of tension.
Warning
• Filters : Filtration keeps out larger dust and impurities.
• Moderate Air FlowDO
: Moderate
and
mild air
flow
avoids
discomfort
the nose.
NOT use the
machine
when
there
are any
hazardous within
vapors or
• Headset : Headset pesticide
is designed
comfortable
use.
spray for
in the
room.
notdesign
use while
or in other wet location
to avoid
the risk of
• Vapor discharge : Do
The
of bathing
water condensation
tube and
exhaust
serious
or fatal
injuryand
fromcleans
electricalfilter
shock.
blower avoids residue
vapor
effect
membranes.
Do not leave the machine near heated areas. High heat will cause
the plastic case to deform.
Disconnect the power cord from the electrical outlet if not in use.
unit on
stable,
surface
during operation.
A tilted
or
Caution : AdvicePlace
on how
to aget
the flat
best
performance
from the
machine.
unstable placement will result in shifting of internal parts thereby
causing
larger
vibration andfor
noise.
Warning : Important
safety
information
hazards that might cause serious
During operation, do not press hard upon the external plastic tube as
injury this
or machine
breakdown.
will result in air flow restriction and damage to unit.
Safety Information
Safety Information – (Continued)
Danger : Urgent safety information for hazards that will cause serious injury or death.
Danger
Dangerous
Caution
When
theunit
power
cord
is found
Check the electrical rating on the
Keep the
and all
electrical
remove
the
plugbefore
from
damaged
broken,
send
it to your
cords awayorfrom
heated
surfaces
unit Please
label and
wall
outlet
THIS
MACHINE
IS NOT FOR MEDICAL
USE.
It is designed
for will center
electric outlet
when
not in use.
or appliances.
The oxygen
dealer
or authorized
service
connecting
the power
cord.
health maintenance.
make
the materialorflammable.
for
examination
repair.
Do not block the ventilation port located on the back of unit.
Do not reach for the unit in the event
Do
notbathing
set baseoron carpet or other soft
This could
cause
air
Dosurface.
not attempt
to open
cabinet.
If
Do child,
not use
while
Infant,
or
disabled
people
the unit falls
into water.return
Unplugunit
the to a
flow restriction
damage to unit. service
is
required,
should
the watchand
of other
withuse
wet under
hands.
unit immediately, then send it to your
dealer
anpanel
authorized
best performance,
regularly cleanqualified
the Intake
Filter or
and
adult to avoid For
accidental
injury.
dealer
or authorized
service
center
center.orOpening
located in the back of the machine. service
for examination
repair. or
with
the unit will void
Do not use the machine more than 60tampering
minutes per
session.
Adjust operating time if necessary. warranty.
4
Warning
DO NOT use the machine when there are any hazardous vapors or
pesticide spray in the room.
Do not use while bathing or in other wet location to avoid the risk of
serious or fatal injury from electrical shock.
Do not leave the machine near heated areas. High heat will cause
the plastic case to deform.
Disconnect the power cord from the electrical outlet if not in use.
Place unit on a stable, flat surface during operation. A tilted or
unstable placement will result in shifting of internal parts thereby
causing larger vibration and noise.
During operation, do not press hard upon the external plastic tube as
this will result in air flow restriction and damage to unit.
Caution
5
injury or machine breakdown.
Danger : Urgent safety information for hazards that will cause serious injury or death.
Diagram - Headset
Danger
[ Headset
] electrical rating on the
Check the
unit label and wall outlet before
Headset
connecting the
power cord.
When the power cord is found
damaged or broken, send it to your
dealer or authorized service center
for examination or repair.
Safety Information – (Continued)
Do not attempt to open cabinet. If
Infant, child, or disabled people
should
use
underArm
the watch of other
Headset
Flexible
adult to avoid accidental injury.
service is required, return unit to a
qualified dealer or an authorized
for
service center.Adjusting
Opening Knob
or
with
the unit
willPostion
void
Oxygen
Inlet
Dangeroustampering
warranty.
Headset
Tube
Keep the unit
and all
electrical
cords away from heated surfaces
or appliances. The oxygen will
make the material flammable.
Condensation Chamber
Do not reach for the unit in the event
the unit falls into water. Unplug the
unit immediately, then send it to your
dealer or authorized service center
for examination or repair.
Please remove the plug from
electric
outlet when not in use.
Oxygen
Outlet
Oxygen
Inlet
Do not use while bathing or
with wet hands.
Operation
Getting started
Warning
1 Open the box containing your Tranquil Sounds
2
2
3
3
4
4
Oxygen Bar, check
the contents
and make
sure
theare any hazardous vapors or
DO NOT
use the machine
when
there
following components
enclosed:
pesticideare
spray
in the room.
*
Oxygen concentrator
unit
Do not use
while bathing or in other wet location to avoid the risk of
Headset and
and serious
hose (including
(including
optional
or fatal injury
from condensation
electrical
shock.
Headset
hose
condensation
chamber)
*In areas of high humidity,
Do not leave the machine near heated areas. High heat willusecause
the condensation
chamber) manual
Operation
chamber to collect excess
the plastic
case
to deform.
manual
water condensate from the
If Operation
there are missing
items,
please
contact the
Disconnect the power cord from the electrical outlet if not inunit.
use.
dealer
you purchased
your contact
Tranquilthe
Sounds
If therewhere
are missing
items, please
Place unit on a stable, flat surface during operation. A tiltedNote:
or Using the
Oxygen
Bar. you
dealer where
purchased
your
condensation chamber will
unstable
placement
willTranquil
result in Sounds
shifting of internal parts thereby
reduce airflow. Use only if
Read
user
manual
carefully.
Oxygen
Bar.
causing larger vibration and noise.
necessary.
Connect
the
hose
provided
to the
oxygen
on the external plastic tube as
Read user
manual
carefully.
During
operation,
do not
press outlet
hard upon
the
side of
Oxygen
Bar.intoairthe
Connect
thethe
hose
provided
oxygen
outlet
the side
of the Oxygen Bar.
this
will
result
flow
restriction
andon
damage
to unit.
Operating Procedure
1 Place unit on Procedure
Operating
a stable, flat surface which is clean
free
dust.
Do notflat
setsurface
base on
carpet
or
1 and
Place
unitofon
a stable,
which
is clean
Caution
other
softofsurface
asnot
thisset
could
cause
air flow
and free
dust. Do
base
on carpet
or
restriction
and damage
unit. cause air flow
other soft surface
as thistocould
2 Check
THIS
IS NOT
USE. It is designed for
to see
theMACHINE
power
switch
is inFOR
the MEDICAL
"
"
restriction
andthat
damage
to unit.
health
maintenance.
position.
Plug
power
cord
into
electrical
outlet.
2 (OFF)
Check to see that the power switch is in the "
"
notpower
block cord
the ventilation
port outlet.
located on the back of unit.
(OFF) position.Do
Plug
into electrical
Operation
Do not set base on carpet or other soft surface. This could cause air
3 Press the power
to "and"damage
(ON) position.
flowswitch
restriction
to unit. The power switch is located at
the back of the
in the lower
bottom
corner.
WhenFilter
the power
switch is
Formachine
best performance,
regularly
clean
the Intake
and panel
in the
of the
turned on it islocated
in “stand
by”back
status
andmachine.
there is no indication light.
Do not use
theyour
machine
than 60the
minutes
per session.
4 Position the headset
over
earsmore
and adjust
position
of the flexible arm.
Adjust operating time if necessary.
6
up/down direction to adjust
the oxygen inlet.
Operation
Small Hole
( Less air flow )
Larger Hole
( More air flow )
3 Press the power switch to "
" (ON) position. The power switch is located at
the back
of the
machine in the lower bottom corner. When the power switch is
Time
Setting
turned on it is in “stand by” status and there is no indication light.
4 Position
the headset over your ears and adjust the position of the flexible arm.
1 Press the
“On” button on the control panel to start the machine.
The fixed time setting is 10 minutes. The music does not operate unless turned on.
2 Set the running
Positioning
headset:
time by pressing the Start Timer Button as follows :
Press the Button
onePlacement
time and the unit will run 20 minutes,
and
the Placement
20
Over Ear
Around
Neck
minute
indicator
window
will
light.
[ Control panel ]
Press the Button two times and the unit will run 30 minutes and the 30
Music
Indicator
(x4)
Time Indicator (x3)
Exhaust Indicator
minute indicator
window
will light.
Press the Button three times and the unit will run 40 minutes and the 10
minutes and 30 minutes indicator window will light.
Press the Button four times and the unit will run 50 minutes and the 20
minutes and 30 minutes indicator window will light.
Press the Button five times and the unit will run 60 minutes and the 10
minutes, 20 minutes and 30 minutes indicator window will light.
Time
Press
the Setting
Button one time again and the unit running time will be reset to
10 minutes.
Adjust
AirsetFlow
83 When
Oxygen
Inletindicator
When the
the set
time is
is counting
counting down,
down,
the time
time
indicator
time
the
will change
change indicating
indicating the
the time
time remaining.
remaining.
will
Volume
1 Move
the arm in an
Control
Operation Indicator
up/down direction to adjust
Larger Hole
the oxygen
Musicinlet.
Selection
A
Diagram of Oxygen Bar and Control Panel
Operation
A
B
Music Selection Button
Start Timer Button
On/Off Button
Small Hole
( Less air flow )
( More air flow )
1 Relaxing music can be turned on when the Oxygen Bar is in operation.
Turnbody
on the]music selection as follows:
[ Main
Setting
AFrontTime
Press the
Music selection button one time, the first music selection
of machine
Back of machine
indicator will light and first music will be on continuously.
1 Press
Press
buttonpanel
two times,
music
the the
“On”Music
buttonselection
on the control
to startthe
thesecond
machine.
Exhaust
Ventselection
will
light and
music
will bedoes
on continuously.
Theindicator
fixed time
setting
is 10second
minutes.
The music
not operate unless turned on.
Speaker
Control
Panel
Oxygen
Outlet
Intake
Filter Panel
2 SetPress
the
Music
selection
button
threeTimer
times,
theHandle
third
music
the running
time
by pressing
the Start
Button
as follows
: selection
indicator
will light
and
third
willwill
berun
on 20
continuously.
Press
the Button
one
time
andmusic
the unit
minutes, and the 20
Press indicator
the Music
selection
button four times, the fourth music selection
minute
window
will light.
indicator
will light
and
fourth
willwill
berun
on30
continuously.
Press
the Button
two
times
andmusic
the unit
minutes and the 30
Press indicator
the Music
selection
button five times, all the music selection
minute
window
will light.
indicators
will light
and
music
onwill
sequentially
from and
the first
one to
Press
the Button
three
times
andwill
thebe
unit
run 40 minutes
the 10
minutes
andone.
30 minutes indicator window will light.
the fourth
Press
times and
the six
unit
will runall50the
minutes and the 20
Pressthe
theButton
Musicfour
selection
button
times,
Intake
minutes
and 30 minutes
window
willstop.
light.
Filter
Panelwill
music indicators
will beindicator
off and
music
Press the Button five times and the unit will run 60 minutes and the 10
minutes,
20 minutes
30 minutes
indicator
window
willbutton
light. to
2 Music
volume
can be and
adjusted.
Use the
volume
control
Press the Button one time again and the unit running time will be reset to
adjust the sound volume.
10 minutes.
Music the
canset
nottime
playisalone
whendown,
the Oxygen
operation stops.
33 When
counting
the timeBar
indicator
will change indicating the time remaining.
C
Air Intake
Dispelling Vent
End of OperationHeat
Cycle
Power Switch
7
Power Cord
Diagram - Headset
Operation
]
3[ Headset
Press the power
switch to "
" (ON) position. The power switch is located at
Operation
the back of the machine in the lower bottom corner. When the power switch is
Headset
turned on it is in “stand by” status and there is no indication light.
4 Position the headset over your ears and adjust the position of the flexible arm.
A
Time Setting
Headset Flexible Arm
Positioning
headset:
Adjusting Knob for
8 When the set
timeEar
is counting
down, the time indicator
Oxygen
Inlet
Postion
Over
Placement
Around
Neck
Placement
will change indicating the time remaining.
Headset Tube
Outlet Selection
Music
BOxygen
1 Relaxing music can be turned on when the Oxygen Bar is in operation.
Turn on the music selection as follows:
Press the Music selection button one time, the first music selection
indicator will light and first music will be on continuously.
PressAir
the Flow
Music selection button two times, the second music selection
Adjust
Oxygen Inlet
indicator will light and second music will be on continuously.
3 Press the power switch to "
" (ON) position. The power switch is located at
Press the
button three times, the third music selection
1the
Move
armMusic
in anselection
Getting
started
backthe
of the
machine
in the lower bottom corner. When the power switch is
indicator
will
light
and
third
music will be on continuously.
up/down
to adjust
turned
onbox
itdirection
iscontaining
in “stand
by” status
and there is no indication light.
1 Open
the
your
Tranquil
Larger
Hole
Press
the
Music selection
buttonSounds
four times, the fourth music
selection
the
oxygen
inlet.
4 Oxygen
PositionBar,
thecheck
headset
over
yourand
earsmake
and sure
adjust
the position of the flexible arm.
the
contents
the
Small
indicator will light and fourth music will
be
on Hole
continuously.
following
components
enclosed:
air flow all
) the music (selection
More air flow ) *
Press
the Music are
selection
button( Less
five times,
Oxygen
concentrator
Positioning
headset:
indicators
will lightunit
and music will be on sequentially from the first one to
Headset
and hose
the fourth
one.(including optional condensation
*In areas of high humidity,
Over Ear Placement
Around Neck
Placement
use the condensation
chamber)
Press the
Music selection button six times, all the
Time
Setting
chamber to collect excess
Operation
manual will be off and music will stop.
water condensate from the
music indicators
unit.
2 1
If there
are
missing
items,
please
contact
the
Press the “On” button on the control panel to start the machine.
Using the
2
dealer
where
yousetting
purchased
your Use
Tranquil
Sounds
Music
volume
can
beisadjusted.
themusic
volume
control
button unless
to Note:
condensation
chamberon.
will
The
fixed
time
10 minutes.
The
does
not operate
turned
reduce
airflow. Use only if
Oxygen
adjust
the
sound
volume.
2
Set
theBar.
running
time
by pressing the Start Timer Button as follows : necessary.
3 Read
3 Music
can
not play
alone when the Oxygen Bar operation stops.
user
manual
carefully.
Press the Button one time and the unit will run 20 minutes, and the 20
4 Connect
the hose provided to the oxygen outlet on the side of the Oxygen Bar.
minute indicator window will light.
Press the Button two times and the unit will run 30 minutes and the 30
minute indicator
window will light.
Operating
Procedure
Press the Button three times and the unit will run 40 minutes and the 10
1 Adjust
Flow
Placeminutes
unit Air
onand
a stable,
flat surface
which
is clean
30 minutes
indicator
window
Oxygen will
Inletlight.
and free
of
dust.
Do
not
set
base
on
carpet
End
of
Operation
Cycle
Press the Button four times and the unitorwill run 50 minutes and the 20
other
softthe
surface
asan
this could
cause air
flow will light.
minutes
and 30
minutes
indicator
window
1
Move
arm
in
Press
the
Button
five
times
the unit
run 60 minutes and the 10
restriction
and
damage
toadjust
unit.
1 up/down
When
the
set
timeto
ends,
the and
machine
willwill
automatically
direction
Larger Hole
2 Check
minutes,
20
minutes
and
30
minutes
indicator
window
to
see
that
the
power
switch
is
in
the
"
"
activate
theinlet.
blowing cycle for one minute in order
to will light.
the
oxygen
Small
Hole time will be reset to
Press
the Button
one time
again
and theoutlet.
unit
running
Plug
power
cord
into
electrical
(OFF)
position.
speed up the discharge of vapors.
10 minutes.
( Less air flow )
( More air flow )
3 When the set time is counting down, the time indicator
will change indicating the time remaining.
Operation
Operation
A
C
8 Time Setting
8A
Operation
2 After the blowing ends, the heat dispelling
fan will continue to run for 3 minutes to
Operation
drive away hot air. The machine will then
2
3
turn off automatically. Turn the power
switch off if you are not going to use it
Exhaust
within a short time.
gas vent
After the blowing ends, the heat dispelling
If the unit will not be used for a period of
fan will continue to run for 3 minutes to
time, remove the power cord from electrical
drive away hot air. The machine will then
outlet.
turn off automatically. Turn the power
switch off if you are not going to use it
Exhaust
within a short time.
gas vent
If the unit will not be used for a period of
time, remove the power cord from electrical
Cleaning Condensation
Turn off the unit and remove the Power Cord
outlet.
Danger
from the electrical outlet before maintenance to
Chamber
avoid electrical shock.
During operation, water vapor will
condense and therefore, there is a
condensation chamber in the middle
section
of the external
connection hose.
Accumulated water
Cleaning
Condensation
Maintenance
3
A
1
A
B
Changing the Air Intake Filters
Chamber
If water in the condensation chamber
2
11 Pull
out
the
two
Intake
exceeds
1/3,
pour
the Filter
waterPanels
out
by on
The
condensation
chamber
in
the
2
33
2
4
5
4
3
5
Open
Close
the
reartwisting
of the machine.
gently
the
condensation
Intake Filter
middle
section
of the
external
Panel
chamber
tothoroughly
openisit.used
Rinse
them
with
warm tap
connection
hose
in areas
of high
humidity. During operation, water vapor
water.
Accumulated water
Then
lightly shake both the upper and
will
accumalate.
Shake
out water, put in a dry place and
lower end of the condensation chamber
allow to air dry.
and
theninre-assemble
the condensation
If
water
the condensation
chamber
Open
Close
Replace the Intake Filters.
chamber.1/3, pour the water out by
exceeds
Clean
the
Intake
Filters
once
a
month.
If
gently twisting the condensation
the
Oxygen
is it.
used frequently,
chamber
to Bar
open
If the
water
accumulation
exceeds the
more than 1/2, it may cause water
Intake
Filters
will
have
to
be
backflow and resulting watercleaned
accumulation on the external connection hose.
Then two
lightly
shake both the upper and
every
weeks.
lower
end ofexcessive
the condensation
Sometimes
water willchamber
cause abnormal sounds generated by
and
thenand
re-assemble
thesolved
condensation
bubbles
this can be
by clearing the accumulated water.
chamber.
4 If the water accumulation exceeds more than 1/2, it may cause water
9
and resulting
water accumulation
the external
connection hose.
Cleaning
the Headset
Tubeonand
Headset
Cbackflow
Oxygen Inlet
5 Sometimes excessive water will cause abnormal sounds generated by
the
use
of
Oxygen
1 During
bubbles and this can be solved by clearing the accumulated water.
concentrator, there will be
water condensation in the
99
avoid electrical shock.
B
Changing the Air Intake Filters
1 Pull out the two Intake Filter Panels on
the rear of the machine.
2 Rinse them thoroughly with warm tap
Intake Filter
Panel
water.
3 Shake out water, put in a dry place and
allow to air dry.
4 Replace the Intake Filters.
5 Clean the Intake Filters once a month. If
the Oxygen Bar is used frequently, the
Intake Filters will have to be cleaned
every two weeks.
C
Cleaning the Headset Tube and Headset
Oxygen Inlet
1 In areas of high humidity,
during the use of Oxygen
concentrator, there will be
water condensation in the
condensation chamber and
headset tube. Proper
Attach the Parts
Oxygen Inlet
cleaning is necessary if not
used for a long period of time.
Separate the Condensation chamber and front part of headset
tube from unit, and rinse these parts with warm water and allow
Separate
the
chamber and front part of headset
the
parts to
airCondensation
dry.
tube
from
unit,
and
rinse
these
Re-attach the parts to the unit. parts with warm water and allow
the parts to air dry.
Re-attach the parts to the unit.
Maintenance
2
2
3
3
D
Cleaning the Cabinet
1 Wipe the cabinet with a soft, moist, clean cloth.
2 Do not use washing detergent, benzene, thinner or alcohol.
10
Troubleshooting
A : Unit does not turn on
1. Check power source and connections.
2. Check that your wall outlet is live.
3. Check that power cord is not damaged.
Benefits of the Oxygen Bar
B: Motor
runs,
no oxygenfuel
is (carbohydrates,
emitted.
Oxygen
creates
lifebut
by converting
fats and proteins) into energy
1.
Check
all
hose
connections.
during aerobic respiration. Low levels of oxygen result in lower energy production making
2. sluggish
Check for
damaged
or hose
kinks.oxygen can benefit people from every
us feel
and
drained hoses
of energy.
Additional
walk 3.
of Check
life in virtually
all that
do. Studies have shown that there are multiple benefits
that filters
arewe
clean.
to using concentrated oxygen. When adding concentrated oxygen to your weekly routine,
various improvements can result. Some of the benefits include:
C: Limited oxygen flow
1. Check
for damaged
hoses
or *7
hose kinks.
• Oxygen
improves
general well
being
2. Check voltage of wall outlet.
• Oxygen heightens concentration, alertness and memory *2
3. Check that filters are clean.
• Oxygen gives you energy! 90% of our energy comes from oxygen, and only 10% from
food and water *4
• Oxygen helps keep energy levels which allows longer exercise sessions,
which helps weight loss *1
11
• Oxygen is vital to your immune system, memory, thinking and sight *3
• Oxygen promotes healing and counters aging *6
• Oxygen strengthens your heart, reducing the risk of heart attacks *2
• Oxygen calms your mind and stabilizes your nervous system *3
• Oxygen speeds up the body's recovery after physical exertion *5
• Oxygen provides a natural remedy for headaches, migraines and hangovers *2
• Oxygen relieves temporary altitude discomfort *6
• Oxygen improves digestion and cell metabolism *4
• Oxygen relieves muscle stiffness, supports pre-athletic performance *1
• Oxygen lessens chronic fatigue syndrome and gives you better sleep patterns *6
References:
1.) Mechanisms of dyspnoea relief and improved exercise endurance after furosemide inhalation in COPD, Thorax
1993;48:708-713; doi:10.1136/thx.48.7.708, BJ Lipworth
2.) Long-term oxygen therapy improves health-related quality of life, C. Lewis , P. Young , Y. Kennedy , J. E. Garrett and J. Kolbe
Respiratory Medicine, Volume 98, Issue 4, Pages 285-293
3.) Long-Term Oxygen Therapy, Stephen P. Tarpy, M.D., and Bartolome R. Celli, M.D. Volume 333:710-714 September 14, 1995
4.) Oxygen Therapy in Chronic Obstructive Pulmonary Disease Proceedings of the ATS, May 1, 2008; 5(4): 513 - 518.
5.) Recommendations on the use of exercise testing in clinical practice, Eur. Respir. J., January 1, 2007; 29(1): 185 - 209.
6.) Oxygen: the good, the bad, and the necessary...Thorax, December 1, 2004; 59(12): 1005 - 1006.
7.) Acceptability of oxygen concentrators: the patient's view Br J Gen Pract. 1990 Oct;40(339):415-7
11
Zadro Health Solutions, Inc.
Innovative Ideas That Make Life Easier™
Huntington Beach, CA 92649
(714) 892-9200 FAX (714) 892-7477
E-Mail: [email protected]
Website: www.zadrohs.com
Rev.05302012