1
C i s c o
I P
S Y S T E M S
T e l e p h o n y
U s e r
G u i d e
Central Oregon Community College, OR
E N G I N E E R I N G
R E P O R T
December, 2011
Cisco IP Telephony End user Guide
Notices:
© 7/23/2013 INX Inc. All Rights Reserved. This document and its contents are the confidential and
proprietary intellectual property of INX Inc. and may not be duplicated, redistributed or displayed to any
third party without the express written consent of INX Inc.
Other product and company names mentioned herein may be the trademarks of their respective owners.
Revision: 2.0
Confidential and Proprietary
Page 2 of 17
Cisco IP Telephony End user Guide
Table of Contents
1.1. What is a Cisco IP phone? ........................................................................................................................4
2. Using Your New Cisco IP Phone................................................................................................................... 6
2.1. Dialing Instructions. ..................................................................................................................................6
2.2. Line Keys ...................................................................................................................................................6
2.3. Soft Keys ...................................................................................................................................................6
2.4. Using the handset/ speaker phone ..........................................................................................................6
2.5. Using the headset .....................................................................................................................................6
2.6. Volume Adjustment..................................................................................................................................7
2.7. ANSWERING A CALL..................................................................................................................................7
2.8. ENDING A CALL .........................................................................................................................................7
2.9. MUTING A CALL ........................................................................................................................................7
2.10. REDIAL ....................................................................................................................................................7
2.11. PLACING A CALL ON HOLD......................................................................................................................8
2.12. TRANSFER ...............................................................................................................................................8
2.13. TRANSFER DIRECTLY INTO VOICEMAIL ...................................................................................................8
2.14. CONFERENCE ..........................................................................................................................................8
2.15. CALL FORWARDING ................................................................................................................................8
2.16. CALL HISTORY .........................................................................................................................................9
2.17. DIRECTORY .............................................................................................................................................9
2.18. CALL PARK...............................................................................................................................................9
3. How to Access Your Voicemail .................................................................................................................. 11
4. Cisco Call Manager User Page .................................................................................................................... 13
4.1. How to Login ..........................................................................................................................................13
4.2. User Options ...........................................................................................................................................13
Revision: 2.0
Confidential and Proprietary
Page 3 of 17
Cisco IP Telephony End user Guide
Cisco IP Phone Overview
1.1. What is a Cisco IP phone?
1.1.1. Cisco 7942
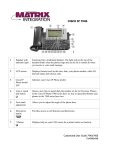
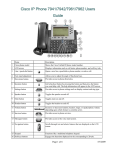
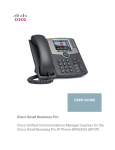
The Cisco Unified IP Phone 7942G is a full-featured IP phone with speakerphone and handset
designed for wideband audio. It has two programmable backlit line/feature buttons and four
interactive soft keys that guide you through all call features and functions. The phone has a
large, 4-bit grayscale graphical LCD that provides features such as date and time, calling party
name, calling party number, digits dialed, and presence information.
1.1.2. Cisco 7962
The Cisco Unified IP Phone 7962G is a full-featured IP phone with speakerphone and handset
designed for wideband audio. It has six programmable backlit line/feature buttons and four
interactive soft keys that guide you through all call features and functions. The phone has a
large, 4-bit grayscale graphical LCD that provides features such as date and time, calling party
name, calling party number, digits dialed, and presence information.
Revision: 2.0
Confidential and Proprietary
Page 4 of 17
Cisco IP Telephony End user Guide
Revision: 2.0
Confidential and Proprietary
Page 5 of 17
Cisco IP Telephony End user Guide
2. Using Your New Cisco IP Phone
2.1. Dialing Instructions.
•
INTERNAL
4 digit ext. Number
•
LOCAL CALLS
9 + 1 + Telephone Number
•
LONG DISTANCE 9 + 1 + Telephone Number
•
EMERGENCIES
9911
2.2. Line Keys
•
LINE 1
o Make or Receive up to 4 telephone calls from your personal number.
•
LINE 2 - 6 (Where applicable)
o These lines can be used for Extra Line Appearances or Speed Dials. They can also
be used to answer/cover other incoming telephone numbers. If blank: you may
program Outbound Speed Dials via the CCM User Page mentioned above
2.3. Soft Keys
•
The small rectangular buttons located below the main display of the phone, these
buttons serve many purposes. The function of each soft key changes based on the
state of the phone. Watch the soft key labels for the current function. Press the
MORE soft key for additional soft key functions when available.
2.4. Using the handset/ speaker phone
•
To place and answer calls with the handset, simply lift the handset. To change from
the handset to the speakerphone, press SPEAKER and hang up the handset.
2.5. Using the headset
•
To place and answer calls using a headset, plug the headset into the back of the
phone base (marked with headset icon) and press HEADSET. Once engaged the
headset icon appears on display near the soft keys and the button will light green.
Revision: 2.0
Confidential and Proprietary
Page 6 of 17
Cisco IP Telephony End user Guide
•
To start a phone call after the headset has already been engaged, press NEWCALL.
The headset will remain active for calls until disengaged by pressing the HEADSET
button again.
2.6. Volume Adjustment
2.6.1. RING VOLUME
•
With the phone idle (no active call), use the - (left side) & + (right side) of the VOLUME bar
to adjust the ring volume.
2.6.2. HANDSET/HEADSET/SPEAKER VOLUME
•
When using handset/headset/speaker press the - (left side) & + (right side) of the
VOLUME bar to adjust the volume of the call.
•
Press the SAVE soft key to save your setting.
2.7. ANSWERING A CALL
•
You can answer a call by lifting the handset or by pressing HEADSET, SPEAKER, or
NEWCALL soft key.
2.8. ENDING A CALL
•
If using the speakerphone or a headset, press the ENDCALL soft key.
2.9. MUTING A CALL
•
While on a call, you may mute the handset, headset, or speakerphone, preventing
the party with whom you are speaking from hearing what you or someone else in
the room is saying.
o To activate the mute function, press MUTE. (the button will light red)
o To disengage mute function, press MUTE again. (red light will go out)
2.10. REDIAL
•
Revision: 2.0
To redial the most recently called number, lift the handset and press the REDIAL
soft key. Alternatively, you may simply press the REDIAL soft key to activate the
speakerphone or headset (if engaged).
Confidential and Proprietary
Page 7 of 17
Cisco IP Telephony End user Guide
2.11. PLACING A CALL ON HOLD
•
To place a call on hold, press the HOLD soft key.
•
To return to the call, press the RESUME soft key. If multiple calls on one line are
on hold, use the scroll key to select the desired call before you press RESUME. If
multiple calls on multiple lines are on hold, press the line button of the line to
which you want to switch and use the scroll keys to select the desired call before
you press RESUME.
2.12. TRANSFER
•
While on a call, press the TRANSFER key. The original caller is placed on hold.
Dial the number you want to transfer to and once you hear ringing either press
TRANSFER again (blind transfer) OR once the party answers (consultative
transfer), announce the call and press TRANSFER. If the party refuses the call
press the RESUME soft key to return to the original caller.
2.13. TRANSFER DIRECTLY INTO VOICEMAIL
•
Press TRANSFER and dial * (star) plus the extension number.
•
Then hang up (hanging up quickly will allow the caller to hear the entire voicemail
greeting).
2.14. CONFERENCE
•
AD-HOC
o When on a call, press the CONFRN key. The original caller is placed on hold. Dial
the number you want to join in. When ready, press CONFRN again to add this
person to the call. You may repeat these steps to add a total of 8 people to the
conference call.
•
NOTE: Once the conference call initiator disconnects, no additional parties may be
added.
2.15. CALL FORWARDING
•
Use this procedure to forward all of your incoming calls to an alternate number:
1. Press the CFWDALL soft key. You should hear two beeps.
2. Enter the number to which you want to forward all of your calls. An animated
right arrow will appear in the upper-right corner of the LCD, indicating that all
Revision: 2.0
Confidential and Proprietary
Page 8 of 17
Cisco IP Telephony End user Guide
calls have been forwarded. The LCD will also display the text “Forwarded to [the number you entered-]”.
3. To cancel the forwarding of calls, press the CFWDALL soft key again. The
animated arrow will no longer display in the upper-right corner of your LCD. The
LCD text will revert to the original message.
2.16. CALL HISTORY
•
A history of all calls made, missed, and received are logged on your phone including
the Caller ID, time, and date of the call.
1. Press the DIRECTORIES button.
2. Use the SCROLL key to select the desired call history option: Missed, Received or
Placed Calls.
3. Press the SELECT soft key to display the call history list.
4. If desired, press the DIAL soft key to speed dial a number from the call history list.
5. When you are finished, press the EXIT soft key twice to exit the Directory menu.
2.17. DIRECTORY
1. Press the DIRECTORIES button.
2. Toggle to option 5-Corporate Directory.
3. Press the SELECT soft key.
4. Toggle to the FIRST NAME, LAST NAME, or NUMBER field.
5. Type the desired individual’s name or number as per your previous selection. You
may enter the entire name/number or even just a single character of it. Make
your search as specific or vague as you like.
6. Press SEARCH.
7. If necessary press MORE, then NEXT to toggle additional pages.
8. Toggle up or down the list to the desired party and then press the DIAL soft key to
begin the call.
2.18. CALL PARK
•
You can “Park” a call when you want to store the call so that you or someone else
can retrieve it from any other internal phone in the Cisco Unified Communications
system.
Revision: 2.0
Confidential and Proprietary
Page 9 of 17
Cisco IP Telephony End user Guide
2.18.1. STORE AN ACTIVE CALL USING CALL PARK:
•
During a call, press PARK soft key (You may need to press the MORE soft key to see the PARK
soft key). This prompts your phone to store the call. Be sure to note the call park number
displayed on your phone screen and then hang up. This number is system assigned.
2.18.2. RETRIEVE A PARKED CALL:
•
From any internal Cisco IP phone; enter the call park number to connect to the call. You will
be alerted after 60 seconds at the original destination, in case the park number had been
forgotten. After 10 minutes, the call will be sent back to the original destination it was
parked from.
Revision: 2.0
Confidential and Proprietary
Page 10 of 17
Cisco IP Telephony End user Guide
3. How to Access Your Voicemail
ACCESSING VOICEMAIL
VOICEMAIL SHORTCUTS
Internal – From Your Extension
Press Messages Key (Envelope)
4•1
Change greetings
Enter Voicemail PIN ( Default 12345), followed by
# (Pound)
4•1•2
Turn on/off alternate greeting
Internal – From Another Extension
4•2•1
Change message notification
4•3•1
Change phone password
4•3•2
Change recorded name
Press Messages Key (Envelope)
Press *, then Extension, followed by # (Pound)
Enter Voicemail PIN, followed by # (Pound)
External – Off Site
Dial 541-383-7701 and Press *
Enter your Extension, followed by # (Pound)
Enter your PIN, followed by # (Pound)
INITIAL ENROLLMENT
• Press Messages key (Envelope)
The first time you sign into your voicemail box, it will take you through the initial enrollment
process.
During this process you will be asked to complete 3 steps.
(If you do not complete all steps, you will be prompted until you do)
• Step 1
It will prompt you to Record your Name.
Record First and Last Name
- Press 1 to Record
- Press # when complete
• Step 2
It will prompt you to Record a personal
greeting.
- Press 1 to Record
- Press # when complete
Record Personal Greeting
Revision: 2.0
Confidential and Proprietary
Page 11 of 17
Cisco IP Telephony End user Guide
• Step 3
It will prompt you to change your PIN
- Press # when complete
Create a PIN (4-20 characters long)
Confirm PIN
You have finished enrollment.
Mailbox Setup is Complete!
MAIN MENU
- OPTIONS -
1
HEAR NEW MESSAGES
2
SEND A MESSAGE
3
REVIEW OLD MESSAGES
DURING MESSAGE PLAYBACK
AFTER MESSAGE PLAYBACK
- OPTIONS -
- OPTIONS –
1
RESTART MESSAGE
1
REPEAT MESSAGE
2
SAVE
2
SAVE/RESTORE AS SAVED
3
DELETE
3
DELETE
7
REWIND MESSAGE
4
REPLY
Revision: 2.0
Confidential and Proprietary
Page 12 of 17
Cisco IP Telephony End user Guide
4. Cisco Call Manager User Page
The Cisco Call Manager User Page is a great tool to accompany your new Cisco IP Phone. Below
is a quick reference sheet to the options you will be able to utilize. A few things to remember;
the user page is only accessable on the COCC Internal Network (unless you have VPN access),
you must remember to SAVE all of your entries, and you must change your PIN and PASSWORD
the first time you log onto the user page.
4.1. How to Login
• You will log on to the internal network user page by typing
https://phonemanager.ad.cocc.edu/ccmuser the below page will appear.
•
Type in your username (what you currently use at COCC ) and your password
4.2. User Options
• Once you log into the user page, this is the second page that will appear.
• In the upper left corner of the page you will see a drop down box that says User
Options.
•
Click on the drop down menu and you will see all of your options
•
Once you log into the user page, this is the second page that will appear.In the upper
left corner of the page you will see a drop down box that says User Options.
Revision: 2.0
Confidential and Proprietary
Page 13 of 17
Cisco IP Telephony End user Guide
4.2.1. Click User Settings- this is where you would go to change your pin. Again your
default pin is 12345.
4.2.2. Go back to the User Options drop down menu and click on device.
Revision: 2.0
Confidential and Proprietary
Page 14 of 17
Cisco IP Telephony End user Guide
•
Once you are on the device page you will see a tool bar at the top.
•
Click on Line Settings- this is where you can set up your Call Forwarding.
4.2.3. You are able to set up your call forwarding from your phone as well, but if you are
away from your phone and want to set up your call forwarding, your are able to
activate call forwarding from this user page.
•
When entering the number you would like your phone forwarded to, enter the number
by adding a 9 and 1 plus the 10 digit number for Long Distance or adding a 9 plus the
10 digit number for a Local Number (no spaces, hashes, dashes, hyphens).
•
Remember, you can only access this user page on the COCC campus or offsite IF you
have VPN access.
•
REMEMBER TO SAVE YOUR ENTRY!
4.2.4. Speed Dial Configuration
•
In the device option from the drop down menu, in the tool bar, click the speed dials. The
above page will appear.
•
This is where you will populate all of your speed dials.
•
You may have an option to have a few of your first speed dials as line appearances on
your phone.
Revision: 2.0
Confidential and Proprietary
Page 15 of 17
Cisco IP Telephony End user Guide
•
The other speed dials will be utilized by pressing the speed dial number, (corresponding
to the person you are trying to call) on your phone without a dial tone, and then
pressing the ABBRDIAL soft key.
o The phone number you have populated associated to the speed dial number you
entered will ring.
o REMEMBER- you must add the 9 and 1 to the 10 digit number for Long Distance
and 9 and the 10 digit number for Local Numbers (no spaces, dashes, hashes, or
hyphens) if the number is outside of COCC.
o If you set up a speed dial for a person within COCC, you enter the 4 digit
extension.
•
Enter a Label to correspond with the number; it will automatically populate the ASCII
Label.
•
REMEMBER TO SAVE YOUR ENTRIES!
Revision: 2.0
Confidential and Proprietary
Page 16 of 17
Cisco IP Telephony End user Guide
4.2.5. Personal Address Book Configuration
•
You are able to set up a personal address book/directory on your user page.
•
Once you populate your user page with your personal contacts and save them, they will
sync to your Cisco IP Phone.
•
From the drop down User Options you would select the Personal Address Book, Add
new contact, the above page will appear, populate all of the cells.
•
You then can access your personal contacts from your phones. You would select the
directories button on your phone, scroll down to #4 Personal Directories, press the
select soft key, it will ask you for your PIN (Again the default PIN is 12345, if you have
not changed it yet on the user page). It asks for your PIN for privacy purposes, so no one
else is able to access your personal contacts.
•
REMEMBER TO SAVE YOUR ENTRIES!
Revision: 2.0
Confidential and Proprietary
Page 17 of 17