1
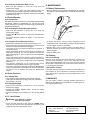
4.3.3 Selecting Temperature Units (°C/°F).
• Make sure the instrument is turned ON, if not press the
Measurement Trigger.
• Pressing the “°C /°F” button will switch between Celsius and
Fahrenheit Degrees as the temperature measurement units.
temperature reading and selected measurement units will be
The
•
displayed on the LCD.
5. MAINTENANCE
5.1 Battery Replacement
•When the battery is low and needs to be replaced, the “Low Battery Warning” symbol will appear on the lower left hand side of the
display.
4.4 ThermoSounder
4.4.1 Introduction
The ThermoSounder is a feature of your LTX12 that facilitates finding
temperature variations or differentials (e.g. cold and hot spots)
quickly and easily by providing a sound that varies proportionally to
temperature differences.
Pull to open
battery cover
4.4.2 Activating the ThermoSounder function
• Make sure the instrument is turned ON, if not press the
Measurement Trigger.
Pressing
the “ ” button will turn on and off the ThermoSounder
•
function.
• The ThermoSounder indicator will display on the LCD when
activated.
4.4.3 Using the ThermoSounder function
• Activate the ThermoSounder function as described in 4.4.2.
• Point at the area or object whose temperature you want to use as
reference and press the Measurement Trigger.
• The LTX12 will use the reference temperature to generate a
‘reference’ beeping.
temperatures (than the reference) will be indicated by a
Higher
•
faster pace of beeping, the more the difference the faster the
pace of the beeping (i.e. pace is proportional to the temperature
difference).
• Lower temperatures (than the reference) will be indicated by a
slower pace of beeping, the more the difference the lower the
pace of beeping (i.e. pace is proportional to the temperature
difference).
• The reference temperature for the ThermoSounder will be
maintained as long the Measurement Trigger is pressed.
• To choose a new reference temperature release the Measurement
Trigger, then point at the area or object with the new temperature
you want to use as reference and press the Measurement
Trigger.
4.5 Other Functions
4.5.1 Display Hold
•The instrument will automatically hold the last temperature
reading after the Measurement Trigger has been released for
approximately 7 seconds.
4.5.2 Display Backlight
Battery
•To replace the battery, open the battery compartment cover
(located at the front of the handle) by pulling on the finger indents
near the trigger, and remove the battery.
•Replace with a new 9 V alkaline battery type NEDA 1604 or
IEC6F22 observing the proper polarity when connecting to the
battery terminals.
•Close the battery cover.
5.2 Cleaning
5.2.1 Lens cleaning
Debris or dirt on the lens may cause obstruction and reduce the
accuracy of the thermometer. If this occurs, either wipe the lens
with a Q-tip (moistened with water only) or blow the loose particles
off with clean compressed air. Do not use solvent on the lenses, as
it may damage the instrument.
5.2.2 Exterior cleaning
Periodically wipe the case with a soft damp cloth and mild household cleanser. Do not use abrasives or solvents. Ensure that no
water gets inside the instrument to prevent possible short circuits
and damage.
6. WARRANTY
One year limited warranty, excluding batteries and fuses. For
details see Standard Warranty Information on our web page or you
may request a printed copy.
• Make sure the instrument is turned ON, if it is not, press the
Measurement Trigger.
Pressing
the Backlight ON/OFF Button, will turn the display
•
backlight ON or OFF.
• When the backlight is not needed, turn it off to prolong battery
life.
4.5.3 Laser Pointer
!
CAUTION:Laser Radiation is emitted
Avoid direct eye contact
• To turn the laser sight ON or OFF, press the “LASER” button,
when the unit is ON. The laser sight indicator will appear on the
display when the laser sight function is ON.
General Technologies Corp.
#121 - 7350 72nd Street
Delta, BC Canada V4G 1H9
Tel.: (604) 952-6699
Fax: (604) 952-6690
www.gtc.ca
© Copyright 2008 General Technologies