Download LYNX Touch Series Security Systems
Transcript
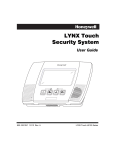
LYNX Touch Series
Security Systems
Home Automation Guide
800-11309 3/12 Rev. A
Home Automation
Z-Wave® Programming
The LYNX Touch control features Z-Wave® technology that is designed to automate devices in a home
control network. The control allows you to easily add and control multiple devices with the press of a button.
Check with your installer to see if this feature is available.
Your control and every Z-Wave device you add are linked together into a wireless network. Each device in
your network has a unique address assigned to it and cannot be activated by your neighbor's Z-Wave
controller. The Z-wave network supports multiple controllers allowing additional Z-wave remotes to be used
throughout the home. Management of Z-Wave devices (also known as nodes) includes two main operations,
inclusion/exclusion and association (or controlling). Refer to the Controlling Z-Wave Devices section for
information regarding “association”.
This section describes how to Include (add) devices into your home control network, edit devices and Exclude
(delete) devices. Automation and Z-Wave functions are accessed via the LYNX Touch Automation icon, ZWave Device Management and Z-Wave Advanced Tools screens. A list of compatible Z-Wave devices can be
found in the Z-Wave Compatibility Chart contained in this document. The devices can be controlled from the
LYNX Touch control or the Mobile Internet Device (MID) (or tablet). Check with your Installer to see which
features are available with your system. Refer to the Z-Wave Glossary for additional information regarding
term and functions.
Ready To Arm
12:35
Ready To Arm
PM
72
October 26, 2011
Security
Mostly Sunny
68 F
Feels Like 71
News
Traffic
Zones
Automation
F
72
5-Day Forecast
Automation
Notices
Arm Away
Delay
Arm Stay
Message
10:18 AM June 8, 2010
Phone
More
5100-100-001-V0
5100-100-004-V0
LYNX Touch Dashboard Screen
LYNX Touch Security Home Screen
(Total Connect Remote Services Enabled)
Automation is intended for lifestyle convenience. It should not be used for life safety or property protection.
!
UL
Z-Wave automation functionality is supplementary only and has not been evaluated by UL.
Ready To Arm
68
Button
Switches
Rules
Switches
Thermostat
Schedules
Rules
Locks
Scenes
Thermostat
Schedules
Tools
5100-100-007-V0
LYNX Touch Automation Screen
Locks
Scenes
Tools
Ready To Arm
Include Devices
Button
Include Devices
Exclude Devices
Check Network
Advanced Tools
Exclude Devices
Check Network
Advanced Tools
Warning: automation can only be used for life style
enhancement. It must not be used for personal safety or
property protection.
5100-100-074-V0
Z-Wave Device Management Screen
-2-
Function
Provides access to the Switches Grouping Screen
Provides access to the Rules Screen. Rules are used to
automate Z-Wave devices based on specified Zone Activity,
Alarm Status or Alarm Conditions.
Provides access to the Thermostats Grouping Screen
Provides access to the Schedules Screen. Schedules are
used to activate Scenes based on a specified time and
repeat frequency.
Provides access to the Locks Grouping Screen
Provides access to the Scenes Screen. Scenes are used to
control a single or group of devices together, turning them
Off, On, on to a preset lighting level, temperature or mode,
or locked/unlocked. Up to 20 scenes can be programmed.
Provides access to the Z-Wave Device Management Screen
Function
Enroll Z-Wave Modules
Delete Z-Wave Modules
Perform system check of Z-Wave network
Provides access to additional Z-Wave options
Home Automation
Button
Ready To Arm - Chime
View Enrolled
Devices
View Enrolled
Controllers
Reset Controller
Pri. Controller Shift
to Secondary
Locking Door
Learn
Base Command
Set On
Base Command
Set Off
View Enrolled
Devices
View Enrolled
Controllers
Reset Controller
5100-100-075-V0
Z-Wave® Advanced Tools Screen
Pri. Controller
Shift to
Secondary
Locking Door
Learn
Base Command
Set On
Base Command
Set Off
Function
View Z-Wave device information: System Index/name,
device type, device ID, manufacturer, node number
View Controller Information: Controller role: (Primary or
Secondary), Home ID, device type, device ID, node number,
manufacturer
Deletes all nodes and generates a new random Home ID.
Resetting the Controller does not Exclude the individual
devices; therefore, each device will need to be Excluded
before being Included into a Controller.
Transfers the role of primary controller to another controller*
(i.e.; a Z-Wave remote control) and duplicates the Z-Wave
network.
Enable Arm Stay, Arm Away or Arm without Auto-Stay when
Z-Wave door lock is locked. Causes the system to arm in
the selected mode, Away, Stay, or Away without Auto-Stay
when the Z-Wave Door is Locked.
Includes the panel as secondary controller*, usually on a ZWave remote control, and duplicates the Z-Wave network.
Devices (switches and thermostats only) may be Included
using the Z-Wave remote control and the information can be
transferred to the control panel using this feature. The
secondary controller (control panel) cannot have Z-Wave
devices Included. The Learn button is selected after Include
process is started on the primary controller.
Required test command to turn On all switches.
Note: Some thermostats will exit Setback mode.
Required test command to turn Off all switches.
Note: Some thermostats will enter Setback mode.
* Although both controllers can operate the Z-Wave devices, only the Primary can
Include/Exclude devices.
Including Z-Wave® Devices
The functions described below should be accomplished at the LYNX Touch control.
Z-Wave devices should be in their final location prior to inclusion. When Including a device, it may be
necessary to perform an Exclude before a successful Include can be achieved. This is particularly true if the
device was previously in another Z-Wave network.
Include/Add a Light Switch or Outlet Module
Install the receptacle, wall switch or lamp/appliance module (refer to the Module’s Instruction Guide). To
Include a Light switch or outlet module into a Z-Wave network, perform the following:
ACTION
1.
2.
3.
4.
5.
6.
7.
NOTES
At the Dashboard screen or Security Home Screen select the
“Automation” icon
At the Automation Screen, select “Tools”.
At the “Device Management” screen, select “Include Devices”.
The panel displays “Ready to include device. Press the function button
on device”. Within one minute press the device’s Function button or
activate the switch.
If the module has been successfully enrolled, the panel displays
“Device Found! Please Wait” and then the device information is
displayed.
After successfully including a light switch or outlet module, the device’s
information will be added to the top of the inclusion list.
Once you have finished including devices, press the “Home” key to
return to the Dashboard screen or select the “2” button to return to the
previous screen.
-3-
• Z-Wave light modules may vary; follow the
instructions provided with your specific device
to Include properly.
Home Automation
Include/Add a Door Lock
Z-Wave® door locks are encrypted, and for security purposes, enroll at a low power transmission range,
approximately 6 feet. This may require enrolling the lock before it is installed in the door.
Assemble the Z-Wave® door lock (if required); install batteries and connect necessary cables (refer to the
Door Lock’s Instruction Guide). Enroll the door lock adjacent to the control (within 6 feet) and mount within
the proper Z-Wave range (refer to the “Important Notes” section for further information). To Include a door
lock into a Z-Wave network, perform the following:
ACTION
1.
2.
3.
4.
5.
6.
7.
8.
NOTES
At the Dashboard screen or Security Home Screen select the
“Automation” icon
At the Automation Screen, select “Tools”.
At the “Device Management” screen, select “Include Devices”.
The panel displays “Ready to include device. Press the function button
on device”. Within one minute press the device’s Function button or
activate in accordance with the manufacturer’s instructions.
If the module has been successfully enrolled, the panel displays
“Device Found! Please Wait” and then the device information is
displayed.
After successfully including a lock, the device’s information will be
added to the top of the inclusion list.
To include next device press the “include” button.
Once you have finished including devices, press the “Home” key to
return to the Dashboard screen or select the “2” button to return to the
previous screen.
• Program the user code in the control panel
prior to programming that user code into the
door lock. User Codes must be 4-digits.
When programming user codes into the panel,
determine if the user code will have access to
the Z-Wave lock. If so, the user code will be
transferred to the lock.
• Door lock devices may vary; follow the
instructions provided with your specific door
lock to Include properly and to program a new
user code.
• If locks will be associated with a Scene, the
lock’s autolock feature must be disabled.
• Due to Low Power Inclusion Mode of secure
devices, Include the Z-Wave Lock first, if not
using an Inclusion Tool/Remote Control. The
lock should be installed before including other
devices.
Include/Add a Honeywell Thermostat
Install a Honeywell Thermostat according to the manufactures instructions. Device should be mounted in
the final location and tested before adding it to the system. To Include a Honeywell Thermostat into a ZWave network, perform the following:
Note: Some thermostats do not update temperature status automatically (i.e., Wayne Dalton).
IMPORTANT: Honeywell is not responsible for property damages due to improper setting of the thermostat modes.
ACTION
1.
2.
3.
4.
5.
6.
7.
8.
9.
NOTES
At the Dashboard screen select the “Automation” icon.
At the Automation Screen” screen, select “Tools”.
At the “Device Management” screen, select “Include Devices”.
The panel displays “Ready to include device. Press the function button
on device” Within one minute Include the Z-Wave thermostat.
a. Press “System” on the ZW-STAT.
th
b. Press and Hold the 4 (or center) button on the bottom row of the
ZW-STAT.
c. Press the first down arrow T to change display to “rf10”.
d. Press the right (last) up arrow S to Include the ZW-STAT.
Refer to the Installation Instructions provided with the thermostat for
“Z-Wave inclusion”.
To complete inclusion, press “Done”.
Press “Done” on the thermostat to return to normal operation.
After successfully including a thermostat, the device’s information will
be added to the top of the inclusion list.
Once you have finished including devices, press the “Home” key to
return to the Dashboard screen or select the “2” button to return to the
previous screen.
-4-
• If you are installing another brand of
thermostat, follow the instructions provided
with your specific device to Include properly.
• When using Z-wave thermostat control on the
LYNX Touch, the scheduling feature within
thermostat should not be used.
• When the HOLD button on the LYNX Touch
Thermostat control screen is highlighted, Zwave scenes driven by rules or schedules will
not
affect
the thermostat operation.
Additionally, if your system is connected to
TotalConnect Service, the remote 7-day
schedules will also not affect the thermostat
operation.
• For threshold monitoring to be configurable on
the Total Connect Remote Services LYNX
TOUCH Z-wave thermostat screen, the
respective zones will first need to be assigned
with a response type in zone programming.
• You must program both Zones for each
respective thermostat (i.e..; Zone 80 & 81 for
thermostat #1, Zone 82 & 83 for thermostat #2
and Zone 84 & 85 for thermostat #3).
Home Automation
View, Edit and Delete Z-Wave® Devices
View Enrolled Z-Wave Devices or Controllers
To View a list of the enrolled devices perform the following:
ACTION
1.
2.
3.
4.
5.
6.
7.
NOTES
At the Dashboard screen select the “Automation” icon.
At the Automation Screen, select “Tools”.
At the “Device Management” screen, select “Advanced Tools”.
Enter the Master User Code on the displayed keypad.
At the Advanced Tools Screen, select “View Enrolled Devices” OR
“View Enrolled Controllers”.
Use the down T arrow to scroll to the next page of options. Use the S
arrow to return to the previous page.
Press the “Home” key to return to the Dashboard screen or select the
“2” button to return to the previous screen.
Edit Z-Wave Device Names
To Edit a device name, perform the following:
ACTION
1.
2.
3.
4.
5.
6.
7.
NOTES
At the Dashboard screen select the “Automation” icon.
At the Automation Screen, select the type of device that you wish to
edit. (i.e.; Switches, Thermostats or Locks as applicable.)
Select the device that you wish to edit from the displayed list.
Select the edit button.
Enter the desired information (limited to 14 characters) on the displayed
keypad and then select “Done”.
The system returns to the previous screen.
Select “Back” to return to the Automation Screen or Press the “Home”
key to return to the Dashboard screen.
Exclude/Delete a Z-Wave Device
To Exclude a Z-Wave device, perform the following:
ACTION
1.
2.
3.
4.
5.
6.
NOTES
At the Dashboard screen select the “Automation” icon.
At the Automation Screen, select “Tools”.
At the “Device Management” screen, select “Exclude Devices”.
The panel displays “Ready to Exclude device. Press the function button
on device”. Within one minute press the device’s Function button or
activate the switch.
If the module has been successfully Excluded, the Excluded device’s
information will be added to the excluded list. If a device which is not
known to the panel is excluded “Unknown Device Excluded” will be
added to the excluded list.
Once you have finished excluding devices, press the “Home” key to
return to the Dashboard screen or select the “2” button to return to the
previous screen.
-5-
• Excluding a device sends a command to the
Node
erasing
any
previous
network
information that was learned into it.
• Previously deleted devices (but not Excluded)
will still need to be Excluded before they can
be re-Included into a controller.
Home Automation
Remove/Delete all Z-Wave® Devices (Reset Controller)
To Remove all Z-Wave devices, perform the following:
ACTION
1.
2.
3.
4.
5.
6.
7.
8.
9.
NOTES
At the Dashboard screen select the “Automation” icon.
At the Automation Screen, select “Tools”.
At the “Device Management” screen, select “Advanced Tools”.
Enter the Master User Code on the displayed keypad.
Select “Reset Controller”.
The panel displays “This will delete all nodes and generate a new home
ID”.
Select “Yes”. The panel displays “All nodes deleted and new home ID
generated”.
Select “OK”.
The system returns to the previous screen.
• Resetting the Controller does not Exclude
the devices individually; therefore, each
device will need to be Excluded before
being Included into a controller.
Shift Primary Control
After all Z-Wave devices have been Included into the Primary Controller, control can be shifted to a
Secondary Controller. To shift primary control to the secondary Z-Wave controller, perform the following:
ACTION
1.
2.
3.
4.
5.
6.
7.
NOTES
At the Dashboard screen select the “Automation” icon.
At the Automation Screen, select “Tools”.
At the “Device Management” screen, select “Advanced Tools”.
Enter the Master User Code on the displayed keypad.
Select “Pri. Controller Shift to Secondary”.
The panel displays “Shifting”.
Put the controller you are shifting to in “learn” mode. Refer to the
documentation provided with the controller for additional information.
Turn On/Off all lights
To turn all lights On or Off, perform the following:
ACTION
1.
2.
3.
4.
5.
6.
NOTES
At the Dashboard screen select the “Automation” icon.
At the Automation Screen, select “Tools”.
At the “Device Management” screen, select “Advanced Tools”.
Enter the Master User Code on the displayed keypad.
To turn all lights On, select “Base Command Set On” OR to turn all
lights Off, select “Base Command Set Off”.
Press the “Home” key to return to the Dashboard screen or select the
“2” button to return to the previous screen.
• If Base Command is set On, some
thermostats will exit Setback mode.
• If Base Command is set Off, some
thermostats will enter Setback mode.
Controlling Z-Wave® Devices
Scenes are used to control a single or group of devices together, turning them OFF, ON, ON to a preset
lighting level, temperature or mode, or lock/unlocked. The LYNX Touch has 20 Scenes which may each be
configured with up to 10 devices each. Scenes can be manually activated or activated by a Rule or Schedule.
Rules are used to control Scenes by pre-set “Conditions” and “Triggers”. Up to 20 Rules may be programmed
locally into the LYNX Touch. To program Scenes and Rules, refer to the LYNX Touch User Manual. Devices
can also be activated manually. To active devices manually, perform the following:
ACTION
1.
2.
3.
4.
NOTES
At the Dashboard screen select the “Automation” icon.
At the Automation Screen, select the type of device that you wish to
edit. (i.e.; Switches, Thermostats or Locks as applicable.)
Select the device that you wish to control from the displayed list.
Refer to the figures below for typical examples of the features that can
be controlled manually for the devices.
-6-
• The control screens vary according to the
features of the specific Z-Wave device that is
Included.
• The features and functions that can be
controlled vary by manufacturer and you will
need to review the user manual that was
provided to determine capabilities of each
device.
Home Automation
Ready To Arm
Ready To Arm
Den Lamp
ON 70%
Den Lamp
ON
EDIT
EDIT
BACK
BACK
5100-100-016-V0
5100-100-015-V0
Light Control Screen (Without Dimming Support)
Light Control Screen (With Dimming Support)
Ready To Arm
Ready To Arm
Set to
73
Living Room
Mode
HEAT
Fan
Hold
Living Room
AUTO
Mode
Threshold Monitoring
EDIT
AUTO
Hold
BACK
EDIT
5100-100-017-V0
Heat
Setpoint
Cool
Setpoint
73
84
Fan
AUTO
Threshold Monitoring
BACK
5100-100-018-V0
Thermostat Control Screen
Dual Setback Thermostat Control Screen
Ready To Arm
Front Door
Unlocked
EDIT
BACK
5100-100-020-V0
Lock Control Screen
Z-Wave® Glossary
Controller
The Primary Controller is the main device used to set up and control your Z-Wave network. There can only be one
primary controller and it must be used to add or delete devices. A primary controller can be a portable device like a
hand-held remote, a static controller (permanently installed and never moved), a Z-wave enabled PC or a Z-Wave
enabled Ethernet router/bridge. A Secondary controller can not be used to add or delete devices. If the secondary
controller is the same brand and model as the primary, it will have all of the same capabilities as the primary but can not
be used to add or delete devices.
Event
An event is something you want to happen at a specific time and day. This could be every day, a specific day of the
week, Monday through Friday, Saturday and Sunday only, or a one time occurrence. Events can be set up to control
an individual device, a group or a scene.
Exclude
When a device is excluded, it is removed from the LYNX Touch system. Excluding the device also removes the network
pairing from the device’s memory.
Important Note: A device must be excluded before it can be moved to another network or re-included after a controller reset.
Include
Including a device pairs it with the LYNX Touch so that the two can communicate. It is also referred to as Adding.
Node
Node is the technical term used to describe a Z-Wave device in your home control network. Please note that the terms
"Node", "Device" and "Light" all refer to an individual Z-Wave enabled device and are interchangeable within the context
of these instructions.
Rules
Rules are used to automatically perform specified functions in response to certain events, which trigger scenes.
Scene
A scene lets you control multiple functions automatically. For example you can establish preset brightness levels for
multiple Z-wave controlled lights and then control them with one command. This is ideal for mood or task lighting.
Scene 1 could be the family room lights set to dim for watching TV. Scene 2 could have the same lights set to a
different brightness level for other activities like reading or entertaining.
Schedules
The Schedules Feature can be used to program the system to automatically perform certain functions (i.e.;
automatically arming the system in Stay mode and activating output [Z-Wave] devices) via Scenes.
-7-
Home Automation
Z-Wave Compatibility
Z-Wave devices may vary; follow the instructions provided with the specific device when including and
excluding devices into the Z-Wave network. Refer to the list to view the compatible devices.
Note: Not all Z-wave devices have been tested and some features may produce unpredictable results.
Door Locks
Yale Real Living Push Button Lever Lock
Yale Real Living Touchscreen Lever Lock
Yale Real Living Push Button Deadbolt Lock
Yale Real Living Touchscreen Deadbolt Lock
Schlage Link Deadbolt Lock
Schlage Link Lever Lock
Kwikset Smartcode Lever lock
Kwikset Smartcode Deadbolt Lock
Thermostats
Honeywell ECC
Wayne Dalton Zwave Thermostat
Trane Zwave Thermostat
Residential Control Systems Thermostat (Model TZ45)
Intermatic InTouch Thermostat (Model CA8900)
Appliance
HomeManageable Appliance Module
Wayne Dalton Small Appliance Module
GE Wireless Lighting Control Plug In Appliance Module
SOMFY
Cooper In-Wall Duplex Receptacle Module (Model RF9505-TDS)
Lights
Leviton/ViziaRF+ switches
Leviton/ViziaRF+ dimmers
Leviton/ViziaRF+ plug in modules
GE wireless lighting control dimmers
GE wireless lighting control Switches
GE wireless lighting control plug in lamp modules
Intermatic In-Wall Receptacle (Model HA01)
Cooper Plug-in Lighting Switch Module (Model RFAPM)
AEON Labs Lamp/Dimmer Module (Model DSC06106-ZWUS)
Remotec Lamp Dimmer Module (Model ZDS-100US)
Important Notes
Wireless Range
This device complies with the Z-Wave® standard of open-air, line of sight transmission distances of 100 feet. Actual
performance in a home depends on the number of walls between the controller and the destination device, the type of
construction and the number of Z-Wave enabled devices installed in the control network.
Please Note: Z-Wave home control networks are designed to work properly alongside wireless security sensors, Wi-Fi,
Bluetooth and other wireless devices. Some 900MHz wireless devices such as baby cams, wireless video devices and older
cordless phones may cause interference and limit Z-Wave functionality.
Things to consider regarding RF range:
•
•
•
Each wall or obstacle (such as refrigerator, big screen TV, etc.) between the remote and the destination device will
reduce the maximum range of 100 feet by approximately 25-30%.
Brick, tile or concrete walls block more of the RF signal than walls made of wooden studs and drywall.
Wall mounted Z-Wave devices installed in metal junction boxes will suffer a significant loss of range (approximately
20%) since the metal box blocks a large part of the RF signal.
WARNING: NOT FOR USE WITH MEDICAL OR LIFE SUPPORT EQUIPMENT!
Z-Wave enabled devices should never be used to supply power to, or control the On/Off status or medical and /or life support
equipment.
Additional Z-Wave Information
1.
2.
3.
Once the system has reached node number 232, the system will not allow devices to be enrolled. Reset Controller needs
to be performed to allow the system to enroll Z-wave devices. The node numbers can be viewed by selecting
Automation Tools Advanced Tools View Enrolled Devices.
The system is not aware of door locks being enabled with any temporary user shutdown feature such as Vacation Mode.
The system will continue to unlock a door if programmed to do so via Rules, Schedules and Scenes.
Certain door lock models with thumbturns will provide a brief time window for you to turn the thumbturn before they
automatically lock on their own. These types of door locks are not recommended for use in conjunction with Z-Wave
rules, schedules, and scenes.
Z-Wave devices are identified by the Z-Wave logo and can be purchased from your local retailer.
Z-Wave is a registered trademark Sigma Designs, Inc. and/or its subsidiaries.
Ê800-11309&Š
800-11309 3/12 Rev. A
2 Corporate Center Drive, Suite 100
P.O. Box 9040, Melville, NY 11747
Copyright © 2012 Honeywell International Inc.
www.honeywell.com/security


