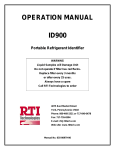
Download Sarasota ID900/FD900/PD900, Sarasota RTR900 User Manual
Transcript
Sarasota ID900/FD900/PD900 Sarasota RTR900 Gas Density Meters & Instrument Retractor User Guide P/N HB-ID/FD900 Revision G Part of Thermo Fisher Scientific Sarasota ID900/FD900/PD900 Sarasota RTR900 Gas Density Meters & Instrument Retractor User Guide P/N HB-ID/FD900 Revision G © 2011 Thermo Fisher Scientific Inc. All rights reserved. “Ni-Span C” is a registered trademark of the Special Metals Corporation. “HART” is a registered trademark of the HART Communication Foundation. “Inconel” is a registered trademark of Special Metals Wiggin Ltd. “Microsoft” and “Windows” are either registered trademarks or trademarks of Microsoft Corporation in the United States and/or other countries. All other trademarks are the property of Thermo Fisher Scientific Inc. and its subsidiaries. Thermo Fisher Scientific (Thermo Fisher) makes every effort to ensure the accuracy and completeness of this manual. However, we cannot be responsible for errors, omissions, or any loss of data as the result of errors or omissions. Thermo Fisher reserves the right to make changes to the manual or improvements to the product at any time without notice. The material in the manual is proprietary and cannot be reproduced in any form without express written consent from Thermo Fisher. This page intentionally left blank. Revision History Thermo Fisher Scientific Revision Level Date Comments 0.0 08-1996 Initial release. A 01-2007 Revised per ECO 5423. B 09-2007 Revised per ECO 5979. C 11-2008 Revised per ECO 6657. D 05-2010 Revised per ECO 7393. E 11-2010 Revised per ECO 7573. F 06-2011 Revised per ECO 7733. G 08-2011 Revised per ECO 7799. User Guide for Sarasota ID900, FD900, & PD900 Gas Density Meters v This page intentionally left blank. Contents Important Safety Information............................................................................ xi Control of Substances Hazardous to Health...........................................xi Electrical Safety ......................................................................................xi Thermo Fisher Scientific Chapter 1 Product Overview ............................................................................................. 1-1 Introduction........................................................................................ 1-1 Operation ........................................................................................... 1-2 Chapter 2 Installation ......................................................................................................... 2-1 Sarasota ID900 ................................................................................... 2-1 Sarasota RTR900 ................................................................................ 2-4 Sarasota FD900................................................................................... 2-8 Sarasota PD900................................................................................. 2-11 Temperature Considerations .......................................................... 2-11 Pressure Considerations.................................................................. 2-12 Dirt Consideration......................................................................... 2-12 Pocket Location & Installation....................................................... 2-12 Meter Installation........................................................................... 2-13 Installing the Bypass System........................................................... 2-14 Electrical Considerations ................................................................... 2-14 Hazardous Area Installation .............................................................. 2-15 Marking ......................................................................................... 2-16 Electrical Data................................................................................ 2-17 Chapter 3 Commissioning .................................................................................................. 3-1 Sarasota RTR900 ................................................................................ 3-1 Initial Operation .............................................................................. 3-1 Insertion........................................................................................... 3-2 Retraction ........................................................................................ 3-3 Sarasota PD900................................................................................... 3-6 Setting the Bypass Flow Rate............................................................ 3-7 Chapter 4 Calibration.......................................................................................................... 4-1 Air Checks .......................................................................................... 4-1 Corrections ......................................................................................... 4-1 Liquid Checks ..................................................................................... 4-2 Vacuum Point Cleaning...................................................................... 4-2 Temperature Correction at Check Points ............................................ 4-3 User Guide for Sarasota ID900, FD900, & PD900 Gas Density Meters vii Contents viii Chapter 5 Maintenance ......................................................................................................5-1 General ............................................................................................... 5-1 RTR900 Maintenance Schedule.......................................................... 5-1 Gland Packing.................................................................................. 5-4 Cleaning.............................................................................................. 5-4 General ............................................................................................ 5-4 The Spool ........................................................................................ 5-5 Chapter 6 Troubleshooting & Service .............................................................................6-1 General Troubleshooting .................................................................... 6-1 Contact Information ........................................................................... 6-3 Appendix A Ordering Information .......................................................................................A-1 Sarasota ID900 ...................................................................................A-1 Sarasota FD900...................................................................................A-4 Sarasota PD900...................................................................................A-6 Sarasota RTR900 ................................................................................A-8 Appendix B Specifications...................................................................................................B-1 Sarasota Gas Density Meters ...............................................................B-1 Sarasota RTR900 ................................................................................B-4 Appendix C Drawings............................................................................................................ C-1 Appendix D Health & Safety Clearance Form...................................................................D-1 Appendix E Toxic & Hazardous Substances Tables ....................................................... E-1 User Guide for Sarasota ID900, FD900, & PD900 Gas Density Meters Thermo Fisher Scientific Important Safety Information Control of Substances Hazardous to Health ● Know the safety precautions and first aid instructions before you use a hazardous substance. ● Read the label on the container in which the substance is supplied. ● Read the data sheet applicable to the substance. ● Obey the local orders and instructions. Electrical lectrical Safety Warning Remove all power from the unit before making any connections. Electrocution can result if power is present. ▲ Warning Ensure the power supply is isolated. Take suitable precautions to prevent reinstatement of power while working on the system. ▲ Thermo Fisher Scientific User Guide for Sarasota ID900, FD900, & PD900 Gas Density Meters xi This page intentionally left blank. Chapter 1 Product Overview Introduction The Thermo Scientific Sarasota range of gas density meters is designed for the continuous, inline, high accuracy measurement of density or density related variables within the oil and gas, petrochemical, and power industries. From this measurement, output variables such as specific gravity, calorific value, or molecular weight can be provided either by a Thermo Scientific AutoPILOT PRO flow computer, a Sarasota CM515 density converter, or a Sarasota HME900 headmounted electronics. Suitable third party flow computers or density converters may also be used. The Sarasota ID900 direct insertion gas density meter is installed directly into the pipeline or vessel, generally using its integral flanges or the Sarasota RTR900 instrument retractor, which allows the meter to be removed from a pressurized line without having to shut down the line or process, avoiding downtime. The Sarasota FD900 bypass density meter is normally installed on a bypass sample line. Where the line size is 25 mm (1”) or less, it may be placed directly inline. A choice of fittings and flange options is available to suit the pipework configuration. Density and temperature measurements are therefore at line or near line conditions. The Sarasota PD900 pocket density meter offers many of the same design features as the Sarasota ID900 but is mounted into a thermowell pocket that is installed directly into the pipeline. Since the pocket is in the pipeline, density and temperature measurements are at near process conditions, and the use of an inlet filter prevents dirt or moisture from entering the measuring chamber. Two versions of the gas density meters are available. The F option provides frequency output and 4-wire PT100 connections that may be used by a remote density converter or flow computer. With the H option, an onboard HART compliant density converter provides a linearized 4–20 mA output. Thermo Fisher Scientific User Guide for Sarasota ID900, FD900, & PD900 Gas Density Meters 1-1 Product Overview Operation Operation Sensors in the sensor assembly are caused to vibrate at their natural resistance. Gas flowing through the sensors causes changes in the vibration frequency. The change in vibration frequency is proportional to the density of the gas. The instrument retractor accommodates the Sarasota ID900 density meter with the vent valve mounted to mate with the system isolation valve. The head of the vent valve interferes with lugs on the clamp ring, preventing removal of the clamp ring while the bleed valve is shut. This safety feature prevents removal of the top seal housing until seal housing pressure is released. The retractor allows the Sarasota ID900 to be removed from the system while leaving the seal housing still clamped to the system pipeline. It is designed to be used with pipeline pressures up to 170 bar (2500 psi). 1-2 User Guide for Sarasota ID900, FD900, & PD900 Gas Density Meters Thermo Fisher Scientific Chapter 2 Installation Note Installation must be carried out in accordance with local site requirements and regulations. ▲ Sarasota ID900 The Sarasota ID900 should be mounted vertically in the pipeline with the outlet port downstream. There are three mounting methods: ● Welded flange version ● Male connector Swagelok fitting ● Sarasota RTR900 instrument retractor Ensure that the flow direction arrow etched onto the Sarasota ID900 stems points in the flow stream direction. Fit suitable flange gaskets and tighten flange bolts evenly. See the figures below. Thermo Fisher Scientific User Guide for Sarasota ID900, FD900, & PD900 Gas Density Meters 2-1 Installation Sarasota ID900 Figure 2–1. Sarasota ID900 dimensional drawing 2-2 User Guide for Sarasota ID900, FD900, & PD900 Gas Density Meters Thermo Fisher Scientific Installation Sarasota ID900 Figure 2–2. Installation of flanged Sarasota ID900 Figure 2–3. Installation of Sarasota ID900 with Sarasota RTR900 Note If using the Sarasota RTR900 instrument retractor, be sure to review the following section for mounting instructions. ▲ Thermo Fisher Scientific User Guide for Sarasota ID900, FD900, & PD900 Gas Density Meters 2-3 Installation Sarasota RTR900 Sarasota RTR900 The Sarasota RTR900 instrument retractor should be mounted on a ball or gate location valve and have sufficient clearance to allow the Sarasota ID900 and retractor to pass clearly through when the valve is open. The isolation valve must be mounted squarely on the nozzle attached to the system pipeline or tank and be clear of internal obstructions. You will need the following equipment to install the Sarasota RTR900: ● Allen key, 5 mm ● Wrench, open-ended 1-1/5-inch and 1-5/16-inch AF ● Wrench (2 off) to suit flange bolts ● C wrench for gland nut (supplied) ● Oil can containing good quality light machine oil (Shell Dexron II) Fit the instrument retractor as follows: 1. Remove the amplifier box from the density meter. 2. Using the Allen headed bolts, fit the handwheel to retractor shaft. 3. Lightly lubricate the O-ring at the top of the jackscrew. 4. Insert the density meter through the nut of the pipe fitting and push all the way up to the stem. Take care when passing the O-ring. 5. Ensure the density meter body fits snugly against the nut and that the cannon plug at the end of the density meter stem projects beyond the retractor handwheel. 6. Finger-tighten the nut at the end of the retractor stem. Using a wrench, tighten the nut 1-1/4 turns further. Check the density meter is held firmly. 7. Turn the knob on the vent valve fully counterclockwise to allow the lugs on the clamp nut to clear the valve handle. Undo the clamp nut and remove it from the remainder of the seal housing along with the retractor stem and instrument. Take care not to loose the Inconel C ring on top of the seal housing. 2-4 User Guide for Sarasota ID900, FD900, & PD900 Gas Density Meters Thermo Fisher Scientific Installation Sarasota RTR900 Caution Handle the Inconel C ring with care. The C ring may be shipped separately in a plastic bag attached to the wheel. ▲ 8. Bolt the seal housing to the valve, ensuring it is aligned with the valve. Caution Misalignment can cause the density meter to be inserted at an angle and contact the edge of the nozzle where it enters the pipeline. The density meter may be trapped but should not be retrieved until the next time the pipeline is completely shut down. ▲ 9. Ensure that the Inconel C ring is not damaged and that the mating surfaces are clean and free from dirt. Fit the C ring and screw down the top of the seal housing and lead screw assembly. 10. Using the C wrench, tighten to clamp the ring to 330 Nm (250 lbf.ft). Thermo Fisher Scientific User Guide for Sarasota ID900, FD900, & PD900 Gas Density Meters 2-5 Installation Sarasota RTR900 Figure 2–4. Sarasota RTR900 dimensional drawing 2-6 User Guide for Sarasota ID900, FD900, & PD900 Gas Density Meters Thermo Fisher Scientific Installation Sarasota RTR900 Figure 2–5. Sarasota RTR900 installation Thermo Fisher Scientific User Guide for Sarasota ID900, FD900, & PD900 Gas Density Meters 2-7 Installation Sarasota FD900 Sarasota FD900 The Sarasota FD900 should be installed vertically or within 15° of vertical. Flow should be upwards for liquids and downwards for gases. Caution Do not install the density meter too close to bends, pressure reducers, or pumps. ▲ Figure 2–6. Typical installation for Sarasota FD900 Figure 2–7. Sarasota FD900 with 1.5” BSP installation dimensions 2-8 User Guide for Sarasota ID900, FD900, & PD900 Gas Density Meters Thermo Fisher Scientific Installation Sarasota FD900 Figure 2–8. Sarasota FD900 with flange installation dimensions Thermo Fisher Scientific User Guide for Sarasota ID900, FD900, & PD900 Gas Density Meters 2-9 Installation Sarasota FD900 Figure 2–9. Sarasota FD900 dimensional drawing 2-10 User Guide for Sarasota ID900, FD900, & PD900 Gas Density Meters Thermo Fisher Scientific Installation Sarasota PD900 Sarasota PD900 When preparing to install the Sarasota PD900, reference the dimensional drawing below and the following sections. Figure 2–10. Sarasota PD900 dimensional drawing Temperature Considerations To obtain the most accurate results, density should be measured at the pipeline temperature. Therefore, the meter and its supply pipeline should be in close thermal contact with the pipeline and insulated from ambient conditions. Conduction from the pipeline through the pocket wall is improved by the addition of the silicone heat transfer fluid. Cladding of the pipe wall and/or the parts of the pocket and the density meter that protrude from the pipeline is essential. To ensure the fluid temperature in the bypass is the same as the temperature of the pipe wall, and therefore as close as possible to the temperature of the fluid in the main line, two further actions are required: 1. Keep the valve between the meter and the density sample point very well insulated and fully open. If the valve is fully open, temperature changes at the vale are prevented. Thermo Fisher Scientific User Guide for Sarasota ID900, FD900, & PD900 Gas Density Meters 2-11 Installation Sarasota PD900 2. Thermally bond the bypass tubing to the exterior surface of the pipework using a thermal conducting paste. Pipework scale should be removed. Also, remember access will be required for servicing. Pressure Considerations Pressure changes will occur in the bypass line due to the piping, filter, and valves. The pressure changes will be proportional to the flow in the bypass and can be made to be insignificant. This is further described in the chapter on commissioning. Dirt Consideration Even with “clean” fluids, it is best to install a filter upstream of the meter. A self-cleaning filter or a type which allows quick replacement of a cartridge is recommended. Pocket Location & Installation Each pocket location should be treated as a unique case and reference made to the relevant pipeline codes of practice. The presence of the pocket should not disturb the flow pattern at the orifice plate. See BS1042 Part 1:1981 for guidance on suitable locations. For best operation of the instrument, the thermowell pocket and density meter should be mounted on top of a horizontal pipeline so as to be within ±5° of the vertical. At the selected location a 3” (7.6 cm) ± 0.05” diameter hole is required through the pipe wall to accept the pocket. To install the pocket, follow the steps below. 1. Insert the pocket as far as possible into the pipe while leaving sufficient room to make a good weld. Welds on the pocket must be made on the thicker upper section. 2. Align the pocket as shown in the figure below. 3. Tack weld at positions 1, 2, 3, and 4. 4. Fillet weld between 1 and 4. 5. Fillet weld between 3 and 2. 6. Fillet weld between 3 and 1. 7. Fillet weld between 2 and 4. 2-12 User Guide for Sarasota ID900, FD900, & PD900 Gas Density Meters Thermo Fisher Scientific Installation Sarasota PD900 8. Pressure test this section of pipework to 1.5 times the maximum operating pressure to ensure the welds are secure. Figure 2–11. Pocket installation for Sarasota PD900 Meter Installation 1. Ensure the inside of the pocket and all flange surfaces are free of dirt and grease. If cleaning is necessary, use a suitable solvent (e.g. acetone) and a lint-free cloth. 2. Pour approximately 40 ml of the supplied silicone heat transfer fluid into the empty pocket. 3. Check the O-ring is fitted to the pocket. 4. Insert the meter until the inlet/outlet ports are parallel with the pipe and the inlet port is pointing upstream. 5. Secure the density meter to the pocket flange using 6 off M8 x 30 mm socket head bolts tightened to 27 Nm (20 lbf.ft). Thermo Fisher Scientific User Guide for Sarasota ID900, FD900, & PD900 Gas Density Meters 2-13 Installation Electrical Considerations Installing alling the Bypass System A full bore regulating/isolating valve should be fitted to both the inlet and outlet sides of the density meter. The valves should be distances from the meter, well insulated, and in good thermal contact with the pipe wall. The meter is supplied with a filter which should be installed on the inlet side to protect the spool from abrasion and contamination. If there is a possibility of reverse flow through the meter, a filter should also be installed on the outlet side. The filter(s) should have good thermal contact with the pipe wall. Use of a thermal conducting paste is recommended. The 1/4” to 1/2” piping used in the bypass should be thermally bonded to the pipe wall and then the wall from the orifice plate to beyond the density meter carefully lagged. The optional flexpak jacket can then be put around the steam and pocket and fixed with self-sealing straps and ties. If the jacket is not used, onsite insulation will be required instead. Electrical Considerations Warning Refer to the warnings at the beginning of this manual. ▲ Warning Perform all site safety procedures prior to beginning electrical installation. ▲ Note The Sarasota RTR900 itself requires no electrical installation. However, the instrument used with the Sarasota RTR900 must be installed in accordance with its appropriate requirements. ▲ Note Drawing AD_6502 in the drawing appendix provides wiring diagrams for the Sarasota density meters. ▲ 2-14 ● For Sarasota ID900 only: Electrical connections to a density meter used in conjunction with a retractor must be made after the retractor has been commissioned. The wiring is required to run to the instrument connection box when the retractor is fully installed. ● For Sarasota ID900 only: Provision must be made for the easy removal of the electrical wiring to allow the retractor to be rotated when it is used. If the electrical installation must be done before the retractor is commissioned, allowance must be made for movement of the instrument connection box. User Guide for Sarasota ID900, FD900, & PD900 Gas Density Meters Thermo Fisher Scientific Installation Hazardous Area Installation ● ● Hazardous Area Installation Where zener barriers or galvanic isolators are used, the maximum capacitance and inductance of the cable must not exceed the values detailed in the electrical installation figures in the drawing appendix. Where long cable is required, the maximum capacitance will be 0.1 F before acceptable signal attenuation occurs. If low signal levels at the computer are a problem, consult the manufacturer. The Sarasota ID900, FD900, and PD900 density meters and RTR900 instrument retractor have been designed to satisfy the requirements of Clause 1.2.7 of the essential Health and Safety Requirements such that it will not give rise to physical injury when handled properly. These instruments do not produce excessive surface temperature, nor do they emit infra red, electromagnetic, or ionizing radiation. Before starting installation work, ensure all power connections are isolated and take precautions to prevent power from being restored while work is taking place. Hazardous area installations forbid the use of tools or equipment which could produce an explosion hazard by causing a spark or imposing excessive mechanical stress. The instruments must be installed in a manner to avoid exposure to thermal or mechanically induced stresses, and in addition, they should not be exposed to chemically aggressive substances beyond the expected levels. The instruments are not intended to be exposed to significant conditions of dust buildup. In cases of location in Zone 0 (ATEX Category 1), where impact/abrasion or other mechanical forces may be expected, appropriate methods of protection must be used. Thermo Fisher Scientific User Guide for Sarasota ID900, FD900, & PD900 Gas Density Meters 2-15 Installation Hazardous Area Installation Marking The Sarasota ID900, FD900, and PD900 density meters are marked for use in hazardous areas according with the ATEX Directive. They are marked as follows. F option [BAS00ATEX1175X] II 1 G Ex ia IIC T6 Ga Installed in the hazardous area [BAS00ATEX1175X] is marked on the label as shown below: Figure 2–12. H option [BAS01ATEX1002X] II 1 G Ex ia IIC T4 Ga Installed in the hazardous area [BAS01ATEX1002X] is marked on the label as shown below: Figure 2–13. 2-16 User Guide for Sarasota ID900, FD900, & PD900 Gas Density Meters Thermo Fisher Scientific Installation Hazardous Area Installation Electrical Data F option At the amplifier terminals 1 & 2: Ui = 30 V, li = 100 mA, Pi = 0.7 W At the PRT terminals W, X, Y, & Z: Ui = 10 V, li = 300 mA per terminal, Pi = 0.5 W H option At the amplifier terminal pairs 1 & 2, 3 & 4, 5 & 6: Ui = 28.5 V, li = 100 mA, Pi = 0.7 W (Terminals 5 & 7 are linked internally) Terminals 7 to 8: Uo = Ui, lo = li, Po = Pi Thermo Fisher Scientific User Guide for Sarasota ID900, FD900, & PD900 Gas Density Meters 2-17 This page intentionally left blank. Chapter 3 Commissioning Warning Refer to the warnings at the beginning of this manual. ▲ Warning Ensure all safety rules that apply to this equipment are followed and any permits necessary for the work have been issued. Also ensure obligations under the Health and Safety at Work Act are met. ▲ Warning Before pressurizing, ensure all safety labels are in place and securely wire the warning label to the isolation valve handwheel. ▲ Sarasota RTR900 You will need the following equipment when commissioning the Sarasota RTR900 ● Special C wrench, supplied with Sarasota RTR900 ● Appropriate wrenches to fit seal housing flange nuts ● Can of light machine oil (Shell Dexron II or equivalent) ● Tools for removing electrical connections, conduit connections to the terminal box Caution If at any time during insertion or retraction the torque becomes excessive (refer to graph in Figure 3–1) or exceeds that which can be applied by one individual turning the handwheel without using a lever to multiply torque, the line must be depressurized to safely remove the instrument retractor from the line for inspection. ▲ Initial tial Operation 1. Unscrew the gland nut and check that packing is fitted. Use the C wrench provided to tighten the gland nut to 75 Nm (55 lbf.ft). 2. Ensure the seal housing top clamp nut is fully tightened. 3. Carefully open bleed valve with a one-quarter turn, and slightly crack the main line valve. Thermo Fisher Scientific User Guide for Sarasota ID900, FD900, & PD900 Gas Density Meters 3-1 Commissioning Sarasota RTR900 4. Once fluid starts to come from the bleed valve, stop opening the main line valve. Shut the vent valve tightly. 5. Check: a. The joints between the seal housing and valve for fluid leaks. b. For fluid weeping past the gland, and tighten the gland further if necessary. c. For fluid leaks passing up the stem of the instrument inside the threaded retractor tube. d. For leaks past the Inconel C ring. If there are leaks, ensure the clamp ring is tight (330 Nm/250 lbf.ft). If this does not stop the leakage, steps 1 through 4 will need to be reversed, and the C ring will need to be replaced. Make sure the mating surfaces are free from grit, dirt, or damage. Insertion 1. Remove the amplifier box on the end of the density meter stem. 2. Check the cleanliness of the retractor thread. 3. If the thread is excessively dirty, clean it using an appropriate solvent (clean kerosene). Once the thread is clean, liberally apply light machine oil to the thread, especially at the point where it enters the gland nut. 4. Insert the density meter into the line by rotating the handwheel clockwise. Check for leakage around the screw head as the insertion is performed. 5. Once insertion is completed to the required depth, check the orientation of the density meter and adjust as necessary. 6. Protect any exposed threads on the retractor by coating with waterproof grease. 7. Reconnect all electrical connections by fitting the amplifier box to the top of the density meter stem. Ensure that the cable ends and terminal identifications correspond. 8. Check that the flow arrow on the amplifier aligns with pipe flow direction for the density meter installation. 9. Check for leakage and make corrections as necessary. 3-2 User Guide for Sarasota ID900, FD900, & PD900 Gas Density Meters Thermo Fisher Scientific Commissioning Sarasota RTR900 Retraction etraction Warning Refer to the warnings at the beginning of this manual. ▲ Warning Refer to the local safety rules before commencing work. ▲ Caution If at any time during insertion or retraction the torque becomes excessive (refer to graph in Figure 3–1) or exceeds that which can be applied by one individual turning the handwheel without using a lever to multiply torque, the line must be depressurized to safely remove the instrument retractor from the line for inspection. ▲ 1. Clean off any excess grease used to protect the retractor threads. During retraction, the threads are lubricated by the process fluid. Additional lubrication is normally not needed. 2. Remove the amplifier from the top of the stem. 3. Rotate the handwheel counterclockwise to retract the instrument. The gland nut may be slackened just enough to reduce turning friction but not enough to allow a leak. 4. The instrument is fully retracted when the thread from the handwheel to the top of the seal housing is 700 mm (27.5”). The valve to the main line may be shut once this is reached. 5. Once the main valve is shut, the bleed valve may be opened to relieve pressure. Caution If fluid continues to come from the bleed valve, the main line valve is either not completely shut or is faulty. No further action to remove the retractor or instrument should be taken. ▲ 6. If no leakage occurs at the bleed valve, the retractor seal housing top clamp nut may now be removed with the C Wrench provided. Thermo Fisher Scientific User Guide for Sarasota ID900, FD900, & PD900 Gas Density Meters 3-3 Commissioning Sarasota RTR900 Caution If the seal housing bleed valve is blocked, the seal housing may still be under pressure. When the clamp nut is first released, examine for excessive fluid loss. If further loss is excessive, retighten the clamp nut and resolve the leak issue before going any further. ▲ 7. Unscrew the clamp nut while supporting the instrument and retractor. The top of the retractor and instrument may be removed for inspection and maintenance. Remove the Inconel C ring from the top of the seal housing and keep in a clean, safe place. Cover the top of the housing to keep it clean. Alternatively, grease the C ring to protect it from dirt. Figure 3–1. Average insertion torque versus pressure 3-4 User Guide for Sarasota ID900, FD900, & PD900 Gas Density Meters Thermo Fisher Scientific Commissioning Sarasota RTR900 Figure 3–2. Sarasota RTR900 commissioning sequence Thermo Fisher Scientific User Guide for Sarasota ID900, FD900, & PD900 Gas Density Meters 3-5 Commissioning Sarasota PD900 Sarasota PD900 Follow the procedure below to ensure the installed equipment is functioning adequately and safely. 1. Check all local and national safety regulations have been adhered to and obligations under the Health and Safety at Work Act are met. 2. Ensure the electrical wiring conforms to the supplied installation drawings. 3. Ensure flange bolts have been tightened to 27 Nm (20 lbf.ft). 4. With air at atmospheric pressure within the instrument, apply power and note the periodic time of the output either from the computer front panel or using a frequency/period meter. This should agree to within ± 1 μs with the values of the Tair given on the calibration certificates. 5. If the period reading is incorrect, an oscilloscope should be used to check the signal. The voltage peak-peak needed to drive a Sarasota HME900 is 1.5 V, but a larger voltage will help to avoid interference. Depending on the model and conditions 2–10 V p-p should be used. In all cases, spikes should not be presents which could give rise to false signal and erratic periods. If it is not possible provide a densitometer signal of at least 1.5 V p-p at the terminal box, consult the factory. 3-6 User Guide for Sarasota ID900, FD900, & PD900 Gas Density Meters Thermo Fisher Scientific Commissioning Sarasota PD900 Setting the Bypass Flow Rate In normal applications there is usually too much differential pressure available to drive flow around the bypass. Therefore, bypass flow must be regulated at the valve which does not lie between the meter and the selected density measurement point. A suitable flow rate may be set up as follows: 1. With normal flow in the main line, open both valves fully to allow fast temperature stabilization of the system. The temperature at the density measuring spool may be displayed on the Sarasota HME900 or CM515. 2. Close the valve on the opposite side of the bypass to the density measuring point. The density reading then displayed by the computer is the density at the chosen point and will be very accurate since there are no pressure errors and temperature is stable. 3. Re-open the valve very slowly and observe the density reading. It will change as flow through the bypass causes a change in pressure. A small change is acceptable, commensurate with the system accuracy required. Thermo Fisher Scientific User Guide for Sarasota ID900, FD900, & PD900 Gas Density Meters 3-7 This page intentionally left blank. Chapter 4 Calibration Warning Refer to the warnings at the beginning of this manual. ▲ Warning Refer to the local safety rules before commencing work. ▲ Density calibration is very specialized and is best performed at the factory where accuracy and traceability to national standards are guaranteed. Also, data is processed with factory approved algorithms to produce the best accuracy calibration. However, if units cannot be returned for regular calibration, complete the checks outlined below. If you return a density meter, you must complete the Health and Safety Clearance Form (provided at the end of Chapter 6). Failure to return this form may result in the meter being returned. Note The tests below do not replace works calibration where fiscal accuracy is required but are useful in checking that the transducer is working correctly. ▲ Airr Checks With the instrument clean and dry, check the reading of the sensor time period on air (Tair). Connect the instrument to a power supply and a timer counter to the signal terminal. Read the periodic time. The display will read time period in microseconds. Make necessary corrections according to the section below, and Tair should correspond closely to the Tair value documented on the calibration certificate for that unit. Corrections For Ni-Span C spools (maximum 75°C/167°F), the temperature coefficient is negligible. No correction is needed for the air temperatures different from the calibration temperature at which Tair was measured. For high temperature instruments (above 75°C/167°F), measure the temperature and correct for the difference from the Tair temperature on the calibration sheet using the temperature coefficient of the spool. Refer to “Temperature Correction at Check Points” later in this chapter. Thermo Fisher Scientific User Guide for Sarasota ID900, FD900, & PD900 Gas Density Meters 4-1 Calibration Liquid Checks Liquid Checks In a jar large enough to hold the sensor, take a sample of clean liquid with density within the instrument’s calibrated range. Check the sample density with a hydrometer and its temperature with a thermometer. Connect the density meter to a Sarasota HME900 that is correctly configured and programmed with the density meter coefficients. Immerse the sensor body completely in the liquid, press the DENSITY key to read the density calculated by the computer. If the hydrometer and computer readings differ by more than ±2 kg/m3, move the sensor head in the liquid to help move any bubbles attached to the spool. Check that the temperature indicated by the computer is consistent with the temperature of the liquid measured with a thermometer. If the indication is unstable or still in error, clean the instrument as detailed in “Cleaning” (Chapter 5). Vacuum Point Cleaning Gas density meters should be checked using Tvac vacuum point check. This is a check that the time period at vacuum is the same as when tested at vacuum during factory calibration. Any buildup of dirt on the spool will give a positive shift to the time period at vacuum, damage to the spool may cause negative or positive shifts of time period. The best method of checking the time period at vacuum Tvac of the transducer is to install it in an approved calibration test chamber. However, if this impractical, the test can be performed using a seal housing/retractor. In this scenario, fully withdraw the density meter into the seal housing and close the isolation valve. If offline, use a blanking flange to seal the housing. Connect to a vacuum pump and observe the time period as the vacuum is pulled. Allow time for a good vacuum, which is indicated as a steady period reading. Note the periodic time and the instrument temperature. Correct for temperature of Tvac on the calibration sheet and compare the temperature corrected period with the Tvac on the calibration sheet. The measured value should be correct to within the accuracy stated for the instrument on the calibration sheet. If there is a large error, check the following: ● Ensure a vacuum <5 mm of mercury has been obtained (<0.01 kg/m3). ● Ensure no dirt or other contamination is affecting the chamber spool or body. ● Ensure there is no damage to the spool. 4-2 User Guide for Sarasota ID900, FD900, & PD900 Gas Density Meters Thermo Fisher Scientific Calibration Temperature Correction at Check Points Temperature Correction at Check Points The temperature coefficient for units fitted with Ni-Span C spools (maximum 75°C/167°F) is so small that Tair or Tvac checks can be made without correcting for the difference between the temperature of the check and the temperature during the calibration Tair/Tvac . When high temperature spools (above 75°C/167°F) are fitted, it is advisable to make the following correction when doing Tair or Tvac checks: Tcorr = Tm + Tcof * (1 - 2) where Tm = time period in s measured at check conditions Tcof = temperature coefficient of transducer in s from calibration certificate 1 = temperature of Tvac or Tair on calibration certificate (°C) 2 = temperature of instrument at time of vacuum point check (°C) Thermo Fisher Scientific User Guide for Sarasota ID900, FD900, & PD900 Gas Density Meters 4-3 This page intentionally left blank. Chapter 5 Maintenance Warning Refer to the warnings at the beginning of this manual. ▲ Warning Refer to the local safety rules before commencing work. ▲ General eral The Sarasota ID900 should be checked and cleaned at every plant shutdown, unless these are very frequent. When the process fluid is dirty and more frequent cleaning is required, the instrument should be installed with the Sarasota RTR900 to enable removal without pipeline shutdown. Where the Sarasota ID900 is installed through a 1-inch NPT male connector Swagelok fitting or with welded flange option, it should be removed from the pipeline during shutdown. The Sarasota FD900 and PD900 should be checked and cleaned every three months. Routine maintenance to the Sarasota RTR900 is minimal. If possible, it should be planned to coincide with maintenance of the density meter or flow meter, which involves retraction and insertion of the instrument. RTR900 Maintenance Schedule Note The frequency of maintenance may need to increase if line conditions are severe. ▲ The following equipment is required: Thermo Fisher Scientific ● C wrench provided with the instrument ● Wrenches to fit bolts between seal housing and mating valve ● Light machine oil ● Solvent cleaning agent and wiper or paper towel ● Waterproof grease ● Replacement packing material User Guide for Sarasota ID900, FD900, & PD900 Gas Density Meters 5-1 Maintenance RTR900 Maintenance Schedule ● Replacement Inconel C ring ● Replacement O-ring, size 50–120 Nitrile ● Replacement gasket for mating flange between valve and seal housing ● Tools for removing electrical connections Table 5–1. Sarasota RTR900 maintenance schedule Frequency Tasks Six months / 25 cycles 1. Check gaskets and vent valve for signs of leakage. 2. Check the gland nut for signs of leakage and tighten if required. 3. Clean off old waterproof grease from the exposed position of the retractor jackscrew. If the previous grease coating has been ineffective in protecting the jackscrew, clean the thread using solvent and a clean wipe. Maintenance frequency may need to be increased. 4. Check the jackscrew for any signs of thread damage, excessive wear, or bending. If any damage or bending is found, perform the steps outlined in “Two Years/50 Cycles”. 5. Apply more grease to the exposed portion of the retractor threaded jackscrew. Yearly 1. Fully retract the retractor and remove it from the line. Remove the flow meter or density meter from the retractor. 2. Unscrew the retractor jackscrew fully from the seal housing and visually inspect the internal threads of the gland nut and the seal housing insert for damage or excessive wear. 3. Inspect the gland nut external thread and its mating thread in the seal housing for signs of damage or excessive wear. Note A dentist mirror or similar will be required to inspect the seal housing internal thread insert. ▲ 4, Inspect the jackscrew thread for signs of damage or excessive wear. 5. Apply more lubricant to the threads with anti-seizing grease and reassemble the retractor. Caution When reassembling the retractor, do not exchange the gland nut with one from another unit. Gland nuts are machined to fit the seal housing with which they are supplied. Exchanging gland nuts between units will either make it impossible to assembly the gland nut/seal housing/jackscrew, or it will product an assembled retractor which is stiff in operation due to a small mismatch between internal and external threads of the gland nut. ▲ 6. If the gland nuts are inadvertently exchanged between retractors, a gland nut/retractor pair can be identified. The gland nut is identified with the stamp n where “n” is the number of that retractor within a batch. The gland body should be marked in the same way. 5-2 User Guide for Sarasota ID900, FD900, & PD900 Gas Density Meters Thermo Fisher Scientific Maintenance RTR900 Maintenance Schedule Frequency Tasks Two years / 50 cycles 1. Check the gaskets and vent valve for signs of leakage. 2. Check the gland nut for signs of leakage and tighten if necessary. 3. Retract the density meter and clean and inspect the jackscrew thread for excessive thread wear, bending, or other signs of deterioration. If any sign of wear or damage is found on the jackscrew, perform the steps outlined in “Five Years/100 Cycles”. Five years / 100 cycles 1. Check the gaskets and vent valve for signs of leakage. 2. Check the gland nut for signs of leakage and tighten if necessary. 3. Retract the instrument. 4. Remove the retractor from the isolation valve. Remove the instrument from the jackscrew, and remove the old gland packing. 5. Wind the jackscrew out of the seal housing. 6. Clean the retractor parts with a brush and solvent. Do an overall inspection for damage or excessive wear. 7. Rebuild with new gland nut packing and O-ring. Refer to “Gland Packing”. 8. If excessive wear is found, the unit should be inspected by an approved service agent or returned to the factory for a complete overhaul. Ten years / 200 cycles Thermo Fisher Scientific 1. The unit should be inspected by an approved service agent or returned to the factory for full service. User Guide for Sarasota ID900, FD900, & PD900 Gas Density Meters 5-3 Maintenance Cleaning Gland Packing After prolonged use or aging, the gland packing material may become depressed to the point that it stops sealing correctly. This is apparently when tightening the gland nut no longer prevents seeping or leaking from around the gland. 1. The retractor and instrument must be retracted and depressurized before the gland nut may be unscrewed. 2. Remove the old packing material by inserting a long, thin screwdriver down into the packing and turning the packing out along the shaft of the retractor. Caution Exercise care when handling the threaded jackscrew as damage may shorten the life of the gland material and increase the potential for leaks and nut wear. ▲ 3. Install the new packing by winding it gently around the screw in the opposite direction to the thread and carefully working the packing down into the packing area by using a small screwdriver. 4. Screw down the gland nut, taking care that the sharp end of the gland nut does not shear off pieces of packing. Tighten down the gland nut to 75 Nm (55 lbf.ft) applied to the end of the supplied C wrench. Cleaning General eneral Cleaning may be done with trichloroethylene, genklene, Freon, or a similar solvent. 1. Remove the density meter from the pipeline. Wipe clean the outside and carefully remove the circlips holding the inlet and outlet filters. 2. Remove and examine the filter discs and O-rings. Clean in an ultrasonic solvent cleaner bath or replace with new as necessary. 3. The unit can now be cleaned with a solvent cleaner, preferably in an ultrasonic bath without removing the spool. 5-4 User Guide for Sarasota ID900, FD900, & PD900 Gas Density Meters Thermo Fisher Scientific Maintenance Cleaning 4. With the sensor clean and dry, perform a Tair or Tvac check. Refer to Chapter 4 on calibration. The accuracy required determines whether further cleaning is desirable. Cleaning using solvents will not remove any fine magnetic particles which pass through the filters. If magnetic particles are present and causing a change in Tair or Tvac, remove and clean the spool according to the following section. The he Spool Caution The gas spools are very thin. Exercise extreme caution when performing any maintenance. ▲ Note Handling the spool or a change in ambient air temperature will change the Tair reading. ▲ 1. Remove the lock ring with the wrench provided. Where process fluid is not of a harmful nature, you can remove the spool by inserting your index finger into the spool. Where this is not the case, handle the spool by the ends, as shown in Figure 5–1. Figure 5–1. Handling the spool safely 2. Clean the spool and body with soft paper and a suitable detergent or solvent cleaner. Acetone and isopropyl are acceptable. Caution Acids must not be used on NiSpan-C spools! ▲ 3. If deposit buildup is heavy or if there are magnetic solids stuck to the inside of the body near the center, check the filters and increase the frequency of cleaning. Thermo Fisher Scientific User Guide for Sarasota ID900, FD900, & PD900 Gas Density Meters 5-5 Maintenance Cleaning 4. Clamp the body vertically with the spool opening upward. 5. Place the cleaned spool into the body cavity, lining up the hole in the spool with the locating pin in the body. 6. Carefully move the spool up and down to check that it does not bind on the pin. 7. Install the locking ring and finger-tighten to the spool. Then release one turn. 8. Move the spool to check freedom of movement and correct seating. 9. Use a torque wrench (not supplied) for the following steps: a. Apply steadily increasing pressure in a clockwise direction to 5.5 Nm (4 lbf.ft), which is the equivalent of tightening the ring by hand. b. When the torque wrench is felt to give, do not continue for more than a quarter turn. Do not allow the wrench head to click back. Remove the torque wrench and turn the end by hand until it clicks. c. Loosen the lock ring two turns, move the spool to ensure correct seating, and tighten again as in step 9. Wrench rotation should be at a constant speed. d. Repeat the procedure 3 times until consecutive Tair readings are to within 0.002 to 0.003 s. 10. Take a reading of Tair to within 0.001 s and note the air temperature. 5-6 User Guide for Sarasota ID900, FD900, & PD900 Gas Density Meters Thermo Fisher Scientific Maintenance Cleaning Figure 5–2. Types of spool damage Figure 5–3. Spool contamination Thermo Fisher Scientific User Guide for Sarasota ID900, FD900, & PD900 Gas Density Meters 5-7 This page intentionally left blank. Chapter 6 Troubleshooting & Service General Troubleshooting If unstable readings or readings of zero occur, complete these troubleshooting steps. The symptoms listed in this section include: ● Unstable readings ● Meter readings at zero ● Meter readings permanently at full scale ● Meter readings vary with flow rate Symptom: Unstable readings 1. Ensure the Sarasota HME900 power supply links are correctly set up for the supply voltage. 2. Ensure the computer or converter is set up correctly by checking through the configuration data sheet. Check that the sensor serial number calibration coefficients are the same as documented on the calibration certificate. 3. If the readings are unstable, replace the computer. If using the Sarasota HME900 and the period readings are stable, check the other variable values used. If there are none, replace the Sarasota HME900. 4. If the time period and temperature readings are stable, check the signal from the density meter. The voltage should be above 1 V p-p and stable in frequency. If the voltage is below 1 V, check zener barriers and field connections. 5. Check the current drawn by the density meter by inserting a milliamp meter in series with the positive supply. A gas density meter about 20 mA. Also check the terminal voltages at the density meter amplifier box. Voltage should be 25 V. 6. If readings are still unstable, remove the instrument. Clean it and check the filter. Determine the cause of any buildup. Thermo Fisher Scientific User Guide for Sarasota ID900, FD900, & PD900 Gas Density Meters 6-1 Troubleshooting & Service General Troubleshooting 7. Examine the spool and body immediately after removal and check for condensation, as well as dirt. Symptom: Meter readings at zero. 1. If density reading is zero, check the period reading. If it is correct, the fault is associated with the Sarasota HME900 or flow computer. If the period reading is zero, check whether there is a period signal from the density meter at the terminal box and barriers, if used. If not, check the supply to it as described in step 5 for “Unstable readings”. 2. If there is no supply, check through the barriers and terminal box connections to the Sarasota HME900 or flow computer. If no supply is present, replace the Sarasota HME900 or computer. 3. If the supply is correct but there is no signal output from the density meter, ensure that the instrument is clean and the spool is undamaged (refer to “Cleaning” in Chapter 5). If the density meter appears clean, contact Thermo Fisher. Symptom: Meter readings permanently at full scale. 1. Check the period reading. If correct, then check the Sarasota HME900 for incorrect parameters. 2. If the period is incorrect, check the supply to the density meter described in step 5 for “Unstable readings”. Check the spool for dirt. If the supply is incorrect, check through the connections and barriers to the Sarasota HME900 or flow computer. If faulty, replace or return to manufacturer for servicing. Symptom: Meter readings vary with flow rate. 1. If readings are erratic, clean the density meter. 2. If readings are stable, check the installation. 3. Check for air bubbles. 4. Check for dirt in the fluid. 6-2 User Guide for Sarasota ID900, FD900, & PD900 Gas Density Meters Thermo Fisher Scientific Troubleshooting & Service Contact Information Contact Information If you have completed the troubleshooting steps in the previous section and the unit still is not performing satisfactorily, the local representative is your first contact for support and is well equipped to answer questions and provide application assistance. You can also contact Thermo Fisher directly at any of the following. Process Instruments 14 Gormley Industrial Avenue Gormley, Ontario L0H 1G0 CANADA Unit 702-715, 7/F Tower West Yonghe Plaza No. 28 Andingmen East Street, Beijing 100007 CHINA +1 (800) 437-7979 +1 (713) 272-0404 direct +1 (713) 4573 fax +1 (905) 888-8808 +1 (905) 888-8828 fax +86 (10) 8419-3588 +86 (10) 8419-3580 fax A-101, 1CC Trade Tower Senapati Bapat Road Pune 411 016 Maharashtra, INDIA Ion Path, Road Three Winsford, Cheshire CW7 3GA UNITED KINGDOM 1410 Gillingham Lane Sugar Land, TX 77478 USA +91 (20) 6626 7000 +91 (20) 6626 7001 fax +44 (0) 1606 548700 +44 (0) 1606 548711 fax www.thermoscientific.com For returns, consult Thermo Fisher for specific instructions. Thermo Fisher Scientific User Guide for Sarasota ID900, FD900, & PD900 Gas Density Meters 6-3 This page intentionally left blank. Appendix A Ordering Information Sarasota ID900 Table A–1. Sarasota ID900 Code Signal Output ID900F Insertion density meter with frequency output: No local display. Requires density converter (consult Thermo Fisher). ID900H Insertion density meter with smart headmounted electronics: Provides HART compatible analog (4–20 mA) output. Accepts 4 –20 mA input from pressure transducer for pressure compensation. Code Density Range A 0–20 kg/m3, gas applications B 15–80 kg/m3, gas applications C 75–250 kg/m3, gas applications D 200–500 kg/m3, liquefied gas applications E 500–1000 kg/m3, liquefied gas applications and light liquid applications with viscosity < 1 cp Code Process Temperature Range A -200°C to +75°C (-328°F to +167°F) B -20°C to +75°C (-4°F to +167°F) C -20°C to +200°C (-4°F to +392°F) D -20°C to +150°C (-4°F to +302°F) Code Sensing Spool Material Z Ni-Span C: Use with non-corrosive gases and liquids; process temperatures < 75°C (167°F) Y FV-520 B: Magnetic stainless steel suitable for all applications Code Installation Configuration C Retractable insertion via flange and 1” compression fitting (blind flange drilled and tapped with 1” compression fitting screwed into the flange); process pressure < 5 bar (flange not supplied) D Retractable insertion via Sarasota RTR900 F0 ID900 fixed insertion, complete with integral flange: 3” ANSI B16.5 RF Class 300 F1 ID900 fixed insertion, complete with integral flange: 3” ANSI B16.5 RF Class 150 F2 ID900 fixed insertion, complete with integral flange: 3” ANSI B16.5 RF Class 600 F6 ID900 fixed insertion, complete with integral flange: 3” ANSI B16.5 RF Class 900 Thermo Fisher Scientific User Guide for Sarasota ID900, FD900, & PD900 Gas Density Meters A-1 Ordering Information Sarasota ID900 Code Stem Length SF 300 mm: For flanged option L 1000 mm: Suitable for use with RTR900 or compression fitting Code Certification C CSA explosion proof Class 1, Div. 1, Groups B, C, & D I ATEX Ex II 1 G Ex ia IIC T6 Ga (-20°C Ta +60°C ) with frequency output option only ATEX Ex II 1 G Ex ia IIC T4 Ga (-20°C Ta +60°C) with headmounted electronics option only Code Options M Wetted parts traceability to EN 10204. Type 3.1. N NACE Conformance: All wetted parts suitable for sour gas service; NACE specification MR-01-75 S Special documentation package: Includes manufacturer’s Quality Plan, ISO 9001 certificate, quality assurance manual, welder qualification, welding procedure specification, hydrostatic test certificate T Traceable Calibration Certificate: Provides a record of all the instruments used during calibration and their certificates D Non-destructive testing: NDT of pressure containing welds by Dye Penetrant; (50% all external welds; 100% all internal and external welds) Table A–2. Sarasota ID900 spares P/N Spares SID**** Spare sensing spool (consult Thermo Fisher) HD-B0070 Spool lock ring Gas filter kit Gas filter kit HID-FA Gas frequency output A range amplifier (consult Thermo Fisher for other ranges) HID-HA Gas headmounted output A range amplifier (consult Thermo Fisher for other ranges) ZR20-0117/B Amplifier box seal ring ZR10-0120/B Amplifier box to stem O-ring, packet of 10 H90-0030/A Preset torque wrench PC251/252-T HME spare card set. Includes PC251 processor and PC252 safety and isolation PCBs Local display Local display kit for Sarasota HME900. Includes mounting components and display PCB LIQ FILTER KIT Liquid filter kit A-2 User Guide for Sarasota ID900, FD900, & PD900 Gas Density Meters Thermo Fisher Scientific Ordering Information Sarasota ID900 Table A–3. Sarasota ID900 installation accessories P/N Description ZB/MTL/D1 For use with smart headmounted electronics option with pressure transducer input (set of 3 barriers): 2x MTL728/28V-300 ohm for density meter power supply and pressure transducer loop power 1x MTL787S/28V-300 ohm + diode return to power HART signal loop 4–20 mA ZB/MTL/D2 For use with frequency output option with connection to Sarasota CM515 (set of 3 barriers): 1x MTL787S/28V-300 ohm + diode return to power density meter 2x MTL755 dual channel 3V-10 ohm AC barriers ZB/MTL/D3 For use with smart headmounted electronics option without pressure transducer input (set of 2 barriers): 1x MTL728/28V-300 ohm for density meter power supply 1x MTL787S/28V-300 ohm + diode return to power HART signal loop 4–20 mA ZB/MTL/D4 For use with frequency output option with connection to Sarasota CM515 with pressure transmitter input (set of 4 barriers): 2x MTL787S/28V-30 ohm + diode return for power to density meter and pressure transducer 2x MTL755/3V 10 ohm AC barriers for PT 100, extra barrier allows for pressure input ISO/P+F/GH Isolation barriers for use with smart headmounted electronics option without pressure transducer input (set of 2 barriers): 1x KFD2-STC3-Ex1 for HART signal loop 4–20 mA 1x KFD2-SD-Ex1.48 for density meter power; should be used when no earth ground is available or in some countries or locations when the device is used in Zone 0 hazardous area ISO/MTL Isolation barriers for use with smart headmounted electronics option without pressure transducer input (set of 2 barriers): 1x MTL5541 for HART signal loop 4–20 mA 1x MTL5525 for density meter power; should be used when no earth ground is available or in some countries or locations when the device is used in Zone 0 hazardous area Thermo Fisher Scientific User Guide for Sarasota ID900, FD900, & PD900 Gas Density Meters A-3 Ordering Information Sarasota FD900 Sarasota FD900 Table A–4. Sarasota FD900 Code Signal Output FD900F Bypass density meter with frequency output: No local display; requires density converter (consult Thermo Fisher). FD900H Bypass density meter with smart headmounted electronics: Provides HART compatible analog (4–20 mA) output. Accepts 4 –20 mA input from pressure transducer for pressure compensation. Code Density Range A 0–20 kg/m3, gas applications B 15–80 kg/m3, gas applications C 75–250 kg/m3, gas applications D 200–500 kg/m3, liquefied gas applications E 500–1000 kg/m3, liquefied gas applications and light liquid applications with viscosity < 1 cp Code Process Temperature Range A -200°C to +75°C (-328°F to +167°F) B -20°C to +75°C (-4°F to +167°F) C -20°C to +200°C (-4°F to +392°F) D -20°C to +150°C (-4°F to +302°F) Code Sensing Spool Material Z Ni-Span C: Use with non-corrosive gases and liquids; process temperatures < 75°C (167°F) Y FV-520 B: Magnetic stainless steel suitable for all applications Code Process Connections A 1” ANSI B16.5 RF Class 600 C 1.5” BSP screwed body with adaptors Code Certification C CSA explosion proof Class 1, Div. 1, Groups B, C, & D I ATEX Ex II 1 G Ex ia IIC T6 Ga (-20°C Ta +60°C ) with frequency output option only ATEX Ex II 1 G Ex ia IIC T4 Ga (-20°C Ta +60°C) with headmounted electronics option only Code Options M Wetted parts traceability to EN 10204. Type 3.1. N NACE Conformance: All wetted parts suitable for sour gas service; NACE specification MR-01-75 S Special documentation package: Includes manufacturer’s Quality Plan, ISO 9001 certificate, quality assurance manual, welder qualification, welding procedure specification, hydrostatic test certificate T Traceable Calibration Certificate: Provides a record of all the instruments used during calibration and their certificates A-4 User Guide for Sarasota ID900, FD900, & PD900 Gas Density Meters Thermo Fisher Scientific Ordering Information Sarasota FD900 Table A–5. Sarasota FD900 accessories and spares P/N Description SFD**** Spare sensing spool (consult Thermo Fisher) HD-B0070 Spool lock ring H90-0030/A Preset torque wrench ZR20-0117/B Box seal ring, packet of 2 ZR20-0220/B Viton O-ring for 1.5” BSP end caps, packet of 10 PC251/252-T HME spare card set. Includes PC251 processor and PC252 safety and isolation PCBs Local display Local display kit for Sarasota HME900. Includes mounting components and display PCB Table A–6. Sarasota FD900 installation accessories P/N Description ZB/MTL/D1 For use with smart headmounted electronics option with pressure transducer input (set of 3 barriers): 2x MTL728/28V-300 ohm for density meter power supply and pressure transducer loop power 1x MTL787S/28V-300 ohm + diode return to power HART signal loop 4–20 mA ZB/MTL/D2 (CM515) For use with frequency output option with connection to Sarasota CM515 (set of 3 barriers): 1x MTL787S/28V-300 ohm + diode return to power density meter 2x MTL755 dual channel 3V-10 ohm AC barriers ZB/MTL/D3 For use with smart headmounted electronics option without pressure transducer input (set of 2 barriers): 1x MTL728/28V-300 ohm for density meter power supply 1x MTL787S/28V-300 ohm + diode return to power HART signal loop 4–20 mA ZB/MTL/D4 For use with frequency output option with connection to Sarasota CM515 with pressure transmitter input (set of 4 barriers): 2x MTL787S/28V-30 ohm + diode return for power to density meter and pressure transducer 2x MTL755/3V 10 ohm AC barriers for PT 100, extra barrier allows for pressure input ISO/P+F/GH Isolation barriers for use with smart headmounted electronics option without pressure transducer input (set of 2 barriers): 1x KFD2-STC3-Ex1 for HART signal loop 4–20 mA 1x KFD2-SD-Ex1.48 for density meter power; should be used when no earth ground is available or in some countries or locations when the device is used in Zone 0 hazardous area ISO/MTL Isolation barriers for use with smart headmounted electronics option without pressure transducer input (set of 2 barriers): 1x MTL5541 for HART signal loop 4–20 mA 1x MTL5525 for density meter power; should be used when no earth ground is available or in some countries or locations when the device is used in Zone 0 hazardous area Thermo Fisher Scientific User Guide for Sarasota ID900, FD900, & PD900 Gas Density Meters A-5 Ordering Information Sarasota PD900 Sarasota PD900 Table A–7. Sarasota PD900 signal output Code Description PD900F Pocket density meter with frequency output: No local display; requires density converter (consult Thermo Fisher) PD900H Pocket density meter with smart headmounted electronics: Provides HART compatible analog (4–20 mA) output. Accepts 4 –20 mA input from pressure transducer for pressure compensation. Code Density Range A 0–20 kg/m3, gas applications B 15–80 kg/m3, gas applications C 75–250 kg/m3, gas applications Code Process Temperature Range A -200°C to +75°C (-328°F to +167°F) B -20°C to +75°C (-4°F to +167°F) C -20°C to +200°C (-4°F to +392°F) D -20°C to +150°C (-4°F to +302°F) Code Sensing Spool Material Z Ni-Span C: Use with non-corrosive gases and liquids; process temperatures < 75°C (167°F) Y FV-520 B: Magnetic stainless steel suitable for all applications Code Sample Filter Options E Standard inlet dry particulate filter Code Certification C CSA explosion proof Class 1, Div. 1, Groups B, C, & D I ATEX Ex II 1 G Ex ia IIC T6 Ga (-20°C Ta +60°C ) with frequency output option only ATEX Ex II 1 G Ex ia IIC T4 Ga (-20°C Ta +60°C) with headmounted electronics option only Code Options M Wetted parts traceability to EN 10204. Type 3.1. N NACE Conformance: All wetted parts suitable for sour gas service; NACE specification MR-01-75 S Special documentation package: Includes manufacturer’s Quality Plan, ISO 9001 certificate, quality assurance manual, welder qualification, welding procedure specification, hydrostatic test certificate T Traceable Calibration Certificate: Provides a record of all the instruments used during calibration and their certificates D Non-destructive testing: NDT of pressure containing welds by Dye Penetrant; (50% all external welds; 100% all internal and external welds) A-6 User Guide for Sarasota ID900, FD900, & PD900 Gas Density Meters Thermo Fisher Scientific Ordering Information Sarasota PD900 Table A–8. Sarasota PD900 spares P/N Description SFD**** Spare sensing spool (consult Thermo Fisher) HD-B0070 Spool lock ring H90-0030/A Preset torque wrench 16-319/B Heat transfer fluid, 50 ml bottle ZR20-0127/B End cap O-ring, packet of 5 ZR40-5870/B Body/pocket O-ring, packet of 5 ZW10-08-030/B Fixing screws, M8 x 30 stainless steel, packet of 6 ZR20-0117/B Box seal ring, packet of 2 ZF12-0051/B Filter element for coalescing filter, packet of 10 PC251/252-T HME spare card set. Includes PC251 processor and PC252 safety and isolation PCBs Local display Local display kit for Sarasota HME900. Includes mounting components and display PCB Table A–9. Sarasota PD900 installation accessories P/N Description PD70-2693B Standard pocket, carbon steel A350-LF2. Pressure rating up to 150 bar. PD70-4076 Standard pocket, 316L SS. Pressure rating up to 100 bar. ZB/MTL/D1 For use with smart headmounted electronics option with pressure transducer input (set of 3 barriers): 2x MTL728/28V-300 ohm for density meter power supply and pressure transducer loop power 1x MTL787S/28V-300 ohm + diode return to power HART signal loop 4–20 mA ZB/MTL/D2 For use with frequency output option with connection to Sarasota CM515 (set of 3 barriers): 1x MTL787S/28V-300 ohm + diode return to power density meter 2x MTL755 dual channel 3V-10 ohm AC barriers ZB/MTL/D3 For use with smart headmounted electronics option without pressure transducer input (set of 2 barriers): 1x MTL728/28V-300 ohm for density meter power supply 1x MTL787S/28V-300 ohm + diode return to power HART signal loop 4–20 mA ZB/MTL/D4 For use with frequency output option with connection to Sarasota CM515 with pressure transmitter input (set of 4 barriers): 2x MTL787S/28V-30 ohm + diode return for power to density meter and pressure transducer 2x MTL755/3V 10 ohm AC barriers for PT 100, extra barrier allows for pressure input ISO/P+F/GH Isolation barriers for use with smart headmounted electronics option without pressure transducer input (set of 2 barriers): 1x KFD2-STC3-Ex1 for HART signal loop 4–20 mA 1x KFD2-SD-Ex1.48 for density meter power; should be used when no earth ground is available or in some countries or locations when the device is used in Zone 0 hazardous area Thermo Fisher Scientific User Guide for Sarasota ID900, FD900, & PD900 Gas Density Meters A-7 Ordering Information Sarasota RTR900 P/N Description ISO/MTL Isolation barriers for use with smart headmounted electronics option without pressure transducer input (set of 2 barriers): 1x MTL5541 for HART signal loop 4–20 mA 1x MTL5525 for density meter power; should be used when no earth ground is available or in some countries or locations when the device is used in Zone 0 hazardous area Sarasota RTR900 Table A–10. Sarasota RTR900 Code Model RTR900 Instrument retractor, for use with 1000 mm stem density meter only; permanently mounted to the monitoring location Code Retractor Pressure Class B ANSI 150 (use ANSI sizing below) F ANSI 300 (use ANSI sizing below) A ANSI 600 (use ANSI sizing below) E ANSI 900 (use ANSI sizing below) H DIN PN 40 (use DN sizing below) J DIN PN 100 (use DN sizing below) Code Retractor Flange Size 3 3” ANSI or DN 80 (DIN 2402) (Form D) Code Retractor Flange Type RF Raised Face RJ Ring Joint Code Process Temperature Rating S -50°C to +200°C (-58°F to +392°F) T -200°C to +50°C (-328°F to +122°F) Code Vent (Bleed) Valves 1 Single vent valve: Pressure relief after retracted 2 Dual vent valves: Once retracted and isolated form the process, allows validation check of density meter without removal from the housing assembly Code Options M Wetted parts traceability to EN 10204. Type 3.1. N NACE Conformance: All wetted parts suitable for sour gas service; NACE specification MR-01-75 A-8 User Guide for Sarasota ID900, FD900, & PD900 Gas Density Meters Thermo Fisher Scientific Ordering Information Sarasota RTR900 Code Model S Special documentation package: Includes manufacturer’s Quality Plan, ISO 9001 certificate, quality assurance manual, welder qualification, welding procedure specification, hydrostatic test certificate D Non-destructive testing: NDT of pressure containing welds by Dye Penetrant; (50% all external welds; 100% all internal and external welds) Table A–11. Sarasota RTR900 spares P/N Description ZR20-0120/B Lead screw O-ring, packet of 10 RTR-1400/B Standard packing ZR50-0010/B “C” seal, packet of 2 ZC09-1600A/B Compression nut assembly 16/190 Grease, 14 oz 16/189 Machine oil, 500 ml ZV10-0020 Sampling valve with interlock ZW10-06-030/B Socket headed screws, packet of 10 RT80-3926P C wrench Thermo Fisher Scientific User Guide for Sarasota ID900, FD900, & PD900 Gas Density Meters A-9 This page intentionally left blank. Appendix B Specifications Results may vary under different operating conditions. Sarasota Gas Density Meters Thermo Fisher Scientific Table B–1. Functional specifications Transducer calibration accuracy 2 kg/m3 (0.125 lb/ft3) and above: ± 0.1% reading Below 2 kg/m3: ± 0.002 kg/m3 (± 0.000125 lb/ft3) Repeatability ± 0.01% span Flow range Sarasota ID900: Normal pipeline velocities. Accuracy unaffected by velocity. Sarasota FD900 & PD900: Ideally 4–20 liters/min (0.14–0.71 ft3/min) Operating density range Sarasota ID900 & FD900: 0 to 1000 kg/m3 (0 to 62.4 lb/ft3) Sarasota PD900: 0 to 250 kg/m3 (0 to 62.4 lb/ft3) Temperature effect (corrected) 0.001 kg/m3/°C (0.000035 lb/ft3/°F). NOTE: Correction coefficients applied. Installation Ideally within 15° of vertical. Consult Thermo Fisher for other orientations. Shipping dimensions Sarasota ID900, fixed flange: 610 x 360 x 360 mm (24 x 14 x 14 in) Sarasota ID900, 1 meter stem: 1320 x 230 x 230 mm (52 x 9 x 9 in) Sarasota FD900: 610 x 360 x 360 mm (24 x 14 x 14 in) Sarasota PD900: 740 x 320 x 390 mm (29 x 13 x 15 in) Net weight Sarasota ID900, fixed flange: typically 13 kg (29 lb) Sarasota ID900, 1 meter stem: typically 7 kg (16 lb) Sarasota FD900, flanged: typically 6 kg (14 lb) Sarasota PD900: typical 5 kg (11 lb) Shipping weight Sarasota ID900, fixed flange: typically 15 kg (33 lb) Sarasota ID900, 1 meter stem: typically 8 kg (18 lb) Sarasota FD900, flanged: typically 7 kg (15 lb) Sarasota PD900: typical 8.5 kg (19 lb) Environmental rating IP65 (NEMA 4X) User Guide for Sarasota ID900, FD900, & PD900 Gas Density Meters B-1 Specifications Sarasota Gas Density Meters Electrical connections Screw terminals. Cable entry: 2 x 3/4-inch NPT Temperature measurement High accuracy 1/3 DIN integral 4-wire PT100 Local display (H option) 4-1/2 digit 7.6 mm (0.3 in) 7-segment LCD display. Resolution 0.1% or 0.01% depending on display variable. Factory calibration range Depends on range selected. Operating temperature range -20°C to +60°C (-4°F to +140°F) ambient Process temperature range -200°C to +200°C (-328°F to +392°F) ambient Maximum operating pressure Sarasota ID900: 150 bar (2175 psi) or flange rating Sarasota FD900: 170 bar (2465 psi) or flange rating Sarasota PD900, standard SS pocket: 100 bar (1450 psi) Sarasota PD900, standard carbon steel pocket: 150 bar (2175 psi) Sarasota PD900, quick response SS pocket: 50 bar (725 psi) Sarasota PD900, quick response carbon steel pocket, 50 bar (725 psi) Output F option: Frequency related to density on 2-wire current modulated loop, 6–18 mA, 4-wire PT100 H option: Analog 4–20 mA related to density or density derived variable, HART protocol Power supply F option: 13–28 Vdc, 10 mA average (peak 18 mA) H option: 2 x 13–28 Vdc, 25 mA Table B–2. Material specifications Spool Ni-Span C or FV520B Other wetted parts Stainless steel (316L/1.4404) Non wetted parts Stainless steel (316L/1.4404) Electronics housing Copper free aluminum grey epoxy finish. Plate glass window for local display. Pocket (Sarasota PD900 only) Standard pocket: Carbon steel ASTM A350 LF2 or stainless steel 316L/1.4404 Quick response pocket: Carbon steel ASTM A350 LF2 or stainless steel 316L/1.4404 B-2 User Guide for Sarasota ID900, FD900, & PD900 Gas Density Meters Thermo Fisher Scientific Specifications Sarasota Gas Density Meters Table B–3. Compliance/certifications Thermo Fisher Scientific Quality assurance ISO 9001:2000 CE mark Compliant Electromagnetic Compatibility Compliant (EN 61326:1997) Pressure Equipment Directive (97/23/EC) SEP (sound engineering practice) Low Voltage Directive Compliant Safe Area Use As standard BS EN ISO 15156 / NACE MR0175 Conformance Optional ATEX conformance: Intrinsically Safe (94/9/EC) ATEX Ex II 1 G Ex ia IIC T6 Ga (-20°C Ta +60°C ) with frequency output option only ATEX Ex II 1 G Ex ia IIC T4 Ga (-20°C Ta +60°C) with headmounted electronics option only Canadian Standards Association CSA Explosion proof Class I, Groups B, C, D Maximum ambient 60°C Temp. code T4, T3, or T2 for use with maximum process fluid temperatures up to 120, 185, 200°C respectively. CSA/C-US 900F Series, Intrinsically Safe Class I, Groups A, B, C, D Entity Parameters: Ui = 30 V, Ii = 100 mA, Pi = .7 W at amplifier terminals 1 & 2; Ui = 10 V, Ii = 300 mA, Pi = .5 W per terminal at PRT terminals W, X, Y, Z Per drawing FD90/5876 Maximum ambient 60°C Temp. code T4, T3, or T2 for use with maximum process fluid temperatures up to 120, 185, 200°C respectively. 900H Series, Intrinsically Safe Class I, Groups A, B, C, D Entity Parameters: Ui = 28.5 V, Ii = 100 mA, Pi = .7 W at amplifier terminal pairs 1 & 2, 3 & 4, 5 & 6; Uo = Ui, Io = Ii, Po = Pi at terminals 7 to 8 (terminals 5 & 7 are linked internally) Per drawing FD90/5873 Maximum ambient 60°C Temp. code T4, T3, or T2 for use with maximum process fluid temperatures up to 120, 185, 200°C respectively. User Guide for Sarasota ID900, FD900, & PD900 Gas Density Meters B-3 Specifications Sarasota RTR900 Sarasota RTR900 Calibration certification Calibration traceable to national standards. Calibration certificates supplied as standard. Optional traceable calibration equipment listing available. Material traceability Wetted parts traceable to BS EN 10204.3.1.b. Certification available. Table B–4. Functional specifications Process temperature range -50°C to +200°C (-58°F to +392°F) or -200°C to +50°C (-328°F to +122°F) Operating pressure range 177 bar (2567 psi) or flange rating Length of stroke 660 mm (26 in) Leadscrew pitch 4.23 mm (6 threads per inch) Table B–5. Physical specifications Materials Seal housing: Stainless steel Leadscrew: Dry lubricant coated stainless steel Gland nut: Aluminum bronze Seal: Silver plated Inconel X750 Handwheel: Nylon coated aluminum alloy Dimensions See dimensional drawing, Figure 1–3. Shipping dimensions 1020 x 660 x 380 mm (40 x 26 x 15 in) Weight (based on 3-inch ASME B16.5 RF Class 300 flange) Net: Typically 40 kg (90 lb) Shipping: Typically 45 kg (100 lb) Installation requirements Must be mounted on a full bore isolation valve or ball valve. The isolation valve must be mounted squarely on the nozzle attached to the system pipeline or tank and must be clear of obstructions. The instrument should be installed directly on a mating flange allowing minimum headroom of 1400 mm (55 in) for complete retraction. Environmental rating IP65 (NEMA 4X) B-4 User Guide for Sarasota ID900, FD900, & PD900 Gas Density Meters Thermo Fisher Scientific Specifications Sarasota RTR900 Table B–6. Compliance/certification Thermo Fisher Scientific Quality assurance ISO 9001:2000 CE mark Compliant Pressure Equipment Directive (97/23/EC) SEP (sound engineering practice) BS EN ISO 15156 / NACE MR0175 Conformance Optional Material traceability Wetted parts traceable to BS EN 10204.3.1.b. Certification available. User Guide for Sarasota ID900, FD900, & PD900 Gas Density Meters B-5 This page intentionally left blank. Appendix C Drawings Note Information presented in this chapter has been regenerated from original drawings. Every effort is made to maintain document accuracy. However, in order to enhance legibility, the documents may have been restructured, and some information may have been intentionally excluded. Therefore, the drawings within this guide may not be exact duplicates of the original drawings. ▲ Note Drawings in this manual are included for reference only and may not be the current version. Contact the factory if you need a copy of the latest revision. ▲ Table C–1. Thermo Fisher Scientific Drawing # Rev. Description Page AD_6502 C Wiring diagrams, barrier & non-hazardous/safe area options for Sarasota density meters (9 sheets) C–2 User Guide for Sarasota ID900, FD900, & PD900 Gas Density Meters C-1 Drawings Figure C–1. AD_6502: Wiring diagrams, barrier & non-hazardous/safe area options for Sarasota density meters (sheet 1 of 9) C-2 User Guide for Sarasota ID900, FD900, & PD900 Gas Density Meters Thermo Fisher Scientific Drawings Figure C–2. AD_6502: Wiring diagrams, barrier & non-hazardous/safe area options for Sarasota density meters (sheet 2 of 9) Thermo Fisher Scientific User Guide for Sarasota ID900, FD900, & PD900 Gas Density Meters C-3 Drawings Figure C–3. AD_6502: Wiring diagrams, barrier & non-hazardous/safe area options for Sarasota density meters (sheet 3 of 9) C-4 User Guide for Sarasota ID900, FD900, & PD900 Gas Density Meters Thermo Fisher Scientific Drawings Figure C–4. AD_6502: Wiring diagrams, barrier & non-hazardous/safe area options for Sarasota density meters (sheet 4 of 9) Thermo Fisher Scientific User Guide for Sarasota ID900, FD900, & PD900 Gas Density Meters C-5 Drawings Figure C–5. AD_6502: Wiring diagrams, barrier & non-hazardous/safe area options for Sarasota density meters (sheet 5 of 9) C-6 User Guide for Sarasota ID900, FD900, & PD900 Gas Density Meters Thermo Fisher Scientific Drawings Figure C–6. AD_6502: Wiring diagrams, barrier & non-hazardous/safe area options for Sarasota density meters (sheet 6 of 9) Thermo Fisher Scientific User Guide for Sarasota ID900, FD900, & PD900 Gas Density Meters C-7 Drawings Figure C–7. AD_6502: Wiring diagrams, barrier & non-hazardous/safe area options for Sarasota density meters (sheet 7 of 9) C-8 User Guide for Sarasota ID900, FD900, & PD900 Gas Density Meters Thermo Fisher Scientific Drawings Figure C–8. AD_6502: Wiring diagrams, barrier & non-hazardous/safe area options for Sarasota density meters (sheet 8 of 9) Thermo Fisher Scientific User Guide for Sarasota ID900, FD900, & PD900 Gas Density Meters C-9 Drawings Figure C–9. AD_6502: Wiring diagrams, barrier & non-hazardous/safe area options for Sarasota density meters (sheet 9 of 9) C-10 User Guide for Sarasota ID900, FD900, & PD900 Gas Density Meters Thermo Fisher Scientific Appendix D Health & Safety Clearance Form The Health & Safety (COSHH) Clearance form can be found on the following page. Failure to return this form may result in the meter being returned. Thermo Fisher Scientific User Guide for Sarasota ID900, FD900, & PD900 Gas Density Meters D-1 This page intentionally left blank. 1410 Gillingham Lane Sugar Land, TX 77478 USA Tel: 713.272.0404 Fax: 713.272.2272 HEALTH AND SAFETY (COSHH) CLEARANCE FORM Failure to comply with this procedure will result in equipment service delays. This form must be completed for all equipment returned to Thermo Fisher Scientific (Thermo Fisher) – Sugar Land Depot Repair. Depot repair personnel are unable to handle any equipment that has been in contact with a process fluid or hazardous material if it is not accompanied by this correctly completed Health and Safety Clearance Form. All sections of this form must be completed, and the form must arrive at Thermo Fisher prior to the arrival of the equipment. A copy of this form must also accompany the equipment. Prior to returning any equipment for service, authorization must be obtained from customer service. A Return Material Authorization (RMA) number will be issued and must be entered in Section 1 of this form. Section 1: Reference Details Section 4: Declaration RMA #: Must be authorized ONLY if non-toxic or nonhazardous substances apply. Equipment type: Serial #: I hereby confirm that the equipment specified above has not come into contact with any toxic or hazardous substances. Section 2: Process Fluid Information Signed: All substances in contact with the equipment must be declared. Name: Position: For/on behalf of: Chemical names (list all): Date: Precautions to be taken when handling these substances (list all): Must be authorized if toxic or hazardous substances apply. Action to be taken in the event of human contact or spillage: I hereby confirm that the only toxic or hazardous substances that the equipment specified has been in contact with are named in Section 2, that the information given is correct, and that the following actions have been taken: Additional information you consider relevant: 1. The equipment has been drained and flushed. 2. The inlet/outlet ports have been sealed, and the equipment has been securely packed and labeled. 3. The carrier has been informed of the hazardous nature of the consignment and has received a copy of this completed form. Section 3: Shipping Information Carrier details: Tel: / Fax: Signed: Scheduled delivery date to Thermo Fisher: Name: Position: For/on behalf of: Date: A copy of this completed form MUST BE HANDED TO THE CARRIER to accompany the equipment. Form No.: QF_COSHH ECO: 5424 REV: B Date 12-08-06 This page intentionally left blank. Appendix E Toxic & Hazardous Substances Tables The English and Chinese versions of the Toxic and Hazardous Substances tables for the Sarasota gas density meters are provided on the following pages. Thermo Fisher Scientific User Guide for Sarasota ID900, FD900, & PD900 Gas Density Meters E-1 Toxic & Hazardous Substances Tables E-2 User Guide for Sarasota ID900, FD900, & PD900 Gas Density Meters Thermo Fisher Scientific Toxic & Hazardous Substances Tables Thermo Fisher Scientific User Guide for Sarasota ID900, FD900, & PD900 Gas Density Meters E-3 Toxic & Hazardous Substances Tables E-4 User Guide for Sarasota ID900, FD900, & PD900 Gas Density Meters Thermo Fisher Scientific Thermo Fisher Scientific 81 Wyman Street P.O. Box 9046 Waltham, Massachusetts 02454-9046 United States www.thermofisher.com


