1
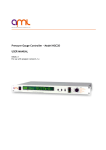
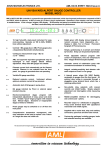
DUAL PRESSURE GAUGE CONTROLLER MODEL NGC2-D
USER MANUAL ISSUE 1.3
For use with program version 4.4
COPYRIGHT RESERVED 2011
CONTENTS
1
Warnings & safety
2
2
Installation
2
2
4
2.1
2.2
Instrument
Ion Gauge
3
Front Panel
5
4
Preparation for Use (Setup)
6
6
6
6
7
7
8
9
9
9
4.1
4.2
5
5.1
5.2
6
Switching On
Setup
Passwords / Units
Interlock / Autostart
Gauges
Relays
Bake
TSP
Degas
Preparing for Operation
Function switch in Operation
Relay Trip Levels
Display Menu
Pirani
Leak Detector
Ion Gauge Sensitivity
Temperature
Capacitance Manometer
7
7.1
7.2
7.3
8
Ion Gauge Operation
Display Menu in Emission
Starting the Ion Gauges
Emission Change
Changing Emission Current
Prompted Emission Change
Degassing
Manual
Programmed
Quick
9
Baking
10
10
10
11
11
11
11
11
11
12
12
12
12
13
13
13
14
14
14
15
10 Faults
16
11 Remote Operation
17
12 Capacitance Manometer
17
13 Recorder Output
17
14 External Inhibit
18
15 Forgotten Password
18
16 Assistance
18
APPENDIX A
Gauge Principals
19
APPENDIX B
Interface Manual
20
Declaration of Conformity
23
1
WARNINGS and SAFETY
WARNING – Safe operation of ion gauges requires grounding of all exposed
conductors of the vacuum system, gauges and controller. LETHAL VOLTAGES may be
established under some operating conditions unless correct grounding is provided. All
exposed and isolated metal parts should therefore be reliably grounded to a common system
earth point via 4mm2 or thicker copper wire/braid, the integrity of which should be checked
regularly.
High voltages are present within the instrument when operating and for some seconds after switching off.
Remove the mains lead before removing the cover for any reason.
Instruments are shipped with password protection disabled. If you set a password you must record what it is.
Password usage restricts access to most functions of the instrument, other than pressure measurement.
The conditions set at manufacture assume that you do not require any interlocks and that the ion gauge has a
Tungsten filament. You may fuse coated Ion Gauge filaments if you do not set up the instrument appropriately.
Allow several minutes for Pirani gauges to reach operating temperature after switching on before using them
for interlock, autostart or process control.
Two fans are used sequentially for cooling. Orange Status LEDs on the front panel indicate which fan is being
used. If a fan fails a message is displayed at the time of failure and the LED for that fan flashes thereafter.
Operation with only one fan is permissible but replace a failed fan as soon as possible. If the remaining fan fails,
operation of the ion gauge will be disabled. Replacement fans must conform to the specification printed on the
rear panel and are available from AML.
Discharges from X-ray power supplies and other high-voltage and high-energy sources (which are commonly
used in vacuum systems) into the Ion Gauge may damage the instrument. Such damage is not covered by the
warranty. Discharge damage will be minimised by decreasing the impedance of the strap/cable from the earth
stud on the instrument to the vacuum system earth distribution point. This connection may also be essential for
operator safety: follow the safety instructions and recommendations of the supplier of any high-voltage
equipment used in the vacuum system.
2
INSTALLATION
Checks on receipt of the instrument
On receipt of the instrument remove all packing material and check that all items on the shipping list have been
received. Report any damage or shortages to the Company or the Distributor who supplied the instrument. The
packing material has been specially designed to protect the instrument and should be retained for possible
future use.
2.1 Instrument installation.
Mounting
The instrument is suitable for mounting in a standard 19" rack and occupies 1U (1.75”, 44.5mm) of the rack.
The mounting holes in the front panel are intended for retaining the instrument in the rack and will not support its
weight. Additional support is required toward the rear and various arrangements are provided by rack
manufacturers for this purpose.
© Arun Microelectronics Ltd 2011
2
Ventilation
The instrument is forced-air ventilated through grilles on the sides and a vent in the rear panel. Mount it in a
location where there is an adequate supply of air as close as possible to cool room-ambient temperature. The
instrument is tolerant of, and is compensated for, operation at elevated ambient temperatures up to 45° Celsius.
Long-term accuracy and reliability will be enhanced by operation at the lowest possible temperature. If there
are other instruments in the rack which generate significant amounts of waste heat, try to ensure that this is
deflected away from this instrument.
Line Power Connection
The NGC2D operates from a 100V to 240V nominal AC power source having a line frequency of 48 to 65 Hz.
Use a three-wire power cord to connect to a properly grounded wall outlet.
Line Fuse
There is a line fuse located on the inside of the instrument on the rear of the power inlet connector. A spare fuse
is located in a replacement fuse holder on the circuit board. Replacement fuses must be T2.0A. High voltages
are present within the instrument when operating and for some seconds after switching off. Remove the mains
lead before removing the cover for any reason.
Grounding
The instrument earth stud must be connected directly to the vacuum system earth
distribution point with a low-impedance strap/cable (>=4mm2 or 12awg): there must be
no ferrite components installed on it.
Ion Gauge 1 & 2
Use AML-approved gauges with properly-screened leads. The ground braid of the ion gauge cable must be
connected to the instrument ground stud.
Ion gauge leads should not be installed close to cables carrying high
alternating currents or through areas where there are significant alternating
magnetic fields. They should be constrained, since movement or vibration
will generate charges or currents and these may disturb UHV pressure
readings.
Third-party ion gauge cables may not allow compliance with EU EMC
Directives and may lead to unstable emission. As a minimum there must
be an overall screen on the lead and an inner screen on the collector
connected to the BNC shell. These screens must not connect either to the
vacuum chamber or to each other. Interlock pins 1 & 3 must be connected
together.
Ion Gauge Connector Pin Allocations
Pin
Function
1
Interlock
2
Grid
3
Interlock
4
Filament Common
5
Filament 1
6
Filament 2
Pirani 1 & 2
AML Pirani gauges PVU or PVB are suitable for use with this instrument. Pirani 1 pressure is used for Ion
Gauge 1 Interlock and Autostart functions and should be installed in the same chamber as the Ion Gauge.
Pirani 2 is normally used for backing-line pressure measurement.
© Arun Microelectronics Ltd 2011
3
Relays
Four single pole, change-over relays are provided for process control and can be independently assigned to any
gauge. Contacts are rated at 5A, 240V maximum. The contacts of the relays are shown diagrammatically on the
rear panel legend, in the de-energised condition, adjacent to the terminal blocks to which they are connected.
Inductive loads, including contactor coils, should have "snubber" networks connected in parallel to avoid arc
generation which could interfere with the operation of this and other equipment. The external wiring is
connected to the instrument through a two-part pluggable terminal block. This can be removed and wired
independently of the instrument. Ensure that external wiring is of adequate cross section for the load current.
Strip and twist the wires (do not tin them) and poke into the receptacle in the terminal block. Close the leaf on
the wire by tightening the screw immediately above. Take appropriate action to strain-relieve the wiring
nearby and to restrict access to the terminals if harmful voltages are to be present. Fit the terminal block
cover supplied.
If the Bake function is to be used then relay D must be assigned to Bake. It is used to switch on the Bake
heaters when energised. Do not connect heaters directly to relay D: use a contactor and fit a snubber directly
across its coil. The pressure measurement during the bake cycle is read from Ion Gauge 1 only.
If the TSP function is to be used then relay C must be assigned to TSP. Relay C is energised for 0.5 seconds
to fire the TSP. Consult the TSP manual for further information. The pressure measurement for TSP control is
read from Ion Gauge 1 only.
Bake Thermocouple
The K thermocouple tip must be isolated from the vacuum chamber and situated where it accurately represents
the bake temperature. Mineral-insulated thermocouples with a miniature flat-pin thermocouple connector should
be used.
Auxiliary Connector
The Auxiliary (AUX) connector terminal block is plug-in with pin assignments indicated on the rear panel legend.
The Capacitance Manometer output is connected to CM and 0V (Refer to section 12). The recorder is
connected between REC and 0V (Refer to section 13). Connecting ILOCK to 0V will prevent ion gauge emission
(Refer to section 14).
Serial Connector
The serial interface is RS232-compatible and only one instrument may be
connected to a computer serial port.
Serial Connector Pin Allocations
Pin
Function
2
Tx
3
Rx
5
GND
2.2 Ion gaugehead installation
Consult the information supplied with the gaugehead for advice on flanges, gaskets and adaptors for
mechanical fixing.
Mount the gaugehead in a position where the free electrons generated in its vicinity will not affect other
equipment. The performance of the ion gauge may be affected by other electron or ion generating processes
within the vacuum chamber: should shielding of the gaugehead be necessary, ensure that the conductance
between the gaugehead and volume of interest is not significantly decreased by its presence. The orientation of
the gaugehead should be such that the filament is to the side of, or below, the grid structure. This will ensure
that if the filament should sag or break it will not short-circuit to the grid.
The gauge and controller are protected from all normal failure modes of either. Users should be aware of
potential hazards from other equipment, however, particularly those introducing high voltages into the vacuum
chamber
© Arun Microelectronics Ltd 2011
4
3 FRONT PANEL
The rotary Function Switch has two sets of positions: for setup
and operating. The SETUP locations are labelled in orange
print. The switch must be stationary for a brief time before any
action results.
A set of status LEDs are situated in the Status Window. The LEDs on the
right side of the window show further information about operations
involving the Ion Gauges, such as the Degas program in use. The LEDs
on the left side indicate the status of the instrument, the fans and the
number of the filament and gauge in use.
Flashing of the display or of individual LEDs either require a response by
the user or indicate potentially hazardous operations.
INC, DEC and ENT are pushbutton switches
with tactile feedback. They select the format
of pressure display, modify setups and
change parameters before and during Ion
Gauge operation. Only press one switch at a
time.
The messages and displays shown in the large Display Window are
largely self-explanatory and may be accompanied by sounds. The legends
above and below the display window indicate the units and the exponent
scale for interpreting the bargraph displays of Ion Gauge pressure.
The units of the pressure display are indicated by one of three
LEDs in the display area. The centre orange LED indicates that
mBar has been selected, the green LED above it indicates Pascal
and the green LED below indicates Torr.
LEDs indicate the status of
the four relays available for
pressure-related
control,
Bake and TSP control. Each
LED illuminates when the
associated
relay
is
energised.
© Arun Microelectronics Ltd 2011
5
4
PREPARATION FOR USE (SETUP)
New users should explore and familiarise themselves with the use of the controls and displays before
connecting any gauges or wiring to the rear panel.
4.1 Switching on
Turn the Function Switch to the OFF position. Connect and switch on the mains supply and wait for the selfdiagnosis and ‘signing on’ messages to run (approx. 20 seconds). A sequence of displays allows verification
that all the display LEDs are working. Both fans are checked for correct operation. The ambient temperature
of the incoming air near the electrometer is displayed. The last display in the sequence will show Pirani 1
pressure. Pirani gauges take some time to stabilise before they indicate correct pressure. If Pirani 1 is not
connected the display will show ‘Pir 1 Atm.’. If the Function Switch is at a position calling for emission at
switch-on emission is inhibited and 'Switch Em Off' is displayed.
4.2 Setup, General description
Setups are distributed among seven switch locations in order to reduce the time taken to modify parameters.
There is no restriction on when, how many times, or in what order you can enter a particular setup.
You may move the Function switch part-way though a sequence if you do not wish to modify subsequent
settings within a setup. E.g. in SETUP GAUGES you may change the filament in use without progressing
through filament material, overpressure, etc..
If the instrument is waiting for a response from you then part of the display will flash, indicating that a choice or
a numeric entry is required. INC and DEC modify the choice or number and ENT confirms it. If you do not
modify the displayed setting for a few seconds the instrument will make a periodic beep. If you do not respond
for a further few seconds then the current display will be replaced by ‘Setup Aborted’ and the setting or choice at
the aborted stage will revert to its former setting.
If you move the Function Switch after modifying a choice or value but have not confirmed it with ENT then the
existing choice or value is unchanged.
If you do not require the Bake or TSP functions they can be disabled by not assigning relays to them.
Setups and access to operating parameters and functions can be password-protected to prevent unauthorised
use
Password / Units
Set Password?
Press INC or DEC to select if a password is to be used.
Press ENT to confirm.
Change the password number with INC or DEC and
confirm with ENT.
Select the units of pressure display.
The current selection will flash in the main display. Press
INC or DEC to change to the desired units and confirm
by pressing ENT.
© Arun Microelectronics Ltd 2011
6
Interlock / Autostart
Define Interlock, Yes or No.
Interlock prevents the ion gauge operating when Pirani 1
pressure is above a set pressure.
Change the set pressure with INC or DEC and confirm
with ENT.
Define Autostart, Yes or No.
Autostart starts the ion gauge the first time Pirani 1
pressure falls below the set pressure.
The set pressure is the same for both functions. If they
are used together Interlock is suspended until the Ion
____________________________________
Gauge
has started.
Gauges
Select the filament in use for each Ion Gauge.
Change of the filament in use is allowed without entering
the password if set.
Define the filament material type for each gauge. This
automatically sets the current limits for the filaments.
Use the Yttria setting for thoria-coated filaments.
Set the ion gauge overpressure trips (OVP) to suit the
filament material and your customary practice. The OVP
will automatically restrict the maximum trip pressure of
any relay assigned to that gauge to half the OVP.
A maximum OVP of 1e-3 mB/Torr is recommended for an
AIG17G with Tungsten filaments or 1e-2 mB/Torr with
coated filaments.
Define whether you require the instrument to recommend
when emission current should be changed. (Em Promp?)
Refer to section 7.2 for Ion Gauge emission details.
© Arun Microelectronics Ltd 2011
7
Gauges (Cont.)
Define whether you have a Capacitance Manometer
(CM) connected.
Change the full-scale pressure with INC or DEC and
confirm with ENT.
The full-scale pressure and units of the CM are as
defined by the manufacturer for +10v output.
The units of display are chosen independently under
PASSWORD/UNITS.
Relay Assignment
You can assign any relay to any gauge or to ‘None’.
Relays assigned to ‘None’ are permanently deenergised.
____________________________________
Trip levels are set to maximum on assignment.
Trip levels for relays are set using the TRIPS pushbutton and can be modified when the Function Switch is
at position IG1, OFF or IG2. Refer to section 5.2 for
instructions on trip settings.
Relay ‘C’ can also be assigned to trigger the TSP and
Relay ‘D’ to Bake.
Relay C additional assignment
Relay D additional assignment
© Arun Microelectronics Ltd 2011
8
Bake
Set the bake temperature setpoint, total bake time and
overpressure (OVP) setpoint as required.
During Bake relay D is energised when both the
temperature and pressure are below their setpoints.
The hysteresis on temperature is 5C° and on pressure
is 50%. Refer to section 9 for more information.
TSP (Ti. Sublimation Pump)
Define whether you require multiple display and
audible warnings of an impending TSP firing. The first
warning occurs 8 minutes before firing.
Define whether you require the opportunity to inhibit
TSP firing during the countdown.
Timing of TSP firings is according to a fixed table of
current pressure against the elapsed time since the last
firing. Relay C is energised for 0.5 seconds to fire the
TSP.
The first firing will occur 10 minutes after the pressure
indication falls below 1e-6mBar or 10 minutes after
starting emission if the pressure is already below 1e6mBar, and thereafter according to the table.
____________________________________
Pressure
mBar/Torr
1x10
-6 to -7
1x10
-7 to -8
1x10
-8 to -9
<1x10⁻⁹
Interval
10min
30min
90min
10hours
Degas
The settings for degas parameters should not be
changed until manual degas has been run (see section
8) and settings appropriate for your chamber and
usage have been derived.
Quick Degas.
Set the maximum power used in quick degas.
Programed Degas.
Set the maximum power used in programmed degas,
the rate of power increase and the dwell time once
maximum power is reached.
© Arun Microelectronics Ltd 2011
9
5
PREPARING FOR OPERATION
5.1 Use of the Function Switch in the operating positions.
The Function Switch must be stationary for a brief time before any action results. This allows you to rotate the
switch through various operating positions without starting the ion gauge or other functions. The ion gauge will
be started about one second after rotating it to the IG position. As additional security, Bake or Degas will not
start unless you enter the password (if set) and then select and/or confirm your requirement.
5.2 Relay trip levels and Pirani ON/OFF switching.
Relay trip levels can be reviewed and modified in the IG1, OFF and IG2 positions of the Function Switch by
pressing ENT when a pressure reading is being displayed. If a password has been set you must enter it to be
able to modify settings. If the password is set and you do not enter it you may view the settings but cannot
change them.
If you make no response at some stage of the sequence the display ‘times-out’ to the pressure display that was
current before the start of the sequence and the setting at the interrupted stage is unchanged.
The relay trip levels or their assignments to Bake/TSP
are displayed in sequence, starting with Relay A and
progressing to Relay D. The next in the sequence is
shown each time that you press ENT. The status LED
for the relay and the numeric setting of the trip level flash
if trip modification is allowed. Modify the displayed
setting by pressing INC or DEC, then press ENT to
confirm it and display the next.
Relays assigned to a gauge are energised when the
pressure falls below the trip level and de-energised at
twice the trip level.
If a trip level is set at the upper limit of its range the relay
is permanently de-energised. If a trip level is set at the
lower limit of its range the relay is permanently
energised. Setting trip levels at these limits does not
cancel the assignment of the relay. Relays assigned to
’None’ are de-energised.
The maximum setting for any relay assigned to the Ion
Gauge is half the overpressure trip setting. Changing
the overpressure trip may cause the status of relays
assigned to the Ion Gauge to change if the current
pressure is between the former and new overpressure,
after emission is re-started.
Numeric values of trip levels will change automatically if
the units of measurement are changed, in order to
maintain the trip levels at the same pressures.
If the Function Switch is in the OFF position then review
of Relay D trip level is followed by the ON/OFF status of
the Pirani Gauges. Pirani Gauges can be switched on or
off with INC or DEC followed by ENT. Switching Pirani
Gauges off suspends the operation of the Pirani
Autostart and Interlock functions.
It is not possible to switch the Piranis on or off while the
Ion Gauge is in emission.
© Arun Microelectronics Ltd 2011
10
6
DISPLAY
6.1 Display sequence when the function switch is in the OFF position.
The following displays can be selected sequentially by pressing INC or DEC.
Pirani
Pirani 1 pressure with falling pressure trend indicator.
The Pirani gauge low-resolution bar graphs are also
permanently displayed whenever the Pirani gauges are
operating.
Atm is displayed if the Pirani pressure is above its upper
limit or disconnected.
Leak Detector
The leak detector operates on the Ion Gauge pressure if
the Ion gauge is in emission; otherwise it operates on
Pirani 1 pressure.
The display is a histogram of the rate of pressure change
with baseline restoration and is accompanied by a tone
whose frequency is modulated by the offset of the
histogram. Use a probe gas, e.g. helium, or volatile
blocking agent, e.g. acetone, at the suspected leak site.
If a pressure change is produced there may be a leak.
Allow the baseline restoration to restore the histogram
and tone close to the centre before continuing probing.
Pressing ENT will change the sensitivity of the leak
detector. The height of the pair of dots to the right of
'Leak' in the display indicates the sensitivity.
Three
levels of sensitivity are provided for the Ion Gauge and
two for Pirani 1.
IG Sensitivity
Ion Gauge sensitivity can be modified by pressing ENT,
then INC or DEC to change the number and then ENT
again to confirm the new setting. The units of sensitivity
are the reciprocal of the units of pressure display you
have setup and are dependent on the gauge in use and
the gas species. For nitrogen and carbon monoxide the
sensitivity for AML AIG17G gauges is 19mB-1 (=26Torr-1
or 0.19Pa-1). If the units of measurement are changed
the numeric value of sensitivity is changed to make the
pressure readings consistent.
Temperature
The ambient temperature inside the instrument near the
electrometer is monitored and may be displayed.
Capacitance Manometer
Capacitance Manometer pressure with rising pressure
trend indicator. Capacitance Manometer pressure is only
available in numeric format and only if the gauge has
been setup
© Arun Microelectronics Ltd 2011
11
7
ION GAUGES OPERATION
7.1 Display sequence when Ion Gauges are in emission
In emission the LEDs in the Status Window show the ion gauge in use, the emission current and the number
of the filament in use.
Starting the Ion Gauge.
Turning the function switch to IG1 or IG2 always starts
emission at 0.5mA. Until the filament reaches emission
temperature the display shows the emission current.
If there is an Interlock or an Autostart pending or any fault
that prevents emission from starting an appropriate
warning will be displayed. Clear the condition, or refer to
section 10 for advice.
The initial display of pressure is in numeric format. Ion
gauge pressure can also be displayed in single-decade,
auto-ranging bar-graph or full-range bar-graph formats.
These cam be invoked by pressing the INC pushbutton.
Subsequent depression of the INC pushbutton will cycle
through the Pirani & Capacitance Manometer pressure
displays, the leak detector and IG Sensitivity.
Manual Emission Change
The Emission current can be changed manually when an
ion gauge is in operation. See section 7.2
WARNING. Changing emission current to 5.0mA at
inappropriate vacuum levels could damage the Ion
Gauge filaments.
To change emission current manually, press ENT.
An analogous display is shown to decrease current.
© Arun Microelectronics Ltd 2011
12
7.2 Changing Ion Gauge Emission
For most practical purposes the default emission current of 0.5mA is satisfactory and desirable. This is
because the performance of the electrometer is much better than older instruments and there are
disadvantages to changing the emission current. Increasing emission will give a pressure burst and the
recorder output will also be shifted by +1volt, either of which may be problematic. Because the filament is
permanently hotter at 5mA emission the indicated pressure will normally be slightly above that at 0.5mA, after
the burst subsides.
At extreme UHV a higher emission current maybe desired. If “Em Prompt?” is set to Yes in SETUP-GAUGES
then the instrument will advise when this is appropriate. If “EM Promp?” is set to No then the operator is
responsible for selecting emission current levels.
It is not necessary to increase emission current, Ie, until the collector current, Ic, is less than 10pA. (The
pressure, P, corresponding to these currents is dependent on the sensitivity, s, according to P=Ic/(s*Ie).)
If the pressure burst produced after an increase in emission lasts for more than a few minutes then degassing
of the Ion Gauge may be required. Increased outgassing from the surfaces near the ion gauge should be much
less than from the filament, but may last longer. The suggestion to decrease emission current is set to occur at
a much higher collector current, so that any normal pressure burst after an increase in emission is unlikely to
produce it.
7.3 Prompted Emission Change
If “Em Prompt?” is enabled in SETUP-GAUGES the instrument will suggests when a change in emission
current is appropriate.
This display is shown periodically when the collector
current is below 10pA. Pressing ENT while it is present
cancels the accompanying sound for all repeats of the
display, but does not change emission. In order to
change emission press INC to change 'No' to 'Yes' and
then press ENT. The filament takes a second to stabilise
at the new emission temperature.
Analogous displays suggest when emission should be
decreased.
8
DEGASSING THE ION GAUGE
Read this entire section before attempting degas. Degas is required in UHV systems periodically. It is not
desirable to degas at high vacuum and above as this could damage the gauge or affect other operations in the
vacuum chamber.
Degas increases the emission current and grid voltage so that the grid is heated to drive off adsorbed gas.
The degas power should be increased slowly to allow the gas evolved to be pumped away. If power is
increased too rapidly plasma will be produced, which will short the grid to the filament or ground.
The
instrument will detect this and degas will be aborted to protect the gauge and instrument.
The instrument only allows degas to start:• When a valid password has been entered. (If password use is enabled.)
• If the gauge has run in emission for at least 5 minutes in the preceding 30 minutes
• If degas has not been run at greater than 7.5 watts in the preceding 5 minutes
If any condition prevents degas starting then 'Degas Denied' will be displayed. Move the Function Switch to
OFF.
© Arun Microelectronics Ltd 2011
13
In all degas modes emission is run at 0.5mA and then 5mA for a few seconds before degas power is applied.
This sequence is automatic. For each increase in emission the emission current is displayed as the filament
heats up. Ion gauge pressures are displayed and the fixed degas overpressure trip (1e–5mBar) is active for a
few seconds at 5mA. Degas is aborted if the pressure exceeds that level.
In all modes degas power is changed in 2.5 watt steps. In manual mode, DgM is displayed and the Manual
LED in the Status Window flashes. In the other modes DgP or DgQ is displayed and the appropriate status LED
flashes.
Move the Function Switch to the DEGAS position to
select the required mode. Select Manual, Programmed or
Quick with INC or DEC and confirm by pressing ENT.
Moving the Function Switch away from the degas position
terminates degas immediately.
In programmed or quick modes the grid power is
increased automatically. Use Manual Degas to derive
safe rates of power increase and maximum power to set
up the other modes in SETUP-DEGAS
Once UHV has been established most systems will only
require an occasional Quick Degas.
Manual Degas
In manual mode the degas grid power is increased by
2.5watts every time INC is pressed. If INC is pressed
several times the instrument stores up to five steps and
increases power at five-second intervals. This is not
recommended. If a request to increase cannot be
implemented or stored a sound is made. The maximum
degas power is 30watts and the maximum degas time is
10 minutes.
The degas power is shown at the centre of the display.
The time on the right of the display is in minutes and
seconds. In manual mode this is the time elapsed since
the start of degas: in other modes it is the time remaining
until completion of degas.
Pressing DEC in manual mode decreases the grid power
by 2.5watts immediately.
After 10 minutes of manual degas or after completion of
another mode of degas 'Degas Finished' is displayed.
Turn the Function Switch to OFF.
Programmed Degas
Programmed Degas follows the profile set in SETUPDEGAS and is intended for gentler degassing over longer
periods during pump-down of a vacuum system.
Quick Degas
Quick Degas increases the power rapidly to the level set
in SETUP-DEGAS and holds it for one minute.
If a fault occurs during degas 'Degas Aborted' is
displayed.
© Arun Microelectronics Ltd 2011
14
9
BAKE
Baking is necessary for ultra-high vacuum systems to reach their ultimate pressure. Typically the complete
vacuum system will be heated to 200°C and maintained at that temperature for at least 24 hours. In addition to
a temperature setpoint there is a pressure setpoint so that if excessive gas is evolved the heaters are switched
off to avoid overloading the pumps. As there are risks involved, systems should only be baked after they have
been pumped close to the best vacuum they can achieve without baking. Bake should be competently
supervised. Setting the password will enable only operators who know the password to initiate or terminate
Bake. The pressure should be significantly lower than the bake pressure setpoint before starting a bake, as
there will be a significant pressure rise as the system heats.
Start Bake by turning the Function Switch to BAKE and
press ENT.
Relay D must be assigned to the bake function: it is used
to switch on the heaters via a contactor. If relay D is not
so assigned the display will prompt you to re-assign relay
D. If the password is enabled you are required to enter it.
If the entered password fails three times 'Bake Denied' is
displayed. If Bake has been aborted or finished within
the previous 10 minutes 'Bake Denied' is displayed. The
bake program operates with the pressure from Ion Gauge
1 only.
If all conditions are satisfied the Ion Gauge starts
emission and then Bake starts. The progress of Bake is
shown by three alternating displays of pressure, the time
remaining to the end of bake and the measured
temperature.
The ON/OFF status of the heaters is
shown in all three displays. The Bake LED in the Status
Window flashes during Bake.
When Bake is finished you can leave the function switch
on BAKE to monitor the temperature and pressure as the
system cools. The time display in the sequence of three
alternating displays is replaced by ‘Bake Finished'
Moving the Function Switch off the BAKE position alone
cannot terminate a bake cycle. If you do this you will be
asked to return it to BAKE and then to confirm whether
you want to terminate the bake.
If the password is
enabled you will then be required to enter it. This
procedure discourages misuse or inadvertent termination
of a bake. If Bake is terminated manually it cannot be restarted for 10 minutes.
Bake will be terminated automatically if a gauge fails or
the pressure exceeds the ion gauge overpressure limit or
if the thermocouple measuring the temperature fails or is
disconnected. The display will show the cause of the
termination, alternating with the time at which it occurred,
rounded to the nearest hour.
© Arun Microelectronics Ltd 2011
15
10 FAULTS
Fan 1 slow / failed
Fans are used alternately on a four-hour cycle. A fan that is running slowly will cause an occasional ‘Fan 1
slow’ or ‘Fan 2 slow’ message to be displayed during its 4-hour cycle. Fan speed is dependent on
environmental factors and a warning may not be present in every 4-hour cycle for a marginal fan. Fans
reported as failed may still be working, but are too slow to be effective. If a fan is reported as slow ensure that
you have a replacement ready. Replace a failed fan as soon as convenient. Instructions are packed with spare
fans.
Temperature
If the ambient temperature exceeds 40°C the ion gauge is automatically switched off to protect the instrument
and a temperature warning will be displayed in place of the pressure reading. Turn the NGC2-D off and wait for
the temperature to fall before re-starting.
Emission Fault
Ion gauge faults can have multiple causes, some of which are transient or simultaneous. The most common
causes of persistent problems in emission are unsuitable gauges or leads or incorrect installation. Other
possible causes:•
Excess emission current may be caused by a grid-to-filament short, production of a plasma in degas or
another source of ions or electrons nearby.
•
Low emission current may be caused by a grid-to-ground short, magnetic or electric fields, an
unsuitable filament, loss of filament coating or incorrect setup of filament type.
•
When using Yttria filaments. If the filament worked previously the coating may have deteriorated. If the
filament has been exposed to air it will have adsorbed moisture: attempt emission several times to drive
it off. Unsuitable or contaminated filaments operated at high local pressure may also cause this display.
Failure of Pirani gauge 1 will stop the ion gauge operating if the interlock is set, regardless of any other
conditions. Operation of the ion gauge can be restored after failure of Pirani 1(if it is safe to do so) by switching
the Pirani gauges off and disabling Interlock and Autostart, if appropriate.
IG fil 1 o/c
If "IG fil x o/c" (IG filament open circuit) is shown the filament has probably failed or there is a poor connection to
the cable. In some cases if there is a high resistance connection or the cable is long or of inadequate cross
section this fault may be reported after some period of normal operation. Disconnect the mains power
connector before checking any cables.
© Arun Microelectronics Ltd 2011
16
Ion gauge connections
Base connections of AIG1x gauges.
Connections at the controller end of an AIGLx lead.
If you probe the pins with an ohmmeter take care
not to stress them, as this may cause a leak.
The cold filament resistance is very low. The grid,
collector and filaments should be isolated from each
other and from the chamber.
11 REMOTE OPERATION
Refer to Appendix B for the NGC2D Interface Manual.
12 CAPACITANCE MANOMETER
The capacitance manometer (CM) is connected via the Auxiliary Connector. For details on this connector refer
to Section 2.1. The instrument caters for capacitance manometers with full-scale output voltages of 10v,
representing 1, 10, 100 or 1000 millibar or Torr. An external power supply will be required. The CM can be
interrogated by pressing a "Display" switch until the CM pressure reading appears. This is only available in
numeric format. Ensure the full-scale and pressure selected in CM setup matches your gauge.
13 RECORDER OUTPUT
An analog voltage representing the base-10 logarithm of collector current is available on the auxiliary connector.
This is scaled at 1V per decade and 0 volts represents 1E-13A. The output increases by 1volt when emission is
increased from 0.5 to 5mA. The output resistance is padded to 1Kilohm.
As the recorder output is related to collector current it has to be combined with sensitivity and emission current
to derive pressure
Pressure = [antilog (V-13)]/(s*Ie)
where V is the recorder output voltage, s is the sensitivity and Ie is the emission current in amps.
© Arun Microelectronics Ltd 2011
17
14 EXTERNAL INHIBIT
Operation of the ion gauge may be inhibited by an external contact closure, which prevents starting of the ion
gauge by any means. External inhibit can be used as an external trigger for the ion gauge. The condition
specified by the position of the emission switch will be established when the external inhibit is released.
15 PASSWORD FORGOTTEN?
If another user has inadvertently set a password the most likely setting is 7FFF or a hexadecimal number close
to it. Once you have discovered the number by trial-and-error you can disable password usage.
Instructions for resetting factory default conditions (including disabling the password) are printed on the
Processor PCB assembly, near the cable which connects the display. Disconnect the mains lead before
removing the top cover.
16 ASSISTANCE
In the first instance contact the distributor or supplier of the equipment. Always quote the serial number of the
instrument and the version number of the program. Provide a written description of the problem. If the problem
is related to gauges and leads quote the serial numbers and filament type used. Do not return products to AML
without prior approval.
Arun Microelectronics Ltd
Fitzalan Road
Arundel
West Sussex
BN18 9JS
England
Tel. +44 (0)1903 884141
Fax.+44 (0)1903 884119
email. [email protected]
www.arunmicro.com
In the European Union (EU), waste from electrical and electronic equipment (WEEE) is now subject to
legislation designed to prevent the disposal of such waste and to encourage proper treatment measures
to minimize the amount of waste ultimately disposed to landfill. To view AML’s WEEE policy please visit
www.arunmicro.com > Servicing > WEEE Policy
© Arun Microelectronics Ltd 2011
18
APPENDIX A
Gauge Principles
A.1 IONISATION GAUGES
Ionisation gauges are thermionic triode devices. The appropriate choice for UHV use is the Bayard-Alpert type.
This consists of a very thin collector wire mounted along the axis of a cylindrical mesh grid. The filament is
outside the grid and usually parallel to it. The grid is voltage-biased positively with respect to the filament, and
the collector negatively.
A stabilised emission current is established between the incandescent filament and the grid structure. Electrons
oscillate on long paths through the open grid structure, being repelled from the central collector and attracted to
the grid. A proportion of the electrons encounter gas molecules before reaching the grid. These molecules are
ionised by the collision and those within the grid volume are attracted to the collector to form a current, which is
proportional to the concentration of gas molecules over a very wide range.
Pressure may be derived from the ion current by solving the equation:
Pressure =
Ion current
--------------------------------------Sensitivity x Emission Current
where the units for the two currents are the same and the sensitivity is a quoted constant for a particular
gaugehead and gas species.
The impact of electrons on the grid structure generates soft X-rays; some of these impinge on the collector and
release photo-electrons. These form a small current in the same direction as the ion current. When this
'photocurrent' becomes significant in relation to the 'true' ion current, the gauge ceases to function as a reliable
pressure transducer and is said to have reached its 'X-Ray limit'.
A.2 PIRANI GAUGES
The Pirani Gauge is a thermal conductivity gauge. A tungsten filament in the vacuum space is heated from a
constant voltage source and is incorporated in a Wheatstone bridge. The electrical resistance of the filament
depends on its temperature and this in turn depends on the rate at which heat is conducted away from the
filament by residual gas. The thermal conductivity of a gas depends on its pressure (below about 1 millibar) and
the nature of the residual gas. The Pirani gauge unbalances the Wheatstone bridge and the voltage across the
bridge represents pressure over the range of 0.5 millibar to about 1x10E-3 millibar.
The lower pressure limit is determined by the heat loss due to radiation becoming significant compared to that
due to thermal conductivity. The radiant heat loss depends on the emissivity of the filament. A new filament is
bright, but can become blackened by deposits from decomposed rotary pump oils and the lower limit of
pressure readings will rise. It is possible to clean filaments.
A.3 CAPACITANCE MANOMETERS
Capacitance manometers operate by measuring the deflection of a thin circular radially tensioned membrane
between the vacuum space and a reference volume at a pressure substantially below the operating range of the
transducer. The deflection is measured as a modulation of the electrical capacitance between the membrane
and a fixed plate and converted to a voltage proportional to the pressure difference across the membrane.
© Arun Microelectronics Ltd 2011
19
APPENDIX B
NGC2D Pressure Gauge Controller Interface Manual Issue 2.0
1. INTRODUCTION
The serial interface is RS232-compatible and only one instrument may be connected to a computer serial port.
Remote control is established and relinquished via the serial interface. An instrument may be switched to remote
or local control by a single command.
At switch-on the NGC2 is reset into the local operation mode with the ion gauge switched off and the Pirani
gauges switched on.
NGC2 does not check the viability or consistency of commands issued by a remote computer.
2. INTERFACE PROTOCOL.
9600 baud, 8 data bits, 1 stop bit, no parity, no handshaking
2.1 Local/remote control.
An NGC2 starts operation in local control, i.e. using the front panel. In local mode the NGC2 responds only to
commands without parameters (<poll>, <control>, <status> and <reset error>). The <control> command puts
the NGC2 into remote mode, and all the other commands can then be used. The front panel can still be used to
change the display but not to control gauges or change setpoints. When a host takes control of the NGC2
emission is stopped, and any current Setup operation is cancelled. When the host returns the NGC2 to local
control, emission is again stopped.
If any relay is permanently Energised or De-energised while in remote control the setpoint for that relay is
changed to the limit so the status of the relay is no longer affected by pressure either in remote control or on
return to local control.
2.2 Host Computer Commands.
The host computer sends commands to NGC2s in the following format:
First byte:
'*' (ASCII 47)
Second byte:
Command character. All commands are represented by a single character.
Third byte:
Ignored on NGC2. (Character ‘0’ to ‘8’ or ‘X’ [ASCII 88]. This ensures
compatibility with PGC1, which had a multi-drop capability where instruments
were addressable. (All the examples below use ‘0’.)
Optional parameter:
Additional command parameters, single ASCII characters.
2.3 NGC2D Response.
The instrument responds with a state byte and an error byte, followed by a CR-LF (ASCII 13, 10). If a status
report was requested the state and error bytes are followed by the report and CR-LF. All responses terminate in
CR-LF.
2.4 Timing of Next Command.
The host computer should not begin transmitting a new command until a CR-LF has been received, signalling the
end of transmission. It is not necessary to poll the NGC more than 4 times per second, and we strongly
recommend that a delay of at least 100ms is implemented before the next report request. The response to
commands is typically less than 1 second.
© Arun Microelectronics Ltd 2011
20
2.5 State & Error byte coding:
State byte:
Bits 3-0 :
Bit 4
:
Bit 5
:
Bit 6
:
Bit 7
:
Instrument type (00102 – NGC2)
0 = local mode, 1 = remote mode
1
0 = IG 1 selected, 1 = IG 2 selected
Ion gauge disconnected
Error byte:
Bit 0
Bit 1
Bit 2
Bit 3
Bit 4
Bit 5
Bit 6
gauge - specific error
over temperature trip
0
temperature warning
0
0
1
:
:
:
:
:
:
:
The value in the error byte is maintained until reset by a <reset error> command.
2.6 Host Computer Command Characters.
Command parameters are single printable ASCII characters.
Relays are addressed by uppercase letters 'A' to 'D'.
Command
Char.
Ignored
Para.
Description
<poll>
P
0
Poll instrument (returns state and error byte).
( e.g. *P0)
<control>
C
0
Remotely control NGC2.
(e.g. *C0)
<release>
R
0
Return NGC2 to local control.
(e.g. *R0)
<reset error>
E
0
Reset all error flags.
(e.g. *E0)
<status>
S
0
Request a report of operating status for all gauges.
(e.g. *S0)
<Gauge on>
i
0
E
Switch on ion gauge emission.
E = ‘0’ 0.5mA
E = ‘1’ 5mA
(e.g. *i00)
<Select IG>
j
0
G
G = ‘1’ Ion Gauge 1 selected.
G = ‘2’ Ion Gauge 2 selected.
<Gauge off>
o
0
<override>
O
0
R
Permanently energise relay R.
R = ‘A’ to ‘D’
(e.g. *O0A)
<inhibit>
I
0
R
Permanently de-energise relay R
R = ‘A’ to ‘D’
(e.g. *I0A)
Switch off ion gauge.
(e.g.*o0)
© Arun Microelectronics Ltd 2011
21
2.7 <status> Status report.
The status report gives the operating status and pressure of each gauge in the NGC2.
State byte:
Error byte:
Relay status byte:
An unused byte:
Gauge record:
As detailed above.
The relay status byte is of the form 0100XXXX2, where the least significant 4
bits indicate the state of relays A to D (1 = energised) with relay 'A' indicated by
the least significant bit.
‘0’
For each gauge in the NGC2:-
Byte
Name
Details
1
Header byte
'G'
2
Gauge type
'I' : Ion gauge
'P' : Pirani
'M' : capacitance manometer
3
Gauge number
4
Gauge status
'1' : Ion Gauge 1
‘2’ : Pirani 1
‘3’ : Pirani 2
‘4’ : Capacitance manometer
‘5’ : Ion Gauge 2
All bits are set to 0 unless stated otherwise:
Ion Gauge Status
Bit 6: 1
Bit 5: filament 2
Bit 3: gauge in degas
Bit 2: gauge controlling bakeout
Bit 0: gauge in emission
Pirani Gauge Status:
Bit 0: gauge operating
5
Gauge error
Ion Gauge error:
Bit 0: filament open-circuit
Bit 1: overemission
Bit 2: underemission
Bit 3: overpressure
Bit 4: Pirani interlock/autostart prevents starting
Bit 6: 1
Bit 7: Filament/leads
Pirani Gauge error:
Bit 0: Pirani gauge open-circuit
Bit 6:1
Bit 7:0
6-13
Pressure
Comma delimited string in scientific notation, e.g. "1.3E-07," If
the gauge is not operating the string consists of spaces only.
Units Byte:
‘T’ = Torr.
‘P’ = Pascal.
‘M’ = mBar.
Unused Byte: ‘0’
CR-LF
All pressure values read from the NGC2 are in the NGC2’s current display units.
© Arun Microelectronics Ltd 2011
22
Declaration of Conformity
We, Arun Microelectronics Ltd., hereby declare that the equipment mentioned
below complies with the provisions of the Electromagnetic Compatibility
Directive 89/336/EEC and the Low Voltage Equipment Directive 73/23/EEC.
Product
Pressure Gauge Controller
NGC2D
Standards
Harmonised and international/national standards and specifications:
EN 61010-1 Safety requirements for electrical equipment for measurement,
control and laboratory use.
EN 50081-1 Electromagnetic compatibility generic emission standard.
EN 50082-1 Electromagnetic compatibility generic immunity standard.
Signature
Philip Brooker
Managing Director
Arun Microelectronics Ltd.
Fitzalan Road
Arundel
BN18 9JS
United Kingdom
Date
December 2007