1
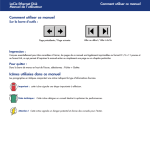
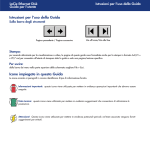
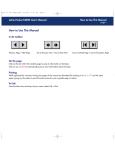
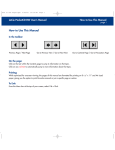
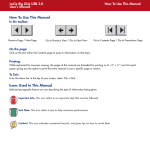
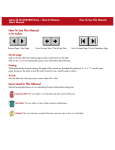
How to Use Pages.qxd
3/14/03
11:08 AM
Page 1
LaCie Ethernet Disk User’s Manual
How to Use This Manual
page i
How to Use This Manual
In the toolbar:
Previous Page / Next Page
Go to Previous View / Go to Next View
Go to Contents Page / Go to Precautions Page
On the page:
Click on the text within the Contents page to jump to information on that topic.
Click on any red text to automatically jump to more information about that topic.
Printing:
While optimized for onscreen viewing, the pages of this manual are formatted for printing on 8 1/2” x 11” and A4 sized
paper, giving you the option to print the entire manual or just a specific page or section.
To Exit:
From the Menu bar at the top of your screen, select: File > Quit.
Ethernet Disk_UG_E.qxd
3/14/03
10:23 AM
Page 1
LaCie Ethernet Disk User’s Manual
Foreword
page 1
Copyrights
Copyright © 2003 LaCie. All rights reserved. No part of this publication may be reproduced, stored in a retrieval system, or
transmitted in any form or by any means, electronic, mechanical, photocopying, recording or otherwise, without the prior
written consent of LaCie.
Trademarks
Apple, Mac, Macintosh and FireWire are registered trademarks of Apple Computer, Inc. Microsoft, Windows NT, Windows
98, Windows 98 SE, Windows 2000, Windows Millennium Edition and Windows XP are registered trademarks of Microsoft
Corporation. Sony and iLink are registered trademarks of Sony Electronics. Other trademarks mentioned in this manual are
the property of their respective owners.
Changes
The material in this document is for information only and subject to change without notice. While reasonable efforts have
been made in the preparation of this document to assure its accuracy, LaCie assumes no liability resulting from errors or
omissions in this document, or from the use of the information contained herein. LaCie reserves the right to make changes or
revisions in the product design or the product manual without reservation and without obligation to notify any person of such
revisions and changes.
FCC Statement:
Warning! Modifications not authorized by the manufacturer may void the user’s authority to operate this device.
NOTE: This equipment has been tested and found to comply with the
limits for a Class A digital device, pursuant to Part 15 of the FCC
Rules. These limits are designed to provide reasonable protection
Tested To Comply
against harmful interference when the equipment is operated in a
With FCC standards
commercial environment. This equipment generates, uses, and can
radiate radio frequency energy and, if not installed and used in
FOR HOME OR OFFICE USE
accordance with the instruction manual, may cause harmful
interference to radio communications. Operation of this equipment in
a residential area is likely to cause harmful interference in which case the user will be required to correct the interference at
his own expense.
LaCie Ethernet Disk 600624/600625/600626
NOTE: This equipment has been tested and found to comply with the limits for a Class B digital device, pursuant to Part 15 of
the FCC Rules. These limits are designed to provide reasonable protection against harmful interference in a residential
installation. This equipment generates, uses and can radiate radio frequency energy and, if not installed and used in
accordance with the instructions, may cause harmful interference to radio communications. However, there is no guarantee
Ethernet Disk_UG_E.qxd
3/14/03
10:23 AM
Page 2
LaCie Ethernet Disk User’s Manual
Foreword
page 2
that interference will not occur in a particular installation. If this equipment does cause harmful interference to radio or
television reception, which can be determined by turning the equipment off and on, the user is encouraged to try and correct
the interference by one or more of the following measures:
• Reorient or relocate the receiving antenna.
• Increase the separation between the equipment and receiver.
• Connect the equipment into an outlet on a circuit different from that to which the receiver is connected.
Consult the dealer or an experienced radio/TV technician for help.
Canada Compliance Statement
This Class A digital apparatus meets all requirements of the Canadian Interference-Causing Equipment Regulations.
Manufacturer’s Declaration for CE Certification
We, LaCie, solemnly declare that this product conforms to the following European standards:
Class B EN60950, EN55022, EN50082-1, EN61000-3-2
With reference to the following conditions:
73/23/EEC Low Voltage Directive
89/336/EEC EMC Directive
Ethernet Disk_UG_E.qxd
3/14/03
10:23 AM
Page 3
LaCie Ethernet Disk User’s Manual
Health and Safety Precautions
page 3
Health and Safety Precautions
Only qualified persons are authorized to carry out maintenance on this device.
• Read this User's Guide carefully, and follow the correct procedure when setting up the device.
• Do not open your LaCie Ethernet Disk or attempt to disassemble or modify it. Never insert any metallic object into the drive
to avoid any risk of electrical shock, fire, short-circuiting or dangerous emissions. Your LaCie Ethernet Disk contains no userserviceable parts. If it appears to be malfunctioning, have it inspected by a qualified LaCie Technical Support representative.
• Never expose your device to rain, or use it near water, or in damp or wet conditions. Never place objects containing
liquids on the LaCie Ethernet Disk, as they may spill into its openings. Doing so increases the risk of electrical shock, shortcircuiting, fire or personal injury.
• Make sure that the computer and LaCie Ethernet Disk are electrically grounded. If the devices are not grounded, there is an
increased risk of electrical shock.
General Use Precautions:
• Do not expose the LaCie Ethernet Disk to temperatures outside the range of 5° C to 45° C (41° F to 104° F). Doing so may
damage the LaCie Ethernet Disk or disfigure its casing. Avoid placing your LaCie Ethernet Disk near a source of heat or
exposing it to sunlight (even through a window). Inversely, placing your LaCie Ethernet Disk in an environment that is too cold
or humid may damage the unit.
• Always unplug the LaCie Ethernet Disk from the electrical outlet if there is a risk of lightning or if it will be unused for an
extended period of time. Otherwise, there is an increased risk of electrical shock, short-circuiting or fire.
• Use only the power supply shipped with the device.
• Do not use the LaCie Ethernet Disk near other electrical appliances such as televisions, radios or speakers. Doing so may
cause interference which will adversely affect the operation of the other products.
• Do not place the LaCie Ethernet Disk near sources of magnetic interference, such as computer displays, televisions or
speakers. Magnetic interference can affect the operation and stability of your LaCie Ethernet Disk.
• Do not place heavy objects on top of the LaCie Ethernet Disk or use excessive force on it.
• Never use excessive force on your LaCie Ethernet Disk. If you detect a problem, consult the Troubleshooting section in this
manual.
• Protect your LaCie Ethernet Disk from excessive exposure to dust during use or storage. Dust can build up inside the device,
increasing the risk of damage or malfunction.
• Never use benzene, paint thinners, detergent or other chemical products to clean the outside of the LaCie Ethernet Disk.
Such products will disfigure and discolor the casing. Instead, use a soft, dry cloth to wipe the device.
Warning! The LaCie Ethernet Disk's warranty may be void as a result of the failure to respect the precautions listed
above.
Ethernet Disk_UG_E.qxd
3/14/03
10:23 AM
Page 4
LaCie Ethernet Disk User’s Manual
Foreword
Health, Safety and General Use Precautions
1. Introduction
1.1 Icons Used in This Manual
2. Getting to Know Your LaCie Ethernet Disk
2.1 Minimum System Requirements
2.2 LaCie Ethernet Disk – Views
3. Setting Up Your LaCie Ethernet Disk
3.1 Rack Installation
3.2 Stand-alone Installation
4. Installing Your LaCie Ethernet Disk
4.1 Connecting the LaCie Ethernet Disk to Your Network
4.2 Turning On Your LaCie Ethernet Disk
4.3 Turning Off Your LaCie Ethernet Disk
4.3.1 Power Button
4.3.2 Web Administration
5. Configuring Your LaCie Ethernet Disk
5.1 Installing the LaCie Network Configurator
5.1.1 Windows Users
5.1.2 Mac OS 9.x Users
5.1.3 Mac OS 10.x Users
5.1.4 UNIX Users
5.2 Configuring the Network Parameters of Your LaCie Ethernet Disk
6. Using Your LaCie Ethernet Disk
6.1 Choosing an Interface
6.2 Wizard and Advanced Modes
6.3 Using the Wizard Mode
6.3.1 Share Name
6.3.2 User Name
6.3.3 Confirmation
6.3.4 Results
Table of Contents
page 4
1
3
7
7
9
9
9
11
11
11
12
12
12
12
12
12
13
13
13
13
13
13
14
16
16
17
17
17
18
18
18
Ethernet Disk_UG_E.qxd
3/14/03
10:23 AM
Page 5
LaCie Ethernet Disk User’s Manual
6.4 Using the Advanced Mode
6.4.1 Defining the Server Name
6.4.2 Setting the Date and Time of Your Server
6.4.3 Sharing Your Server in Advanced Mode
6.4.3.1 Creating Users
6.4.3.2 Creating Groups
6.4.3.3 Creating Shares
6.5 Accessing Your Shares
6.5.1 Microsoft Windows Me, 2000 and XP Users
6.5.2 Microsoft Windows 95, 98 and NT Users
6.5.3 Mac OS 9.x and 10.x Users
6.5.4 UNIX Users
6.5.5 Connecting Via http or FTP
6.5.6 Connecting With an FTP Client
7. Advanced Management of Users, Groups and Shares
7.1 Listing Local Users
7.1.1 Creating a User
7.1.2 Editing a User
7.1.3 Deleting a User
7.2 Listing Local Groups
7.2.1 Creating a Group
7.2.2 Editing a Group
7.2.3 Deleting a Group
7.3 Listing Local Shares
7.3.1 Creating a Share
7.3.2 Editing a Share
7.3.3 Deleting a Share
7.3.4 Deleting a Broken Share
8. Customizing Your LaCie Ethernet Disk
8.1 Checking Your Server Configuration
8.2 Changing the Administrator’s Password
Table of Contents
page 5
19
19
19
19
20
20
20
22
22
22
23
23
23
24
25
25
25
25
26
26
26
26
27
27
27
27
27
27
28
28
29
Ethernet Disk_UG_E.qxd
3/14/03
10:24 AM
Page 6
LaCie Ethernet Disk User’s Manual
8.3 Enabling/Disabling Guest Accounts
8.4 Rebooting Your Server
8.5 Shutting Down Your Server
8.6 Changing Your Network Configuration
8.7 Formatting Your Disks
8.8 Defragmenting Your Disks
8.9 Backing Up Your Disks
8.10 Backing Up Your Disks Using Third Party Software Programs
8.11 Uploading a New Version of the System Software
8.12 Restoring Your NAS System
9. Expanding Your LaCie Ethernet Disk
9.1 Adding Additional Storage Space
9.2 Net Over FireWire/IEEE 1394
9.3 Print Server
9.4 Connecting Remotely Using Remote Desktop
9.5 Using the Local Outputs
10. Troubleshooting
11. Contacting Customer Service
11.1 Warranty
12. Glossary
Table of Contents
page 6
29
29
30
30
30
31
32
33
33
34
35
35
35
36
36
36
37
40
42
43
Ethernet Disk_UG_E.qxd
3/14/03
10:24 AM
Page 7
Introduction
LaCie Ethernet Disk User’s Manual
page 7
1. Introduction
Congratulations on the purchase of your new LaCie Ethernet Disk. This network attached storage (NAS) system will give you a
unique combination of compatibility and convenience, as well as generous storage capacity. For even greater flexibility, your
LaCie NAS system is also cross-platform, which enables you to use it in Mac, PC and UNIX environments.
The LaCie Ethernet Disk was designed to easily integrate into any environment. Engineered to be rack mountable, you can
quickly and easily place the LaCie drive into your standard 19-inch computer equipment racks, or if you prefer it seamlessly
incorporates into workstation configurations as a stand-alone or stackable device.
With all it can do for you, we’re confident that your LaCie Ethernet Disk will quickly become an important tool in your day-today business and personal computing.
This manual will help you to:
• Install your new device properly
• Get your drive up and running
• Quickly learn how to operate it
1.1 Icons Used in This Manual
Italicized paragraphs feature an icon describing the type of information being given.
Important Note
Technical Information or News
Warning! (This icon indicates potential hazard).
Precautions
Always follow the basic precautions to use your LaCie Ethernet Disk safely and correctly. Respecting these guidelines will help
to avoid the possibility of personal injury to yourself or others, as well as to prevent damage to your device and other
computer equipment. For a complete list of precautions, please see Health, Safety and General Use Precautions.
Warranty
LaCie accepts no liability for any loss of data during the use of this device, or for any of the problems caused as a result.
Under no circumstances does LaCie guarantee the reliability of the drive.
Manual Updates
LaCie is constantly striving to give you the most up-to-date, comprehensive User’s Manuals available on the market. It is our
goal to provide you with a friendly, easy-to-use format that will help you quickly install and utilize the many functions of your
Ethernet Disk_UG_E.qxd
3/14/03
10:24 AM
Page 8
LaCie Ethernet Disk User’s Manual
Introduction
page 8
new device.
If your manual does not reflect the configurations of the product that you purchased, please check our Web site for the most
current version available.
Ethernet Disk_UG_E.qxd
3/14/03
10:24 AM
Page 9
LaCie Ethernet Disk User’s Manual
Getting To Know Your LaCie Ethernet Disk
page 9
2. Getting To Know Your LaCie Ethernet Disk
What can your LaCie Ethernet Disk do?
• Add storage over the network
• Offer extra security for your files
• Economically add storage capacity
• Improve availability of your file servers
2.1 Minimum System Requirements
Client’s Minimum Requirements:
• TCP/IP enabled network
• Microsoft Windows 95, 98, Me, NT, 2000, XP
• Macintosh OS 9.x, 10.x
• Any machine with a browser
• Any machine with an FTP client
Configurator’s Minimum Requirements:
• Microsoft Windows 95, 98, Me, NT, 2000, XP
• Macintosh OS 9.x, 10.x
2.2 LaCie Ethernet Disk – Views
1) Power button –
Used to turn the LaCie Ethernet Disk on Front View
and off. Please see 4.2 Turning On Your
LaCie Ethernet Disk and 4.3 Turning Off
Your LaCie Ethernet Disk for more
details.
2) Ready Light –
This light indicates that the LaCie
Ethernet Disk is ready to serve files.
3) Disk Light –
1
This light indicates when the LaCie
4
2
4
3
Ethernet Disk is being accessed.
4) Rackmount Brackets –
Use to connect your LaCie Ethernet Disk in standard, 19” computer equipment racks. Please see 3.1 Rack Installation for more
details.
Ethernet Disk_UG_E.qxd
3/14/03
10:24 AM
Page 10
Getting To Know Your LaCie Ethernet Disk
LaCie Ethernet Disk User’s Manual
1) Power Input – This
is where you plug in Rear View
the AC adapter
supplied with the
drive.
2) Ventilation Fan Be sure not to block
this opening when
using your drive.
3) Mouse Port
4) Keyboard Port
5) Ethernet port –
This is where you
1
2
plug in the Ethernet
cable included with your drive.
6) USB 1.1 ports
7) Printer Port (top)
8) Serial Port (lower left)
9) Video Port (lower right)
10) FireWire Port
11) Sound Ports (in and out, not used)
12) Expansion Bay
3
page 10
4
5
6
7
8
9
10 11
12
Serial Number Sticker - This is where you will find your LaCie drive's serial number. Write down the serial number and keep
it in a safe place, because you will need to provide the number in the event you have to call LaCie Technical Support for any
reason in regard to the drive’s performance. The serial number would also come in handy if your drive is lost or stolen.
Ethernet Disk_UG_E.qxd
3/14/03
10:25 AM
Page 11
LaCie Ethernet Disk User’s Manual
Setting Up Your LaCie Ethernet Disk
page 11
3. Setting Up Your LaCie Ethernet Disk
Your LaCie Ethernet Disk was designed to allow for quick and easy installation.
3.1 Rack Installation
The LaCie Ethernet Disk fits easily into standard 19” computer equipment racks.
1) Carefully slide the LaCie Ethernet Disk into a shelf space in the rack. Use the included screws to secure the server in place
in the rack.
Warning! Once you have mounted the LaCie Ethernet Disk, do not set any heavy objects on top of the drive.
3.2 Stand-alone Installation
If you do not want to install the LaCie Ethernet Disk into a rack, you can place it on a desktop or workstation.
1) Peel the silicon feet from the included backing sheet.
2) Attach the silicon feet onto the markings on the bottom of the unit.
3) Place the side covers over the rack mounting brackets.
Ethernet Disk_UG_E.qxd
3/14/03
10:25 AM
Page 12
LaCie Ethernet Disk User’s Manual
Installing Your LaCie Ethernet Disk
page 12
4. Installing Your LaCie Ethernet Disk
4.1 Connecting The LaCie Ethernet Disk To Your Network
The LaCie Ethernet Disk is compatible with either 10BaseT or 100BaseTX networks.
1) Connect the LaCie Ethernet Disk to your network using the Ethernet cable provided.
Important Note: If your primary system is not part of a network, or you want to connect the LaCie Ethernet Disk
directly to another computer, connect the LaCie Ethernet Disk using a network crossover cable.
2) Connect the included AC power cord to your LaCie Ethernet Disk, then connect the other end to an AC wall outlet.
4.2 Turning On Your LaCie Ethernet Disk
Press the power button on the front of the drive and wait for the LaCie Ethernet Disk to start up. Once the Ready (?) light is on
and stays lit, the LaCie Ethernet Disk will be ready to use.
4.3 Turning Off Your LaCie Ethernet Disk
You can turn off the LaCie Ethernet Disk by using the power button on the front of the drive, or by using the Web
Administration tool.
Important Note: It is recommended that you utilize the Web Administration tool to switch off the LaCie Ethernet
Disk.
4.3.1 Power Button
Press the power button on the front of the drive once. The shutdown process will start automatically once the button is
pushed, and the LaCie Ethernet Disk will shutdown shortly afterwards.
Important Note: You can also force the LaCie Ethernet Disk to shutdown by pressing the power button for five
seconds. Forcing the LaCie Ethernet Disk to shutdown with this method may cause data corruption or data loss.
4.3.2 Web Administration
From your browser, open the Web Administration tool, and click on the shutdown button in the server page.
Ethernet Disk_UG_E.qxd
3/14/03
10:25 AM
Page 13
LaCie Ethernet Disk User’s Manual
Configuring Your LaCie Ethernet Disk
page 13
5. Configuring Your LaCie Ethernet Disk
Important Note:: DHCP and Windows – If your network is DHCP enabled and you are working under Windows,
you will not need to install any software or to configure the network. You can skip the next two sections and go
directly to 6. Using Your LaCie Ethernet Disk.
5.1 Installing the LaCie Network Configurator
5.1.1 Windows Users
Insert the installation CD-ROM into your drive. The LaCie Network Configurator’s installer will start automatically. Click on the
LaCie Network Configurator icon once it is installed to configure the network.
5.1.2 Mac OS 9.x Users
Insert the installation CD-ROM into your drive. Double-click on the Mac OS install icon. The LaCie Network Configurator’s
installer will start automatically. Click on the LaCie Network Configurator icon once it is installed to configure the network.
Important Note: Your system must have Java installed. Most systems have Java enabled by default. Please refer to
your operating system’s manual for specific information if it is not installed.
5.1.3 Mac OS 10.x Users
Insert the installation CD-ROM into your drive. Double-click on the Mac OS X install icon. The LaCie Network Configurator’s
installer will start automatically. Click on the LaCie Network Configurator icon once it is installed to configure the network.
Important Note: With older versions of Mac OS 10.x, there may be some difficulties using the Mac OSX installer.
Try using the Mac OS installer, instead.
Important Note: Your system must have Java installed. Most systems have Java enabled by default. Please refer to
your operating system’s manual for specific information if it is not installed.
5.1.4 UNIX Users
First, you will need to log in as the root to run the program. Mount and go to the root directory of your install CD-ROM.
Type: cd unix
For Java 2, type: java –jar lacie.jar
For Java 1.1x, type: java –classpath lacie.jar ConfServer
If this does not work, try typing: java –classpath [path to]classes.zip:lacie.jar ConfServer
If this does not work, either, on sh-like shells, try typing:
Ethernet Disk_UG_E.qxd
3/14/03
10:25 AM
Page 14
LaCie Ethernet Disk User’s Manual
Configuring Your LaCie Ethernet Disk
page 14
cd [directory where lacie.jar is located]
CLASSPATH=$CLASSPATH:config.jar
export CLASSPATH
java ConfServer
Or, for csh-like shells, try typing:
cd [directory where nconfig.jar is located]
setenv CLASSPATH $CLASSPATH:nconfig.jar
java ConfServer
Important Note: A graphical environment is required. Your system must also have Java installed. Most systems have
Java installed by default. Please refer to your operating system’s manual for specific information if it is not installed.
5.2 Configuring the Network Parameters of Your LaCie Ethernet Disk
The LaCie Network Configurator uses a common graphical user interface (GUI) that has the same functionalities under
Windows, Mac and UNIX operating systems.
Important Note: By default, the LaCie Ethernet Disk is configured to use DHCP.
A few seconds after loading, your server (which is shown by its MAC
address) will appear in the Available servers listbox on the left of the
application. The current network configuration will appear on the right.
There are two possible scenarios:
If your network is DHCP enabled
You will not need to configure your LaCie Ethernet Disk’s network. Write
down the IP address and quit the configurator.
If your network uses static IP
You will need to configure your LaCie Ethernet Disk to match your
network configuration. Refer to your network administrator for more
information.
1) Uncheck the DHCP checkbox and fill in the network parameters, then
press Update.
2) Write down the IP address.
Ethernet Disk_UG_E.qxd
3/14/03
10:25 AM
Page 15
LaCie Ethernet Disk User’s Manual
Configuring Your LaCie Ethernet Disk
page 15
3) An administrator will be prompted. Type in admin. This is the default administrator password for the LaCie Ethernet Disk.
After processing the information, the server will reboot with the new network parameters.
Once you have finished this operation, you should not use the LaCie Network Configurator again, unless you have forgotten
the IP address or you are moving the LaCie Ethernet Disk.
Ethernet Disk_UG_E.qxd
3/14/03
10:26 AM
Page 16
LaCie Ethernet Disk User’s Manual
Using Your LaCie Ethernet Disk
page 16
6. Using Your LaCie Ethernet Disk
Windows Users: Open your browser to http://NAS-LACIE.
Mac and UNIX Users: open your browser to http://server_ip (the server_ip stands for the IP address assigned to your LaCie
Ethernet Disk by the LaCie Network Configurator).
Important Note: It is recommended that you use Internet Explorer 5.0 or higher as your browser.
You should see a Web page showing the available shares on your LaCie Ethernet Disk.
To go to the Web Administration Page, click on the link to that page. You will be prompted to enter a user name and a
password. Use administrator for the username, and admin for the password.
You will then be in the Web Administration Page. Users, groups and shares will be created from these pages.
6.1 Choosing an Interface
The Web Administration Page can be used with Flash enabled or
disabled. The user interface is more user friendly with Flash mode
enabled, but it requires that the Macromedia Flash plug-in be
installed in your browser (most recent browsers include Flash by
default). The normal mode (Flash disabled) should be compatible
with most browsers.
Click on the enter button to view the Web Administration Page
with Flash enabled, and the no flash button to view the Web
Administration Page with Flash disabled.
Ethernet Disk_UG_E.qxd
3/14/03
10:26 AM
Page 17
LaCie Ethernet Disk User’s Manual
Using Your LaCie Ethernet Disk
page 17
6.2 Wizard and Advanced Modes
There are two different ways to use the Web
Administration Page: Wizard mode or Advanced
mode.
Wizard Mode
This method is recommended for beginning users, or
those who have a limited technical knowledge base.
The Wizard mode is an easy way to create new shares.
This mode will guide you through a series of questions
and will help you to create your shares.
Click the Wizard Mode button to use this
utility.
Important Note: Only public shares can be created in Wizard mode.
Advanced Mode
The Advanced mode provides you with all of the available tools: you can create, delete and customize any share. You can
also change the system configuration (machine name, time, etc.) and defrag or backup drives.
Click the Advanced Mode button to utilize these tools.
6.3 Using the Wizard Mode
Important Note: The share will not be created until the last step
of the Wizard. You need to complete all the steps of the Wizard
to create the share correctly. During the process, you can use the
Next and Back buttons to make changes to your settings.
6.3.1 Share Name
Enter the name of the share you want to add and press the Next button.
The name must only contain valid characters.
Ethernet Disk_UG_E.qxd
3/14/03
10:26 AM
Page 18
LaCie Ethernet Disk User’s Manual
Using Your LaCie Ethernet Disk
page 18
6.3.2 Username
The share that you are about to create is public – this means that anyone who has
an account on the LaCie Ethernet Disk will be able to access it. If you already have a
user account, you can skip this step and click on the Next button. If you want to add
a user, please fill in the input boxes and then press Next.
6.3.3 Confirmation
This step give you a summary of the actions that are going to be performed by the
Wizard. Use the Back button to go to the previous screens and to change the
settings. Once everything is how you would like it, press the Next button.
6.3.4 Results
Once the Wizard has successfully completed the above steps, you will see this page.
Click Exit to go back to the main page.
Ethernet Disk_UG_E.qxd
3/14/03
10:26 AM
Page 19
LaCie Ethernet Disk User’s Manual
Using Your LaCie Ethernet Disk
page 19
6.4 Using the Advanced Mode
6.4.1 Defining the Name of the Server
The server name is the one that is used to identify your LaCie Ethernet Disk on the
network. By default, it is set as NAS-LACIE. To change the name of your LaCie
Ethernet Disk, in the Web Administration Page, go to the server section and press the
edit button on the right of the machine name. You can then change the name through
this page, but you will need to reboot the sever in order for your changes to take
effect.
Windows Users: You can choose whether or not your LaCie Ethernet Disk should
belong to a Workgroup or a Domain. By default, your LaCie Ethernet Disk will
belong to the workgroup named WORKGROUP. You can also set your server into a
Windows domain. An administrator domain user name and password will be required, though. Please ask your system
administrator for more information.
6.4.2 Setting the Date and Time of Your Server
You can set the date and time of your server in the Web Administration Page, under
the server section. Click on the button near the current time, which brings you to the
Edit system time page. Set the date and time, and then press the Set time and date
button.
6.4.3 Sharing Your Server in Advanced Mode
Once you have defined the server name and set the date and time in Advanced Mode, your server is now ready to be shared
on the network. Your LaCie Ethernet Disk works like a typical sharing system: you create users and/or groups that have
access to use and share data, then create a share and assign the users and/or groups rights to that share.
Ethernet Disk_UG_E.qxd
3/14/03
10:26 AM
Page 20
LaCie Ethernet Disk User’s Manual
Using Your LaCie Ethernet Disk
6.4.3.1 Creating Users
Click on the Users tab and press the Add a user icon. Enter the username* and all
the necessary information in the textfields, then press the Create the user button.
*Username must be unique and contain at least 4 characters.
6.4.3.2 Creating Groups
Click on the Groups tab and press the Add a group icon. Enter a group name* and
a description for the group in the textfields and press the Create the group button.
*The group name must be unique and contain at least 4 characters.
6.4.3.3 Creating Shares
Click on the Shares tab and press the Add a share icon. Enter a share name* and
press the Create a share button.
*The share name must be unique and contain at least 4 characters – special
characters are not allowed.
page 20
Ethernet Disk_UG_E.qxd
3/14/03
10:27 AM
Page 21
LaCie Ethernet Disk User’s Manual
Using Your LaCie Ethernet Disk
page 21
Once the share is created, you must edit it in order to allow people to access it. Click
on the edit icon to edit the share. This will bring you to the edit page, where you can
select the type of share you want to create, and define who will have access rights to
the share.
There are four types of shares:
Windows (CIFS/SMB)
This share is compatible with Microsoft
Windows networks. Enable this type of share if you want to share your data under
Windows (95, 98, Me, NT, 2000 and XP).
Apple (Appleshare)
This share is compatible with Mac OS systems. Enable this type of share if you want
to share your data under Mac OS 9.x and 10.x.
http
This share is compatible with all systems that have a Web browser(Internet Explorer,
Netscape Navigator, Opera, Lynx, etc.). This share type is compatible with nearly all
modern systems, but is suitable for read-only data operations. Enable this type of
share if you want maximum compatibility over your network, and if you can share
your data as read-only.
FTP
This share is compatible with all systems that have an FTP client. Most systems include
this tool. Enable this type of share for maximum compatibility over the network.
In the current version of the server, you can only set share permissions under
Windows. Use the arrow buttons to add or remove permissions.
Under Apple, if enabled, the share will be accessible for any authenticated user.
Under http and FTP, the share will be public in either or both read and write access,
whether or not you checked the read and/or write checkboxes.
Important Note: When you create a share, the Windows (CIFS/SMB) sharing is activated by default.
Ethernet Disk_UG_E.qxd
3/14/03
10:27 AM
Page 22
LaCie Ethernet Disk User’s Manual
Using Your LaCie Ethernet Disk
page 22
6.5 Accessing Your Shares
Your LaCie Ethernet Disk appears as a server with shared folders on the network. You can connect to the LaCie Ethernet Disk
as you would with any other server.
6.5.1 Microsoft Windows Me, 2000 and XP Users
To find the server, look in My Network Places. By default, the server will be named NAS-LACIE under Workgroup. When you
connect to a share, you will be asked to enter a username and a password.
In Windows Me and 2000, if you cannot find the server, try using the Windows search tool. From the Start menu, click
Search, then For Files or Folders. In the Search Results window, select Computers. In the Search for Computers dialog box,
enter the server name and click the Search Now button. The server name is NAS-LACIE by default.
Important Note: Windows Me Users – To access your shares under Windows Me, you will need to create a user
with the same username and password as your log in for Windows. This is due to a limitation in Microsoft’s
operating system.
In Windows XP, use the Windows Search function. From the Start menu, click Search, and then For Files or Folders. In the
Search Results window, select Computers. In the Search for Computers dialog box, enter the server name and click the
Search Now button. The server name is NAS-LACIE by default.
For faster time connections and usability, LaCie recommends that you map a drive to share (for more information about drive
mapping, refer to your Windows manual). From Windows Explorer, in the Tools menu, click on Map a drive. Fill in the
appropriate information and press Finish. This will create a new drive mapped to your share.
Important Note: If you have just turned on the server, it may take a few minutes for the server to show up in the
network.
6.5.2 Microsoft Windows 95, 98 and NT Users
To find the server, look in Network Neighborhood. By default, the server will be named NAS-LACIE under Workgroup.
If you cannot find the server, try using the Windows search tool. From the Start menu, click Find, then Computer. Enter the
server name and click Find Now. Windows will search your system and after a little while, the server should appear in the
result window. Click on the icon, and you will then be asked to enter a username and password.
Important Note: Windows 95 and 98 Users – To access your shares under Windows 95 and 98, you will need to
create a user on the LaCie Ethernet Disk with the same username and password as your log in for Windows. This is
due to a limitation in Microsoft’s operating system.
Ethernet Disk_UG_E.qxd
3/14/03
10:27 AM
Page 23
LaCie Ethernet Disk User’s Manual
Using Your LaCie Ethernet Disk
page 23
For faster time connections and usability, LaCie recommends that you map a drive to share (for more information about drive
mapping, refer to your Windows manual). From Windows Explorer, in the Tools menu, click on Map a drive. Fill in the
appropriate information and press Finish. This will create a new drive mapped to your share.
Important Note: If you have just turned on the server, it may take a few minutes for the server to show up in the
network.
6.5.3 Mac OS 9.x and 10.x Users
From the Apple menu, select Network Browser, Chooser or Connect to Server. In Chooser, click the Appleshare icon. Your
server should appear in the list with the default name (NAS-LACIE). Select it and press OK.
Under Mac OS 10.x, click Connect to Server in the Go menu, and enter the IP address of your LaCie Ethernet Disk. A list of
shares will appear. Click on ones that you want open and press OK. Enter a valid username and password. The new shares
will be placed on your desktop.
6.5.4 UNIX Users
You can connect your LaCie Ethernet Disk using Samba. Please consult the Samba manual, or ask your administrator, for
detailed information on how to connect using Samba.
6.5.5 Connecting Via http or FTP
If you enabled http share, you can access your share directly from any computer with a current browser. Just open a browser
to http://server_ip_address (the server_ip_address stands for the IP address assigned to your LaCie Ethernet Disk by the
LaCie Network Configurator). If you are operating under Windows, you can use the server’s name instead of the IP address,
i.e. http://nas-lacie.
Once this has loaded, you can choose how you want to connect to the server. Click the http button to access in http mode, or
FTP to access in the FTP mode.
You can also connect directly to the FTP share by opening a browser at ftp://server_ip_address/sharename. If you are using
Windows, use ftp://nas-lacie/sharename.
Important Note: If you are operating under Windows are using Internet Explorer to connect via FTP, you can drag
and drop objects to upload files if the share is write enabled.
Ethernet Disk_UG_E.qxd
3/14/03
10:27 AM
Page 24
LaCie Ethernet Disk User’s Manual
6.5.6 Connecting With an FTP Client
You can use any FTP client to connect to the LaCie Ethernet Disk. Clients like
LeechFTP, CuteFTP, etc., will work normally.
You can also use the command line command, “ftp”:
Type: ftp server_ip
Enter your username and password.
Type: cd /sharename
Important Note: The ftp command line exists under most Windows
versions, and on most UNIX operating systems.
Using Your LaCie Ethernet Disk
page 24
Ethernet Disk_UG_E.qxd
3/14/03
10:27 AM
Page 25
LaCie Ethernet Disk User’s Manual
Advanced Management
page 25
7. Advanced Management of Users, Groups and Shares
7.1 Listing Local Users
In the Web Administration Page, click on Users to have access to the list of the
local users on your LaCie Ethernet Disk.
7.1.1 Creating a User
In the Web Administration Page, click on the Users tab. From the lower-right
corner of the page, click on Add a user to create a new user (please refer to
6.4.3.1 Creating Users for more information):
1) Enter the new username. It must be unique to the local machine.
2) Enter a description.
3) Enter a password and confirm it.
4) Press the Create the user button.
5) Your new user has been created, and by default, it will belong to the Users group.
7.1.2 Editing a User
1) From the list of local users, click on the button next to the username that you wish to edit.
2) Edit the username, password and description as you like.
3) Assign groups to the user.
4) Submit the changes.
Important Note: By default, a user belongs to the Users group. If you want a user to become an administrator, add
that user to the Administrators group.
Ethernet Disk_UG_E.qxd
3/14/03
10:29 AM
Page 26
LaCie Ethernet Disk User’s Manual
Advanced Management
page 26
7.1.3 Deleting a User
Edit the user, then, from the bottom of the page, click on the Delete button.
7.2 Listing Local Groups
In the Web Administration Page, click on the Groups tab to have access to the list
of local groups on your LaCie Ethernet Disk.
7.2.1 Creating a Group
In the Web Administration Page, click on the Groups tab. From the lower-right
corner of the page, click on Add a group to create a group (please refer to
6.4.3.2 Creating Groups for more information).
1) Enter the new group name. It must be unique to the local machine.
2) Leave the domain group blank, or fill it in if you want to create a domain group (you will need to have access rights to the
domain if you create it as such. Ask your system administrator for more information). For default settings, leave it blank.
3) Enter a description.
4) Press the Create the group button.
5) Your group is now created, and by default, it belongs to the Users group.
Important Note: There are a few fixed groups on the LaCie Ethernet Disk, and they can not be deleted. They are:
Administrators, Guests, Power Users and Users.
7.2.2 Editing a Group
1) From the list of local groups, click on the button next to the group name that you wish to edit.
2) Change the description as desired.
3) Submit the changes.
Ethernet Disk_UG_E.qxd
3/14/03
10:29 AM
Page 27
LaCie Ethernet Disk User’s Manual
Advanced Management
page 27
7.2.3 Deleting a Group
Edit the group, then, from the bottom of the page, click the Delete button.
Important Note: There are a few fixed groups on the LaCie Ethernet Disk, and they can not be deleted. They are:
Administrators, Guests, Power Users and Users.
7.3 Listing Local Shares
From the Web Administration Page, click on the Shares tab to list the local shares
on your LaCie Ethernet Disk.
7.3.1 Creating a Share
In the Web Administration Page, click on the Shares tab. From the lower-right
corner of the page, click on Add a share to create a share (please refer to
6.4.3.3 Creating Shares for more information).
Important Note: When you have multiple drives in your LaCie Ethernet
Disk, or when you connect a mass storage device to your LaCie Ethernet
Disk, you will be able to choose which drive that you want to create the share. The drives will be named as they
typically are under Windows, i.e. D: (first data drive), E: (second data drive), etc..
7.3.2 Editing a Share
From the list of local groups, click on the button right next to the share name to edit that share. Refer to 6.4.3.3 Creating
Shares for more information.
7.3.3 Deleting a Share
Edit the share, then, from the bottom of the page, click the Delete button.
Important Note: There are a few fixed groups on the LaCie Ethernet Disk, and they can not be deleted. They are:
Administrators, Guests, Power Users and Users.
7.3.4 Deleting a Broken Share
When you create shares on a removable drive, when you disconnect that drive, you create “broken shares.” The shares will
still be in the share database, but it is not physically present. If you connect your removable drive again, it will not work.
The LaCie Ethernet Disk program allows you to remove the broken shares from the database. At the bottom of the Shares
page, there will be a list of broken shares, if you have any. Click on the Delete button if you want to remove them.
Ethernet Disk_UG_E.qxd
3/14/03
10:29 AM
Page 28
LaCie Ethernet Disk User’s Manual
Customizing Your LaCie Ethernet Disk
8. Customizing Your LaCie Ethernet Disk
8.1 Checking Your Server Configuration
In the Web Administration Page, click on the Status tab to find out the configuration of your LaCie Ethernet Disk.
You should see:
• Machine name
• Current date
• Network configuration (IP address, subnet mask, gateway)
• NAS software configuration
• Operating system
• Patch level
• BIOS version
• Manufacturer and model
• Processor
• Number of processors
• Physical memory
• Virtual memory
From this page, you can also reboot and shutdown the server.
page 28
Ethernet Disk_UG_E.qxd
3/14/03
10:29 AM
Page 29
LaCie Ethernet Disk User’s Manual
Customizing Your LaCie Ethernet Disk
8.2 Changing the Administrator’s Password
By default, the administrator’s password is admin. Change this password as
soon as possible, for security reasons.
1) In the Web Administration Page, click on the Users tab.
2) Click on Change Administrator Password button.
3) Enter your new password and confirm it.
4) Press Submit changes.
8.3 Enabling/Disabling Guest Accounts
Enabling guest accounts allows people to connect to shares without
authenticating. However, there are some limitations. For instance, under
Windows, you will not be allowed to connect to protected shares unless you
map the share as a drive, and there are also security issues. Some problems
may also occur under the Mac OS, as well. Therefore, it is recommended that
you not enable guest accounts unless you know exactly what you are doing.
8.4 Rebooting Your Server
1) In the Web Administration Page, click on the Status tab.
2) At the bottom of the page, click on the Reboot button.
3) The server will start to reboot. It will take a little time before it reboots.
page 29
Ethernet Disk_UG_E.qxd
3/14/03
10:29 AM
Page 30
LaCie Ethernet Disk User’s Manual
Customizing Your LaCie Ethernet Disk
page 30
8.5 Shutting Down Your Server
1) In the Web Administration Page, click on the Status tab.
2) At the bottom of the page, click on the Shut Down button.
3) The server will shut down shortly after.
8.6 Changing Your Network Configuration
You can change the network configuration from the Web Administration Page.
It is similar to the NAS Network Configurator.
1) In the Web Administration Page, click on the Network tab.
2) Enter the parameters for the network, and submit the changes. For your
LaCie Ethernet Disk, only the IP address and subnet mask need to be doublechecked prior to making changes. Other values are optional. Ask your system
administrator for more details.
3) The Reboot your machine page will appear.
4) Reboot the machine.
Warning! If you change the subnet mask, LaCie recommends that you use the NAS Network Configurator. If you
change the subnet mask, you will not get the Reboot your machine page, because your LaCie Ethernet Disk will have
changed to another subnet and will appear as though you cannot access the LaCie Ethernet Disk. You will then need
to use a machine on the same subnet to access the Web Administration Page of your LaCie Ethernet Disk.
8.7 Formatting Your Disks
The LaCie Ethernet Disk allows you to format a disk. To format a disk, use the
formatting tool:
1) In the Web Administration Page, click on the Disk tab.
2) Check format for the drive* that you want to format.
*There should only be one drive, unless you have attached an external hard
disk drive to your LaCie Ethernet Disk.
Ethernet Disk_UG_E.qxd
3/14/03
10:30 AM
Page 31
LaCie Ethernet Disk User’s Manual
Customizing Your LaCie Ethernet Disk
page 31
3) Answer the following questions, then click on the Format button. Leave the
status window open until the formatting process completes.
The formatting process can be a quick process, or a long process, depending
on the size of your hard drive. If necessary, you can stop the formatting process
at any time – it is not recommended, though, because you may corrupt files or
cause other errors.
Important Note: Before beginning the formatting process, all files
must be unlocked (the files cannot be used by a user). It is recommended that you format the drive immediately after
a reboot to ensure that no one is accessing shares during the formatting process.
8.8 Defragmenting Your Disks
When a disk is too fragmented it causes the disk to slow down. You can
defragment a disk using the defragment tool provided with your LaCie Ethernet
Disk.
1) In the Web Administration Page, click on the Disk tab.
2) Check defragment for the drive* that you want to defragment.
*There should only be one drive, unless you have attached an external hard
disk drive to your LaCie Ethernet Disk.
3) Answer the following questions, then click on the Degragment button. Leave
the status window open until the defragmentation process completes.
The defragmentation process can be a quick process, or a long process,
depending on the size of your hard drive. If necessary, you can stop the
defragmentation process at any time – it is not recommended, though, because
you may corrupt files or cause other errors.
Ethernet Disk_UG_E.qxd
3/14/03
10:30 AM
Page 32
LaCie Ethernet Disk User’s Manual
Customizing Your LaCie Ethernet Disk
page 32
8.9 Backing Up Your Disks
The LaCie Ethernet Disk includes a backup program, but this backup program is only available if your NAS system has two or
more drives, because you can only do a backup from one drive to another with this program.
The LaCie Ethernet Disk is compatible with third party backup programs, such as Retrospect, ArcServeIT, NT Backup, etc., and
you can utilize these programs to backup your LaCie Ethernet Disk over the network.
The LaCie Ethernet Disk uses Microsoft’s NT Backup to perform a backup of one, many, or all directories of your drive, and
can be scheduled to run every day, week or month at a predetermined time. The backup file will be saved under the
destination drive (\nas.backup\backup.bkf) file.
1) In the Web Administration Page, click on the Disk tab.
2) Check backup for the drive that you want to backup.
3) Choose the drive that you want to backup to.
4) Choose the directories that you want to backup. Hold down the CTRL key if you want to choose specific, multiple
directories, or choose to backup all the directories.
5) Choose a schedule for your backup. You can choose between a daily, weekly or monthly backup at a specified time. You
can also choose to backup right now.
6) Press the Run scheduled backup button to start the backup process.
Important Note: Backup time is dependent upon the speed of the drive that you are using, the port that you are
using (internal drives are limited to 133Mb/s, USB 1.1 is limited to 10Mb/s and FireWire/IEEE 1394 is limited to
400Mb/s) and the size of the data that you are backing up.
You can stop the backup process while it is running by clicking the Stop the running backup button.
To remove the scheduled backup, from the Backup page, press the Remove all scheduled backup button located at the
bottom of the page.
Important Note: If you are using an external device to backup your data, it is recommended, for speed reasons,
that you use the FireWire/IEEE 1394 port for optimal backup speeds.
Ethernet Disk_UG_E.qxd
3/14/03
10:30 AM
Page 33
LaCie Ethernet Disk User’s Manual
Customizing Your LaCie Ethernet Disk
page 33
8.10 Backing Up Your Disks Using Third Party Software Programs
The LaCie Ethernet Disk is compatible with third party backup programs, such as Retrospect, ArcServeIT, NT Backup, etc..
Since your server can be seen on the LAN, and because you can map the shares, you can backup all the data on your server
over the network, using the program of your choice.
Important Note: If you are going to backup over the network, it is recommended that you utilize the FireWire/IEEE
1394 port for the best backup speeds. This will prevent the Ethernet port from being overloaded, and your NAS will
be able to share its files at optimal speeds during the backup (see 9.1 Net Over FireWire/IEEE 1394 for more
information).
8.11 Uploading a New Version of the System Software
Warning! Insure that you are only uploading a newer, valid
version of system software.
1) From LaCie’s Web site (www.lacie.com), upload the latest version of the
system software.
2) In the Web Administration Page, click on the Status tab. At the NAS
Software version line, click on the button to the right of the version number.
3) This will bring you to the Update the system page.
4) Browse for the file that you just downloaded from LaCie’s site.
5) Press the Update the file button.
6) Reboot your machine.
Once the server has rebooted, go to the Status page again, and check the version of the NAS software. It should now be
updated to the latest version.
Ethernet Disk_UG_E.qxd
3/14/03
10:30 AM
Page 34
LaCie Ethernet Disk User’s Manual
Customizing Your LaCie Ethernet Disk
page 34
8.12 Restoring Your NAS System
Warning! This is an emergency procedure only! Do not attempt to restore your LaCie Ethernet Disk if your system is
functioning properly.
1) If you want to restore your system to its initial version, open a browser to http://server_ip/nas.restore (If you are operating
under Windows, you can use the server name instead of the IP address, i.e. http://nas-lacie/nas.restore).
2) Enter the administrator password and click the Restore the system button. Your LaCie Ethernet Disk’s system will be
restored.
If you reboot the system using the Reboot button, you should retrieve the same version of the system as the one that was
originally installed when you purchased your LaCie Ethernet Disk.
Ethernet Disk_UG_E.qxd
3/14/03
10:30 AM
Page 35
LaCie Ethernet Disk User’s Manual
Expanding Your LaCie Ethernet Disk
page 35
9. Expanding Your LaCie Ethernet Disk
9.1 Adding Additional Storage Space
You can add additional storage space to your LaCie Ethernet Disk by connecting an
external hard drive by either the USB or FireWire port. Tested, certified drives include
LaCie d2 hard drives, LaCie Studio Drives and LaCie Pocket Drives.
1) Connect the hard drive to the LaCie Ethernet Disk via either the FireWire or USB port.
2) In the Web Administration Page, click on the Disk tab.
3) Refresh the page if necessary (under Windows in either Internet Explorer or Netscape
Navigator, right-click in the frame and click on Refresh or Reload).
4) A second drive should then be listed.
9.2 Net Over 1394 (FireWire)
You can use the FireWire/IEEE 1394 port to speed up your network transfers up to 400Mb/s. If you are using an operating
system (Windows XP and Mac OS 10.x) that is compatible with Net Over 1394, you will be able to communicate with your
NAS four times as fast as Fast Ethernet.
Use a FireWire/IEEE 1394 cable to connect your LaCie Ethernet Disk to your server.
You can also use the FireWire/IEEE 1394 port as a second network adapter, which enables you to connect to two different
subnets at the same time and at different speeds, without using a hub or a switch. This functionality is especially useful if you
backup your LaCie Ethernet Disk through the network. In fact, it is recommended that you utilize the FireWire/IEEE 1394 port
to backup at high speed, which prevents overloading the Ethernet port.
Ethernet Disk_UG_E.qxd
3/14/03
10:30 AM
Page 36
LaCie Ethernet Disk User’s Manual
Expanding Your LaCie Ethernet Disk
page 36
9.3 Print Server
You can use the LaCie Ethernet Disk as a print server. Connect the printer to the LaCie Ethernet Disk via the parallel interface.
Connect to the LaCie Ethernet Disk using Remote Desktop, or connect directly by plugging in a screen, mouse and keyboard
(see 9.4 Connecting Remotely Using Remote Desktop and 9.5 Using the Local Outputs for more information).
You will need to install the necessary drivers for your printer and configure the printer to share. The printer should then be
available to all of the network.
9.4 Connecting Remotely Using Remote Desktop
You can connect to the LaCie Ethernet Disk using Remote Desktop for XP. You will need to use the administrator account to
connect. Please refer to your Windows XP user documentation for more information on this function.
9.5 Using the Local Outputs
In some extra-ordinary cases, such as future upgrades to the system, you will be required to connect a PC monitor, a
keyboard and a mouse to the LaCie Ethernet Disk to manage the system locally. Complementary documents will be provided
in that event.
Ethernet Disk_UG_E.qxd
3/14/03
10:30 AM
Page 37
Troubleshooting
LaCie Ethernet Disk User’s Manual
page 37
10. Troubleshooting
In the event that your LaCie Ethernet Disk is not working correctly, please refer to the following checklist to find out where the
problem is coming from. If you have gone through all of the points on the checklist and your drive is still not working
correctly, please have a look at the FAQs that are regularly published on our Web site – www.lacie.com. One of these FAQs
may provide an answer to your specific question. You can also visit the drivers pages, where the most recent software updates
will be available.
If you need further assistance, please contact LaCie Technical Support (see 11. Contacting Customer Service for details).
Issues
Possible Solutions
The LaCie Network Configurator is not running on my
machine.
Java 1.1.7+ must be installed on your system. Under Windows,
the installer that is provided should install Java 1.4 automatically.
Under Macs, if you ran the default installation, Java 1.1.8 should
have been installed automatically. On most recent UNIX systems,
Java should also be installed by default. Consult your system
administrator for more information about installing Java if it is not
already installed.
The LaCie Ethernet Disk is not seen by the LaCie
Network Configurator.
From the LaCie Network Configurator, press the Refresh list button
and wait about a minute. If it still is not seen, your network
(routers, switches, etc.) is stopping UDP broadcasts that are
required for the Network Configurator to find the LaCie Ethernet
Disk. In this case, connect the LaCie Ethernet Disk directly into the
same hub as your workstation and try again. If this still does not
work, connect your LaCie Ethernet Disk to your workstation with a
crossed Ethernet cable and try again.
A share can not be deleted.
For safety reasons, the share needs to be emptied before it can be
deleted. If you are operating in a Windows environment, ensure
that View hidden files is enabled from the Folders options menu,
otherwise it will appear that a share is empty, when in fact it is
not. Files may also be locked due to being used, as well, so ensure
that no one is sharing those files. Please consult your administrator
for more information.
Ethernet Disk_UG_E.qxd
3/14/03
10:30 AM
Page 38
Troubleshooting
LaCie Ethernet Disk User’s Manual
page 38
Issues
Possible Solutions
Retrieving the IP address of the LaCie Ethernet Disk
while in DCHP.
Use the LaCie Network Configurator. You will see all of the related
information about your LaCie Ethernet Disk on the right panel of
the configurator: when you open the LaCie Network Configurator,
you will see a list of all of the NAS servers running on your
network. When you browse through this list, all of the related
information about the network, including IP addresses, will be
displayed in the right panel of the window.
Important Note: If you are operating in a Windows
environment, you can use a command prompt to
perform this function, instead of using the LaCie
Network Configurator. Open a command prompt, and
type: “ping [nas_name]”, and you will see the LaCie
Ethernet Disk’s IP address.
The LaCie Ethernet Disk can not be formatted or
degragmented.
Some files may be locked due to being accessed by an operation.
It is recommended that system intensive operations such as
formatting and defragmenting be performed immediately after
rebooting the LaCie Ethernet Disk.
How do you backup the LaCie Ethernet Disk?
The LaCie Ethernet Disk can be backed up over the network from
a workstation or a remote server, with a connected backup device,
such as a tape drive or hard drive. The LaCie Ethernet Disk has
been tested for compatibility with some of the most popular
backup applications, including:
• Windows 95/98/NT/2000/Me/XP Native Backup
• Computer Associates ARCServeIT (Windows)
• Dantz Retrospect (Macintosh)
How do you grant access to a few users, while
restricting others, on the same network?
The easiest way to achieve this is to create a group, and then
assign permission and grant access to only that particular group.
Ethernet Disk_UG_E.qxd
3/14/03
10:30 AM
Page 39
Troubleshooting
LaCie Ethernet Disk User’s Manual
page 39
Issues
Possible Solutions
A share cannot be created with a specific name.
Make sure that there is not an existing share with the same name.
Go the Web Administration Page and click on the Share tab to
verify that there is not a share with that same name. Even if you
cannot see the share, it may exist on a removable mass storage
device. If this is the case, and the device is not plugged in, the
share names will still be in the registry of your LaCie Ethernet Disk.
In this instance, you will need to delete the “broken share” (see
7.3.4 Deleting a Broken Share for more information) before
creating the share again.
Why does Windows sometimes report inaccurate free
space?
Some Windows clients are unable to recognize disk space in
excess of 2GB. This only affects the display, and not the “real”
available free space.
How do you install multiple LaCie Ethernet Disks on the Install the LaCie Ethernet Disks individually, one at a time. Make
sure that you change the name of the LaCie Ethernet Disk before
same network?
installing the next one. There will be a conflict if they are not
unique.
Ethernet Disk_UG_E.qxd
3/14/03
10:30 AM
Page 40
LaCie Ethernet Disk User’s Manual
Contacting Customer Service
page 40
11. Contacting Customer Service
Before You Call Technical Support
1) Read the manuals and review the Troubleshooting section.
2) Try to isolate the problem. If possible, make the drive the only external device on the CPU, and make sure all cables are
correctly and firmly attached.
If you have asked yourself all of the pertinent questions in the troubleshooting checklist, and you still can't get your LaCie drive
to work properly, call us directly using the number below. Before calling, make sure that you are in front of your computer
and that you have the following information on hand:
1) Your drive's serial number
2) Computer brand and model
3) Operating system and version (Mac OS, Windows or UNIX)
4) Amount of memory installed
5) Names of CD or DVD drives installed on your computer
6) Names of any other devices installed on your computer
Technical Support Contact Numbers and Hours
LaCie Australia
• Monday through Friday, 9:30AM –
5:30PM EST
Contact Us At:
• (61)2 9669 6900 phone
• [email protected]
LaCie Belgium
• Monday through Friday, 9AM – 5PM
LaCie Denmark
• Monday through Friday, 9AM – 5PM
LaCie France
• Monday through Friday, 9AM – 5PM
LaCie Germany
• Monday through Friday, 9AM – 5PM
Contact Us At:
• 45 70 27 65 43
• [email protected]
Contact Us At:
• 33 (0) 1 69 32 84 23
• [email protected]
Contact Us At:
• 49 (0) 211 30 121-111
• [email protected]
Contact Us At:
• 32 (0) 2 639 14 71
• [email protected]
LaCie Canada
• Monday through Friday, 9:30AM –
5:30PM EST
Contact Us At:
• (416) 530 2545 phone
• (416) 530 2546 fax
• [email protected]
Ethernet Disk_UG_E.qxd
3/14/03
10:31 AM
Page 41
LaCie Ethernet Disk User’s Manual
Contacting Customer Service
page 41
Technical Support Contact Numbers and Hours - Continued
LaCie Italy
• Monday through Friday, 9AM – 6PM
LaCie Netherlands
LaCie Japan
• Monday through Friday, 9AM – 5PM • Monday through Friday, 9AM – 5PM
Contact Us At:
• 39 02 89 14 09 20
• [email protected]
Contact Us At:
• 81 3 5733 2205
• [email protected]
Contact Us At:
• 31 (0) 713 326 833
• [email protected]
LaCie Nordic
(Finland, Norway and Sweden)
• Monday through Friday, 9AM – 5PM
Contact Us At:
• 46 (0) 8 411 60 02
• [email protected]
LaCie Spain
• Monday through Friday, 9AM – 2PM,
and 4PM – 7PM
Contact Us At:
• 34 91 323 83 11
• [email protected]
LaCie Switzerland
• Monday through Friday, 9AM –
5:30PM
Contact Us At:
• 41 (0) 61 386 80 45
• [email protected]
LaCie United Kingdom & Ireland
• Monday through Friday, 9AM – 5PM
LaCie USA
• Monday through Friday, 6AM – 5PM
PST
Contact Us At:
• 503-844-4503 phone
• 503-844-4505 fax
• [email protected]
Contact Us At:
• 44 (0) 20 7872 0872
• [email protected]
Ethernet Disk_UG_E.qxd
3/14/03
10:31 AM
Page 42
LaCie Ethernet Disk User’s Manual
Warranty
page 42
11.1 Warranty
LaCie warrants your LaCie Ethernet Disk against any defect in material and workmanship, under normal use, for the period
designated on your warranty certificate. In the event this product is found to be defective within the warranty period, LaCie
will, at its option, repair or replace the defective drive.
This warranty is void if:
• The drive was operated/stored in abnormal use or maintenance conditions;
• The drive is repaired, modified or altered, unless such repair, modification or alteration is expressly authorized in writing by
LaCie;
• The drive was subjected to abuse, neglect, lightning strike, electrical fault, improper packaging or accident;
• The drive was installed improperly;
• The serial number of the drive is defaced or missing;
• The broken part is a replacement part such as a pickup tray, etc.
• The tamper seal on the drive casing is broken.
LaCie will not, under any circumstances, be liable for direct, special or consequential damages such as, but not limited to,
damage or loss of property or equipment, loss of profits or revenues, cost of replacement goods, or expense or inconvenience
caused by service interruptions.
Under no circumstances will any person be entitled to any sum greater than the purchase price paid for the drive.
To obtain warranty service, call LaCie Technical Support. You may be asked to furnish proof of purchase to confirm that the
drive is still under warranty.
All drives returned to LaCie must be securely packaged in their original box and shipped with postage prepaid.
Register online for free technical support: www.lacie.com/register.htm
Ethernet Disk_UG_E.qxd
3/14/03
10:31 AM
Page 43
LaCie Ethernet Disk User’s Manual
Glossary
page 43
12. Glossary
Backup – (1) The act of creating at least one additional copy of data onto a different (and safe) storage device from where it
can be retrieved at a later time if needed. (2) A copy of a file, directory, or volume on a separate storage device from the
original, for the purposes of retrieval in case the original is erased, damaged, or destroyed.
Bit – The smallest measure of computerized data, either a 1 or a 0. Eight
bits equal one byte, or one character.
Block – A very small section of the storage media comprised of one or more sectors. A block is the smallest amount of space
allocated on a drive for data storage. By default, a sector of data consists of 512 bytes.
Buffer – RAM cache that is faster than the data that is being delivered. Buffers are used so data may be stored and delivered
to the receiving item as it is needed.
Bus – Electronic links that enable data to flow between the processor, RAM and extension cables (peripherals).
Byte – A sequence of adjacent binary digits, or bits, considered as a unit, 8 bits in length. There are 8 bits in 1 byte. See also
MB (Megabyte) or GB (Gigabyte).
Cache, -ing – This is an area of electronic storage (usually RAM) set aside to store frequently used data from electromechanical storage (hard drives, floppy disks, CD/DVD-ROM, tape cartridges, etc.) Therefore, storing frequently used data in
RAM can enhance your system’s overall response to disk-intensive operations significantly.
Configuration – When talking about a PC, configuration is understood to be the sum of the internal and external components
of the system, including memory, disk drives, the keyboard, the video subsystem and other peripherals, such as the mouse,
modem or printer. The configuration also implies software: the operating system and various device managers (drivers), as
well as hardware settings and options set by the user via configuration files.
Controller – This is a component or an electronic card (referred to in this case as a "controller card") that enables a computer
to communicate with or manage certain peripherals. The controller manages the operation of the peripheral associated with
it, and links the PC bus to the peripheral via a ribbon cable inside the PC. An external controller is an expansion card which
fills one of the free slots inside your PC and which enables a peripheral (CD-ROM drive, scanner or printer, for instance) to be
connected to the computer.
Cross-platform – Term that refers to a device that is able to be operated by both Mac and Windows operating systems.
Ethernet Disk_UG_E.qxd
3/14/03
10:31 AM
Page 44
LaCie Ethernet Disk User’s Manual
Glossary
page 44
Data Stream – The flow of data that accomplishes a task, usually related to moving data from storage to computer RAM or
between storage devices.
Digital – Discrete information that can be broken down to zero or one bits.
Driver (peripheral manager) – A software component that enables the computer system to communicate with a peripheral.
Most peripherals will not operate correctly – if at all – if the appropriate drivers are not installed on the system.
DHCP (Dynamic Host Configuration Protocol) – This is a communications protocol that allows network administrators to
centrally manage and automate the assignment of Internet Protocol (IP) addresses in an organization’s network. Using IP, each
computer that connects to the Internet must have a unique IP address.
Ethernet – A LAN technology, based on the IEEE 802.3 standard. The most common Ethernet systems are 10BASE-T, which
provides transmission speeds up to 10Mb/s, and 100BASE-T (also known as Fast Ethernet), which provides transmission
speeds up to 100Mb/s.
File System – Links the physical map of a disc to its logical structure. Thanks to the file system, users and computers can easily
display path, directories and files recorded onto the disc.
FTP (File Transfer Protocol) – This is a standard Internet protocol that uses the Internet’s TCP/IP protocols to exchange files
between computers on the Internet. It is commonly used to download programs and other files to a computer from a server.
Firmware – Permanent or semi-permanent instructions and data programmed directly into the circuitry of a programmable
read-only memory or an electronically-erasable, programmable read-only memory chip. Used for controlling the operation of
the computer or tape drive. Distinct from the software, which is stored in random access memory and can be altered.
Folder – A list created on a disk to store files. Creating folders and sub-folders enables you to organize the storage of your
files in a logical, hierarchical manner so that you can find and manage them more easily.
Format, -ting, -ted – This is a process where a device is prepared to record data. In this process, the hard disk writes special
information onto its own recording surfaces into areas (blocks) that are ready to accept user data. Since this operation causes
all current user data stored on the hard disk to be lost, this is an infrequent operation that usually only happens at the factory
that created the hard disk. It is unusual for something to happen to a hard disk that requires the end-user to initially perform
this operation.
GB (GigaByte) – This value is normally associated with data storage capacity. Basically, it means a thousand million or a
billion bytes. In fact, it equals 1,073,741,824 bytes (or 1,024 x 1,024 x 1,024).
Ethernet Disk_UG_E.qxd
3/14/03
10:31 AM
Page 45
LaCie Ethernet Disk User’s Manual
Glossary
page 45
Hardware – Physical components of a computer system, including the computer itself and peripherals such as printers,
modems, mice, etc.
Host Bus Adapter (HBA) – A printed circuit board that installs in a standard microcomputer and an interface between the
device controller and the computer. Also called a controller.
http (Hypertext Transfer Protocol) – This is the set of rules for exchanging files (i.e. text, images, audio, video, etc.) on the
World Wide Web. http is an application protocol, relative to the TCP/IP suite of protocols that form the basis for exchanging
information on the Internet.
Initialize, -ed, Initialization – After a hard drive (or other storage device) is formatted and partitioned, some special data
needs to be written to it that helps the Mac and Windows create files and save data. The process is called initialization. This
process, like formatting, causes all user data on the storage device to be lost.
Internet – A collection of networks whose users communicate with one another. Each communication carries the address of
the source and destination networks and the particular machine within the network associated with the user or host computer
on each end.
IP (Internet Protocol) – This is the protocol that controls how data is sent from one computer to another on the Internet.
IP Address – This is a number (either 32-bit for Internet Protocol Version 4, or 128-bit for Internet Protocol Version 6) that
identifies each sender or receiver of information that is sent in packets across the Internet.
Interface – The protocol data transmitters, data receivers, logic and wiring that link one piece of computer equipment to
another, such as a hard drive to an adapter or an adapter to a system bus. Protocol means a set of rules for operating the
physical interface, such as: do not read or write before the drive is ready.
I/O (Input/Output) – Refers to an operation, program or device whose purpose is to enter data into or to extract data from a
computer.
Kb (Kilobit) – Equivalent to 1,000 bits.
Kb/s – Kilobits per second. 480Kb/s is equal to 60KB/s.
KB (KiloByte) – Basically, this means 1,000 bytes, but it is actually 1,024 bytes.
KB/s – Kilobytes per second. A means of measuring throughput.
Ethernet Disk_UG_E.qxd
3/14/03
10:31 AM
Page 46
LaCie Ethernet Disk User’s Manual
Glossary
page 46
LAN (Local Area Network) – A group of computers and associated devices that share a common communication line and
typically share the resources of a single processor or server within a small geographic area.
Mb (Megabit) – Equivalent to 1,000,000 bits.
Mb/s – Megabits per second. A means of measuring throughput. 480Mb/s is equal to 60MB/s.
MB (Megabyte) – Basically means one million bytes, but is actually 1,024 Kilobytes or 1,024 x 1,024 bytes, which equals
1,048,576 bytes.
MB/s – Megabytes per second. A means of measuring throughput.
Media – The material or device used to store information in a storage subsystem, such as a tape cartridge, CD, DVD or disk
drive.
Network – A series of points or nodes interconnected by communication paths. Networks can interconnect with other
networks and contain subnetworks.
Operating System (OS) – Software that controls the assignment and use of hardware resources such as memory, processor
time, disk space and peripherals. An operating system is the basis on which software (applications) run. Windows, Mac OS
and UNIX are among the most common.
Overwrite – To write data on top of existing data thus erasing the original data.
Partition, -ing – After formatting, the hard drive is not yet ready to store files. It must be divided into sections that will contain
special information required for a Mac or PC to operate and other sections that will contain the files. This process of dividing
up the hard drive is called partitioning. A partition is just one section of the hard drive that will contain either special data put
there by Silverlining or other files and data.
Peripheral – A generic term applied to printers, scanners, mice, keyboards, serial ports, graphics cords, disk drives and other
computer subsystems. This type of peripheral often relies on its own control software, known as a peripheral driver.
Port, hardware – A connection component (SCSI port, for example) that enables a microprocessor to communicate with a
compatible peripheral.
Port, number – Used to identify a specific process to which an Internet or other network message is to be forwarded when it
arrives at a server.
Ethernet Disk_UG_E.qxd
3/14/03
10:31 AM
Page 47
LaCie Ethernet Disk User’s Manual
Glossary
page 47
Port, software – A memory address that identifies the physical circuit used to transfer information between a microprocessor
and a peripheral.
Protocol – In IT terminology, this describes the special set of rules that end points in a telecommunication connection use when
they communicate.
RAM (Random Access Memory) – Generally referred to as a computer’s “memory.” An integrated circuit memory chip that
allows information to be stored and retrieved by a microprocessor or controller. The information can be stored or accessed in
any order, and all storage locations are equally accessible.
Seek Time – The amount of time (in thousandths of a second, or milliseconds) that it takes a hard drive’s read/write head to
move to a specific location on the disk. Average seek, then, is the average of a large number of random samplings all over
the disk. Seek time is CPU independent, meaning that seek time is the same for a disk drive, whether it is attached to a
computer or not.
Software – In a nutshell, software is a set of instructions for the computer. A set of instructions to perform a particular task is
called a program. There are two main types of software: system software (an operating system such as Mac OS or Windows)
which controls the operation of the computer and application software (programs such as Word or Excel) which enable users
to perform tasks such as word processing, spreadsheet creation, graphics, etc.
Storage – In computers, any equipment in which information may be kept. PCs generally use disk units and other external
storage media (diskettes, CD-ROMs, magnetic disks, etc.) for permanent storage of information.
Striping – Spreading data evenly over multiple disk drives to enhance performance. Data striping can be performed on a bit,
byte or block basis for optimum application performance.
Subnetwork (Subnet) – This is a separate, identifiable part of a network, such as all of the computers at one geographic
location, in one building or on the same local area network. Subnets make it possible to have an organization’s network
connected to the Internet with a single, shared network address.
Transfer Rate – The rate at which the drive sends and receives data from the controller. Transfer rates for reading data from
the disk drive may not be the same as the transfer rate for writing data to the disk drive. Transfer rates are CPU dependent,
meaning that regardless of how great a transfer rate your drive is capable of, the actual transfer rate can only be as fast as
the slowest of your hard drive and computer.
TCP/IP (Transmission Control Protocol/Internet Protocol) – This is the basic communication protocol of the Internet. TCP/IP
uses the client/server model of communication, in which a client (a computer user) requests and is provided a service (such as
Ethernet Disk_UG_E.qxd
3/14/03
10:31 AM
Page 48
LaCie Ethernet Disk User’s Manual
Glossary
page 48
a Web page) by another computer (a server) in the network.
Volume – A desktop mountable storage area, may be a partition of a hard drive, a removable disk or a cartridge. Typically
measured in Megabytes or Gigabytes.
UDP (User Datagram Protocol) – This is a communications protocol that allows a limited amount of service when messages
are exchanged between computers in a network that uses the Internet Protocol (IP). UDP uses the IP to get a data unit (a
datagram) from one computer to another, but does not sequence the packets that the data arrives in. UDP also provides port
numbers to distinguish different user requests, and an optional checksum capability to verify that the data arrived intact.
Utility – Software designed to perform maintenance tasks on the system or its components. Examples include backup
programs, programs to retrieve files and data on disk, programs for preparing (or formatting) a disk or and resource editors.