1
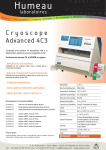
Cryoscope C1 manual
Cryoscope C1A automat
USER MANUAL
User Manual Gerber Cryoscope C1
Table of contens:
1.
Introduction
4
1.1
1.2
1.3
1.4
Usage
Short description of the instrument
Operating conditions
Informations about the user manual
4
4
4
4
2.
Discription of the Gerber Cryoskope C1
6
2.1
2.2
2.3
Front view of the manual and automatic devices
Touchscreen
Rear view of the Cryoscope C1
6
6
7
3.
Unpacking/Device control/Accessories/
8
3.1
3.2
3.3
Unpacking
Device control
Accessories
8
8
9
3.3.1 Standard accessories
3.3.2 Optional accessories
9
9
4.
Initial installation
10
4.1
4.2
4.3
4.4
4.5
4.6
4.7
Connect the external power supply
Connect printer (optional)
Insertion of the Heat Transfer liquid
Control of the cooling system
Switch on the device
Ventilate cooling circuit
Password entry
10
10
11
11
12
13
14
5.
Control and settings
15
5.1
Setup
15
5.1.1
5.1.2
5.1.3
5.1.4
5.1.5
Check/change calibration mode
Check/change measuring mode
Check/change stirrer
Select periphery
Adapt sensors
16
17
18
19
20
5.2
5.3
Diagnostics
Check/change date and time
21
22
Gerber Instruments AG
1
Version 1.0 (02/2014)
User Manual Gerber Cryoscope C1
6.
First calibration(routine calibration)
23
6.1
Calibration with standard A und B
23
6.1.1
6.1.2
6.1.3
6.1.4
Manual device-standard A
Manual device-standard B
Automatic device-standard A
Automatic device-standard B
24
26
28
29
6.2
Verification of the calibration with the control solution
31
6.2.1 Manual device
6.2.2 Automatic device
31
32
7.
Daily work
33
7.1
7.2
7.3
7.4
Generell informations
Sample preparation
Performing measurements in routine operation
Advice for optimum repeatability
33
33
33
34
8.
Internet support
35
8.1
8.2
8.3
8.4
8.5
Requiered pieces for internet support
Installation of the software Software
Installation of the hardware
Configuration of the USB-Ethernet Adapter
Support application
35
35
35
35
36
9.
Cleaning
37
10. Servicing
37
10.1
10.2
10.3
10.4
37
37
37
37
Daily servicing
Weekly servicing
Monthly servicing
Servicing on the sample throughput
11. Packaging
38
12. Disposal
38
13. Technical assistance
38
14. Warranty
38
Gerber Instruments AG
2
Version 1.0 (02/2014)
User Manual Gerber Cryoscope C1
15. Order numbers
39
15.1 Optional accessories
15.2 Consumables
15.3 Spare parts
39
39
40
17. Technical data
41
18. Notes
42
Gerber Instruments AG
3
Version 1.0 (02/2014)
User Manual Gerber Cryoscope C1
1.
Introduction
1.1
Usage
The cryoscope is used to determine the freezing point of raw, pasteurized, Ultra-High
Temperature (UHT) or sterilized whole milk, semi-skimmed milk and skimmed milk (skim
milk).
It is possible to use the freezing point for the detection of extraneous water inside the milk.
(see 5.1.1).
1.2
Short description of the instrument
The Gerber Cryoscope C1A is built tough and has a compact design. Operation works via the
large touchscreen. Parameters, such as measurement mode, the amplitude of the stirrer,
length of the freezing impulse and measuring unit can be adjusted very easily. Thanks to the
understandable menu guide the C1A is easy to calibrate. Measurement data can be printed
by an external printer or PC. In the event of malfunctions it is possible to connect the C1A to
the Internet and our technicians can therefore access to your device.
1.3
Operating conditions
The cryoscope is keep away from:
¾ Direct sunlight
¾ Heat sources near
¾ Draught
¾ Vibrations
¾ Humidity
1.4
Informations about the user manual
¾ This user manual always refers to a volume of 2.0 ml (standard- and control solution,
milk samples).
If the volume sizes are changed (for example 2.5 ml) it is has to be remembered for
the calibration.
¾ Example: Setup
If the text is highlighted in yellow (Setup) it is a function key.
¾
1
Numbers in a yellow circle indicate information about a button or a text.
Gerber Instruments AG
4
Version 1.0 (02/2014)
User Manual Gerber Cryoscope C1
¾ Changing Values
To change existing values (for example date) press on the relevant field. You will see a
keypad with which you can enter the new data.
Press Enter to complete.Press
ress Save to confirm.
¾
This symbol alerts you to proceed with caution.
caution
¾
This symbol indicates
indic
that important information must be
observed.
Gerber Instruments AG
5
Version 1.0 (02/2014)
User Manual Gerber Cryoscope C1
2.
Description of the Gerber Cryoscope C1
2.1
Front view of the manual and automatic device
2
2
3
3
4
5
1
1
1
Touchscreen
2
Measuring Head
3
Probe
4
Opening of the cooling unit
2.2
Touchscreen
5
Turntable for 8 samples
2
3
1
4
5
6
7
8
1
Display (with functions)
5
Measuring value of the freezing point
2
Operation mode
6
Extraneous water content (if activated)
3
Display operation mode
7
Start analyse
4
Status of calibration
8
Stop analyse
Gerber Instruments AG
6
Version 1.0 (02/2014)
User Manual Gerber Cryoscope C1
2.3.
Rear view of the Cryoscope C1
7
5
1
6
2
3
4
1
Main switch
2
Input external power supply
3
RS 232 output for printer or computer
4
Network connection (needed for support)
5
Cooling unit
6
Fluid transfer tank
7
Measuring Head
Gerber Instruments AG
7
Version 1.0 (02/2014)
User Manual Gerber Cryoscope C1
3.
Unpacking/Device control/Accessories
3.1
Unpacking
Place the packing box on the floor. The arrows on the box should point up. Now, open the
packing box.
1
1
In the carton there are two small boxes.
1
One box with standard accessories.
1
One box with optional accessories.
¾ Remove the two boxes from the carton.
¾ Remove the remaining packing material. Take the cryoscope out from the packaging
and place it on a suitable surface (see 4.Initial installation).
3.2
Device control
Check the cryoscope according to the following criteria:
¾ Transport damage
¾ Moisture on the surface of the housing
¾ Other irregularities
If one of those criterisas occur, do not switch on the instruments.
Please contact your local service partner.
Gerber Instruments AG
8
Version 1.0 (02/2014)
User Manual Gerber Cryoscope C1
3.3
Accessories
3.3.1 Standard accessories
1
2
3
4
1
Calibration solution -408 m°C, -600 m°C, -512 m°C (control solution) each 250 ml
2
Heat Transfer liquid 250 ml
3
Test tubes 2 ml (pack a 10 pc.)
4
CD with user manual
Coolant solution Coolant C1, country specific power cable (without image)
3.3.2 Optional accessories
1
2
3
1
Thermo printer with power supply and USB-cable
2
USB-RS232-Adapter, printer paper (pack a 10 rolls)
3
Pipette 2.0 ml or 2.5 ml fixed volume
4
Test tube rack of stainless steel for 30 test tubes
4
Test tubes 2.5 ml (pack a 10 pc.), pipette tips, USB-Ethernet-Adapter (without image)
Gerber Instruments AG
9
Version 1.0 (02/2014)
User Manual Gerber Cryoscope C1
4.
Initial installation
Place the cryoscope on a solid base. The base should not transmit any vibrations and has to
be placed at least 10 cm away from the rear wall and with a 5 cm room to move on the sides.
Direct sunlight, other heat sources or drought should be avoided.
4.1.
Connect the external power supply
¾ Connect the external power supply to the socket provided on
(see 2.3 rear view Cryoscope C1).
¾ Connect the country-specific power cord to the power supply.
4.2
Connect printer (optional)
¾ Connect the printer to the USB-RS232-adapter to the Cryoscope.
¾ The printer has a battery. If the print quality declines, the charger must be
connected (see 2.3 rear view Cryoscope C1).
Check beforehand wether the current voltage and frequency match with the
technical specifications of the external power supplies.
Gerber Instruments AG
10
Version 1.0 (02/2014)
User Manual Gerber Cryoscope C1
4.3
Insertion of the Heat Transfer liquid
¾ Insert the bottle containing the Heat Transfer liquid in the provided container.
¾ Insert both tubes into the open bottle.
4.4
Control of the cooling system
¾ Open one of the two screws of the cooler and check the coolant level.
¾ If necessary (no liquid visible), fill up the cooler with the delivered cooling liquid
(C1 Coolant) until it reaches the lower edge of the vessel.
¾ Close the opening.
Gerber Instruments AG
11
Version 1.0 (02/2014)
User Manual Gerber Cryoscope C1
4.5
Switch on the device
1
1
Turn on the device using the main switch.
¾ After a while, the picture below will be displayed.
¾ The status indicator is light blue during the startup phase (Standby cooling).
¾ If the standby temperature of the cooling unit is achieved, the status indicator
changes to blue.
¾ The cryoscope remains in this mode until the Start button is pressed.
Gerber Instruments AG
12
Version 1.0 (02/2014)
User Manual Gerber Cryoscope C1
4.6
Ventilate cooling circuit
1
Press into lower half from the graphic display.
1
3
2
2
Automat
¾ Place an empty sample tube into the next free position in front of the probe and press
the Ok button.
3
Manual device
¾ Place an empty sample tube into the opening of the cooling unit and press
the Ok button.
¾ The cooling system will automatically be ventilated.
¾ Repeat the venting so often until the Heat Transfer liquid run back out of the thick
tube in the bottle.
¾ After finishing with the ventilation the measuring head moves upwards.
Automat
¾ Press the Start-button, the turntable moves forward one position, remove the sample
tube.
Manual device
¾ Remove the sample tube.
At any work with the Cryoscope it must be ensured, that is a test tube
under the measuring head. Thus, a contamination of the stirrer/probe
avoided with coolant solution.
Gerber Instruments AG
13
Version 1.0 (02/2014)
User Manual Gerber Cryoscope C1
4.7
Password entry
1
Press into upper half from the graphic display.
1
2
Enter the password which was given from your local partner. Confirm with Enter.
2
3
5
4
3
With button Next you reach Selection.
4
With button Exit you reach main screen.
5
With button Logout you leave the password-protected area.
Gerber Instruments AG
14
Version 1.0 (02/2014)
User Manual Gerber Cryoscope C1
5.
Control and settings
After entering the password and press the Next button the following menu appears:
1
2
3
5
4
1
Calibration (enforcement of calibrations).
2
Setup (verification and modification of attitudes and values).
3
Diagnostics (inspection of lift and turntable).
4
Time (review and updating of date and time).
5
Back to main (return to the password request)
5.1
Setup
Before starting calibration of the Cryoscope C1 it is possible to check or change the factory
settings.
1
1
Press Setup.
The Cryoscope is delivered with factory settings.
Without compelling reason, there is no need to change them.
Gerber Instruments AG
15
Version 1.0 (02/2014)
User Manual Gerber Cryoscope C1
5.1.1 Check/change calibration mode
1
1
Press Calibration.
5
2
6
3
4
2
Control of the standard value A (-408.0 m°C).
Control of the standard value B (-600.0 m°C).
(For special measuring the value can be changed)
3
If desired, the base point for the calculation of extraneous water may be entered.
4
Enter the validity of the calibration (from 0-30 days selectable).
Factory setting are 0 days. If no change is made, a recalibration is not mentioned (see
2.2 status of calibration).
5
If you change data, save them by pressing the Save button.
6
To exit press Back .
Gerber Instruments AG
16
Version 1.0 (02/2014)
User Manual Gerber Cryoscope C1
5.1.2 Check/change measuring mode
1
31
Press Measuring.
4
2
3
5
2
Choose the measuring mode (Plateau, 30, 45 or 60 seconds).
3
Choose measuring units (m°
(m Celsius or m° Hortvet).
4
If you change data, save them by pressing the Save button.
5
Press Back to reach the Setup-Menu.
Setup
Please do not change the Icing and Cooler values !
If Mode and Units
nits are going to be changed, the cryoscope has to be recalibrated.
Gerber Instruments AG
17
Version 1.0 (02/2014)
User Manual Gerber Cryoscope C1
5.1.3 Check/change stirrer
1
1
Press Stirrer.
3
4
2
¾ The swinging motion of the stirrer should be about 3-4 mm.
¾ During Icing the stirrer has to beat strongly against the wall of the glass.
glass
¾ Duration is the time of Icing. They should be between 0.5 and 2.0 sec.
sec
2
Using the test buttons,, the values can be checked and changed.
3
Changed values are to be confirmed with Save.
4
To exit press Back.
After each change,
change the device must be recalibrated.
Gerber Instruments AG
18
Version 1.0 (02/2014)
User Manual Gerber Cryoscope C1
5.1.4 Select periphery
1
1
Press Periphery.
2
3
4
5
2
Manual device
¾ If a printer is connected, you have the option to enter a sample identification.
Only numbers are allowed and the maximum length are 9 digits.
3
Manual device and automat
¾ Transfer the data to a Printer or a computer Software. A specially developed software
can be ordered at Gerber Instruments.
4
All entries are to be confirmed with Save.
5
To exit press Back.
Gerber Instruments AG
19
Version 1.0 (02/2014)
User Manual Gerber Cryoscope C1
5.1.5 Adapt sensors
1
1
Press Sensors.
¾ Is sensors to be must replaced, new calibration values of the sensors must be
entered. (Announcement of the new values at delivery from spare parts).
Example: Probe
2
3
2
All entries are to be confirmed with Save.
3
To exit press Back.
Gerber Instruments AG
20
Version 1.0 (02/2014)
User Manual Gerber Cryoscope C1
5.2.
Diagnostics
1
1
Press Diagnostics.
2
3
4
2
Manual device and automat
¾ With the buttons Up/Down you can check the function of the elevator.
3
Automat
¾ With the button Step the turntable move one position clockwise.
4
To exit press Back.
At any work with the Cryoscope it must be ensured, that is a test tube
under the measuring head. Thus, a contamination of the stirrer/probe is
avoided with coolant solution.
Gerber Instruments AG
21
Version 1.0 (02/2014)
User Manual Gerber Cryoscope C1
5.3
Check/change date and time
1
1
Press Time.
3
2
2
Show Dates (display the last calibration date).
3
Press Set Time (display/change the current date and time).
6
4
5
4
If necessary set the date and time into the input field (see 1.4 changing values
5
By pressing the Set Time button the time will be saved.
6
To exit press Back.
Gerber Instruments AG
22
Version 1.0 (02/2014)
User Manual Gerber Cryoscope C1
6.
First calibration (routine calibration)
6.1
Calibration with standard A and B
1
1
Press Calibration to set the cryscope into the calibration mode.
2
2
Calibration mode (standard A) will be displayed.
¾ If the operation mode not Ready/green press the Start button.
Gerber Instruments AG
23
Version 1.0 (02/2014)
User Manual Gerber Cryoscope C1
6.1.1 Manual device-standard A
2
3
1
¾ Add 2 ml of standard A (-408 m°C) into the sample tube and insert it into the opening
of the cooling unit.
1
Press Start.
2
The first measuring value will be shown.
3
The sample counter will be set to 1.
¾ Again add 2 ml of standard A (-408 m°C) into the sample tube and insert it into the
opening of the cooling unit.
¾ Press Start.
¾ The second measuring value will be shown.
¾ The sample counter will be set to 2.
Gerber Instruments AG
24
Version 1.0 (02/2014)
User Manual Gerber Cryoscope C1
4
¾ Again add 2 ml of standard
tandard A (-408
( 408 m°C) into the sample tube and insert it into the
th
opening of the cooling unit.
¾ Press Start.
¾ The third measuring value will be shown.
shown
¾ The sample counter will be set to 3.
3
4
Press Next.
1
1
tandard B) will be displayed.
displayed
Calibration mode (standard
After each change of solutions (standard or control solution),
olution), the stirrer and the
temperature sensor have to be cleaned gently with a lint-free
free laboratory cloth from
top to bottom.
Gerber Instruments AG
25
Version 1.0 (02/2014)
User Manual Gerber Cryoscope C1
6.1.2 Manual device-standard B
3
4
2
¾ Add 2 ml of standard B (-600 m°C) into the sample tube and insert it into the opening
of the cooling unit.
2
Press Start.
3
The first measuring value will be shown.
4
The sample counter will be set to 1.
¾ Again add 2 ml of standard B (-600 m°C) into the sample tube and insert it into the
opening of the cooling unit.
¾ Press Start.
¾ The second measuring value will be shown.
¾ The sample counter will be set to 2.
Gerber Instruments AG
26
Version 1.0 (02/2014)
User Manual Gerber Cryoscope C1
5
¾ Again add 2 ml of standard B (-600 m°C) into the sample tube and insert it into the
opening of the cooling unit.
¾ Press Start.
¾ The third measuring value will be shown.
¾ The sample counter will be set to 3.
5
Press Next.
7
6
Display of the statistics.
¾ From the measurements carried out the highest and lowest values and also the mean
values are reported.
¾ If the deviations from the min/max value for the average correspond with the country
specific requirements,
confirm with Evaluate.
7
6
8
¾ The calibration is accepted.
8
To exit press Back.
Gerber Instruments AG
27
Version 1.0 (02/2014)
User Manual Gerber Cryoscope C1
6.1.3 Automatic device-standard A
2
3
1
¾ Fill in into 3 sample tubes 2 ml of standard A (-408 m°C) and insert this into the next
free space of the turntable (not directly under the probe).
1
Press Start.
2
The first measuring value will be shown.
3
The sample counter will be set to 1.
¾ The second measuring value will be shown.
¾ The sample counter will be set to 2.
4
¾ The third measuring value will be shown.
¾ The sample counter will be set to 3.
¾ Remove the sample tubes.
4
Press Next.
Gerber Instruments AG
28
Version 1.0 (02/2014)
User Manual Gerber Cryoscope C1
1
1
Calibration mode (standard
tandard B) will be displayed.
displayed
After change of the solutions (standard or control solution),
olution), the stirrer and the
temperature sensor have to be cleaned gently with a lint-free
free laboratory cloth from
top to bottom.
6.1.4 Automatic device-standard
tandard B
3
4
2
¾ Add 3 sample tubes 2 ml of standard B (-600 m°C) and insert this into the next free
space of the turntable (not
(
directly under the probe).
2
Press Start.
3
The first measuring value will be shown.
shown
4
The sample counter will be set to 1.
1
Gerber Instruments AG
29
Version 1.0 (02/2014)
User Manual Gerber Cryoscope C1
¾ The second measuring value will be shown.
¾ The sample counter will be set to 2.
5
¾ The third measuring value will be shown.
¾ The sample counter will be set to 3.
¾ Sample tubes take out.
5
Next Weiter drücken.
7
6
Display of the statistics.
¾ From the measurements carried out the highest and lowest values and also the mean
values are reported.
¾ If the deviations from the min/max value for the average correspond with the country
specific requirements,
confirm with Evaluate.
7
6
8
8
The calibration is accepted.
To exit press Back.
Gerber Instruments AG
30
Version 1.0 (02/2014)
User Manual Gerber Cryoscope C1
If the deviations are outside the country-specific
country
tolerance, the entire
calibration process has to be repeated.
repeated
After change of the solutions (standard or control solution),
olution), the stirrer and the
temperature sensor have to be cleaned gently with a lint-free
free laboratory cloth from
top to bottom..
6.2
Verification of the calibration with the control solution
so
6.2.1 Manual device
1
(
m°C) into the sample tube and insert it into the
¾ Fill in 2 ml of the control solution (-512
opening of the cooling unit.
unit
1
Press Start.
2
2
The first result will be displayed.
displayed
¾
¾
¾
¾
¾
If no printer is available the results should be written
wr
down.
This measurement shall be repeated at least two times.
The results now should be compared with the value of
o the
he control solution (-512 m°C).
If the country-specific
specific deviation stays within the tolerance the device
device is ready for use.
If the country-specific
specific deviation stays outside the tolerance the error must be wanted.
Gerber Instruments AG
31
Version 1.0 (02/2014)
User Manual Gerber Cryoscope C1
6.2.2 Automatic device
1
¾ Fill in into 3 sample tubes 2 ml of contol solution (-512 m°C) and insert this into the
next free space of the turntable (not directly under the probe).
1
Press Start.
2
2
Successively all three results will be displayed.
¾
¾
¾
¾
If no printer is available the results should be written down.
The results now should be compared with the value of the control solution (-512 m°C.
If the country-specific deviation stays within the tolerance the device is ready for use.
If the country-specific deviation stays outside the tolerance the error must be wanted.
Gerber Instruments AG
32
Version 1.0 (02/2014)
User Manual Gerber Cryoscope C1
7.
Daily work
7.1
General informations
Perform the routine calibrations (see 6.) according to your internal and country-specific
regulations. If the ambient temperature of the device changes by more than 5°C or operating
parameters are changed, a new calibration is necessary.
Always work with the sample tubes and sample volumes with which you have carried out the
calibration (2.0 ml oder 2.5 ml). The sample tubes must comply with the ISO 5764 and always
have to be in a clean and dry condition. The sample volume always has to be pipetted
exactly.
7.2
Sample preparation
Use representative and homogeneous samples that are not damaged during transport,
storage or have been modified.
The examination of the samples should be done immediately after arriving at the laboratory.
If necessary, the samples can also be stored for a short time at a temperature of 0-6 °C.
The test samples and standard solutions at the beginning of the analysis should have the
same temperature.
Before pipetting, the milk sample have to be mixed well (multiple swirling without trapping air).
7.3
Performing measurements in routine operation
Manual device
¾ Take a clean sample tube and pipette 2 ml of milk into it.
¾ Place the sample tube into the opening of the cooling unit.
¾ Press Start.
¾ The measuring head moves down and the cooling phase begins.
Automat
¾ Pipette 2 ml of milk into clean sample tubes.
¾ Place the sample tubes (max. 7 pc.) into the pitches of the turntable anti clockwise.
¾ (not directly under the probe).
¾ Press Start. The turntable moves forward one position.
¾ The measuring head moves down and the cooling phase begins.
¾ As soon as the milk sample reaches -3 °C, the freezing pulse is triggered and the
sample freezes.
¾ If necessary, you can interrupt the process by pressing the Stop button.
Gerber Instruments AG
33
Version 1.0 (02/2014)
User Manual Gerber Cryoscope C1
¾ At the end of each measuring phase, the result is displayed on the screen or on a
printer/PC (if available).
available)
After each measurement, the stirrer and the temperature sensor have to be cleaned
gently with a lint-free
free laboratory cloth from top to bottom.
bottom
7.4
Advice for optimum repeatability
¾ For each analysis always use clean and ISO 5764 corresponding
corresponding sample tubes.
¾ To clean the glasses we recommend to use hot water as well as a non
non-ionic
detergent. Please rinse the sample tubes with distilled
distilled water and dry carefully.
¾ At the beginning of each inspection every standard solution and milk sample should
have the equal temperature.
¾ Avoid any kind of changes on the samples wich are not examined immediate.
immediate
¾ Always keep the same workflow.
workflow
¾ Always work with the same amount of sample.
sample
¾ According to need, the stirrer and the temperature sensor have to be cleaned
c
gently
with a lint-free
free laboratory cloth from top to bottom. Careful: Probe and stirring needle
must not be bent.
measurement might vary slightly.
¾ After a longer measuring break, the first measurement
However,, all subsequent samples should be within the required
required specifications
Gerber Instruments AG
34
Version 1.0 (02/2014)
User Manual Gerber Cryoscope C1
8.
Internet support
Using this kind of support, Gerber Instruments is able to access your cryoscope and help you
with problems.
8.1
¾
¾
¾
¾
¾
¾
8.2
Requiered pieces for internet support
Computer with internet access
LAN Cable
USB-Ethernet Adapter
Drivers for USB - Ethernet Adapter
TeamViewer
VNCViewer
Client
Client
Optional
Enclosed
Homepage Gerber Instruments
Enclosed
Installation of the software
¾ Install the driver for USB - Ethernet adapter on your computer.
¾ Install the TeamViewer on your computer.
¾ Install the VNCViewer on your computer.
8.3
Installation of the hardware
¾ Connect the USB connector of the adapter to your computer.
¾ Connect the Ethernet port from the adapter with the Cryoscope
(cable from the customer).
8.4
¾
¾
¾
¾
Configuration of the USB- Ethernet Adapter
Open the network connections.
Open the High Speed USB- Ethernet Adapter connection.
Open the internet protocol (TCP/IP).
Insert the following IP adress:
IP adress:
192.168.1.37
Subnet mask:
255.255.255.0
Standardgateway:
192.168.1.1
Gerber Instruments AG
35
Version 1.0 (02/2014)
User Manual Gerber Cryoscope C1
8.5
¾
¾
¾
¾
Support application
pplication
Call Gerber Instruments (telephone: +41 (0)52 343 37
37 37) and ask for support.
Open the TeamViewer.
Give your ID to Gerber Instruments (left window).
Give your password to Gerber Instruments.
Instruments
A connection to the cryoscope will be established.
established
For questions about your privacy policies, please contact
contact your local IT service
before installing the software. Defective or incomplete software
software installations
are not covered by the warranty.
warranty
Gerber Instruments AG
36
Version 1.0 (02/2014)
User Manual Gerber Cryoscope C1
9.
Cleaning
If needed, clean the surface of the cryoscope with a lint-free laboratory cloth.
The tooth- and guide rod must not be cleaned.
10. Servicing
10.1 Daily servicing
¾ After change of the solutions (standard or control solution), the stirrer and the
temperature sensor have to be cleaned gently with a lint-free laboratory cloth from top
to bottom.
¾ Remove the turntable and clean it (just for automatic).
1. Loosen the knurted nut.
2. Remove the bush.
3. Remove the turntable.
4. Clean the housing area.
10.2 Weekly servicing
¾ Check the level Heat Transfer liquid, if necessary change the bottle
(to avoid dilution, do not refill).
10.3 Monthly servicing
¾ Check the level cooling liquid, if necessary (no liquid visible), fill up the cooler with the
delivered cooling liquid Coolant C1.
10.4 Servicing on the sample throughput
¾
¾
¾
¾
Replace the stir wire.
Replace the yoke.
Replace the clapper.
Replace the spring.
Gerber Instruments AG
37
Version 1.0 (02/2014)
User Manual Gerber Cryoscope C1
11. Packaging
The device is delivered in a special packaging. Please keep the original packaging for any
return shipping.
12. Disposal
At the end of its life time, the instrument must be disposed or collected in the appropriate
ways, according to the regulations in force in the country of use.
For any question please contact our sales office under:
E-mail:
Telephone:
Fax:
[email protected]
+41 (0)52 343 37 37
+41 (0)52 343 30 70
13. Technical assistance
Adress:
Gerber Instruments AG
Im Langhag 12
CH-8307 Effretikon
14. Warranty
Gerber Instruments warrants that this product will be free from defects in material and
workmanship for a period of 2 years from the delivery date respectively starting
installation date*. Providing that the instrument is used solely per the intended use and
following the instructions of use specified in the present manual well as the use of only
original Gerber spare parts, accessories and consumables. In case of default within the
warranty period, Gerber Instruments will proceed, free of charge, to the repair or the
replacement of the defect instrument. The instrument will have to be returned within the
warranty period. The return of the product to Gerber Instruments is unfree by the customer.
The service made under warranty, will not extend the contractual warranty duration, nor open
any possibility of claim for a duration extension of this latter. The repairs made because of
ordinary wear and tear, will be chargeable following the costs in force at time of execution.
Freight costs for replaceable parts pays by the customer.
*Only valid, if the attached installation report and the report registration/warranty has
been completed and emailed no later than 3 months from the delivery date to the
manufacturer email adress: [email protected]
Gerber Instruments AG
38
Version 1.0 (02/2014)
User Manual Gerber Cryoscope C1
15. Order numbers
15.1 Optional accessories
Description
Thermo printer with power supply and USB-cable
USB-RS232-Adapter
Printer paper
Printerset (printer incl. power supply, USB-cabel, USBRS232-Adapter, printer paper 10 rolls)
Pipette 2.0 ml fix. volume
Pipette 2.5 ml fix. volume
Test tube rack of stainless steel for 30 test tubes
Test tubes 2.5 ml with ring mark
Pipette tips 2 ml
Pipette tips 5 ml
USB - Ethernet Adapter
Article-nb.
05.25502
05.25503
05.25505
05.25504
Selling unit
pack=1 pc..
pack=1 pc.
pack=10 rolls
pack=10 pc.
6.235043
6.258006
05.5030
05.5021
9.411501
9.411449
05.25095
pack=1 pc.
pack=1 pc.
pack=1 pc.
pack=10 pc.
pack=500 pc.
pack=500 pc
pack=1 pc.
Article-nb.
05.5024
05.5026
05.5025
05.5012
05.5028
05.25505
05.5020
05.5021
9.411501
9.411449
Selling unit
250 ml
250 ml
250 ml
250 ml
250 ml
pack =5 rolls
pack =10 pc.
pack =10 pc.
pack=500 pc.
pack=500 pc
15.2 Consumables
Description
Standard solution -408 m°C
Standard solution -600 m°C
Control solution -512 m°C
Heat transfer liquid
Coolant liquid Coolant C1
Printer paper
Sample tubes 2.0 ml with ring mark
Sample tubes 2.5 ml with ring mark
Pipette tips 2 ml
Pipette tips 5 ml
Gerber Instruments AG
39
Version 1.0 (02/2014)
User Manual Gerber Cryoscope C1
15.3 Spare parts
Description
Gearwheel
Pump hose
Fan
Cooling pump
Pump Heat Transfer liquid
Slip clutch complete
Lift PCB
Motor complete
Coil complete
Cooling unit complete
Elevator complete
Probe complete
Article-nb.
05.25053
05.25060
05.25069
05.25059
05.25067
05.25057
05.25044
05.25043
05.25004
05.25242
05.25058
05.25012
Quantity
1
1
1
1
1
1
1
1
1
1
1
1
Yoke
Clapper
Stir wire manual device
Stir wire automatic device
Probe holder for manual device
Probe holder for automatic device
Spring for manual device
Spring for automatic device
05.25002
05.25003
05.25001
05.25113
05.25007
05.25017
05.25028M
05.25028A
1
1
1
1
1
1
1
1
Gerber Instruments AG
40
Version 1.0 (02/2014)
User Manual Gerber Cryoscope C1
16. Technical data
Test time
Sample capacity
Sample volume
Units
Approx. 90 seconds (Time mode 30 secounds)
Single sample for manual version
8 samples for automatic version
2.0 ml or 2.5 ml
m°C or m°H
Resolution
Range
Repeatability
0.1 m°C/ m°H
0 to -1000 m°C/m°H
+/- 2 m°C/m°H (1 S.D.)
Temperature
Humidity
Storage
15 to 35 °C with full sample troughput
5 to 80 % relative humidity (non condensing)
0 to 45 °C
Voltage
Power
Dimensions (wxdxh)
Net weight
Shipping weight
110 to 240 VAC (50/60 Hz)
90 W
28 x 42 x 32 cm (measuring head down)
11 kg
15 kg
Warranty
2 years
Gerber Instruments AG
41
Version 1.0 (02/2014)
User Manual Gerber Cryoscope C1
17. Notes
__________________________________________________________
__________________________________________________________
__________________________________________________________
__________________________________________________________
__________________________________________________________
__________________________________________________________
__________________________________________________________
__________________________________________________________
__________________________________________________________
__________________________________________________________
__________________________________________________________
__________________________________________________________
__________________________________________________________
Gerber Instruments AG
42
Version 1.0 (02/2014)