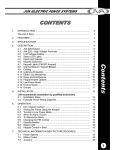
1
ELECTRIC FENCE ENERGISERS 122B 62B 42B EN Operating Manual FI Contents of the Box 122B √ 62B √ 42B √ - Earth stake stand (in parts) √ √ √ - Fence connect cable and wall mount screw √ √ √ - Earth stake connection wire √ √ √ - Operating manual √ √ √ - Olli fence energizer Thank you for choosing the Olli energiser. Please read these instructions carefully before using the device. More instructions for fencing are available at http://www.olli.fi. Safety This appliance is not meant to be used, cleaned or maintained by children or other persons with reduced physical, sensory or mental capabilities or lack of experience and knowledge, unless they have been given supervision or instruction concerning safe use of the appliance and understand the hazards involved. Children shall not play with the appliance. Vented rechargeable batteries must be placed in a well-ventilated area during charging. Do not handle fire near the battery. Discard leaking batteries with care. Recycle used batteries according to your local regulations. All Olli energisers fulfill the safety regulations that are defined for fence energisers. The electric shock given by the fence is painful and may present an danger for small children or persons suffering from heart problems if they get trapped in electric fence wires. Place the energiser upright where the animals cannot knock it over, protected from rain and direct sunlight. Please refer to the end of this user guide to see the full list of safety instructions. 2 FI How an Electric Fence Works When an animal touches the fence, electrical current travels through the animal to earth, and back to the energiser through the earth stakes. Preparation for Use Never install the energiser upside down or leave it on the ground! The energiser must be screw mounted on a wall or a post or to included earth stake stand. 3 FI Earth Stake Stand Assembly Assemble the earth stake stand as illustrated above. Push earth stake firmly to the ground. Make sure it doesn't fall. If soil is dry, the included earth stake stand may not provide sufficient earthing. In this case use separate Olli earth rods. Fence connection Connect black earth wire to terminal marked with the earth symbol . Connect red fence connect wire to terminal marked with a lightning symbol and to the fence wire. Batteries Energiser may be supplied from a 12 V rechargeable lead acid battery or from four non-rechargeable 1.5 V alkaline size D batteries (type LR20). If both are installed, the 12 V battery will be used. Rechargeable 12 V lead acid battery: Connect battery cord red clamp to positive (+) battery pole and black clamp to negative (-) battery pole. 4 FI Non-rechargeable alkaline batteries: - Remove battery holder by squeezing its handle and pull it out. - Insert four batteries in correct polarity as shown on the battery holder. - Firmly push battery holder back into the energiser so that it locks in place. Do not touch the fence with the battery cord: the energiser could be damaged! When using the energiser without a 12 V battery, connect both battery cord clamps to the earth stake stand instead of leaving them on the ground. Mains Adapter (optional accessory for 122B / 62B) The mains adapter may be used to supply the energiser and to recharge the 12 V battery. During a power outage, energiser will continue to operate from the 12 V battery. Once mains voltage returns, 12 V battery will be charged slowly(ca. 10 Ah per day) until battery is fully charged. - Connect white connector to the charging port on the bottom of the energiser. - Optionally connect 12 V battery (battery backup for unreliable mains). - Put the adapter to a mains outlet (indoor use only!). - Power the energiser on by pressing the power button. Huom: Paimen on käynnistettävä akun lataamisen aloittamiseksi. Lataamisen alettua voidaan paimen sammuttaa. Verkkolaitteen merkkivalo syttyy verkkolaitteen tai aurinkopaneelin ollessa yhdistettynä paimeneen, vaikka lataus ei olisi käynnissä. Adapter is for indoor use only! Use only Olli mains adapter N:o 6059900 Solar Panel (optional accessory for 122B / 62B) A solar panel may be connected to increase operating time from 12 V battery. During sunny summer season the energiser will not need recharging at all. - Connect fully charged 12 V lead acid battery to the battery cord - Connect Olli solar panel to the charging port on the bottom of the energiser. 5 FI Note: the energiser needs to be switched on before battery charging starts. Once charging has started, the energiser can be switched off. The adapter/solar light will shine if mains adapter or solar panel is connected, even when not charging. Battery life depends on power setting, capacity of batteries and temperature and for models 122B and 62B also speed setting, fence length and vegetation, length of day and for solar panel operation, amount of sunlight. 12 V batteries self discharge even when disconnected for storage. Fully discharging the battery may damage it, resulting in lose of capacity. Take care to recharge your 12 V battery even while in storage e.g. during winter. Once per month or two is sufficient for most batteries. Do not store batteries at very low temperatures as discharged batteries may be damaged due to freezing. Olli 42B Features Pulse light Full power Battery warning light Low power Power button To switch On, press power button until the unit beeps twice. To change from high power to low power (or vice versa) press power button again. To switch Off, press and power button and keep it pressed for 3 seconds until the unit beeps twice on shutdown. 6 FI Olli 122B / 62B Features Pulse light Battery warning light Mains adapter or solar panel connected Power button Full power Low power Day mode: Full power during the day–Low at night Night mode: Full power at night – Low during the day Power mode select button Fast pulse every 1.5 seconds Slow pulse every 2.5 seconds Speed select button Pulse Light Pulse light flashes upon each fence pulse. If fence voltage is poor (less than 2000 V), the light will flash twice on each pulse. In this case check the fence for faults. 7 FI Battery Warning Light on 12 V Operation When 12 V battery is connected, the battery warning light indicates voltage of the 12 V battery after each fence pulse. - No light: Battery voltage is good. - One flash: Under 12.15 Volts. Battery should be charged. - Two flashes: Under 11.95 Volts. Recharge the battery! - Three flashes: Under 11,75 Volts. Battery is empty. Deep discharge protection is active: operating with low power and slow pulse rate.. Recharge the battery! Battery Warning Light on Alkaline Battery Operation When neither 12 V battery nor mains adapter are connected, the battery warning light indicates voltage of the alkaline batteries after each fence pulse. - No light: Battery voltage. - One flash: Buy new alkaline batteries. - Two flashes: Change the alkaline batteries. - Three flashes: Alkaline batteries are empty. Operating with low power and slow pulse rate. Pulse light will stop flashing if battery voltage is no longer sufficient to give a fence pulse. Beeper will sound twice during the pulse if there is a problem in the fence or with the energiser. Earthing Poor earthing is the most likely cause of poor performance of the energiser; please follow these simple rules: 1. Wet/clay ground makes good earthing – Dry/sandy soil is a poor earth. 2. Use good quality earth stakes that are galvanized – A piece of iron will not work for very long. 3. DO NOT connect the earth to a building/water pipes etc. 8 FI To get good earthing it may be necessary to have more than one earth stake. Extra earth stakes should be 1 m from each other and connected together with electrical wire. How to Test Earthing 1. Make a fence fault by connecting fence wire to ground with metal rods. 2. Push fence tester earth rod into the ground. 3. Touch the earth stake with the metal tip of the tester. If tester reads over 400 Volts, add more earth stakes 1 m apart from each other and connect them with electrical wire. Fence Testing with Olli Digitester Test the fence: 1. Push the tester’s earth rod into the ground. 2. Touch the fence with the tester’s metal tip. 3. Indicated voltage should be at least 4 kV. The power in the electric fence is highly dependent on quality of the fence. Install wires and insulators wit care. Any vegetation touching the fence wire will draw power away from the fence. It is necessary to check the fence regularly! 9 FI Lightning protection All Olli energisers are protected against over voltage and the warranty covers also lightning damage. However, it is not possible to build the fence energiser to withstand all possible situations. Therefore it is wise to use an Olli lighting diverter whenever the fence is situated in very open ground or if lightning occurs frequently in the region. It is also advisable to disconnect both the fence and mains power from the energiser if you leave your electric fence unused for a long period of time. Warranty This product carries a three (3) year manufacturer’s warranty for materials and workmanship and lightning induced damage, from the date it was retailed. To claim the warranty, the customer should return the defect product to the Manufacturer, reseller or the nearest Olli Service Partner at customer's own expense. The warranty claim must be accompanied by the description of the fault, copy of the sales receipt and customer's contact information. The Manufacturer / Olli Service Partner will repair or replace the defect product and return it as soon as possible. The warranty does not cover any damages that are caused by incorrect or careless use of the product, installation that does not correspond to the provided instructions and other damages which may arise due to causes beyond the control of the Manufacturer. Olli does not accept any responsibility for any direct, indirect or consequential damages that are caused by the use of the product or the fact that the product could not be used. The liability of Olli is limited to the price of the product in maximum. Only the manufacturer and its authorised service partners are allowed to open up or repair the energiser. Danger of electrical shock! Opening up the unit will void the warranty. 10 FI Installation and Use of Electric Fences Electric fences shall be installed, operated and maintained in a manner that minimizes danger to persons, animals or their surroundings. These instructions add to any official local regulations but are not meant to overrule them. Any electric fence installed along a public road or pathway must be identified with warning signs at regular intervals. The warning sign should have a yellow background and be at least 100 mm x 200 mm large, and have the words “Caution Electric fence” or a symbol to represent a hand and shock. The inscription shall be indelible, 25 mm tall minimum and inscribed on both sides of the warning sign. Electric fences must not be supplied from two separate energisers or from independent fence circuits of the same energiser. Avoid contacting electric fence wires especially with the head, neck or torso. Do not climb over, through or under an electric fence. Use a gate or a specially designed crossing point. Constructions that could lead to entanglement should be avoided. For any two separate electric animal fences, each supplied from a separate energiser independently timed, the distance between the wires of the two electric animal fences shall be at least 2.5 m. If this gap is to be closed, this shall be affected by means of electrically nonconductive material or an isolated metal barrier. Barbed wire or razor wire MUST NOT be electrified by an energiser. A distance of at least 10 m shall be maintained between the energiser earth electrode and any other earthing system connected parts such as the power supply system protective earth or the telecommunication system earth. Connecting leads that are run inside buildings shall be effectively insulated from the earthed structural parts of the building. This may be achieved by using insulated high voltage cable. Connecting leads that are run underground shall be run in conduit of insulating material or else insulated high voltage cable shall be used. Care must be taken to avoid damage to the connecting leads due to the effects of animal hooves or tractor wheels sinking into the ground Connecting leads shall not be installed in the same conduit as the mains supply wiring, communication cables or data cables. Connecting leads and electric fence wires shall not cross above overhead power or communication lines. If an electric fence has to be installed under or near overhead power lines, do not install fence wires higher than 3 m from the ground. This height limit is applied up to a walking distance of 2 meters when looking straight up at the power line if power line voltage is up to 1000 V or less, or up to 11 FI 15 m for power lines with higher voltage. Additionally, the fence or any part of it should be no closer to overhead wires than the values shown below Power Line Voltage Power Line Voltage Power Line Voltage Up to 1,000 Volts 1,000 to 33,000 Volts Over 33,000 Volts Clearance 3 m Clearance 4 m Clearance 8 m Electric fences intended for deterring birds, household pet containment or training animals such as cows need only be supplied from low output energisers to obtain satisfactory and safe performance. In electric fences intended for deterring birds from roosting on buildings, no electric fence wire shall be connected to the energiser earth electrode. A warning sign shall be fitted to every point where persons may gain ready access to the conductors. Where an electric fence crosses a public pathway, a non-electrified gate shall be incorporated in the electric animal fence at that point or a crossing by means of stiles shall be provided. At any such crossing, the adjacent electrified wires shall carry warning signs. Ensure that all mains-operated, ancillary equipment connected to the electric animal fence circuit provide a degree of isolation between the fence circuit and the supply mains equivalent to that provided by the energiser (clauses 14, 16 and 29 of the standard IEC 60335-2-76 and their local modifications from e.g. EN 60335-2-76 define the minimum required isolation). Do not connect a mains supplied device to an electric fence unless its operating manual specifically allows this connection to be made. Protection from the weather shall be provided for the ancillary equipment unless this equipment is certified by the manufacturer as being suitable for use outdoors, and is of a type with a minimum degree of protection IPX4. The above isolation requirement also applies to battery chargers. Unless user’s manual of the energiser or the battery charger otherwise specifies, the energiser must be disconnected from the fence whenever the charger is connected. 12 FI Tekniset tiedot 122B 62B 42B Maximum fence voltage Fence voltage at 500 Ω load 8500 V 3880 V 8500V 2960V 9100V 2800V Charged energy 1, 63 J 0,82 J 0,43 J Maximum output energy 1,21 J 0,60 J 0,43 J 69-109 mA / 46 mA 40-55 mA / 28 mA 28 mA / 15 mA Ideal fence (according to CEE norm) 62 km 32 km 23 km Light vegetation 12 km 6 km 3 km Moderate vegetation 3 km 2 km 1 km IPX4 * IPX4 * IPX4 * Current consumption (fast speed): 12 V battery (full power / low power) Maximum fence length (full power): IP classification *= Protection against splashes of water Declaration of Conformity according to ISO/IEC 17050-1 Farmcomp Oy Jusslansuora 8 04360 TUUSULA, FINLAND declares, that the products described in this instruction manual conform to the EMC directive 2004/108/EC by following the harmonised standards EN 55014-1:2006+A1:2009+A2:2011 EN 55014-2:1997+A1:2001+A2:2007 and comply with the electrical safety standard EN 60335-2-76:2005+A1:2006+A11:2008+A12:2010. Tuusula, Finland February 31th, 2014 Signed Declaration of Conformity documents are filed at Farmcomp Oy, Tuusula. 13 FI FARMCOMP OY Jusslansuora 8 FI-04360 TUUSULA, FINLAND Tel. +358 9 7744 970Fax +358 9 7744 9744 [email protected], http://www.olli.fi Copyright © Farmcomp Oy 2014, All Rights Reserved 38XXXXX Rev_XXX 14