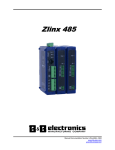
1
Wireless Modbus I/O
Model Numbers
MDR4241A
MDR4242A
MDR4243A
MDR4244A
MDR4901A
MDR4902A
MDR4903A
MDR4904A
MDE01A
MDE02A
MDE03A
MDE04A
MDE05A
MDE06A
MDE07A
MDE08A
MDP01
MDP02
Manual Documentation Number: Wireless I/O-1204
Table of Contents
Black Box Corporation - 1000 Park Drive - Lawrence, PA 15055-1018
www.blackbox.com -- Tech Support and Ordering: 724-746-5500 - Fax: 724-746-0746
Black Box Corporation - 1000 Park Drive - Lawrence, PA 15055-1018
www.blackbox.com -- Tech Support and Ordering: 724-746-5500 - Fax: 724-746-0746
ii
Updating I/O Firmware............................................................................................................... 39
Testing Modbus Mode Operation .............................................................................................. 41
Table of Contents
Table of Contents ........................................................................................................................iii
Appendix A: Default Configuration Settings ............................................................ 43
Chapter 1: Introduction ................................................................................................ 1
Appendix B: Product Specifications......................................................................... 45
About this Manual ........................................................................................................................ 1
I/O Product Family ....................................................................................................................... 1
Features....................................................................................................................................... 2
Package Checklist ....................................................................................................................... 3
Appendix C: Dimensional Diagrams......................................................................... 50
Appendix D: Modbus I/O Assignments .................................................................... 52
Chapter 2: Hardware ..................................................................................................... 5
Appendix E: I/O Models and Features ...................................................................... 61
I/O Modules ................................................................................................................................. 5
Appendix F: I/O Troubleshooting .............................................................................. 63
Base Modules .........................................................................................................................6
Expansion Modules ................................................................................................................6
Programming Module ............................................................................................................7
Indicators, Connectors and Accessories ..................................................................................... 8
LED Indicators .......................................................................................................................8
Antennas .................................................................................................................................9
Connectors..............................................................................................................................9
Power Supply Requirements ................................................................................................12
Mounting Hardware.............................................................................................................12
I/O Options and Characteristics................................................................................................. 13
I/O Options ...........................................................................................................................13
I/O Types and Characteristics .............................................................................................13
I/O Wiring.............................................................................................................................15
I/O Modes of Operation ............................................................................................................. 21
Peer-to-Peer Mode...............................................................................................................21
Modbus Mode .......................................................................................................................22
Repeater Mode .....................................................................................................................22
Chapter 3: Getting Started .......................................................................................... 23
I/O Installation............................................................................................................................ 23
RF Site Considerations ........................................................................................................23
Computer System Requirements............................................................................................... 24
Installing I/O Software................................................................................................................ 24
Connecting I/O to a PC.............................................................................................................. 25
Starting I/O Manager ................................................................................................................. 25
Information Tab....................................................................................................................28
Configuration Tab ................................................................................................................28
Input/Output Tab ..................................................................................................................28
Chapter 4: Configuration & Operation...................................................................... 29
Configuring I/O........................................................................................................................... 29
Wireless Settings ..................................................................................................................29
Modbus Mode Settings .........................................................................................................32
Peer-to-Peer Mode Settings .................................................................................................33
Input/Output Settings ...........................................................................................................35
Saving the Configuration .....................................................................................................39
Manual Documentation Number: Wireless I/O-1204
Table of Contents
Black Box Corporation - 1000 Park Drive - Lawrence, PA 15055-1018
www.blackbox.com -- Tech Support and Ordering: 724-746-5500 - Fax: 724-746-0746
Black Box Corporation - 1000 Park Drive - Lawrence, PA 15055-1018
www.blackbox.com -- Tech Support and Ordering: 724-746-5500 - Fax: 724-746-0746
iv
Introduction
Chapter 1: Introduction
Thank you for purchasing an I/O product! This product has been
manufactured to the highest standards of quality and performance to ensure
your complete satisfaction.
About this Manual
This manual has been created to assist you in installing, configuring and
using your I/O module. Please read it carefully and follow the instructions to
achieve best results.
I/O Product Family
Wireless Modbus I/O modules provide easy-to-use, cost-effective peer-topeer or Modbus wire-replacement solutions.
Figure 1.
Introduction
The I/O family of products features a selection of operational modes,
communications ranges and I/O combinations. The system is scalable making
it easy to start with a few I/O points and build a system with the required I/O
mix.
Features
•
Choice of number and type of digital and analog I/O
•
Sourcing or sinking digital outputs available
•
Flexible and scalable by adding expansion modules
•
Wireless MODBUS and Peer-to-Peer communications modes
•
Small, economical and configurable
•
Wide operating temperature range
•
AC or DC power sources
•
Three radio options for different range capabilities
•
Power, RSSI, RF Data and Bus LED’s
•
Removable screw terminal strips for power supply and I/O points
•
I/O Manager configuration software
•
DIN rail mountable
An MDR4241A Module
Manual Documentation Number: Wireless I/O-1204
Black Box Corporation - 1000 Park Drive - Lawrence, PA 15055-1018
www.blackbox.com -- Tech Support and Ordering: 724-746-5500 - Fax: 724-746-0746
1
Black Box Corporation - 1000 Park Drive - Lawrence, PA 15055-1018
www.blackbox.com -- Tech Support and Ordering: 724-746-5500 - Fax: 724-746-0746
2
Introduction
Introduction
Package Checklist
Base Modules are shipped with the following items included:
9
9
9
I/O module
a printed version of this user manual
a printed version of the I/O Quick Start Guide
Expansion Modules are shipped with the following items included:
9
9
I/O module
a printed version of the I/O Quick Start Guide
Programming Modules (MDP01) are shipped with the following items
included:
9
9
9
MDP01 Programming Module
6 foot DB9 male to DB9 female straight-through serial cable
a printed version of the I/O Quick Start Guide
Programming kits (MDP02) are shipped with the following items included:
9
9
9
9
MDP01 Programming Module
6 foot DB9 male to DB9 female straight-through serial cable
a printed version of the I/O Quick Start Guide
a CD-ROM disc with
o I/O Manager configuration software
o I/O Firmware Updater
o this manual in .PDF format
o a Quick Start guide in .PDF format
Manual Documentation Number: Wireless I/O-1204
Black Box Corporation - 1000 Park Drive - Lawrence, PA 15055-1018
www.blackbox.com -- Tech Support and Ordering: 724-746-5500 - Fax: 724-746-0746
3
Black Box Corporation - 1000 Park Drive - Lawrence, PA 15055-1018
www.blackbox.com -- Tech Support and Ordering: 724-746-5500 - Fax: 724-746-0746
4
Hardware
Hardware
Base Modules
Chapter 2: Hardware
Each I/O system is built around a Base Module. Base Modules provide
digital and/or analog I/O and radio communications with other nodes.
Wireless Modbus I/O encompasses a growing family of products including
Base Modules, Expansion Modules, Programming Modules, configuration
software and accessories. All modules are built into similar enclosures
featuring male local bus plugs and female local bus receptacles on the sides,
which allow modules to connect together. Modules are DIN rail mountable
and feature removable screw terminal blocks.
I/O Modules
I/O systems consist of Base Modules and Expansion Modules. These
modules are configured using a Programming Module, connected to a PC and
running I/O Manager software. I/O systems can operate in Modbus or Peerto-Peer modes. In Modbus mode an I/O system exchanges Modbus messages
with a Modbus radio modem. In Peer-to-peer mode two I/O systems provide
wire-replacement functionality. Some Base Modules can also be used as
repeaters, to extend the communication distance of a system.
Figure 3.
A Typical Base Module
Radio options include two frequency bands (900 MHz and 2.4 GHz) and
three power output/range categories: Short Range, Medium Range and Long
Range.
Frequency
Band
Range Category
Indoor
2.4 GHz
2.4 GHz
900 MHz
900 MHz
Short Range (SR)
Medium Range (MR)
Medium Range (MR)
Long Range (LR)
300 ft
600 ft
1500 ft
3000 ft
Figure 4.
Outdoor
(Line of Sight)
1 mile
3 miles
7 miles
14 miles
Radio Type Options and Ranges (with included antennas)
Several different combinations of digital inputs (DI), digital outputs (DO),
analog inputs (AI) and analog outputs (AO) are available. For example, the
MDR4241A features a combination of two DI’s, two DO’s, two AI’s and two
AO’s in a package with a short range (SR) 2.4 GHz radio option. Similar
models are available with medium range (MR) and long range (LR) radio
options.
Figure 2.
Front View of I/O Programming, Base and Expansion Modules
Manual Documentation Number: Wireless I/O-1204
5
Expansion Modules
Up to six Expansion Modules can be plugged into the Base Module to add
more I/O capabilities in any combination needed. For example, the MDE02A
Black Box Corporation - 1000 Park Drive - Lawrence, PA 15055-1018
www.blackbox.com -- Tech Support and Ordering: 724-746-5500 - Fax: 724-746-0746
Black Box Corporation - 1000 Park Drive - Lawrence, PA 15055-1018
www.blackbox.com -- Tech Support and Ordering: 724-746-5500 - Fax: 724-746-0746
6
Hardware
Hardware
Expansion Module provides eight additional digital outputs; the MDE06A
provides two analog inputs and two analog outputs.
Refer to Appendix E for a list of I/O models and features.
Expansion Modules connect to Base Modules by plugging the modules
together, engaging the local bus connectors located on the sides of the boxes.
Male plugs on Expansion Modules plug into female connectors on the side of
the Base Module or other Expansion Modules, resulting in a horizontal
“stack” with the Base Module on the left and Expansion Modules extending
to the right.
MDP01
Figure 6.
A PC, Programming Module and Base Module
Indicators, Connectors and Accessories
LED Indicators
Base Modules have four LED indicators: a Power LED, an RSSI LED, a
Wireless Data LED and a Local Bus Data LED.
Expansion Modules and Programming Modules have two LED’s: a Power
LED and a Local Bus Data LED
Figure 5.
Power LED
Base and Expansion Modules Connected Together
The Power LED illuminates (red) immediately on power up indicating that
AC or DC power is present on the power supply terminals.
Programming Module
The MDP01 Programming Module provides a convenient way to interface
Base and Expansion Modules with a PC and the software used to configure
them. The Programming Module plugs into a Base or Expansion Module.
The Programming Module connects to a PC serial port (COM1 to 16) using a
standard straight-through 9-pin serial cable.
RSSI LED
The RSSI LED provides an indication of the signal strength of the received
radio signal. The color of the LED indicates whether the signal is weak, OK
or strong.
LED Color
Signal Strength
Off
Red
Yellow
Green
No signal
Weak
OK
Strong
Figure 7.
Manual Documentation Number: Wireless I/O-1204
Black Box Corporation - 1000 Park Drive - Lawrence, PA 15055-1018
www.blackbox.com -- Tech Support and Ordering: 724-746-5500 - Fax: 724-746-0746
RSSI LED Status Table
7
Black Box Corporation - 1000 Park Drive - Lawrence, PA 15055-1018
www.blackbox.com -- Tech Support and Ordering: 724-746-5500 - Fax: 724-746-0746
8
Hardware
Hardware
RF Data LED
The RF Data LED blinks (green) when data is being transmitted or received
on the radio link. When the LED is off no data is being transmitted or
received.
Bus LED
The Bus LED blinks (green) when data is being transmitted or received on
the local bus connection. When the LED is off no data is being transmitted or
received.
Note: If communications is not established within a preset number of retries
(default is 10) the RF Data and Bus LED’s blink alternately to indicate a loss of
communications.
Figure 8.
Top View of a Base Module
Antennas
Base Modules operating in the 900 MHz band come equipped with 6.5-inch
folding rubber duck antennas that screw onto the reverse SMA connector on
top of the case. Base Modules operating in the 2.4 GHz band come equipped
with 4.25-inch, folding rubber duck antennas. Higher gain antennas may be
connected to extend range.
I/O Base and Expansion Modules feature connectors for connecting field I/O
wiring and plugging together I/O modules (local bus). In addition, Base
Modules include connectors for connecting an antenna and power supply.
Programming Modules include a serial connector for connecting to a PC
COM port.
Antenna Connector
Base Modules have a reverse SMA antenna connector mounted on the top
edge of the enclosure.
Black Box Corporation - 1000 Park Drive - Lawrence, PA 15055-1018
www.blackbox.com -- Tech Support and Ordering: 724-746-5500 - Fax: 724-746-0746
The Power Supply connector (Base Modules only) is a two-position
removable terminal block located on the top of the unit. Terminal spacing is
3.5 mm. The terminal block accepts solid and stranded wires from 28 AWG
to 16 AWG. Please check polarity marking in Figure 8.
Refer to the following section for information on Power Supply Requirements.
Connectors
Manual Documentation Number: Wireless I/O-1204
Power Supply Connector
9
The Programming Module and all Expansion Modules receive power from
the Base Module via the local bus connector.
Serial Port Connector
The Serial Port connector (Programming Module only) is a DB-9F (female)
connector. The Programming Module is configured as a DCE device and
supports standard RS-232 serial communications signal levels. For
programming, a standard straight-through serial cable with DB-9F on one
end and DB-9M on the other is required.
Figure 9.
DB-9 Female Serial Port Connector with Pin-out
Black Box Corporation - 1000 Park Drive - Lawrence, PA 15055-1018
www.blackbox.com -- Tech Support and Ordering: 724-746-5500 - Fax: 724-746-0746
10
Hardware
Local Bus Connectors
Hardware
Power Supply Requirements
The Local Bus connectors are included on Base, Expansion and
Programming Modules. These connectors are dual row, 14 pin (2 mm
spacing) connectors, male on one side of the module and female on the other.
Modules are plugged together to supply power and facilitate communication
between modules.
I/O systems can be powered from DC or AC power sources. No supply is
included since the power rating of the supply will depend on the total power
requirements of all modules used in the system.
When adding an Expansion Module to a Base Module the male connector on
the Expansion Module plugs into the female connector on the Base Module.
The second Expansion Module plugs into the first, and so on, up to a
maximum of six Expansion Modules.
If an AC power supply is to be used, it should be 24VAC.
Appendix B contains a listing of power requirements for all I/O modules.
If a DC power supply is to be used, it is important to note whether the system
will include DO’s with sourcing outputs.
•
Systems which incorporate DO’s with sourcing (PNP transistor) outputs
on the Base Module or any Expansion Modules must be powered with a
supply voltage range of 10 to 46 VDC maximum.
•
Systems in which all digital outputs have sinking (NPN transistor)
outputs on the Base Module and all Expansion Modules (no sourcing
drivers) can be powered with a supply voltage range of 10 to 48 VDC.
Refer to the I/O Options and Characteristics section for more information on
sourcing and sinking outputs.
Mounting Hardware
I/O modules can be DIN rail mounted. The DIN mounting clip and spring is
included on each module.
Figure 10. Local Bus Connector
On the Programming Module, either Local Bus connector (male or female)
can be used to plug into Base or Expansion Modules.
I/O Connectors
I/O connectors for Base and Expansion Modules are removable (plug in)
screw terminal blocks located on the front of the unit. Terminal spacing is 3.5
mm. Depending on the specific model, the number of terminals may vary.
The maximum is 16 terminals (two 8-terminal blocks).
Formatted: Bullets and Numbering
Figure 11. DIN Clip with Spring on a I/O Module
Manual Documentation Number: Wireless I/O-1204
Black Box Corporation - 1000 Park Drive - Lawrence, PA 15055-1018
www.blackbox.com -- Tech Support and Ordering: 724-746-5500 - Fax: 724-746-0746
11
Black Box Corporation - 1000 Park Drive - Lawrence, PA 15055-1018
www.blackbox.com -- Tech Support and Ordering: 724-746-5500 - Fax: 724-746-0746
12
Hardware
Hardware
Sourcing (PNP transistor) drivers provide up to 40 mA per output (or 320
mA total for an 8 DO modules) at output voltages up to 45 VDC to connected
loads.
I/O Options and Characteristics
I/O Options
The Wireless Modbus I/O family of products features a variety of input and
output options. Base and Expansion Module options include:
•
2 analog inputs, 2 analog outputs, 2 digital inputs and 2 digital outputs
(sourcing or sinking driver)
•
4 digital inputs and 4 digital outputs (sourcing or sinking driver)
•
8 digital inputs
•
8 digital outputs (sourcing or sinking driver)
•
4 analog inputs
o RTD Temperature input module available
•
4 analog outputs
•
2 analog inputs and 2 analog outputs
Sinking (NPN transistor) drivers can sink up to 40 mA per output (or 320 mA
total for an 8 DO module) at voltages up 48 VDC.
Analog Inputs
Analog inputs accept voltage, current signals, or RTD temperature signals.
When configured as voltage inputs the full scale range is 0 to 10 VDC. When
configured as current inputs the full scale range is 0 to 20 mA and the input
resistance is 250 ohms. When configured as RTD input the range is PT100,
PT1000, CU10 types.
Analog Outputs
(Modules continue to be developed with additional features and options.)
Analog outputs produce voltage or current output signals. When configured
as voltage outputs the full scale range is 0 to 10 VDC at 1 mA maximum.
When configured as current outputs the full scale range is 0 to 20 mA with a
maximum load resistance of 450 Ω at 20 mA.
0 to 20 mA AI’s and AO’s accommodate standard 4 to 20 mA instrumentation
current loop signals.
Refer to Appendix E for a list of available models and options.
I/O Types and Characteristics
Digital Inputs
DI’s can detect the presence of contact closures, transistor switches or on/off
DC voltage signals (low or high logic levels). Voltages below 0.8 VDC are
interpreted as a low state. Voltages between 4.0 VDC and 48 VDC are
interpreted as a high state.
Note: Inputs have an internal “weak” pull-up resistor so unconnected inputs will
read as being in the high state.
Digital Outputs
Digital outputs send on/off signals (low or high logic levels) to drive external
devices such as indicators, relay coils or the inputs of other equipment such
as PLC’s, SCADA, etc. Modules with digital outputs are available with
sourcing or sinking drivers.
Manual Documentation Number: Wireless I/O-1204
Black Box Corporation - 1000 Park Drive - Lawrence, PA 15055-1018
www.blackbox.com -- Tech Support and Ordering: 724-746-5500 - Fax: 724-746-0746
13
Black Box Corporation - 1000 Park Drive - Lawrence, PA 15055-1018
www.blackbox.com -- Tech Support and Ordering: 724-746-5500 - Fax: 724-746-0746
14
Hardware
Hardware
I/O Wiring
DI Wiring
The following diagram shows typical connection wiring for various digital
inputs:
Figure 13. Typical Digital Output Wiring for Sourcing Outputs
(MDE03A Expansion Module)
Formatted: Bullets and Numbering
The following diagram shows typical connection wiring for modules
featuring sinking (NPN) drivers:
Figure 12. Typical Digital Input Wiring for Various Input Devices
(MDE03A Expansion Module)
Formatted: Bullets and Numbering
Note: No external power supply wiring is required for Expansion Modules
Figure 14. Typical Digital Output Wiring for Sinking Outputs
(MDE03A Expansion Module)
Formatted: Bullets and Numbering
DO Wiring
The following diagram shows typical connection wiring for modules
featuring sourcing (PNP) drivers:
Manual Documentation Number: Wireless I/O-1204
Black Box Corporation - 1000 Park Drive - Lawrence, PA 15055-1018
www.blackbox.com -- Tech Support and Ordering: 724-746-5500 - Fax: 724-746-0746
15
Black Box Corporation - 1000 Park Drive - Lawrence, PA 15055-1018
www.blackbox.com -- Tech Support and Ordering: 724-746-5500 - Fax: 724-746-0746
16
Hardware
Hardware
AO Wiring
The following diagram shows typical connection wiring for analog outputs:
AI Wiring
The following diagram shows typical connection wiring for analog inputs:
Formatted: Bullets and Numbering
Figure 16. Typical Analog Output Wiring (MDR4901A Base Module)
RTD Wiring
The following diagram shows typical connection wiring for RTD inputs.
Formatted: Bullets and Numbering
Figure 15. Typical Analog Input Wiring (MDR4901A Base Module)
Figure 17. Typical RTD Input Wiring
Manual Documentation Number: Wireless I/O-1204
17
Black Box Corporation - 1000 Park Drive - Lawrence, PA 15055-1018
www.blackbox.com -- Tech Support and Ordering: 724-746-5500 - Fax: 724-746-0746
Black Box Corporation - 1000 Park Drive - Lawrence, PA 15055-1018
www.blackbox.com -- Tech Support and Ordering: 724-746-5500 - Fax: 724-746-0746
18
Hardware
Hardware
Base
Expansion 1
Expansion 2
Expansion 3
Expansion 4
Expansion 5
Expansion 6
Modbus I/O Addressing
I/O modules can be configured to operate as wireless Modbus nodes. In
Modbus mode messages are sent across the wireless link from a Modbus
modem to the I/O and from the I/O to the Modbus modem. Digital and
analog input information from the I/O inputs is stored in the I/O memory and
then sent across the link to the Modbus modem. Digital and analog output
information is sent from the Modbus modem to the I/O, stored in its memory
and then sent to the outputs.
To use Modbus mode successfully, an understanding of the I/O memory map
assignments is necessary.
Modbus fundtion codes supportd are:
DO
DI
AI
AO
00001 to 00112
10001 to 10112
30001 to 30112
40001 to 40112
Figure 18. I/O Memory Areas Table
Within these sections, addresses are reserved for all I/O modules that may be
used.
Module
The following examples show how the addressing works:
Example 1: To turn on the second digital output (DO2) on the Base Module,
the Modbus modem sends a message placing a logic 1 in memory location
00002.
A list of all Modbus address assignments for all I/O points is shown in
Appendix D. Several important points about this list should be noted:
Messages sent between I/O and a Modbus modem use Modbus memory
addresses to specify what type of information is being sent and where it is
stored. In the Modbus addressing scheme each type of I/O (DO, DI, AI and
AO) is stored in a different section of the memory.
I/O Type
Figure 19. Module I/O Addressing Table
Example 2: To cause Expansion Module 3 to output a specified voltage on
AO1, the Modbus modem sends a message to set the register at Modbus
address 40049 to the appropriate value.
Function 1: Read DO Status
Function 2: Read DI’s
Function 3: Read AO Status
Function 4: Read AI’s
Function 6: Write to Single AO
Function 15: Write to Multiple DO’s
Modbus Memory
Address
x0001 to x0016
x0017 to x0032
x0033 to x0048
x0049 to x0064
x0065 to x0080
x0081 to x0096
x0097 to x0112
•
Some addresses are listed but not implemented in current versions of I/O
hardware.
•
Some addresses are reserved for internal I/O use.
•
Some addresses are reserved for future use.
•
40000 series addresses store Analog Output data AND Frequency
Counter data when Digital Inputs are configured for Frequency Counter
operation. For each module, the first eight memory locations are
assigned to AO data and the next four locations are assigned to
Frequency Counter data.
•
If a Modbus device communicating with I/O tries to send to or receive
from a memory address not implemented by the hardware in use,
the I/O replies with an exception response.
Appendix D of this manual contains a list of Modbus I/O assignments for the
I/O.
Memory Range
Manual Documentation Number: Wireless I/O-1204
Black Box Corporation - 1000 Park Drive - Lawrence, PA 15055-1018
www.blackbox.com -- Tech Support and Ordering: 724-746-5500 - Fax: 724-746-0746
19
Black Box Corporation - 1000 Park Drive - Lawrence, PA 15055-1018
www.blackbox.com -- Tech Support and Ordering: 724-746-5500 - Fax: 724-746-0746
20
Hardware
Hardware
Modbus Mode
I/O Modes of Operation
I/O systems can operate in Peer-to-Peer or Modbus modes. Some Base
Modules can be configured as repeaters to extend the radio coverage
distance.
In Modbus mode standard Modbus messages can be sent and received
between a Modbus radio modem and a I/O system. Data written to output
addresses in the I/O result in signals appearing on its outputs. Signals
connected to I/O inputs are converted and stored in Modbus input memory
locations and then sent across the link as Modbus messages to the Modbus
radio modem.
Peer-to-Peer Mode
In Peer-to-Peer mode two I/O systems provide wire replacement
functionality. In this mode one Base is configured as the master and the other
as the slave. (It does not matter which end of the link is the master and which
is the slave.) Both Base Modules must be the same model. Analog and digital
input signals connected to AI’s and DI’s on one module appear on the
corresponding AO’s and DO’s on the other module. Any Expansion Modules
included in a Peer-to-Peer system must be chosen to be complimentary. For
example, if Expansion Module 1 on one end of the link is a MDE04A (4
analog inputs), Expansion Module 1 on the other end of the link must be a
MDE05A (4 analog outputs).
Figure 21. Modbus Mode
Repeater Mode
When a I/O Base Module is configured as a radio repeater it relays data (from
a Modbus modem or another I/O Base Module) and extends the range of
communication.
Figure 20. Peer-to-Peer Mode
Manual Documentation Number: Wireless I/O-1204
Black Box Corporation - 1000 Park Drive - Lawrence, PA 15055-1018
www.blackbox.com -- Tech Support and Ordering: 724-746-5500 - Fax: 724-746-0746
21
Figure 22. Using a Base Module as a Repeater
Black Box Corporation - 1000 Park Drive - Lawrence, PA 15055-1018
www.blackbox.com -- Tech Support and Ordering: 724-746-5500 - Fax: 724-746-0746
22
Getting Started
Chapter 3: Getting Started
Getting Started
Most importantly, some research and testing of the proposed installation
location(s) should be carried out. Sometimes small changes in location can
make a significant improvement to coverage.
Computer System Requirements
I/O Installation
The I/O Manager software requires the following computer hardware and
operating systems:
RF Site Considerations
When installing any radio equipment it is important to give careful
consideration to the installation location and the surrounding area. Radio
transmission and reception is affected by absorption, reflection and refraction
of the radio signals. These factors are determined by the distance between the
transmitting and receiving antennas, the type, position and amount of
obstructions, antenna heights, frequency band and RF power used, and other
factors.
•
A PC with one serial port available between COM1 and COM16
•
Windows XP (Home or Professional with SP1 and SP2), Windows 2000
(with SP4), Windows 98 (SP1, Second Edition) or Windows ME
Installing I/O Software
To install the I/O Manager software:
There are several ways to optimize the RF environment to ensure satisfactory
performance. A partial list of these follows:
1. Insert the CD included with your I/O product into the CD ROM drive of
your PC.
•
2. The installation should launch automatically. If not:
Select the I/O radio option that provides sufficient power for your
application. Lower frequencies travel farther and are less affected by
absorption in materials. Higher power levels generally provide greater
penetration through objects.
•
Select installation locations that come as close as possible to providing
LOS access between Base Modules.
•
Avoid installation locations where metal objects may block, reflect,
refract or cause multipathing of radio frequencies. (In some cases
reflections may enhance reception but in others it can cause problems.
Some experimentation may be necessary.)
•
Select installation locations to increase antenna heights.
•
Select equipment enclosures made of materials that minimize RF
attenuation.
•
Avoid locations with other radio equipment that may cause interference.
•
In some cases alternate types of antennas (more directional) or remote
antenna mounting (outside of enclosures or at a higher elevation) may be
required.
Manual Documentation Number: Wireless I/O-1204
Black Box Corporation - 1000 Park Drive - Lawrence, PA 15055-1018
www.blackbox.com -- Tech Support and Ordering: 724-746-5500 - Fax: 724-746-0746
a.
Click Start on the Task Bar and select Run
b.
Type in [CD drive letter]:\setup.exe
3. Follow the prompts to install the software.
When installation is complete I/O Manager, I/O Firmware Updater, and
.PDF files containing this manual and the Quick Start Guide are
accessible from the Windows Start menu.
23
Black Box Corporation - 1000 Park Drive - Lawrence, PA 15055-1018
www.blackbox.com -- Tech Support and Ordering: 724-746-5500 - Fax: 724-746-0746
24
Getting Started
Getting Started
starts with the most recently used serial port in which a device was
found.
Connecting I/O to a PC
1. With power disconnected from the Base Module, plug the MDP01
Programming Module into the Base Module.
MPD01
Figure 23. A PC, Programming Module and Base Module
2. Connect any required Expansion Modules to the Base Module. (The
male local bus connector on the first Expansion Module plugs into the
female connector on the Base Module. The second Expansion Module
plugs into the first, etc.)
3. Connect the PC serial port to the Programming Module using a straightthrough serial (9 pin) cable.
4. Re-apply power to the I/O Base Module. The Power LED should light
up.
Starting I/O Manager
Figure 24. Discovery Window
During the scan the Progress box displays information about the
scanning process. If a device is not found at the most recently successful
port it continues to scan through COM ports 1 to 16. The bar graph near
the bottom of the window indicates progress.
3. If the device is not found the Progress box displays:
The device was not found on any serial port.
a.
Check the power supply and serial cable connections
b.
Click the Connect button. The connection process will be repeated
and the device should be found.
1. From the Windows Start menu, start the I/O Manager software.
The I/O splash window appears briefly, followed by the discovery
window.
2. The Connection drop down list defaults to Automatic discovery. The
software scans through COM ports looking for I/O devices. The scan
Manual Documentation Number: Wireless I/O-1204
Black Box Corporation - 1000 Park Drive - Lawrence, PA 15055-1018
www.blackbox.com -- Tech Support and Ordering: 724-746-5500 - Fax: 724-746-0746
25
4. If Automatic connection is not desired, a particular COM port (1 to 16)
can be specified:
a.
Select the COM port number from the Connection drop down list.
b.
Click the Connect button to initiate the connection process.
Clicking the Stop button stops the module discovery process.
Black Box Corporation - 1000 Park Drive - Lawrence, PA 15055-1018
www.blackbox.com -- Tech Support and Ordering: 724-746-5500 - Fax: 724-746-0746
26
Getting Started
5. If the device is found, the I/O Manager window opens.
Getting Started
•
An Update button used to save configuration parameters to the
modules.
•
An Exit button.
Information Tab
The Information tab displays a tree structure listing:
•
Base and Expansion modules detected and their model numbers
•
Firmware version number for each module
•
Hardware version number for each module
•
Radio firmware version number for the Base Module
•
Radio hardware version number for the Base Module
Configuration Tab
The Configuration tab contains fields that allow configuration of:
Figure 25. I/O Manager
The I/O Manager window contains:
•
File and Help menus
•
Three tabbed panes: Information, Configuration, and Input/Output
•
A Help sidebar containing information and hints related to the
current tab
•
A graphic display of the Base and Expansion Modules discovered
•
A Status bar (at the bottom) showing the COM port and
communications parameters (baud rate, parity, data bits, stop bits
and flow control)
Manual Documentation Number: Wireless I/O-1204
Black Box Corporation - 1000 Park Drive - Lawrence, PA 15055-1018
www.blackbox.com -- Tech Support and Ordering: 724-746-5500 - Fax: 724-746-0746
•
Wireless (Radio) parameters: Region, Channel Number, Network
Identifier and Repeater Mode
•
Communications Modes: Peer-to-Peer Master, Peer-to-Peer Slave,
Modbus (and related parameters)
Input/Output Tab
The Input/Output tab contains:
•
A tree structure listing input and output types for each module
•
Input and output configuration options
27
Black Box Corporation - 1000 Park Drive - Lawrence, PA 15055-1018
www.blackbox.com -- Tech Support and Ordering: 724-746-5500 - Fax: 724-746-0746
28
Configuration & Operation
Configuration & Operation
Chapter 4: Configuration & Operation
I/O Manager software is used to configure I/O hardware. Using I/O
Manager, the system can be configured to operate in Peer-to-Peer (wirereplacement) or Modbus modes (receiving Modbus commands and data from
a Modbus wireless modem). Digital inputs can be configured to operate in
Discrete (on/off) or Frequency Counter modes and analog inputs and outputs
are configurable for voltage or current loop operation.
Configuring I/O
I/O modules can be configured to operate as wireless Modbus nodes or as
wire replacement links in Peer-to-Peer mode. Wireless configuration options
are the same for either mode.
Figure 26. Wireless Area of Configuration Tab
Wireless Settings
I/O Base Modules can be configured for operation in different geographic
areas of the world. They can also be configured to operate on several
different radio channels. This allows multiple I/O systems to operate in the
same area without interference. The number of different systems can be
further increased by configuring a unique Network Identifier (which selects
the frequency hopping sequence). Base Modules also can be used as
repeaters, to extend the range of a system.
3. Set the Channel Number field to match the channel used by the device
with which it will communicate.
a.
If that device is another I/O Base Module, set the Channel Numbers
the same when configuring each of them.
b.
If the device is a Modbus radio modem, the modem must be
configured by using the correct AT command to match the Base
Module’s Channel Number.
c.
Each I/O radio type uses a different Channel Number range. Modbus
radio modems use different AT commands depending on the radio
type. The table below shows these ranges and commands.
To configure Wireless settings:
1. Select the Configuration tab.
2. In the Region drop down list, select the region in which you are
operating: Europe or Other. The Region selection configures the radio
to operate with the power output and other parameters appropriate for
that region. The default Region selection is Europe, which limits power
levels to those acceptable in that region.
Type/Range
Base Module Channel
Number Range
Radio Modem
AT Command
Short Range (SR)
Medium Range (MR)
Long Range (LR)
12 to 23
0 to 6
0 to 9
ATCH
ATHP
Figure 27. Radio Types, Channel Numbers and AT Commands
Manual Documentation Number: Wireless I/O-1204
Black Box Corporation - 1000 Park Drive - Lawrence, PA 15055-1018
www.blackbox.com -- Tech Support and Ordering: 724-746-5500 - Fax: 724-746-0746
29
Black Box Corporation - 1000 Park Drive - Lawrence, PA 15055-1018
www.blackbox.com -- Tech Support and Ordering: 724-746-5500 - Fax: 724-746-0746
30
Configuration & Operation
The default value of the Channel Number field for SR radios is 12; the
default for MR and LR radios is 0.
4. Set the Network Identifier field to match the Identifier used by the
device with which it will communicate.
a.
If that device is another I/O Base Module, set the Network
Identifiers the same when configuring each of them.
b.
If the device is a Modbus radio modem, the modem must be
configured by using the correct AT command to match the Base
Module’s Network Identifier.
c.
Each I/O radio type uses a different Network Identifier range.
Modbus radio modems must be configured to use the ATID
command. The table below shows the channel number ranges.
Type/Range
Base Module Network
Identifier Range
Radio Modem
AT Command
Short Range (SR)
Medium Range (MR)
Long Range (LR)
0 to 255
16 to 255
17 to 255
ATID
Configuration & Operation
Modbus Mode Settings
When configured as a wireless Modbus node, I/O communicates with a
Wireless Modbus Modem and provides remote I/O functionality.
Refer to Appendix E for a list of which I/O Modbus modems are compatible with
which I/O Base Modules.
When the I/O receives a Modbus message to write to a discrete output (0xxxx
addresses in its memory map), the I/O module turns on its corresponding
digital output. If a message containing holding register data is received
(4xxxx addresses in its memory map), the I/O module converts the value to a
voltage or current signal on the corresponding analog output.
Figure 28. Network ID Value Table
The default value of the Channel Number field for SR radios is 0; the
default for MR radios is 16 and for LR radios is 17.
d.
For MR and LR radio modems, set the destination address (ATDT)
to 0xFFFF.
5. Select the Repeater checkbox if the I/O Base Module is to be used as a
repeater, re-broadcasting I/O data received in Modbus or Peer-to-Peer
modes.
The default value of the Repeater field is: unchecked.
Note: Repeater Mode can only be implemented on the medium range (MR) and
long range (LR) Base Modules. The Repeater checkbox is not available when
short range (SR) Base Modules.
Figure 29. Modbus Mode
Digital and analog signals applied to the I/O module’s input terminals are
converted to Modbus messages to be sent back to the radio modem. Digital
inputs are stored as 1xxxx (coil) addresses; analog inputs are converted to 12
bit binary values and stored in 3xxxx (input register) addresses.
To configure the I/O for Modbus mode:
1. Select the Configuration tab.
Manual Documentation Number: Wireless I/O-1204
Black Box Corporation - 1000 Park Drive - Lawrence, PA 15055-1018
www.blackbox.com -- Tech Support and Ordering: 724-746-5500 - Fax: 724-746-0746
31
2. Select the Modbus option button.
Black Box Corporation - 1000 Park Drive - Lawrence, PA 15055-1018
www.blackbox.com -- Tech Support and Ordering: 724-746-5500 - Fax: 724-746-0746
32
Configuration & Operation
3. In the Modbus Address box, type the Modbus address to be used.
The allowable range of Modbus addresses is from 1 to 247. The default
Modbus address is 1.
Configuration & Operation
1. Select the Configuration tab.
2. Select the Peer-to-Peer Master option button.
Figure 31. Peer-to-Peer Master Configuration
Figure 30. Configuration Tab with Default Values
3. Set the Peer-to-Peer Master address from 1 to 255. Please note the Peerto-Peer Slave address must also match.
Peer-to-Peer Mode Settings
In Peer-to-Peer mode digital and analog signals can be transferred in both
directions across a I/O link. For successful communication both Base
Modules must be the same model and all Expansion Modules must be
complimentary (e.g. DI to DO, AI to AO) and arranged in the same order on
the Local Bus. One is configured as Peer-to-Peer Master and other is
configured as Peer-to-Peer slave. It does not matter which one is configured
as master. Additionally, Peer-to-Peer Master address MUST match the Peerto-Peer Slave address (1-255).
Peer-to-Peer Master
4. The Polling Rate box contains the number of seconds between polls by
the master. The default value of 1 second is usually satisfactory. The
range of values is 0 to 20 seconds. If the I/O points are not updating
properly, try increasing the value.
5. The Retry Count box contains the number of attempts that will be made
to communicate with the slave device before the module indicates
communication has been lost. Lost communication is indicated by the RF
Data and Bus LED’s blinking alternately. The default value of 10 is
usually satisfactory. The range of values is 10 to 255.
To configure the I/O Base Module for Peer-to-Peer Master Mode:
Peer-to-Peer Slave
To configure the I/O Base Module for Peer-to-Peer Slave Mode:
Manual Documentation Number: Wireless I/O-1204
33
Black Box Corporation - 1000 Park Drive - Lawrence, PA 15055-1018
www.blackbox.com -- Tech Support and Ordering: 724-746-5500 - Fax: 724-746-0746
Black Box Corporation - 1000 Park Drive - Lawrence, PA 15055-1018
www.blackbox.com -- Tech Support and Ordering: 724-746-5500 - Fax: 724-746-0746
34
Configuration & Operation
1. Select the Configuration tab.
Configuration & Operation
1. Select the Input/Output tab.
2. Select the Peer-to-Peer Slave option button...
An input tree appears listing all Base and Expansion Modules in the
system and the inputs available on them.
3. Set the Peer-to-Peer Slave address from 1 to 255. Please note the Peerto-Peer Master address must also match.
Figure 32. Peer-to-Peer Slave Configuration
Figure 33. Digital Input Configuration
Input/Output Settings
Digital inputs and analog inputs/outputs on I/O modules are configured from
the Input/Output tab of the I/O Manager. The first two digital inputs on any
module can be configured as Discrete inputs or Frequency Counter inputs.
(Any additional digital inputs operate as Discrete inputs only.) Frequency
Counter operation is only functional when the I/O is set up in Modbus mode.
Analog inputs and outputs can be configured for voltage or current loop
operation.
2. Select the Digital Input to be configured.
3. Select Discrete or Frequency Counter (for the first two inputs only). Do
NOT exceed 5 kHz for frequency input.
Setting the Digital Mode of either of the first two DI’s to Frequency Mode sets
both DI’s on that module to the same mode. Do NOT exceed 5 kHz for
frequency input.
4. Select the Analog Input to be configured.
To configure digital and analog I/O:
5. Select the required Analog Mode (0 to 10 VDC or 0 to 20 mA).
Manual Documentation Number: Wireless I/O-1204
35
Black Box Corporation - 1000 Park Drive - Lawrence, PA 15055-1018
www.blackbox.com -- Tech Support and Ordering: 724-746-5500 - Fax: 724-746-0746
Black Box Corporation - 1000 Park Drive - Lawrence, PA 15055-1018
www.blackbox.com -- Tech Support and Ordering: 724-746-5500 - Fax: 724-746-0746
36
Configuration & Operation
Configuration & Operation
Setting the Analog Mode of one AI or AO sets all AI’s and AO’s on that module
to the same mode.
If RTD module present then,
1. Select the Input/Output tab.
An input tree appears listing all Base and Expansion Modules in the
system and the inputs available on
them.
Figure 34. Analog Input Configuration
6. Select the Analog Output to be configured.
7. Select the required Analog Mode (0 to 10 VDC or 0 to 20 mA).
2. Select the RTD to be configured.
3. To increase speed, RTD channels may be turned on or off. If nothing is
connected to the RTD channel, then uncheck the Channel Enabled
option.
Manual Documentation Number: Wireless I/O-1204
37
4. Select the RTD type as PT100, PT1000, CU10 depending on your RTD
type.
Black Box Corporation - 1000 Park Drive - Lawrence, PA 15055-1018
www.blackbox.com -- Tech Support and Ordering: 724-746-5500 - Fax: 724-746-0746
Black Box Corporation - 1000 Park Drive - Lawrence, PA 15055-1018
www.blackbox.com -- Tech Support and Ordering: 724-746-5500 - Fax: 724-746-0746
38
Configuration & Operation
5. Select if you have wired a 2, 3, or 4 wire RTD probe to the input module.
Configuration & Operation
3. With power disconnected from the Base Module, plug the Programming
Module into the Base Module.
4. Connect Expansion Modules requiring updates to the Base Module. (The
male local bus connector on the first Expansion Module plugs into the
female connector on the Base Module. The second Expansion Module
plugs into the first, etc.)
Setting the Analog Mode of one AI or AO sets all AI’s and AO’s on that module
to the same mode.
Saving the Configuration
When all configuration settings are complete, click the Update button to save
them in the I/O Base Module.
5. Connect the PC serial port (COM 1 to 16) to the Programming Module
using a straight-through serial (9 pin) cable.
1. The Progress bar at the bottom of the windows shows the progress of the
update.
6. From the Windows Start menu, start the I/O Firmware Updater software.
The I/O Firmware Updater Caution dialog box appears.
2. The Status bar displays the following text:
Sending module parameters to the base module.
3. When the updating process is complete, the Status bar displays the
message:
The configuration has been sent successfully.
Note: When configuration is complete, and the configuration has been saved,
power can be removed from the Base Module and the MDP01 Programming
Module disconnected and removed.
Updating I/O Firmware
Figure 35. Firmware Updater Caution Dialog Box
Occasionally, updated firmware becomes available for I/O modules. When
the I/O Manager software is installed on your computer the I/O Updater
software is also installed. This can be used to update the firmware in your I/O
modules. The following procedure describes the firmware updating process
1. Disconnect power from the Base Module.
7. Select the COM port from the Connection drop down list.
8. Click Connect.
9. Re-apply power to the I/O Base Module. The Power LED should light
up.
2. Disconnect all modules from external equipment. (The easiest way to
disconnect is to unplug all I/O terminal blocks.)
10. The I/O Firmware Updater window opens and displays a list of the Base
and Expansion Modules.
11. On the module list, select the Base or Expansion Module to be updated.
Manual Documentation Number: Wireless I/O-1204
Black Box Corporation - 1000 Park Drive - Lawrence, PA 15055-1018
www.blackbox.com -- Tech Support and Ordering: 724-746-5500 - Fax: 724-746-0746
39
12. In the Firmware Image drop down box, select the image file (.hex).
Black Box Corporation - 1000 Park Drive - Lawrence, PA 15055-1018
www.blackbox.com -- Tech Support and Ordering: 724-746-5500 - Fax: 724-746-0746
40
Configuration & Operation
13. Click the Program button to load the firmware into the module.
14. When all updates are complete, click Exit.
15. Before reconnecting the I/O, and before disconnecting the Programming
Module, run the I/O Manager software and check to ensure all modules
are configured properly.
16. When the configuration check is complete:
a.
exit the I/O Manager program
b.
disconnect power from the Base Module
c.
remove the Programming Module
d.
Reconnect the I/O.
e.
Re-connect power to the Base Module.
Testing Modbus Mode Operation
Using a Modbus radio modem, a PC and Modbus simulation software (e.g.
Modscan) you can test the link and hardware, and investigate the operation of
the I/O. Modscan is a Windows application that simulates a Modbus master
node. You can read from and write to memory locations on the I/O. Modscan
is available as a fully functional time-limited demo from www.win-tech.com
Manual Documentation Number: Wireless I/O-1204
Black Box Corporation - 1000 Park Drive - Lawrence, PA 15055-1018
www.blackbox.com -- Tech Support and Ordering: 724-746-5500 - Fax: 724-746-0746
41
Black Box Corporation - 1000 Park Drive - Lawrence, PA 15055-1018
www.blackbox.com -- Tech Support and Ordering: 724-746-5500 - Fax: 724-746-0746
42
Default Configuration Settings
Default Configuration Settings
Appendix A: Default Configuration
Settings
Wireless Region:
Wireless Channel Number:
Wireless Network ID:
Repeater Mode:
Communication Mode:
Modbus Address:
Digital Inputs:
Europe
12 for SR Base Modules
0 for MR and LR Base Modules
0 for SR Base Modules
16 for MR Base Modules
17 for LR Base Modules
Not selected
Modbus
1
Discrete
Analog Inputs:
0 to 10 VDC
Analog Outputs:
0 to 10 VDC
Manual Documentation Number: Wireless I/O-1204
Black Box Corporation - 1000 Park Drive - Lawrence, PA 15055-1018
www.blackbox.com -- Tech Support and Ordering: 724-746-5500 - Fax: 724-746-0746
43
Black Box Corporation - 1000 Park Drive - Lawrence, PA 15055-1018
www.blackbox.com -- Tech Support and Ordering: 724-746-5500 - Fax: 724-746-0746
44
Product Specifications
Product Specifications
High Voltage (1):
Appendix B: Product Specifications
Base Module Models:
Expansion Module Models:
Manual:
CD-ROM disc:
Operating Systems supported:
Dimensions:
Expansion Feature:
Short Range (SR) Option:
Long Range (LR) Option:
Voltage Range:
Open Source:
RF Data Indicator:
Bus Indicator:
Paper copy of this manual, PDF available
Resolution:
I/O Manager
PDF of I/O User Manual
PDF of Quick Start guide
Input Accuracy:
Output Accuracy:
Windows ME/98/2000/XP
AI Load Resistance:
1.15 x 3.65 x 5 in (2.92 x 9.27x 12.7 cm)
1 base module and up to 6 expansion modules
AO Max Output Current:
AO Max Source Load:
Input Protection:
Up to 300 ft indoors / 1 mile outdoors (LOS)
Power Supply Voltage
Requirements:
Up to 1500 ft indoors / 7 miles outdoors (LOS)
Up to 3000 ft indoors / 14 miles outdoors (LOS)
Power Supply:
Base Module Power Connector:
0 to 10 VDC or 0 to 20 mA
12 bit
0.2 % full scale reading typical, 0.5 % max
0.27 % full scale reading typical, 0.63 % max
100 Mega ohms when configured for voltage input
250 ohms when configured for current input
1 mA when configured for voltage output
450 ohms when configured for current output
Over-voltage to 2x max input voltage
Sourcing modules: 10 VDC to 46 VDC, 24 VAC ±10%
Sinking modules: 10 VDC to 48 VDC, 24 VAC ±10%
Not included
Removable screw terminal (2) block, 3.5 mm spacing
Relay Outputs
Tri-color LED (Off = no signal, Red = weak, Yellow = OK, Green = Strong)
Number of Relays:
Green LED (blinks with TD or RD data traffic, Off = no data traffic)
Type:
Green LED (blinks with TD or RD data traffic, Off = no data traffic)
Output Connection:
Red LED
I/O Connectors:
Removable screw terminal (2, 4 or 8 position) block, 3.5 mm spacing
Common Connectin:
Ratings:
Digital Inputs
Voltage Range:
10 to 45 VDC (for sourcing outputs), 0 to 48 VDC (for sinking outputs)
40 mA per output
Analog Inputs/Outputs
Ranges:
Power Indicator:
Low Voltage (0):
Two DI inputs per module software selectable as Frequency Counters, 0 to 5
kHz range (do NOT exceed more than 5kHz)
MDE04A, MDE05A, MDE06A, MDE01A,MDE02A, MDE03A, MDE07A,
MDE08A
LED Indicators
Receive Signal Strength Indicator:
Frequency Input:
4.0 V minimum
38 uA
Digital Outputs
MDR4241A, MDR4242A
MDR4243A, MDR4244A
MDR4901A, MDR4902A
MDR4903A, MDR4904A
Radio Properties
Medium Range (MR) Option:
Pull up/down current:
8
C (normally open and normally closed)
3.5mm removable terminal block (2 per output)
3.5mm removable terminal block (1 per bank of 4 output)
250 VAC @ 8A, 30 VDC @ 5A (maximum per bank of 4 as grouped on the
label)
0 to 48 VDC
RTD Inputs
0.8 V maximum
Number of RTD:
Wire configuration:
Manual Documentation Number: Wireless I/O-1204
Black Box Corporation - 1000 Park Drive - Lawrence, PA 15055-1018
www.blackbox.com -- Tech Support and Ordering: 724-746-5500 - Fax: 724-746-0746
45
Type:
4
2, 3, and 4 wire
PT100*, PT1000*, Cu10**
*Optimized for temperature coefficient of 385
Black Box Corporation - 1000 Park Drive - Lawrence, PA 15055-1018
www.blackbox.com -- Tech Support and Ordering: 724-746-5500 - Fax: 724-746-0746
46
Product Specifications
Product Specifications
**Optimized for temperature coefficient of 427
Input Connection:
Temperature Range:
Resolution:
Accuracy @ 25ºC:
3.5mm removable terminal block (4 per output)
PT100 = -200 to 650 º C
PT1000 = -200 to 100 º C
Cu10 = -100 to 260 º C
0.1 º C across -40 to 85 º C
±0.5ºC typical
Accuracy -40 to 85ºC:
±2.0ºC maximum
Power Consumption:
SR = 10W Max
MR = 9.5W
LR = 13.1W
MDE04A = 1W
MDE05A = 1.1W
MDE06A = 1.2W
MDE01A = 0.4W
MDE02A = 15.8W
MDE03A = 8.1W
MDE07A = 3.2W
MDE08A = 0.4W
Operating Temperature:
-40 to 80°C (-40 to 176 °F)
-40 to 65ºC (-40 to 149 º F)
Storage Temperature:
-40 to 85 °C (-40 to 185 °F)
Humidity:
Enclosure Rating:
Mounting:
Certifications:
Accessories and Replacement
Parts:
10% to 90% R.H. non-condensing
IP30
DIN rail mount, 35 mm
FCC: Part 15 Class A
CISPR (EN55022) Class A
EN61000-6-1 Generic Standards for Residential, Commercial & Light Industrial
EN61000-4-2 ESD
EN61000-4-3 RFI
EN61000-4-4 EFT
EN61000-4-5 Surge
EN61000-4-6 CI
EN61000-4-8 Power Frequency Magnetic
EN61000-4-11 Voltage Dips & Interruptions
MDP02
MDP01
Programming Module, serial cable, CD withI/0 Manager
software and hardcopy of Quick Start Guide
Programming Module, serial cable, and hardcopy of Quick
Start Guide
Manual Documentation Number: Wireless I/O-1204
Black Box Corporation - 1000 Park Drive - Lawrence, PA 15055-1018
www.blackbox.com -- Tech Support and Ordering: 724-746-5500 - Fax: 724-746-0746
47
Black Box Corporation - 1000 Park Drive - Lawrence, PA 15055-1018
www.blackbox.com -- Tech Support and Ordering: 724-746-5500 - Fax: 724-746-0746
48
Product Specifications
Appendix C: Dimensional Diagrams
Programming Module MDP01
Power Source:
Power Consumption:
LED Indicators:
Serial Connector:
Interface Lines Supported:
Serial Data Rates Supported:
Parity:
Supplied through local bus connector from powered base module
5 VDC @ 40 mA max
Power ON: Red LED illuminated steady
Local Bus: Data present on TD or RD line – Green LED blinks
DB-9F 9 pin D-type female connector (configured as DCE)
RS-232 - TD, RD, RTS, CTS, DTR, DSR, DCD, GND
115200 bps
None
Data Bits:
8
Stop Bits:
1
Flow control:
Cable:
Local Bus Connection:
Temperature:
Dimensions
Operating Humidity:
Certifications:
None
Gray straight-through DB9M to DB9F, 6 foot (included) – Part No. 9PAMF6
14 pin dual row 2mm connector
Operating: -40°C to 85°C
Storage: -40°C to 85°C
1.15 x 3.65 x 5 in (2.92 x 9.27x 12.7 cm)
10 to 90% non-condensing
FCC: Part 15 Class A
CISPR (EN55022) Class A
EN61000-6-1 Generic Standards for Residential, Commercial & Light Industrial
EN61000-4-2 ESD
EN61000-4-3 RFI
EN61000-4-4 EFT
EN61000-4-5 Surge
EN61000-4-6 CI
EN61000-4-8 Power Frequency Magnetic
EN61000-4-11 Voltage Dips & Interruptions
Manual Documentation Number: Wireless I/O-1204
Black Box Corporation - 1000 Park Drive - Lawrence, PA 15055-1018
www.blackbox.com -- Tech Support and Ordering: 724-746-5500 - Fax: 724-746-0746
49
Black Box Corporation - 1000 Park Drive - Lawrence, PA 15055-1018
www.blackbox.com -- Tech Support and Ordering: 724-746-5500 - Fax: 724-746-0746
50
Dimensional Diagrams
Figure 36. Dimensional Diagram of a I/O Base Module
Modbus I/O Assignments
Appendix D: Modbus I/O Assignments
00001-00112 Discrete Digital Outputs
Modbus function codes supported are:
Function 1: Read DO Status
Function 2: Read DI’s
Function 3: Read AO Status
Function 4: Read AI’s
Function 5: Write to Single DO (firmware v2.0 or higher)
Function 6: Write to Single AO
Function 15: Write to Multi DO’s
Manual Documentation Number: Wireless I/O-1204
Black Box Corporation - 1000 Park Drive - Lawrence, PA 15055-1018
www.blackbox.com -- Tech Support and Ordering: 724-746-5500 - Fax: 724-746-0746
51
Modbus Address
00001
00002
00003
00004
00005
00006
00007
00008
00009
00010
00011
00012
00013
00014
00015
00016
00017
00018
00019
00020
00021
00022
00023
00024
00025
00026
00027
00028
00029
00030
00031
00032
00033
00034
00035
00036
00037
00038
00039
00040
00041
00042
00043
Description
Base Digital Output-1
Base Digital Output-2
Base Digital Output-3
Base Digital Output-4
Base Digital Output-5
Base Digital Output-6
Base Digital Output-7
Base Digital Output-8
Base Digital Output-9
Base Digital Output-10
Base Digital Output-11
Base Digital Output-12
Base Digital Output-13
Base Digital Output-14
Base Digital Output-15
Base Digital Output-16
EXP-1 Digital Output-1
EXP-1 Digital Output-2
EXP-1 Digital Output-3
EXP-1 Digital Output-4
EXP-1 Digital Output-5
EXP-1 Digital Output-6
EXP-1 Digital Output-7
EXP-1 Digital Output-8
EXP-1 Digital Output-9
EXP-1 Digital Output-10
EXP-1 Digital Output-11
EXP-1 Digital Output-12
EXP-1 Digital Output-13
EXP-1 Digital Output-14
EXP-1 Digital Output-15
EXP-1 Digital Output-16
EXP-2 Digital Output-1
EXP-2 Digital Output-2
EXP-2 Digital Output-3
EXP-2 Digital Output-4
EXP-2 Digital Output-5
EXP-2 Digital Output-6
EXP-2 Digital Output-7
EXP-2 Digital Output-8
EXP-2 Digital Output-9
EXP-2 Digital Output-10
EXP-2 Digital Output-11
#Bytes
-
Count
0-1
0-1
0-1
0-1
0-1
0-1
0-1
0-1
0-1
0-1
0-1
0-1
0-1
0-1
0-1
0-1
0-1
0-1
0-1
0-1
0-1
0-1
0-1
0-1
0-1
0-1
0-1
0-1
0-1
0-1
0-1
0-1
0-1
0-1
0-1
0-1
0-1
0-1
0-1
0-1
0-1
0-1
0-1
V Range
Refer to Appendix B
Refer to Appendix B
Refer to Appendix B
Refer to Appendix B
Refer to Appendix B
Refer to Appendix B
Refer to Appendix B
Refer to Appendix B
Refer to Appendix B
Refer to Appendix B
Refer to Appendix B
Refer to Appendix B
Refer to Appendix B
Refer to Appendix B
Refer to Appendix B
Refer to Appendix B
Refer to Appendix B
Refer to Appendix B
Refer to Appendix B
Refer to Appendix B
Refer to Appendix B
Refer to Appendix B
Refer to Appendix B
Refer to Appendix B
Refer to Appendix B
Refer to Appendix B
Refer to Appendix B
Refer to Appendix B
Refer to Appendix B
Refer to Appendix B
Refer to Appendix B
Refer to Appendix B
Refer to Appendix B
Refer to Appendix B
Refer to Appendix B
Refer to Appendix B
Refer to Appendix B
Refer to Appendix B
Refer to Appendix B
Refer to Appendix B
Refer to Appendix B
Refer to Appendix B
Refer to Appendix B
Black Box Corporation - 1000 Park Drive - Lawrence, PA 15055-1018
www.blackbox.com -- Tech Support and Ordering: 724-746-5500 - Fax: 724-746-0746
52
Modbus I/O Assignments
Modbus Address
00044
00045
00046
00047
00048
00049
00050
00051
00052
00053
00054
00055
00056
00057
00058
00059
00060
00061
00062
00063
00064
00065
00066
00067
00068
00069
00070
00071
00072
00073
00074
00075
00076
00077
00078
00079
00080
00081
00082
00083
00084
00085
00086
00087
00088
00089
00090
00091
00092
00093
00094
00095
00096
00097
Description
EXP-2 Digital Output-12
EXP-2 Digital Output-13
EXP-2 Digital Output-14
EXP-2 Digital Output-15
EXP-2 Digital Output-16
EXP-3 Digital Output-1
EXP-3 Digital Output-2
EXP-3 Digital Output-3
EXP-3 Digital Output-4
EXP-3 Digital Output-5
EXP-3 Digital Output-6
EXP-3 Digital Output-7
EXP-3 Digital Output-8
EXP-3 Digital Output-9
EXP-3 Digital Output-10
EXP-3 Digital Output-11
EXP-3 Digital Output-12
EXP-3 Digital Output-13
EXP-3 Digital Output-14
EXP-3 Digital Output-15
EXP-3 Digital Output-16
EXP-4 Digital Output-1
EXP-4 Digital Output-2
EXP-4 Digital Output-3
EXP-4 Digital Output-4
EXP-4 Digital Output-5
EXP-4 Digital Output-6
EXP-4 Digital Output-7
EXP-4 Digital Output-8
EXP-4 Digital Output-9
EXP-4 Digital Output-10
EXP-4 Digital Output-11
EXP-4 Digital Output-12
EXP-4 Digital Output-13
EXP-4 Digital Output-14
EXP-4 Digital Output-15
EXP-4 Digital Output-16
EXP-5 Digital Output-1
EXP-5 Digital Output-2
EXP-5 Digital Output-3
EXP-5 Digital Output-4
EXP-5 Digital Output-5
EXP-5 Digital Output-6
EXP-5 Digital Output-7
EXP-5 Digital Output-8
EXP-5 Digital Output-9
EXP-5 Digital Output-10
EXP-5 Digital Output-11
EXP-5 Digital Output-12
EXP-5 Digital Output-13
EXP-5 Digital Output-14
EXP-5 Digital Output-15
EXP-5 Digital Output-16
EXP-6 Digital Output-1
#Bytes
1
-
Count
0-1
0-1
0-1
0-1
0-1
0-1
0-1
0-1
0-1
0-1
0-1
0-1
0-1
0-1
0-1
0-1
0-1
0-1
0-1
0-1
0-1
0-1
0-1
0-1
0-1
0-1
0-1
0-1
0-1
0-1
0-1
0-1
0-1
0-1
0-1
0-1
0-1
0-1
0-1
0-1
0-1
0-1
0-1
0-1
0-1
0-1
0-1
0-1
0-1
0-1
0-1
0-1
0-1
0-1
V Range
Refer to Appendix B
Refer to Appendix B
Refer to Appendix B
Refer to Appendix B
Refer to Appendix B
Refer to Appendix B
Refer to Appendix B
Refer to Appendix B
Refer to Appendix B
Refer to Appendix B
Refer to Appendix B
Refer to Appendix B
Refer to Appendix B
Refer to Appendix B
Refer to Appendix B
Refer to Appendix B
Refer to Appendix B
Refer to Appendix B
Refer to Appendix B
Refer to Appendix B
Refer to Appendix B
Refer to Appendix B
Refer to Appendix B
Refer to Appendix B
Refer to Appendix B
Refer to Appendix B
Refer to Appendix B
Refer to Appendix B
Refer to Appendix B
Refer to Appendix B
Refer to Appendix B
Refer to Appendix B
Refer to Appendix B
Refer to Appendix B
Refer to Appendix B
Refer to Appendix B
Refer to Appendix B
Refer to Appendix B
Refer to Appendix B
Refer to Appendix B
Refer to Appendix B
Refer to Appendix B
Refer to Appendix B
Refer to Appendix B
Refer to Appendix B
Refer to Appendix B
Refer to Appendix B
Refer to Appendix B
Refer to Appendix B
Refer to Appendix B
Refer to Appendix B
Refer to Appendix B
Refer to Appendix B
Refer to Appendix B
Manual Documentation Number: Wireless I/O-1204
Black Box Corporation - 1000 Park Drive - Lawrence, PA 15055-1018
www.blackbox.com -- Tech Support and Ordering: 724-746-5500 - Fax: 724-746-0746
53
Modbus I/O Assignments
Modbus Address
00098
00099
00100
00101
00102
00103
00104
00105
00106
00107
00108
00109
00110
00111
00112
Description
EXP-6 Digital Output-2
EXP-6 Digital Output-3
EXP-6 Digital Output-4
EXP-6 Digital Output-5
EXP-6 Digital Output-6
EXP-6 Digital Output-7
EXP-6 Digital Output-8
EXP-6 Digital Output-9
EXP-6 Digital Output-10
EXP-6 Digital Output-11
EXP-6 Digital Output-12
EXP-6 Digital Output-13
EXP-6 Digital Output-14
EXP-6 Digital Output-15
EXP-6 Digital Output-16
Modbus Address
10001
10002
10003
10004
10005
10006
10007
10008
10009
10010
10011
10012
10013
10014
10015
10016
10017
10018
10019
10020
10021
10022
10023
10024
10025
10026
10027
10028
10029
10030
10031
10032
10033
10034
10035
10036
10037
10038
Description
Base Digital Input-1
Base Digital Input-2
Base Digital Input-3
Base Digital Input-4
Base Digital Input-5
Base Digital Input-6
Base Digital Input-7
Base Digital Input-8
Base Digital Input-9
Base Digital Input-10
Base Digital Input-11
Base Digital Input-12
Base Digital Input-13
Base Digital Input-14
Base Digital Input-15
Base Digital Input-16
EXP-1 Digital Input-1
EXP-1 Digital Input-2
EXP-1 Digital Input-3
EXP-1 Digital Input-4
EXP-1 Digital Input-5
EXP-1 Digital Input-6
EXP-1 Digital Input-7
EXP-1 Digital Input-8
EXP-1 Digital Input-9
EXP-1 Digital Input-10
EXP-1 Digital Input-11
EXP-1 Digital Input-12
EXP-1 Digital Input-13
EXP-1 Digital Input-14
EXP-1 Digital Input-15
EXP-1 Digital Input-16
EXP-2 Digital Input-1
EXP-2 Digital Input-2
EXP-2 Digital Input-3
EXP-2 Digital Input-4
EXP-2 Digital Input-5
EXP-2 Digital Input-6
#Bytes
-
Count
0-1
0-1
0-1
0-1
0-1
0-1
0-1
0-1
0-1
0-1
0-1
0-1
0-1
0-1
0-1
V Range
Refer to Appendix B
Refer to Appendix B
Refer to Appendix B
Refer to Appendix B
Refer to Appendix B
Refer to Appendix B
Refer to Appendix B
Refer to Appendix B
Refer to Appendix B
Refer to Appendix B
Refer to Appendix B
Refer to Appendix B
Refer to Appendix B
Refer to Appendix B
Refer to Appendix B
Count
0-1
0-1
0-1
0-1
0-1
0-1
0-1
0-1
0-1
0-1
0-1
0-1
0-1
0-1
0-1
0-1
0-1
0-1
0-1
0-1
0-1
0-1
0-1
0-1
0-1
0-1
0-1
0-1
0-1
0-1
0-1
0-1
0-1
0-1
0-1
0-1
0-1
0-1
V Range
Refer to Appendix B
Refer to Appendix B
Refer to Appendix B
Refer to Appendix B
Refer to Appendix B
Refer to Appendix B
Refer to Appendix B
Refer to Appendix B
Refer to Appendix B
Refer to Appendix B
Refer to Appendix B
Refer to Appendix B
Refer to Appendix B
Refer to Appendix B
Refer to Appendix B
Refer to Appendix B
Refer to Appendix B
Refer to Appendix B
Refer to Appendix B
Refer to Appendix B
Refer to Appendix B
Refer to Appendix B
Refer to Appendix B
Refer to Appendix B
Refer to Appendix B
Refer to Appendix B
Refer to Appendix B
Refer to Appendix B
Refer to Appendix B
Refer to Appendix B
Refer to Appendix B
Refer to Appendix B
Refer to Appendix B
Refer to Appendix B
Refer to Appendix B
Refer to Appendix B
Refer to Appendix B
Refer to Appendix B
10001-10112 Discrete Digital Inputs
#Bytes
-
Black Box Corporation - 1000 Park Drive - Lawrence, PA 15055-1018
www.blackbox.com -- Tech Support and Ordering: 724-746-5500 - Fax: 724-746-0746
54
Modbus I/O Assignments
Modbus Address
10039
10040
10041
10042
10043
10044
10045
10046
10047
10048
10049
10050
11051
10052
10053
10054
10055
10056
10057
10058
10059
10060
10061
10062
10063
10064
10065
10066
10067
10068
10069
10070
10071
10072
10073
10074
10075
10076
10077
10078
10079
10080
10081
10082
10083
10084
10085
10086
10087
10088
10089
10090
10091
Description
EXP-2 Digital Input-7
EXP-2 Digital Input-8
EXP-2 Digital Input-9
EXP-2 Digital Input-10
EXP-2 Digital Input-11
EXP-2 Digital Input-12
EXP-2 Digital Input-13
EXP-2 Digital Input-14
EXP-2 Digital Input-15
EXP-2 Digital Input-16
EXP-3 Digital Input-1
EXP-3 Digital Input-2
EXP-3 Digital Input-3
EXP-3 Digital Input-4
EXP-3 Digital Input-5
EXP-3 Digital Input-6
EXP-3 Digital Input-7
EXP-3 Digital Input-8
EXP-3 Digital Input-9
EXP-3 Digital Input-10
EXP-3 Digital Input-11
EXP-3 Digital Input-12
EXP-3 Digital Input-13
EXP-3 Digital Input-14
EXP-3 Digital Input-15
EXP-3 Digital Input-16
EXP-4 Digital Input-1
EXP-4 Digital Input-2
EXP-4 Digital Input-3
EXP-4 Digital Input-4
EXP-4 Digital Input-5
EXP-4 Digital Input-6
EXP-4 Digital Input-7
EXP-4 Digital Input-8
EXP-4 Digital Input-9
EXP-4 Digital Input-10
EXP-4 Digital Input-11
EXP-4 Digital Input-12
EXP-4 Digital Input-13
EXP-4 Digital Input-14
EXP-4 Digital Input-15
EXP-4 Digital Input-16
EXP-5 Digital Input-1
EXP-5 Digital Input-2
EXP-5 Digital Input-3
EXP-5 Digital Input-4
EXP-5 Digital Input-5
EXP-5 Digital Input-6
EXP-5 Digital Input-7
EXP-5 Digital Input-8
EXP-5 Digital Input-9
EXP-5 Digital Input-10
EXP-5 Digital Input-11
#Bytes
-
Count
0-1
0-1
0-1
0-1
0-1
0-1
0-1
0-1
0-1
0-1
0-1
0-1
0-1
0-1
0-1
0-1
0-1
0-1
0-1
0-1
0-1
0-1
0-1
0-1
0-1
0-1
0-1
0-1
0-1
0-1
0-1
0-1
0-1
0-1
0-1
0-1
0-1
0-1
0-1
0-1
0-1
0-1
0-1
0-1
0-1
0-1
0-1
0-1
0-1
0-1
0-1
0-1
0-1
V Range
Refer to Appendix B
Refer to Appendix B
Refer to Appendix B
Refer to Appendix B
Refer to Appendix B
Refer to Appendix B
Refer to Appendix B
Refer to Appendix B
Refer to Appendix B
Refer to Appendix B
Refer to Appendix B
Refer to Appendix B
Refer to Appendix B
Refer to Appendix B
Refer to Appendix B
Refer to Appendix B
Refer to Appendix B
Refer to Appendix B
Refer to Appendix B
Refer to Appendix B
Refer to Appendix B
Refer to Appendix B
Refer to Appendix B
Refer to Appendix B
Refer to Appendix B
Refer to Appendix B
Refer to Appendix B
Refer to Appendix B
Refer to Appendix B
Refer to Appendix B
Refer to Appendix B
Refer to Appendix B
Refer to Appendix B
Refer to Appendix B
Refer to Appendix B
Refer to Appendix B
Refer to Appendix B
Refer to Appendix B
Refer to Appendix B
Refer to Appendix B
Refer to Appendix B
Refer to Appendix B
Refer to Appendix B
Refer to Appendix B
Refer to Appendix B
Refer to Appendix B
Refer to Appendix B
Refer to Appendix B
Refer to Appendix B
Refer to Appendix B
Refer to Appendix B
Refer to Appendix B
Refer to Appendix B
Manual Documentation Number: Wireless I/O-1204
Black Box Corporation - 1000 Park Drive - Lawrence, PA 15055-1018
www.blackbox.com -- Tech Support and Ordering: 724-746-5500 - Fax: 724-746-0746
55
Modbus I/O Assignments
Modbus Address
10092
10093
10094
10095
10096
10097
10098
10099
10100
10101
10102
10103
10104
10105
10106
10107
10108
10109
10110
10111
10112
Description
EXP-5 Digital Input-12
EXP-5 Digital Input-13
EXP-5 Digital Input-14
EXP-5 Digital Input-15
EXP-5 Digital Input-16
EXP-6 Digital Input-1
EXP-6 Digital Input-2
EXP-6 Digital Input-3
EXP-6 Digital Input-4
EXP-6 Digital Input-5
EXP-6 Digital Input-6
EXP-6 Digital Input-7
EXP-6 Digital Input-8
EXP-6 Digital Input-9
EXP-6 Digital Input-10
EXP-6 Digital Input-11
EXP-6 Digital Input-12
EXP-6 Digital Input-13
EXP-6 Digital Input-14
EXP-6 Digital Input-15
EXP-6 Digital Input-16
Modbus Address
30001
30002
30003
30004
30005
30006
30007
30008
30009
30010
30011
30012
30013
30014
30015
30016
30017
30018
30019
30020
30021
30022
30023
30024
30025
30026
30027
30028
30029
30030
30031
30032
Description
Base Analog Input-1
Base Analog Input-2
Base Analog Input-3
Base Analog Input-4
Base Analog Input-5
Base Analog Input-6
Base Analog Input-7
Base Analog Input-8
System Input Power
Base Reserved
Base Reserved
Base Reserved
Base Reserved
Base Reserved
Base Reserved
Base Reserved
EXP-1 Analog Input-1
EXP-1 Analog Input-2
EXP-1 Analog Input-3
EXP-1 Analog Input-4
EXP-1 Analog Input-5
EXP-1 Analog Input-6
EXP-1 Analog Input-7
EXP-1 Analog Input-8
EXP-1 Reserved
EXP-1 Reserved
EXP-1 Reserved
EXP-1 Reserved
EXP-1 Reserved
EXP-1 Reserved
EXP-1 Reserved
EXP-1 Reserved
#Bytes
-
Count
0-1
0-1
0-1
0-1
0-1
0-1
0-1
0-1
0-1
0-1
0-1
0-1
0-1
0-1
0-1
0-1
0-1
0-1
0-1
0-1
0-1
V Range
Refer to Appendix B
Refer to Appendix B
Refer to Appendix B
Refer to Appendix B
Refer to Appendix B
Refer to Appendix B
Refer to Appendix B
Refer to Appendix B
Refer to Appendix B
Refer to Appendix B
Refer to Appendix B
Refer to Appendix B
Refer to Appendix B
Refer to Appendix B
Refer to Appendix B
Refer to Appendix B
Refer to Appendix B
Refer to Appendix B
Refer to Appendix B
Refer to Appendix B
Refer to Appendix B
A/D Count
0-4095
0-4095
0-4095
0-4095
0-4095
0-4095
0-4095
0-4095
0-1023
0-4095
0-4095
0-4095
0-4095
0-4095
0-4095
0-4095
0-4095
-
(V)/(I)Range
0-10vdc/0-20ma
0-10vdc/0-20ma
0-10vdc/0-20ma
0-10vdc/0-20ma
0-10vdc/0-20ma
0-10vdc/0-20ma
0-10vdc/0-20ma
0-10vdc/0-20ma
0-48vdc
0-10vdc/0-20ma
0-10vdc/0-20ma
0-10vdc/0-20ma
0-10vdc/0-20ma
0-10vdc/0-20ma
0-10vdc/0-20ma
0-10vdc/0-20ma
0-10vdc/0-20ma
-
30001-30112 Analog Inputs
#Bytes
2
2
2
2
2
2
2
2
2
2
2
2
2
2
2
2
2
-
Black Box Corporation - 1000 Park Drive - Lawrence, PA 15055-1018
www.blackbox.com -- Tech Support and Ordering: 724-746-5500 - Fax: 724-746-0746
56
Modbus I/O Assignments
Modbus Address
30033
30034
30035
30036
30037
30038
30039
30040
30041
30042
30043
30044
30045
30046
30047
30048
30049
30050
30051
30052
30053
30054
30055
30056
30057
30058
30059
30060
30061
30062
30063
30064
30065
30066
30067
30068
30069
30070
30071
30072
30073
30074
30075
30076
30077
30078
30079
30080
30081
30082
30083
30084
30085
Description
EXP-2 Analog Input-1
EXP-2 Analog Input-2
EXP-2 Analog Input-3
EXP-2 Analog Input-4
EXP-2 Analog Input-5
EXP-2 Analog Input-6
EXP-2 Analog Input-7
EXP-2 Analog Input-8
EXP-2 Reserved
EXP-2 Reserved
EXP-2 Reserved
EXP-2 Reserved
EXP-2 Reserved
EXP-2 Reserved
EXP-2Reserved
EXP-2 Reserved
EXP-3 Analog Input-1
EXP-3 Analog Input-2
EXP-3 Analog Input-3
EXP-3 Analog Input-4
EXP-3 Analog Input-5
EXP-3 Analog Input-6
EXP-3 Analog Input-7
EXP-3 Analog Input-8
EXP-3 Reserved
EXP-3 Reserved
EXP-3 Reserved
EXP-3 Reserved
EXP-3 Reserved
EXP-3 Reserved
EXP-3Reserved
EXP-3 Reserved
EXP-4 Analog Input-1
EXP-4 Analog Input-2
EXP-4 Analog Input-3
EXP-4 Analog Input-4
EXP-4 Analog Input-5
EXP-4 Analog Input-6
EXP-4 Analog Input-7
EXP-4 Analog Input-8
EXP-4 Reserved
EXP-4 Reserved
EXP-4 Reserved
EXP-4 Reserved
EXP-4 Reserved
EXP-4 Reserved
EXP-4Reserved
EXP-4 Reserved
EXP-5 Analog Input-1
EXP-5 Analog Input-2
EXP-5 Analog Input-3
EXP-5 Analog Input-4
EXP-5 Analog Input-5
#Bytes
2
2
2
2
2
2
2
2
2
2
2
2
2
2
2
2
2
2
2
2
2
2
2
2
2
2
2
2
2
A/D Count
0-4095
0-4095
0-4095
0-4095
0-4095
0-4095
0-4095
0-4095
0-4095
0-4095
0-4095
0-4095
0-4095
0-4095
0-4095
0-4095
0-4095
0-4095
0-4095
0-4095
0-4095
0-4095
0-4095
0-4095
0-4095
0-4095
0-4095
0-4095
0-4095
(V)/(I)Range
0-10vdc/0-20ma
0-10vdc/0-20ma
0-10vdc/0-20ma
0-10vdc/0-20ma
0-10vdc/0-20ma
0-10vdc/0-20ma
0-10vdc/0-20ma
0-10vdc/0-20ma
0-10vdc/0-20ma
0-10vdc/0-20ma
0-10vdc/0-20ma
0-10vdc/0-20ma
0-10vdc/0-20ma
0-10vdc/0-20ma
0-10vdc/0-20ma
0-10vdc/0-20ma
0-10vdc/0-20ma
0-10vdc/0-20ma
0-10vdc/0-20ma
0-10vdc/0-20ma
0-10vdc/0-20ma
0-10vdc/0-20ma
0-10vdc/0-20ma
0-10vdc/0-20ma
0-10vdc/0-20ma
0-10vdc/0-20ma
0-10vdc/0-20ma
0-10vdc/0-20ma
0-10vdc/0-20ma
Manual Documentation Number: Wireless I/O-1204
Black Box Corporation - 1000 Park Drive - Lawrence, PA 15055-1018
www.blackbox.com -- Tech Support and Ordering: 724-746-5500 - Fax: 724-746-0746
57
Modbus I/O Assignments
Modbus Address
30086
30087
30088
30089
30090
30091
30092
30093
30094
30095
30096
30097
30098
30099
30100
30101
30102
30103
30104
30105
30106
30107
30108
30109
30110
30111
30112
Description
EXP-5 Analog Input-6
EXP-5 Analog Input-7
EXP-5 Analog Input-8
EXP-5 Reserved
EXP-5 Reserved
EXP-5 Reserved
EXP-5 Reserved
EXP-5 Reserved
EXP-5 Reserved
EXP-5Reserved
EXP-5 Reserved
EXP-6 Analog Input-1
EXP-6 Analog Input-2
EXP-6 Analog Input-3
EXP-6 Analog Input-4
EXP-6 Analog Input-5
EXP-6 Analog Input-6
EXP-6 Analog Input-7
EXP-6 Analog Input-8
EXP-6 Reserved
EXP-6 Reserved
EXP-6 Reserved
EXP-6 Reserved
EXP-6 Reserved
EXP-6 Reserved
EXP-6Reserved
EXP-6 Reserved
#Bytes
2
2
2
2
2
2
2
2
2
2
2
-
A/D Count
0-4095
0-4095
0-4095
0-4095
0-4095
0-4095
0-4095
0-4095
0-4095
0-4095
0-4095
-
(V)/(I)Range
0-10vdc/0-20ma
0-10vdc/0-20ma
0-10vdc/0-20ma
0-10vdc/0-20ma
0-10vdc/0-20ma
0-10vdc/0-20ma
0-10vdc/0-20ma
0-10vdc/0-20ma
0-10vdc/0-20ma
0-10vdc/0-20ma
0-10vdc/0-20ma
-
40001-40112 Analog Outputs/Special Registers
Modbus Address
40001
40002
40003
40004
40005
40006
40007
40008
40009
40010
40011
40012
40013
40014
40015
40016
40017
40018
40019
40020
40021
40022
40023
40024
40025
40026
40027
Description
Base Analog Output-1
Base Analog Output-2
Base Analog Output-3
Base Analog Output-4
Base Analog Output-5
Base Analog Output-6
Base Analog Output-7
Base Analog Output-8
Base Freq Input – 1
Base Freq Input – 2
Base Freq Input – 3
Base Freq Input – 4
Base Address
Local COM Comm Status
Number Of Local COM Devices
Base Reserved
EXP-1 Analog Output-1
EXP-1 Analog Output-2
EXP-1 Analog Output-3
EXP-1 Analog Output-4
EXP-1 Analog Output-5
EXP-1 Analog Output-6
EXP-1 Analog Output-7
EXP-1 Analog Output-8
EXP-1 Freq Input – 1
EXP-1 Freq Input – 2
EXP-1 Freq Input – 3
#Bytes
2
2
2
2
2
2
2
2
2
2
2
2
2
2
2
2
2
2
2
2
2
2
2
2
2
D/A Count
0-4095
0-4095
0-4095
0-4095
0-4095
0-4095
0-4095
0-4095
0-5000
0-5000
0-5000
0-5000
0-1023
Bit Map
0-4095
0-4095
0-4095
0-4095
0-4095
0-4095
0-4095
0-4095
0-5000
0-5000
0-5000
(V)/(I)Range
0-10vdc/0-20ma
0-10vdc/0-20ma
0-10vdc/0-20ma
0-10vdc/0-20ma
0-10vdc/0-20ma
0-10vdc/0-20ma
0-10vdc/0-20ma
0-10vdc/0-20ma
0-10vdc/0-20ma
0-10vdc/0-20ma
0-10vdc/0-20ma
0-10vdc/0-20ma
0-10vdc/0-20ma
0-10vdc/0-20ma
0-10vdc/0-20ma
0-10vdc/0-20ma
-
Black Box Corporation - 1000 Park Drive - Lawrence, PA 15055-1018
www.blackbox.com -- Tech Support and Ordering: 724-746-5500 - Fax: 724-746-0746
58
Modbus I/O Assignments
Modbus Address
40028
40029
40030
40031
40032
40033
40034
40035
40036
40037
40038
40039
40040
40041
40042
40043
40044
40045
40046
40047
40048
40049
40050
40051
40052
40053
40054
40055
40056
40057
40058
40059
40060
40061
40062
40063
40064
40065
40066
40067
40068
40069
40070
40071
40072
40073
40074
40075
40076
40077
40078
40079
40080
Description
EXP-1 Freq Input – 4
EXP-1 Address
EXP-1 Reserved
EXP-1 Reserved
EXP-1 Reserved
EXP-2 Analog Output-1
EXP-2 Analog Output-2
EXP-2 Analog Output-3
EXP-2 Analog Output-4
EXP-2 Analog Output-5
EXP-2 Analog Output-6
EXP-2 Analog Output-7
EXP-2 Analog Output-8
EXP-2 Freq Input – 1
EXP-2 Freq Input – 2
EXP-2 Freq Input – 3
EXP-2 Freq Input – 4
EXP-2 Address
EXP-2 Reserved
EXP-2 Reserved
EXP-2 Reserved
EXP-3 Analog Output-1
EXP-3 Analog Output-2
EXP-3 Analog Output-3
EXP-3 Analog Output-4
EXP-3 Analog Output-5
EXP-3 Analog Output-6
EXP-3 Analog Output-7
EXP-3 Analog Output-8
EXP-3 Freq Input – 1
EXP-3 Freq Input – 2
EXP-3 Freq Input – 3
EXP-3 Freq Input – 4
EXP-3 Address
EXP-3 Reserved
EXP-3 Reserved
EXP-3 Reserved
EXP-4 Analog Output-1
EXP-4 Analog Output-2
EXP-4 Analog Output-3
EXP-4 Analog Output-4
EXP-4 Analog Output-5
EXP-4 Analog Output-6
EXP-4 Analog Output-7
EXP-4 Analog Output-8
EXP-4 Freq Input – 1
EXP-4 Freq Input – 2
EXP-4 Freq Input – 3
EXP-4 Freq Input – 4
EXP-4 Address
EXP-4 Reserved
EXP-4 Reserved
EXP-4 Reserved
#Bytes
2
2
2
2
2
2
2
2
2
2
2
2
2
2
2
2
2
2
2
2
2
2
2
2
2
2
2
2
2
2
2
2
2
2
2
2
2
2
2
2
2
-
D/A Count
0-5000
0-1023
0-4095
0-4095
0-4095
0-4095
0-4095
0-4095
0-4095
0-4095
0-5000
0-5000
0-5000
0-5000
0-1023
0-4095
0-4095
0-4095
0-4095
0-4095
0-4095
0-4095
0-4095
0-5000
0-5000
0-5000
0-5000
0-1023
0-4095
0-4095
0-4095
0-4095
0-4095
0-4095
0-4095
0-4095
0-5000
0-5000
0-5000
0-5000
0-1023
-
(V)/(I)Range
0-10vdc/0-20ma
0-10vdc/0-20ma
0-10vdc/0-20ma
0-10vdc/0-20ma
0-10vdc/0-20ma
0-10vdc/0-20ma
0-10vdc/0-20ma
0-10vdc/0-20ma
0-10vdc/0-20ma
0-10vdc/0-20ma
0-10vdc/0-20ma
0-10vdc/0-20ma
0-10vdc/0-20ma
0-10vdc/0-20ma
0-10vdc/0-20ma
0-10vdc/0-20ma
-
Modbus I/O Assignments
Modbus Address
40081
40082
40083
40084
40085
40086
40087
40088
40089
40090
40091
40092
40093
40094
40095
40096
40097
40098
40099
40100
40101
40102
40103
40104
40105
40106
40107
40108
40109
40110
40111
40112
Description
EXP-5 Analog Output-1
EXP-5 Analog Output-2
EXP-5 Analog Output-3
EXP-5 Analog Output-4
EXP-5 Analog Output-5
EXP-5 Analog Output-6
EXP-5 Analog Output-7
EXP-5 Analog Output-8
EXP-5 Freq Input – 1
EXP-5 Freq Input – 2
EXP-5 Freq Input – 3
EXP-5 Freq Input – 4
EXP-5 Address
EXP-5 Reserved
EXP-5 Reserved
EXP-5 Reserved
EXP-6 Analog Output-1
EXP-6 Analog Output-2
EXP-6 Analog Output-3
EXP-6 Analog Output-4
EXP-6 Analog Output-5
EXP-6 Analog Output-6
EXP-6 Analog Output-7
EXP-6 Analog Output-8
EXP-6 Freq Input – 1
EXP-6 Freq Input – 2
EXP-6 Freq Input – 3
EXP-6 Freq Input – 4
EXP-6 Address
EXP-6 Reserved
EXP-6 Reserved
EXP-6 Reserved
#Bytes
2
2
2
2
2
2
2
2
2
2
2
2
2
2
2
2
2
2
2
2
2
2
2
2
2
2
-
D/A Count
0-4095
0-4095
0-4095
0-4095
0-4095
0-4095
0-4095
0-4095
0-5000
0-5000
0-5000
0-5000
0-1023
0-4095
0-4095
0-4095
0-4095
0-4095
0-4095
0-4095
0-4095
0-5000
0-5000
0-5000
0-5000
0-1023
-
(V)/(I)Range
0-10vdc/0-20ma
0-10vdc/0-20ma
0-10vdc/0-20ma
0-10vdc/0-20ma
0-10vdc/0-20ma
0-10vdc/0-20ma
0-10vdc/0-20ma
0-10vdc/0-20ma
0-10vdc/0-20ma
0-10vdc/0-20ma
0-10vdc/0-20ma
0-10vdc/0-20ma
0-10vdc/0-20ma
0-10vdc/0-20ma
0-10vdc/0-20ma
0-10vdc/0-20ma
-
0-10vdc/0-20ma
0-10vdc/0-20ma
0-10vdc/0-20ma
0-10vdc/0-20ma
0-10vdc/0-20ma
0-10vdc/0-20ma
0-10vdc/0-20ma
0-10vdc/0-20ma
-
Manual Documentation Number: Wireless I/O-1204
Black Box Corporation - 1000 Park Drive - Lawrence, PA 15055-1018
www.blackbox.com -- Tech Support and Ordering: 724-746-5500 - Fax: 724-746-0746
-
59
Black Box Corporation - 1000 Park Drive - Lawrence, PA 15055-1018
www.blackbox.com -- Tech Support and Ordering: 724-746-5500 - Fax: 724-746-0746
60
Appendix E: I/O Models and Features
MDE02A
Digital Output Module
8DO
sourcing
MDE03A
Digital Input/Output
Module
4DI, 4DO
sourcing
MDE07A
Digital Output Module
8DO
relays
MDE08A
Analog Input Module
4AI
RTD
Base Modules
Model Number
Module Type
Frequency/Range
I/O
MDR4241A
Base
2.4 GHz, short range
2AI, 2AO, 2DI, 2DO
(sourcing DO’s)
MDR4242A
Base
2.4 GHz, short range
4DI, 4DO
(sourcing DO’s)
Base/Repeater Modules
Compatible Radio Modems
Radio Modem Model
Description
I/O Base Module Model
MDR3243A
2.4 GHz RS-232/422/485 radio modem
MDR4241A
MDR4242A
MDR3241A
2.4 GHz RS-232/422/485 radio modem 9600 bps
MDR4243A
MDR4244A
MDR3901A
900 MHz RS-232/422/485 radio modem 9600 bps
MDR4901A
MDR4902A
MDR3903A
900 MHz RS-232/422/485 radio modem 115.2
kbps
MDR4903A
MDR4904A
Model Number
Type
Frequency/Range
I/O
MDR4243A
Base/Repeater
2.4 GHz, medium range
2AI, 2AO, 2DI, 2DO
(sourcing DO’s)
MDR4244A
Base/Repeater
2.4 GHz, medium range
4DI, 4DO
(sourcing DO’s)
MDR4901A
Base/Repeater
900 MHz, medium range
2AI, 2AO, 2DI, 2DO
(sourcing DO’s)
MDR4902A
Base/Repeater
900 MHz, medium range
4DI, 4DO
(sourcing DO’s)
Model Number
MDR4903A
Base/Repeater
900 MHz, long range
2AI, 2AO, 2DI, 2DO
(sourcing DO’s)
MDP01
Programming Module
MDP02
Programming Module and CD with I/O Manager software
MDR4904A
Base/Repeater
900 MHz, long range
Accessories
Description
4DI, 4DO
(sourcing DO’s)
Expansion Modules
Model Number
Type
I/O
I/O Types
mA, V
MDE04A
Analog Input Module
4AI
MDE05A
Analog Output Module
4AO
mA, V
MDE06A
Analog Input/Output
Module
2AI, 2AO
mA, V
MDE01A
Digital Input Module
8DI
Pull-up, R
Black Box Corporation - 1000 Park Drive - Lawrence, PA 15055-1018
www.blackbox.com -- Tech Support and Ordering: 724-746-5500 - Fax: 724-746-0746
61
Black Box Corporation - 1000 Park Drive - Lawrence, PA 15055-1018
www.blackbox.com -- Tech Support and Ordering: 724-746-5500 - Fax: 724-746-0746
62
Appendix F: I/O Troubleshooting
Problem
RSSI LED and RF Data
LED intermittently blink
Causes
•
Firmware does not match
The firmware for all base modules must match and the
firmware for all expansion modules must match. The firmware
rev number may be viewed on the information tab of the
configuration software.
If the firmware does not match, then update the firware with the Firmware
updater program.
•
No Peer-Peer communication link
The communication link is not established. Verify that all
parameters in the configuration tab in the programming
software is correct.
Make sure that there are no obstacles in the path of the wireless
transmission.
•
Too many expansion modules installed
Only 6 expansion modules may be connected to any base module.
•
Expansion modules in peer-peer mode do not match
In peer-peer mode, the master and slave must have the same number of
expansion modules.
•
Expansion module added/removed without cycling power on
base module
The I/O configures the base module and expansion modules on a cycle of
power. No damage occurs by adding/removing a module “hot” but the
power does need to be cycled for the base module to update the expansion
locations.
Black Box Corporation - 1000 Park Drive - Lawrence, PA 15055-1018
www.blackbox.com -- Tech Support and Ordering: 724-746-5500 - Fax: 724-746-0746
63