1
Multi-Languages QIG in Driver CD
Český: Českého průvodce rychlou instalací naleznete na
přiloženém CD s ovladači
Deutsch: Finden Sie bitte das deutsche QIG beiliegend in der
Treiber CD
Español: Incluido en el CD el QIG en Español
Français: Veuillez trouver l’français QIG ci-joint dans le CD
Italiano: Incluso nel CD il QIG in Italiano
Magyar: A magyar telepítési útmutató megtalálható a mellékelt
CD-n
Nederlands: De nederlandse QIG treft u aan op de bijgesloten CD
Polski: Skrócona instrukcja instalacji w języku polskim znajduje się
na załączonej płycie CD
Português: Incluído no CD o QIG em Portugues
Русский: Найдите QIG на pусскoм языке на приложеном CD
Romana: Cd-ul cuprinde Ghid de instalare rapida in limba romana
Slovensky: Anglického sprievodcu rýchlou inštaláciou nájdete na
priloženom CD s ovládačmi.
Türkçe: Ürün ile beraber gelen CD içinde Türkçe Hızlı Kurulum
Kılavuzu'nu bulabilirsiniz
Copyright© by Edimax Technology Co, LTD. all rights reserved. No part of this
publication may be reproduced, transmitted, transcribed, stored in a retrieval
system, or translated into any language or computer language, in any form or
by any means, electronic, mechanical, magnetic, optical, chemical, manual or
otherwise, without the prior written permission of this Company.
This company makes no representations or warranties, either expressed or
implied, with respect to the contents hereof and specifically disclaims any
warranties, merchantability or fitness for any particular purpose. Any software
described in this manual is sold or licensed "as is". Should the programs prove
defective following their purchase, the buyer (and not this company, its
distributor, or its dealer) assumes the entire cost of all necessary servicing,
repair, and any incidental or consequential damages resulting from any defect
in the software. Further, this company reserves the right to revise this
publication and to make changes from time to time in the contents hereof
without obligation to notify any person of such revision or changes.
The product you have purchased and the setup screen may appear slightly
different from those shown in this QIG. For more detailed information about
this product, please refer to the User's Manual on the CD-ROM. The software
and specifications could be subjected to change without notice. Please visit
our web site www.edimax.com for the update. All right reserved including all
brand and product names mentioned in this manual are trademarks and/or
registered trademarks of their respective holders.
Linux Open Source Code
Certain Edimax products include software code developed by third
parties, including software code subject to the GNU General Public
License ("GPL") or GNU Lesser General Public License ("LGPL").
Please see the GNU (www.gnu.org) and LPGL
(www.gnu.org) Websites to view the terms of eachlicense.
The GPL Code and LGPL Code used in Edimax products are distributed
without any warranty and are subject to the copyrights of their authors.
For details, see the GPL Code and LGPL Code licenses. You can
download the firmware-files at
http://www.edimax.com under "Download" page.
1. Product Information
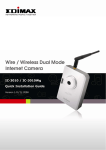
Thank you for purchasing this IP camera! This IP camera is an ideal
product for all kinds of video surveillance purposes, like home/office
safety, kid/pet monitoring, and remote video acquire etc. features
motorized Pan and Tilt with a viewing angle 355 degree horizontally
and 120 degree vertically. Users can view and control remotely via a
browser or Edimax utility to monitor a wider range than normal IP
camera. It can be preset a specific angle to make the camera focus
on this point accurately and quickly.
Before you start to use this IP camera, please check the package
contents. If anything is missing, please contact the dealer of
purchase and return the package to claim for missing contents.
2. Check your package contents
One IP Camera
z One power adapter
z One mounting kits
z One Category 5 Ethernet cable
z One Quick Installation Guide
z One CD (Including Manual/Utility/Multi-Language QIG)
z Two Antenna (IC-7000PTn only)
z
If any of the above items are missing, please contact your
supplier.
3. System Requirement
System requirement for PC, MAC or Notebook PC to access the IP
Camera as following:
z Computer OS: Windows 2000, XP SP2 and Vista
z CPU: Intel Pentium III 750MHz above or Celeron 1GHz above.
z Memory Size: 128MB (256MB recommended)
z VGA Card Resolution: 1024 x 768 or above.
4. Hardware Installation
Please follow the following instructions to set the camera up:
1. Connect the Ethernet cable to your local area network, and
connect the other end to the LAN jack of this IP camera.
NOTE: Skip this step if you use IC-7000PTn with wireless LAN only.
2. Plug the power adapter to wall socket and connect the power
connector to the power jack located at the back of the IP camera.
3. Connect the antennas to the antenna base (for IC-7000PTn only)
located at the back of the IP camera.
4. Place the IP camera at a secure place, and point the camera to
the place you wish to monitor. If you wish to hang the camera on
the ceiling or wall, please use the tripod connector (located at the
bottom of the IP camera as shown on the below) to secure the
camera.
5. Software Installation
Follow the simple steps below to run the Install Wizard to guide you
quickly through the Installation process. The following installation is
implemented in Windows Vista. The installation procedures in
Windows XP and 2000 are similar.
1. Insert the CD shipped along with the IP Internet Camera into
your CD-ROM drive. The “Autorun.exe” program should be
executed automatically. If not, run “Autorun.exe” manually from
“Autorun” folder in the CD.
2. The Install Wizard will show four selections, select the program
you want to install or click ‘EXIT’ to install the program later. The
following installation steps are the demonstration of ‘Install
Administrator Utility & Camera Viewer’.
3. The system will start the installation procedures. Click ‘Next’ to
continue installation.
4. If you wish to install the software program in an alternate
location, click ‘Browse’; otherwise click ‘Next’ to move on to the
next step.
5. Click ‘Next’ to move on to the next step.
6. Click ‘Install’ to start installing the program, the system will
install the program automatically.
7. Click ‘Finish’ to complete the software installation.
rd
8. If you have Windows Defender or other 3 party firewall software,
you may see the following or similar message, Please click
‘Unblock’ to let IP camera Utility pass the firewall, or the IP
camera utility may not be able to function properly
9. A new folder named ‘IP Camera’ in ‘All Programs’ will be created:
Admin Utility and Uninstall. You can use these 2 utilities to
connect to the IP camera and use the functions of the camera
without web browser.
10. When the installation is completed, the system will auto run the
‘Administrator Utility’. On the first page, the cameras found in the
network are listed in the window. Choose the one you want to
configure and click ‘Configure Camera’ icon to proceed.
11. You’ll be prompted to input user name and password. The
default user name is ‘admin’ (you can not change it), and the
default password is ‘1234’, and then click ‘OK’ to continue.
12. IP Camera is working through the network (TCP/IP Protocol).
The IP address setting must be correct, or you cannot access
to the IP camera. The wizard program will detect the IP
address status of your network automatically and suggest a
free IP address for the IP Camera by DHCP. You can accept
the suggested value or enter the value manually. If you enter
the value manually, please be aware that the ‘Subnet Mask’
must be the same for both the camera and the PC. Click ‘OK’
to apply the configuration.
6. WEB Management Interface
Use WEB browser (Internet Explorer 5.5 or above) to connect to the
IP you get by the wizard (type the address in the address bar of web
browser) You’ll be prompted to input user name and password:
User name: admin / Password: 1234
After logged on, you should see the following messages appear at
the top of Internet Explorer, click on the message, and click ‘Install
ActiveX Control…’
When you see this message, click ’Install’ to install required ActiveX
control.
You should be able to see the images captured by the IP camera
now. For advanced functions, please refer to instructions given in
user manual (on supplied CD-ROM)
R&TTE Compliance Statement
This equipment complies with all the requirements of DIRECTIVE
1999/5/EC OF THE EUROPEAN PARLIAMENT AND THE
COUNCIL of March 9, 1999 on radio equipment and
telecommunication terminal Equipment and the mutual recognition
of their conformity (R&TTE)
The R&TTE Directive repeals and replaces in the directive
98/13/EEC (Telecommunications Terminal Equipment and Satellite
Earth Station Equipment) As of April 8, 2000.
Safety
This equipment is designed with the utmost care for the safety of
those who install and use it. However, special attention must be paid
to the dangers of electric shock and static electricity when working
with electrical equipment. All guidelines of this and of the computer
manufacture must therefore be allowed at all times to ensure the
safe use of the equipment.
EU Countries Intended for Use
The ETSI version of this device is intended for home and office use
in Austria, Belgium, Denmark, Finland, France, Germany, Greece,
Ireland, Italy, Luxembourg, Bulgaria, Cyprus, Czech Republic,
Estonia, Hungary, Latvia, Lithuania, Malta, Poland, Romania,
Slovakia, Slovenia, the Netherlands, Portugal, Spain, Sweden, and
the United Kingdom.
The ETSI version of this device is also authorized for use in EFTA
member states: Iceland, Liechtenstein, Norway, and Switzerland.
EU Countries not intended for use
None