Download 80 W offline LED driver with PFC
Transcript
UM0670
User manual
80 W offline LED driver with PFC
1
Introduction
The use of high power LEDs in lighting applications is becoming increasingly popular due to
rapid improvements in lighting efficiency, longer life, higher reliability and overall cost
effectiveness. Dimming functions are more easily implemented in LEDs, and they are more
robust and offer wider design flexibility compared to other light sources.
For this reason a demonstration board for driving high brightness and power LEDs has been
developed. The STEVAL-ILL013V1 demonstration board is an 80 W offline dimmable LED
driver with high power factor (PF) intended for fixed number of LEDs, the overall design of
which is described in detail in this user manual.
The LED current can be set to 350 mA, 700 mA and 1000 mA, using jumpers. Additionally,
a dimming function using a PWM (pulse width modulation) signal is implemented as well,
allowing the user to set the LED brightness from 0% up to 100%. The demonstration board
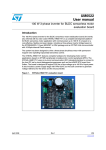
can be ordered using order code STEVAL-ILL013V1, and is shown in Figure 1.
STEVAL-ILL013V1 main features
■
80 W LED driver
■
350 mA, 700 mA and 1 A LED current settings
■
High efficiency (~90%)
■
Wide input voltage range: 88 to 265 VAC
■
High power factor: 0.99 for 110 VAC and 0.98 for 230 VAC
■
Universal PWM input for dimming (external board required)
■
Non-isolated SMPS
■
Brightness regulation between 0% and 100%
■
EMI filter implemented
■
EN55015 and EN61000-3-2 compliant
Figure 1.
August 2009
STEVAL-ILL013V1 demonstration board
Doc ID 15327 Rev 2
1/43
www.st.com
Contents
UM0670
Contents
1
Introduction . . . . . . . . . . . . . . . . . . . . . . . . . . . . . . . . . . . . . . . . . . . . . . . . 1
2
Getting started . . . . . . . . . . . . . . . . . . . . . . . . . . . . . . . . . . . . . . . . . . . . . . 5
3
Design concept . . . . . . . . . . . . . . . . . . . . . . . . . . . . . . . . . . . . . . . . . . . . . 6
4
STEVAL-ILL013V1 technical details . . . . . . . . . . . . . . . . . . . . . . . . . . . . 9
5
Schematic diagram . . . . . . . . . . . . . . . . . . . . . . . . . . . . . . . . . . . . . . . . . 10
6
Bill of material . . . . . . . . . . . . . . . . . . . . . . . . . . . . . . . . . . . . . . . . . . . . . 12
7
STEVAL-ILL013V1 performance . . . . . . . . . . . . . . . . . . . . . . . . . . . . . . . 14
8
Dimming function . . . . . . . . . . . . . . . . . . . . . . . . . . . . . . . . . . . . . . . . . . 17
9
Measurement . . . . . . . . . . . . . . . . . . . . . . . . . . . . . . . . . . . . . . . . . . . . . . 19
10
11
9.1
Output waveform measurement . . . . . . . . . . . . . . . . . . . . . . . . . . . . . . . . 19
9.2
Power MOSFET turn ON and OFF time . . . . . . . . . . . . . . . . . . . . . . . . . . 22
9.3
LED current ripple reduction . . . . . . . . . . . . . . . . . . . . . . . . . . . . . . . . . . 22
9.4
Standard EN61000-3-2 measurement . . . . . . . . . . . . . . . . . . . . . . . . . . . 23
9.5
EMI measurement (EN55015) . . . . . . . . . . . . . . . . . . . . . . . . . . . . . . . . . 26
Design features . . . . . . . . . . . . . . . . . . . . . . . . . . . . . . . . . . . . . . . . . . . . 32
10.1
Proper startup circuit design . . . . . . . . . . . . . . . . . . . . . . . . . . . . . . . . . . 32
10.2
Zero dimming design implementation . . . . . . . . . . . . . . . . . . . . . . . . . . . 33
References and related materials . . . . . . . . . . . . . . . . . . . . . . . . . . . . . 36
Appendix A Design calculation . . . . . . . . . . . . . . . . . . . . . . . . . . . . . . . . . . . . . . . 37
A.1
12
2/43
Design specifications for a modified buck convertor . . . . . . . . . . . . . . . . . 37
Revision history . . . . . . . . . . . . . . . . . . . . . . . . . . . . . . . . . . . . . . . . . . . 42
Doc ID 15327 Rev 2
UM0670
List of tables
List of tables
Table 1.
Table 2.
Table 3.
Table 4.
LED values for different output currents . . . . . . . . . . . . . . . . . . . . . .
Output LED current adjustment on the demonstration board . . . . . .
STEVAL-ILL013V1 demonstration board bill of material . . . . . . . . .
Document revision history . . . . . . . . . . . . . . . . . . . . . . . . . . . . . . . .
Doc ID 15327 Rev 2
.......
.......
.......
.......
......
......
......
......
.....5
.....5
. . . . 12
. . . . 42
3/43
UM0670
List of figures
List of figures
Figure 1.
Figure 2.
Figure 3.
Figure 4.
Figure 5.
Figure 6.
Figure 7.
Figure 8.
Figure 9.
Figure 10.
Figure 11.
Figure 12.
Figure 13.
Figure 14.
Figure 15.
Figure 16.
Figure 17.
Figure 18.
Figure 19.
Figure 20.
Figure 21.
Figure 22.
Figure 23.
Figure 24.
Figure 25.
Figure 26.
Figure 27.
Figure 28.
Figure 29.
Figure 30.
Figure 31.
Figure 32.
Figure 33.
Figure 34.
Figure 35.
Figure 36.
Figure 37.
Figure 38.
Figure 39.
Figure 40.
Figure 41.
Figure 42.
Figure 43.
STEVAL-ILL013V1 demonstration board . . . . . . . . . . . . . . . . . . . . . . . . . . . . . . . . . . . . . . . 1
STEVAL-ILL013V1 block schematic . . . . . . . . . . . . . . . . . . . . . . . . . . . . . . . . . . . . . . . . . . . 6
High PF boost converter design concept . . . . . . . . . . . . . . . . . . . . . . . . . . . . . . . . . . . . . . . 7
Modified buck converter with dimming design concept. . . . . . . . . . . . . . . . . . . . . . . . . . . . . 8
STEVAL-ILL013V1 with PWM module . . . . . . . . . . . . . . . . . . . . . . . . . . . . . . . . . . . . . . . . . 9
High PFC boost converter with the L6562A . . . . . . . . . . . . . . . . . . . . . . . . . . . . . . . . . . . . 10
Modified buck converter with the L6562A . . . . . . . . . . . . . . . . . . . . . . . . . . . . . . . . . . . . . . 11
Efficiency over the whole input voltage range . . . . . . . . . . . . . . . . . . . . . . . . . . . . . . . . . . 14
Power factor for wide input voltage range . . . . . . . . . . . . . . . . . . . . . . . . . . . . . . . . . . . . . 15
Detailed power factor for wide input voltage range. . . . . . . . . . . . . . . . . . . . . . . . . . . . . . . 15
Total harmonic distortion for wide input voltage range . . . . . . . . . . . . . . . . . . . . . . . . . . . . 16
Output LED current dimming capability . . . . . . . . . . . . . . . . . . . . . . . . . . . . . . . . . . . . . . . 18
Output LED current waveform (ILED = 350 mA) . . . . . . . . . . . . . . . . . . . . . . . . . . . . . . . . . 19
Output LED current for different LED voltages (ILED = 350 mA). . . . . . . . . . . . . . . . . . . . . 20
Output LED current waveforms (ILED = 700 mA) . . . . . . . . . . . . . . . . . . . . . . . . . . . . . . . . 20
Output LED current for different LED voltage (ILED = 700 mA). . . . . . . . . . . . . . . . . . . . . . 21
Output LED current waveform (ILED = 1000 mA) . . . . . . . . . . . . . . . . . . . . . . . . . . . . . . . . 21
Output LED current for different LED voltage (ILED = 1000 mA). . . . . . . . . . . . . . . . . . . . . 22
Power MOSFET turn ON and OFF measurement . . . . . . . . . . . . . . . . . . . . . . . . . . . . . . . 22
LED current ripple for the 100 nF output capacitor . . . . . . . . . . . . . . . . . . . . . . . . . . . . . . . 23
EN61000-3-2 analysis for LED current of 350 mA and VIN from 85 V to 160 VAC . . . . . . 23
EN61000-3-2 analysis for LED current of 350 mA and VIN from 180 V to 265 VAC . . . . . 24
EN61000-3-2 analysis for LED current of 700 mA and VIN from 85 V to 160 VAC . . . . . . 24
EN61000-3-2 analysis for LED current of 700 mA and VIN from 180 V to 265 VAC . . . . . 24
EN61000-3-2 analysis for LED current of 1000 mA and VIN from 85 V to 160 VAC . . . . . 25
EN61000-3-2 analysis for LED current of 1000 mA and VIN from 180 V to 265 VAC . . . . 25
Average limit measurement from 150 kHz to 30 MHz (ILED = 350 mA) . . . . . . . . . . . . . . . 26
Quasi-peak limit measurement from 9 kHz to 150 kHz (ILED = 350 mA) . . . . . . . . . . . . . . 26
Quasi-peak limit measurement from 150 kHz to 30 MHz (ILED = 350 mA). . . . . . . . . . . . . 27
Average limit measurement from 150 kHz to 30 MHz (ILED = 700 mA) . . . . . . . . . . . . . . . 27
Quasi-peak limit measurement from 9 kHz to 150 kHz (ILED = 700 mA) . . . . . . . . . . . . . . 28
Quasi-peak limit measurement from 150 kHz to 30 MHz (ILED = 700 mA). . . . . . . . . . . . . 28
Average limit measurement from 150 kHz to 30 MHz (ILED = 1000 mA) . . . . . . . . . . . . . . 29
Quasi-peak limit measurement from 9 kHz to 150 kHz (ILED = 1000 mA) . . . . . . . . . . . . . 29
Quasi-peak limit measurement from 150 kHz to 30 MHz (ILED = 1000 mA). . . . . . . . . . . . 30
Average limit measurement from 150 kHz to 30 MHz (ILED = 0 mA) . . . . . . . . . . . . . . . . . 30
Quasi-peak limit measurement from 9 kHz to 150 kHz (ILED = 0 mA) . . . . . . . . . . . . . . . . 31
Quasi-peak limit measurement from 150 kHz to 30 MHz (ILED = 0 mA) . . . . . . . . . . . . . . . 31
Proper startup circuit design . . . . . . . . . . . . . . . . . . . . . . . . . . . . . . . . . . . . . . . . . . . . . . . . 32
Proper startup using diode D104 and capacitor C110 . . . . . . . . . . . . . . . . . . . . . . . . . . . . 33
Improper startup without using diode D104 and capacitor C110 . . . . . . . . . . . . . . . . . . . . 33
Design improvement allowing zero dimming . . . . . . . . . . . . . . . . . . . . . . . . . . . . . . . . . . . 34
Voltage on capacitor C110 and output bus voltage of 400 V . . . . . . . . . . . . . . . . . . . . . . . 35
Doc ID 15327 Rev 2
4/43
Getting started
2
UM0670
Getting started
This section is intended to help designers begin evaluating the board quickly, describing
how the board should be connected with the load and how the jumpers adjust the output
LED current.
As mentioned in the introduction, the board has a nominal output power of 80 W and the
output LED current can be set to 350 mA, 700 mA or 1 A. The LEDs are connected to one
string. Basically, this means if the LED current is set to 350 mA, then the LED voltage should
be approximately 228 V in order to provide output power of 80 W. If the LED current is set to
700 mA, then the LED voltage should be around 114 V. Finally, if the LED current is set
to 1 A, then the LED voltage should be about 80 V. Assuming that a high brightness LED
has (typically) a 3.5 V forward voltage drop, the number of LEDs for the 350 mA output
current is 65, for the 700 mA output current it is 32 and for the output current of 1 A it is 23
(see Table 1). Of course, designers must recalculate the number of LEDs in cases where
the LED has a forward voltage drop other than 3.5 V. If the output LED voltage is different
than that given in Table 1, output LED current precision will be influenced so is
recommended that the total forward voltage drop across all the LEDs is as close as possible
to the calculated output voltages shown in Table 1.
Connect the LED string to the board using connector J2 or J3, being careful to observe the
correct LED polarity (anode + and cathode –). Set the output LED current to 350 mA, 700
mA or 1 A, based on how many LEDs are connected to the output. The output LED current
is set using jumpers JP1, JP2, JP3 and JP4, in accordance with the connection settings
specified in Table 2. It is not necessary to connect a dimming module with a PWM signal,
because if the module is not used the LED brightness is set to maximum level (100%
brightness). Finally, connect an input voltage to the demonstration board between 88 VAC
and 265 VAC, and the LEDs begin illuminating.
Note:
The LEDs cannot be connected during operation, when the input voltage is connected to the
demonstration board. This is because in this case the output capacitor C208 = 0.47 µF is
charged to 400 V and can cause uncontrolled peak LED current.
Table 1.
Output LED current [mA]
Output LED voltage [V]
Number of LEDs for forward
voltage drop 3.5 V
350
228
65
700
114
32
1000
80
23
Table 2.
5/43
LED values for different output currents
Output LED current adjustment on the demonstration board
Jumper
350 mA
700 mA
1000 mA
JP1
Not connected
Connected
Not connected
JP2
Not connected
Connected
Not connected
JP3
Not connected
Not connected
Connected
JP4
Not connected
Not connected
Connected
Doc ID 15327 Rev 2
UM0670
3
Design concept
Design concept
The STEVAL-ILL013V1 block schematic is illustrated in Figure 2. As shown, the design is
divided into two main topologies. The first is a high PF (power factor) boost converter, and
the second is a modified buck converter. As an additional board, any external PWM
generator can be used for LED brightness regulation. If no PWM generator is connected to
the STEVAL-ILL013V1, the LED brightness is pre-adjusted to 100%.
There are two main reasons the high PF boost converter is designed on the STEVALILL013V1 demonstration board. The first is the requirement for lighting equipment with an
input active power higher than 25 W to comply with standard EN61000-3-2 (harmonic
current distortion). Thanks to the high PF converter, compliance to the standard is achieved
with no difficulty. The second reason is that a high input voltage (in this case 400 V) is
needed for the modified buck converter, because it is, in fact, a buck converter and thus the
input voltage must be higher than the output voltage. The output LED voltage can be up to
228 V, as was shown in Table 1. An additional advantage of the high PF converter is its wide
input voltage range. This allows the demonstration board to be used either in either the
European or US markets. A more detailed description of the high PF boost converter is
provided in the EVL6562A-TM-80W data brief (see Section 11: References and related
materials: 1).
The second converter is designed as a constant current source, as it ensures the best
lighting performance from the LEDs. Concerning the topology, the “modified buck” has been
chosen, “modified” insofar as the power switch is connected to ground (instead of the highside switch, as in a standard buck topology) and therefore it is easier to control the switch.
The design uses a FOT (fixed off-time) network, operating in CCM (continuous conduction
mode) and thanks to this principle the overall solution is very simple and cost effective. All
equations needed for proper modified buck converter design are described in application
note AN2928 (see Section 11: References and related materials: 2).
Figure 2.
STEVAL-ILL013V1 block schematic
STEVAL- ILL013V1
HIGH POWER FACTOR BOOST CONVERTER
MODIFIED BUCK CONVERTER
STTH1L06
VIN = 88 V to
265 V AC
80 W LOAD
400 V
Input
filter
STPSC806D
STP8NM50FP
PF controller
L6562A
PF controller
L6562A
STF9NM50N
EXTERNAL PWM GENERATOR
Microcontroller
ST7LITEU05
Bright regulation
AM00400
Doc ID 15327 Rev 2
6/43
Design concept
UM0670
Figure 3 illustrates a high PF boost converter design concept. Two additional features are
implemented in the application and these improvements are shown in the blue segments.
The first improves circuit behavior during startup (see Section 10.1 for a description) and the
second allows the dimming of the LED down to 0%, or no LED brightness (description
provided in Section 10.2).
Figure 4 shows the design concept of a modified buck converter with a dimming function.
The output LED current is adjusted by setting the proper sense resistor size via the jumpers
(to adjust maximum LED current), together with the proper setting of the capacitor used in
the FOT network (adjust minimum LED current). The external PWM generator provides
a PWM signal between 0 and 100% for brightness regulation. This signal is connected
through a diode to the current sense pin and allows control of LED brightness.
Figure 3.
High PF boost converter design concept
Vc = 16 V
Supplying PWM generator with ST7LITEU05
Supplying L6562A in modified BUCK converter
STTH1L06
VIN = 88 V
to 265 V AC
ZCD COMP INV
VCC
L6562A GD
MULT
GND
CS
D104
STP8NM50FP
VOUT = 400 V
C110
Input EMI filter
C107
Proper startup
Allowing
0% dimming
AM00413
7/43
Doc ID 15327 Rev 2
UM0670
Design concept
Figure 4.
Modified buck converter with dimming design concept
Vc = 16 V generated by the first converter
VIN = 400 V generated by the first converter
Additional board
STPSC806D
80 W LEDs
L78L33
VDD
VSS
ST7LITEU05
CLKIN PWM
NC ICCCLK
VCC
INV
L6562A
STF9NM50N
GD
COMP
MULT
GND
CS
ZCD
RESET AIN2
ICC
programming
External module
for brightness regulation
Fixed off-time
network
350 mA
700 mA
1A
PWM signal 0% to 100%
AM00414
Doc ID 15327 Rev 2
8/43
STEVAL-ILL013V1 technical details
4
STEVAL-ILL013V1 technical details
●
80 W LED driver
●
350 mA, 700 mA and 1 A LED current settings
●
PF = 0.99 with VIN = 110 V or PF = 0.98 with VIN = 230 V
●
THD (total harmonic distortion) = 4.6 and VIN = 110 V or THD = 10.3 and VIN = 230 V
●
High PFC boost converter operating in transition mode
●
Modified buck converter working in CCM and using FOT network
●
Switching frequency f = 125 kHz / 350 mA (modified buck converter)
●
Switching frequency f = 69 kHz / 700 mA (modified buck converter)
●
Switching frequency f = 55 kHz / 1000 mA (modified buck converter)
●
The same inductor and transformer core used (E25)
●
Supply voltage provided for external PWM generator
●
Board size: 130 mm x 60 mm x 27 mm
●
Optional external PWM generator (non isolated)
●
Full brightness if PWM generator is not connected
●
Two output connectors for LEDs
●
High efficiency (~90%)
●
Wide input voltage range: 88 V to 265 VAC
●
Brightness regulation between 0% and 100%
●
EMI filter implemented
●
EN55015 and EN61000-3-2 tested
Figure 5.
9/43
UM0670
STEVAL-ILL013V1 with PWM module
Doc ID 15327 Rev 2
J1
F1
2A
Doc ID 15327 Rev 2
C101
R102
1 MΩ
C103
220 nF
1
MΩ
R103
C109
R106
12 nF
270 kΩ
C108
12 nF
R109
47 Ω
R108
47 Ω 10 9 8 7 6
T101
STTH1L06
D103
R118
1 MΩ
R123
R126
330 kΩ 20 kΩ
400 V
16 V
1
MΩ
D102
R112 R113 R114 R120 R121
1 Ω 1 Ω 1 Ω 15 kΩ 82 kΩ
AM00402
1 23 5
C112
R122
150 nF
R119
R107
R110
BR1
0Ω
R117
R124
1 MΩ
270 kΩ
47 kΩ
22 kΩ
330 kΩ R127
R104
20 kΩ
U101
C111
L6562A
C113
5 2 2200 nF
D104
Q101
R125
3 STP8NM50FP
8 ZCD COMP 1
C104
330 kΩ
V CC
INV R115
47uF
1
220
2
Q102
3
7
/ 450 V
nF
MULT GD
C110
4
33 Ω
Heatsink
BUX83
33 µF
GND CS
C106
R105
R116
D101
6
4
100 nF
15 kΩ
47 kΩ
R128
C105 18 V
10nF
43 kΩ
C107
R111
10 µF
0Ω
CMC2x 22 mH / 1 A
TR1
1nF / Y1 / 250 V AC
C102
470 nF
NTC
10 Ω
Secondary: 11 turns 1 x 0.3 mm
Primary: 105 turns 2 x 0.3 mm
1.5 mm gap, N67
Figure 6.
R101
1 MΩ
5
E 25 x 13 x 7
UM0670
Schematic diagram
Schematic diagram
High PFC boost converter with the L6562A
10/43
11/43
J4
10
9
8
7
6
5
4
3
2
1
PWM
dimming
signal
Doc ID 15327 Rev 2
1N4148
D204
3.9 KΩ
R209
4
3
2
1
R208
47 KΩ
VCC
CS
330 pF
C207
1 KΩ
R207
ZCD
MULT GND
COMP GD
INV
U201
L6562A
5
6
7
8
R203
3.9 KΩ
220 pF
/ 63V
C203
22 µF / 35 V
C204
390 pF
/ 63 V
R202
1 KΩ
1N4148
33 Ω
D201
R201
100 nF
C202
1
C205
820 pF
/ 63 V
4
1
R205
1.5 Ω / 0.6 W
2.2 Ω / 0.6 W
2.7 Ω / 0.6 W
R204
R206
STTH1L06A
D203
1.6 mH / 172 turns
JP4
JP2
1 JUMPER 2 JUMPER
2
C208
0.47 µF / 450 V
L201
Q201
1 STF9NM50N
Heatsink
1.5 nF / 63 V
C206
JP1
JP3
2 JUMPER 2 JUMPER
1
2
3
D202
STPSC806D
400 V
AM00403
1
2
3
4
5
6
1
2
J3
J2
–
+
–
+
Figure 7.
C201
16 V
Schematic diagram
UM0670
Modified buck converter with the L6562A
UM0670
Bill of material
6
Bill of material
Table 3.
STEVAL-ILL013V1 demonstration board bill of material (1)
I Q
Reference
Part
Note
Manufacturer
Order code
1
1 J1
Socket
Input socket
2
1 F1
Fuse
2.5 A / 250 V
3
1 F1
Fuse socket
Socket
4
1 NTC
10 Ω
NTC thermistor
EPCOS
B57235S100M
5
1 TR1
2 x 22 mH / 1 A
Common mode choke
EPCOS
B82732R2102B030
6
1 BR1
1 A / 250 V
Diode bridge
7
1 C101
1 nF / 250 VAC
Y1 capacitor
Murata Manufacturing
DE1E3KX102MA5B
Co., Ltd.
8
1 C102
470 nF / 265 VAC
X2 capacitor
EPCOS
B32922C3474K
9
2 C103, C104
220 nF / 265 VAC
X2 capacitor
EPCOS
B32922C3224M
10 1 C105
10 nF / 63 V
SMD capacitor 1206
11 2 C106, C202
100 nF / 63 V
SMD capacitor 1206
12 1 C107
10 µF / 35 V
Electrolytic capacitor
13 2 C108, C109
12 nF / 63 V
SMD capacitor 1206
14 1 C110
33 µF / 35 V
Electrolytic capacitor
15 1 C111
2200 nF / 25 V X7R
SMD 1206 ceramic
capacitor
AVX
12063C225KAT2A
16 1 C112
150 nF / 50 V
SMD capacitor 1206
17 1 C113
47 µF / 450 V
Electrolytic capacitor
EPCOS
B43501A5476M000
18 1 D101
18 V / 0.5 W
Zener diode
19 4
D102, D104,
1N4148
D201, D204
SMD diode
20 1 D103
STTH1L06U
SMB package
21 2 U101, U201
L6562A
PFC controller
1 MΩ
SMD resistors 1206
23 1 R105
15 kΩ
SMD resistors 1206
24 2 R106, R107
270 kΩ
SMD resistors 1206
25 2 R108, R109
47 Ω
SMD resistors 1206
22 4
26 3
R101, R102
R103, R104
R110, R116,
47 kΩ
R208
27 2 R111, R122
28 3
0Ω
R112, R113,
1 Ω / 1%
R114
29 2 R115, R201
33 Ω
STMicroelectronics
STMicroelectronics
STTH1L06U
L6562AD
SMD resistors 1206
SMD resistors 1206
SMD resistors 1206
SMD resistors 1206
Doc ID 15327 Rev 2
12/43
Bill of material
Table 3.
I Q
UM0670
STEVAL-ILL013V1 demonstration board bill of material (continued)(1)
Reference
Part
Note
Manufacturer
Order code
30 1 R117
22 kΩ
SMD resistors 1206
31 2 R118, R119
1 MΩ / 1%
Axial resistor 0.6 W / 1%
32 1 R120
15 kΩ / 1%
SMD resistors 1206
33 1 R121
82 kΩ / 1%
SMD resistors 1206
330 kΩ
SMD resistors 1206
35 2 R126, R127
20 kΩ
Axial resistor 0.6 W
36 1 R128
43 kΩ
SMD resistor 1206
37 1 T101
Transformer
E25/13/7 1.5 mm gap , N67
Primary: 105 turns 2 x 0.3
Secondary: 11 turns 1 x 0.3
38 1 Q101
STP8NM50
Power MOSFET
STMicroelectronics
STP8NM50FP
39 1 Q102
BUX87
Bipolar transistor
STMicroelectronics
BUX87
34 3
R123, R124
R125
40 2 Heat sink
Heat sink for MOSFETs
41 2 R202, R207
1kΩ
SMD resistors 1206
42 2 R203, R209
3900 Ω
SMD resistors 1206
43 1 R204
1.5 Ω / 0.6 W
Axial resistor
44 1 R205
2.7 Ω / 0.6 W
Axial resistor
45 1 R206
2.2 Ω / 0.6 W
Axial resistor
46 1 C201
22 µF / 35 V
Electrolytic cap
47 1 C203
220 pF / 63 V
SMD capacitor 1206
48 1 C204
390 pF / 63 V
SMD capacitor 1206
49 1 C205
820 pF / 63 V
SMD capacitor 1206
50 1 C206
1.5 nF / 63 V
SMD capacitor 1206
51 1 C207
330 pF / 63 V
SMD capacitor 1206
52 1 C208
0.47 µF / 450 V
Electrolytic capacitor
EPCOS
B43827A5474M000
53 1 D202
STPSC806D
Silicon carbide diode
STMicroelectronics
STPSC806D
54 1 D203
STTH1L06A
SMA package
STMicroelectronics
STTH1L06A
Jumper
Two pin connector
56 2 JPJ1, JPJ2
Jumper
Jumpers
57 1 J2
Socket
Output socket
58 1 J3
Socket
Output socket
59 1 J4
Socket
PWM socket
60 1 Q201
STF9NM50N
Power MOSFET
STMicroelectronics
STF9NM50N
61 1 L201
1.6 mH
E25/13/7 2 mm gap N67,
172 turns 1 x 0.28
55 4
JP1, JP2
JP3, JP4
1. The power MOSFET STF9NM50N can be replaced by STF10NM60N.
13/43
Doc ID 15327 Rev 2
UM0670
7
STEVAL-ILL013V1 performance
STEVAL-ILL013V1 performance
Figure 8 shows the efficiency of the STEVAL-ILL013V1 (measured also with an external
PWM generator) for the output LED current 350 mA, 700 mA and 1 A, over the entire input
voltage range.
Measured efficiency for the input voltage of 230 V was above 90% (90.49% for the 350 mA
output LED current, 90.53% for the 700 mA output LED current, and 90.3% for the 1 A
output LED current)
Efficiency for the input voltage of 110 V was above 87% (88.05% for the 350 mA output LED
current, 88.2% for the 700 mA output LED current and 87.37% for the output LED current of
1 A).
Measured PF for the output LED current of 350 mA, 700 mA and 1 A is shown in Figure 9
and Figure 10. PF for the input voltage of 110 VAC is 0.99, and 0.98 for the input voltage of
230 VAC.
THD is demonstrated in Figure 11, and as it can be observed is below 12% over the whole
input voltage range.
Note:
LE UW E3B OSTAR® LEDs from OSRAM were used as the load (see Section 11:
References and related materials: 6.).
Figure 8.
Efficiency over the whole input voltage range
100.00
90.00
80.00
70.00
Efficiency [%]
60.00
700 mA at 6 LEDs
50.00
350 mA at 12 LEDs
40.00
1 A at 4 LEDs
30.00
20.00
10.00
0.00
85
100 110 120 140 160 180 200 220 230 240 265
Input v oltage [V]
AM00395
Doc ID 15327 Rev 2
14/43
STEVAL-ILL013V1 performance
Figure 9.
UM0670
Power factor for wide input voltage range
1
0.8
700 mA at 6 LEDs
0.6
350 mA at 12 LEDs
Power factor [-]
1 A at 4 LEDs
0.4
0.2
0
85
100
110
120
140
160
180
200
220
230
240
265
Input v oltage [V]
AM00397
Figure 10. Detailed power factor for wide input voltage range
1
0.99
0.98
700 mA at 6 LEDs
Power factor [-]
350 mA at 12 LEDs
1 A at 4 LEDs
0.97
0.96
0.95
85
100
110
120
140
160 180
200
220
230
240
265
Input v oltage [V]
AM00396
15/43
Doc ID 15327 Rev 2
UM0670
STEVAL-ILL013V1 performance
Figure 11. Total harmonic distortion for wide input voltage range
12.00
10.00
8.00
700 mA at 6 LEDs
THD [%]
350 mA at 12 LEDs
6.00
1 A at 4 LEDs
4.00
2.00
0.00
85
100
110 120
140 160
180 200
220 230
240 265
Input v oltage [V]
AM00398
Doc ID 15327 Rev 2
16/43
Dimming function
8
UM0670
Dimming function
LEDs as a light source are very often used in applications where the brightness regulation is
required. Their biggest advantage is that their minimum brightness can be easily regulated
by changing their current, and they are stable even at very low brightness. Generally, there
are two basic concepts regarding how the brightness is regulated. The first is called “analog
dimming”, which means that the brightness is regulated by changing the continuous forward
LED current. This concept is not used on the STEVAL-ILL013V1. The second solution is to
use a low frequency (~200 Hz) PWM signal and change the brightness by pulse width
modulation. This is the approach used in the design of the STEVAL-ILL013V1. Any external
PWM generator can be used for brightness regulation, but it should be taken into account
that the STEVAL-ILL013V1 is not isolated.
In order to demonstrate the dimming function on the STEVAL-ILL013V1, an external PWM
generator using STMicroelectronics’ ST7LITEU05 microcontroller was connected to the
board, and the output LED current was measured. The microcontroller generates a PWM
signal with a frequency of 250 Hz. The duty cycle is set by a potentiometer from 0% up to
100%.The result with duty cycles of 50%, 10% and 2% is shown in Figure 12. The input
voltage was, in this case, 230 VAC and the output LED current was set to 350 mA. It is also
possible to achieve LED brightness regulation below 2%. In this case the nominal LED
current is slightly decreased.
17/43
Doc ID 15327 Rev 2
UM0670
Dimming function
Figure 12. Output LED current dimming capability
Doc ID 15327 Rev 2
18/43
Measurement
UM0670
9
Measurement
9.1
Output waveform measurement
Figure 13 shows the output LED current waveform. The LED current was set to 350 mA and,
as shown, the current ripple is 92 mA and the switching frequency for the modified buck
converter is 125 kHz. The input voltage was 230 VAC and 12 LEDs were used as the load
(OSTAR LED LE UW E3B; see Section 11: References and related materials 6).
The output LED current slightly varies with the output voltage, as explained in detail in
application note AN2928, (Section 11: References and related materials 2) and therefore
this design is optimal for a fixed number of LEDs. The output LED current accuracy for
different LED voltages is demonstrated in Figure 14.
Figure 13. Output LED current waveform (ILED = 350 mA)
19/43
Doc ID 15327 Rev 2
UM0670
Measurement
Figure 14. Output LED current for different LED voltages (ILED = 350 mA)
VLED v s. ILED for nominal LED current 350 mA
450
400
350
LED
300
current
250
[mA]
200
350 mA
150
100
50
0
174
193
211
230
250
LED voltage [V]
AM00399
Figure 15 shows the output LED current waveform for the LED current of 700 mA. The
current ripple is, in this case, 333 mA and the switching frequency for the modified buck
converter is 69 kHz. The input voltage was 230 AC and 6 LEDs were used as the load
(OSTAR LED LE UW E3B see Section 11: References and related materials: 6). The output
LED current accuracy for the different LED voltages is shown in Figure 16.
Figure 15. Output LED current waveforms (ILED = 700 mA)
Doc ID 15327 Rev 2
20/43
Measurement
UM0670
Figure 16. Output LED current for different LED voltage (ILED = 700 mA)
VLED v s. ILED for nominal LED current 700 mA
800
700
600
LED
500
current
[mA] 400
700 mA
300
200
100
0
82
101
121
139
LED voltage [V]
AM00404
Figure 17 shows the output LED current waveform for the output LED current of 1000 mA.
The current ripple is 433 mA and the switching frequency for the modified buck converter is
55 kHz. The input voltage was 230 VAC and 4 LEDs were used as the load (OSTAR LED LE
UW E3B see Section 11: References and related materials: 6). The output LED current
accuracy for the different LED voltages is shown in Figure 18.
Figure 17. Output LED current waveform (ILED = 1000 mA)
21/43
Doc ID 15327 Rev 2
UM0670
Measurement
Figure 18. Output LED current for different LED voltage (ILED = 1000 mA)
VLED v s. ILED for nominal LED current 1 A
1200
1000
LED 800
current
[mA] 600
1A
400
200
0
63
84
103
122
LED voltage [V]
AM00405
9.2
Power MOSFET turn ON and OFF time
The power MOSFET turn ON and OFF time is shown in Figure 19. Turn ON time is
approximately 50 ns and turn OFF time is approximately 120 ns (OFF time is used in
Equation 13 in the appendix).
Figure 19. Power MOSFET turn ON and OFF measurement
9.3
LED current ripple reduction
The output LED current ripple can be reduced by increasing the output capacitor size. For
example, inductor current ripple is 400 mA for the 100 nF / 450 V output capacitor, as shown
in Figure 20. Thanks to the larger 470 nF capacitor used on the STEVAL-ILL013V1, the
Doc ID 15327 Rev 2
22/43
Measurement
UM0670
output current ripple is reduced to 92 mA (see Figure 13). However, there are some
limitations for the capacitors used in dimmable applications, as capacitors that are too large
cause a decrease in dimming resolution (minimum duty cycle is limited). The 470 nF
capacitor used on the STEVAL-ILL013V1 is a good compromise between lower output
current ripple and good dimming resolution, as illustrated in Figure 12.
Figure 20. LED current ripple for the 100 nF output capacitor
9.4
Standard EN61000-3-2 measurement
Figure 21. EN61000-3-2 analysis for LED current of 350 mA and VIN from 85 V to 160 VAC
EN61000-3-2 analysis for LED current 350 mA at 12 LEDs VIN from 85 V to 160 V AC
1200
1000
800
Current
600
[mA]
Real
Limits
400
200
0
1 3 5 7 9
85 V
1 3 5 7 9
1 3 5 7 9
1 3 5 7 9
1 3 5 7 9
1 3 5 7 9
100 V
110 V
120 V
140 V
160 V
AM00406
23/43
Doc ID 15327 Rev 2
UM0670
Measurement
Figure 22. EN61000-3-2 analysis for LED current of 350 mA and VIN from 180 V to 265 VAC
EN61000-3-2 analysis for LED current 350 mA at 12 LEDs VIN from 180 V to 265 V AC
600
500
Current 400
[mA]
300
Real
Limits
200
100
0
1 3 5 7 9
180 V
1 3 5 7 9
1 3 5 7 9
1 3 5 7 9
1 3 5 7 9
1 3 5 7 9
200 V
220 V
230 V
240 V
260V
AM00407
Figure 23. EN61000-3-2 analysis for LED current of 700 mA and VIN from 85 V to 160 VAC
EN61000-3-2 analysis for LED current 700 mA at 6 LEDs VIN from 85 V to 160 V AC
1200
1000
800
Current
[mA]
600
Real
Limits
400
200
0
1 3 5 7 9
1 3 5 7 9
1 3 5 7 9
1 3 5 7 9
1 3 5 7 9
1 3 5 7 9
85 V
100 V
110 V
120 V
140 V
160 V
AM00408
Figure 24. EN61000-3-2 analysis for LED current of 700 mA and VIN from 180 V to 265 VAC
EN61000-3-2 analysis for LED current 700 mA at 6 LEDs VIN from 180 V to 265 V AC
600
500
400
Current
[mA] 300
Real
Limits
200
100
0
1 3 5 7 9
1 3 5 7 9
1 3 5 7 9
180 V
200 V
220 V
1 3 5 7 9
230 V
1 3 5 7 9
1 3 5 7 9
240 V
260 V
AM00409
Doc ID 15327 Rev 2
24/43
Measurement
UM0670
Figure 25. EN61000-3-2 analysis for LED current of 1000 mA and VIN from 85 V to 160 VAC
EN61000-3-2 analysis for LED current 1 A at 4 LEDs VIN from 85 V to 160 V AC
1200
1000
800
Current
600
[mA]
Real
Limits
400
200
0
1 3 5 7 9
85 V
1 3 5 7 9
1 3 5 7 9
1 3 5 7 9
1 3 5 7 9
1 3 5 7 9
100 V
110 V
120 V
140 V
160 V
AM00410
Figure 26. EN61000-3-2 analysis for LED current of 1000 mA and VIN from 180 V to 265 VAC
EN61000-3-2 analysis for LED current 1 A at 4 LEDs VIN from 180 V to 265 V AC
600
500
400
Current
300
[mA]
Real
Limits
200
100
0
1 3 5 7 9
1 3 5 7 9
1 3 5 7 9
1 3 5 7 9
1 3 5 7 9
1 3 5 7 9
180 V
200 V
220 V
230 V
240 V
260 V
AM00411
25/43
Doc ID 15327 Rev 2
UM0670
9.5
Measurement
EMI measurement (EN55015)
Figure 27. Average limit measurement from 150 kHz to 30 MHz (ILED = 350 mA)
Figure 28. Quasi-peak limit measurement from 9 kHz to 150 kHz (ILED = 350 mA)
Doc ID 15327 Rev 2
26/43
Measurement
UM0670
Figure 29. Quasi-peak limit measurement from 150 kHz to 30 MHz (ILED = 350 mA)
Figure 30. Average limit measurement from 150 kHz to 30 MHz (ILED = 700 mA)
27/43
Doc ID 15327 Rev 2
UM0670
Measurement
Figure 31. Quasi-peak limit measurement from 9 kHz to 150 kHz (ILED = 700 mA)
Figure 32. Quasi-peak limit measurement from 150 kHz to 30 MHz (ILED = 700 mA)
Doc ID 15327 Rev 2
28/43
Measurement
UM0670
Figure 33. Average limit measurement from 150 kHz to 30 MHz (ILED = 1000 mA)
Figure 34. Quasi-peak limit measurement from 9 kHz to 150 kHz (ILED = 1000 mA)
29/43
Doc ID 15327 Rev 2
UM0670
Measurement
Figure 35. Quasi-peak limit measurement from 150 kHz to 30 MHz (ILED = 1000 mA)
Figure 36. Average limit measurement from 150 kHz to 30 MHz (ILED = 0 mA)
Doc ID 15327 Rev 2
30/43
Measurement
UM0670
Figure 37. Quasi-peak limit measurement from 9 kHz to 150 kHz (ILED = 0 mA)
Figure 38. Quasi-peak limit measurement from 150 kHz to 30 MHz (ILED = 0 mA)
31/43
Doc ID 15327 Rev 2
UM0670
Design features
10
Design features
10.1
Proper startup circuit design
High PF boost converter design is described in the EVL6562A-TM-80W (Section 11:
References and related materials: 1.) and this type of design typically includes a single
electrolytic capacitor on the VCC pin of the L6562A to ensure proper startup. The situation
for the STEVAL-ILL013V1 is different, as this input capacitor also supplies the second
L6562A driver, used for controlling the modified buck converter, and also provides a supply
voltage for the PWM generator. Generally, this means that there is always some additional
current discharging the input capacitor during startup, and therefore the high PF boost
converter does not start properly if the low input AC voltage is applied to the board. This is
due to there being insufficient energy in the input capacitor to guarantee proper startup. The
waweforms which illustrate this situation are given in Figure 41 (circuit without capacitor
C110 and diode D104). As soon as the input voltage reaches the turn ON threshold, the
L6562A starts operating and the input voltage on the VCC pin is decreased. As soon as it
reaches the turn OFF threshold, the capacitor is charged again and the L6562A stops
operating. This behavior is repeated and so after a short period the output voltage should
reach 400 V. However, this is not possible due to low energy in the input capacitor on the
VCC pin. This problem is solved by adding capacitor C110 and diode D104 to the original
schematic, as shown in Figure 39. Thanks to this configuration the input capacitor C107 on
the VCC pin is not discharged because it is supplying the PWM generator and second
converter. Capacitor C110 is used to provide supply voltage to the PWM generator and the
second converter. Capacitor C110 is charged via a capacitive supply source connected to
the ZCD when the L6562A operates. The voltage on capacitor C110 is added to the voltage
on capacitor C107 through diode D104, and as soon as the voltage on capacitor C110 also
reaches the turn ON threshold, the L6562A starts operating continuously and the output
voltage reaches 400 V, as shown in Figure 40.
Figure 39. Proper startup circuit design
VCC
ZCD COMP INV
D104
MULT
C107
L6562A
GD
GND
CS
C110
AM00412
Doc ID 15327 Rev 2
32/43
Design features
UM0670
Figure 40. Proper startup using diode D104 and capacitor C110
Figure 41. Improper startup without using diode D104 and capacitor C110
10.2
Zero dimming design implementation
During zero dimming (duty cycle is 0%) the high PF boost converter is in burst mode
because there is zero load. During this mode, capacitors C107 and C110 are charged only
in short pulses (C107 is also slightly charged via resistor from the input voltage, but it is not
enough) and therefore do not have enough energy to also supply the PWM generator and
the second L6562A controller used for the modified buck converter. The circuit shown in
Figure 42 allows brightness changes down to 0% without any problem, because if the
33/43
Doc ID 15327 Rev 2
UM0670
Design features
voltage on the emitter of Q102 is below the limit established by voltage divider R125
and R128 (upper limit set to 16.6 V) the transistor is opened and charges C110 and C107.
Therefore, it is possible to change the brightness between 0% and 100% on the STEVALILL013V1. The real measurement is shown in Figure 43, and it is evident that the supply
voltage on capacitor C110 is not below 12.5 V during no brightness.
Figure 42. Design improvement allowing zero dimming
Supplying PWM generator with ST7LITEU05
Supplying L6562A in modified BUCK converter
Vc = 16 V
R125
R126
D104
ZCD
VCC
COMP
L6562A
MULT
GND
INV
GD
CS
VOUT = 400 V
Q102
C110
R128
C107
Allowing
0% dimming
AM00401
Doc ID 15327 Rev 2
34/43
Design features
UM0670
Figure 43. Voltage on capacitor C110 and output bus voltage of 400 V
35/43
Doc ID 15327 Rev 2
UM0670
11
References and related materials
References and related materials
1.
STMicroelectronics, EVL6562A-TM-80W, 80 W high performance transition mode PFC
evaluation board, data brief; see www.st.com
2.
STMicroelectronics, AN2928, Modified buck converter for LED applications, application
note; see www.st.com
3.
STMicroelectronics, STF9NM50N, N-channel second generation MDmesh™ power
MOSFET, datasheet; see www.st.com
4.
STMicroelectronics, STPSC806D, 600 V power Schottky silicon carbide diode,
datasheet; see www.st.com
5.
EPCOS, B66317, Ferrites and accessories E25/13/7 (EF25) core and accessories,
datasheet; see www.epcos.com
6.
OSRAM, LE UW E3B, OSTAR Lighting with optics, datasheet; see www.osram-os.com.
Doc ID 15327 Rev 2
36/43
Design calculation
Appendix A
UM0670
Design calculation
The aim of this section is to demonstrate how the components for the modified buck
converter are calculated. Design calculation follows precisely the equations used in
application note AN2928 (Section 11: References and related materials: 2.). Therefore,
please refer to this application note for more information.
A.1
Design specifications for a modified buck convertor
●
VIN = 400 V
●
VLED = 80 V
●
IAVR = 1 A
●
IMAX = 1.4 A
●
IMIN = 0.6 A
●
f = 50 kHz
●
TA = 30 °C
●
TJMAX_MOSFET = 70 °C
Modified buck converter working with duty cycle (output LED current is 1 A):
Equation 1
V LED
80
D = ------------- = ---------- = 0.2
400
V IN
Calculated OFF time for selected switching frequency of 50 kHz is:
Equation 2
(1 – D)
( 1 – 0.2 )
t OFF = ------------------ = ---------------------- = 16μs
f
50000
Now, the FOT network should be calculated. First, resistor R203 is selected:
R203 = 3900 Ω
Two capacitors in parallel (C204 and C206) are used for the 1 A output LED current (jumper
JP3 is connected) and their size is determined using the following equation:
Equation 3
–6
t OFF
16 × 10
= ---------------------------- = 1.95nF
C 204 | | C 206 = --------------------------2.1 × 3900
2.1 × R 203
Therefore the capacitors C204 and C206 have the following size:
C204 = 390 pF
C206 = 1.5 nF
37/43
Doc ID 15327 Rev 2
UM0670
Design calculation
Resistor R202 limits the charging current and should be in the following range:
Equation 4
V GD MAX – V ZCD C LAMP – V F
------------------------------------------------------------------------------- < R 202 < R 203 ×
V ZCD C LAMP
I ZCD MAX + ----------------------------------R 203
V
–V
– VF
⎛ GD MIN
⎞
ZCD C LAMP
⎜ ------------------------------------------------------------------------------⎟
V
⎝
⎠
Z CD CLAMP
Equation 5
15 – 5.7 – 0.7-----------------------------------< R 202 < 3900 ×
5.7
0.01 + ⎛ -------------⎞
⎝ 3900⎠
– 5.7 – 0.7-⎞
⎛ 9.8
-----------------------------------⎝
⎠
5.7
Equation 6
750 < R 202 < 2326
A 1 kΩ resistor is chosen for R202.
Capacitor C203 should be lower than 1.25 nF, and therefore a value of 220 pF was chosen:
Equation 7
V ZCD CLAMP
5.7
–9
C 203 < ( C 204 | | C 206 ) ---------------------------------------------------------------------------------------- = 1.89 × 10 ----------------------------------- = 1.25nF
15 – 5.7 – 0.7
( V GD CMAX – V ZCD CLAMP – V F )
C203 = 220 pF
Inductor size is calculated using following equation:
Equation 8
–6
V LED × t OFF
80 × 16 × 10
L = --------------------------------------------- = --------------------------------------- = 1.6mH
2 × ( 1.4 – 1 )
2 × ( I MAX – I AVR )
Two sense resistors are connected in parallel and their size is calculated:
Equation 9
V CS 1.08
= ----------- = 0.77Ω
R 204 | | R 206 = -----------I MAX 1.04
The output LED current of 1 A was precisely set by adjusting resistors R204 and R206, and
therefore their optimal resistance values are 1.5 Ω and 2.2 Ω.
R204 = 1.5 Ω
R206 = 2.2 Ω
In the next step the power MOSFET and its heat sink are calculated. The power MOSFET
RMS current is derived using the following equation:
Doc ID 15327 Rev 2
38/43
Design calculation
UM0670
Equation 10
2
2
lRMS = D ×
2
l PP
2
0.8 - = 0.21
- = 0.2 1 + ---------lAVR + ------12
12
Power MOSFET conduction loss is:
Equation 11
2
P CON = l RMS × R DS ( ON ) ( 70° C ) = 0.21 × 0.756 = 0.159W
Where the power MOSFET chosen is the STF9NM50N (see datasheet Section 11:
References and related materials: 3.) and its RDS(on) for 70 °C is:
Equation 12
R DS ( ON ) ( ° C ) = R DS ( ON ) ( ° C ) × 1.35 = 0.56 × 1.35 = 0.756Ω
Power MOSFET switching losses can be approximately calculated (turn OFF time was
measured 120 ns - see Figure 19):
Equation 13
–9
3
V IN × I MAX × tOFF SW × f
400 × 1.4 × 120 × 10 × 50 × 10
P SW = -------------------------------------------------------------------- = --------------------------------------------------------------------------------------------- = 1.68W
2
2
The total power loss on the power MOSFET is 1.839 W, so the heat sink can be calculated
from following equation:
Equation 14
T JMAX MOSFET – T A
P TOT = -----------------------------------------------------------R t hJC + R thCH + R t hH A
And maximum heat sink-to-ambient resistance is:
Equation 15
T JMAX MOSFET – T A
70 – 30
R thH A < ------------------------------------------------------ – R t hJC – R thC H = ------------------- – 5 – 0.5 = 16.25° C ⁄ W
1.839
P TOT
The heat sink used in the power MOSFET on the STEVAL-ILL013V1 has a thermal
resistance of 13.5 °C / W, and therefore this heat sink is optimized for this design.
The last power component remaining to be calculated is the power diode. The diode
conducts during the OFF time, and therefore its average current is:
Equation 16
I AVR
39/43
D=
I MAX + I MIN
1.4 + 0.6
( 1 – D ) × ------------------------------ = ( 1 – 0.2 ) × ----------------------- = 0.8A
2
2
Doc ID 15327 Rev 2
UM0670
Design calculation
Power loss on the STPSC806D diode is:
Equation 17
P LOSS
D=
IAVR
D
× V F = 0.8 × 0.7 = 0.56W
where forward diode voltage was found for the average diode current 0.8 A in the datasheet
(see datasheet Section 11: References and related materials: 4.).
Calculated junction diode temperature without using heat sink is:
Equation 18
T J = P LOSS
D
× ( R t hJC + R t hCA ) + T A = 0.56 × ( 2.4 + 60 ) + 30 = 65° C
Junction-to-case thermal resistance is available in the datasheet for the STPSC806D and
case-to-ambient temperature is determined by the device package used. In this case, the
TO-220 package is used and its thermal resistance is typically 60 °C / W.
Calculated junction diode temperature without using a heat sink is much lower than the
maximum junction temperature for the STPSC806D, and therefore this diode is suitable for
the design.
One of the most important things to consider is proper inductor design. The inductor size
was calculated in Equation 8, but generally the inductor size by itself is not enough to ensure
proper inductor design and therefore several additional equations are used for completing
overall inductor construction.
First, the inductor core size must be selected and for this selection it is very helpful to
calculate the minimum area product using application parameters. Minimum required core
area product (AP), where the flux swing is limited by core saturation is:
Equation 19
4
---
--4-
L × l PEAK × l R MS 3 ⎛ 1.6 × 10 – 3 × 1.4 × 1 ⎞ 3
-⎟ = 0.2518cm 4
AP MIN = ⎛ ---------------------------------------------⎞ = ⎜ ----------------------------------------------------------⎝
B MAX × Cl ⎠
⎝ 0.3 × 420 × 0.5 × 10 –4⎠
where the constant is Cl = JMAX x CR x 10–4 = 420 x 0.5 x 10–4.
The inductor core E25 from EPCOS was selected. The minimum core cross section is 51.5
mm2 and the winding cross section is 61 mm2 (see datasheet Section 11: References and
related materials: 5.) and the calculated product area is:
Equation 20
AP = A N × A MIN = 61 × 51.5 = 0, 31415cm
4
The calculated product area is bigger than the minimum required product area, and
therefore the inductor core E25 can be used.
Doc ID 15327 Rev 2
40/43
Design calculation
UM0670
The number of turns for the inductor is:
Equation 21
N=
L
------ =
AL
–3
1.6 × 10
---------------------------------- = 172
–9
54.22 × 10
where the inductance factor Al for the E25 core and 2 mm gap is calculated:
Equation 22
1
-----K2
AL = K1 ×
s = 90 ×
1
-------------– 0.73
2 = 54.22nH
K1 = 70 (see datasheet Section 11: References and related materials: 5.)
K2 = – 0,73 (see datasheet Section 11: References and related materials: 5.)
s = E25 core air gap [mm].
The last step to complete the inductor design is to calculate the wire diameter.
Maximum inductor power dissipation is:
Equation 23
P MAX
LOSS =
T MAX – T A 70 – 30
--------------------------- = ------------------- = 1W
40
RT
The wire resistance on the inductor is (copper wire with diameter of 0.28 mm is chosen):
Equation 24
R= ρ ×
lN × N
5 × 172 --l- = ρ × --------------- = 1.76 × 10 – 6 × --------------------------------= 17.2mΩ
s
3.14 × 0.028
π× d
where average turn length IN is written in the core datasheet (see datasheet Section 11:
References and related materials 5.).
The power dissipation on the wire is:
Equation 25
2
P WIR E = R × lAVR = 17.2 × 10
–3
2
× 1 = 17.2mW
The power loss in the wire is much lower than the maximum power loss in the inductor, and
so a wire with a diameter of 0.28 mm is suitable for this inductor.
41/43
Doc ID 15327 Rev 2
UM0670
12
Revision history
Revision history
Table 4.
Document revision history
Date
Revision
Changes
15-May-2009
1
Initial release.
10-Aug-2009
2
Document reformatted, corrected typing error in Figure 7, added
note below Table 3.
Doc ID 15327 Rev 2
42/43
UM0670
Please Read Carefully:
Information in this document is provided solely in connection with ST products. STMicroelectronics NV and its subsidiaries (“ST”) reserve the
right to make changes, corrections, modifications or improvements, to this document, and the products and services described herein at any
time, without notice.
All ST products are sold pursuant to ST’s terms and conditions of sale.
Purchasers are solely responsible for the choice, selection and use of the ST products and services described herein, and ST assumes no
liability whatsoever relating to the choice, selection or use of the ST products and services described herein.
No license, express or implied, by estoppel or otherwise, to any intellectual property rights is granted under this document. If any part of this
document refers to any third party products or services it shall not be deemed a license grant by ST for the use of such third party products
or services, or any intellectual property contained therein or considered as a warranty covering the use in any manner whatsoever of such
third party products or services or any intellectual property contained therein.
UNLESS OTHERWISE SET FORTH IN ST’S TERMS AND CONDITIONS OF SALE ST DISCLAIMS ANY EXPRESS OR IMPLIED
WARRANTY WITH RESPECT TO THE USE AND/OR SALE OF ST PRODUCTS INCLUDING WITHOUT LIMITATION IMPLIED
WARRANTIES OF MERCHANTABILITY, FITNESS FOR A PARTICULAR PURPOSE (AND THEIR EQUIVALENTS UNDER THE LAWS
OF ANY JURISDICTION), OR INFRINGEMENT OF ANY PATENT, COPYRIGHT OR OTHER INTELLECTUAL PROPERTY RIGHT.
UNLESS EXPRESSLY APPROVED IN WRITING BY AN AUTHORIZED ST REPRESENTATIVE, ST PRODUCTS ARE NOT
RECOMMENDED, AUTHORIZED OR WARRANTED FOR USE IN MILITARY, AIR CRAFT, SPACE, LIFE SAVING, OR LIFE SUSTAINING
APPLICATIONS, NOR IN PRODUCTS OR SYSTEMS WHERE FAILURE OR MALFUNCTION MAY RESULT IN PERSONAL INJURY,
DEATH, OR SEVERE PROPERTY OR ENVIRONMENTAL DAMAGE. ST PRODUCTS WHICH ARE NOT SPECIFIED AS "AUTOMOTIVE
GRADE" MAY ONLY BE USED IN AUTOMOTIVE APPLICATIONS AT USER’S OWN RISK.
Resale of ST products with provisions different from the statements and/or technical features set forth in this document shall immediately void
any warranty granted by ST for the ST product or service described herein and shall not create or extend in any manner whatsoever, any
liability of ST.
ST and the ST logo are trademarks or registered trademarks of ST in various countries.
Information in this document supersedes and replaces all information previously supplied.
The ST logo is a registered trademark of STMicroelectronics. All other names are the property of their respective owners.
© 2009 STMicroelectronics - All rights reserved
STMicroelectronics group of companies
Australia - Belgium - Brazil - Canada - China - Czech Republic - Finland - France - Germany - Hong Kong - India - Israel - Italy - Japan Malaysia - Malta - Morocco - Philippines - Singapore - Spain - Sweden - Switzerland - United Kingdom - United States of America
www.st.com
43/43
Doc ID 15327 Rev 2


