1
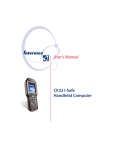
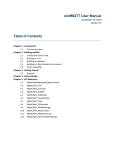
ProfService Germany Newsletter 01/2008
I always get ]C1 in front of scanned barcodes .............................................................................................. 2
Search and replace inside a barcode with GRID........................................................................................... 2
GRID data editing examples ............................................................................................... 2
IP4, IVA 4.03.35.1064 and SR07022200 ..................................................................................................... 3
Autoinstall custom applications .................................................................................................................... 3
AutoRun/AutoCab on Windows Mobile 2003 devices....................................................... 3
Using \Flash File Store.................................................................................................. 3
Using a memory card .................................................................................................... 4
Windows Mobile 2005: sstransfer.xml ............................................................................... 5
Using Flash File Store................................................................................................... 5
Using a memory card .................................................................................................... 7
NEW Intermec Developer Library Resource Kits ........................................................................................ 8
How are applications launched on events ..................................................................................................... 8
1
I always get ]C1 in front of scanned barcodes
You scanned an EAN128 barcode. Per default, the option 'EAN128 identifier' is enabled. Just start
Intermec Settings or Configuration Utility (CK3x) and look for DataCollection-InternalScannerSymbologies-Code128-EAN128 identifier.
Search and replace inside a barcode with GRID
With the use of GRID data editing you can search inside a scanned barcode and change the data sent by
the virtual wedge. GRID editing is not possible for application that use the scanner directly, it only works
via the keyboard wedge (the barcode is scanned and transfered via the keyboard buffer into the
application).
GRID data editing examples
Replace the two 0s at start of 00340483950005513226 by nothing:
(00)(.*)=>\2;
Please note, that the clear text below some barcodes will not allways show what is really in the barcode:
The GRID "(00)(.*)=>\2;" will work on all barcodes as it does not check the length of strings to show. If
you scan a barcode with no 00 at beginning, the scanner will not deliver it to the wedge. You will one
good beep for the scanner has recognized the barcode, but then you get a bad beep as the barcode does not
match the search string "(00)(.*)"
If you would like to get other barcodes unchanged, you can declare an second rule. The GRID will search
through the GRID line and does a search/replace for the first matching rule. The Grid:
(00)(.*)=>\2;.*
2
will output barcodes starting with 00 without the 00 and all other barcodes without change (as long as
there are no control characters inside.
To add a line feed to the replace expression, you can use \x0D or the DataCollection-InternalScannerSymbologyOptions setting for Postamble.
(00)(.*)=>\2\x=D;*\x0D
If the GRID string gets longer, you can place it in a file and separate each grid with a CrLf. Lines starting
with a semicolon will treated as comments. The grid file is evaluated line by line and the engine applies
the first matching grid only. To use a file as grid, enter "<FILE>\Windows\grid.txt" (replace
\Windows\grid.txt with the file location and name of your file.
If the grid will become more complex or you will have more than 9 groups (\x syntax), you can write a
DLL which does the search and replace.
More Information about GRID data editing can be found in the user manual of your device and the white
paper "UTILIZING GRID EDITING CAPABILITIES OF INTERMEC DEVICES". The GRID syntax is
similar to the Unix grep commend. To examine grep like RegEx expressions, you can use the free PC
software "The RegEx Coach".
IP4, IVA 4.03.35.1064 and SR07022200
Actually the above SR will possible disturb the functionality of the IP4 if used together with BETA RFID
IVA 4.03.35.1064. See KC bulletin answer #10122 for details.
Autoinstall custom applications
AutoRun/AutoCab on Windows Mobile 2003 devices
Using \Flash File Store
If the cab files to install are not to big, you can directly place them on the device in the folder
\Flash File Store\Cabfiles. Ensure the cab files are marked read-only, otherwise they are deleted after
install. If the device is cold booted, the cab files will be installed after the intermec cab files are installed
and the device does a warmboot. To have the cab files being installed in a specific order (ie first the
3
compact framework 2 and then the application), you have to place an ASCII file in the folder
\Flash File Store\2577 and name it AutoCab.dat. The file should have a line for each cab to install. Enter
the names of the cab files without a path.
Example
Cabfiles to install are DC_Net.CAB, LagerInventur.CAB, NETCFv2.cab, sqlce30.CAB,
sqlce30.dev.CAB and sqlce30.repl.CAB. To have them install in the right order, create the following
AutoCab.dat file and place it at \Flash File Store\2577 on the device:
NETCFv2.cab
sqlce30.CAB
sqlce30.dev.CAB
sqlce30.repl.CAB
DC_Net.CAB
LagerInventur.cab
Note:
Do not use longer names for the cabfiles or the cabfiles install will behave very strange.
The original names of the SQL CE 3.0 files are to long:
sqlce30.dev.ENU.ppc.wce4.armv4.CAB
sqlce30.ppc.wce4.armv4.CAB
sqlce30.repl.ppc.wce4.armv4.CAB
Now place all the files listed in AutoCab.dat in the folder \Flash File Store\Cabfiles. If there more cabfiles
in this folder, first the listed files are installed and then the not listed. If a listed cab files is not available,
you will get an error message during OS startup.
Automatic warmboot after install
To let the device do a warmboot after the install of these custom cabs, let one of the cabs install a file
called __resetmeplease__.txt into the windows dir. If autocab encounters this file, it will do a reboot after
this group of cabfiles has been installed.
Using a memory card
If there are more files to install or to autoinstall devices without first changing the device's file system,
you can use a memory card. Create a directory 2577 and one called Cabfiles on the memory card. The
name of the inserted memory card at the device maybe "Storage Card" or "SDMMC Disk". I will use
"Storage Card" in further writing.
OK, you have now two dirs on your card. Now copy AutoCab.exe, AutoCab.dat, AutoRun.exe and
AutoRun.dat from the device's \Flash File Store\2577 directory. Then copy the cab files to install into the
directory \CabFiles on the card. Ensure, they are marked read-only or they will be deleted after first
install.
Storage Card + 2577 - AutoCab.exe
|
AutoCab.dat
|
AutoRun.exe
|
AutoRun.dat
|
+ Cabfiles - NETCFv2.cab
sqlce30.CAB
sqlce30.dev.CAB
sqlce30.repl.CAB
DC_Net.CAB
LagerInventur.cab
4
You have to change the AutoRun.dat now, so it uses the memory card. Your original file
Storage Card\2577\AutoRun.dat should look like this:
EXEC "Flash File Store\2577\AutoCab.exe" -CHKRST=1 -SHOW=1
CALL "Flash File Store\2577\AutoUser.dat"
Change this now to:
EXEC "Storage Card\2577\AutoCab.exe" -CHKRST=1 -SHOW=1
You can change the file on the memory card inserted in a card reader at your desktop pc.
With the files in place, you can now insert the card into a WM2003 device and do a cold boot. The device
will then boot, install the intermec files, warmboot and install your custom files.
Windows Mobile 2005: sstransfer.xml
Unfortunately the AutoRun on the WM2005 devices will actually not chain from the internal memory to
external memory cards. So, a WM2005 device will only execute the first AutoRun it finds. To get a
device, that autoinstalls everything needed, you can extend the \Flash File Store\SSPB folder and change
the file _sstransferagent.xml. If storage memory gets low, you have to switch to external storage and
insert a memory card. As only one _sstransferagent.xml is run on startup, you have to put the intermec
files and your custom files onto the memory card.
Using Flash File Store
A CN3 will have following files in Flash File Store\SSPB after installation of the SSPB:
_sstransferagent.xml
CN3_WM5_SSPB_ID.CAB
IBI.cab
idl.CAB
iGPSApplet.cab
InstallSelectCN3WM.CAB
Intermec_DHCP.cab
IntermecValueAdd.js
IntermecValueAdd.txt
itcauto.CAB
itcivacn3wm.cab
OtherNeededStuff.WM2005_ARMVI.CAB
PowerPro.CAB
PrinterSupport.CAB
SetupASTStart.itc
supprcmagneto.cab
wlenablercn3.arm.cab
The file _sstransferagent.xml controls which files will be installed at a clean boot and what applications
will run on startup.
<?xml version="1.0"?>
<Devices>
<Device Type="C" Family="N" Model="3">
<Files
SrcDir="\Flash File Store\SSPB">
<!-- files to load to the device -->
<File SrcName="SetupASTStart.itc" DestName="SetupASTStart.itc" DestDir="\Windows"
ConfigString="CN3*" OS="PocketPC"/>
5
<File SrcName="InstallSelectCN3WM.CAB" DestName="InstallSelectCN3WM.CAB"
DestDir="\CabFiles" ConfigString="CN3*" OS="PocketPC"/>
<File SrcName="itcivacn3wm.CAB" DestName="itcivacn3wm.CAB" DestDir="\CabFiles"
ConfigString="CN3*" OS="PocketPC" Desc="Data Collection & Intermec Settings"/>
<File SrcName="SuppRCMagneto.CAB" DestName="SuppRCMagneto.CAB" DestDir="\CabFiles"
ConfigString="CN3*" OS="PocketPC" Desc="Funk Wireless Security"/>
<File SrcName="IntermecValueAdd.txt" DestName="IntermecValueAdd.txt"
DestDir="\Windows" ConfigString="CN3*" OS="PocketPC"/>
<File SrcName="IntermecValueAdd.js" DestName="IntermecValueAdd.js"
DestDir="\Windows" ConfigString="CN3*" OS="PocketPC"/>
<File SrcName="PrinterSupport.CAB" DestName="PrinterSupport.CAB"
DestDir="\CabFiles" ConfigString="CN3*" OS="PocketPC" Desc="Printer Support"/>
<File SrcName="WLEnablerCN3.ARM.CAB" DestName="WLEnablerCN3.ARM.CAB"
DestDir="\CabFiles" ConfigString="CN3????????E1??" OS="PocketPC" Desc="Avalanche Enabler"/>
<File SrcName="WLEnablerCN3.ARM.CAB" DestName="WLEnablerCN3.ARM.CAB"
DestDir="\CabFiles" ConfigString="XCN3????????E2??" OS="PocketPC" Desc="Avalanche Enabler"/>
<File SrcName="WLEnablerCN3.ARM.CAB" DestName="WLEnablerCN3.ARM.CAB"
DestDir="\CabFiles" ConfigString="XCN3????????E3??" OS="PocketPC" Desc="Avalanche Enabler"/>
<File SrcName="Intermec_DHCP.cab" DestName="Intermec_DHCP.cab" DestDir="\CabFiles"
ConfigString="CN3*" OS="PocketPC" Desc="Intermec DHCP Client"/>
<File SrcName="itcauto.CAB" DestName="itcauto.CAB" DestDir="\Temp"
ConfigString="CN3*" OS="PocketPC"/>
<File SrcName="IBI.cab" DestName="IBI.cab" DestDir="\CabFiles" ConfigString="CN3*"
OS="PocketPC" Desc="Bluetooth"/>
<File SrcName="CN3_WM5_SSPB_ID.CAB" DestName="CN3_WM5_SSPB_ID.CAB"
DestDir="\CabFiles" ConfigString="CN3*" OS="PocketPC" />
<File SrcName="idl.CAB" DestName="idl.CAB" DestDir="\CabFiles" ConfigString="CN3*"
OS="PocketPC" Desc="IDLRuntime"/>
<File SrcName="PowerPro.CAB" DestName="PowerPro.CAB" DestDir="\CabFiles"
ConfigString="CN3*" OS="PocketPC" Desc="Power Profiler"/>
<File SrcName="iGPSApplet.cab" DestName="iGPSApplet.cab" DestDir="\CabFiles"
ConfigString="CN3*" OS="PocketPC" Desc="GPS Applet"/>
<File SrcName="OtherNeededStuff.WM2005_ARMVI.CAB"
DestName="OtherNeededStuff.WM2005_ARMVI.CAB" DestDir="\CabFiles" ConfigString="CN3*"
OS="PocketPC" Desc="Additional Files"/>
<File SrcName="" DestName="wceload.exe" DestDir="\windows" ConfigString="CN3*"
Run="true" CmdLine=" /noui \Temp\itcauto.CAB" StartIn="\"/>
<File SrcName="" DestName="RunAutoRun.exe" DestDir="\Windows" ConfigString="CN3*"
Run="NoWait" CmdLine="" StartIn="\"/>
</Files>
</Device>
</Devices>
You see many lines that initiate a copy of a cab file to \Cabfiles or other destinations. Then the itcauto.cab
is installed by running wceload.exe. Finally RunAutoRun is executed, which will start the install of the
cabfiles copied to \Cabfiles.
To have your cabfiles also installed automatically, you have to copy the cabfiles to Flash File Store\SSPB
and then insert lines in Flash File Store\SSPB\_sstransferagent.xml. Insert a new line for every custom
cabfile to install. Use the syntax used for the intermec cabfiles. For example, to get a file
MachineConfig.cab installed automatically, please a copy of the file at \Flash File Store\SSPB and insert
following line before the line with the RunAutoRun.exe command:
<File SrcName="MachineConfig.CAB" DestName="MachineConfig.CAB"
DestDir="\CabFiles" ConfigString="CN3*" OS="PocketPC" Desc="Config"/>
6
Now, when you do a clean boot, your MacineConfig.cab is installed automatically at the end of the
intermec install. The cabfiles are installed in the order they are copied to \Cabfiles.
Using a memory card
If you dont like to setup a device with several (manual) steps or if you need more storage on the device or
if your custom cab files are too large you can put the SSPB and custom files on a memory card. Then
change the \_sstransferagent.xml file on the memory card to avoid the normal SSPB install. The normal
install will copy all SSPB files to \Flash File Store\SSPB and then change the _sstransferagent.xml
location in the registry of the device:
<?xml version="1.0"?>
<Devices>
<Device Type="C" Family="N" Model="3">
<Commands>
<Chain Dir="\Flash File Store\SSPB" />
<DeleteDir Dir="\Flash File Store\SSPB" />
<CopyDir SrcDir="\SD CARD\SSPB" DestDir="\Flash File Store\SSPB"/>
<SetRegKey KeyName="Software\Intermec\Devmgmt\SSTransferAgent"
ValueName="PostBootFileLocation" Value="\Flash File Store\SSPB" />
</Commands>
</Device>
</Devices>
You must change this file, so the device always uses the memory card as source for _sstransferagent.xml:
<?xml version="1.0"?>
<Devices>
<Device Type="C" Family="N" Model="3">
<Commands>
<Chain Dir="\SD Card\SSPB" />
<SetRegKey KeyName="Software\Intermec\Devmgmt\SSTransferAgent"
ValueName="PostBootFileLocation" Value="\SD Card\SSPB" />
</Commands>
</Device>
</Devices>
The SSPB directory on the memory card should have the following files plus your custom cabfiles:
_SSTransferAgent.xml
CN3_WM5_SSPB_ID.CAB
IBI.CAB
idl.CAB
iGPSApplet.cab
InstallSelectCN3WM.CAB
Intermec_DHCP.cab
IntermecValueAdd.js
IntermecValueAdd.txt
itcauto.CAB
itcivacn3wm.cab
OtherNeededStuff.WM2005_ARMVI.CAB
PowerPro.CAB
PrinterSupport.CAB
SetupASTStart.itc
supprcmagneto.cab
wlenablercn3.arm.cab
When all files are changed and in place, perform a clean boot and your device will automatically install
the SSPB contnents and your custom cabfiles.
7
NEW Intermec Developer Library Resource Kits
On 12. december 2007 the following resource kits have been updated:
IDL Resource Kit - Data Collection ver. 3.20
IDL Resource Kit - Device Management ver. 3.10
IDL Resource Kit Antares Migration ver. 3.10
On 14. december 2007 the following kits have been updated:
IDL Resource Kit - Communications ver. 3.10
IDL Resource Kit - Bluetooth ver. 3.10
IDL Resource Kit - Mobile Gadgets ver. 3.10
IDL Resource Kit Printing ver. 3.10
Keep up to date and periodically look at
http://home.intermec.com/eprise/main/GSS/Service/Content/Downloads/Show_DownloadSearchResults?
Product=DEVRESOURCEKIT
Installation Problems?
As I tried to update all these resource kits on my german WinXP, the installer stopped for erratic things.
First it says, it has to remove the old version. OK, I thought this is no problem and I selected Yes,
uninstall the previous version. But then it stops and said, it could not find the file
"...\Windows\Installer\Intermec Data Collection Resource Kit.msi" ( as I tried to install the DC resource
kit). The installer reversed all changes and finished without installing the new version. Now, I tried to
remove the old DC res. kit by using control panel-add/remove software. But this stopped with the same
error for the missing file. I then started the new installer again and looked at my temp folder. In one of the
actual subdirs I found the missing file and copied it to \Windows\Installer. Now, I was able to uninstall
the older resource kit using Settings-add/remove software without any problems. I tried again to install
the new resource kit, but it still states, it has found an old version. I deleted the directory with the old
version, same complain. Then I looked at the registry of my PC and found
HKLM\Software\Intermec\IDL\ResourceKits. There the old resource kit was still listed - what an
uninstall. OK, I deleted the two keys found for the datacollection resource kit (DCPC and DCRK) and
NOW I was able to install the new datacollection resource kit.
Same procedure had to be done on my PC with others of the 'new' resource kits.
How are applications launched on events
Do you wonder, how ActiveSync is launched automatically, when you dock a Windows Mobile device?
Or would you like to launch your own application at special events? Then take a look at the notification
API (CeGetUserNotificationHandles, CeGetUserNotification, .NET: State and Notification Broker API).
I already done a small app called iRunAtEvent, which enables you to take a look at events and assigned
applications. It does not have a GUI, it just creates a text file in the root of the device, where you can
check the function. Here is the printout of a simple "iRunAtEvent list list" command of a CN3:
================================
iRunAtEvent started
==========================================
01.06.2005 23:19:00:
options
===========
set fullPathExeName event
will set app to run at event
sample: iRunAtEvent set "\Windows\pword.exe" NETCONNECT
8
reset fullPathExeName
will reset all events set for app
sample: iRunAtEvent reset "\Windows\pword.exe"
list
will dump a list of apps linked to eventssample: iRunAtEvent list
================================
known events:
TIMECHANGE
SYNCEND
ONACPOWER
OFFACPOWER
NETCONNECT
NETDISCONNECT
DEVICECHANGE
IRDISCOVERED
RS232DETECTED
RESTOREEND
WAKEUP
TZCHANGE
MACHINENAMECHANGE
================================
Unsupported Events:
IRDISCOVERED
NETCONNECT
NETDISCONNECT
OFFACPOWER
ONACPOWER
================================
\iRunAtEvent.exe
list
list
========== notification registered apps ================
Handle
Status AppName
Event Type
0x3300000e
0x0
\Windows\calupd.exe
NOTIFICATION_EVENT_NONE
0x3100000f
0x0
CALNOT.EXE
NOTIFICATION_EVENT_NONE
0x31000010
0x0
clocknot.exe
NOTIFICATION_EVENT_NONE
0x3200000c
0x0
\windows\rtcupdate.exe
NOTIFICATION_EVENT_TIME_CHANGE
0x30000008
0x0
calnot.exe
NOTIFICATION_EVENT_RESTORE_END
0x30000009
0x0
calnot.exe
NOTIFICATION_EVENT_TIME_CHANGE
0x30000007
0x0
clocknot.exe
NOTIFICATION_EVENT_TIME_CHANGE
0x30000006
0x0
clocknot.exe
NOTIFICATION_EVENT_RESTORE_END
0x3200000d
0x0
Program Files\Intermec\Network\Bluetooth\btcc.exe
NOTIFICATION_EVENT_WAKEUP
0x30000004
0x0
repllog.exe
NOTIFICATION_EVENT_LAST
0x30000005
0x0
repllog.exe
NOTIFICATION_EVENT_TIME_CHANGE
0x30000003
0x0
repllog.exe
NOTIFICATION_EVENT_RS232_DETECTED
At the bottom of the file you will find the registered applications. Although the CN3 has an USB dock,
you will see, that ActiveSync (repllog.exe) is launched by an event called
NOTIFICATION_EVENT_RS232_DETECTED. To have your own application also start as soon as a
dock connection is recognized, you can use the command
iRunAtEvent set \Path\MyApp.exe TIMECHANGE
(replace \Path and \MyApp.exe with the names of your choice). With this in place, your app will be
started with every docking detected.
You can also remove an application from the list. In example, if you dont like ActiveSync is started
automatically on docking, then use the command:
iRunAtEvent reset repllog.exe
This will remove all repllog.exe entries from the notification list.
9