1
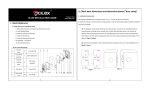
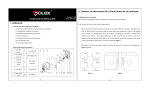
3. After the procedure is completed, fix the Lock Body using a screwdriver, as shown in Figure 6. Insert the screwdriver into the crossshaped hole of the Lock Body. When you rotate the cylinder clockwise, it springs out Ⅵ. Install the Front panel Assembly automatically, as shown in Figure 7. When you rotate the cylinder counterclockwise, it springs back automatically, 1. Install a Silica gel backing plate on the f Front panel Assembly (moisture proof / waterproof). As shown in as shown in Figure 8. Figure 12. Silica gel backing plate Figure 6 Figure 7 Figure 8 Ⅴ. Confirm the length of Locking Bar Figure 12 Figure 13 Front panel Assembly 1. Install the Front panel Assembly of the lock onto the door (Please see Ⅵ . Install the Front panel Assembly ). As 2. Stretch the Spring Bolt back to the Lock Body and pull the Connecting Wire out of the hole at the bottom of the shown in Figure 9: Lock Body. 3. Install the Front panel Assembly into the matching Hole Slot on the door. (There are three holes on the Lock Body, as shown in the preceding figure. The cylinder on the fore plate composition must be pulled out from the crossshaped hole of the Lock Body and the Locking Bar must be vertical to the ground.), as shown in Figure 13. Figure 9 Figure 10 Figure 11 4. Install the Back Lining Plate to the mapping Hole Slot. Pull the Connecting Wire out of the Ovalshaped Hole of the Back Lining Plate (As shown in Figure 14) and fix the Back Lining Plate and Front panel Assembly using a screwdriver, as shown in Figure 15. 2. Check whether the Locking Bar is too long. If yes, take the Front panel Assembly off and cut away the excess part of the Locking Bar (see Method for Cutting Locking Bar). As shown in Figure 10. Method for cutting Locking Bar: Suppose that the part of the Locking Bar that stretches out of the Hole Slot on the door is CD, as shown in Figure 11. Cut away the Locking Bar from A to ensure that the Locking Bar does not stretch out of the Hole Slot. 5 Figure 14 Figure 15 6