1
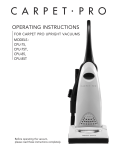
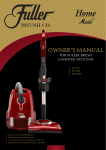
Owner’s Manual
For Fuller Brush
Tidy Maid Vacuum
Model
FBTM-PW
Thank you for purchasing this
Fuller Brush Upright Vacuum.
To ensure the best results, please read this
manual first and keep it for future reference.
Index
Important Safety Instructions ������������������������������������������������������������������������������������������������������������������������� 2
Two-Wire Polarized Cord ��������������������������������������������������������������������������������������������������������������������������� 3
Parts Identification��������������������������������������������������������������������������������������������������������������������������������������� 4
Replacement Bags and Filters����������������������������������������������������������������������������������������������������������������������� 4
How to Assemble and Operate the Vacuum��������������������������������������������������������������������������������������������������� 5
How to Change the Vacuum Bag����������������������������������������������������������������������������������������������������������������� 5
How to Adjust the Handle��������������������������������������������������������������������������������������������������������������������������� 6
How to Change the Filters��������������������������������������������������������������������������������������������������������������������������� 6
Edge Cleaning Feature������������������������������������������������������������������������������������������������������������������������������� 6
Automatic Self-Adjusting Nozzle������������������������������������������������������������������������������������������������������������������� 7
Optional Cleaning Tools/Accessories ����������������������������������������������������������������������������������������������������������� 7
On-Board Tool Cleaning ��������������������������������������������������������������������������������������������������������������������������� 7
How to Replace the Headlight Bulb and the Vacuum Belt ��������������������������������������������������������������������������������� 8
How to Clean the Nozzle Hose������������������������������������������������������������������������������������������������������������������� 9
Thermal Fuse Protection������������������������������������������������������������������������������������������������������������������������������� 9
For Best Performance ������������������������������������������������������������������������������������������������������������������������������� 10
Customer’s Record
The model and serial numbers of this product may be found on the back side of the unit. You should complete
the enclosed warranty card and mail it back to us or register it online at www.fullerbrushvacuums.com as soon as
possible for your protection. Also, note the model and serial numbers of your unit in the spaces provided below, and
retain this book as a permanent record of your purchase.
Model Number ______________________________________________________________________________________
Serial Number _______________________________________________________________________________________
Date Purchased ______________________________________________________________________________________
Your Fuller Brush vacuum cleaner is a product of high-quality materials and superior workmanship. We urge you to
read these operating instructions carefully before you use this vacuum cleaner in order to obtain the full performance and
satisfaction it can offer you.
Save These Instructions
Before you plug in your Fuller Brush vacuum cleaner, make sure the voltage indicated on the rating plate located on the
back of the vacuum cleaner is the same as your local supply.
1
IMPORTANT SAFETY INSTRUCTIONS
READ ALL INSTRUCTIONS BEFORE USING THIS APPLIANCE.
When using an electrical appliance, basic precautions should always be followed, including the following:
SAVE THESE INSTRUCTIONS.
WARNING:
To reduce the risk of fire, electric shock or injury:
1. Do not leave appliance unattended when plugged in. Unplug from outlet when not in use and before servicing.
2. WARNING: ELECTRIC SHOCK COULD OCCUR IF USED OUTDOORS OR ON WET SURFACES.
3.Do not allow to be used as a toy. Close attention is necessary when used by or near children.
4.Use only as described in this manual. Use only manufacturer’s recommended attachments.
5.Do not use with damaged cord or plug. If appliance is not working as it should, has been dropped,
damaged, left outdoors or dropped into water, return it to a service center.
6.Do not pull or carry by cord, use cord as a handle, close a door on cord, or pull cord around sharp edges or corners.
Do not run appliance over cord. Keep cord away from heated surfaces.
7.Do not unplug by pulling on cord. To unplug, grasp the plug, not the cord.
8.Do not handle plug or appliance with wet hands.
9. Turn off all controls before unplugging.
10.Do not put any object into openings. Do not use with any opening blocked; keep free of dust, lint, hair and anything that
may reduce air flow.
11.Keep hair, loose clothing, fingers and all parts of body away from openings and moving parts.
12.Do not pick up anything that is burning or smoking, such as cigarettes, matches or hot ashes.
13. Do not use without vacuum bag and/or filters in place.
14. Use extra care when cleaning on stairs.
15.Do not use to pick up flammable or combustible liquids such as gasoline or use in areas where they may be present.
16. Do not attempt to service the unit while appliance is plugged in.
2
Two-Wire Polarized Cord
This product is equipped with a polarized alternating current line
plug (a plug having one blade wider than the other).
This plug will fit into the power outlet only one way. This is a
safety feature. If you are unable to insert the plug fully into the
outlet, try reversing the plug. If the plug should still fail to fit,
contact an electrician to replace the obsolete outlet. Do not
defeat the safety purpose of the polarized plug.
3
Parts Identification
Quick cord release
Handle tube
Power cord
Cord storage hooks
Bag compartment
cover latch
Metal
telescopic
power wand
On/Off
switch
Easy-carry
handle
Accessory
attachment
opening
Bag
compartment
Tools
Quick
clean-out
port
Headlight
Nozzle
hose
Quick
clean-out
port
Handle
release pad
Nozzle hose
Furniture
guard
Self-adjusting nozzle
Thermal reset
button
Replacement Bags and Filters
• Genuine Fuller Brush HEPA Filter
Part # FB-06288
• Genuine Fuller Brush Vacuum Bags
Part # FB-06181 6 per package
Part # FB-06163 12 per package
• Genuine Fuller Brush Secondary Filter
Part # FB-06250
4
How to Assemble and Operate the Vacuum
How to Attach the Handle to the Vacuum Cleaner
The vacuum and the handle are packed separately.
1. A
fter first removing the handle screw, slide the handle into the slots
on top of the vacuum cleaner (Fig. 1).
2. Line up the small hole on the handle with the small hole on the
vacuum cleaner and insert the screw. Make sure the screw is
tightened securely.
3. T urn the upper cord storage hook to the upright position and wind the
power cord around the cord storage hooks when storing the
vacuum cleaner (Fig. 2).
Fig. 1
How to Release the Power Cord
1. The upper cord storage hook has a quick-release action.
To release the cord, rotate the hook downward and the cord will
drop off the handle for immediate use (Fig. 2).
2. Return the hook to the upright position before attempting to rewind
the cord.
Cord Release
On/Off Switch (Fig. 2)
1. To turn the vacuum on, push the switch located on the side of the
bag compartment to the ( I ) position.
2. To turn the vacuum off, push the switch located on the side of the
bag compartment to the ( 0 ) position.
On/Off switch
Fig. 2
How to Change the Vacuum Bag
Always operate the vacuum cleaner with a vacuum bag installed.
Bags should be changed when they are 2/3 full.
How to Change the Vacuum Bag
1. Unplug the vacuum cleaner. Remove the bag compartment cover
(Fig.1).
2. Remove the bag from the bag holder. Attach the new vacuum bag
onto the bag holder (Fig. 2).
3. P ull the bottom corners of the new vacuum bag out to expand the
bag capacity (Fig. 3).
4. Reinsert the tab on the end of the bag compartment cover into the
groove on the bag compartment housing. Press the bag compartment
cover into place closing it tightly.
5
Fig. 1
Fig. 3
Fig. 2
How to Adjust the Handle
The handle on this vacuum cleaner can be set to one of three positions – upright,
middle or low.
How to Adjust the Handle
1. To release the handle, step on the handle release pad on the left side of the
vacuum cleaner nozzle and pull back the handle (Fig.1).
2. U
pright position – for storage or when cleaning tools are used (Fig 2). Handle locks
in this position.
3. M
iddle position – for normal cleaning (Fig. 3).
4. Low position – for cleaning under furniture* (Fig. 4).
*Once in the middle position, step on the handle release pad again and lower the
handle to place the vacuum in the low position.
Fig. 2
Fig. 3
Fig. 1
Fig. 4
How to Change the Filters
Your vacuum cleaner is equipped with a secondary filter and a HEPA filter. These
filters capture fine dust particles and protect the motor from dirt. Accumulated dirt in the bag
compartment will be collected on the filters and may restrict motor performance. It is important
to change the filters regularly — approximately once a year or as needed.
How to Change the Secondary Filter
1. Unplug the vacuum cleaner. Remove the bag compartment cover and remove
the vacuum bag.
2. Remove the secondary filter by sliding it out from under the bag supporter (Fig. 1).
3. Insert a new filter, replace the bag and bag compartment cover.
Fig. 1
How to Change the HEPA Filter
1. Unplug the vacuum cleaner. Remove the bag compartment cover.
2. Remove the HEPA filter from the front of the bag compartment (Fig. 2).
3. Insert a new filter and replace the bag compartment cover.
Fig. 2
Edge Cleaning Feature
The edge cleaning feature provides improved cleaning of carpets near walls and stationary furniture. For maximum edge
cleaning, position the right side of the vacuum (from the user’s perspective) near walls or stationary furniture.
6
Automatic Self-Adjusting Nozzle
Your Fuller Brush upright vacuum cleaner is designed with an Automatic Self-Adjusting Nozzle. No manual adjustments
are required. The height of the nozzle is instantly and automatically adjusted to carpet pile height. This self-adjusting
feature allows the nozzle to float evenly over all carpet pile surfaces.
Optional Cleaning Tools/Accessories
7-Piece Deluxe Attachment Kit (Fig. 1)
15-foot crushproof hose with curved handle
Extension wand (2 pieces)
Dusting brush
Crevice tool
Upholstery tool
Upholstery brush insert
Deluxe floor brush
Fig. 1
6-Piece Standard Attachment Kit (Fig. 2)
7-foot hose with curved handle
Extension wand (2 pieces)
Dusting brush
Crevice tool
Upholstery tool
Upholstery brush insert
Connecting the hose assembly to the vacuum cleaner:
Open the lid located on the back side of the vacuum cleaner
and insert the plastic end of the hose assembly into the cleaning
attachment opening. Then connect the extension wand to the other end
of the hose assembly (Fig. 3).
Fig. 2
Fig. 3
On-Board Tool Cleaning
The Tidy Maid is equipped with on-board cleaning tools including
a metal telescopic Power Wand, stretch hose, dusting brush and a
crevice tool.
1. To use the cleaning tools, lift the hose handle straight up from
the vacuum (Fig. 1).
2. Extend the wand by pulling the button back and pulling the
smaller wand out of the larger wand (Fig. 2).
3. Attach any of the on-board tools to the end of the wand or
if you do not need the wand, any tool can be connected
directly onto the hose handle.
7
Fig. 1
Fig. 2
How to Replace the Headlight Bulb and the Vacuum Belt
CAUTION:
First, unplug the vacuum cleaner.
How to Remove the Bottom Plate
1. Place vacuum cleaner in the lowest position by stepping on the handle release pad
and pulling back the handle twice. Then, turn the vacuum cleaner over, exposing
the underside.
2. Remove the four screws holding the lower plate in place (Fig. 1).
3. Now remove the bottom plate.
Fig. 1
How to Replace the Bulb
1. Place vacuum cleaner in the low position and remove the bottom plate as
described above.
2. To remove the old bulb, pull it straight out (Fig. 2).
3. To install a new bulb, press it in until it clicks into place. These bulbs are
standard size and may be obtained from most appliance repair shops.
4. Replace the bottom plate with the four screws.
How to Replace the Belt
1. Turn the unit over and remove the bottom plate as described above (Fig. 1).
2. Take out the agitator assembly and remove the belt (Fig. 3).
3. Loop the new belt around the agitator pulley and the motor drive shaft.
4. Reinsert the agitator assembly back into housing (Fig 4). Turn the agitator assembly
by hand, making sure the belt is not twisted and all rotating parts move smoothly
(Fig. 5). Make sure the arrows on the ends of the agitator are facing down into
the nozzle.
5. Press the bottom plate into place and fasten it with the four screws.
NOTE: To ensure maximum cleaning efficiency, check the belt regularly to ensure it
is in good condition. Replace the belt if it is stretched, cracked or if excessive slipping
is occurring.
Fig. 2
Fig. 3
Fig. 4
Fig. 5
8
How to Clean the Nozzle Hose
CAUTION:
Unplug the vacuum cleaner.
How to Clean the Nozzle Hose
1. Remove the wand from the wand/hose holder as shown on page 7.
2. Squeeze the tabs on both sides of the quick clean-out port and pull away
from the vacuum (Fig. 1).
3. Check above and below the port opening for obstructions.
4. Remove any obstructions.
5. Replace the quick clean-out port by squeezing both tabs and pushing it
back into the wand/hose holder.
Fig. 1
Thermal Fuse Protection
Your Fuller Brush vacuum cleaner comes equipped with a Manual Reset Thermal Fuse Protector. This thermal
protector is designed to protect your vacuum cleaner from overheating due to restricted airflow (i.e. clogged hose,
operating the vacuum without a bag). Should this situation occur, the thermal fuse protector will safely shut off your
vacuum cleaner to avoid any potential damage.
NOTE: To determine that it was the thermal fuse protector that turned off your vacuum cleaner and not some other reason,
please refer to the vacuum cleaner’s headlight. If the headlight is on while the motor is off, then the thermal
fuse did safely shut down the motor. If the headlight and motor are both off, then there is some reason other than
the thermal protector (i.e. pulled plug) the vacuum cleaner has shut down.
How to Reset the Thermal Fuse
1. Unplug the vacuum cleaner.
2. Check for problem (over-filled bag, clog in hose, clogged filters, etc.).
3. Correct problem.
4. Locate “tripped” fuse — the small white or red button located at the bottom of the back side of the main body
(roughly one inch to the right of the left wheel).
5. Using a pencil, paper clip, or other pointy object, push the reset button.
6. Plug vacuum cleaner in and begin using.
Please contact your Fuller Brush retailer with any questions.
9
For Best Performance
• Keep machine and all accessories clean and in good operating condition.
• Change vacuum bags when they are 2/3 full to maintain optimum cleaning efficiency.
•C
hange filters when dirt is visible on them or every six months if someone in your home suffers from allergies. Otherwise,
once a year should do for replacing the filters.
•A
lways use genuine bags, filters and parts, as use of other products may result in poor cleaning or filtration performance.
Fuller Brush filtration products are designed for maximum performance.
• Store machine carefully in dry area.
• For optimum cleaning performance and safety, follow your owner’s manual.
10
Fuller Brush Vacuum Cleaners
PO Box 730
Fenton, MO 63026
www.fullerbrushvacuums.com
Should your vacuum ever need service, simply call the retailer where the original purchase was made.
©2012 Fuller Brush Vacuum Cleaners.