1
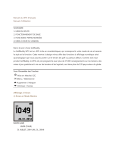
CDManualE2009.7.174:32PM페이지1
Introduction
Safety Precautions
Contents
CDManualE2009.7.174:32PM페이지1
Introduction
Thank you for choosing the GolfBuddy, the most powerful GPS
rangefinder in the golf industry. Whether you are an occasional golfer,
avid golfer, or golf professional, the GolfBuddy provides you with the
critical information you need to be at the top of your game. Each
GolfBuddy model features a large, high resolution screen, an easy-tonavigate toggle button, and a durable high-impact waterproof casing.
The GolfBuddy is ready to use right out of the box.
Please read the user manual thoroughly, prior to using the product. If you
ever have any questions, please visit us online at www.gpsgolfbuddy.com
to access an online Q&A.
Thank You,
GolfBuddy USA
Contents Contents Main
CDManualE2009.7.174:32PM페이지2
Safety Precautions
1. For optimal results, only use GolfBuddy Lithium Polymer
batteries.
- Using aftermarket lithium polymer batteries may affect the performance
of your GolfBuddy.
- When using AAA batteries for backup purposes, for best results, use
only alkaline batteries or Nickel-Metal Hydrate rechargeable batteries.
- Lithium polymer rechargeable batteries have a limited number of
charging cycles and may eventually need to be replaced. Battery life and
number of charging cycles may vary by use and settings.
2. Use only the charger that is provided with your Golf Buddy unit.
Using other chargers may result in malfunction of the unit and
will void your warranty.
3. Although the GolfBuddy is water-resistant, do not immerse the
unit in water.
- If your unit becomes immersed in water:
1) Do not power on the unit.
2) Immediately remove the battery from the unit.
3) Please contact a GolfBuddy customer service representative.
4. Never attempt to disassemble your GolfBuddy unit. Doing so
will void your warranty.
5. Keep your GolfBuddy unit away from extremely hot or cold
temperatures. If your unit is exposed to extreme temperatures, it
may permanently damage the LCD screen.
Main Contents Contents
CDManualE2009.7.174:32PM페이지3
Chapter 1 : Getting Started
1.1 Package Contents ................................................................... 8
1.1.1 Included Items ........................................................................ 8
1.1.2 Optional Accessories ............................................................. 9
1.2 GolfBuddy Overview .............................................................. 10
1.2.1 Buttons and Components of the GolfBuddy ....................... 10
1.3 Display .................................................................................... 11
1.3.1 Green View Display ............................................................. 11
1.3.2 On-Screen Indicators ........................................................... 11
1.4 Charging ................................................................................. 12
1.4.1 Battery Charging Time and Usage ...................................... 12
1.4.2 Battery Charge Indicator ...................................................... 13
1.4.3 Low Battery Warning ............................................................ 13
1.4.4 AAA Battery Backup ............................................................ 14
Contents Contents Main
CDManualE2009.7.174:32PM페이지4
Chapter 2 : Before Using Your GolfBuddy
2.1 Powering On and Off ............................................................. 16
2.2 Downloading courses to your GolfBuddy ............................. 16
2.3 Settings .................................................................................. 17
2.3.1 Distance: Unit of Measurement ......................................... 17
2.3.2 Screen Contrast ................................................................. 18
2.3.3 Backlight Duration .............................................................. 18
2.3.4 Battery Type ....................................................................... 19
2.3.5 Demo Mode ........................................................................ 19
2.3.6 Sound Settings ................................................................... 20
2.3.7 Expert On/Off ...................................................................... 20
2.3.8 Language Selection ........................................................... 21
2.3.9 Course/Hole Recognition ................................................... 22
2.3.10 Automatic Power Off .......................................................... 23
Chapter 3 : Using Your GolfBuddy During a Round
3.1 Establishing Satellite Signal .................................................. 26
3.2 Green View Display ............................................................... 27
3.2.1 At Green ............................................................................... 28
Main Contents
CDManualE2009.7.174:32PM페이지5
3.3 Target Display ........................................................................ 28
3.4 Custom Targets - Add/Delete ............................................... 29
3.5 Measuring Shot Distance ...................................................... 30
3.6 Pin Placement ........................................................................ 32
3.7. Score Tracking ...................................................................... 32
3.8 Changing Settings During Play ............................................. 33
3.8.1 Adjusting Backlight Brightness ............................................ 33
3.8.2 Demo Mode .......................................................................... 34
3.8.3 Manually Changing the Course and Hole ........................... 34
3.8.4 Manually Changing the Greens ........................................... 36
Chapter 4 : Advanced Menu
4.1 Time Settings ......................................................................... 38
4.2 System Information ............................................................... 38
4.3 GPS Information .................................................................... 39
4.4 Reset GPS ............................................................................. 39
4.5 NMEA Output ........................................................................ 40
Contents Main
CDManualE2009.7.174:32PM페이지6
Chapter 5. Creating Your Own Course Data
5.1 Creating Course Data ........................................................... 42
5.2 Add/Edit Course .................................................................... 43
5.3 Add/Edit/Delete Targets ........................................................ 44
5.4 Accessing personally mapped out course information ........ 44
Chapter 6. Setting up the GB Manager
6.1 Download and Install the GolfBuddy Manager .................... 48
6.2 Registration: Creating a User Name and Password ........... 57
6.3 Logging in to GB Manager .................................................... 60
Chapter 7. Using the GB Manager
7.1 Course .................................................................................... 66
7.2 Score ...................................................................................... 73
7.3 Device .................................................................................... 77
7.4 Firmware Upgrade ................................................................. 81
FAQ
GolfBuddy Specifications
Warranty
Main
CDManualE2009.7.174:32PM페이지7
Chapter 1
Getting Started
1.1 Package Contents
1.1.1 Included Items
1.1.2 Optional Accessories
1.2 GolfBuddy Overview
1.2.1 Buttons and Components
of the GolfBuddy
1.3 Display
1.3.1 Green View Display
1.3.2 On-Screen Indicators
1.4 Charging
1.4.1 Battery Charging Time
and Usage
1.4.2 Battery Charge Indicator
1.4.3 Low Battery Warning
1.4.4 AAA Battery Backup
CDManualE2009.7.174:32PM페이지8
1.1 Package Contents
● Your
GolfBuddy package should contain the contents listed below.
Please check to make sure that all of the contents have been
included.
● Pictures and/or illustrations in the User Manual are for
demonstrational purposes. Actual product may vary slightly.
1.1.1 Included Items
GolfBuddy GPS Rangefinder
Wall Charger
8
Belt clip/Plastic Holster
User’s Manual
Main Contents Chapter 1
USB Data Cable
Rechargeable
Battery
CDManualE2009.7.174:32PM페이지9
Getting Started
1.1.2 Optional Accessories
In addition to the included contents, the following accessories can also
be purchased from www.gpsgolfbuddy.com or through an authorized
retailer.
Cart Mount (Permanent and
Temporary)
Car Charger
Leather Holster
Chapter 1 Contents Main
9
CDManualE2009.7.174:32PM페이지10
1.2 GolfBuddy Overview
1.2.1 Buttons and Components of the GolfBuddy
Satellite Signal chip
- Power On/Off
[
- Backlight On/Off
Mark Button
Menu Button
Cancel Button
- Go back to Menu or
Play Screen
Toggle Button
Left : Change Hole
Right : Target Info/Edit Target
Center : Confirm/ Edit Score
Up : Change Green
Down : Change Unit(meters/yards)
10
Main Contents Chapter 1
PC Interface/
Charging Slot
CDManualE2009.7.174:32PM페이지11
Getting Started
1.3 Display
1.3.1 Green View Display
Large Number
Back of the Green
Center of the Green
Front of the Green
Shot Distance
Current Time
Change Hole
Target Info
fig. 1
1.3.2 On-Screen Indicators
- GPS Satellite Signal
- Signal Strength Indicator
- Hole Info
- Green Info(Left/Right)
- Par Info
- Y : yard / m : meter
- Battery Indicator
fig. 2
Chapter 1 Contents Main
11
CDManualE2009.7.174:32PM페이지12
1.4 Charging
Before using your GolfBuddy be sure to fully charge the battery. Please
follow the steps listed below:
1. Remove the battery cover by
loosening the battery cover screw,
using a coin. Angle the battery so
that the three gold colored contacts
on the battery align with the matching
contact points on towards the bottom
of the battery slot on the GolfBuddy
and slide the battery down to insert*.
Replace the battery cover.
2. Gently pull back the rubber cover to
fig. 3. Connecting to the charger
expose the mini usb/charger port
located at the bottom of your GolfBuddy. Connect the charger into
the slot . (fig.3)
* Make sure that the rechargeable battery is inserted properly with “This Side
Up” facing outwards. Your GolfBuddy will not function if the battery is not
inserted properly.
1.4.1 Battery Charging Time and Usage
Please charge the battery for at least 3 hours to obtain a full charge. Your
GolfBuddy can be used for up to 13 hours on a single charge*. (fig. 4)
12
Main Contents Chapter 1
CDManualE2009.7.174:32PM페이지13
Getting Started
Status
Time
Charging Time
~ 3 Hours
Standard Usage Time*
~13 Hours
▶ Actual battery life may vary depending on customer use and settings.
▶ *Estimated battery life is based on use of the GolfBuddy unit with the backlight
turned off.
1.4.2 Battery Charge Indicator
The battery charge indicator lights are located toward the top of the
screen in the black area surrounding the lcd screen. When the battery
is charging, a solid red light will appear on the top left. Once it is fully
charged, a blue light will appear on the top right. If a blinking red light
appears on the top left, please check to make sure that the battery
connections are clean and free of dust. (fig. 5)
Status
Upper Left Light
Charging
Red
Charge Complete
Blue
Error while Charging
Blinking Red
1.4.3 Low Battery Warning
When the battery is low, the screen will display “-Low Battery- Power
Off?”, every 60 seconds. This is an indication that it is time to recharge
the battery.
Chapter 1 Contents Main
13
CDManualE2009.7.174:32PM페이지14
1.4.4 AAA Battery Backup
The GolfBuddy is equipped with a AAA battery backup system. AAA
batteries can be used in the place of the included rechargeable battery.
To insert AAA batteries, please remove the battery cover. Then remove
the rechargeable battery, and place the AAA batteries into the two
slots. Please make sure to follow the polarity guides (+,-) engraved on
the battery slot.
* Important- When using AAA battery backup, please make sure to access
the settings menu and specify which type of battery you are using. (Alkaline
or Nickel-Metal Hydrate. See Chapter 2, 2.3.4)
14
Main Contents Chapter 1
CDManualE2009.7.174:32PM페이지15
Chapter 2
Before Using Your GolfBuddy
2.1 Powering On and Off
2.2 Downloading courses to
your GolfBuddy
2.3 Settings
2.3.1 Distance: Unit of Measurement
2.3.2 Screen Contras
2.3.3 Backlight Duration
2.3.4 Battery Type
2.3.5 Demo Mode
2.3.6 Sound Settings
2.3.7 Expert On/Off
2.3.8 Language Selection
2.3.9 Course/Hole Recognition
2.3.10 Automatic Power Off
CDManualE2009.7.174:32PM페이지16
2.1 Powering On and Off
●
●
●
To power on your unit, press and hold the power button until your
GolfBuddy powers on. Once the GolfBuddy is powered on, the
GolfBuddy logo will appear on the screen followed by the satellite
connection diagram. (fig. 6)
To power off your unit, press and hold the power button. The screen
will then display [Power Off?].
Using your toggle stick, highlight and select “Yes” to turn off your
GolfBuddy. (fig. 7)
fig. 6.
fig. 7. Turn off GolfBuddy? screenshot
2.2 Downloading courses to your GolfBuddy
●
16
Your GolfBuddy comes with all of the available courses in our library
Main Contents Chapter 2
CDManualE2009.7.174:32PM페이지17
Before Using Your GolfBuddy
pre-loaded into the memory. However, if you cannot find a course
that you are looking for on your GolfBuddy, please go to our website,
www.gpsgolfbuddy.com, to download the course. Please follow the
simple instructions listed on the website to download any course in
our course library. If the course that you are looking for is not listed in
the course library, please contact our customer service department,
and we will promptly make the course available to download.
2.3 Settings
●
You may customize the settings on your GolfBuddy to your
preference. Select the “Settings” icon from the main menu to access
this function.
2.3.1 Distance: Unit of Measurement
●
This setting allows you to change your
distance units to be displayed in yards or
meters. (fig. 8)
※ Factory default for distance unit is in Yards.
* You may also access this menu while on the
Green View screen. Move the toggle button up
and hold for a few seconds and the menu will
appear.
fig. 8
Chapter 2 Contents Main
17
CDManualE2009.7.174:32PM페이지18
2.3.2 Screen Contrast
●
This setting allows you to set your screen’s
contrast level. (fig. 9)
※ The contrast levels are from 1 to 111. Factory
default for screen contrast is 72.
fig. 9
2.3.3 Backlight Duration
●
This setting allows you to set the duration
of the LCD backlight. (fig. 10)
※ You will experience better battery life by
turning off the LCD backlight.
fig. 10
18
Main Contents Chapter 2
CDManualE2009.7.174:32PM페이지19
Before Using Your GolfBuddy
2.3.4 Battery Type
●
This setting allows you to select the type of
battery to use as a AAA backup along with
your Lithium Polymer rechargeable battery
(LPB). When using Alkaline AAA batteries,
select “LPB/Alkaline”. When using Nickelmetal Hydrate AAA batteries, select
“LPB/Ni-MH”. (fig. 11)
※ The default setting is set to LPB/Alkaline.
fig. 11
2.3.5 Demo Mode
●
fig. 12
The demo mode enables you to familiarize
yourself with GolfBuddy where a satellite
signal is unreachable. To activate demo
mode, select Enable by pushing in the
toggle button. (fig. 12)
※ By pressing the “cancel” button, next to the
toggle button, in demo mode, it will simulate
game-play by changing the distance yardage
measurements as if you were advancing along
towards the green on the field.
※ Distance measurements on demo mode are
only for reference, and may vary from actual
distances.
Chapter 2 Contents Main
19
CDManualE2009.7.174:32PM페이지20
2.3.6 Sound Settings
●
This setting allows you to turn the sound
on or off while operating your GolfBuddy.
(fig. 13)
※ The default setting for sound is “on”.
fig. 13
2.3.7 Expert On/Off
●
In order to access the advanced menu
you must select “Expert On”. (fig. 14)
※ The default setting is “Expert Off”.
fig. 14
20
Main Contents Chapter 2
CDManualE2009.7.174:32PM페이지21
Before Using Your GolfBuddy
2.3.8 Language Selection
●
This setting allows you to choose the
language selection on your GolfBuddy.
(fig. 15)
※ Available options are English and Korean
* Other languages options will be available for
update.
fig. 15
Chapter 2 Contents Main
21
CDManualE2009.7.174:32PM페이지22
2.3.9 Course/Hole Recognition
●
fig. 16
22
This setting allows you to choose your
course recognition options. Available
options are: manual, automatic, sequential.
(fig. 16)
※ Automatic - Allows your GolfBuddy to
automatically select the course and hole for
you. This option requires the least amount of
manual operation.
※ Manual - Enables you to select the course and
hole manually after the GPS signal is
established. This setting is for advanced users.
※ Sequential - Allows your GolfBuddy to increase
the hole sequentially (1,2,3). This option is
beneficial in areas where courses or holes are
in close proximity to each other so that the
GolfBuddy will not accidentally change from
hole to hole.
Main Contents Chapter 2
CDManualE2009.7.174:32PM페이지23
Before Using Your GolfBuddy
2.3.10 Automatic Power Off
●
This setting allows you to select the
automatic power off time interval. (fig. 17)
※ Available intervals are 30min, 60min, 90min,
120min, Always on. Factory default setting is
“Always On”.
fig. 17
Chapter 2 Contents Main
23
CDManualE2009.7.174:32PM페이지24
Contents Contents
CDManualE2009.7.174:32PM페이지25
Chapter 3
Using Your GolfBuddy During a Round
3.1 Establishing Satellite Signal
3.2 Green View Display
3.2.1 At Green
3.3. Target Display
3.4 Custom Targets - Add/Delete
3.5 Measuring Shot Distance
3.6 Pin Placement
3.7 Score Tracking
3.8 Changing Settings During Play
3.8.1 Adjusting Backlight Brightness
3.8.2 Demo Mode
3.8.3 Manually Changing the Course
and Hole
3.8.4 Manually Changing the Greens
CDManualE2009.7.174:32PM페이지26
3.1 Establishing Satellite Signal
●
To begin using your GolfBuddy, power on your unit by pressing and
holding down the power button until it turns on. Once the GolfBuddy
is powered on, the GolfBuddy logo will appear on the screen,
followed by the satellite connection diagram. (fig. 18) Point your
GolfBuddy upward toward the sky for 1-2 minutes. (Initial satellite
connection may take up to 3-5 minutes) Once a satellite signal is
achieved, your Golfbuddy will prompt you with a message asking,
“Proceed to the Teebox?”, along with the name of the course that
you are on, highlighted below. Push the toggle button to select the
course, and you will be taken to the “Green View” Display (fig. 19)
< Acquiring Satellite Signal >
fig. 18
26
Main Contents Chapter 3
fig. 19
CDManualE2009.7.174:32PM페이지27
Using Your GolfBuddy During a Round
3.2 Green View Display
Large Number
Back of the Green
Center of the Green
Front of the Green
Shot Distance
Target Info
- GPS Satellite Signal
- Signal Strength Indicator
- Hole Info
- Green Info(Left/Right)
- Par Info
- Y : yard / m : meter
- Battery Indicator
fig. 20
Chapter 3 Contents Main
27
CDManualE2009.7.174:32PM페이지28
3.2.1 At Green
●
The GolfBuddy provides you with an
accurate distance to the green so you can
plan your shot accordingly. Once you are
on the green, your GolfBuddy will display
“At Green” since the distance information
is no longer needed. (fig. 21)
fig. 21
3.3 Target Display
●
fig. 22
28
This function will display your remaining
distance to bunkers, hazards, targets,
layups, etc.
※ To access the Target display from the Green
View display, move the toggle button once to
the right and push in the toggle button to select.
※ The Target display will show distances to different
targets on the hole you are playing. (fig. 22)
※ Notice the target bar along the left side of the
screen. The solid black line indicates the
selected target’s position in relation to the hole
you are playing.
Main Contents Chapter 3
CDManualE2009.7.174:32PM페이지29
Using Your GolfBuddy During a Round
- “G” along the top of the line indicates the green.
- “T” along the bottom of the line indicates the
teebox.
- The shaded gray area along the bottom
indicates your current position on the hole.
3.4 Custom Targets - Add/Delete
●
This function allows you to add or edit custom targets in addition to the
ones that are already pre-programmed in the course data.
a) Adding Targets
From the Green View screen, move the toggle button to the right twice to get
to the “User Created Target” menu (User Created Tg). Push in the toggle
button once, and move the toggle button up/down to select a new target.
After choosing your target, push in the toggle button to select. (fig. 23)
b) Editing Targets
From the Green View screen, move the toggle button to the right once to
show your list of custom targets. Move the toggle button up/down to select
a target, and push in the toggle button once to choose and record.
c) Deleting Targets
From the Green View screen, move the toggle button to the right twice
to get to the User Created Target menu. Highlight the target you wish
to remove, and move the toggle button to the right once, and then push
Chapter 3 Contents Main
29
CDManualE2009.7.174:32PM페이지30
the toggle in to delete.
※ This function can only be accessed with the“Expert Setting”on.
fig. 23 Adding Targets
3.5. Measuring Shot Distance
●
●
●
30
From the Green View screen, press the “Mark” button located along
the right side of the GolfBuddy. The screen will then display “Mark
New Position?”. Highlight “Yes”, using the toggle button and push in
the toggle stick once to select. (fig. 24)
Check to make sure the screen displays “0” Take your shot and walk
to the position that your ball has landed. The number will continually
change as you move, showing the offset distance from the marked
position as you walk towards the ball.
After marking the position of your shot, It you wish to clear the
Main Contents Chapter 3
CDManualE2009.7.174:32PM페이지31
Using Your GolfBuddy During a Round
fig. 24 Measuring Shot Distance
●
measurement from the Green view screen, press the mark button
once, and push the toggle button to the right to select “Reset”. This
will disable the mark feature from the Green view screen, and the
yardage measurement will no longer continue to advance.
Press the cancel button to go back to the Green View Screen.
Chapter 3 Contents Main
31
CDManualE2009.7.174:32PM페이지32
3.6 Pin Placement
This feature allows you to move the placement
of the pin on your GolfBuddy to give you a
more accurate yardage measurement based
on the actual position of the pin on the green
that you are playing on. (fig. 25)
※ At the Green View screen, move the toggle
button down once and the center (+) will blink.
Move up( ), down( ), left( ), right( ) on
your toggle button to select the desired pin
location. Push in the toggle button to select.
※ After the new pin location has been set, a
different distance to the selected pin position ( )
will be displayed.
●
fig. 25
3.7 Score Tracking
The GolfBuddy allows you to store your scores for up to 1000 rounds of
golf into the memory.
● On the Green View screen, navigate to the score tracking screen by
moving the toggle button to the left, once. When the hole information
screen appears, push in the toggle button to select.
● Move up or down on the toggle button to select holes, and move left
or right on the toggle button to select the score. Push in the toggle
button to store your score.
32
Main Contents Chapter 3
CDManualE2009.7.174:32PM페이지33
Using Your GolfBuddy During a Round
※ While selecting your score, moving the toggle button to the left will decrease
score(“-1,-2,-3”) and moving the toggle button to the right will increase your
score (“+1, +2, +3”). (fig. 26)
●
After entering your score, press confirm, by pushing in the toggle
button, and the message “save score” will appear. Move the toggle
button and select “Yes” to save your score. (fig. 27)
fig. 26
fig. 27
3.8 Changing Settings During Play
The following settings can be changed while the GolfBuddy is in use
during a game. They can all be accessed while you are on the Green
View display.
3.8.1 Adjusting Backlight Brightness
You can change the brightness of the backlight by pressing the power
Chapter 3 Contents Main
33
CDManualE2009.7.174:32PM페이지34
button.
● Push the power button once to turn on the backlight.
● Push the power button twice to increase the brightness of the
backlight.
● Push the power button three times to turn the backlight off.
3.8.2 Demo Mode
The demo mode allows you to familiarize yourself with the functions of
your GolfBuddy before using it during a round.
● While on the Green View screen, press the menu button located on
the right side of your GolfBuddy. A submenu will pop up on the bottom
of the screen prompting you to enable the demo mode. Select “Demo
On”.
● You may familiarize yourself with GolfBuddy once the simulated
numbers appear on the screen. By pressing the “cancel button” on
your GolfBuddy, the yardage measurements will advance towards the
green to simulate game play during a round.
● Before activating the demo mode, you must first go into the settings
menu and enable the demo mode function. (See Chapter 2, 2.3.5)
3.8.3 Manually Changing the Course and Hole
You have the option to manually change the course and holes on your
GolfBuddy.
34
Main Contents Chapter 3
CDManualE2009.7.174:32PM페이지35
Using Your GolfBuddy During a Round
●
Changing the Course
fig. 28
●
- From the Green View screen, move
your toggle button to the left( ) twice.
This will take you to course selection
screen. (fig. 28)
- At the course selection screen, move
up( ) on your toggle button to select the
current course. Move left/right( / ) on
your toggle button to select the course
you wish to play. Then push in the toggle
button to choose the course.
Changing Hole
- At the play screen, move your toggle
button to the left( ) twice. This will take
you to the hole selection screen. (fig. 29)
- At the hole selection screen, move
left/right( / ) on your toggle button to
select the hole you wish to play. Then
push in the toggle button to select.
fig. 29
Chapter 3 Contents Main
35
CDManualE2009.7.174:32PM페이지36
3.8.4 Manually Changing the Greens
You can manually change the green when there are two greens in a
hole your are playing.
● At the play screen, move up and hold the toggle stick for a few
seconds. The screen will then display [Changing to Left/Right Green].
The remaining distance can now be changed from left green to right
green or vice versa.
36
Main Contents Chapter 3
CDManualE2009.7.174:32PM페이지37
Chapter 4
Advanced Menu
4.1 Time Settings
4.2 System Information
4.3 GPS Information
4.4 Reset GPS
4.5 NMEA Output
CDManualE2009.7.174:32PM페이지38
4.1 Time Settings
●
This setting allows you to view current time
or the time in other time zones. Daylight
savings time may also be set in this
setting. (fig. 30)
※ Move up/down on the toggle button to select
time zones. Move the toggle button to the left
once to turn on/off the summer time.
fig. 30
4.2 System Information
●
This function allows you to view operating
system version and hardware information.
(fig. 31)
fig. 31
38
Main Contents Chapter 4
CDManualE2009.7.174:32PM페이지39
Advanced Menu
4.3 GPS Information
●
This function allows you to view the GPS
signal status. (fig. 32)
fig. 32
4.4 Reset GPS
●
Use this function to reset GPS when you
are continually experiencing an unstable
GPS signal, or if you are playing in a
different country. (fig. 33)
※ After resetting your GPS, please allow 3-5
minutes for your GolfBuddy to establish a
satellite signal.
fig. 33
Chapter 4 Contents Main
39
CDManualE2009.7.174:32PM페이지40
4.5 NMEA Output
●
●
40
This feature is for serial output of NMEA data. It may output GSA and
GSV.
Communication mode is Asynce, 57600 baud rate, Parity: No, Data: 8
bit, Stop : 1 bit.
Main Contents Chapter 4
CDManualE2009.7.174:32PM페이지41
Chapter 5
Creating Your Own Course Data
5.1 Creating Course Data
5.2 Add/Edit Course
5.3 Add/Edit/Delete Targets
5.4 Accessing Personally Mapped out Course Information
CDManualE2009.7.174:32PM페이지42
5.1 Creating Course Data
If the course you wish to play on is not listed in our database, then you
may personally map (Add/Edit Course) the course yourself, and use the
information right away
- When using this feature, you will not be able to see the shape of the
green. Only distances to the green and targets are available when
using this feature.
<Creating Course Data>
42
Main Contents Chapter 5
CDManualE2009.7.174:32PM페이지43
Creating Your Own Course Data
5.2 Add/Edit Course
a. From the main menu screen, select “Advanced Menu”
b. In the advanced menu, scroll down to “New/Edit Course”
c. On the “Edit Course Name Screen” enter the course name using the
toggle button.
d. After entering the course name and select ok. Then the “Select Hole”
screen will appear. Using this setting, you can change the par
information for each hole using the toggle button. After entering the
par information for a hole, push in the toggle button to set.
e. After setting the par information, you will be taken to the “survey
screen” and the bottom area next to “T-Box” should be highlighted.
Walk to the tee box area and push in the toggle button (REC) to mark
your starting position.
f. After pressing REC, walk to the front of the green and press REC
again to record the distance to the front of the green.
g. Once you have recorded the distance to the front of the green, walk to
the center of the green and follow the same instructions to record the
yardage to the center, and also to the back.
h. After entering the yardage information for all 18 holes on the course,
press the “menu” button along the side of your device, and scroll
down to “save course” and push in the toggle button to save.
Chapter 5 Contents Main
43
CDManualE2009.7.174:32PM페이지44
5.3 Add/Edit/Delete Targets
To add or edit target points on new golf course data do the following:
a. Adding Targets- From the mapping screen, move the toggle button to
the right twice to get to the User Created Target menu (User Created
Tg). Push in the toggle button once, and move up/down on the toggle
button to select a new target. After choosing your target, push in the
toggle button to select.
b. Editing Targets- From the mapping screen, move the toggle button to
the right once, to show your list of targets. Move up/down on the
toggle button to select a target, and push in the toggle button once to
choose and record.
c. Deleting Targets- From the mapping screen, move the toggle button
to the right twice, to get to the User Created Target menu. Highlight
the target you wish to remove, and move the toggle button to the right,
and push in the toggle button to delete.
*Important*
You must save after each hole in order for the course data to come up in
the future.
5.4 Accessing Personally Mapped out Course Information
●
44
Courses which have been personally mapped do not auto recognize.
You must manually select the courses which you map out.
Main Contents Chapter 5
CDManualE2009.7.174:32PM페이지45
Creating Your Own Course Data
●
To select a personally mapped out course, turn on your GolfBuddy.
Once the satellite info screen appears, move the toggle button to the
left, and select “manual”. This will bring up a list of countries. Move the
toggle button up or down until you notice a “User CC section”. Select
this option by pushing in the toggle button. All personally mapped out
courses should appear in this section. You may then select your
personally mapped out course.
Chapter 5 Contents Main
45
CDManualE2009.7.174:32PM페이지46
CDManualE2009.7.174:32PM페이지47
Chapter 6
Setting up the GB Manager
6.1 Download and Install the GolfBuddy Manager
6.2 Registration: Creating a User Name and Password
6.3 Logging in to GB Manager
CDManualE2009.7.174:32PM페이지48
6.1 Download and Install the GolfBuddy Manager
* Important: Do not connect your GolfBuddy to your computer until after
you have installed the GB Manager and restarted your computer.
6.1.1 Go to http://www.golfbuddyglobal.com
6.1.2 Click on the Download Courses link on the top menu of the
homepage. (fig. 34)
fig. 34
48
Main Contents Chapter 6
CDManualE2009.7.174:32PM페이지49
Setting up the GB Manager
6.1.3 On the Download Courses page, click on the yellow bar to install
the GolfBuddy Manager(GB Manager) and follow the
instructions to download and install. (fig. 35)
* Note - Once you have have finished downloading the GB Manager, you
must restart your computer.
** In order to download GB Manager, your internet browser default must be set
to Microsoft Internet Explorer
fig. 35
Chapter 6 Contents Main
49
CDManualE2009.7.174:32PM페이지50
6.1.3.1 After you click on the link to download the GB Manager, a window
will appear, asking you if you would like to run or save the file.
Click “Run” (fig.36) After you click run, a window with a download
progress bar will appear. (fig. 37)
If you have a high-speed internet connection, it should take a few
minutes for the download to complete. If you are using dial-up it
may take considerably longer to download.
fig. 36
50
Main Contents Chapter 6
CDManualE2009.7.174:32PM페이지51
Setting up the GB Manager
fig. 37
6.1.3.2 Once the download is complete, an Internet Explorer Security
Warning will appear. (fig. 38) Click “Run”
fig. 38
Chapter 6 Contents Main
51
CDManualE2009.7.174:32PM페이지52
6.1.3.3 Next, the InstallShield Wizard will appear and you will be
prompted to select a language. (fig. 39) Highlight the desired
language from the list of options and click “Next” to continue.
fig. 39
52
Main Contents Chapter 6
CDManualE2009.7.174:32PM페이지53
Setting up the GB Manager
6.1.3.4 Next, an installShield Wizard, welcome screen will appear, (fig.
40) ) Click “Next” to continue.
fig. 40
Chapter 6 Contents Main
53
CDManualE2009.7.174:32PM페이지54
6.1.3.5 The InstallShield Wizard will then ask you if you would like to
begin the installation. (fig. 41) Click“Install”to proceed.
fig. 41
6.1.3.6 Once you begin the installing the GB Manager, a progress bar will
appear. (fig. 42) After the installation is complete, InstallShield
Wizard will inform you that the GB Manager has been
successfully installed (fig. 43)
54
Main Contents Chapter 6
CDManualE2009.7.174:32PM페이지55
Setting up the GB Manager
Click“Finish”
.
fig. 42
Chapter 6 Contents Main
55
CDManualE2009.7.174:32PM페이지56
fig. 43
6.1.3.7 After the GB Manager has been successfully installed, please
make sure to restart your computer before proceeding to the next
step.
56
Main Contents Chapter 6
CDManualE2009.7.174:32PM페이지57
Setting up the GB Manager
6.2 Registration: Creating a User Name and Password
In order to access the GB Manager, you must first register and create a
user name and password.
6.2..1 After completing the download and install process in Step 1, the GB
Manager log in window should have automatically appeared on
your screen. (fig. 44) and the GB Manager icon should have been
automatically added onto your computer’s desktop. (fig. 45) You
may double click on this icon each time you would like to access
the GB Manager.
fig. 44
fig. 45
Chapter 6 Contents Main
57
CDManualE2009.7.174:32PM페이지58
6.2.2 On the GB Manager log in window, (fig. 44) click the “Sign Up”
button towards the bottom of the window to begin the registration
process.
Note: Before accessing the registration page, please check the following:
1) Make sure you have an active internet connection
2) Make sure your default internet browser is set to Windows Internet
Explorer
6.2.3 After you click on the “Sign Up” button, your internet browser will
open up and take you to the registration screen on your internet
browser. (fig. 46) Fill out all the required information to complete
the process and click submit. Once you have completed the
registration, you will be directed to the main page of the
GolfBuddy website. You may close your internet browser at this
time, as you will no longer need it open in order to run the GB
Manager.
Note: Please be sure to click the orange tab labeled “Check Availability” next
to the User ID blank to check if the User ID you have chosen has not already
been taken.
58
Main Contents Chapter 6
CDManualE2009.7.174:32PM페이지59
Setting up the GB Manager
fig. 46
Chapter 6 Contents Main
59
CDManualE2009.7.174:32PM페이지60
6.3 Logging in to GB Manager
After you have completed the registration process you are ready to log
in to the GB Manager.
6.3.1 Connect your GolfBuddy unit to your computer by plugging in one
end of the USB data cable into your GolfBuddy unit, (fig. 47) and the
other end into your computer’s USB port. (fig. 48)
fig. 47
60
Main Contents Chapter 6
fig. 48
CDManualE2009.7.174:32PM페이지61
Setting up the GB Manager
6.3.2 Go to your computer’s desktop and double click the GB Manager
icon. (fig. 45) The GB Manager log in window will appear once
you click on the icon. (fig. 44) Type in your new User ID and
Password and click the green “Log In” tab.
Chapter 6 Contents Main
61
CDManualE2009.7.174:32PM페이지62
6.3.3 Once you complete the log in process, the GB manager window
will appear and will begin performing an auto update. (fig. 49)
6.3.3 When the auto update is complete, you will be prompted to
restart the GB Manager. (fig. 50) Click “yes” and repeat step 3.3
to log in to the GB Manager again.
fig. 46
62
Main Contents Chapter 6
CDManualE2009.7.174:32PM페이지63
Setting up the GB Manager
fig. 46
Chapter 6 Contents Main
63
CDManualE2009.7.174:32PM페이지64
CDManualE2009.7.174:32PM페이지65
Chapter 7
Using the GB Manager
7.1 Course
7.2 Score
7.3 Device
7.4 Firmware Upgrade
CDManualE2009.7.174:32PM페이지66
The GolfBuddy Manager (GB Manager) allows you to manage your
courses, perform firmware upgrades, track your scores, and customize
your GolfBuddy by adding images or logos to your welcome screen.
7.1 Course
The Course tab allows you to manage the courses in your GolfBuddy
unit by adding new courses, and updating exisiting course data your
unit when they are revised. (fig. 51)
fig. 51
66
Main Contents Chapter 7
CDManualE2009.7.174:32PM페이지67
Using the GB Manager
7.1.1 Searching For Courses
Click on the tab labeled “Course” (fig. 52) and click then click the yellow
tab labeled “Sync With GolfBuddy” (fig. 53) to refresh the page.
fig. 52
fig. 53
7.1.1.1 Click on a country along the column on the left, (fig. 54) A list of
courses for that country will appear along the right column . If you
click on a country, a list of states or provinces will appear for that
country as subfolders in the column. (fig. 55You can then select
an individual subfolder to view a list of courses available for that
state or provinces in the right column. (fig. 56)
7.1.1.1 You may also search for individual courses by typing in a course
name in the search query window located right above the right
column. (fig. 57) If the course you are searching for is in our
library, it will appear in the right column.
Chapter 7 Contents Main
67
CDManualE2009.7.174:32PM페이지68
fig. 54
68
Main Contents Chapter 7
fig. 55
CDManualE2009.7.174:32PM페이지69
Using the GB Manager
fig. 56
fig. 57
Chapter 7 Contents Main
69
CDManualE2009.7.174:32PM페이지70
7.1.1.2 Notice the five tabs along the top of the right column in the Course
window. (Num., Club, Course, City, and Total). (fig. 58) By clicking
on these tabs, you can categorize and view the courses by course
name, city, etc. Notice the drop menu on the far right labeled
“total”.(fig. 59) By clicking on this tab, you may scroll down and
choose either “New, Latest, or Renovated”. Choosing one of
these options will narrow down the list, and only show the
selection you wish to view.
New - Newly mapped courses that have been updated to GolfBuddy’s
library but have not been loaded into your unit.
Latest - Data is up to date for this course and is already loaded on your
unit. No other action needs to be taken.
Renovated - This course is on your unit, but has been updated. These
courses should be reloaded to your unit to ensure that
you have the most correct and accurate data for this
course.
A total number of courses in GolfBuddy’s course library can be found
towards the bottom of the window under the right column. (fig. 60)
70
Main Contents Chapter 7
CDManualE2009.7.174:32PM페이지71
Using the GB Manager
fig. 58
fig. 59
fig. 60
Chapter 7 Contents Main
71
CDManualE2009.7.174:32PM페이지72
7.1.2 Downloading Courses
7.1.2.1 Once you have located the courses you wish to download, check
off the white boxes in the right column next to the course or
courses you wish to download. (fig. 61)
Note: Checking off the white box in the tab labeled“Num”will select all the
courses in the right column. (fig. 62)
fig. 61
fig. 62
72
Main Contents Chapter 7
CDManualE2009.7.174:32PM페이지73
Using the GB Manager
7.1.2.2 After you have checked off the selected the courses you wish to
update, click the green button labeled“Download Selected
Courses to GolfBuddy”to download them to your unit. (fig. 63)
fig. 63
Chapter 7 Contents Main
73
CDManualE2009.7.174:32PM페이지74
7.2 Score
The GolfBuddy allows you to track and store scores for up to 1000
rounds in the unit. The score function on the GB Manager makes it
easy for you to view your list of scores by categorizing them into folders
that are sorted by the course name. It also allows you to add, delete
and modify courses that you have recorded onto your unit. (fig. 64)
fig. 64
74
Main Contents Chapter 7
CDManualE2009.7.174:32PM페이지75
Using the GB Manager
7.2.1 Viewing Scores - To bring up a list of your recorded scores, click
on the “Score” tab (fig. 65) and then click “Sync with GolfBuddy”.
(fig. 66).
fig. 65
fig. 66
7.2.1.1 The left column lists all the courses which you have recorded your
scores on. Highlighting“Total Scores”,(fig.67) will list all of the
scores in the right column,(fig.68) and highlighting a single course
on the list will bring up only the scores you have recorded on that
particular course.
Chapter 7 Contents Main
75
CDManualE2009.7.174:32PM페이지76
fig. 67
76
Main Contents Chapter 7
fig. 68
CDManualE2009.7.174:32PM페이지77
Using the GB Manager
7.3 Device
Allows you to customize your GolfBuddy’s welcome screen with
images or logos that will appear each time your GolfBuddy is powered
on, and allows you to type in your user information (name/phone
number). Also allows you to perform software updates as they become
available.
7.3.1 Click on the “Device” tab (fig. 69) in the GB Manager, then click
“Sync with GolfBuddy” (fig. 70)
fig. 69
fig. 70
7.3.2 Adding Images to the Welcome Screen - You may add up to
three images that will appear each time your GolfBuddy unit is
powered on.
7.3.2.1 On the “User Info” window on the left, (fig. 71) click on folder icon
next to the “My Logo” drop menu. (fig. 72) Once you click on the
icon, a search window will appear over the GB Manager window.
(fig. 73) Choose a picture from your computer’s s hard drive and
Chapter 7 Contents Main
77
CDManualE2009.7.174:32PM페이지78
click “OK”.
7.3.2.1 Important Note: after choosing a logo, you must click the green
button labeled“Download User Information”to save your logo on
your unit.
7.3.2.1 To set your Sub Logo and Main logo, click on the drop menu (fig.
75) make a selection, and repeat the steps to insert an additional
logo.
fig. 71
78
Main Contents Chapter 7
fig. 72
CDManualE2009.7.174:32PM페이지79
Using the GB Manager
fig. 73
fig. 74
fig. 75
Chapter 7 Contents Main
79
CDManualE2009.7.174:32PM페이지80
7.3.2 Module Update - A list of updates is shown in the “Module
Update” window (fig.76) under the “Device” tab. Next to each
individual item, under the “info” tab, it will be labeled as either
“Latest, New or Renovated” If all the updates are shown as
“Latest”, it means that your software is current and up to date.
However, if they are listed as either, “New” or “Renovated”, the
updates should be downloaded to ensure that your unit performs
at its optimum level.
fig. 76
80
Main Contents Chapter 7
CDManualE2009.7.174:32PM페이지81
Using the GB Manager
7.3.2.1 To download module updates, select the box next to the update
you wish to download, and then click the green button labeled
“Download Selected Modules”. (fig.77)
fig. 74
Chapter 7 Contents Main
81
CDManualE2009.7.174:32PM페이지82
7.4 Firmware Upgrade
If your GolfBuddy unit is in need of a firmware upgrade, a message
prompting you to“Please Upgrade Firmware”will appear and flash on
the upper right corner of the GB Manager window. (fig. 78)
fig. 78
82
Main Contents Chapter 7
CDManualE2009.7.174:32PM페이지83
Using the GB Manager
7.4.1 Performing Firmware Upgrade
7.4.1.1 To begin performing the firmware upgrade, click on the small
white box next to the “Please Upgrade Firmware” message and
select “Firmware Upgrade” from the drop menu. (fig. 79)
fig. 79
7.4.1.2 Next, a File Download - Security Warning will appear. Click Run
to continue. (fig. 80) Once you click Run, a download progress bar
will appear. Wait for the file to finish downloading and do not press
cancel. Once the download is complete, another Security
Warning will appear. (fig. 82) Click run again.
Chapter 7 Contents Main
83
CDManualE2009.7.174:32PM페이지84
fig. 80
84
Main Contents Chapter 7
CDManualE2009.7.174:32PM페이지85
Using the GB Manager
fig. 81
Chapter 7 Contents Main
85
CDManualE2009.7.174:32PM페이지86
fig. 82
86
Main Contents Chapter 7
CDManualE2009.7.174:32PM페이지87
Using the GB Manager
7.4.1.3 Next, a “GolfBuddy Firmware Upgrade” window will appear. (fig.
83) Click “Start Upgrade (Bootloader + Firmware) and wait for the
progress bar to indicate that the installation is complete. (fig. 84)
fig. 83
Chapter 7 Contents Main
87
CDManualE2009.7.174:32PM페이지88
fig. 84
88
Main Contents Chapter 7
CDManualE2009.7.174:32PM페이지89
Frequently Asked Questions
GolfBuddy Specifications
Warranty
CDManualE2009.7.174:32PM페이지90
1. Why is my unit not receiving a satellite signal?
- Although the GolfBuddy will normally pick up a satellite signal within 3-4
minutes after powering on the device, it may take longer if you are in an
area with more geographic obstructions.
- If your device is having trouble picking up a signal:
1) Turn your unit off and power it back on.
2) Go to “Advanced” menu on your device, and select “Reset GPS”.
2. Why is my unit giving me exact yardage on certain
courses, but not on others?
- Please check the following:
1) Check unit indicator if it is set properly to yards or meters.
2) Check satellite strength indicator to see if you are getting a signal of
at least S4.
3) Golf courses generally measure yardage based on distance the
along the fairway. The measurements on the GolfBuddy units are
based on a straight line from the T-box to the hole. This may result
in slight variations in measurements, especially on holes such as
dog leg holes.
4) The GolfBuddy device receives a constant satellite signal.
However, if your unit is suddenly removed from an obstructed area,
such as inside your pocket, or in your golf cart, it may take a few
minutes for the device to regain a signal. If your device does not
90
Main Contents Contents
CDManualE2009.7.174:32PM페이지91
Frequently Asked Questions
regain a signal, turn the unit off and power it on again.
- If you have checked all of the above, and your yardage is still
inaccurate:
1) The course may have been renovated since the time the course
was surveyed and programmed into our system. In such instances,
please contact a customer service representative to report the
problem, and we will take immediate action to update the course
information.
3. Why is my unit not recognizing a golf course?
- Please check the following:
1) Check to make sure that the course is pre-loaded into your device.
If it is not in your unit, log on to www.gpsgolfbuddy.com and
download it from our website.
2) If the course is not listed on our website, please contact a customer
service representative to request the course data to be updated
onto our site.
4. Why can’t I download course data to my GolfBuddy
unit?
- Please check the following:
1) Check to make sure you have downloaded the course download
software and USB driver to your computer.
2) In order to update courses onto your device, you must first set up a
Chapter 6 Contents Main
91
CDManualE2009.7.174:32PM페이지92
login ID and password. If you did not purchase the unit from an
authorized GolfBuddy retailer, then you must obtain the password
information from the original owner of the device.
5. What do I do if my unit is defective?
- Please check the warranty section in the GolfBuddy manual.
6. If your question has not been answered in the FAQ
section, please visit www.gpsgolfbuddy.com or
contact a customer service representative at (877)
607-4653 for further assistance.
92
Main Contents Contents
CDManualE2009.7.174:32PM페이지93
GolfBuddy Specifications
1. GolfBuddy Specifications
- Size : 4.25 ×2.25×1
- Weight : 4.23 oz (Include battery)
- PC interface : USB
- Display : Mono LCD 2 and LED Backlight
- The GolfBuddy will only operate in temperatures between 32 F
to 104 F
- Power source: Lithium polymer rechargeable battery with AAA
battery backup.
_
__
- Power adapter: 5 V , 450 mA
- Durable and water-resistant design
- 20,000 course capability
2. System Requirements
- PC with Microsoft windows 98/NT/2000/XP/Vista
- Microsoft Internet Explorer 6.0 or higher.
- 256 MB of RAM
- 4 MB of available hard disk space
- Internet access
- Available computer USB port
- 2X CD-ROM drive (optional)
Chapter 6 Contents Main
93
CDManualE2009.7.174:32PM페이지94
1. Terms and Conditions
The GolfBuddy Pro and Tour units are guaranteed to be free of defects
in material and workmanship for a period of 90 days from the date of
original purchase, when used under normal conditions. GolfBuddy will
not be responsible for any software, firmware, data information, or
memory data contained in, stored on, or integrated with any products
returned to GolfBuddy for repair by the original purchaser.
2. Limitations and Exclusions
- The lithium polymer rechargeable battery carries a 6 month warranty
from the date of purchase.
- Original purchase receipt with date of purchase required.
- The warranty does not cover any damages caused to the unit by
improper use, customer neglect, or repairs performed by an
unauthorized technician.
- Using any non-GolfBuddy components such as USB cables or
chargers will void the warranty.
- The warranty does not cover damage to the LCD screen due to
customer neglect such as cracks and scratches or any damages
caused by exposure to excessive temperatures.
3. Return Policy
- Please contact a Customer Service Representative to obtain Return
Merchandise Authorization number for any returns.
94
Main Contents Contents
CDManualE2009.7.174:32PM페이지95
Warranty
- No returns will be accepted without an RMA number. Any items
returned to GolfBuddy without an authorized RMA number will be
returned, post-paid shipping.
- An original receipt with date of purchase is required for all returns. If
you have lost your receipt, please contact our Customer Service
department.
Chapter 6 Contents Main
95