Download Instruction Manual
Transcript
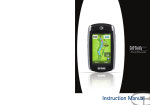
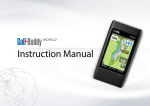
Instruction Manual
IMPORTANT SAFETY INSTRUCTIONS
TO REDUCE THE RISK OF FIRE OR ELECTRIC SHOCK,
CAREFULLY FOLLOW THESE INSTRUCTIONS
Thank you for choosing the GolfBuddy World.
Your GolfBuddy comes preloaded with thousands of courses
from all across the world, so you can begin using it immediately
without having to pay for any annual membership or subscription.
Please note that not all courses are currently available in“ Full
Layout Mode”. However, our team of professional course
surveyors are continuing to map out thousands of new courses
each month that can be downloaded to your unit, at no charge,
as they are made available.
If the golf course that you are looking for is not in your unit’s
memory, or has not yet been updated with the Full Layout view
of that particular course, please visit www.gpsgolfbuddy.com to
check if it has been updated to our course library and available
for download.
Again, thank you and we hope you have a truly wonderful
experience using your GolfBuddy World during your rounds of
golf.
Golfbuddy World Instruction Manual
The GolfBuddy World has been designed, developed, and
manufactured in accordance to the strict standards of DECA
Systems Co., Ltd. and international quality standards.
It has gone through and passed a series of rigorous quality
control and tests to ensure safe operation, including temperature, humidity, shock, dust, vibration, and drop testing.
Please read the entire manual carefully and follow all safety
precautions to ensure safe operation of your GolfBuddy World,
and reduce the risk of bodily harm.
2
Safety Precautions
Battery - Safety Precautions and Proper Handling
1. Use only the battery that has been provided with your unit, or an
OEM replacement battery that has been obtained through
DECA International Co., Ltd. Using a non-OEM battery can
shorten the product’s life cycle, decrease performance, and
may result in malfunctioning of the unit. Always use an
approved OEM battery to ensure safe use of the product.
The lithium ion rechargeable battery is an expendable item
and has a limited number of charge cycles. When the battery
life decreases to about half of what it was at the time of
purchase, it may be time to replace the battery. Properly
charging/discharging the battery will increase the life of the
battery.
2.Use only provided adapter to charge approved OEM battery.
Using a non-OEM adapter may result in malfunctioning of the
unit and can cause damage to the unit.
In order to ensure that your battery stays properly connected,
always make sure that the battery cover is always tightly
screwed in, and fastened properly to the body of the product.
3. Avoid submerging the unit in water. If accidental submergence
occurs, do not attempt to dry the product or battery using a
heating device such as a microwave, electric heater, or hair
dryer. Attempting to do so may result in electric shock or
explosion. If the product’s main body or battery has been
submerged in water, handling the unit may result in electric
shock or explosion due to damaged parts and circuits. Do not
power on the unit while it is wet.
Separate the battery from the unit immediately, and request
repair service through an authorized service center.
4. Be careful not to subject the unit to any heavy shock or force.
If your unit appears to be malfunctioning due to such cause, do
not attempt to disassemble or repair the unit yourself.
Attempting to do so may cause bodily injury or further damage
to the unit and will also void your warranty. If your unit is not
functioning properly please contact our technical support
department to have your unit inspected and repaired.
Golfbuddy World Instruction Manual
Always make sure to power off the unit before removing the
battery to avoid the risk of electric shock.
Never attempt to disassemble the battery.
Do not crush and do not expose the battery pack to any
shock or force such as hammering, dropping or stepping on
it.
Do not short circuit and do not allow metal objects to come
into contact with the battery terminals.
Do not expose to high temperature such as direct sunlight or
in a car parked in the sun.
Do not incinerate or dispose of in fire.
Do not handle damaged or leaking lithium ion batteries.
Keep the battery pack out of reach of small children.
Discard used battery packs promptly and dispose of them
properly.
3
Contents
4. Course Download
1. Getting Started
1.1 Checking Package Contents
6
4.1 Connecting with the PC
19
1.2 Inserting and Charging Battery
6
4.2 Install and Log in
19
1.3 Using the Touch Screen
7
4.3 Firmware Upgrade
20
1.4 Identifying Parts and Screen Symbols
7
4.4 Downloading Courses
20
2. Basic Menu
5. Course Download
2.1 Powering On/Off
9
9
5.1 User Profile
5.2 Distance : Unit of Measurement
22
2.2 Locking and Unlocking the screen
2.3 Searching for Courses
9
5.3 Language Selection
23
2.4 Menu Introduction
10
5.4 World Time Settings
23
2.5 Play Round
11
5.5 Button Sound Settings
23
2.5.1. Checking and Changing Course/Hole
11
5.6 Screen Timeout Settings
23
2.5.2. Hole Zoom In/Out
11
5.7 Power Management Settings
24
2.5.3. Green View and PIN Setting
12
5.8 Screen Brightness Settings
24
2.5.4. Target Information
12
5.3 Touch Calibration Settings
24
2.5.5. Course Play in Green View
12
5.10 System Information
24
2.6. Preview Mode
13
5.11 Reset GPS
25
2.7. User History
13
5.12 Abbreviations
25
3. Advanced Menu
6. Size and Specifications
3.1 Add/Edit Targets
15
3.2 Adding a New Course
15
3.3 ProPlay
16
3.3.1 Recording Your Scores
16
3.3.2 Mark Function
17
3.3.3 Stroke Play / Stableford Scoring
17
Golfbuddy World Instruction Manual
22
4
1. Getting Started
1.1 Checking Package Contents
1.2 Inserting and Charging Battery
1.3 Using the Touch Screen
1.4 Identifying Parts and Screen Symbols
Golfbuddy World Instruction Manual
5
1.1 Checking Package Contents
1.2 Inserting and Charging Battery
The following items should be included in the package at the
time of purchase. Please check to make sure they have all been
supplied.
Remove the battery cover located on the back of the unit by
pushing the square button and push down the battery cover at
the same time.
The pictures and illustrations in the Instruction Manual are for
demonstration purposes only. Actual items may vary slightly.
Open the cover located on the bottom of the unit. Connect the
power adaptor to the wall outlet and insert the connector into the
unit, as shown in the illustration below. A message on the
screen will indicate that the battery is charging.
Once the battery is fully charged, a message stating “Charging
Complete” will appear on the screen.
Battery Charging Time and Usage
Time
[Fig.01] GolfBuddy GPS
Rangefinder
[Fig.02] USB Data Cable
[Fig.03] Rechargeable
Battery
[Fig.04] Plastic Holster
[Fig.05] Power Adaptor
[Fig.06] Quick Guide
Chargint Time
Standard Usage Time
4 Hours
About 10 Hours
- Charging time may vary according to the battery’s
charge level, and voltage.
- Standard Usage time is based on operating the unit
with the backlight turned off.
※Package contents may change.
[Fig.07] Charging when
the power is OFF
Golfbuddy World Instruction Manual
[Fig.08] Charging with
USB Cable
[Fig.09] Complete with
Power Adaptor Inserting
the battery
6
1.3 Using the Touch Screen
1.4 Identifying Parts and Screen Symbols
Touching
Navigating through the menu is done by touching a selection on
the screen. By touching the “search” box as seen in the illustration below, a keyboard layout will appear on the screen, on
which you can type by touching the individual characters on the
keyboard.
Scrolling
You can scroll through the menu by either pressing the up and
down buttons below the bar located on the bottom edge of the
screen.
You can also drag the screen up and down by touching the
screen and moving your finger up and down in a swiping motion
or by touching the Fast Scroll Icon and moving your finger up
and down to scroll the screen faster.
Hole No./
Hole change Button
Power On/Off
Lock/Unlock Button
ProPlay /ESC Button
Distance to the Green/
Zoom in to Green Button
Function Buttons
Menu/ Quick Tools
Button
Back Button
Micro SDSlot
PC Interface/ Charging Slot
Status Icon
What it means
Satellite Reception Signal
[Fig.10] Touch View
[Fig.11] Scroll View
[Fig.12] Fast Scroll View
Notes in using the touch screen
- Press the touch screen lightly, while making sure to make contact with your finger on
your selection as accurately as possible. The touch may not operate properly if more
than one selection on the menus are touched simultaneously.
- In Tools menu, you may recalibrate the touch screen. (Refer to section 5.8)
Golfbuddy World Instruction Manual
Par 4
Y/M
Par Information
Unit Indicator (Yard/Meter)
Battery Level
7
2. Basic Menu
2.1 Powering On/Off
2.2 Lock / Unlock
2.3 Searching for Courses
2.4 Main Menu
2.5 Play Round
2.5.1 Changing Hole/Course During Round
2.5.2 Hole Zoom In/Out
2.5.3 Green View and PIN Setting
2.5.4 Target Information
2.5.5 Course Play in Green View
2.6 Preview Mode
2.7 User History
Golfbuddy World Instruction Manual
8
2.1 Powering On/Off
2.3 Searching for Courses
Power On :
In order to allow your unit to automatically recognize the course
you are on, just power on the unit and it will advance to the
“Locating Satellites” screen, which indicates that the unit is
acquiring a satellite signal and locating the course that you are
on. Once it has acquired a signal and has located the course
you are on, it will advance to another screen prompting you to
advance to the tee box. Once you are on the tee box, the course
information will automatically appear.
To power on the unit, press and hold the power
button located along the right side of your unit.
A screen with the GolfBuddy logo will appear
on the screen, followed by a screen that will
indicate that it is locating a satellite signal.
Power Off :
To power off your unit, press and hold the power
button until the “Power Off” message comes up.
Select “Yes” to power off the unit.
[Fig.13] Power On/Off
View
2.2 Lock / Unlock
It generally takes about 3 minutes for the unit to automatically
locate the course you are on. Standing in one location without
moving around will allow it to pick up a signal and locate the
course you are on faster.
Locking your unit when it is not in use will prevent
any accidental selections to be made when not in
use by either touching the screen or pressing the
buttons.
Lock :
To lock the unit, press the power button once, and
the lock screen will appear. Touch the lock icon
in the middle of the screen once to lock the unit.
[Fig.14] Lock View
[Fig.16] Acquiring GPS
Satellite Statue View
Unlock :
If it fails to recognize the course you are on or fails to acquire a
satellite signal, it will advance to the Nearby Golf Clubs screen.
Please download updated course with GolfBuddy World Course
Manager.
To unlock the unit, press the power button once,
and the unlock screen will appear.
Touch the icon in the middle of your screen to
unlock the unit.
[Fig.15] Unlock View
Golfbuddy World Instruction Manual
[Fig.17] Current Golf Club [Fig.18] List of Golf Clubs
You will notice one of two icons next to the name of each course
on the list. icon denotes Full Layout view and icon denotes
Green View.
9
2.4 Main Menu
Manually Searching for a Course
To manually search for a course, press the “Menu” button on the
unit, and the main menu will appear. Select “Play Round” by
touching the screen, and the “Locating Satellites” screen will
appear.
Touch “Manual Search” and a menu will appear, giving you the
option to select a course by country, name, your user history, or
custom courses that have been added. Touch one of the
options, and search for your desired course.
You can access the Main Menu by pushing the “Menu” button
on the unit, or by touching the “Main Menu” selection on the
“Locating Satellites” screen.
While you are playing, pushing the “Menu” button on the side of
the unit will bring up the Quick Tools screen. Select “End
Round” to gain access to the Main Menu.
Select this option to begin playing a round. It will
take you to the “Locating Satellites” screen and
begin searching automatically for the course and
hole you are on.
Preview Mode allows you to familiarize yourself
with the unit or preview a course or hole when you
are indoors and a GPS signal is not available.
This selection allows you to view a list of the
courses that you have played on, while using your
unit.
This selection allows you to adjust various
settings on your unit such as screen brightness,
language options, etc.
[Fig.19] Main Menu
[Fig.20] Acquiring GPS
Satellite Status View
[Fig.21] Manual Search
[Fig.22] Select a Country
Golfbuddy World Instruction Manual
[Fig.23] Rounds History
[Fig.24] Tools
10
2.5 Play Round
Your unit will automatically recognize the course you are on and
course information will automatically appear as illustrated below.
Hole Number Indicator
Distance to center of the Green
You can also use the arrows to the right and left of the hole
number and then push the “OK” button on the bottom left the
screen to switch to your selected hole.
To change to a different course, on the “Hole Information”
screen, touch the “Course Name” on the gray bar above the hole
number and select another course from the list that appears.
Distance to selected point and
remaining distance
Distance from Marked Point to
current position when measuring
shot distance
Zoom in and out of the map
[Fig.27] Play Round
[Fig.28] Hole Change
[Fig.29] List of Holes
2.5.2 Hole Zoom In/Out
[Fig.25] Quick Tools
[Fig.26] Targets
2.5.1 Changing Hole/Course During a Round
To manually change to another hole or course during the middle
of a round, touch the Hole Number Indicator towards the top left
of the screen, and the “Hole Information” screen will appear.
Touch the hole number in the middle of the screen, and a list of
holes on the course will appear.Touch a number on that list and
the unit will switch to that hole.
Golfbuddy World Instruction Manual
As you advance along the
hole you are playing on, the
Hole Map will automatically
zoom in according to your
current position on the hole.
You can also manually zoom in
or out at any time to get a closer
view of a specific point along
that hole by touching the
icons towards the lower right of
the play screen.
[Fig.30] Zoom In/Out View
[Fig.31] Zoom View
11
2.5 Play Round
2.5.3 Green View and PIN Setting
2.5.5 Course Play in Green View
The user can enlarge the green and change the PIN position on
the green while playing.
Touch the “Distance” option on the top right from the screen or
press the button below the “Green” option on the bar located on
the bottom of the screen and the “Green view” option will
appear. If you touch the PIN and drag it to the desired location,
it will be automatically updated.
Press the “Hole” option on the bottom of the screen to get back
to the play view.
You may lock your PIN position preventing any accidental and
changes of PIN position by touching the icon on the screen.
If the full layout view of the course you are playing on has not yet
been made available in GolfBuddy course library, the play
screen will show a view of the green for each hole during the
course of your round without the map of the hole, as shown in
the illustration below.
If the full layout view of the course you wish to play on is not
preloaded in your unit, please go to www.gpsgolfbuddy.com to
see if the course library has been updated with the maps since
the time you purchased your unit. If you find that the map of your
desired course has not yet been added, please check the
course library periodically, as thousands of maps are being
added each month and are available for free to download. You
may also place a request to have the map of a specific course
added.
denotes Full Layout View
[Fig.32] Green view
[Fig.33] Pin Lock
[Fig.34] Pin Unlock
2.5.4 Target Information
This allows you to check the distance information from your
position to the targets.
To view a list of targets along
the hole you are playing on,
press the button below the
“Target” option on the bottom
of the screen and a list of
targets for that hole will appear.
Please refer to section 5.10, for
a list of abbreviations for the
target menu.
[Fig.35] Target on Hole
Map
[Fig.36] Targets
Golfbuddy World Instruction Manual
denotes Green View.
You can also record the score and add/edit the targets on the
course.
A list of each target for that hole can be seen by pressing the target
button located on the bottom of the screen. You can return back to
the play screen by pressing the “Back” button on the bottom right of
the unit.
[Fig.37] Club List
[Fig.38] Play Round
[Fig.39] Targets
12
2.6 Preview Mode
2.7 User History
Preview Mode allows you to familiarize yourself with the
functions and features of your unit in indoor locations where a
satellite signal is not available. It also allows you to preview a
specific course before playing a round.
The User History allows you to view a history of all the rounds
you have played while using your GolfBuddy. It also allows you
to review your scores that you recorded during those rounds.
Go to the Main Menu and touch “Preview Mode”, and a list of
countries will appear. Select one of the countries by touching
the screen, and select a golf course from the list that appears.
To exit from Preview mode, press the “Menu” button and the
“Quick Tools” menu will appear. Touch “End Round” and you
will then be taken back to the Main Menu.
※Since preview mode is “simulating” a satellite signal, not all functions will work
correctly.
Go to the Main Menu and touch “User History”, and a list of
courses that you have played on will appear in the “Rounds
History” Screen. Touch a selection from the list, and the score
card for your round on that course will appear.
The menu button on the Rounds History screen allows you to
sort your rounds by the course name or date, and also allows
you to delete courses from the list.
To delete one or more courses from the list, touch the box or
boxes next to the course names that you would like to delete
and then press the “Menu” button. Then touch the “Delete
Selected” option. Touching “Delete All” will delete all the rounds
stored in the round history.
By pressing the “Menu” button on the Score Card screen, you
can select “Scoring System” to view your scorecard in Stroke
Play or Stableford mode.
[Fig.40] Main Menu
[Fig.41] Select a country
[Fig.42] Play Round
[[Fig.43] Main Menu
Golfbuddy World Instruction Manual
[Fig.44] User History
[Fig.45] Score Card
13
3. Advanced Menu
3.1 Add/Edit Targets
3.2 Adding a New Course
3.3 ProPlay
3.3.1 Recording Your Scores
3.3.2 Mark Function
3.3.3 Stroke Play / Stableford Scoring
Golfbuddy World Instruction Manual
14
3.1 Add/Edit Targets
3.2 Adding a New Course
This function allows you to add your own custom targets in
addition to the list of existing targets for that hole.
This function allows you to create a new course and record your
own information for each hole.
To create a new target, move to the position along the hole at
which you would like to create the target and then press the
button below “Targets” located at the bottom of the Play Screen,
which will then take you to the list of existing targets for that hole.
Press the button below “New” button located on the bottom of
the targets list and a “Create Target” screen will appear. Touch
one of the target names on the list to set a label for your custom
target. You can also create your own name for that target by
scrolling to the bottom of the list and touching “Other”.
The keyboard will appear on the screen allowing you to create
your own name for the target.
From the “Manual Search” screen, touch “Custom Courses”. A
list of your custom courses will appear. If you have not created
any custom courses, the list will appear blank. Press the “Menu”
button on the Custom Courses screen and then enter a name
for the course using the keyboard that appears.
You can edit or delete the targets created by touching the pencil
icon that appears next to your custom target. This allows you to
delete the target or set a new point for the target by touching
“Record Again”.
Walk to the tee box and green for each hole and touch the “Edit”
icons along the right of the screen to record the distance for
each position.
Press the “Target” button to add your own targets for each hole.
To finish with the Custom Course screen, press the “Menu”
button and select “End Round”.
※Please refer to section 5.10, for a list of abbreviations for the target menu.
[Fig.46] Play Round
[Fig.47] Targets
Golfbuddy World Instruction Manual
[Fig.48] Add Target
[Fig.49] Edit Target
popup
[Fig.50] Manual Search
[Fig.51] Enter Course
Name
[Fig.52] Enter Course
15
3.3 ProPlay
The ProPlay function allows you to keep a record of your scores
for each round and allows you to keep record of your statistics
including your putts per round, fairways hit, and sand saves. It
also allows you to measure the distance of your shots using the
“Mark Feature”.
To view scores that have been recorded, touch the player along
the left side of the screen to view that player’s score card.
To access the “ProPlay” feature, press the “ProPlay” button on
the right of your unit and the ProPlay menu will appear.
ProPlay Button
[Fig.54] Score Record
[Fig.53] ProPlay Menu
3.3.1 Recording Your Scores
[Fig.55] Score Editing
[Fig.56] Score Card
You can change the scoring system, set pars and handicaps
and make a new scorecard by pressing the “Menu” button while
you are on the Score Card screen.
You can keep track of your own scores for each round.
To record a score, press the “ProPlay” button and touch “Enter
Score” from the ProPlay menu. Touch the “Edit” icons along the
right of the screen, to enter a new score for a player. On the
“Enter Score” screen that appears, touch a number on the
screen to enter a score, or use the left and right arrows to
increase or decrease the score, and then touch “Ok” to record.
Press “Done” on the next screen that appears to return to the
menu.
Golfbuddy World Instruction Manual
[Fig.57] Score Card
[Fig.58] Menu Pop-up
16
3.3.2 Mark Function
3.3.3 Stroke Play / Stableford Scoring
The Mark Function allows you to measure the distance of your
shots.
The score card can be used in either the Stroke Play or the
Stableford system.
To measure the distance of your shot, stand next to the ball and
press the “ProPlay” button on the side of your unit. On the
ProPlay menu that appears, touch “New Mark”, and a box
labeled “From Mark” will appear towards the lower right of the
Play Screen. Take your shot, and travel to the position where
your ball has landed. You will notice the number increasing as
you advance towards the position of your ball. Once you have
reached your ball, press the ProPlay button again to save the
distance of your shot.
To select either Stroke Play or Stableford , go to the scorecard
and touch the “Menu” button, then touch the Scoring System on
the pop up menu that appears. Check the box next to your
desired method of scoring and touch “OK” to set.
[Fig.59] Pro Play Pop-up
[Fig.60] New Mark
Golfbuddy World Instruction Manual
※Stableford is a scoring system used in the sport of golf. Rather than counting the total
number of strokes taken, as in stroke play, it involves scoring points based on the
number of strokes taken at each hole. Unlike traditional scoring methods, where the
aim is to have the lowest score, under Stableford rules, the objective is to have the
highest score.
[Fig.61] Stroke Play Card
[Fig.62] Stableford Card
17
4. Course Download
4.1 Connecting with the PC
4.2 Install and Log In
4.2.1 Install
4.2.2 Log In
4.3 Firmware Upgrade
4.4 Downloading Courses
Golfbuddy World Instruction Manual
18
4.1 Connecting with the PC
GolfBuddy World Course Manager is used for multiple applications. You can
download new course information to your unit, upgrade the firmware and check
scores you have saved onto your unit
Please use the enclosed USB cable to connect your GolfBuddy
World with your computer.
4.2 Install and Log In
4.2.1 Install
You can also visit our website at www.gpsgolfbuddy.com and
click on “Support” to download and install the GolfBuddy
Manager program.
4.2.2 Log In
Please turn On the GolfBuddy World and insert the USB cable
to both the PC and the unit.
(If you have not installed the GolfBuddy World Manager, please
refer to section 4.2.1.)
Please connect the USB Cable to the GolfBuddy World and your
computer.
Registration for new users
You can enter the User ID and the Password and click on “Login”
to run the program.
Please click on the yellow “Sign Up” button to create a new user account.
Run the GolfBuddy World Course Manager previously installed
on your computer.
※If you have upgraded from the Plus, Pro or the Tour unit to the GolfBuddy World,
your previous UserID and Password will allow you access as well.
[Fig.63] Log in
[Fig.65] GolfBuddy Manager Download
[Fig.66] Log in
[Fig.64] Registration
Golfbuddy World Instruction Manual
19
4.3 Firmware Upgrade
4.4 Downloading Courses
Firmware Upgrade is automatically performed each time your
unit logs into the program.
At step 3, you can click on “Course Download” on the left
column.
This will open up an updated window on the right with a list of
countries.
※Firmware Upgrade can be forced
if the previous upgrade did not
successfully complete.
[Fig.67] Step 2 : Firmware Information
[Fig.68] Step 3 : Select countries
Each country will show either “Installed” or “Need to Update”.
“Installed” means all courses are updated and there is no need
to download any courses. “Need to Update” means there are
updated courses available and you should download them to
keep your unit up-to-date.
Once all courses have been downloaded and your unit has
been updated, please disconnect the unit and reboot the unit.
[Fig.69] Update Finished
Golfbuddy World Instruction Manual
20
5. Tools
5. 1 User Profile
5. Settings
5. 10 System Information
5. 2 Distance : Unit of Measurement
5. 11 GPS Reset
5. 3 Language Selection
5. 12 Abbreviations
5. 4 World Time Settings
5. 5 Button Sound Settings
5. 6 Screen Timeout Settings
5. 7 Power Management Settings
5. 8 Screen Brightness Settings
5. 9 Touch Calibration Settings
Golfbuddy World Instruction Manual
21
5.1 User Profile
5.2 Distance : Unit of Measurement
To input user profile, touch the “view” tab that shows the image,
owner name and phone number.
This setting allows you to change your distance measurement
from yards to meters. The default setting is set to yards.
The image should be added with GolfBuddy World Manager.
Choose the “Profile” tab on the left column and click “Add” to
add the images. Once the images have been uploaded please
disconnect the unit and reboot the unit.
The tab next to “Distance Unit” in the tools menu shows the
current unit of measurement that your unit is set to. To change
from yards to meters and vice-versa, touch the tab, and then
touch “Done” on the bottom of the screen to save the setting.
[Fig.71] Tools
Fig.73] Tools
[Fig.74] Quick Tools
[Fig.70] Profile
[Fig.72] User Profile
Touch the empty image on the user profile screen and select
your desired image.
Owner Name and Phone Number can also be entered by using
GolfBuddy World Manager or by touching the “Enter Name” and
“Phone Number” bar on your unit.
Golfbuddy World Instruction Manual
22
5.3 Language Selection
5.5 Button Sound Settings
To select a new language for
the menu, touch the tab that
shows the current language
setting, and a pop up menu
will appear with a list of
available languages. Touch
the desired language and the
language will automatically
change after a few seconds.
The button sounds can be turned off and on
by checking or unchecking the box next to the
“Button Sound” selection.
[Fig.75] Tools
[Fig.76] Language
Selection Pop-up
5.4 World Time Settings
To set a new time zone, touch
the tab that shows the current
setting, and the “Time Zone”
screen will appear. Use the
left and right arrows to set
your desired time zone and
then press the “OK” button
located on the bottom bar to
set.
[Fig.67] Tools
[Fig.79] Tools
5.6 Screen Timeout Settings
The Screen Timeout Setting
enables your unit to automatically turn off the backlight to
conserve battery life after a
period of time that it is not in
use.
[Fig.78] Time Zone Setting
You can also set your unit to automatically adjust itself to
daylight savings time by touching the boxes next to “DST” and
checking “ Auto” and “ On”
To adjust this setting, touch
the current time tab that shows
[Fig.80] Tools
[Fig.81] Screen Timeout
the current setting and the
Setting Pop-up
“Screen Timeout” menu will
appear.
Check the box next to your desired selection, and then press
“OK”.
※ The default setting for the backlight to automatically turn off when not in use
is ‘5 seconds’. You will achieve longer battery life from your unit by setting
the backlight to turn off when not in use.
Golfbuddy World Instruction Manual
23
5.7 Power Management Settings
5.9 Touch Calibration Settings
You can set your unit to
automatically power itself off
when it is not used for an
extended period of time in
order to save battery life.
This setting allows you to
accurately calibrate the touch
screen.
Touch the current setting, and
the “Power Management”
menu will appear. Make your
selection by touching the box
next to your desired setting,
and press “OK” to set.
[Fig.82] Tools
[Fig.83] Power
Management
Setting Pop-up
※ The factory default for this setting is “Always On”.
To calibrate the touch screen,
press “Reset”, next to the
“Calibration” setting in the
Tools menu, and the touch
calibration screen will appear.
[Fig.85] Tools
[Fig.86] Calibration
Follow the directions on the
Setting
screen and press and hold
your finger in the middle of the cross point that will appear at
each corner of the screen for 1 second until you hear a beep
sound. After you have touched the crosses that appear at
each corner, you will be prompted to repeat the process a
second time. Once you receive a messagestating that you
have successfully calibrated the screen, press “OK” to
complete the calibration.
5.8 Screen Brightness Settings
5.10 System Information
You can adjust the brightness of the LCD
screen by moving the Scroll bar either left or
right by touching the screen.
This setting shows you the
system information for your
unit.
(OS, Application, Data-base,
Serial Number of GolfBuddy)
[Fig.84] Tools
Golfbuddy World Instruction Manual
For system upgrades, please
refer to the GolfBuddy website
at www.gpsgolfbuddy.com.
[Fig.87] Tools
[Fig.88] System
Information View
24
5.11 Reset GPS
5.12 Abbreviations
You can initialize the GPS Satellite information of your unit by
touching “Reset” when it fails to acquire a satellite signal.
For Example. GrFrtHzd 1 : Green Front Hazard 1
Direction & Distance
[Fig.89] Tools
[Fig.90] GPS Reset
Golfbuddy World Instruction Manual
Target
Position
OB Bunker
OBBkr
Front
Fr
Beach Bunker BeachBkr
OB Bunkers
OBBkrs
End
End
Ctr
Bog
Bog
OB Light
OBLight
Start
Start
Down
Dn
Bridge
Brdge
OB Rock
OBRock
Jut
Jut
Up
Up
Bunker(s)
Bkr(s)
OB Tree
OBTree
Edge
Eg
Yard
Y
Cart Path
CartRd
Out of Bound OB
Carry
Cy
Meter
M
Cave
Cave
PIN
PIN
Center
Ctr
Cliff
Cliff
Pond
Pond
Coconut
Cocnt
River
River
Creek
Crk
Rock
Rock
Dogleg
Dogleg
Rod
Rod
Garden
Garden
SandBox
SandBox
Grave
Grave
Slope
Slope
Green
Gr
Sprinkler
Spkr
Green Tree
GrTree
Target
Trgt
Hazard
Hzd
Tower
Tower
Tree(s)
Left
Lt
50Yardpost
Right
Rt
Center
50YPost
Hill
Hill
Tree(s)
Hill Tree
HillTree
Valley
Valley
Lake
Lake
Water
Wtr
Layup Point
IP
Water Way
WtrWay
Lawn Bunker
LawnBkr
Weeds
Weeds
Light
Light
Woods
Woods
Mound
Mnd
Yardpost
Ypost
25
Size and Specification
Size (in)
2.2” X 4.1” X 0.7” / 5.5cm X 10.4cm X 1.7cm
Weight (oz)
4.2oz / 119g (when battery is installed)
PC Interface
USB
Display
2.7” (Transreflective touch-screen)
Color TFT LCD (240 X 340)
External Memory
MicroSD(default)
Battery Type
Removable / Rechargeable type Battery
Operation Life : 10 hr
Power Adaptor : 5V, 0.5A
Course Capacity
40,000 Course
Water Resistance
Water Resistant
Operating Temperature
Button
7 Buttons + Touch
Instruction Manual
First Edition : March 2011
Issuer : DECA International, Inc.
Homepage : http://www.gpsgolfbuddy.com
1) GOLFBUDDY is a registered logo of DECA System Co., Ltd.
2) The arbitrary copying of this manual is prohibited (not for sale)
3) The details of this manual can be revised without prior notice.
Golfbuddy World Instruction Manual
26


