1
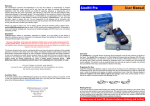
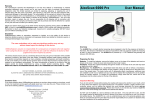
AccuRoute2 User Manual
User Manual
For v2.3.2
October 28, 2003
Critical Path Software Ltd
Century House
2 Corsletts Avenue
Broadbridge Heath
Horsham
West Sussex
RH12 3LG
UK
www.criticalpathsoftware.com
[email protected]
AccuRoute2 User Manual
Page 1 of 12
AccuRoute2 User Manual
Table of Contents
1.
INSTALLING ACCUROUTE ..................................................................................................................... 3
1.1.
1.2.
1.3.
2.
MINIMUM SYSTEM REQUIREMENTS ......................................................................................................... 3
HOW TO INSTALL THE CD........................................................................................................................ 3
HOW TO INSTALL FROM DOWNLOAD ....................................................................................................... 4
INTRODUCTION TO ACCUROUTE ....................................................................................................... 4
2.1. BACKGROUND.......................................................................................................................................... 4
2.2. OBTAINING MAPS .................................................................................................................................... 5
2.2.1.
Simple Maps with Embedded Scale................................................................................................. 5
2.2.2.
Compound Maps with Embedded Scale .......................................................................................... 5
2.2.3.
Simple Maps without Embedded Scale............................................................................................ 5
2.2.4.
Compound Maps without Embedded Scale ..................................................................................... 6
2.3. A TYPICAL ACCUROUTE SESSION ........................................................................................................... 6
3.
MAKING CORRECTIONS TO YOUR ROUTES .................................................................................... 8
3.1. MAJOR CORRECTIONS .............................................................................................................................. 8
3.1.1.
Deleting Last Sub-Trace.................................................................................................................. 8
3.1.2.
Deleting Any Sub-Trace .................................................................................................................. 9
3.1.3.
Deleting All Sub-Traces .................................................................................................................. 9
3.1.4.
Inserting a Sub-Trace...................................................................................................................... 9
3.2. MINOR CORRECTIONS .............................................................................................................................. 9
3.2.1.
“Nudging” Data Points ................................................................................................................ 10
4.
ADVANCED TECHNIQUES .................................................................................................................... 10
4.1.
4.2.
4.3.
4.4.
5.
SETTING THE THROTTLE ........................................................................................................................ 10
ADDING CONTOUR INFORMATION.......................................................................................................... 11
ADJUSTING CALIBRATION DATA............................................................................................................ 12
CREATING MS WORD REPORTS ............................................................................................................. 12
UNINSTALLING ACCUROUTE ............................................................................................................. 12
AccuRoute2 User Manual
Page 2 of 12
AccuRoute2 User Manual
1.
Installing AccuRoute
1.1.
•
•
•
•
•
•
•
Minimum System Requirements
IBM PC or compatible
MS Windows 95 or later
200 MHz CPU
32 MB memory
7 MB hard disk space
MS Word 97 or later
Optical scanner or Internet Explorer
1.2.
How to Install the CD
1) Insert the CD into the CD drive.
2) Within a couple of seconds, the AccuRoute installation routine should begin automatically and you will see
the screen shown in Figure 1
Figure 1 The first screen seen once the CD has been loaded into the drive
3) Before clicking OK, it is recommended that you exit all other applications that are running. Simply press
the Start button and systematically close down each active program, saving any changes if required.
4) Click OK to proceed.
5) You are asked where you would like to store the program on the hard disk. Unless you have good reason,
it’s best simply to accept the default offered, c:\Program Files\AccuRoute v2\. See Figure 2, below.
6) To install to the default directory, simply click the large button displaying an image of a PC, two-thirds of
the way up Figure 2.
7) Installation takes just a matter of seconds, and when complete, you will be presented with the screen shown
in Figure 3.
8) Run AccuRoute by clicking the Start button and selecting “Programs” (or “All Programs” in Windows XP).
AccuRoute v2 will be one of the choices.
AccuRoute2 User Manual
Page 3 of 12
AccuRoute2 User Manual
Figure 2 Choosing the Installation Folder
Figure 3 Installation Completed Successfully
1.3.
How to Install from Download
1) From the AccuRoute website, download the file download_accuroute2.exe to the Desktop.
2) Double click this new icon on the Desktop, and follow the instructions. Ultimately, you will see the same
screen shown in Figure 1, beyond which the installation is the same as the CD installation.
2.
Introduction to AccuRoute
2.1.
Background
The idea behind AccuRoute is deceptively simple – a map is displayed on your PC screen and you are asked to
trace out your route with your mouse. Distances on the ground are then deduced by comparing these mouse
movements with the equivalent mouse movements for any known straight-line (“calibration”) distance on the
same map.
The user can nominate any known straight-line distance as the calibration reference. For example, if the map is
overlain with a coordinate grid, it’s best to set the calibration distance equal to the separation between two grid
points on the same horizontal or vertical grid line. The further apart the two chosen grid points are, the better
will be the overall accuracy, so it’s best not to choose adjacent grid points unless your map only covers a small
geographical area.
AccuRoute2 User Manual
Page 4 of 12
AccuRoute2 User Manual
If no grid exists, you must ensure the map you’re going to display includes some sort of visual scale along one of
the edges. This can be difficult and may entail some image manipulation using a package such as MS Paint.
2.2.
Obtaining Maps
AccuRoute’s global appeal stems from not tying users to maps from a single map maker, maps that probably
wouldn’t actually offer anywhere near the level of coverage or detail users would want.
AccuRoute users themselves provide the maps for display. This doesn’t take very long at all, since most runners
and walkers already have detailed paper maps of the areas where they exercise, and if they themselves don’t
have access to a scanner at home or work, they probably know someone who does. Moreover, most people’s
routes are clustered in the same general area, either around their home or place of work. So in fact, the average
AccuRoute user only needs half a dozen maps or less for all their routes.
More adventurous users who like to run while on holiday or away on business may prefer the added flexibility of
getting their maps from the Internet. The Internet provides a plethora of websites from where good quality maps
can be downloaded for free. Moreover, as long as there is some visual scale on the image, AccuRoute can
equally well display satellite photos which often show a level of detail not encountered on any map. If you can
get hold of these (really only in the USA or UK), these provide the absolute best accuracy of all.
This section describes how you go about obtaining images from the Internet. You have a number of options
depending on how the size of your route compares to the size of the map image.
2.2.1.
Simple Maps with Embedded Scale
If all your route fits within a single image and the mapping website displays maps with an embedded scale, that
is maps where the scale is contained entirely within the boundaries of the map image:
1) Within AccuRoute, look under the Online menu. Here are direct hyperlinks to the commonest mapping
websites, plus a link to a longer list on our website containing some of the lesser-known ones. Go online
and surf to your chosen website.
2) Once on the mapping site, display your area of interest. This is usually achieved by inputting the name of
the town, a post/zip code, or clicking on a country-wide map. Try to display the highest magnification
image you can.
3) When the image is displayed, right click on it and select “Save Picture As” to download to your hard disk.
If you are presented with a choice of image formats, choose JPG, GIF or BMP.
2.2.2.
Compound Maps with Embedded Scale
If you find that your route overspills onto several adjacent map images, perform the above procedure for each
image and join them together using a program such as MS Photo Editor (on MS Office CD-ROM), MS Paint (on
Windows CD-ROM), or the popular commercial image-processing application, Paint Shop Pro. Alternatively,
display the map on the website at a scale that allows your entire route to be displayed on a single image.
However, you run the risk that small roads may not be shown.
2.2.3.
Simple Maps without Embedded Scale
If your route fits entirely within a single frame on the website, but the scale is not displayed within the
downloadable area of the map image, just off to one side for example, follow this alternative procedure:
1) Take a “screen dump” — a snapshot of the whole screen — by pressing the Prt Scrn key on the keyboard.
Nothing will appear to happen, but a copy of the entire screen display will have been stored in memory.
2) Start your image processing application, MS Paint, MS Office, or Paint Shop Pro.
AccuRoute2 User Manual
Page 5 of 12
AccuRoute2 User Manual
3) On the Edit menu of the image processing application, select Paste. A copy of the screen display will be
pasted to a new image.
4) Trim the image to a convenient size so that the scale and map are both visible, but extraneous information is
removed.
5) Save the image in JPG, GIF or BMP format.
2.2.4.
Compound Maps without Embedded Scale
If neither the website displays the scale embedded on the map, nor your route fits on a single image, follow this
procedure:
1) Download each image separately using the Right-Click method. All maps must be at the same
magnification. None will contain a scale.
2) Use the image processing application to paste together all the map images into a single image. Trim the
resultant image as necessary.
3) Return to the website and use the Screen Dump method to capture a view of the screen containing the scale.
4) Paste the screen dump into a new image in your preferred image processing application, and trim it so that
just the scale remains.
5) Copy the image containing the scale and paste it into the map image, making sure it doesn’t cover up any
part of your route.
6) Save the combined image in JPG, GIF or BMP format.
2.3.
A Typical AccuRoute Session
1) Press the Start key on your keyboard and select AccuRoute v2 from the Programs menu.
2) AccuRoute v2.3.0 saw the introduction of a series of movie demos to help users get the best out of the
program quickly and easily. The key one of these is the Quick Start demo, accessible from the introductory
window, Figure 4, by clicking the red “Show Me a Demo” button.
Figure 4 The Introductory Window
3) The Quick Start demo runs on a continuous loop inside an Internet Explorer window (working offline, so
there is no need to physically connect to the Internet to view the demo). When one complete cycle of the
video has finished, exit Internet Explorer to return to the Figure 4 screen.
4) When familiar with how AccuRoute works, the user can choose not to show the introductory window at
start-up by deselecting the “Show at startup” check box in the lower left of the window. Should a reminder
AccuRoute2 User Manual
Page 6 of 12
AccuRoute2 User Manual
be required at any time, however, the Quick Start demo can be re-run from the main Help menu. The Help
menu also allows you to view other demos on more specialised topics.
5) Click the green “Continue” button to exit the introductory window.
6) The “Tip of the Day” window is displayed next, Figure 5. Click OK to continue. Should the user no longer
wish to view the Tips at startup, it can be switched off by deselecting the “Show Tips at Startup” check box.
It can always be re-enabled from the Help menu at any time.
Figure 5 Tip of the Day
7) To open a new map, one that has no pre-existing routes marked on it, click the icon shown in Figure 6, to
the far left of the toolbar. Alternatively, select New Map Image under the File menu
Figure 6 The Open New Map icon
8) The map will load and you will be prompted to perform the calibration procedure. The prompt to calibrate
contains a description of the procedure as an aide-memoire, see Figure 7.
Figure 7 The Calibration Prompt
9) Before you go ahead and perform the calibration, it is possible to nominate a different calibration distance
by clicking the “Change Calibration Distance” button in Figure 7. This takes you to the Preferences form,
Figure 8, from which you can select your two preferred measurement units and the calibration distance. If
you think these settings are likely to apply to the majority of your maps, make sure you select the
“Overwrite Defaults on Exit” option before finally clicking OK. Your settings will become the new defaults
which can be recalled at any time by clicking the “Revert to Defaults” button.
AccuRoute2 User Manual
Page 7 of 12
AccuRoute2 User Manual
Figure 8 The Preferences Dialog Box
10) The settings you chose in the previous step have a well-defined lifetime. If you selected Overwrite Defaults
on Exit, then your settings are remembered beyond the current AccuRoute session. If you did not choose to
Overwrite Defaults on Exit, your settings will be temporary, remaining in force only until you either change
the settings again or you exit the AccuRoute application, whichever is sooner. When you re-start
AccuRoute the next time, the Default settings will be recalled.
11) Once the new calibration distance has been set, the user is returned to the form shown in Figure 7, where
they will find that the yellow statement has been updated to reflect the new distance.
12) With the calibration distance set appropriately, click the “Begin Calibration” button in Figure 7 to teach
AccuRoute this distance: first, position the cursor over one of the ends of the calibration distance, zooming
in as desired, then click the mouse button once (and immediately release) to anchor that end. You will
immediately be prompted to repeat the process to anchor the other end of the calibration distance. The
calibration process is now complete.
13) You can now trace out your routes and the true distance will be displayed in the bottom left of the screen.
Remember, “tracing” can either mean “clicking from point to point”, as if joining the dots, or it can mean
freehand “clicking and dragging”, which may be best if you are following a more meandering path. Both
these methods can be used on the same route.
3.
Making Corrections to your Routes
3.1.
Major Corrections
In the previous section, item 13) made mention of the two methods of tracing a route, either by joining the dots
point-to-point, or by clicking and dragging freehand. Both of these methods require the user to click the mouse
button and subsequently release it. The only difference between them is that during freehand tracing, there is a
significant delay between pressing the mouse button down and releasing it again, during which time, the mouse
may move a considerable distance.
A sub-trace is the name given to the path taken by the mouse between the depression of the mouse button, and
its subsequent release. Many sub-traces together make a Route.
In the point-to-point case, a sub-trace consists merely of the one data-point. In the freehand style, on the other
hand, all the time that the mouse button is kept pressed, AccuRoute will automatically generate data points for
you along the route. The dragged sub-trace is only closed when the mouse button is released, so it consists of
many data points.
3.1.1.
Deleting Last Sub-Trace
The last sub-trace to have been laid down can be deleted whole using the Delete Last Sub-Trace icon, shown in
Figure 9. There is no Undo facility associated with this action.
AccuRoute2 User Manual
Page 8 of 12
AccuRoute2 User Manual
Figure 9 Delete Last Sub-Trace Icon
3.1.2.
Deleting Any Sub-Trace
When the Delete Any Sub-Trace icon, Figure 10, is clicked, the route will display all the individual data points
as small blue circles with white centers. The sub-trace closest to the cursor at any time will be highlighted with
small red circles rather than the blue ones. When the mouse button is clicked, this red sub-trace will be
permanently deleted and the two sub-traces either side will be joined up. There is no Undo facility associated
with this action.
Figure 10 Delete Any Sub-Trace Icon
3.1.3.
Deleting All Sub-Traces
All sub-traces (ie the entire route) can be deleted in one go, and the counters reset to zero, using the Reset icon,
shown in Figure 11. There is no Undo facility associated with this action.
Figure 11 Reset Icon
3.1.4.
Inserting a Sub-Trace
Often used in conjunction with the Delete Any Sub-Trace feature, section 3.1.2, this facility in effect allows you
to replace a badly-drawn sub-trace.
1) Click the Insert a New Sub-Trace icon, Figure 12.
Figure 12 Insert a New Sub-Trace Icon
2) The new sub-trace will be inserted before an existing sub-trace. You are prompted to nominate this existing
sub-trace by moving the cursor close and clicking when its data points have turned red.
3) Now you can click and drag, or click once, to insert the new sub-trace. NB if you want to replace a point-topoint sub-trace (which, by definition, only contains a single data point) with another single data point, it is
much more efficient to use the Nudging facility described in section 3.2.1 to move the existing data point
rather than deleting and replacing it.
4) The data points at either end of the new sub-trace connect with the extrema of the two adjacent sub-traces.
3.2.
Minor Corrections
The remarkable accuracy achievable using AccuRoute to measure your training runs arises largely from two
main features:
i.
from being able to make precise, high-magnification changes to your routes after they have been lain
down
AccuRoute2 User Manual
Page 9 of 12
AccuRoute2 User Manual
ii.
from the fact that the onscreen size of each data point is independent of the map magnification you use. In
other words, when you zoom in on a portion of your route, you won’t find your screen is filled with huge
circular images of the data points too. Consequently, the achievable precision is ultimately governed only
by the image resolution of your map, and the actual correctness of the map itself, not by how well you can
guess the center point of a large circle.
3.2.1.
“Nudging” Data Points
If only a small number of data points within a sub-trace are wayward, not enough to discard the whole sub-trace,
this is the best option to choose.
1) Click the Nudge icon
Figure 13 Nudge Icon
2) The data points will be displayed as small blue circles with white centers. The closest data point to the
cursor at any time is activated and turns red. It can then be re-positioned by “clicking and dragging”,
releasing the mouse button only when the data point is in exactly the right place. You do not have to
position the cursor right on top of a data point before you can click and drag, just close enough that the data
point has turned red.
3) The two distance boxes to the lower left of the screen will be updated to reflect the new data point position.
4) The last nudge can be undone by clicking the “Un-Nudge” icon,
Figure 14 The Un-Nudge Icon
5) If you find your freehand sub-traces contain too many automatically-generated data points, reduce the
number in subsequent sub-traces by changing the Throttle setting, see Section 4.1 on page 10.
6) To return to tracing out the route, simply click on the Trace a Route icon, Figure 15.
Figure 15 The Trace a Route Icon
4.
Advanced Techniques
4.1.
Setting the Throttle
If you ever trace parts of your routes freehand rather than using the point-and-click method, AccuRoute
continuously generates data points along the route as you drag and joins them together with short straight-line
sections.
If you have a powerful PC, AccuRoute can follow each and every small cursor movement with tremendous
precision. This is good news until you accidentally mis-trace part of the route and want to “nudge” it back ontrack (Section 3.2.1). You may then find that there are simply too many off-course data points to nudge
conveniently.
In this case you might find it helpful to alter AccuRoute’s Throttle setting. As its name suggests, the Throttle
affects how fast AccuRoute runs. A high Throttle setting, with AccuRoute running fast, leads to a large number
of high-precision data points being generated; a lower setting means some of the data points are simply discarded
at source so the net rate of data collection is slowed. This makes for more manageable data sets, although there is
a small accompanying loss in accuracy. Too low a value, however, makes AccuRoute feel sluggish and
unresponsive.
AccuRoute2 User Manual
Page 10 of 12
AccuRoute2 User Manual
Only you can decide what the best Throttle setting is for you — if you are a slow careful tracer with a powerful
PC, you could benefit from a lower Throttle value because many of your data points will already be redundant;
someone with a faster tracing style could find that only a high throttle setting allows their cursor movements to
be followed with the necessary accuracy. You will have to experiment.
The Throttle is accessed on the same Preferences form on which the calibration distance can be set
(File>Preferences). Click on the Throttle tab as shown in Figure 16. Setting the slider bar to the far right means
AccuRoute retains every single data point it generates; a setting of 5 (as shown in the figure) means only 1 in
every 5 data points is retained.
Figure 16 The Throttle Tab
4.2.
Adding Contour Information
Maps can only give 2D representations of a 3D landscape. On flat ground, using AccuRoute to trace out a path
on a 2D map leads to a very high precision. However, where the ground is hilly, ignoring the height variations
could leave AccuRoute’s reported distance differing from the actual distance on the ground by several percent,
as the following extreme case highlights: suppose a hill has a 25% gradient (1 metre up for every 4 metres
along). Simple application of Pythagoras’ Theorem tells us that to climb a vertical distance of 1 metre, we
would actually have to move 4.123 metres up the hill, see Figure 17.
Figure 17 A Hill with a 25% Slope
On the map, however, this movement would still only correspond to a 4 metre apparent change in position, a
systematic difference of 3.1%.
All gradients, whether uphill or downhill, always contribute to AccuRoute reading systematically too small a
value, 4.000 versus 4.123 in the example above. That is why the user has the option to add contour information
to their routes.
1) On the Preferences form, Figure 8, select the Vertical Distances tab.
2) Select the appropriate contour units and separation for the current map then click OK, Figure 18.
3) With a map open, display the Height Profile window by clicking the icon shown in Figure 19.
4) Display all the data points along the route by clicking the “Nudge” icon, Figure 13.
5) Activate the very first data point by moving the cursor close enough to it so the blue marker turns red.
AccuRoute2 User Manual
Page 11 of 12
AccuRoute2 User Manual
Figure 18 The Vertical Distance Tab
Figure 19 The Icon to Toggle Display of Height Profile
6) Right click and select “Coerce to Level Contour” from the pop-up menu. This fixes a vertical reference
level for the entire route.
7) Follow the route carefully until you see it cross a contour line. Decide whether it is an uphill contour, or a
downhill one.
8) Nudge the nearest data point exactly onto the contour, right click and select “Coerce to next uphill contour”
or “Coerce to next downhill contour” as appropriate. Note, if you use the point-to-point method to trace your
routes, and you want to incorporate contour information, it pays to place data points on these contourcrossing points from the outset. If you don’t, you may find you don’t have enough data points to mark every
contour unless you insert some (Section 3.1.4 on page 9).
9) The Height Profile display and the overall distance will both be updated to reflect the vertical movement.
4.3.
Adjusting Calibration Data
Inaccurate calibration is another serious cause of error in your overall distance accuracy. If you feel you can
position either of the calibration distance end-points better, click the Fine Tune Calibration icon at any time,
Figure 20. The two calibration end-points will be re-displayed on the screen as small blue circles; the closest
end-point to the cursor at any time turns red and, using a high magnification, can be “nudged” by clicking and
dragging to a new position. Any routes already displayed will have their distances automatically updated.
Figure 20 The Calibration Fine Tune Icon
4.4.
Creating MS Word Reports
If you are a runner who enjoys keeping a running log or diary, then why not keep all the data on your PC?
AccuRoute can create a Word document containing an image of the route, the Height Profile, and the route’s
vital statistics: length, total ascent and descent, maximum uphill and downhill gradients, plus ample space for
you to fill in all your entries.
5.
Uninstalling AccuRoute
AccuRoute can be uninstalled at any time using the “Add/Remove Software” facility on the Control Panel. If
you have added a maps sub-directory under the AccuRoute folder, you will find that they will not be deleted and,
as a consequence, the entire AccuRoute directory tree may not be removed completely.
AccuRoute2 User Manual
Page 12 of 12