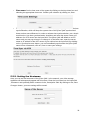
1
QSt
orQMX
Manual
Per
f
ec
tCombi
nat
i
on
Vi
deoSt
or
ageopt
i
mi
z
edf
orMOBOT
I
XCamer
as
Rel
eas
e:
1.
0,
31.
08.
2011
User Manual QMX Series
1
THANK YOU
Thank you for choosing the QStor QMX video storage appliance! This user manual provides
detailed information on the setup and operation of your video recording & storage system.
This manual will be your reference and help you to quickly become familiar with all functions
of the QStor QMX. It will help you to customize the QStor QMX video storage appliance to
your exact requirements.
For the initial setup of the QStor QMX video storage appliance, please refer to the ‚Quick
Install Guide‘.
2
Table of Contents
User Manual QMX Series........................................................................................................ 1
THANK YOU........................................................................................................................... 2
Table of Contents.................................................................................................................... 3
Section 1: Overview of the QStor QMX................................................................................... 7
1.1. Prominent Features...................................................................................................... 7
1.2. Technical Data.............................................................................................................. 9
QStor QMX Standard....................................................................................................... 9
QStor QMX Pro................................................................................................................ 9
Section 2: First Steps............................................................................................................ 10
2.1. Setting up and Connecting the QStor QMX................................................................ 10
2.2. Initial Setup via the Web GUI...................................................................................... 12
Section 3: The Web Interface................................................................................................ 19
3.1. Logging into the Web Interface................................................................................... 19
3.2. Menu Layout of the Web Interface.............................................................................. 21
Section 4: The Mobotix Menu................................................................................................ 23
4.1. Triggering Actions of Mobotix cameras....................................................................... 24
4.2. Adding a Mobotix-Kamera via the Camera Wizard...................................................... 25
Section 5: The System Menu................................................................................................ 31
5.1. System Information..................................................................................................... 31
5.2. Basic Settings............................................................................................................. 32
5.2.1. Setting the Time................................................................................................... 32
5.2.2. Setting the Hostname........................................................................................... 33
5.2.3. Changing Passwords........................................................................................... 34
5.2.4. Setting up a Swap Partition.................................................................................. 35
5.2.5. Selecting the Character Set.................................................................................. 36
3
5.3. System Administration................................................................................................ 36
5.3.1. Hardware Information........................................................................................... 36
5.3.2. Activation.............................................................................................................. 37
5.3.3. Additional Licenses............................................................................................... 38
5.3.4. Command Console............................................................................................... 38
5.3.5. Backing Up System Settings................................................................................ 39
5.3.6. Restoring System Settings................................................................................... 39
5.3.7. Updating the System............................................................................................ 40
5.3.8. Shutting Down the Server.................................................................................... 41
5.3.9. Rebooting the Server........................................................................................... 41
5.4. Event Logs.................................................................................................................. 41
5.4.1. System Log.......................................................................................................... 41
5.4.2. Boot Log............................................................................................................... 42
5.4.3. RAID Log.............................................................................................................. 42
5.4.4. UPS Log............................................................................................................... 43
5.4.5. Log Files for Technical Support............................................................................ 43
5.5. System Services......................................................................................................... 44
5.5.1. Email Notification.................................................................................................. 45
5.5.2. Windows File Sharing........................................................................................... 46
5.5.3. NFS Server.......................................................................................................... 47
5.5.4. APC UPS Service................................................................................................. 47
5.6. Statistics..................................................................................................................... 47
5.6.1. Network Statistics................................................................................................. 48
5.6.2. Server Load.......................................................................................................... 49
5.7. Shutting Down / Rebooting...................................................................................... 49
5.7.1. Shutting Down the Server.................................................................................... 49
5.7.2. Rebooting the Server........................................................................................... 50
5.7.3. Configuring Automatic Shutdown......................................................................... 50
4
Section 6: Storage Management Menu................................................................................. 51
6.1. Managing Network Shares.......................................................................................... 51
6.1.1. Network Shares.................................................................................................... 51
6.1.2. Network Shares Currently In Use......................................................................... 52
6.1.3. Selecting the Logical Drive For Network Shares..................................................52
6.1.4. Creating a Network Share.................................................................................... 53
6.1.5. Modifying Network Shares.................................................................................... 54
6.1.6. Hiding a Network Share (Hidden from Windows Network Discovery)...................55
6.1.7. Removing a Network Share.................................................................................. 56
6.2. Hard Disks.................................................................................................................. 57
6.2.1. Hard Disk Information........................................................................................... 57
6.2.2. S.M.A.R.T............................................................................................................. 58
6.2.3. Initializing a Hard Disk.......................................................................................... 58
6.2.4. Deactivating a Hard Disk...................................................................................... 58
6.3. Software RAID............................................................................................................ 59
6.3.1. RAID Status......................................................................................................... 60
6.3.2. Creating a RAID................................................................................................... 61
6.3.3. Deleting a RAID................................................................................................... 62
6.3.4. Designating Spare Drives (Hot Spares) / Repairing a RAID.................................62
6.3.5. Expanding a RAID................................................................................................ 64
6.4. Hardware RAID Manager............................................................................................ 64
Section 7: Access Control Menu............................................................................................ 65
7.1. Access Control............................................................................................................ 65
7.1.1. Displaying or Modifying Local Users / Groups Who May Access a Network Share
....................................................................................................................................... 65
7.1.2. Displaying or Modifying Domain Users / Groups Who May Access a Network
Share............................................................................................................................. 67
7.2. Users and Groups....................................................................................................... 68
7.2.1. User Administration.............................................................................................. 68
5
7.2.2. Local Group Administration.................................................................................. 72
Section 8: Network................................................................................................................ 75
8.1. Network...................................................................................................................... 75
8.1.1. Network Status..................................................................................................... 75
8.1.2. Domain and Workgroup........................................................................................ 75
8.1.3. TCP/IP Settings.................................................................................................... 78
8.1.4. DNS / WINS Settings........................................................................................... 79
8.1.5. Hosts File Editor................................................................................................... 80
8.1.6. Bundling Network Ports........................................................................................ 80
8.1.7. Ping...................................................................................................................... 82
8.2. APC UPS.................................................................................................................... 82
8.2.1. APC UPS Status.................................................................................................. 83
8.2.2. Configuring a USB-Attached UPS........................................................................ 83
8.2.3. Configuring a Network-Attached UPS.................................................................. 84
6
Section 1: Overview of the QStor QMX
1.1. Prominent Features
QStor QMX is the most reliable and, at the same time, the most technically advanced
solution for storing high resolution video data in a network. QStor QMX offers many
advantages:
•
Professional Integrated System with Mobotix Cameras
Together with current Mobotix network cameras, the QStor QMX implements a wellrounded, comprehensive high-end solution. Mobotix is the world’s leading
manufacturer of high resolution video systems.
As a high-end network storage appliance, QStor QMX provides a Gigabit Ethernet
connection and a POSIX-compliant operating system optimized for video surveillance,
which contains the know-how from seven years of OEM product experience.
Therefore, videos stored on QStor QMX can be very effectively archived and
accessed within the network.
•
RAID Hardware Like a Professional Server
It is not merely the well-engineered operating system that turns the QStor QMX into a
perfect choice for video surveillance – this professional storage server also excels in
the hardware department. High-performance, server-grade processor technology, a
minimum of 2 GB RAM as well as a NAS harddisk system that is optimized for 24/7
operation and offers numerous RAID modes turn the QStor QMX into a performance
champion.
•
Installation in 5 Easy Steps
Add easy setup and operation to uncomprimising performance: The QStor QMX can
be set up without special network know-how and can be deployed in but a few
minutes. There are just five easy steps: Unbox, setup, IP adress configuration, run
our installation wizard and you´re all set!
•
Automatic Setup via a Wizard
The comfortable setup wizard dramatically reduces the setup time – each and every
camera is integrated into the network automatically, which obviates manual
configuration. Especially installations with lots of video cameras benefit from this timesaving feature. Fine-tuning of individual cameras can then be done quickly and
comfortably via the one-click Web GUI.
7
•
Optimal Support For Any Network: Individual IP Adress, NFS, SMB,
Bonjour
QStor QMX supports all common network protocols: Scanning the network is done via
Bonjour, writing is done via NFS and reading is done via SMB. Each video camera
receives its own IP address in the network and is assigned its very own NFS share.
Alternatively, the QStor QMX can also be accessed by the Mobotix management
software.
•
Two Product Lines For Each Situation: Standard und Pro
The QStor QMX product family consists of two product lines, ‚Standard‘ and ‚Pro‘, and
features 4 to 12 hard disks with 500 GB, 1 TB or 2 TB each. Server appliances in the
‚Standard‘ line are intended for small deployments, take up very little space and
feature a software RAID. The total number of cameras is intentionally limited in the
‚Standard‘ line, so that ‚Standard‘ server appliances will perform exactly as intended
and performance bottlenecks can be avoided.
The ‚Pro‘ line, however, is best suited for rack mount applications and takes up 1U or
2U, depending on the model. In contrast to the ‚Standard‘ line, the number of
cameras that can be attached is unlimited. In addition, the ‚Pro‘ line features highend, server-grade computer hardware: Redundant power supplies and a hardware
RAID controller card with a dedicated RAID chip, which supports several different
RAID levels. The ‚Pro‘ devices can also be cascaded and support ‚bonding‘, i.e. their
network ports can be tied together.
8
1.2. Technical Data
QStor QMX Standard
Product Line
Model
QStor QMX Standard
QMX 20 QMX 40 QMX 45
Form Factor
Cube
Cube
Cube
2
4
4
Number of
Harddisk
Capacity per
Harddisk
QMX 2085
1 U Rackmount
2 U Rackmount
4
4
8
40
40
500 GB, 1 TB oder 2 TB
Number of
Cameras
Supported
5
10
25
25
MD-RAID
RAID Type
Supported RAID
Level
0, 1, 5
0, 1, 5, 10
Network
Protocols
Network
Connection
Special Features
QMX 1040 QMX 1045
0, 1, 5, 6, 10
NFS, SMB, Bonjour
2x 1Gbit Ethernet
Extremely quiet due to fanless
operation
20“ Short Rack
QStor QMX Pro
Product Line
Model
Form Factor
Number of Harddisk
Capacity per Harddisk
Number of Cameras
Supported
RAID Type
Supported RAID Level
Network Protocols
Network Connection
Special Features
QStor QMX Pro
QMX 1040+
Short-Rackmount
(1 HE, 50 cm Tiefe)
4
QMX 2120+
QMX 2120 JBOD
Rackmount (2 HE)
12
500 GB, 1 TB oder 2 TB
unbegrenzt
Hardware-RAID
0, 1, 5, 6, 50, 60
JBOD
NFS, SMB, Bonjour
2x 1Gbit Ethernet
Redundantes Netzteil, Kaskadierbar, Bonding-fähig
9
Section 2: First Steps
QStor QMX and Mobotix cameras integrate seamlessly into a self-contained system. In this
system, the QStor QMX acts as the control center which controls all connected cameras.
2.1. Setting up and Connecting the QStor QMX
Please follow these five steps to correctly configure the system:
1. Put the QStor QMX and all cameras at their respective designated locations and
connect all devices to the building power supply, using the enclosed power plugs.
Depending on the camera model, it may alternatively be possible to supply power to
the camera via the network itself (PoE). Please refer to the camera manual about this.
2. Then connect all devices to the network. Attach a keyboard, a mouse and a monitor
to the QStor QMX. The respective connectors can be found at the rear of the server
appliance.
PS/2 connectors for mouse and keyboard are located at the very left side (1) and the
blue connector for a VGA monitor can be found at position (2), to the left of the two
Ethernet ports, which are located at the very right side of the connector panel.
Important: Connect the QStor QMX to the network via the left Ethernet port. It is
marked with a green dot. Connecting the left Ethernet port to the network is required
to be able to reach the QStor QMX via the network.
3. Connect the Mobotix cameras to your network. The QStor QMX as well as the
Mobotix cameras ship with IP addresses preconfigured to the ‚10.‘ network, which
should save you a lot of time. In most cases, it should not be necessary to change
network addresses.
Note: In order for all cameras to be found, Zeroconf (Bonjour) must be enabled on
each camera. After verifying this, please proceed with the configuration of the QStor
QMX.
10
4. After turning on the QStor QMX, its integrated console appears. It is used to configure
all important network settings for the appliance. The console always displays the
currently configured IP addresses for both network ports (1). Network settings can be
changed via the menu in the bottom half of the screen (2).
The QStor QMX defaults to the following IP address settings for its two network ports:
Port
ETH0 (left side, marked with a green dot)
ETH1 (right side)
IP Address Subnet Mask
10.10.10.10 255.0.0.0
10.10.10.11 255.0.0.0
5. After connecting all devices and configuring the network settings as described above,
you can launch the camera detection scan via the Web GUI wizard.
11
2.2. Initial Setup via the Web GUI
The Web GUI of the QStor QMX is used for the detailed system configuration. Cameras that
are connected to the network can be attached to the server appliance via a Web GUI wizard.
The Web GUI works on all major web browsers, for instance Microsoft Internet Explorer and
Mozilla Firefox. We recommend using the latter.
Logging into the System
Point your browser to the IP address of the QStor QMX that you have previously configured
via the VGA console screen. QStor QMX shows the following screen:
Click on the ‚Login‘ button to log on. For your initial Web GUI session, the defaults for user
name and password are:
User name:
admin
Password:
qmx
The Web GUI of the QStor QMX is split into two sections: At the left side of the screen, the
main menu appears, showing the following menu items: ‚Mobotix‘ - ‚System‘ – ‚Storage
Management‘ – ‚Access Control‘ – ‚Network‘
The contents of the currently selected submenu appear on the right side of the screen. How
12
to configure the cameras via the Web GUI is shown in the Quickstart Guide. Please consult
the User Manual for help with all other configuration actions.
Configuring a Swap Partition and a Network Share
Prior to setting up the cameras via the wizard, both a swap partition and a network share
should be configured. The start screen of the Web GUI will remind you that swap partition
and/or network share have not been configured yet.
Hint: Clicking on the word ‚here‘ in any of the reminder notices will redirect you directly to
the configuration screen for the swap partition (section 5.2.4.) and the network shares
(section 6.1.), respectively. Of course, both configuration screens can also be reached from
the main menu.
-
Configuring a network share: Click on the word ‚here‘ in the notice window.
Alternatively, click on ‚Network Share Administration‘ in the main menu and on ‚Create
New Network Share‘ in the submenu that appears. Configure a share name and its
size in Gigabytes. After clicking on ‚Create Network Share‘, QStor QMX will create
the share.
-
Configuring a swap partition: Click on the word ‚here‘ in the notice window.
Alternatively, click on ‚Basic System Settings‘ in the main menu and select the field
‚Swap Partition‘. In the next window, enter the size of the swap partition in
Megabytes. The size of the swap partition should be approximately 1.5 times the
RAM size, but not more than 2 GB. After clicking on ‚Create Swap Partition‘, QStor
QMX will create the swap partition.
13
Configuring Cameras with the Camera Wizard
Configuring new cameras can be easily done via the camera wizard. We will illustrate how
this is done on the following pages.
1. In the main menu, click on the menu item ‚Mobotix‘ and then on the item ‚MX Config‘.
The system now reads in the parameters of all connected cameras and displays them
in a convenient table. (During initial setup, however, there isn’t anything to display
yet.)
2. You can conveniently configure a new camera via the camera wizard, by clicking on
the button ‚Camera Wizard‘ in the ‚MX Config‘ window. After clicking on ‚Next‘, the
server begins to scan the network for newly added cameras. This operation may take
several minutes.
Please note: In order for the QStor QMX appliance to be able to interoperate with
Mobotix cameras, it needs to ‚get to know‘ each one and retrieve its settings. This is
done by adding cameras either manually, or automatically via the camera wizard. The
QStor QMX will not change camera settings, only retrieve them.
14
3. The wizard now displays a list of newly detected cameras. If you want to prevent a
camera from being imported, please deselect the check mark in the ‚Import‘ column
on the respective camera line. Once you are done with this, click on ‚Import Selected
Cameras‘.
4. In order to be able to configure the cameras, please provide the cameras‘
administration password on the next screen of the wizard. As noted in the dialog
window, all cameras will be configured via one and the same administration
password. (In case administration passwords were different among cameras, you
would have to configure each group of cameras that share the same password one
by one.) After entering the password, click on ‚Next‘.
15
5. The camera wizard allows you to reconfigure the IP address range of your cameras.
In this case, the wizard will assign a new IP address to each and every camera, not
just to the ones selected in the previous step, and reboot them. Click on ‚Next‘ to
configure new IP addresses. In case you do not want to change the IP address range,
click on ‚Skip‘.
If you clicked on ‚Next‘, please configure the IP address range and, optionally, a
gateway in the next window. Then click ‚Next‘ to proceed.
6. Now configure a suitable IP address and target network share for the camera
recording data. In case no network share has been configured yet, the field ,Target
Network Share‘ will be empty. You can create a network share by selecting the menu
item ‚Network Share Administration‘ in the main menu and then clicking on „Create
New Network Share‘.
After entering the IP address and the target network share, click on ‚Next‘ to proceed.
16
7. Do you want to configure the recording parameters of the cameras right here in the
wizard? If so, the wizard allows you to do that and you can now enter important
parameters such as image resolution, image quality, recording times and the
maximum recording size.
8. Depending on the scale of your camera deployment, it may take some time until the
wizard has transmitted all entered setup parameters to each and every device.
Hence, the second-to-final window of the wizard gives you the option whether you
want to be notified of configuration start and configuration end by email.
17
In order to enable that, enter the email settings that are valid within your network into
the respective entry fields, then click ‚Next‘. If you want to opt out of receiving email
notifications, click ‚Skip‘ instead.
9. In order for camera recordings to start and end at the precise time that has been
configured, the cameras need to receive their time information from the QStor QMX
appliance. If you want the storage server to provide the time to all cameras, and thus
operate completely synchronous with the cameras, click on ‚Yes‘ here.
10. Now the MX Config wizard has all necessary information to actually begin configuring
your cameras. As soon as this configuration has completed, you can list and inspect
your cameras in the Web GUI under menu item ‚MX Config‘. In case you have
configured email notification, you will also receive a status report by email at that
time.
You can modify camera settings at any time by clicking on the gear icon in column
‚Action‘. Column ‚Action‘ also allows you to do other things: Clicking on the ‚Play‘ icon
will show you the live feed of the camera in a new window and clicking on the red
circle will manually start recording. You can also delete a camera that is no longer
needed by clicking on the broom icon.
Once you have completed all steps of the configuration, QStor QMX will automatically
commence the recording operation by storing video data at the network share which
you have configured.
18
Section 3: The Web Interface
The Web interface that is integrated into the QStor QMX is the ‚command center‘ of the
appliance. Each and every system setting can be configured in detail here. One part of this
is, for instance, camera installation and configuration, which is discussed in section 2. The
web interface also allows configuration access to all settings that are relevant for a network
storage appliance, such as storage management, access control, network configuration and
querying system statistics as well as alert notices.
The web interface works with all current web browsers , including Microsoft Internet Explorer
and Mozilla Firefox. We recommend the latter.
3.1. Logging into the Web Interface
Point your browser to the IP address of the storage appliance that you have previously
configured on the VGA console. QStor QMX will show the login screen:
Click on the ‚Login‘ button to log on. Now, the Web interface asks for the user name and
password.
19
For your initial Web GUI session, the defaults for user name and password are:
User name:
admin
Password:
qmx
Pressing the ‚Enter‘ key or clicking on ‚OK‘ will log you on. The browser now displays the
main menu of the QStor QMX appliance. Here you can configure all system settings.
20
3.2. Menu Layout of the Web Interface
The Web GUI of the QStor QMX is split into two sections: At the left side of the screen, the
main menu appears. The contents of the currently selected submenu appear on the right side
of the screen.
After logging in, the web interface will always show a system information summary page. You
can access this summery page at any time via the menu ‚System‘, menu item ‚System
Information‘.
Note: After the initial logon, the system displays two messages, prompting you to configure
a swap partition and a network share. Both actions can be initiated by clicking on the word
‚here‘ in the respective message box. How to do this in detail is explained in Section 2 ‚First
Steps‘ and also in Section 5.2.4 ‚Setting Up a Swap Partition‘ and Section 6.1.4 ‚Creating a
Network Share‘, respectively.
21
All the functionality of the web interface is contained in the following five top level menus:
•
Mobotix: This menu allows you to administer the Mobotix cameras. You can add
new cameras via a wizard, change camera settings, remove unneeded cameras from
the camera list and even display the live video feed of each camera.
•
System: This is the menu for basic system settings of the QStor QMX. It allows you
to view system configuration, statistics and event logs. You can also shut down or
reboot the QStor QMX via this menu.
•
Storage Management: This menu is all about the hard disks of the QStor QMX:
You can create network shares, initialize hard disks, set the RAID level and manage
any supported hardware RAID controller.
•
Access Control: This menu presents all user management settings. Here you can
define which user belongs to which group and precisely who may access any given
network share.
•
Network: This menu allows you to configure all network-related system parameters.
If you are using a UPS (uninterruptible power supply) made by APC, you can also use
this menu to configure the interaction of the UPS with the QStor QMX.
22
Section 4: The Mobotix Menu
The ‚Mobotix‘ menu has a single, but rather important, submenu - ‚MX Config‘. It is used to
manage all Mobotix cameras that are connected to the QStor QMX. You can also
conveniently add new Mobotix cameras via a wizard.
In order for the QStor QMX appliance to be able to interoperate with Mobotix cameras, it
needs to ‚get to know‘ each one and retrieve its settings. This is done by adding cameras
either manually, or automatically via the camera wizard. The QStor QMX will not change
camera settings, only retrieve them.
If you have already installed a Mobotix camera as described in ‚Section 2 : First Steps‘, the
web interface will now list it. When more cameras are added, each of them gets a line of its
own.
The list has the following columns:
•
Name: The name of the Mobotix camera
•
IP address: The IP address of the Mobotix camera
•
Model: The detailed model designation of the Mobotix camera
•
Firmware: The firmware version of the Mobotix camera
•
Target network share: The network share that you have specified. The Mobotix
camera will store its video recordings there.
•
Protocol: The transmission protocol to be used
•
Status: The current device status of the Mobotix camera
•
Action: This column contains four icons that allow you to modify settings and trigger
actions of the Mobotix camera
23
4.1. Triggering Actions of Mobotix cameras
The column ‚Action‘ allows you to trigger actions for each Mobotix camera. The web interface
allows you to choose four actions:
•
Play back a live video feed: Click on the ‚Play‘ icon to display the current
camera video feed in a new window. Please note that the video feed will only work if
you have set up the network parameters of the camera correctly and completely.
Please consult sections 4.2 and 4.3 on how to add a new camera.
•
Start recording: Clicking the red circle will start recording the video feed of the
selected camera. Video data is stored at the specified network share.
•
Change settings: Click on the gear icon in the ‚Action‘ column and the web
interface will display a screen with detailed settings of the selected camera. You can
modify the name, the IP address, the user name and password, the network address,
the protocol and the target network share.
•
Remove camera: If you no longer want a camera as part of the system or want to
start to configure a camera from scratch, please click on the broom icon, which is the
right-most icon in the ‚Action‘ column. The selected camera will then be removed from
the list.
24
4.2. Adding a Mobotix-Kamera via the Camera Wizard
You can conveniently add a new camera via the camera wizard of the ‚Mobotix‘ menu. We
will now show you how.
1. Click on the ‚Camera Wizard‘ button. After clicking ‚Next‘, the server will scan the
network for newly added cameras. This action can take serveral minutes.
2. Newly added cameras are displayed in list form. If you do not want to add a camera
at this point, deselect the check mark in the ‚Import‘ column of the respective camera
line. Once you are done selecting and deselecting, click on ‚Import Selection‘ to
proceed.
3. To configure one or more cameras, enter the admin password of the selected
cameras on the next screen of the wizard. As noted in the dialog window, all selected
cameras will be configured using the very same admin password. In case the admin
passwords of cameras differ, the configuration has to be repeated separately for each
group of admin passwords. After entering the admin password, click on ‚Next‘.
25
4. The camera wizard allows you to reconfigure the IP address range of your cameras.
In this case, the wizard will assign a new IP address to each and every camera, not
just to the ones selected in the previous step, and reboot them. Click on ‚Next‘ to
configure new IP addresses. In case you do not want to change the IP address range,
click on ‚Skip‘.
If you clicked on ‚Next‘, please configure the IP address range and, optionally, a
gateway in the next window. Then click ‚Next‘ to proceed.
26
5. Now configure a suitable IP address and target network share for the camera
recording data. In case no network share has been configured yet, the field ,Target
Network Share‘ will be empty. You can create a network share by selecting the menu
item ‚Managing Network Shares‘ in the main menu and then clicking on „Create a
Network Share‘.
After entering the IP address and the target network share, click on ‚Next‘ to proceed.
6. Do you want to configure the recording parameters of the cameras right here in the
wizard? If so, the wizard allows you to do that and you can now enter important
parameters such as image resolution, image quality, recording times and the
maximum recording size.
27
7. Depending on the scale of your camera deployment, it may take quite some time until
the wizard has transmitted all entered setup parameters to each and every device.
Hence, the second-to-final window of the wizard gives you the option whether you
want to be notified of configuration start and configuration end by email.
In order to enable that, enter the email settings that are valid within your network into
the respective entry fields, then click ‚Next‘. If you want to opt out of receiving email
notifications, click ‚Skip‘ instead.
8. In order for camera recordings to start and end at the precise time that has been
configured, cameras need to receive their time information from the QStor QMX
appliance. If you want the storage server to provide the time to the cameras, and thus
operate completely synchronous with the cameras, click on ‚Yes‘ here.
Now the MX Config wizard has all necessary information to actually begin configuring
your cameras. As soon as this configuration has completed, you can list and inspect your
cameras in the Web GUI under menu item ‚MX Config‘. In case you have configured
email notification, you will also receive a status report by email at that time.
28
4.3. Add Mobotix Cameras Manually
You can add a new camery manually in the menu ‚Mobotix’. Simply click on the item ‚add
camera manually’ and follow the steps described below.
1. Provide the IP address of the Mobotix camera as well as the administrator account
name and password. The account can be any user with administrative rights. The
admin passwort is always identical: ’meinsm’.
2. QStor QMX will now search the network fort he Mobotix camera and will then show
you the success screen shown below.
If you want to edit the camera settings, please click on ’configure’. Otherwise you can close
the manual installation.
3. In the following screen you can change the name, IP address, administrator account data,
network address, network protocol and the target share for the Mobotix camera.
29
Note:
•
Select port 443 if you want to run an encrypted connection.
•
The administrator password for the Mobotix camera is always ’meinsm’.
After having made the configuration changes click on ’save settings and restart camera’.
Depending on the camera model it may take up to a minute until the camera will have
restarted and be available in the overview. Click on ’back’ to return to the MX configuration
menu.
30
Section 5: The System Menu
Via the ‚System‘ menu you can view and modify all basic system settings of the QStor QMX.
The menu allows you to view the system configuration, statistics and event logs. You can
also shut down or reboot the QStor QMX via this menu.
5.1. System Information
The ‚System Information‘ menu keeps you informed about the current status of all hardware
and network components of the QStor QMX. This menu is also automatically displayed upon
logging into the Web GUI.
For ease of use, the ‚System Information‘ menu is split into two sections: ‚System
information‘ and ‚Network information‘.
•
Section ‚System Information‘ provides the status for CPU load, RAID system and
system memory. Additionally, the QStor QMX displays the uptime, the system name
and the current time.
Please note: After the first power-up and initial login, the start screen of the Web
GUI will remind you that neither a swap partition nor network shares have been
configured yet. Clicking on the word ‚here‘ in any of the reminder notices will redirect
you directly to the configuration screen for the swap partition (Section 5.2.4.) and the
network shares (Section 6.1.), respectively. Of course, both configuration screens can
also be reached from the main menu.
•
In section ‚Network Information‘ the Web GUI will display the current IP address
for both network ports of the QStor QMX, as well as the gateway address and the
volume of received and transmitted data (in MB).
•
The final section on this page lists the network shares, i.e. all currently available
storage directories that can be used over the network. In case no network shares
have been configured yet, this section will not be displayed. Please consult section
6.1. for information on how to create network shares and how to grant access
permissions for them.
31
5.2. Basic Settings
As suggested by its name, the ‚Basic settings‘ menu allows you to view and change basic
system settings of the QStor QMX: The time, the hostname by which the QStor QMX will be
seen in the network, as well as settings for password, swap partition and character set. By
clicking on a menu item, the respective submenu will be displayed.
5.2.1. Setting the Time
The submenu ‚Time‘ allows you to set the system time of the QStor QMX, choose the time
zone and optionally specify a NTP server. In order to change a setting, click on the respective
menu item.
•
Changing date / time: Enter time and date into the entry fields and confirm by
clicking on ‚Save‘. Clicking on ‚Back‘ instead will abandon any changes and get you
back to the ‚Time‘ menu.
32
•
Time zone: Set the time zone of the system by clicking on the drop-down box and
selecting the appropriate time zone. Confirm your selection by clicking on ‚Save‘.
•
Time synchronization via NTP: This menu item allows you to specify a server for time
synchronization, which will keep the system time of the QStor QMX synchronized
down to about one millisecond. In order to activate time synchronization, put a check
mark into the ‚Use time synchronization‘ checkbox and enter the server name or IP
address of a NTP server into the input field. The QStor QMX will default to a NTP
server and you may opt to keep it or change it. In the latter case, enter the server
name or IP address of the NTP server of your choice into the input field. By clicking
on the ‚Synchronize now‘ button, you can immediately synchronize the QStor QMX
server’s time. Afterwards, click on ‚Save‘ to save your settings.
5.2.2. Setting the Hostname
Here you can set the hostname of the QStor QMX. In the network, your video storage
appliance will subsequently appear with this name. Enter the host name into the input field
‚Hostname‘ and optionally add a comment in the ‚Description‘ field. By clicking on the ‚Save
Changes‘ button, your new settings will be stored.
33
5.2.3. Changing Passwords
This menu allows you to change the password for the current user account as well as
passwords for other users. Please see ‚section 7.2. Users and Groups‘ for information on
how to administer existing user accounts and how to create new ones.
The field ‚User name‘ shows the user name of the current user who is logged on in the Web
GUI. In case you want to change the password of a different user, please change the user
name in the input field accordingly. Enter the current password of the user into the ‚Current
password‘ field and then the new password into the ‚New password‘ and ‚Confirm new
password‘ fields. By clicking on the ‚Change password‘ button, the new password will be
saved.
34
5.2.4. Setting up a Swap Partition
For the QStor QMX to run at optimal performance, it is essential to specify a swap partition.
This menu allows you to set up a swap partition by entering the size of the swap partition in
Megabytes.
Note: The size of the swap partition should be approximately 1.5 times the RAM size, but
not more than 2 GB.
After entering the size of the swap partition and clicking on ‚Create Swap Partition‘, the QStor
QMX appliance will create the swap partition. This action will only take an instant and you
can continue working in the Web GUI immediately.
35
5.2.5. Selecting the Character Set
This menu determines the character set that is used for network shares. For international
customers, ‚UTF-8 (international)‘ is recommended. Customers in Germany may keep ‚ISO8859-15‘ instead, which is the factory default. By clicking on ‚Save‘, the setting will be stored.
5.3. System Administration
This menu allows you to configure all basic system parameters of the QStor QMX. This
includes activation and management of licences and a command console. You can also back
up the system configuration, restore the system configuration from a previous backup and
view hardware information. The ‚System Administration‘ menu also allows you to power off
and reboot the QStor QMX.
5.3.1. Hardware Information
The ‚Hardware Information‘ menu gives you an overview over the hardware components
inside the QStor QMX. Apart from system components such as CPU, motherboard, RAM and
network controllers as well as harddisk controllers, detailed information about the attached
harddisks is also available here.
Section ‚Connected harddisks‘ of the Web GUI provides a plethora of information about the
internal harddisks, for instance harddisk number, model name, serial number and capacity. In
addition to that you can see which logical RAID drive a particular physical harddisk belongs
to, whether or not the harddisk has been initialized and what the S.M.A.R.T. status and the
temperature of the harddisk is.
36
Hint: You can get even more detailed information about the S.M.A.R.T. status by first
clicking on ‚Hard Disks‘ and then on ‚S.M.A.R.T.‘ in the ‚Storage Management‘ submenu.
5.3.2. Activation
This menu enables you to activate the QStor QMX. Please note that the QStor QMX server
appliance is already activated when you receive it. Another activation would only be
necessary as part of restoring the system, when instructed to do so by Exus Technologies
customer support.
37
5.3.3. Additional Licenses
This menu allows you to add additional licenses to the QStor QMX. Please note that the
QStor QMX server appliance already comes with all necessary licences when you receive it.
Adding licenses would only be necessary as part of restoring the system, when instructed to
do so by Exus Technologies customer support.
5.3.4. Command Console
You can directly modify system parameters of the QStor QMX via the command line console.
Caution: This menu is labeled ‚Debug‘ for a reason. Please use this console only when
instructed by Exus Technology tech support. Trying to input commands on your own may be
detrimental to the operation of the QStor QMX and may even damage it or render it
unusable.
38
5.3.5. Backing Up System Settings
This menu allows you to back up the system settings of the QStor QMX and download a
copy via your web browser.
Here’s how its done: First click on the button ‚ Create backup file‘. The QStor QMX server
appliance generates a backup file with all system settings and lets you download this file.
This file is always named ‚serversettings.tar.gz‘ and is in the GZIP format. Clicking on the file
name will start the download process.
5.3.6. Restoring System Settings
You can restore a previously saved copy of the system settings at any time. In order to do
this, first copy the backup file into the root directory (home directory) of any network share.
The QStor QMX will automatically recognize this file and display it in the drop-down box. By
clicking on the ‚Select network share‘ button, you can select a backup file and thus restore
previously saved system settings.
39
5.3.7. Updating the System
The QStor QMX system is continuously being improved in order to provide the best
performance and customer experience. Such improvements are bundled into firmware
updates by the Exus Technology development team and you can download and install them
via this menu.
•
Search: The easiest way to update the firmware is by automatic search. By clicking
on the ‚Search‘ button, the system will establish an internet connection to a Exus
Technology server and check whether more recent firmware, than the one that is
installed on your server appliance, is available.
In case your site uses a proxy to connect to the internet, click on the ‚Yes‘ button and
specify the site-specific proxy settings, as shown below. After clicking on ‚Save‘, the
specified proxy will be used in order to find a firmware update. In case there is a more
recent firmware version available, it will be automatically downloaded onto the server
appliance.
•
Manual installation: In case you already have a file containing a firmware update,
40
Click on ‚Install manually‘ on the first screen. Copy the file containing the firmware
update into the root directory of any network share. The server appliance will
automatically recognize the firmware upgrade and display it in the menu. After
clicking on ‚Select network share‘ and a final confirmation, the firmware update will be
installed.
5.3.8. Shutting Down the Server
This menu allows you to shut down the QStor QMX. Just click on ‚Shut down‘. ‚Cancel‘ will
return you to the menu ‚System‘. This menu offers the same functionality as the menu ‚Shut
Down the Server‘ that is reached via ‚System‘ – ‚Shutdown / Reboot‘ (see section 5.7.1.)
5.3.9. Rebooting the Server
This menu allows you to reboot the QStor QMX. Just click on ‚Reboot‘. ‚Cancel‘ will return
you to the menu ‚System‘. This menu offers the same functionality as the menu ‚Reboot the
Server‘ that is reached via ‚System‘ – ‚Shutdown / Reboot‘ (see section 5.7.1.).
5.4. Event Logs
System activity always leaves a trail: The QStor QMX appliance logs all events and
categorizes them for the sake of clarity.
5.4.1. System Log
The system log contains a comprehensive trail of system events. The most recent event is
displayed on top. If you do not want to retain the current log, you can erase it by clicking on
‚Erase all log entries‘.
41
5.4.2. Boot Log
You can view the boot log of the underlying Linux system via this menu. Should you no
longer need the current boot log, you can erase it by clicking on ‚Delete all log entries‘.
42
5.4.3. RAID Log
The QStor QMX logs all events that are related to the RAID system in the ‚RAID log‘. Should
you no longer need the current RAID log, you can erase it by clicking on ‚Delete all log
entries‘.
5.4.4. UPS Log
In case you are using the QStor QMX in tandem with a uninterruptible power supply (UPS),
you can view related events via the ‚UPS log‘ menu. Should you no longer need the current
UPS log, you can erase it by clicking on ‚Delete all log entries‘.
Please note: In case error messages appear, this may be an indication that either there is
no UPS system or that the UPS system has not been configured correctly.
5.4.5. Log Files for Technical Support
Should your QStor QMX experience technical issues, this menu may help in resolving them.
Clicking on ‚Generate Log Files‘ will generate a snapshot of all system settings and log files.
You may be asked to email this file to Exus Technology technical support.
43
44
The file that is generated is always named ‚logfiles.tar.gz‘ and its file format is GZIP. Clicking
on the file name will download this log file to your PC via your browser.
5.5. System Services
In the menu ‚System Services‘ you can configure system services (demons) of the QStor
QMX. They can be grouped into four categories: Email notification, Windows File Sharing
(via SMB/CIFS), the NFS (network file system) server and a service for receiving and
reacting to notifications from an UPS.
When you enter this menu, you can see at one glance which of the four system services are
active. An active system service will have the word ‚running‘ next to it, in green. An inactive
system service will instead have the word ‚stopped‘ next to it, in red.
You can configure detailed settings for each system service via the button ‚Configure‘.
45
5.5.1. Email Notification
In order to facilitate trouble-free and reliable operation, the QStor QMX is continuously
monitoring the most important system parameters and can optionally email you periodic
reports about the system status. Two reports are available: A report about the current RAID
status messages and a report about synchronization activity.
Here’s how to set this up: In the upper half of the input screen, enter the site-specific
parameters for an email connection, namely the IP address of the SMTP server, the sender
name and up to two recipients, who will subsequently receive status reports by email. In case
your SMTP server requires authentication, enable authentication via the the check box
‚SMTP authentication‘ and enter your user name and password.
Now select via check boxes whether the emails should contain status messages about the
RAID (RAID Messages) and/or status messages about synchronisation activity (Sync
Report).
Tip: In order to test the SMTP settings, you can send a test email. To do that, click on the
button ‚Send Test Email‘.
46
5.5.2. Windows File Sharing
This menu allows you to configure the Windows File Sharing service of the QStor QMX
appliance. You can stop a running file sharing service as well as start a stopped one. In order
to start or stop the service, click on the notification message – if the file sharing service is
running, the message ‚File Sharing service is running. Click here to stop it.‘ will be displayed.
Please note: After a server boot or reboot, you have to manually reactivate the file sharing
service.
The File Sharing service supports the following optional functionality, which can be enabled
or disabled via the respective drop-down box:
•
NetBIOS Support
•
Master Browser
When you click on ‚Save‘, the QStor QMX appliance will apply and save your settings.
47
5.5.3. NFS Server
This menu allows you to start or stop the NFS server. Simply click on the word ‚here‘ in the
status message to do that.
5.5.4. APC UPS Service
This menu allows you to start or stop the service that receives notifications from an APC
UPS. Simply click on the word ‚here‘ in the status message to do that.
5.6. Statistics
You can view up-to-date statistics about server and network utilization in this menu. In
contrast to the overview that is presented in ‚System Information‘, the information here is
more detailed and graphical.
48
5.6.1. Network Statistics
Network statistics keep you informed of minimum, average and maximum network utilization,
separately for each network port.
49
5.6.2. Server Load
This menu allows you to keep informed about various server load-related parameters. The
graph shows RAM and swap space utilization as well as the load average.
5.7. Shutting Down / Rebooting
This ‚System‘ menu item allows you to shut down or reboot the QStor QMX and optionally
specify a daily shutdown time.
5.7.1. Shutting Down the Server
This menu allows you to shut down the QStor QMX. To do this, click on ‚Shut down‘. To
abort, click on ‚Abort‘. This menu matches the menu ‚Shut Down the Server‘ that can be
reached via the menus ‚System‘ – ‚System Administration‘ (see section 5.3.8.)
50
5.7.2. Rebooting the Server
This menu allows you to reboot the QStor QMX. To do this, click on ‚Reboot‘. To abort, click
on ‚Abort‘. This menu matches the menu ‚Reboot the Server‘ that can be reached via the
menus ‚System‘ – ‚System Administration‘ (see section 5.3.9.)
5.7.3. Configuring Automatic Shutdown
Instead of manually shutting down the QStor QMX, you can configure a daily shutdown time
in this menu. This is done by checking the check box ‚Enable‘ and selecting the desired
shutdown time via the hour and minute drop-down boxes. When done, click on the ‚Save‘
button.
51
Section 6: Storage Management Menu
Menu item ‚Storage Management‘ is all about the internal hard disks of the QStor QMX: You
can set up network shares, initialize hard disks, set the RAID level and manage any
supported RAID controller.
6.1. Managing Network Shares
The menu ‚Manage Network Shares‘ is the command center for network shares. You can set
up every detail via the menus depicted below.
6.1.1. Network Shares
The submenu ‚Network shares‘ displays all currently active network shares in detail. Share
name, maximum size, currently used and still available storage space are displayed, also as
a percentage.
52
6.1.2. Network Shares Currently In Use
Which Windows computer is currently using which QStor QMX network share? This menu of
the Web GUI answers this question by displaying the currently active connections.
Note: This list only shows Windows connections (SMB/CIFS).
6.1.3. Selecting the Logical Drive For Network Shares
Here you specify which logical RAID drive will be used for network shares. Click on the dropdown box and select the logical drive of your choice. Clicking on ‚Select‘ will save this setting.
Note: In case the QStor QMX has only a single logical RAID disk, for instance a single
RAID 6 array as depicted in the screen shot below, only this particular logical disk can be
selected for network shares.
53
6.1.4. Creating a Network Share
This menu allows you to create a new network share using just a few screen entries and
mouse clicks. First, choose a name for the network share that is suitable and self
explanatory. Then designate the size of the network share in GB in the input field ‚Size in
Gigabytes‘ – the Web GUI will display the maximum available size as a reference. Choose a
suitable size and then create the network share by clicking on ‚Create network share‘.
The QStor QMX server appliance acknowledges the successful creation of the network share
and offers you to create another network share. To create another network share, click on
‚Create another network share‘ and proceed as discussed above. When you are done
creating network shares, click on ‚Back‘ to return to the ‚Manage Network Shares‘ menu.
54
6.1.5. Modifying Network Shares
Occasionally it may be necessary to modify the name of a network share and/or the assigned
storage capacity. You can make both of these modifications in this menu. First select the
network share you want to modify and click on ‚Select‘.
After selecting the network share, you can now make modifications. You can modify the
name of the network share, the description and/or assign a new size in MB. Finally, apply
and save your modifications by clicking on ‚Modify network share‘.
Note: You may only increase the size of a network share, not decrease it.
55
6.1.6. Hiding a Network Share (Hidden from Windows Network
Discovery)
This menu allows you to hide and unhide a QStor QMX network share for Windows. Select
the network share you want to hide or unhide and click on ‚Select‘.
Note: The selection box will display all network shares, even the ones that are currently
marked as hidden.
On the next screen, the Web GUI displays whether the selected network share is hidden or
not. Depending on the current status, you now have the option to hide a visible share or to
unhide a share that is currently hidden.
56
After that the network share selection box is displayed once again – this time, however, the
change you just made is highlighted in bold.
Now you can hide or unhide more network shares by clicking on ‚Select‘ or return to the
‚Mamage Network Shares‘ menu by clicking ‚Back‘.
6.1.7. Removing a Network Share
In order to remove a network share that is no longer needed, select the submenu ‚Remove a
Network Share‘ from the menu ‚Network Share Administration‘. In the submenu, select the
network share you want to remove and click on ‚Remove‘ to proceed. After acknowledging a
confirmation screen, the network share will be removed for good.
57
6.2. Hard Disks
The menu item ‚Hard Disks‘ in the Web GUI is the command center for the physical hard
disks of the QStor QMX server appliance. Here you can view information about the hard
disks, assess their S.M.A.R.T. health situation, add new hard disks and logically remove hard
disks.
6.2.1. Hard Disk Information
Section ‚Hard disk information‘ of the Web GUI displays a plethora of information about the
internal hard disks, including hard disk device code, model, serial number and size. You can
also view which RAID each hard disk belongs to and whether or not it has been initialized
yet. The S.M.A.R.T. status and temperature of each hard disk is also displayed.
58
6.2.2. S.M.A.R.T.
S.M.A.R.T. (Self Analysis And Reporting Technology) is a built-in tool for the self-assessment
of hard disks which, among other things, logs read errors and the total power on time. Menu
item ‚S.M.A.R.T.‘ facilitates displaying detailed S.M.A.R.T. data for each individual hard disk.
After entering the ‚S.M.A.R.T.‘
submenu, click on the hard disk you are interested in. In
the right section of the screen, S.M.A.R.T. parameters will be displayed. By clicking on a
different hard disk, the S.M.A.R.T. parameters of that other hard disk will be displayed.
6.2.3. Initializing a Hard Disk
You can initialize additional hard disks in this menu. Please note, that typically this would only
be done when restoring the system after a system failure and after being instructed to do so
by Exus Technologies customer support.
6.2.4. Deactivating a Hard Disk
You can deactivate hard disks in this menu. Please note, that typically this would only be
done when restoring the system after a system failure and after being instructed to do so by
Exus Technologies customer support.
59
6.3. Software RAID
It is commonly assumed that a software RAID suffers from poor performance and a hardware
RAID can run rings around it, performance-wise. However, this notion is proving to be more
and more outdated in modern servers, as CPU performance has made great gains in recent
years. Nowadays, aided by multi-core CPUs, a software RAID can actually keep up with a
hardware RAID.
The fact that a software RAID does not have a ‚Battery Backup Unit‘ (BBU) is not necessarily
a drawback, as the QStor QMX can be paired with a UPS (uninterruptible power supply) to
make up for that. A software RAID is also easier to create and more cost effective. QStor
QMX appliances rely on Linux-based mdRAID for their implementation of a fast software
RAID and all models support RAID levels 0, 1 and 5. Models QMX 1040 and QMX 2080
additionally offer RAID 6. Both members of the ‚Pro‘ product line, QMX 1040+ and QMX
2120+, also support RAID levels 50 and 60.
The ‚Pro‘ line of QStor QMX server appliances features a hardware RAID and will perform
better when subjected to a high I/O load, as is the case when dozens of Mobotix cameras
are feeding video data simultaneously. Other advantages are an even higher reliability and
easier hard disk replacement (hot swap capability).
60
6.3.1. RAID Status
In order to view the current status of the software RAID, select menu item ‚RAID Status‘. You
will now see all important status data of the configured RAID sets, giving you an overview of
the current configuration. The RAID status is displayed in traffic light colors – a RAID with
perfect status is marked optimal. You can also see the ‚hot spares‘ that are assigned to
each RAID (see section 6.3.4.)
Hint: If the RAID status of a software RAID is not optimal, please check the S.M.A.R.T.
parameters of all component hard disks of this RAID. You can display the S.M.A.R.T.
parameters by navigating to ‚Storage Management‘ – ‚Hard Disks‘ – ‚S.M.A.R.T.‘
By clicking on ‚Back‘, you can return to the ‚RAID Management‘ menu.
61
6.3.2. Creating a RAID
In order to create a new software RAID, navigate from menu ‚Storage Management‘ to
submenu ‚Software RAID‘ and then click on ‚Create a RAID‘.
On the first screen, select the hard disks that you want to become part of the new software
RAID. This is done by clicking on the check box left of the hard disk description. Then click
on ‚Next‘ to select the RAID level.
Pick a name for the new software RAID and select the RAID level. After clicking on ‚Next‘,
the software RAID will be created.
Please note: RAID 0 and RAID 1 require a minimum of two hard disks, the minimum for
RAID 5 is three hard disks and RAID levels 6 and 10 require four harddisks.
62
6.3.3. Deleting a RAID
This menu allows you to delete a software RAID. Please keep in mind that once a RAID has
been deleted, all data on it, if any, will be irrevocably lost. Please use this menu with caution
– the Web GUI will display a warning in red.
Note: If network shares or a swap partition are using the RAID drive you are about to
delete, the Web GUI will display an error message. Prior to deleting a RAID drive, you need
to make sure that the swap partition uses a different RAID drive. You also need to make sure
that the network shares that use this RAID drive are either removed or modified to use a
different RAID drive.
In order to delete a RAID drive, select it via the radio button next to it, then click on ‚Delete‘.
6.3.4. Designating Spare Drives (Hot Spares) / Repairing a RAID
The QStor QMX server appliance offers an easy way to designate one or more hard disks as
spare drives for an existing RAID. In case a RAID member disk fails, the QStor QMX can
then automatically replace the failed drive with the spare drive and thus minimize the time
that the RAID is running in degraded mode.
First, select one or more hard disks that you want to designate as hot spares. Navigate from
the ‚Spare Drives / Repair RAID‘ menu to the ‚Designate Spare Drives (Hot Spares)‘
submenu. The Web GUI will display all available hard disks, i.e. the ones that are not
assigned to any software RAID. Now, select all the hard disks that you want to designate as
hot spares and click on ‚Next‘.
63
Please note: All data on the selected hard disks will be erased.
The second step is assigning the newly selected hot spare(s) to a RAID. This is done by
clicking on the RAID name.
The selected hard disks are now assigned to and reserved for this particular RAID and will
be used as spare drives as soon as a component hard disk of this RAID fails or is removed.
Hint: When you view the RAID status (by navigating from the main menu to ‚Software RAID‘
and then ‚RAID Status‘), you will immediatly see the hot spares that are assigned to each
RAID. The spare disks are marked with the moniker ‚spare‘.
64
If you want to unassign a hot spare disk, navigate from menu ‚Spare Drives (Hot Spares) /
Repair a RAID‘ to the submenu ‚Unassign a hot spare from a RAID‘. A list of all hot spares
will be displayed, displaying the RAID it is assigned to for each of them.
Select the hard disk that you want to unassign from the list and click on ‚Next‘ – the hot spare
will be unassigned and you can now find another use for it – as a member disk of a to-becreated RAID or as a hot spare disk of a another RAID, for instance.
6.3.5. Expanding a RAID
You can expand a RAID in this menu. Please note that a RAID can only be expanded, but
cannot be shrunk.
6.4. Hardware RAID Manager
Menu item „Hardware RAID Manager‘ allows you to manage all supported hardware RAID
controllers. Please refer to the Exus website for a list of supported controllers.
Note: You can only use the Hardware RAID Manager with a QStor QMX appliance that is
part of the ‚Pro‘ product line, because only models in the ‚Pro‘ product line are equipped with
a hardware RAID controller. How to manage a hardware RAID exceeds the scope of this
user manual and is explained in detail in a separate manual.
65
Section 7: Access Control Menu
In order for users to be able to access a network share, you first need to grant them
appropriate access permissions. Only then do users either have full access to the network
share, i.e. may read from it and write to it, or have read-only access. Menu item „Access
Control“ (refer to section 7.1.) allows you to manage which local user or domain user may
use which network share.
Users and groups are managed in menu ‚Users and Groups‘ (refer to section 7.2.). In this
menu, you can add, modify or remove user accounts and also define groups, to which some
or all users belong.
7.1. Access Control
In the user management section of the Web GUI, you can manage who may access a given
network share with what kind of permissions. To do that, you can add, modify or remove user
accounts in menu ‚User Management‘. In menu ‚Local Group Management ‘, you can assign
users to groups and also unassign them.
7.1.1. Displaying or Modifying Local Users / Groups Who May
Access a Network Share
In this menu, you can manage which local users and groups may access which network
share. First, select the network share, whose users and/or groups you want to display or
modify, from a list and click on ‚Next‘.
66
Now assign which local users and groups will have access to the network share. For
individual users, click on a user name listed below ‚Local Users‘ in the left window. For all
users, select ‚@users‘ below ‚Local Groups‘ – this predefined group contains all users. You
can grant the guest user access by selecting the user ‚guest‘.
Tip: In case you have trouble finding a particular user in the list, enter his or her name into
the input field at the very bottom and click on ‚Find‘.
Then, use the selection menu in the middle of the screen to specify which access permission
the previously selected user(s) or group(s) should get. The Web GUI allows you to choose
one of two kinds of access permissions:
•
Full access: The user(s) may read and write to the network share and modify files.
•
Read-only access: The user(s) may only read, but neither write nor modify files on a
network share.
After specifying access permissions, add the previously selected user to the network share
by clicking on the ‚Add‘ button. Irrespective of the access permissions users have or have not
been granted, the administrator always has full access to each and every network share and
thus appears in the access control list by default.
You can add more users and/or groups to a network share in the same way. In order to
revoke access to a network share for a user or a group, click on the user or group listed
below the network share and apply the change by clicking on ‚Remove‘.
67
7.1.2. Displaying or Modifying Domain Users / Groups Who May
Access a Network Share
In this menu, you can manage which domain users and groups may access which network
share. First, select the network share, whose users and/or groups you want to display or
modify, from a list and click on ‚Next‘.
Now assign which domain users and groups will have access to the network share. For
individual domain users, click on a user name listed below ‚Domain Users‘ in the left window.
If you want to select a group of domain users, i.e. a domain group, click on the domain group
listed below ‚Domain Groups‘.
Hint: In case you have trouble finding a particular domain user in the list, enter his or her
name into the input field at the very bottom and click on ‚Find‘.
Then, use the selection menu in the middle of the screen to specify which access permission
the previously selected user(s) or group(s) should get. The Web GUI allows you to choose
one of two kinds of access permissions:
•
Full access: The user(s) may read and write to the network share and modify files.
•
Read-only access: The user(s) may only read, but neither write nor modify files in a
network share.
68
After specifying access permissions, add the previously selected user or group to the
network share by clicking on the ‚Add‘ button. Irrespective of the access permissions users
have or have not been granted, the administrator always has full access to each and every
network share and thus appears in the access control list by default.
You can add more domain users and/or domain groups to a network share in the same way.
In order to revoke access to a network share for a user or a group, click on the user or group
listed below the network share and apply the change by clicking on ‚Remove‘.
7.2. Users and Groups
The menu ‚Users and Groups‘ allows you to set up user accounts and define groups, to
which users can belong.
7.2.1. User Administration
The Web GUI of the QStor QMX differentiates between two types of users:
•
User type ‚admin‘ has full access to all setup parameters of the QStor QMX. Only
‚admin‘ users may add new users, for instance. The user account which you are using
to set up and configure the QStor QMX is an ‚admin‘ user.
69
•
Users belonging to user type ‚user‘ are local users of the video storage appliance and
can use network shares according to the permissions they have been granted by the
administrator.
7.2.1.1. Displaying Local Users
This menu displays all local users. One line per user is displayed, containing the login name,
the full name and the unique identifier (UID) of the user.
7.2.1.2. Displaying Currently Logged On Users
The submenu ‚Currently Logged On Users‘ allows you to display a list of users who are
currently logged on. Please note that only users who are using Windows File Sharing
(SMB/CIFS) will be displayed.
7.2.1.3. Creating a New Local User
In order to create a new local user, navigate from menu ‚Access Control‘ to ‚Users and
Groups‘ – ‚User Management‘ – ‚Create New Local User‘.
Enter the login name and password into the input screen. By default, the new user will be a
member of the group ‚@users‘. In case the user should also belong to another group, open
the drop-down box at the bottom and select the appropriate group name.
70
While login name and password are required, two other fields are optional. The unique
identifier (UID) will be suggested by the Web GUI and you can typically just leave it as
suggested. For later reference, it is, however, advisible to enter the full name of each user in
the ‚Full Name‘ field. This may be of help at a later time and avoid name mixups.
When you have entered everything, click on ‚Create User‘ and the Web GUI will create the
local user. After that, you can create more users, if desired.
7.2.1.4. Removing a Local User
In order to remove a local user account from the appliance, navigate to the submenu
‚Remove Local User‘. The Web GUI will display a list of all user accounts and display
parameters such as login name, full name and the unique identifier (UID).
By clicking on the broom icon on the right, the user account will be removed.
Note: Alternatively, you can delete a user from the submenu ‚Group Management‘ (refer to
section 7.2.2.4.)
71
7.2.1.5. Adding Users to a Group / Removing Users from a
Group
The Web GUI makes it easy to manage membership of a user in one or more groups. First
navigate from ‚Access Control‘ to ‚Users and Groups‘ – ‚User Management‘ – ‚Add Users to a
Group / Remove Users From a Group‘.
Note: You can also manage group membership in the submenu ‚Group Management‘ (refer
to section 7.2.2.2.)
First, select a user and click on ‚Select‘.
The Web GUI now lists all groups that have been configured on the appliance. (Please refer
to section 7.2.2. to learn how to create a group.) Now, assign group membership for the
selected user by clicking on the check box left of a group‘s name. (You may click on multiple
check boxes, because a user may belong to multiple groups.) Then, save the group
membership assignment by clicking on ‚Save‘.
72
7.2.2. Local Group Administration
In der Gruppenverwaltung legen Sie neue Gruppen an und verwalten bestehende Gruppen.
Außerdem können Sie dort Benutzer einer bestimmten Gruppe zuweisen.
Here you can create new groups and manage existing groups. You can also assign users to
a group.
7.2.2.1. Displaying Local Groups
This menu displays all local groups on the appliance in list form. Each line shows the group
name and the group ID (GID).
7.2.2.2. Adding Users to a Group / Removing Users from a
Group
The Web GUI makes it easy to manage membership of a user in one or more groups. First
navigate from menu ‚Access Control‘ to ‚Users and Groups‘ – ‚User Management‘ – ‚Add
Users to a Group / Remove Users From a Group‘
Note: You can also manage group membership in the submenu ‚Group Management‘ (refer
to section 7.2.1.5.)
First, select a user and click on ‚Select‘.
73
The Web GUI now lists all groups that have been configured on the appliance. (Please refer
to section 7.2.2. to learn how to create a group.) Now, assign group membership for the
selected user by clicking on the check box left of a group‘s name. (You may click on multiple
check boxes, because a user may belong to multiple groups.) Then, save the group
membership assignment by clicking on ‚Save‘.
7.2.2.3. Creating a New Local Group
To create a new group, navigate from menu ‚Access Control‘ to ‚Users and Groups‘ –
‚Manage Local Groups‘ – ‚Create a New Local Group‘
Enter the group name into the input field. Optionally, a unique group ID (GID) may be
entered. However, the Web GUI will show a default GID. Click on the ‚Create Group‘ button
to create the group on the server appliance.
74
7.2.2.4. Removing a Local User
To remove a local user from the appliance, navigate to the submenu ‚Remove a Local User‘.
The Web GUI displays a list of all user accounts, one per line. Each line shows the login
name, the full name and the user ID (UID).
In order to remove a user account, click on the broom icon at the very right of the line.
Hint: You can also remove a user via the submenu ‚User Management‘ (refer to section
7.2.1.4.)
7.2.2.5. Removing a Local Group
If you want to remove a local group from the appliance, navigate to the submenu ‚Removing
a Local Group‘. The Web GUI displays a list of all local groups.
In order to remove a group, select the radio button to the left of the group and then click on
‚Remove‘.
75
Section 8: Network
8.1. Network
8.1.1. Network Status
This menu shows an overview of the QStor QMX server’s current network settings. The Web
GUI displays the most important parameters of both Ethernet ports, eth0 and eth1. These
are: IP address, subnet mask, gateway and MAC address. You are also made aware whether
or not the ports are active and shown the link speed the port is set to.
8.1.2. Domain and Workgroup
The submenu ‚Domain and Workgroup‘, a submenu of the ‚Network‘ menu, displays settings
related to the Windows network environment the QStor QMX is part of, i.e. the current
domain or the current workgroup.
8.1.2.1. Domain Settings
The menu ‚Domain Settings‘ displays, which network hierachy the QStor QMX is connected
to. There are three possible settings:
•
The QStor QMX is part of a Workgroup: The Web GUI displays category
‚Workgroup‘ followed by the name of the workgroup.
•
The QStor QMX is part of an Active Directory Domain (Windows Server
2000/2003 or 2008): The Web GUI displays category ‚Active Directory Domain‘
followed by the domain name.
•
The QStor QMX is part of a legacy Windows Domain (Windows NT 4.0, Windows
2000 compatibility mode): The Web GUI displays the category ‚Windows Domain‘
followed by the domain name.
In the following screen shot, the QStor QMX belongs to a workgroup named ‚qmx‘:
76
8.1.2.2. Changing Domain or Workgroup
You can modify the domain settings of the QStor QMX by selecting the submenu ‚Change
Domain / Workgroup“ in the menu ‚Domain and Workgroup‘. At the top, the submenu will
show whether the QStor QMX is currently part of a Workgroup, an Active Directory Domain
or a Windows Domain and, if so, its name.
In order for the video storage appliance to join a Workgroup, Active Directory Domain or a
legacy Windows Domain, please select the respective category and then click on ‚Next‘.
Each of the three possible choices has its own configuration screen:
•
Workgroup: Enter the name of the Workgroup and a brief description and enable
the checkbox ‚Guest access allowed‘ in case you want to allow a guest user to have
access. Clicking on ‚Save‘ will make the QStor QMX join the Workgroup.
77
•
Active Directory Domain: An Active Directory Domain requires a few more
settings than a Workgroup. Enter the name of the Active Directory Domain, its
organizational unit (OU) and the user name and password of a user with domain
administrator permissions. Optionally, enable the checkbox ‚Guest access allowed‘ in
case you want to allow a guest user to have access. Clicking on ‚Save‘ will make the
QStor QMX join the Active Directory Domain.
•
Windows Domain: Enter the name of the Windows Domain and the user name
and password of a user with domain administrator permissions. Optionally, enable the
checkbox ‚Guest access allowed‘ in case you want to allow a guest user to have
access. Clicking on ‚Save‘ will make the QStor QMX join the Windows Domain.
78
8.1.3. TCP/IP Settings
In order to configure TCP/IP parameters, first select which of the two network ports you want
to configure. Click the ‚Select‘ button to select a port.
The next step is choosing between a manual configuration of TCP/IP parameters or
automatic configuration via a DHCP server. Click ‚Next‘ to proceed.
In case you have selected ‚DHCP‘, you are done with network configuration – click on
‚Reboot server‘ in the next menu to apply the settings. Otherwise, for manual network
configuration, enter the IP address, the subnet mask and the gateway and then save your
settings by clicking on ‚Save‘.
79
The Web GUI displays a summary of all settings. Click on ‚Reboot server‘ in order to apply
the settings.
8.1.4. DNS / WINS Settings
After changing TCP/IP settings of the server appliance or, in case DHCP is enabled, after
each system boot, DNS and WINS settings need to be verified and, if necessary, entered
manually. To do this, navigate to the ‚DNS / WINS Settings‘ menu and enter the IP address of
your DNS and WINS servers in the respective entry fields. Apply and save these settings by
clicking on ‚Save‘.
80
8.1.5. Hosts File Editor
In case your DNS server doesn’t resolve all host names to IP addresses, you can manually
assign host names to existing IP addresses by using the ‚Hosts File Editor‘. Using names for
network resources such as cameras is, of course, preferable to using numerical IP
addresses.
In order to manage entries in the hosts file, navigate from menu ‚Network‘ to the submenu
‚Hosts File Editor‘. Currently active entries in the ‚hosts‘ file are displayed at the bottom of the
screen. (In case there is no entry in the ‚hosts‘ file yet, nothing will be shown there.)
In order to add a new entry in the ‚hosts‘ file, enter the IP address and a fully qualified name
as well as a short name (host name). Upon pressing ‚Add entry‘, the Web GUI will add this
entry to the ‚hosts‘ file and immediately display it at the bottom of the screen.
In order to remove an entry in the ‚hosts‘ file, click on the word ‚here‘ in the top line of the
menu. Select the IP address to remove and click on the ‚Remove‘ button. The entry is
removed from the ‚hosts‘ file.
8.1.6. Bundling Network Ports
The QStor QMX can bundle its two network ports and thus either obtain higher network
throughput or enhanced connection reliability, depending on the selected mode.
There are four different network port bundling modes available:
•
Load Balancing: Load balancing distributes network data evenly among the two
Ethernet ports. This results in a higher transmission speed. Caution: In order for load
balancing to work, the network switch must support it. Please consult the manual of
your switch to find out whether your switch supports load balancing and how to
enable it.
81
•
Adaptive Load Balancing: Adaptive load balancing does not require switch
support. Ethernet packets are distributed among the two ports depending on current
traffic and this results in a higher transmission speed.
•
Port Failover: Port failover increases the reliability of the data connection. In case
one of the two ports experiences connection issues, the other port will pick up the
network traffic and maintain connectivity. Port failover does not require any special
switch support.
•
Dynamic Link Aggregation: Dynamic Link Aggregation, as specified in IEEE
802.3ad, bundles the load of both Ethernet ports and thus achieves a higher
transmission speed. Like load balancing, this mode has to be supported by the switch
in order to work.
Bundling of Network Ports
Mode
Load Balancing
Adaptive Load Balancing
Port Failover
Dynamic Link Aggregation
Advantage
Throughput
Throughput
Reliability
Throughput
Support by Switch
Necessary?
yes
no
no
yes
Please select the bundling method that you want to use and confirm by clicking on ‚Next‘. On
the next screen, select both network ports and apply the new bundling mode by clicking on
‚Reboot‘. After setting or changing the bundling mode, it is necessary to reboot the QStor
QMX.
82
8.1.7. Ping
In order to be able to verify whether other devices, such as cameras, servers and routers,
are up and running and are reachable via the network, the Web GUI has a ‚Ping‘ test screen.
You can navigate to this screen by clicking on ‚Ping‘ in the submenu ‚Network‘.
Enter the destination IP address into the entry field and commence testing by clicking on the
‚Ping‘ button. If everything works, all network packets will reach the destination and will be
echoed, as shown in the screen shot. In order to repeat the test with the same or a different
IP address, just enter the IP address into the input field and click on ‚Ping‘ again.
8.2. APC UPS
If you are using the QStor QMX in tandem with a uninterruptible power supply (UPS) by APC,
a top tier manufacturere of UPS systems, you can configure their interaction here.
The object of a UPS is to continue to supply connected devices with electricity during an
outage of the building supply, thus preventing data loss and maintaining operation.
Depending on USP battery capacity, wattage of connected devices and USP make/model, a
USP can ride through several dozen seconds up to several hours of power loss.
83
8.2.1. APC UPS Status
This menu allows you to query the current status of an APC brand UPS. In case the status is
not correctly displayed, the cause may be that the UPS has not been configured correctly. In
order to remedy that, please refer to the manual of your APC UPS.
8.2.2. Configuring a USB-Attached UPS
Here you can configure at what time after a loss of mains power the APC UPS will trigger a
controlled shutdown of the QStor QMX video server appliance. You can specify a battery
charge level as a percentage of total battery capacity and/or configure a ride-through time in
minutes, after which the video server appliance will undergo a controlled shutdown. Enter
both values into their respective input fields and then click on ‚Save‘.
84
Please note:
1. These settings will only work as described if you have an APC brand USP connected
to your QStor QMX appliance.
2. A connection to an APC UPS can be established via USB or LAN, but not via serial
port.
8.2.3. Configuring a Network-Attached UPS
In case your APC UPS model is capable of network communication, you can use this menu
of the Web GUI to configure the UPS. Please enter the IP address of the server as well as
the UPS’s user name and password.
85