1
TrueChrome-‖ User Guide
Chapter 1 Intoduction
Advanced design
TureChrome-‖colorful camera, one of Tucsen’milepost types, is of great a
bility of color rendition, and come up with a true resolution for catching
highly definition maps. The FPGA dual core procession guarantees the r
ecovery of the high speed and high quality picture. According to custom
er demand for personalized, the camera parameter setting could be oper
ate freely and freeze the screen to show the perfect image.
TureChrome-‖ has inherited all of the best merits of TureChrome, and of
course updating the visual experience, hommization experience and the
firm-soft and Microsoft of the camera.
You are more professional than you imaging。
To make full use of this product, please read the user manual.
Cleanliness
Be sure the dust cover is covered, unless using the camera. If you have
to clean the optical window for the accumulating of the dust in the air,
we advise you fiber lens clothes glance aside it with a little ethanol. Typ
ically, clean out from left to right or from top to bottom lightly grazed. If
you can see dust in the inner, please contact Fuzhou xintu photoelectron
ic Co., Ltd customer service to obtain guidance.
Maintain
Only the Fuzhou xintu photoelectronic Co., Ltd has the right to maintain the
camera. So you can contact the service for the maintaining.
CAUTION : Please do not open the camera box randomly and
disassemble the reload for the dust and moisture can enter into the inner.
The resulting chip damage and moisture problems will not warranty.
Chapter 2 System constituent
Tucsen TureChrome-‖camera is constituent of a TureChrome-‖ camera、a
12V2A adapter、a HDMI、a class 10 SD card and a 1.5 meter mouse.
Optional accessories: Switching cylinder
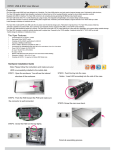
TureChrome-‖camera interface
1. USB interface:A 1.5 meter standard mouse to control the main interface.
2. HDMI interface:A standard HDMI help to transfer the signals to the screen,
the screen is just a screen. And Tucsen camera support the hot plug.
Here we recommend you connect the camera with a desktop computer.
3. Power interface:A 12V2A adapter is suitable。
4.Open or close key:You can bunt the key to open or close the camera.
5.SD card:Ensure the high speed of the signals, we advise you select the
class 10 SD card.
CAUTION:
6.C interface:The optical interface is standard C interface.
7. Adjustable ring: It is allowed to adjust the adjustable ring after loose those
three fixing screws to change the distance between the lens and the sensor. It
is used to make the camera more flexible for different type lens.
8. Anti-dust cap: When the camera is NOT in use, please screw in the
anti-dust cap to avoid the dust from the environment accumulating on the
optical port.
9. Anti-dust eal: The seal will be placed on the camera optical port when it left
the factory. It is used to avoid the dust accumulating during the transport.
Please remove the seal first and then attach to the lens or microscope
when fist time use the camera.
Chapter 3 HDMI Operation
Fig1. TrueChrome-‖
1. Connect the power with a 12V2A adapter。
2. A USB mouse is help to control the camera freely。
As seen in fig.1,a HDMI connect the camera and screen, and the screen just
exhibit the real time signals, and the mouse can control the camera
parameters.
Fig.2. TrueChrome-‖main control interafce
Bunt the open and close key after you connect the camera well, you can see the
main control interface.
Requirement :
(1)The camera is starting with the preview window.
(2)When move the mouse to the far left, the screen will show capture, setting
button. Click the setting button, popup menu item parameter setting.
So in the Fig.2, the main control interface includes preview, capture, video, and later
processing the image.
Fig.3. The left buttons and corresponding illustration
Click
,a series operation of auto exposure, lock the white balance and
color control. A key for you, please lock the white balance in a white
background and then move to the object and manipulate the auto or manual
exposure.
Fig.4. The right buttons and corresponding illustration
Move the mouse to the right of the screen, you can see Fig.4. Here, you can
do like transposition, scaling, shearing, and also enter into the pictures fold.
Fig.5. Contrast the preview and the catching
Click
and
catching ones.
you can see fig.5, and you can contrast the preview and
Fig.6. The album
In the album,click
you can back to the preview quickly.
help you see the upper or later picture and
and
is the deleting
operation.
Fig.7. Mass select the image files
If you want to delete the mass pictures, you can do as Fig.7 and Fig 8
illustrate.
Fig.8. Mass delete the pictures
Fig.9. Play the video
When you check the album, you can play the video directly as seen in Fig.9.In
the process interface,
operations,
can stop the playing. Then you can do following
back to the preview,
delete the video files,
help to select the upper and later picture,
pause the video.
and
is a button to stop or
Chapter 4 USB Operation
Fig.4-1. USB used for the ISCapture operation
(1) The power adapter is 12V2A. After you connect the camera well you
can bunt the key cap to pulse on the camera, and then the blue light is
working.
(2) A standard business to business USB help to transport the real time
message from the camera to the PC.
(3) Free drive ISCapture is researched specifically for Truechrome. The
simple user interface, the philosophy human nature characters help
abecedarian to use the ISC easily and take photos as they want.
(4) If you discon the power or the camera, you have to restart the ISC soft
for that its unsupported plug.
(5) The pictures are saved in your PC.
Fig.4-2. The left side of ISC Capture
(1) Open the ISC you can see the left side as Fig.4-2 shows. Caution:
Please hold on nearly 3 seconds after you click
to initial the
camera.
(2) Chose the
, you can get an uncondensed
picture with normal clock and a condensed picture with high clock. A
reminding should give you that when your PC configurations are
better enough you can get a high speed nearly 30 fps.
(3) Different camera performance florescence, temperature, and
florescence color control functions or without the corresponding
functions show grey.
Fig.4-3. The right side of ISC Capture
(1) You can click the transposition operation to get a right preview, and
you can also revolve the C ring to change the direction as you want.
(2) The zoom function help you to see the details of the objects.
(3) The background could be change to grey or black while you click
.
Fig.4-4. Files documents in small view
(1) You can select the right picture you want or click the
small pictures.
(2) Further more, you can also batch select and delete.
to find more
Fig.4-5. Imaging processing
(1) Click the
Fig.4-6. measurement
you can get Fig.4-5.
(2) There are many classical imaging processing function, like
,
,
,
you may choose the right one you want.
(3)
. So,
tell you how to measure in Fig.4-6.
(4) The mark in dynamic and static could be saved together.
Fig.4-7. About ISCapture
(1) Please contact our staff for more details about ISC in ‘ISC User
Guide’.
(2) All the power to interpret the Fuzhou Xintu photoelectronic Co., Ltd.
Appendix A Technical parameters
Frame speed:HDMI
USB
1920*1080
1920*1080
30fps
30fps
Output port:microSD 卡、 HDMI、 USB2.0
Dynamic resolution:1920*1080
Exposure time:HDMI
USB
Video:1080P
0.001-10s
0.001-10s
30fps
Operation system:XP and above,Mac OSX
Microsoft:HDMI free drive
USB ISCapture
Appendix B Basic technical parameter
Key function
1.1.main menu
(1)拍照
(2)设置
2.2.setting parameter
(3)恢复默认
(4)锁定白平衡
(5)自动/手动曝光
(6)增益
(7)伽玛
(8)对比度
(9)饱和度
(10)R/G/B
(11)亮度
(12)锐度
(13)降噪
(14)录像
2.3 the right interface
(15)水平翻转
(16)垂直翻转
(17)放大
(18)缩小
(19)ROI
(20)恢复
(21)图像对比
(22)相册
2.4 the album
(24)首页
(25)左方向
(26)右方向
(27)删除
(28)播放
(29)暂停
(30)停止
Capture
Settings
Default
Lock White Balance
Auto/Manual Exposure
Gain
Gamma
Contrast
Saturation
Brightness
Sharpness
Denoise
Video
Flip H
Flip V
Zoom In
Zoom Out
Zoom Fit
Compare
Photos
Home
Left
Right
Delete
Live
Pause
Stop
Appendix C
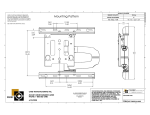
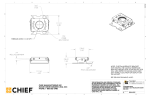
Structure