Download User Manual - UEBO Media Players
Transcript
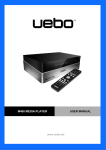
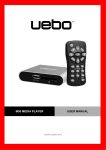
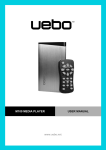
M200 MEDIA PLAYER
USER MANUAL
www.uebo.net
TABLE OF CONTENTS
1. INTRODUCTION ......................................................................................... 4
1.1 Preface.............................................................................................................. 4
1.2 Packing List ..................................................................................................... 5
1.3 Cautions ........................................................................................................... 5
1.4 Connection ....................................................................................................... 6
1.5 Power On / Off ............................................................................................... 12
1.6 Menu Language ............................................................................................. 12
1.7 HDD Format .................................................................................................. 12
2.1 Remote Control .............................................................................................. 14
2.2 Front View...................................................................................................... 16
2.3 Rear View ....................................................................................................... 17
2.4 Side View ....................................................................................................... 17
3. SETUP MENU ........................................................................................... 18
3.1 Changing Audio Settings ............................................................................... 18
3.2 Changing Video Settings ................................................................................ 19
3.3 Changing Network Settings ........................................................................... 20
3.4 Changing System Settings ............................................................................. 25
3.5 Miscellaneous ................................................................................................ 26
4. MEDIA BROWSER MENU ........................................................................ 27
4.1 Browsing All .................................................................................................. 28
4.2 Browsing Music ............................................................................................. 28
4.3 Browsing Photos ............................................................................................ 29
4.4 Browsing Movies ........................................................................................... 29
4.5 A/V Streaming via Network ........................................................................... 30
4.6 A/V Streaming via UPnP-server .................................................................... 32
4.7 Renaming / Deleting Files ............................................................................. 39
4.8 Managing the Playlist .................................................................................... 40
5. FILE COPY MENU..................................................................................... 41
6. MEDIA LIBRARY ....................................................................................... 42
6.1 Music library .................................................................................................. 43
6.2 Photo Library ................................................................................................. 45
6.3 Movie Library ................................................................................................ 47
7. INTERNET RADIO .................................................................................... 49
8. BITTORRENT, NAS & WEB SERVER FUNCTION ................................... 52
8.1 Add a New Torrent ......................................................................................... 52
8.2 Download Menu............................................................................................. 53
8.3 BT Setup Menu .............................................................................................. 53
8.4 Built-in Web Server........................................................................................ 54
8.5 NAS Function (SAMBA) .............................................................................. 58
9. INTERNET CHANNELS (INTERNET MULTIMEDIA SERVICE) MENU .... 59
9.1 Picasa ............................................................................................................. 59
2 / 68
9.2 News .............................................................................................................. 59
9.3 Flickr .............................................................................................................. 59
9.4 Weather .......................................................................................................... 59
10. UPGRADING THE FIRMWARE .............................................................. 60
11. APPENDIXES .......................................................................................... 61
11.1 Specifications ............................................................................................... 61
11.2 Frequently Asked Questions (FAQ) ............................................................. 62
11.3 Copyrights and Trademarks ......................................................................... 64
11.4 Warranty ....................................................................................................... 65
11.5 GPL Statement ............................................................................................. 68
3 / 68
1. INTRODUCTION
1.1 Preface
Congratulations on your purchase of UEBO M200 Media Player. We hope you will enjoy using
it as much as we did designing it.
M200 Media Player Has the Following Functionalities:
A/V Output
•
HDMI V1.3 for high-definition video and digital audio.
•
Composite & component video and stereo audio for analog audio-visual connection.
•
S/PDIF coaxial & optical interface for high-fidelity digital audio.
•
Adjustable video output resolution (NTSC, PAL, 480p, 576p, 720p, 1080i and 1080p).
Multimedia Playback
Supports major audio, video and image file formats (1080p HD video decoding).
•
Supported Video formats:
AVI/MKV/TS/TP/TRP/M2TS/MPG/MP4/M4V/MOV/VOB/ISO/IFO/DAT/
WMV/ASF/RM/RMVB/FLV.
•
Supported music format: MP3/OGG/WMA/WAV/AAC/FLAC.
•
Supported picture format: HD JPEG/JPG/BMP/GIF/TIF/PNG.
•
Photo slide show with background music.
Network Feature
•
A/V streaming/transmission via Ethernet (10M/100M) & Wi-Fi (802.11b/g/n, optional).
•
File sharing via built-in SAMBA server.
•
A/V streaming via UPnP/DLNA Media Server.
•
BitTorrent download (controlled and managed via web server).
•
Internet Radio (SHOUTcast).
File Copy
•
Supports copying and moving files among Memory Card, USB, HDD and Network
USB 2.0 Support
•
USB PLAYER port (for computer connection).
•
USB HOST port x 2 (for USB storage devices).
IMPORTANT: all of the information presently found in this manual is valid at this time. However,
as we continue to update and improve on our feature set, some information may become
obsolete. You can find the most up-to-date information on our website at
http://www.uebo.net.
4 / 68
1.2 Packing List
Part
Quantity
M200 Media Player
1
Composite A/V Cable
1
USB cable
1
Remote Control
1
AA Batteries
2
AC/DC Adaptor
1
Resource CD (with User Manual)
1
IMPORTANT:
The actual contents of your package may be different from the packing list included in this
manual.
1.3 Cautions
In order to ensure both your safety and the proper operation of the M200 Media Player, please
note the following before operating the Player:
1.3.1 Proper Usage
1. You should not modify this Player in any way, as this will void your product warranty.
2. If you want to install the hard drive in the Player, please follow the instructions
provided in this manual on Hard Drive Installation and exercise great caution.
1.3.2 Power
1. The Player power voltage is DC 12V.
2. To operate this Player, please connect the supplied AC adapter to the Player’s power
connector at the back and connect the other end to the wall power plug.
3. Make sure the power cable is not subjected to weight pressure or sharp objects that
might damage the outer shell of the cable and expose the inside wire.
4. To avoid the risk of electric shock, please be sure to unplug the power adapter before
cleaning the Player.
5. Never connect the power adapter to the Player if it is in a wet, high humidity or dusty
environment.
rd
6. Do not replace the power adapter, power cable or power connector with a 3 party
product; instead, call UEBO Customer Service to obtain the replacement part.
1.3.3 Radio Interference
•
This Player complies with Part 15 of the FCC Rules. Operation of this Player is
subject to the following two conditions: 1), this Player must not cause harmful
interference and 2), must accept any interference received, including interference
that may cause undesired operation.
1.3.4 Repair
If you experience problems in operating the Player, or need the Player repaired, please call
5 / 68
UEBO Technical Support. Contact information for Technical Support can be found in the
Service section of our website, http://www.uebo.net.
1.3.5 Disposing off the Player
UEBO strongly encourages recycling of this Player if and when you decide to dispose of it.
Since each city has different regulations with respect to recycling, please consult your local
recycling information center for advice on proper methods of disposal.
1.3.6 A WARNING Regarding the Hard Disk
The Player uses an internal hard disk for media data storage. If you need to format the hard
drive after the initial format, you should first read the <Frequently Asked Questions> section
with care, as well as check our website for the most-up-to-date information.
1
Physical impact may create a bad sector in the hard disk. If this is the case, the best
way to fix the problem is to connect the hard disk to the Windows PC and run a
CHKDSK command.
2
All data stored in the Player may be lost due to physical impact, electrical shock,
power failure, HDD format and other causes, so please backup your data regularly.
3
It is recommended that in order to maintain consistent hard disk performance, you
should routinely perform defragmentation (by connecting it to your PC and run Disk
Defragmentation utility) of the hard disk after long periods of usage.
1.3.7 Others
1
DO NOT disassemble the Player; doing so will void your Player Hardware Warranty.
2
DO NOT operate the Player near water or in a wet or highly humid environment, so as
to avoid electrical shock.
3
DO NOT use the Player during a thunderstorm as there may be a remote risk of
4
DO NOT hit the Player with a hard object.
5
DO NOT shake the Player, as this could cause damage to the hard disk.
6
DO NOT place the Player close to an electromagnetic or magnetic field, as this could
electric shock from lightning.
cause damage to the hard disk.
7
Keep the Player and its cables away from children, so as to protect them from
electrical shock or suffocation hazard.
1.4 Connection
1.4.1
Connecting the Power Supply
1
Follow the instructions below and connect the AC adaptor to the Player’s DC IN jack.
2
Follow the instructions below and plug the AC adaptor into the power outlet.
6 / 68
1.4.2 Connecting to a PC
In order to access the contents of the internal hard disk (purchased separately):
1
Make sure the Player’s power is on.
2
Plug in the square connector of the USB cable to the Player’s USB PLAYER port.
3
Plug the rectangular connector of the USB cable into the computer.
1.4.3 Connecting the USB Player
In order to access the contents of the external USB devices (purchased separately):
1
Make sure the Player’s power is on.
2
Plug the USB stick, USB HDD, USB Camera, USB Camcorder, or any USB storage
devices into the USB HOST port of this Player.
3
You can then browse the contents of the connected USB devices.
7 / 68
1.4.4 Connecting the Memory Card
The Player has a built-in memory card slot, which enables you to view the contents of the
memory card. To do this, please follow these instructions:
1
Insert the memory card into the memory card slot on the Player’s side.
2
Make sure to properly orient the memory card before insertion. And remember that the
memory card can only be inserted from one direction, so don’t try to force it in from
another.
1.4.5 Connecting to a TV
1.4.5.1 A/V OUT (Composite A/V)
1
Plug the composite cable connector (3 colors - Yellow/Red/White) into the Player’s
A/V OUT jack.
8 / 68
2
Plug the other end of the composite cable into your TV’s A/V IN jack.
3
Changing the input on the TV to the jack you used in step 2.
1.4.5.2 Y/Pb/Pr Component OUT
1
Plug the component cable (3 colors – Yellow, Blue and Red) into the Player’s Y/Pb/Pr
jack.
2
Plug the other end of the component cable into your TV’s Y/Pb/Pr jack.
3
The component cable does not carry audio; to facilitate audio connection, please do
one of the following :
a)
Use the audio output from the A/V OUT jack;
b)
Use the audio output from the S/PDIF Coaxial or Optical jack.
9 / 68
1.4.5.3 HDMI OUT
1.
Plug one connector from your HDMI cable to the Player’s HDMI jack.
2.
Plug the other connector from your HDMI cable into the TV’s HDMI jack.
IMPORTANT: The HDMI cable is an optional accessory and is sold separately.
1.4.6 Connecting to a Digital Amplifier
To enjoy special sound processing by Dolby Digital, DTS, or MPEG (Please refer to “3.1
Changing Audio Settings” for configuration), do the following:
1. Plug the coaxial RCA connector into the Player’s S/PDIF coaxial jack.
2. Connect the other end of the coaxial RCA cable to your amplifier or your home stereo
system.
3. Using your optical TOSLink cable is another option. Connect the TOSLink cable to the
optical jack.
4. Connect the other end of the TOSLink cable to your Amplifier or home stereo system.
NOTE: We do not supply TOSLink Optical fibers or Coaxial RCA cables.
10 / 68
1.4.7 Connecting to a LAN
To connect to a LAN (Local Area Network) you need a CAT5, CAT5e or CAT6 network cable
(not supplied).
1. Connect one end of the network cable to the Player’s RJ45’s LAN jack.
2. Connect the other end of the network cable to the network router/switch/hub.
1.4.8 Connecting to a WLAN
To connect to the Wireless LAN, you will need a compliant 802.11G or 802.11n USB Wireless
Adapter from UEBO. This USB Wireless Adapter is an optional item you can purchase
separately by going to the http://www.uebo.net site. Once you have obtained the USB
Wireless Adapter, you can set it up by following these steps:
1. Make sure the Player’s power is on.
2. Plug the USB Wireless Adapter into the USB host port of the Player.
3. Refer to Section 3.3, “Changing Network Settings,” for wireless setup instructions.
11 / 68
1.5 Power On / Off
Power On
After connecting the DC IN jack, press the power button on the front panel; the Player will boot
up and enter the home screen, then the power indicator will turn blue.
Power Off
Press the power button on the front panel; the Player will enter standby mode and the power
indicator will turn red. To power off the Player, unplug the power cord, power off the Player.
1.6 Menu Language
The Player’s system language can be set not only to English but to other languages as well.
You can select the language you want in the Setup menu, which should take effect
immediately.
1.7 HDD Format
For users who wish to install a new SATA HDD into the Player, below are the steps you need to
follow in order to format the hard disk on the Player before usage:
Step 1: Select OK on the Warning page, then press ENTER to confirm. You will see this
message after you have installed the hard disk and powered on the Player.
12 / 68
NOTE: This page can be also accessed via the Setup->System->HDD Format menu.
Step 2: Select Format, press ENTER and then the hard disk formatting process will begin.
IMPORTANT: Please make sure that the hard disk does not contain any important data as
all files will be erased.
The formatting process should be finished within a few minutes. Once completed, the hard
disk provides the Player with media file storage.
IMPORTANT: HDD formatting will remove all data stored on the hard disk drive, so please
proceed with caution.
13 / 68
2. PLAYER INFORMATION
2.1 Remote Control
All instructions in this manual can be carried out using the Remote Control buttons.
Below is a list of the Player’s buttons and their functions:
1. STANDBY
2. MUTE
3. TV SYSTEM
4. BROWSER
5. NUMERIC
6. REPEAT
BUTTONS
7. FR
8. VOL-
9. FF
10. PLAY
11. HOME
12. NAVIGATIONAL
BUTTONS
13. MENU
14. PAUSE/STEP
15. SLOW
16. INS REPLAY
17. CM SKIP
18. SELECT
19. CONFIRM
20. AUDIO
21. SUBTITLE
22. ZOOM IN
23. ZOOM OUT
24. A-B
25. ANGLE
26. SETUP
27. RETURN
28. STOP
29. NEXT
30. VOL+
31. PREV
32. GOTO
33. COPY
34. MUSIC
35. INFO
No.
Button
Function
1
STANDBY
Press to enter standby mode or wake-up.
2
MUTE
Press to mute audio output, press again to resume.
3
TV SYSTEM
Press to switch between NTSC, PAL, 480P, 576P, 720P, 1080I
and 1080P.
14 / 68
4
BROWSER
Press to enter the Media Browser menu.
5
NUMERIC
Press to enter numeric input when changing settings.
BUTTONS
6
REPEAT
Press to set repeat option: One, All and Shuffle.
7
FR
Press to fast rewind the current playback; press repeatedly to
select speeds.
8
VOL-
Press to decrease volume.
9
FF
Press to fast-forward the current playback; press repeatedly to
select speeds.
10
PLAY
Press to begin playback.
11
HOME
Press to enter the home screen.
12
NAVIGATIONAL
Press the arrow buttons to select menu options and the ENTER
BUTTONS
button to confirm.
MENU
Press to activate tools menus:
13
Press in the Media Browser menu to rename and delete
files.
Press My Shortcuts in NET of the Media Browser menu
in order to add shortcuts to network access.
14
PAUSE/STEP
Press to pause in the current playback; press again to step to
the next frame; press the PLAY button to resume playback.
15
SLOW
Press to play back in slow motion; press the PLAY button to
resume regular playback.
16
INS REPLAY
Press to backward 10 seconds in the current playback;
especially suitable for sport programs.
17
CM SKIP
Press to advance 30 seconds in the current playback.
18
SELECT
Press to select files from the Media Browser and File Copy
menu.
19
CONFIRM
Press to confirm and add selections to the playlist.
20
AUDIO
Press to select an audio track.
21
SUBTITLE
Press to set subtitle options.
22
ZOOM IN
Press to zoom in at the image (photos or videos).
23
ZOOM OUT
Press to zoom out the image (photos or videos).
24
A-B
Press to set the beginning and endpoints of a section to be
repeated.
25
ANGLE
Press to change the view angle during DVD (with multi-angle)
15 / 68
playback.
26
SETUP
Press to enter the Setup menu.
27
RETURN
Press to return to the previous screen while navigating menus.
28
STOP
Press to stop playback.
29
NEXT
Press to view the next file / page down.
30
VOL+
Press to increase the volume.
31
PREV
Press to view the previous file / page up.
32
GOTO
Press to jump to a specific point on a title, using Title, Chapter
and Time.
33
COPY
Press to enter the File Copy menu.
34
MUSIC
Press to start playing music from the music playlist.
35
INFO
Press to hide or display the Information Bar during playback.
2.2 Front View
1. Infrared receiver window
2. USB indicator
3. Download indicator
4. Power indicator
5. Power button
16 / 68
2.3 Rear View
1. S/PDIF OPTICAL jack (TOSLink)
2. S/PDIF COAXIAL jack
3. RJ45 LAN socket
4. HDMI jack
5. A/V OUT jack
6. Y/Pb/Pr OUT jack
7. DC IN jack
2.4 Side View
1. Memory Card slot
2. USB HOST port (A-Type) x 2
3. USB PLAYER port (B-Type)
17 / 68
3. SETUP MENU
The Setup menu allows you to personalize and configure your preferences.
To select a Setup option:
1 Select the Setup icon on the home screen, or press the SETUP button on the remote
control.
2 Use the LEFT/RIGHT Navigational Buttons to select an option and then press ENTER.
There are five (5) Setup options, including Audio, Video, Network, System and MISC. Use
the UP/DOWN navigational buttons to select a menu and then press ENTER to confirm.
Then press RETURN to cancel and display the previous menu screen.
3.1 Changing Audio Settings
Use this menu to configure audio settings.
Night Mode
Choose between OFF / ON / COMFORT. Choosing the ON option will enable you to decrease,
the audio output volume.
18 / 68
Digital Output
Choose between HDMI LPCM / HDMI RAW / SPDIF LPCM / SPDIF RAW. In HDMI RAW or
SPDIF RAW mode, Dolby Digital, DTS or MPEG sound will be passed on to the HDMI TV or
Amplifier for processing.
3.2 Changing Video Settings
Use this menu to configure video settings.
Aspect Ratio
•
Pan Scan 4:3: Displays a wide format picture onscreen while cutting off the left and right
portions; select when a standard 4:3 TV is connected.
•
Letter Box 4:3: Displays a wide format picture with two black borders on the top and
bottom of the screen; select when a standard 4:3 TV is connected.
•
16:9: Displays the 4.3 format picture onscreen; select when a 16:9 TV is connected.
Zoom Out
•
Select to zoom out the image size during video playback.
Brightness
•
Adjust the level of brightness.
Contrast
•
Adjust the level of contrast.
Hue
•
Adjust the level of hue.
Saturation
•
Adjust the level of saturation.
Video SYSTEM
•
Select to adjust video output resolution: NTSC / PAL / 480P / 576P / 720P 50HZ / 720P
19 / 68
60HZ / 1080I 50HZ / 1080I 60HZ / 1080P 50HZ / 1080P 60HZ/HDMI Auto.
1080P 24FPS
•
Choose this option to enable or disable 1080P 24HZ support. IMPORTANT: A TV set with
1080P 24HZ (24P) mode is required.
Screen Size
•
Adjust the video output size according to the size of the TV screen.
Seamless Playback
•
Provides uninterrupted playback of video files (.ts,m2ts)
(the naming of the files should be alike, e.g., “abc01.ts” and “abc02.ts”, etc).
3.3 Changing Network Settings
Use this menu to configure Ethernet and WLAN (Wireless Local Area Network) settings.
Wired LAN Setup
•
DHCP IP (AUTO)
Select to obtain IP address automatically.
•
FIX IP (MANUAL)
Select to manually input the IP Address, Subnet Mask, Default Gateway and DNS Server
IP Address.
Wireless Setup
•
Selecting a Connection Profile
20 / 68
This Player can store up to three (3) wireless network connections. Press ENTER to go to
the next step, press RETURN to cancel and press PLAY to connect.
•
Get Connection Mode
Choose between Infrastructure (AP) and Peer-to-Peer (Ad Hoc). Press ENTER to go to
the next step and press RETURN to cancel.
•
Infrastructure (AP)
The infrastructure mode is used to connect your Player, equipped with USB Wireless
Adapter, to an existing Wireless Router or Access Point that is connected to the network.
Selecting the SSID Name
21 / 68
Select the SSID that is associated with your Wireless Router or Access Point. Press
ENTER to go to next step, press RETURN to cancel, or press SELECT to refresh the
SSID list.
IMPORTANT: On the Security list, WEP (Wired Equivalent Privacy) and WPA (Wi-Fi
Protected Access) mean that the network is encrypted, i.e. an encryption key is needed to
access the network. On the other hand, NONE means it is an open, unsecured wireless
network.
Input WEP/WPA Key
Encryption keys can be entered via the virtual keyboard. Press the Navigational Buttons
to select the character, ENTER to input and CAPS to switch between uppercase and
lowercase. To delete a character or insert a space, press SHIFT to make more symbols
available and OK to confirm.
Test Connection
22 / 68
The testing process will take a while, so please be patient. If the test results are OK, the
network information (Profile Name, IP address, Subnet Mask, Gateway, etc.) will be
displayed on the screen.
•
The Peer-to-Peer (Or Ad Hoc) Mode
The Peer-to-Peer mode (also called the Ad-Hoc mode or computer-to-computer mode) is
used to directly connect wireless clients together without the need for a wireless router or
access point.
The Ad-Hoc Setup
Press ENTER for the next step, press RETURN to cancel and then press PLAY to
connect.
•
WPS (AP)
WPS (Wi-Fi Protected Setup) is used to connect to a Wireless Router or Access Point
directly, without searching for SSID and entering the password. In this mode, you just need
to configure the parameters of your Wireless Router or Access Point supporting the WPS
function. There are two (2) options available to you, PBC mode and PIN (pin code) mode.
23 / 68
PBC
First press the WPS button on the router, or select the button mode in the configuration menu
of the router, then select the PBC mode: The connection process could take a while, so please
be patient.
PIN
If you prefer the PIN (pin code) option, enter the PIN code provided by your Player into the
Wireless Router or Access Point. The connection process could take a while, so please be
patient.
PPPoE Setup
•
Input your ADSL account username and password from your ISP in this menu; then the
Player will try to obtain your IP address automatically from your ISP, based on PPPoE
protocol.
24 / 68
BitTorrent and SAMBA
•
Here you turn ON/OFF BitTorrent download and NAS (Network Attached Storage)
services. In order to use BitTorrent protocol to download content from Internet, or to use
the hard disk drive in the Player as the shared media storage, you will need to set this to
ON.
3.4 Changing System Settings
Use this menu to configure system settings.
Menu Language
•
Choose the OSD (On-Screen Display) language.
Text Encoding
•
Here you can choose a text encoding option (subtitle display). The subtitle file must be
located in the same directory as the movie file in order for the Player to find and use it.
System Update
•
This setting is used to update the firmware or extension package via a USB stick. In order
to upgrade the device to the new firmware;
1) Copy “install.img” or extension files to the root directory of a USB stick and then
connect it to the USB HOST port of the Player.
25 / 68
2) Press ENTER to confirm.
HDD Format
•
Select in order to format the built-in HDD.
IMPORTANT: Formatting the hard disk drive might result in the loss of data, please
proceed with caution.
System Info
•
Select if you wish to view system information (firmware version, HDD info, MAC address,
etc.)
Restore Default
•
Select if you wish to restore factory defaults.
3.5 Miscellaneous
Use this menu to adjust miscellaneous settings.
Slide Show Timing
•
Select if you wish to set the interval time for a photo slide show.
Transition Effect
•
Select if you wish to set the transition effect for a photo slide show.
Ken Burns
•
Select if you wish to enable the Slow Zooming function during photo playback.
Background Music
•
Select if you wish to set the background music options while viewing pictures: off / folder /
Playlist.
Screen Saver
•
Select if you wish to turn the screen saver On/Off when the Player is inactive.
26 / 68
Movie Preview
•
Select if you wish to turn the movie preview On/Off in the browser menu. Please note that
if you are using PlayOn TV service, it is advised that you turn this setting to Off to allow for
smoother browsing experience.
Resume Playback
•
Select if you wish to set resume playback (auto-bookmarking) feature for movies On/Off.
4. MEDIA BROWSER MENU
The Media Browser menu allows you to browse and play media files stored on Removable
Media (USB stick or Memory Card), HDD, Network, UPnP-server and Playlist. To enter the
menu, select the Media Browser icon on the home screen, or press the BROWSER button on
the remote control.
The following buttons can be used for navigating the browser menu:
Button
UP / DOWN
Function
Move cursor up / down/ in order to select the desired source,
folders, or files.
LEFT / RIGHT
Select filter options: All, Music, Photos, or Movies.
PREV / NEXT
Go to previous / next page/.
ENTER
Enter or confirm the selected item.
SELECT
Access files of the selected source from the Media Browser
menu.
27 / 68
CONFIRM
Add the selected files to the playlist.
RETURN
Return to the previous menu.
4.1 Browsing All
In this mode, all folders and supported contents (music, photos and movies) will be displayed.
IMPORTANT
•
Please refer to the section entitled “9.1 Specifications” for more about the supported
content formats.
•
It may not be feasible to play music tracks continously using the All filter; if this is case,
please switch to the Music filter.
4.2 Browsing Music
In this mode, all folders and supported audio files in the current directory will be displayed.
The following buttons can be used to control music playback:
Button
PLAY
PAUSE / STEP
FR / FF
REPEAT
Function
Begin playback.
Suspend playback.
Fast rewind or fast forward; press repeatedly to select the speed.
Set repeat options: One, All and Shuffle.
INFO
Hide or display the Information Bar during playback.
STOP
Stop playback.
28 / 68
4.3 Browsing Photos
In this mode, all folders and supported image files in the current directory will be displayed.
The following buttons can be used to control music playback:
Button
PLAY
Function
Begin playback.
PREV / NEXT
View the previous or next photo.
LEFT / RIGHT
Rotate a photo from any angle.
ZOOM IN / OUT
Zoom into / out from the image.
INFO
Hide or display the Information Bar during playback.
STOP
Stop playback.
You can view photos in slide show mode with background music. When it is enabled, the slide
show starts automatically once you press the PLAY button. (Please refer to Section 3.5,
entitled “Miscellaneous,” for information on Slide Show Timing, Transition Effect and
Background Music).
4.4 Browsing Movies
In this mode, all folders and supported video files in the current directory will be displayed.
The following buttons can be used to control video playback.
Button
PLAY
PAUSE / STEP
Function
Begin playback.
Suspend playback and then press again to move to the next
29 / 68
frame.
SLOW
Play video in slow motion; press repeatedly to select the speed.
FR / FF
Fast rewind or fast forward; press repeatedly to select the speed.
PREV / NEXT
REPEAT
ZOOM IN / OUT
View the previous or next movie.
Set repeat options: Title, Chapter and All.
Zoom into / out from the image.
INFO
Hide or display the Information Bar during playback.
GOTO
Display the playback search menu.
A-B
To repeat, set the beginning and endpoints of the section.
ANGLE
Change the view angle during DVD playback with Multi-Angle.
MENU
Return to the Root Menu during DVD playback.
INS REPLAY
To backward 10 seconds of the current playback.
CM SKIP
To advance 30 seconds of the current playback.
AUDIO
Select an audio track while watching BivX video or DVD with
multiple audio tracks.
SUBTITLE
STOP
Set subtitle options.
Stop playback.
4.5 A/V Streaming via Network
You can stream the media files shared on the home network (Ethernet or WLAN). Please refer
to Section 3.3 for details about network settings. There are two ways to locate media files
shared on your local network in the Network menu. One is to browse through the Workgroup
on your network; the other is to browse through “My Shortcuts.”
4.5.1 Browsing through Workgroup
You choose the Workgroup appropriate to your PC from the Workgroup list, find your PC name
and then press the ENTER button to confirm (you may have to enter your login credential to
gain access). Then you can select and play the shared media files you want.
30 / 68
IMPORTANT:
•
While browsing high definition video files (resolution up to 720p / 1080i / 1080p) via
Ethernet or WLAN, the video may be buffering, which is to be expected, due to limitations
in network speed or signal strength.
•
As a result of different network conditions, the Workgroup might not be accessible or
displayed on the list. You may need to use My Shortcuts to browse shared files.
4.5.2 Browsing through My Shortcuts
You can set Specific File Server IP and access it from My Shortcuts on the menu.
•
When you press the MENU button, a popup menu appears.
•
Select Add to open a popup menu, where you can input Label, Net User ID, Net
Password, Domain, Host Name and Specific File Server IP. Then select OK to confirm,
Cancel to cancel and Simple / Detail to switch between simple and advanced options.
31 / 68
•
Select the shortcut you added and press the ENTER button to confirm. Then you can
select and play the shared media files on the destination computer.
4.6 A/V Streaming via UPnP-server
An UPnP/DLNA (Universal Plug and Play/Digital Living Network Alliance) client has been
integrated into the system, which enables the Player to automatically detect UPnP/DLNA
Media Servers on the network. You can then browse and stream media files from the
UPnP/DLNA.
4.6.1 Installing UPnP Media Server on your PC
There is a wide variety of free and commercial UPnP Media Server software, such as Windows
Media Connect, Windows Media Player 11, XBMC Media Center (Linux/Mac/Windows),
MediaTomb (Linux), PlayOn.TV and more. Please install one of them on your networked
32 / 68
computer to enable viewing of streaming contents. In the following sections, we will use
Windows Media Player 11 DLNA Server on Microsoft Windows XP SP2 and PlayOn TV as
examples.
4.6.2 Setting Up Windows Media Player DLNA Server
The Media Sharing feature of Windows Media Player 11 lets you enjoy the contents of your
Windows Media Player library from anywhere in your home.
•
Open Windows Media Player 11 and then click Library -> Add Library -> Advanced
Options to add or remove media files from the library.
•
Click Library -> Media Sharing, then you can allow or deny the Player to access the
media library. Click Allow to authorize your Player.
33 / 68
4.6.3 Setting Up PlayOn TV UPnP/DLNA Server
PlayOn is a software program that runs on your Windows PC, giving you access to a wide
range of Internet-based on-demand content on your TV via M200 Media Player. Examples of
content sites that are available through PlayOn include YouTube, Hulu, Netflix, Amazon VOD,
and many others. This guide is intended as a brief and simple overview of PlayOn and the
features it provides.
Minimum PC Requirements
•
Microsoft Windows XP (Service Pack 2 or later), Windows Vista, Windows 7, or
Windows Server 2003/Windows Home Server (Service Pack 1 or later). 64-bit
versions of Windows are also supported.
•
Windows Internet Explorer 7 or later
•
Windows Media Player 9 or later
•
Installation includes the Microsoft .NET Framework 2.0 (Service Pack 1) if needed
•
Pentium 4 3.2+ GHz, Pentium M 2.0+ GHz, or any multi-core x86 processor
•
512 MB RAM (1 GB recommended)
•
100 MB of available disk space for installation, plus recommended 4-5 GB extra space
on the same drive where Windows is installed (or on a separate drive if you re-map it)
•
Internet broadband connection of at least 1.5 Mbps, and home network with wired,
powerline, or 802.11n connections (for wireless home networks with 802.11g, either
the PC or device should be on a wired connection)
•
Both the PlayOn PC and device should be connected directly to the same router
(putting them on the same "subnet"). Advanced networking setups using additional
network interfaces such as virtual adapters (VPNs) or Internet Connection Sharing
(ICS) may work, but are not officially supported
•
Third-party security software must be configured to allow full local and online network
access to Program Files\MediaMall\MediaMallServer.exe & SettingsManager.exe
Installing and Running PlayOn
PlayOn is simple to install and easy to get running and start using.
1) Download and install PlayOn on your Windows PC from www.playon.tv.
2) Turn on your M200 Media Player, find the PlayOn server under Media Browser, UPnP, and
watch online content directly on your television.
Make sure your M200 Media Player has a network connection to the same router that your
PlayOn PC is connected to, and has the latest system software update installed. Note that
when selecting any online video, it may take up to 10 seconds or longer before video starts
showing on your television. Certain devices also show no indication that video is loading, so
you should wait to see if the video does start playing. Having a faster broadband connection
and/or PC will help reduce this buffering time.
UEBO M200 Media Player
34 / 68
You can find the PlayOn Media Server(s) by searching under Media Browser, UPnP. Make
sure M200 Player is connected to the same LAN segment as your PlayOn.TV server and that
the network function is working properly.
PlayOn Settings
A number of options can be configured in PlayOn Settings. Also, PlayOn Settings is a good
place to start looking for help when you are experiencing technical problems. Open Start Menu
/ All Programs / PlayOn / PlayOn Settings, and review the available options.
UPnP Server Status
The status of the PlayOn UPnP server can be seen in PlayOn Settings as well. If the server is
running, it allows devices to connect to this PC. You can left-click the status panel to force
PlayOn Settings to determine the status of the server. The various status messages are
described below:
Searching
A search is still being performed. Wait for it to finish.
Running
The PlayOn server is running correctly with no errors detected.
Not Running
The PlayOn server is not running.
Not Found
The PlayOn server could not be discovered on the network.
Check firewall settings if you think it should be running.
Initializing
The PlayOn server is still initializing. Click the status panel
to restart the search.
No Service
The MediaMall service is not enabled. You can enable this service
in Control Panel/Administrative Tools/Services.
No SSDP
The SSDP Discovery Service on this PC is disabled. Without it,
PlayOn Settings cannot detect the PlayOn server. You can enable
this service in Control Panel/Administrative Tools/Services.
Error
An error occurred when trying to detect the server status. Contact
support for assistance.
You can manually start and stop the server by pressing the Start/Stop button. When stopping
the server, note that if any devices are connected to this PC, those connections will be closed.
They can of course be reestablished by the device(s) once the server is restarted.
You can also disable or enable PlayOn from running automatically when Windows starts, as
well as show an optional icon in the system tray, which allows you to see the status of the
PlayOn server, and to open PlayOn Settings through a right-click menu option.
Video Performance
If you are experiencing latent or choppy video playback while using PlayOn, you may want to
modify the performance settings to a lower value. This can be especially useful if either your
PC processor is a bit slow, or if you are using a home wireless network or broadband
connection that is not fast enough. A higher performance setting will attempt to preserve the
35 / 68
quality of the videos that are pulled in from the Internet, but will tax your computer and network
more. It is recommended that you use the “Auto” setting, as this allows PlayOn to determine
which quality setting works best for your setup. If the automatic setting still doesn’t work, try
“Low” or “Medium” to see if this helps. You can also use this setting to force PlayOn to always
use a “High” or “Max” setting if you are confident your internet and PC speeds are always
sufficient.
Video Processing
You can configure PlayOn to either always fully process every video you start to watch from
your device, or to end processing shortly after you stop or pause a video. This may be useful
for users who prefer their PC to not allocate resources to PlayOn when they stop or pause a
video before it finishes. Allowing all videos to be fully processed gives you the option in most
situations to resume playback for the most recently played video, but will tax your PC
processor until the entire video has been downloaded and converted.
Parental Controls
Some content providers have MPAA or FCC TV rated media, and offer the opportunity for the
user to filter their content based on parental controls. By enabling the “Enable parental
controls” checkbox, you can select a maximum allowed rating for movies and television
programming, as well as decide to block unrated content. It is important to note that some
content providers may not comply with these settings. User discretion is advised.
Software Updates
You can manually check for new updates to PlayOn by pressing the “Check Now” button in the
“Software Updates” section. If the “Check automatically” checkbox is enabled, then the PlayOn
installation will regularly detect if there are new updates available, and inform the user with a
balloon notification from the system tray.
PC Specifications and Security Software
A number of factors can prevent PlayOn from running optimally, and in more severe cases, can
even block PlayOn entirely. The main factors that can interfere with PlayOn are listed below.
Note also that in some cases, changing your Performance setting (see below) can help
remedy issues you may have with playback.
Antivirus and Firewall software
The vast majority of problems with installing and running PlayOn are due to antivirus and
firewall software. You may want to try temporarily disabling your antivirus software to see
if it helps fix any issues. If you have third party antivirus or firewall security software
installed, make sure that you grant full local and online network access to the following
applications:
• C:\Program Files\MediaMall\MediaMallServer.exe
• C:\Program Files\MediaMall\SettingsManager.exe
36 / 68
Broadband download speed
In order to stream real-time videos from the Internet, your broadband connection speed
must be consistently fast enough to maintain a stable download rate. The general rule of
thumb is that if you can’t watch videos from sites like YouTube, Hulu, and Netflix directly in
your PC browser without seeing a lot of buffering, then it definitely won’t work in PlayOn
either. We recommend a minimum download speed of around 1.5 Mbps. In some cases,
even this won’t be fast enough, depending on the stream quality for the particular media
that you are attempting to watch.
Home network performance
Your home network, or LAN (local area network), must be fast enough to handle the
throughput of sending videos from your PlayOn PC to your device. If you are using
wireless 802.11g, this will in most cases be a bottleneck, especially if the PC is on
wireless. We highly recommend that the PC be on an 802.11n or wired connection.
PC free hard drive space
Since PlayOn needs to convert most online videos to a video format that the devices can
understand, you need extra hard disk space to temporarily handle the video conversion.
We
recommend a minimum of 4 GB of free space. Note that the current version of PlayOn
requires that this free disk space be on the same partition where Windows is installed.
PC processor speed and RAM
The faster your PC processor (CPU) and the more memory your PC has (RAM), the
better it will be able to convert online videos and stream them to your device. If your CPU
or RAM specifications are too low, you may experience choppy playback for videos, or the
device may even show an oftentimes cryptic error message before the video can even
start to play.
Netflix Watch Instantly
You can access your Netflix account “Watch Instantly” videos from your PlayOn device. To do
so, provide your Netflix login credentials in the provided fields, and then press the “Test” button
to confirm you have entered the information correctly. You may also add videos to your Netflix
“Instant Queue” from your PC web browser (if your account has one), for easier access to your
favorites through PlayOn. If your Netflix Account does not have an Instant Queue, PlayOn will
include any Watch Instantly videos from your “DVD Queue”.
Amazon Account (Video On Demand Library)
You can access your Amazon “Video On Demand” Library from your PlayOn device. To do so,
provide your Amazon login credentials in the provided fields, and press the “Test” button to
confirm you have entered the information correctly. Note that you must add videos to your
Amazon Video Library for them then to show up on your PlayOn device. This typically requires
you to purchase the video, however Amazon does offer some free videos which can be added
to your Library as well. For more information on Amazon “Video On Demand”, visit
37 / 68
www.amazon.com/videoondemand.
Hulu Account Queue
You can access your Hulu account “Queue” videos from your PlayOn device. To do so, provide
your Hulu login credentials in the provided fields, and then press the “Test” button to confirm
you have entered the information correctly. Note that you will need to add videos to your Hulu
Queue at http://www.hulu.com/profile/queue from your PC web browser for the videos to then
show up on your PlayOn device.
YouTube Usernames
It is possible to subscribe to public user feeds from YouTube accounts. Enter each username
in the field provided, separated by commas. For each username that is entered, PlayOn will
give you direct access to that user’s favorite and uploaded (published) videos (up to a max of
150), as well as their playlists and subscriptions. Note that only YouTube videos from
publishers that have allowed them to be “embedded” in third party sites will appear on your
PlayOn device. For more information on YouTube accounts and feeds, visit www.youtube.com.
PlayOn Plugins (Alpha)
The “Plugins” tab of PlayOn Settings allows you to view and manage any PlayOn Plugins that
you have chosen to download and install on your PlayOn PC. We highly recommend trying out
the Revision3 plugin developed by MediaMall, available at
www.themediamall.com/playon/plugins, as well as a large number of third party plugins that
are available at www.playonplugins.com. Any plugin that you have installed and enabled
through PlayOn Settings will appear as an additional video service available through your
PlayOn device. Please note that this feature is still in development, and some changes may
occur that require the plugins be upgraded to remain compatible.
You can install plugins by dragging any “.plugin” file that you’ve downloaded to the Plugins tab
of PlayOn Settings. Note that drag and drop will not work if you have UAC (User Account
Control) enabled on your PC. You will also need to restart PlayOn for the plugin to show up on
your TV.
Support Requests
If you are experiencing a specific technical problem that you believe is reproducible, you may
want to contact MediaMall for help. In order to submit a support request, make sure you first
have recently reproduced the issue, and then press the “Support...” button. You will be
requested to enter your contact information, as well as a detailed description of the exact
nature of the issue you have experienced. Submitting a support request will send diagnostic
logs generated by PlayOn to PlayOn support team. It is critical that you indicate the time that
the error occurred (according to the system clock on your PC). This helps us to pinpoint your
specific issue in the diagnostic logs.
4.6.4 Receiving Streaming Content From Windows Media or PlayOn TV Server.
•
Connect your Player to the home network (LAN or WLAN).
38 / 68
•
Visit Media Browser - > UPnP menu on the Player, select the UPnP-server and press
ENTER.
•
Then you can browse the media library shared by Windows Media Player 11 or PlayOn TV
Server.
IMPORTANT:
•
Make sure your Player and your computer share the same local area network and subnet.
•
Firewalls may prevent your Player from communicating with your computer. If that is the
case, please open the ports on the firewall manually and add your Player to the “trusted”
list, or else disable the firewall temporarily.
4.7 Renaming / Deleting Files
While navigating the Media Browser menu, you can press the MENU button to activate a
popup menu providing you with the opportunity to rename and delete files or folders.
39 / 68
Press the UP / DOWN buttons to choose Return, Rename or Delete; then press ENTER to
confirm.
4.8 Managing the Playlist
This Player supports the playlist function, which allows you to add your favorite contents (All,
Music, Photos and Movies), from local HDD to the playlist and enjoy them at any time.
4.8.1 Adding files to the Playlist
Decide on the file you wish to add, press the SELECT button, then press the CONFIRM button;
an on-screen message “Add selects to list” will then be displayed. MULTIPLE FILE
SELECTIONS ARE ALLOWED. See photo below.
40 / 68
4.8.2 Browsing the Playlist
Press the UP / DOWN buttons to select Playlist in the browser menu. Press the LEFT /
RIGHT buttons to select between All, Music, Photos and Movies. Then press the ENTER
button to confirm; you will then enter the playlist.
If you wish to delete a file from the Playlist, press the SELECT button, and then press the
CONFIRM button.
5. FILE COPY MENU
Select the File Copy icon from the home screen to enter the File Copy menu, which allows
you to copy files between Removable Media (USB stick, Memory Card), HDD and Network.
41 / 68
The following buttons can be used under the File Copy menu:
Button
UP / DOWN
RIGHT
SELECT
STOP
ENTER
Function
Move cursor up / down to select the source/destination folders.
To go to the next step.
Select (or cancel) folders or files (the selected items will be ticked).
Cancel all selections.
Confirm the selected options.
Please refer to the following operations if you wish to copy/move folders or files between
sources and destinations available to the Player.
1. Select the source and destination.
2. Select the source files you wish to copy.
3. Select the destination folder to store the above files.
4. Select Copy or Move to proceed.
6. MEDIA LIBRARY
With the built-in, powerful search engine, you can easily search and browse multimedia files
stored on the internal HDD. To enter this menu, select the Media Library icon on the home
screen.
42 / 68
6.1 Music library
Use the left / right button on the remote control to select the Music tab.
Press the Up / Down button to select from Update, Search, All, Artist, Genre and Album.
Then press the ENTER button to confirm.
Update
Search
Select to update and synchronize all the music stored on the internal
HDD to the library.
Select to search for music files by their names.
Use the Navigational Buttons to select and press the ENTER button to
confirm. Select OK, press the ENTER button and then the files you chose
will be displayed on the screen.
All
Select to list all the music files in the library.
Artist
Select to search for music files by artist.
43 / 68
Press the Up / Down button to select the artist, then press the ENTER
button to confirm.
Genre
Select to search for music files by genre.
Press the Up / Down button to select the genre, then press the ENTER
button to confirm.
Album
Select to search for music files by album.
Press the Up / Down button to select the album, then press the ENTER
button to confirm.
Quick-Search
You can also press the Right button to turn on a Quick-Search bar while
browsing music files in the library.
44 / 68
Press the Up / Down button to select characters on the Quick-Search
bar, then press the ENTER button to confirm. And then music files with
names of the specific characters will be displayed at the top. Press the
Left button to delete characters and press the Back button to close the
Quick-Search bar.
6.2 Photo Library
Use the Left / Right button on the remote control to select the Photos tab.
Press the Up / Down button to select from Update, Search, All and Date. Then press the
Enter button to confirm.
Update
Search
Select to update and synchronize all photos stored on the internal HDD
to the library.
Select to search for photos by their names.
45 / 68
Use the Navigational buttons to select and press the Enter button to
confirm. Then select OK, press the ENTER button; the files you desired
will be displayed on the screen.
All
Select to list all the photos in the library.
Date
Select to search for photos by date.
Press the Up / Down button to select the date, then press the ENTER
button to confirm.
Quick-Search
You can also press the Right button to turn on the Quick-Search bar
while previewing photos in the library.
46 / 68
Press the Up / Down button to select characters on the Quick-Search
bar and press the ENTER button to confirm; then photos with names of
the specific characters will be displayed at the top. Press the Left button
to delete characters and the back button to close the Quick-Search bar.
6.3 Movie Library
Use the Left /Right button on the remote control to select the Movies tab.
Press the Up / Down button to select among Update, Search, All, Actor, Genre and Year;
then press the ENTER button to confirm.
Update
Search
Select to update and synchronize all the movies stored on the internal
HDD to the library.
Select to search for movies by their names.
47 / 68
Use the Navigational buttons to select and the ENTER button to confirm.
Select OK and press the ENTER button; the files you have chosen will be
displayed on the screen.
All
Select to list all the movies in the library.
Actor
Press the Up/Down button to select the actor, then press the ENTER
button to confirm.
Genre
Select to search for movies by genre.
48 / 68
Press the Up / Down button to select the genre, then press the ENTER
button to confirm.
Year
Select to search for movies by year.
Press the Up / Down button to select the year, then press the ENTER
button to confirm.
Quick-Search
You can also press the Right button to turn on the Quick-Search bar
while previewing movies in the library.
Press the Up / Down button to select characters on the Quick-Search
bar; press the ENTER button to confirm. And then movies with names of
the specific characters will be displayed at the top. Press the Left button
to delete characters and then press the Back button to close the
Quick-Search bar.
IMPORTANT:
In order to facilitate faster searches, we encourage you to use the following criteria when
naming the movies stored on the internal HDD:
Syntax: [Name][Actor][Genre][Year].Extension
Examples: [Enchanted.CD1][Amy Adams][Love][2007].avi, [The.Dark.Knight.CD1][Christian
Bale][Action][2008].avi, etc.
7. INTERNET RADIO
This Player integrates SHOUTcast free Internet radio function. Select the Internet Radio icon
on the main interface to enter this menu.
49 / 68
IMPORTANT:
•
Make sure the Player is properly connected to a LAN or WLAN with Internet access;
(please refer to Section 3.3, “Changing Network Settings” for more details).
•
When you enter the Internet Radio menu for the first time, it will take several seconds to
download data from the Internet, so please be patient.
•
For more about SHOUTcast, please refer to this website: www.shoutcast.com
The following buttons are found on this menu:
Button
UP / DOWN
PREV / NEXT
Function
Move cursor up / down to select station, channel, and genre.
Page up / down.
ENTER
Confirm and enter the selected menu.
MENU
Add / delete a station to / from Favorite while it is highlighted.
PLAY
Begin playback after a channel has been selected.
STOP
Stop playback.
RETURN
Return to the previous menu.
Station
•
All downloaded stations will be listed in this menu.
Genre
•
You can search for stations by genre (pop, rock, jazz, etc.) in this menu.
50 / 68
Favorite
•
You can list your favorite stations in this menu.
Search
•
You can locate stations in this menu by using key words.
51 / 68
8. BITTORRENT, NAS & WEB SERVER FUNCTION
In order to use this function, please make sure you have enabled the BitTorrent and SAMBA
options in Setup -> Network (see Section 3.3).
Select the BitTorrent icon from the main menu. In this menu, you will be able to see the status
of the Torrents download or configure BT download settings. Press Left/Right button to enter
the Download menu or BT Setup menu.
8.1 Add a New Torrent
First copy the Torrent file to the hard drive in the Player, remember the location of the Torrent
file. On the Player, go to the Media Browser menu and locate your torrent file, then press the
MENU button to add the torrent. Once you add the torrent, the file download will start.
52 / 68
8.2 Download Menu
After adding the BT torrent files, the download progress can be observed in this menu. You can
also set the priority of the download in this menu by pressing the MENU button on the remote
control.
The following buttons can be found on this menu:
Button
Function
UP / DOWN
Move cursor up / down.
MENU
Press to adjust the priority of the download task.
PAUSE
Press to suspend the download.
PLAY
Press to begin the download.
STOP
Press to stop the download.
RETURN
Return to the previous menu.
8.3 BT Setup Menu
53 / 68
In the BT Setup menu, you can configure the following settings. Use UP/DOWN and ENTER
to change the settings.
•
Set the maximum download rate.
•
Set the maximum upload rate.
•
Set the idle hours to start the next download automatically.
•
Set the seeding hours.
•
Set to delete the finished torrent files automatically, if you wish.
•
Set the maximum number of simultaneous download tasks.
8.4 Built-in Web Server
A web server named “Neighbor Web” has been integrated into the Player. To access it, please
follow these steps:
1. Connect the Player to your home network (LAN or WLAN).
2. Find the IP address of the Player in the SETUP -> NETWORK menu.
3. Type the IP address (e.g., 192.168.3.15) in the Address Bar of Internet Explorer on your
PC. You will see the Neighbor Web page.
4. Depending on how the Login Control parameter is set under the Setup->Network menu,
you may or may not have to enter your username and password to login. If Login Control is
set to “On”, the default parameter is as follows:
• Username : admin
• password : 123
5. You can then change the password under Account Management on the Neighbor Web.
6. If the Login Control is set to “Off”, then no login is required and you will be taken directly
into the Neighbor Web.
7. From the Neighbor Web, you can set up the BitTorrent download.
54 / 68
IMPORTANT: Please refer to Extension Info in Section 3.4, “Changing System Settings” to
make sure that all related packages, btpd, samba and unicgi are installed and running
properly.
8.4.1
Account Management
1. Click Account Management on the home page of Neighbor Web.
2. This page allows you to set a password for accessing Neighbor Web.
8.4.2
Visit Neighbor (SAMBA)
1. Clicking Visit Neighbor on the home page of Neighbor Web will launch the Explorer in
your PC so that you can browse the content of the internal HDD of the Player.
55 / 68
8.4.3
BitTorrent Download (btpd)
BitTorrent is a peer-to-peer file sharing protocol used for distributing large amounts of data on
the Internet. A BitTorrent utility (btpd – BitTorrent Protocol Daemon) has been integrated into
the Player to allow BitTorrent control from the web browser.
The BitTorrent client, btpd, is running in daemon mode (a process operating in the
background), which you can manipulate via the Web server.
1. Click BitTorrent Download on the home page of Neighbor Web; then you will enter
the BitTorrent Download page.
Adding New Torrent
1. Click Add New Torrent on the BitTorrent Download page.
2. Click Browse to upload a torrent file and then click Yes to confirm.
8.4.4 Managing the Downloads
The BitTorrent Download page also allows you to start, stop and delete torrents as well as
56 / 68
set priorities for torrents and view the status of current torrents.
1. Click Start to begin download.
2. Click Stop to stop download.
3. Click Delete to delete the selected torrent.
4. Click Refresh to refresh the current status.
5. Click the Down arrow to reduce the priority of the selected torrent.
6. Click the Up arrow to raise the priority of the selected torrent.
8.4.5 Settings
1. Click Setting on the BitTorrent Download page to enter the BitTorrent Setting page.
On the BitTorrent Setting page, you can configure the following settings:
1. Set the maximum download rate.
2. Set the maximum upload rate.
3. Set the idle hours to start the next download automatically.
4. Set the seeding hours.
57 / 68
5. Set to delete the finished torrent files automatically, if you wish.
6. Set the maximum number of simultaneous download tasks.
8.5 NAS Function (SAMBA)
This Player can be used as a NAS (Network-Attached Storage) Server if connected to the
home network via either Ethernet or WLAN. This feature allows you to use the hard disk drive
on the Player as an additional storage area for your home network, or to share files from your
Player and home computer.
In order to use this function, please make sure that you have enabled BitTorrent and the
SAMBA option under Setup -> Network (see Section 3.3). After the configuration is done, you
can access the hard disk drive installed on the Player by typing the IP Address in the Run
window (click Run in the start menu), or in the Address Bar of Internet Explorer on your PC
(for example, if the IP address of the Player is 192.168.0.9, please type: \\192.168.0.9) and
click OK, or press the ENTER button on the keyboard).
For Windows Vista or Windows 7, please type the IP Address (for example \\192.168.0.9) in
the search bar and then press ENTER on the keyboard.
You can view, edit, or delete the files stored on the hard disk drive installed on the Player. You
can also playback and copy files over the network between your PC and the Player.
IMPORTANT:
1. Please turn BitTorrent and SAMBA on in the Setup->Network menu before using these
functions.
58 / 68
9. INTERNET CHANNELS (INTERNET MULTIMEDIA SERVICE) MENU
rd
IMPORTANT: All contents under IMS are provided by 3 parties. UEBO does not offer any
contents under IMS and will not be held responsible for the contents provided there, nor does
rd
UEBO endorse any contents provided by 3 parties. Viewer discretion is advised. UEBO is not
responsible for any operational stability of the contents due to changes made by the content
providers.
9.1 Picasa
The Picasa photo sharing site can be accessed from the Player by going to the Internet
Channels menu. You can view your public photos on the Picasa album by logging in using
your Google username, or you can search for public domain photos.
9.2 News
CNN, NPR and BBC news sites have been pre-programmed on the Player for your
convenience.
9.3 Flickr
You can view the pictures available on Flickr via your HDTV. To browse the pictures, use the
Next and Prev button on the remote control. You can also use the Navigation Buttons. To
look for specific pictures on Flickr, a Search function is provided.
9.4 Weather
To learn the weather of a specific city, you can navigate through the region and country until
you reach the city you are looking for. If you are in the United States, you can enter the ZIP
Code after selecting “United States,” or else simply select the city of you choice; if you wish,
you can add the city to your Favorites list for faster access
IMPORTANT:
•
Make sure the Player is connected properly to a LAN or WLAN with Internet access
(please refer to Section 3.3, “Changing Network Settings” for more details).
59 / 68
10. UPGRADING THE FIRMWARE
“Firmware” is the Operating System (OS) installed on the Player. Firmware upgrades result in
new features, improvements and bug fixes.
To upgrade the firmware, please follow these steps:
1
Download the firmware from the UEBO support site on http://www.uebo.net.
2
Make sure the firmware version you are downloading is newer than the version
currently installed on the Player. You can check the version number by going to
Setup->System->System Info on the player.
3
Copy “install.img” or extension files to the root directory of a USB stick and then insert
it into the USB HOST port of the Player.
4
Put the Player on Standby by pressing the Power button on the front of the Player.
5
Unplug the DC power from the Player.
6
Press and hold the Power button while plugging the DC power in.
7
Wait about 7 seconds or more, then release the Power button.
8
The firmware installation process will then begin. IMPORTANT: PLEASE DO NOT
POWER OFF THE PLAYER WHILE THE FIRMWARE IS BEING PPGRADED. DOING
SO MAY IMPAIR THE FUNCTIONING OF THE PLAYER.
9
There is another way to upgrade the firmware: please refer to the system update and
extension information in Section 3.4, “Changing System Settings,” for more details.
60 / 68
11. APPENDIXES
11.1 Specifications
I/O INTERFACES SUPORTED:
Internal 3.5” SATA I/II HDD
USB 2.0 HOST port x 2 (compatible with USB 1.1)
USB 2.0 DEVICE port (compatible with USB 1.1. For connecting to PC)
Memory Card slot (supports SD/SDHC/MMC/MS/MS Pro)
10/100 Mbps RJ-45 Ethernet LAN Port
Wireless LAN up to WiFi 802.11n (Optional, sold separately)
Composite (CVBS) A/V jack
Component Y/Pb/Pr jack
HDMI V1.3 interface
S/PDIF Coaxial & Optical jack
DC-IN 12V
FILE SYSTEM SURPORTED:
FAT/FAT32/NTFS/EXT3
CONTENT FORMATS SUPPORTED:
Video Formats :
AVI/MKV/TS/TP/TRP/M2TS/MPG/MP4/MOV/M4V/VOB/ISO/IFO/DAT/WMV/ASF/RM/
RMVB/FLV
Audio Formats :
MP3/OGG/WMA/WAV/AAC/FLAC
Picture Formats :
HD-JPEG/JPG/BMP/GIF/TIF/PNG
VIDEO CODECS SURPORTED:
MPEG-1
HD MPEG-2
HD MPEG-4 SP/ASP/AVC (H.264)
WMV9 (VC-1)
RealNetworks (RM/RMVB) 8/9/10, up to 720p
AUDIO CODECS SURPORTED:
MP2/3, OGG Vorbis, WMA (DRM, and Advanced Profile not supported)
SUBTITLE FORMATS SURPORTED:
SRT, SMI, SSA, IDX/SUB, SUB
NETWORK FEATURE
10/100Mbps Auto-Negotiation Ethernet
802.11b/g/n WLAN, up to 300Mbps (supported by optional WLAN USB Adapter)
IMPORTANT: The specifications and design of this product are subject to change without
61 / 68
notice.
11.2 Frequently Asked Questions (FAQ)
Question 1: When I try to disconnect the USB Player, I keep on getting “The Player
‘generic volume’ cannot be stopped right now. Try stopping the Player later,” message.
What should I do?
Answer: Close any program that might be accessing data on the Player, including Windows®
Explorer. If this does not work, close all programs, wait for another 20 seconds and then try the
green arrow icon again. If it still doesn’t work, you should shut down the Player and disconnect
the USB cable.
Question 2: I used my Player to transfer files back and forth between different
computers. Will defragmenting the Player hard disk do any harm to it?
Answer: Defragmenting the Player hard disk may be useful after having transferred many files
to and from the Player. It is never harmful to perform defragmentation on the hard disk drive.
Please be sure that no other programs are running while the Windows® defragment utility is in
use. In addition, make sure that you have connected the Player to the external power adapter
during this procedure.
Question 3: My files have disappeared from the Player. How did that happen?
Answer: Always make sure to browse your files using the correct browser mode, which means
correct filtered views such as Photos, Music, or Movies.
Question 4: During power on, why does the TV flash, or display blue screen or
screensaver?
Answer: This is normal. When the Player first powers up and initializes, it will setup the
corresponding parameters so it can output the correct video signal to the TV. During this
process, the TV will receive incorrect signals that will cause the TV screen to flash; some TV’s
will treat this as no signal and will display a blue screen or screensaver.
Question 5: Why, when I switch to Y/Pb/Pr 480p, 576p, 720p, 1080i or 1080p, does the TV
screen display an unwatchable picture?
Answer: Please check if your TV supports Y/Pb/Pr 480p, 576p, 720p, 1080i, and 1080p
output; if your TV does not support any of these formats, please use the Composite A/V signal
instead. Press the TV SYSYEM button on the remote control and then switch the TV’s video
input to NTSC or PAL.
Question 6: Why is there no sound on movie or music playback when using Y/Pb/Pr
component output?
Answer: Y/Pb/Pr output is a video-only output. When using Y/Pb/Pr output, please use the
Red and White jack on A/V OUT, or the Coaxial/Optical S/PDIF jack, to output sound.
Question 7: I cannot get the SSID name, the screen always shows: “Can’t get any
SSID!!”
62 / 68
Answer: When the USB Wireless Adapter is connected to the Player, it needs some time to
initialize. Please wait about 1~2 minutes and then try refreshing the SSID list again.
Question 8: I cannot see the files shared on my computer via Browser->Network menu.
Answer: Please check the following items:
1) Connect the Player to network and obtain an IP address first;
2) Please enable NetBIOS protocol on the computer;
3) Please check your PC’s firewall settings;
4) Please enable your PC’s “Guest” account;
5) Please share the folders which you wish to browse on your PC and make sure that
“Everyone” or “Guest” has the right to access them.
Question 9: I configured everything correctly, but still cannot get the wireless network
or UPnP function to work.
Answer: Are you using a firewall such as Norton Internet Security, McAfee Personal Firewall,
Zone Alarm, or even the built-in firewall of Windows XP? (Windows 7 and Windows XP Service
Pack 2 automatically upgrade your firewall and turn it on by default).
If you have a firewall running on your computer, it may need to be configured or have
exceptions created in order to allow communication with the Player on the network. To test if
your firewall is preventing network communication (including PING and access shared folders),
try disabling it to see if you can connect; if you can connect with the firewall disabled, you may
need to add the Player to the “Trusted” list or configure the firewall for local intranet access. As
a last resort, you may want to disable your firewall in order to use the Player.
Question 10: I am using the 802.11n Wi-Fi dongle with an 802.11n wireless router. Why
is the speed still 802.11g 54Mbps rather than 300Mbps?
Answer: The IEEE 802.11n draft standard prohibits the use of high throughput with WEP or
TKIP as the unicast cipher. If you use these encryption methods (e.g., WEP, WPA-TKIP) your
data rate will drop to 54 Mbps. You should contact the Access Point or Router manufacturer to
download the latest firmware, or try other encryption methods (WPA2-AES or WPA2-TKIP), or
configure an unsecured profile (this option is not recommended).
Question 11: Where can I find torrent files for BitTorrent download?
Answer: Many torrent sites can be found on the Internet, for example, Isohunt.com,
TorrentPortal.com, Mininova.org, etc. Please be careful about the file you download, as some
might be infringing on the owner’s copyright, thus violating local and international laws.
IMPORTANT: DO NOT DOWNLOAD COPYRIGHTED FILES.
63 / 68
11.3 Copyrights and Trademarks
Copyrights
All rights reserved. No part of this manual may be reproduced, or transmitted in any form or
by any means, whether electronically or mechanically, without the express written permission
from the copyright holder.
Copyrighted materials, such as software, music files, or movies, are protected by local
and international law, and may not be copied or used without permission from the
copyright owner.
Trademarks
UEBO, UITStor, UIT are trademarks of UITStor USA, Inc.
Microsoft and Windows are registered trademarks of Microsoft Corporation.
All other trademarks are property of their respective holders.
Manufactured under license under U.S. Patent #’s: 5,451,942; 5,956,674;
5,974,380; 5,978,762; 6,487,535 & other U.S. and worldwide patents
issued & pending. DTS and the Symbol are registered
trademarks, & DTS 2.0+ Digital Out and the DTS logos are trademarks of
DTS, Inc. Product includes software. © DTS, Inc. All Rights Reserved.
Manufactured under license from Dolby Laboratories.
Dolby and the double-D symbol are registered trademarks of Dolby
Laboratories.
64 / 68
11.4 Warranty
UITStor USA, Inc. (UIT) Twelve (12) Months Limited Warranty
WARRANTY COVERAGE
UITStor USA, Inc. (UIT) warranty obligations are limited to the terms set forth below:
UIT, as defined below, warrants this UEBO-branded hardware product against defects in
materials and workmanship under normal use for a period of TWELVE (12) MONTHS, from
the date of retail purchase by the original end-user purchaser ("Warranty Period"). If a
hardware defect arises and a valid claim is received within the Warranty Period, at its option,
UIT will either (1) repair the hardware defect at no charge, using new or refurbished
replacement parts, or (2) exchange the product with a product that is new or which has been
manufactured from new or serviceable used parts and is at least functionally equivalent to the
original product, or (3) refund the purchase price of the product. UIT may request that you
replace defective parts with new or refurbished user-installable parts that UIT provides in
fulfillment of its warranty obligation. A replacement product or part, including a user-installable
part that has been installed in accordance with instructions provided by UIT, assumes the
remaining warranty of the original product or SIXTY (60) days from the date of replacement or
repair, whichever provides longer coverage for you. When a product or part is exchanged, any
replacement item becomes your property and the replaced item becomes UIT's property. Parts
provided by UIT in fulfillment of its warranty obligation must be used in products for which
warranty service is claimed. When a refund is given, the product for which the refund is
provided must be returned to UIT and becomes UIT's property.
EXCLUSIONS AND LIMITATIONS
This Limited Warranty applies only to hardware products manufactured by or for UIT that can
be identified by the "UEBO" trademark, trade name, or logo affixed to them. The Limited
Warranty does not apply to any non-UIT hardware products or any software, even if packaged
or sold with UIT hardware. Manufacturers, suppliers, or publishers, other than UIT, may
provide their own warranties to the end user purchaser, but UIT, in so far as permitted by law,
provides their products "as is.” Software distributed by UIT, with or without the UIT brand name
(including, but not limited to, system software) is not covered under this Limited Warranty.
Refer to the licensing agreement accompanying the software for details of your rights with
respect to its use.
UIT does not warrant that the operation of the product will be uninterrupted or error-free. UIT is
not responsible for damage arising from failure to follow instructions relating to the product's
use.
This warranty does not apply: (a) to damage caused by use with non-UIT products; (b) to
65 / 68
damage caused by accident, abuse, misuse, flood, fire, earthquake or other external causes;
(c) to damage caused by operating the product outside the permitted or intended uses
described by UIT; (d) to damage caused by service (including upgrades and expansions)
performed by anyone who is not a representative of UIT; (e) to a product or part that has been
modified to significantly alter functionality or capability without the written permission of UIT; (f)
to consumable parts, such as batteries, unless damage has occurred due to a defect in
materials or workmanship; or (g) if any UIT serial number has been removed or defaced.
TO THE EXTENT PERMITTED BY LAW, THIS WARRANTY AND REMEDIES SET FORTH
ABOVE ARE EXCLUSIVE AND IN LIEU OF ALL OTHER WARRANTIES, REMEDIES AND
CONDITIONS, WHETHER ORAL OR WRITTEN, STATUTORY, EXPRESS OR IMPLIED. AS
PERMITTED BY APPLICABLE LAW, UIT SPECIFICALLY DISCLAIMS ANY AND ALL
STATUTORY
OR
IMPLIED
WARRANTIES,
INCLUDING,
WITHOUT
LIMITATION,
WARRANTIES OF MERCHANTABILITY, FITNESS FOR A PARTICULAR PURPOSE AND
WARRANTIES AGAINST HIDDEN OR LATENT DEFECTS. IF UIT CANNOT LAWFULLY
DISCLAIM STATUTORY OR IMPLIED WARRANTIES, THEN TO THE EXTENT PERMITTED
BY LAW, ALL SUCH WARRANTIES SHALL BE LIMITED IN DURATION TO THAT OF THIS
EXPRESS WARRANTY AND TO REPAIR OR REPLACEMENT SERVICE AS DETERMINED
BY UIT AT ITS SOLE DISCRETION. NO UIT RESELLER, AGENT, OR EMPLOYEE IS
AUTHORIZED TO MAKE ANY MODIFICATION, EXTENSION, OR ADDITION TO THIS
WARRANTY.
EXCEPT AS PROVIDED IN THIS WARRANTY AND TO THE EXTENT PERMITTED BY LAW,
UIT IS NOT RESPONSIBLE FOR DIRECT, SPECIAL, INCIDENTAL OR CONSEQUENTIAL
DAMAGES RESULTING FROM ANY BREACH OF WARRANTY OR CONDITION, OR
UNDER ANY OTHER LEGAL THEORY, INCLUDING BUT NOT LIMITED TO LOSS OF USE;
LOSS OF REVENUE; LOSS OF ACTUAL OR ANTICIPATED PROFITS (INCLUDING LOSS
OF PROFITS ON CONTRACTS); LOSS OF THE USE OF MONEY; LOSS OF ANTICIPATED
SAVINGS; LOSS OF BUSINESS; LOSS OF OPPORTUNITY; LOSS OF GOODWILL; LOSS
OF REPUTATION; LOSS OF, DAMAGE TO, OR CORRUPTION OF DATA; OR ANY
INDIRECT
OR
CONSEQUENTIAL
LOSS
OR
DAMAGE
HOWSOEVER
CAUSED,
INCLUDING THE REPLACEMENT OF EQUIPMENT OR PROPERTY, ANY COSTS OF
RECOVERING, PROGRAMMING, OR REPRODUCING ANY PROGRAM OR DATA
STORED OR USED WITH UIT PRODUCTS AND ANY FAILURE TO MAINTAIN THE
CONFIDENTIALITY OF DATA STORED ON THE PRODUCT. THE FOREGOING
LIMITATION SHALL NOT APPLY TO DEATH OR PERSONAL INJURY CLAIMS. UIT
DISCLAIMS ANY REPRESENTATION THAT IT WILL BE ABLE TO REPAIR ANY PRODUCT
UNDER THIS WARRANTY OR MAKE A PRODUCT EXCHANGE WITHOUT RISK TO OR
LOSS OF THE PROGRAMS OR DATA.
CONSUMER PROTECTION LAWS
FOR CONSUMERS WHO ARE COVERED BY CONSUMER PROTECTION LAWS OR
REGULATIONS IN THEIR COUNTRY OF PURCHASE OR, IF DIFFERENT, THEIR
66 / 68
COUNTRY OF RESIDENCE, THE BENEFITS CONFERRED BY THIS WARRANTY ARE IN
ADDITION TO ALL RIGHTS AND REMEDIES CONVEYED BY SUCH CONSUMER
PROTECTION LAWS AND REGULATIONS. Some countries, states and provinces do not
allow the exclusion or limitation of incidental or consequential damages or exclusions or
limitations on the duration of implied warranties or conditions, so the above limitations or
exclusions may not apply to you. This warranty gives you specific legal rights and you may
also have other rights that vary by country, state or province. This Limited Warranty is
governed by and construed under the laws of the country in which the product purchase took
place. UIT, the warrantor under this Limited Warranty, is identified at the end of this document
according to the country or region in which the product purchase took place.
OBTAINING WARRANTY SERVICE
Please access and review the online help resources before requesting warranty service. If the
product is still not functioning after making use of these resources, please contact UIT
Customer Service Representatives using the information provided in the documentation or the
website. A UIT representative will help determine whether your product requires service and if
it does, will inform you how UIT will provide it. UIT will provide warranty service on products
that are tendered or presented for service during the Warranty Period, as permitted by law.
You are responsible for shipping and handling charges when shipping the product to UIT for
service. In accordance with applicable law, UIT may require that you furnish proof of purchase
details and/or comply with registration requirements before receiving warranty service.
67 / 68
11.5 GPL Statement
This product contains free software which is licensed under the GNU General Public License.
After you purchase this product, you may procure, modify or distribute the source code of the
GPL/LGPL software that is used in this product.
To obtain a copy of our open source software, please contact our support center and we will
provide you with a CD-ROM of the source code that is used, charging only the actual expense
involved. However, please note that we do not provide a guarantee with the source code and
that there is no technical support for the source code from us.
68 / 68


