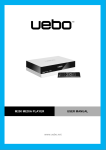
Download M400 MEDIA PLAYER USER MANUAL
Transcript
M400 MEDIA PLAYER USER MANUAL www.uebo.net Table of Contents 1. Introduction ........................................................................................................... 3 1.1 Product Overview ......................................................................................... 3 1.2 Package Contents ........................................................................................ 4 1.3 Radio Interference ........................................................................................ 4 1.4 Repair ........................................................................................................... 5 1.5 Disposing of the Player ................................................................................. 5 1.6 Cautions ....................................................................................................... 5 1.7 Technical Support ......................................................................................... 6 1.8 Connection ................................................................................................... 6 1.9 Front Panel ................................................................................................. 10 1.10 Side Panel .................................................................................................11 1.11 Back Panel.................................................................................................11 1.12 First Time Usage .......................................................................................11 1.13 Remote Control ........................................................................................ 14 2. Main Functions .................................................................................................... 15 2.1 Setup Menu ................................................................................................ 15 2.2 Movie Library .............................................................................................. 26 2.3 Photo Library .............................................................................................. 29 2.4 Music Library .............................................................................................. 32 2.5 File Manager .............................................................................................. 34 2.6 Playlist management .................................................................................. 45 2.7 Copy Function ............................................................................................ 46 2.8 Internet Media............................................................................................. 48 2.9 Web Browser .............................................................................................. 51 2.10 SAMBA Server and Client ......................................................................... 51 2.11 FTP Server ............................................................................................... 52 2.12 Remote Management ............................................................................... 54 3. Upgrading the Firmware ...................................................................................... 55 4. Appendixes ......................................................................................................... 56 4.1 Specifications ............................................................................................. 56 5.2 Frequently Asked Questions ....................................................................... 57 5. Copyrights and Trademarks ................................................................................ 58 6. Warranty.............................................................................................................. 59 7. GPL Statement .................................................................................................... 59 1. Introduction 1.1 Product Overview Congratulations on the purchase of your brand new UEBO M400 Media Player. We hope you will enjoy using it as much as we did designing it. With this Player you can enjoy HD movies, music, and photos of all your memorable moments. Network Feature • A/V streaming via Ethernet(10M/100M/1000M) & WLAN (802.11b/g/n) • A/V streaming via UPnP Media Server • File sharing via SAMBA server • FTP Server • UPnP Server • Internet Radio (SHOUTcast) • BT/Transmission download • Video podcast • Web browser • Remote management • USB 3.0 Support Media Library • Equipped with a powerful search engine that allows you to browse and search multimedia files with ease. Movie Playback • Fast forward/rewind • View subtitle • Supports major video formats (1080p HD video decoding) • Subtitle control: color/offset/size • Movie format: AVI/MKV/TS/TP/TRP/M2TS/MPG/MP4/M4V/MOV/VOB/ISO/IFO/DAT/ WMV/ASF/RM/RMVB/FLV Music Playback • Fast forward/rewind • Shuffle • Repeat • Music format: MP3/OGG/WMA/WAV/FLAC/APE Photo Viewing • You can view photos in slide show mode with background music. • Zoom in/out, Rotate • Photo format: HD JPEG/BMP/GIF/TIF/PNG USB 3.0 &2.0 Support • USB 3.0 DEVICE port (for computer connection, compatible to USB 2.0 ) • USB 2.0 HOST port (for USB storage devices) Card reader • SD/MMC File Copy • Supports copying & moving files among USB, HDD and/or memory card. Note: All the information contained in this manual was correct at the time of publication. However, as our engineers are always updating and improving the product, your device’s software may have a slightly different appearance or modified functionality than presented in this manual. 1.2 Package Contents Part Quantity M400 Media Player 1 USB 3.0 cable 1 A/V cable 1 Remote Control 1 Remote Control Battery 2 AC/DC adaptor 1 Quick Installation Guide 1 User Manual 1 Note: The actual contents in the package might be different from the packing list in this manual. 1.3 Radio Interference This Player complies with Part 15 of the FCC Rules. Operation of this Player is subject to the following two conditions: 1), this Player must not cause harmful interference and 2), must accept any interference received, including interference that may cause undesired operation. 1.4 Repair If you experience problems in operating the Player, or need the Player repaired, please call UEBO Technical Support. Contact information for Technical Support can be found in the Service section of our website, http://www.uebo.net or in Section 1.7 below. 1.5 Disposing of the Player UEBO strongly encourages recycling of this Player if and when you decide to dispose of it. Since each city has different regulations with respect to recycling, please consult your local recycling information center for advice on proper methods of disposal. 1.6 Cautions You should not modify this Player in any way, as this will void your product warranty. 1. Make sure the power cable is not subjected to weight pressure or sharp objects that might damage the outer shell of the cable and expose the inside wire. 2. To avoid the risk of electric shock, please be sure to unplug the power adapter before cleaning the Player. rd 3. Do not replace the power adapter, power cable or power connector with a 3 party product; instead, call UEBO Customer Service to obtain the replacement part. 4. Do not disassemble the Player; doing so will void your Player Hardware Warranty. 5. Do not operate the Player near water or in a wet or highly humid environment, so as to avoid electrical shock. 6. Do not use the Player during a thunderstorm as there may be a remote risk of electric shock from lightning. 7. Do not hit the Player with a hard object. 8. Do not shake the Player, as this could cause damage to the hard disk. 9. Do not place the Player close to an electromagnetic or magnetic field, as this could cause damage to the hard disk. 10. Keep the Player and its cables away from children, so as to protect them from electrical shock or suffocation hazard. 1.6.1 A WARNING Regarding the Hard Disk The Player uses an internal hard disk for media data storage. If you need to format the hard drive after the initial format, you should first read the <Frequently Asked Questions> section carefully, as well as check our website for the most-up-to-date information before you proceed. 1 Physical impact may create a bad sector in the hard disk. If this is the case, the best way to fix the problem is to connect the hard disk to the Windows PC and run a CHKDSK command. 2 All data stored in the Player may be lost due to physical impact, electrical shock, power failure, HDD format and other causes, so please backup your data regularly. It is recommended that in order to maintain consistent hard disk performance, you should routinely perform defragmentation (by connecting it to your PC and run Disk Defragmentation utility) of the hard disk after long periods of usage. 1.7 Technical Support For all troubleshooting and technical issues you can contact UEBO Technical Support by doing the following: • Email us at [email protected]. • Go on www.uebo.net and activate live chat. • Call us Toll Free at 1-877-986-8588 • Send us a Fax at 1-408-986-8585 Our representatives are ready to assist you Monday through Friday from 9am – 6pm (PST). Also find Frequently Asked Questions, as well a Knowledge Base with many articles on known issues, of our products at www.uebo.net/help.asp. 1.8 Connection 1.8.1 Connecting the Power Supply 1. Follow the instructions below and connect the AC adaptor to the Player’s DC IN jack. 2. Follow the instructions below and plug the AC adaptor into the power outlet. 1.8.2 USB Mass Storage Device (like USB stick, USB HDD etc.) Connection Note: The Player will recognize the device as soon as it’s plugged in and all files can be accessed through the appropriate home menus or the file manager. In order to access the contents of the external USB devices (purchased separately): 1 Make sure the Player’s power is on. 2 Plug the USB stick, USB HDD, USB Camera, USB Camcorder, or any USB storage devices into the USB HOST port of this Player. 3 You can then browse the contents of the connected USB devices. 1.8.3 Connecting a Memory Card Note: The Player will recognize the device as soon as it’s plugged in and all files can be accessed through the appropriate home menus or the file manager. The Player has a built-in memory card slot, which enables you to view the contents of the memory card. To do this, please follow these instructions: 1 Insert the memory card into the memory card slot on the Player’s front panel. 2 Make sure to properly orient the memory card before insertion. And remember that the memory card can only be inserted from one direction, please don’t try to force it in as that may damage the memory card or the memory card reader in the Player. 1.8.4 TV connection 1.8.4.1 A/V OUT (Composite A/V) 1 Plug the composite cable connector (3 colors - Yellow/Red/White) into the Player’s A/V OUT jack. 2 Plug the other end of the composite cable into your TV’s A/V IN jack. 3 Changing the input on the TV to the jack you used in step 2. 1.8.4.2 Y/Pb/Pr Component OUT 1 Plug the component cable (3 colors – Yellow, Blue and Red) into the Player’s Y/Pb/Pr jack. 2 3 Plug the other end of the component cable into your TV’s Y/Pb/Pr jack. The component cable does not carry audio; to facilitate audio connection, please do one of the following: a) Use the audio output from the A/V OUT jack; b) Use the audio output from the S/PDIF Coaxial or Optical jack. 1.8.4.3 HDMI OUT 1. Plug one connector from your HDMI cable to the Player’s HDMI jack. 2. Plug the other connector from your HDMI cable into the TV’s HDMI jack. IMPORTANT: The HDMI cable is an optional accessory and is sold separately 1.8.5 Digital Audio Device connection To enjoy special sound processing by Dolby Digital or DTS (Please refer to “3.1 Changing Audio Settings” for configuration), do the following: 1. Plug the coaxial RCA connector into the Player’s S/PDIF coaxial jack. 2. Connect the other end of the coaxial RCA cable to your amplifier or your home stereo system. 3. Using your optical TOSLink cable is another option. Connect the TOSLink cable to the optical jack. 4. Connect the other end of the TOSLink cable to your Amplifier or home stereo system. NOTE: We do not supply TOSLink Optical fibers or Coaxial RCA cables. 1.8.6 Connecting to a LAN To connect to a LAN (Local Area Network) you need a CAT5, CAT5e or CAT6 network cable (not supplied). 1. Connect one end of the network cable to the Player’s RJ45’s LAN jack. 2. Connect the other end of the network cable to the network router/switch/hub. 1.8.7 Connecting to a WLAN This Player has built in Wi-Fi and doesn’t require additional accessories in order to connect to your network. For configuration information, please refer to section ‘2.1.4 Changing Network Settings’. 1.9 Front Panel 1. VFD display screen 2. POWER indicator 1.10 Side Panel 2. Memory Card slot 2. USB 2.0 HOST port 3. USB 3.0 Device port 4. Antenna 1.11 Back Panel 1. U button (Upgrade Button) 2. A/V OUT jack 3. Y/Pb/Pr OUT jack 4. HDMI jack 5. RJ45 LAN socket 6. S/PDIF Optical jack 7. S/PDIF Coaxial jack 8. DC-IN jack 1.12 First Time Usage 1.12.1 Power On / Off Power On After connecting the DC IN jack, press the power button on the remote; the Player will boot up and enter the home screen, then the power indicator will turn blue. Power Off Press the power button on the remote; the Player will enter standby mode and the power indicator will turn red. To power off the Player, unplug the power cord. 1.12.2 Menu language The Player’s system language can be set not only to English but to other languages as well. You can select the language you want in the Setup menu, which will take effect immediately. 1.12.3 HDD Format For users who wish to install a new SATA hard disk drive (HDD) into the Player, please refer to Quick Installation Guide for HDD hardware installation. After the HDD installation, please follow the steps below in order to format the hard disk on the Player: Note: A password is needed when you try to format the HDD; the default password is set to ‘0000’. Please refer to ‘2.1.5 Miscellaneous’ to change password settings. Step 1: Select OK on the Warning page, then press OK to confirm. You will see this message after you have installed the hard disk and powered on the Player. Note: This page can be also accessed via Setup->System-> Format menu. Step 2: Select Format, press OK and then the hard disk formatting process will begin. IMPORTANT: Please make sure that the hard disk does not contain any important data as all files will be erased. The formatting process should be finished within a few minutes. Once completed, the hard disk provides the Player with media file storage. IMPORTANT: HDD formatting will remove all data stored on the hard disk drive, so please proceed with caution. 1.13 Remote Control No. Button 1 2 Power Numeric buttons 3 4 5 6 Shuffle VOLMute Menu 7 8 Home Navigational buttons OK Stop Play/ Pause 9 10 11 1. Power 3. Shuffle 5. Mute 2. Numeric buttons 4. VOL6. Menu 7. Home 9. OK 11. Play/Pause 8. Navigational buttons 10. Stop 12. FR 13. FF 14. Red 15. Green 16. Setup 17. TV SYS. 18. Goto 19. Slow 20. Browser 21. Edit 22. Copy 23. A-B 24. Angle 25. Zoom 26. Audio 27. Subtitle 28. Yellow 29. Blue 30. Prev 31. Next 32. Info 33. Back 34. VOL+ 35. Repeat 36. Eject Function Press to enter standby mode or wake up. Press to enter channel numbers or numeric input when changing settings. Press to select shuffle mode during music playback. Press to decrease the volume. Press to mute audio output, and press again to resume. Press to enable the option menu, where you can change the review mode of file manager and media library; Press to display or hide the option menu during playback. Press to enter the home screen. Press the arrow buttons to select menu options, and the OK button to confirm. Press OK button to confirm. Press to stop playback. Press to begin/pause playback. 12 FR 13 FF 14 15 16 17 Red Green Setup TV SYS. 18 Goto 19 Slow 20 21 Browser Edit 22 23 24 Copy A-B Angle 25 26 27 Zoom Audio Subtitle 28 29 30 31 32 Yellow Blue Prev Next Info Press to fast rewind the current playback. Press repeatedly to select speeds Press to fast forward the current playback. Press repeatedly to select speeds. Function is available in virtual keyboard. Function is available in virtual keyboard. Press to enter the setup menu. Press to switch between NTSC, PAL, 480P, 576P, 720P, 1080I, and 1080P. Press to jump to a specific point on a title. Specify the point using Title, Chapter and Time. Press to play back in slow motion. Press the PLAY button to resume regular playback. Press to enter file manager. Press to enter file editing menu in file manager. Press to enter file selecting menu in media library. Press to enter file selecting menu. Press to set the beginning and end points of a section to repeat. Press to change the view angle during DVD (with multi-angle) playback. Press to zoom the image (photo or video). Press to select an audio track. Press to set subtitle options. You can change the color/size/offset/text encoding of subtitle. Reserved button. No function has been assigned to it yet. Press to open/close USB DVD-rom. Press to view the previous file / page up. Press to view the next file / page down. Press to display current status. Press during playback, an onscreen display appears showing track number and time elapsed/remaining. 33 34 35 36 Back VOL+ Repeat Eject Press to return to the previous screen while navigating menus. Press to increase the volume. Press to set repeat option. Press to safely remove the USB device. 2. Main Functions 2.1 Setup Menu The Setup menu allows you to personalize and configure your preferences. To select a Setup option: 1 Select the Setup icon on the home screen, or press the SETUP button on the remote control. 2 Use the LEFT/RIGHT Navigational Buttons to select an option and then press OK. There are five Setup options, including System, Audio, Video, Network and Misc. Use the UP/DOWN navigational buttons to select a menu. Press OK to confirm. Press RETURN to cancel and display the previous menu screen. 2.1.1 Changing System Settings Use this menu to configure system settings. Menu Language • Select to choose the OSD (On-Screen Display) language. Change system font • Setting the system font.(Create a folder named “Resource” in the root directory of your USB or HDD, rename your font as ‘font.ttf ‘and then copy it to the folder.) Change desktop • Setting the skin of the desktop.(Create a folder named “Resource” in the root directory of your USB or HDD, rename your photo as ‘desktop.png ‘and then copy it to the folder.) Text Encoding • Select to set the text encoding option (subtitle display) DVD Auto-Play • Select to turn on/off DVD auto-play. Screen Saver • Select to turn on / off screen saver. DLNA DMR • Digital Media Renderer. This is referring to the Player itself. The options are On/Off. If it is On, you can play content received from a digital media controller (DMC), which will find content from a digital media server (DMS). For more information on DLNA and its terminology, please refer to www.DLNA.org. DLNA Device Name • Select to name the DLNA DMR for easy identification on the network. Mini KBD Language • Select to change the language of the mini keyboard. Scan storage • Select to set the scan mode of media library. If it is ON, the Player will scan your storage device for media files. Resume Play • Select to turn on / off resume playback (auto-bookmarking) feature for movies. Format • Select to format your HDD. Note: HDD format will remove all data stored on the hard disk drive. Make sure to backup all data before proceeding. BD Menu • Select to turn on/off the Blu-ray Disc menu option. Restore Default • Select to restore factory defaults. 2.1.2 Changing Audio Settings Use this menu to configure audio settings Night Mode • Choose among Off / On / Comfort. If the option is turned on, the audio output volume will be decreased to make you more comfortable. HDMI Output / SPDIF Output • Choose between HDMI LPCM / HDMI LPCM Multi-ch / HDMI RAW / SPDIF LPCM / SPDIF RAW mode. This option will determine if the Player will decode the audio signal. The Player will decode the DTS or Dolby audio signal from your video file if HDMI LPCM, HDMI LPCM Multi-ch or SPDIF LPCM option is selected. The Player will not decode the DTS or Dolby audio signal if HDMI RAW or SPDIF RAW is selected. Usually this option is selected if the HDMI cable is connected to the home stereo system that is capable of decoding DTS or Dolby signal. 2.1.3 Changing Video Settings Use this menu to configure video settings. Aspect Ratio • Pan Scan 4:3: Display a wide format picture onscreen while cutting off the left and right portions; select when a standard 4:3 TV is connected. • Letter Box 4:3: Display a wide format picture with two black borders on the top and bottom of the screen; select when a standard 4:3 TV is connected. • 16:9: Display the 16:9 format picture onscreen; select when a TV with 16:9 display ratios is connected. • 16:10: Select when a TV with 16:10 display ratio is connected. TV SYSTEM • Select to adjust the video output resolution, which include: HDMI Auto, 480P, 720P 60Hz, 1080i 60Hz, and 1080P 60Hz. 1080p 24Hz • Choose this option to enable or disable 1080P 24HZ support. A TV set with 1080P 24HZ (24P) mode is needed. Plasma Mode • Helps protect your plasma TV by reducing the level of brightness. Deep Color • Helps show more detailed level of color depth, making continuous color changes smoother. A TV set with deep color support is needed. Screen Size • Adjust the video output size according to the size of the TV screen. 2.1.4 Changing Network Settings Use this menu to configure your Wireless Local Area Network. Wired LAN Setup • DHCP IP (AUTO) Select to obtain IP address automatically. • FIX IP (MANUAL) Select to manually input the IP Address, Subnet Mask, Default Gateway, and DNS Server IP Address. Wireless Setup There are 3 modes for you to select, Infrastructure (AP), Peer to Peer (Ad Hoc) and WPS (AP) mode. Follow the prompting message on the screen and press EDIT button to choose Peer to Peer (Ad Hoc) or WPS (AP) mode. This Player can store up to three wireless network connections. Press OK to connect, and press RETURN to cancel. You can also press ZOOM to modify the parameters of the connection, and press EDIT button to choose Peer to Peer (Ad Hoc) or WPS (AP). Infrastructure (AP) Infrastructure mode is used to connect computers with wireless network adapters, also known as wireless clients, to an existing wired network with the help from wireless router or access point. Please follow these steps to configure your wireless network. Step 1: Scanning AP(Access Point)in your network Follow the prompting message on the screen and press the ZOOM button to select Infrastructure (AP) mode and update the access points list and all SSID will be displayed on the screen. Step 2: Input WEP / WPA key. Press OK to input encryption keys via the virtual keyboard. Press the navigational buttons to select, OK to input, ZOOM to switch between uppercase and lowercase, STOP to delete a character, -> to insert a space, PLAY/PAUSE to make more symbols available, EDIT to change the language of the virtual keyboard, and OK to confirm and to start testing the connection. The testing process can take a couple minutes to establish a connection. If the test is ok, the network information (Profile Name, IP address, Subnet Mask, Gateway, etc.) will be displayed on the screen. Peer to Peer (Ad Hoc) Peer to Peer mode, which is also called Ad Hoc mode or computer-to-computer mode, is used to connect wireless clients directly together, without the need of a wireless router or access point. WPS (AP) WPS, Wi-Fi Protected Setup, is used to connect a wireless router directly, without searching for a SSID and inputting password. In this mode, you just need to configure the parameters of your router which support WPS function. There are two modes for you to select, PBC mode and PIN mode. PBC: First press the WPS button on the router or select the button mode in the configuration menu of the router, then select the PBC mode. The testing process can take a couple minutes to establish a connection. PIN: Input the pin code when configuring your router, and then select PIN mode. The testing process can take a couple minutes to establish a connection. PPPoE Setup • Input your ADSL account username and password from your ISP in this menu; the Player will try to obtain your IP address automatically from your ISP, based on PPPoE protocol. BT • Select to turn BTTorrent download On/Off. Please refer to ’2.8.2 BT Download’ for more details on this unique feature. Transmission • Select to turn Transmission function On/Off. The Transmission feature is another way to download your torrents. Please refer to ‘2.8.3 Transmission Download’ to learn more details on how to use this feature. NAS Mode • Select to turn the NAS function On/Off. Please refer to ’2.10 SAMBA Server’ for more details on the NAS function of this product. FTP • Select to turn On/Off FTP services and configure your desired login User Name and Password to access your Player through an FTP Client. Please refer to ’2.11 FTP Server’ for more details on this unique feature. UPnP Server • This Player can work as an UPnP Server; all media files stored on your HDD can be found by the UPnP client on your PC. Host Name • Select to key in your desired host name to be seen in your network. 2.1.5 Miscellaneous Use this menu to adjust miscellaneous settings. Version Info • This tab gives you information about the software installed and about the material components of your Player. Network Info • This tab shows you information about your network, MAC Address, IP address Gateway, Subnet. USB Upgrade • This setting is used to update the firmware or extension package via a USB stick. In order to upgrade the device to the new firmware, please follow the instructions below; 1) Download the latest firmware from http://www.uebo.net 2) Copy ‘install.img’ to the root directory of a USB stick, and then connect it to the USB HOST port of the Player. 3) Navigate to the Setup menu. 4) Select USB Upgrade. 5) Press the OK button and the upgrade process will start. HDD spin down • Select to turn the HDD spin down function to Off/5 minutes/15 minutes/30 minutes. This will prevent your HDD from running when you are not using your Player. Pin Protection • Prevents the deletion of files and formatting of the HDD by asking for a password. The default password is ‘0000’, when asked for a password press the Numerical buttons to input, and the OK button to confirm. Folder Protection • You can password protect your files so only you can gain access to them. The default password is ‘0000’, when asked for a password press the Numerical buttons to input, and the OK button to confirm. Password • Change the default password. The default password is ‘0000’, when asked for a password press the Numerical buttons to input, and the OK button to confirm. 2.2 Movie Library Select the Movies tab off the home menu to view your video files. Only files that are supported by this device will be displayed. Please refer to Appendixes in chapter ‘4.1 Specifications’ for more details about the supported files. 2.2.1 Movie Library Options In the movie library, press the MENU button to display the option menu and its capable functions Search • Search through your movie files. Review Mode • Choose a review mode among Thumbnails, List, and Preview from the option menu. DVD Mode • Choose to show All Movies or DVD files (.VOB, .ISO, etc.). Sorting Mode • Choose to sort by Name, Size, Most Viewed or Recently Added from the option menu. IMPORTANT: In order to facilitate faster searches, we encourage you to use the following criteria when naming the movies stored on the internal HDD, USB Drive, External HDD or SD Card: Syntax: [Name][Actor][Genre][Year].Extension Examples: [Enchanted.CD1][Amy Adams][Love][2007].avi, [The.Dark.Knight.CD1][Christian Bale][Action][2008].avi Flash Animation • Choose to display .swf files in the media library. Go to Folder • Choose to locate a specific file in the file manager. 2.2.2 Movie Playback Control You can access the following functions during playback. Button Function Play/Pause Pause or resume the current playback. Prev/Next View the previous or next file/chapter. FR/FF Fast rewind or fast forward. Press repeatedly to select the speed. Slow Play back in slow motion. Goto Jump to a specific point on a title. Specify the point using Title, Chapter and Time. Menu Display or hide the option menu during playback. Stop Stop playback. VOL+/- Increase/decrease the volume. Audio Select an audio track. Subtitle Select a subtitle and change the color/size/offset/text encoding of subtitle. Repeat Zoom Info Set the repeat option. Zoom in the image. View the media information. 2.2.3 Movie Playback Options During movie playback, press the MENU button to display or hide the option menu at the bottom of the screen. DVD Menu • Select to return to the navigation menu during DVD VOB, IFO or ISO playback. GOTO • Select to jump to a specific point in a title. Specify the point using Title, Chapter and/or Time. Video Setting • Select to adjust the value of Brightness, Contrast, Saturation and Hue. 2.3 Photo Library Select the Photos tab off the home menu to view your images. Only files that are supported by this device will be displayed. Please refer to Appendixes in chapter ‘4.1 Specifications’ for more details about the supported files. 2.3.1 Photo Library Options In the photo library, press the MENU button to display the option menu and its capable functions. Search • Search through your photo files. Review Mode • Choose a review mode among Thumbnails, List, and Preview from the option menu. Album Mode • Choose to show All Photos or Photo Albums. Sorting Mode • Choose to sort by Name, Recently Added, or Recently Played from the option menu. Date View • Choose to view photo by date taken. 2.3.2 Photo Playback Control You can access the following functions during photo playback. Button Function Prev / Next View the previous or next photo. Up / Down Rotate a photo in any angle. Menu Display or hide the option menu during playback. Stop Stop playback. Zoom Zoom in the image. 2.3.3 Photo Playback Options During photo playback, press the MENU button to display or hide the option menu at the bottom of the screen. You can get following the functions through the option menu during photo playback. Slideshow Control • Select to choose the Timing and Transition effect of the slideshow. Repeat Mode • Choose a repeat mode between Repeat off, Repeat all and Shuffle Loop from the option menu. Select Music • Select to turn On/Off background music during slideshow playback. • Select a specific file or folder as the background music during photo playback. Video Setting • Select to adjust the value of Brightness, Contrast, Saturation and Hue. 2.4 Music Library Select the Music tab off the home menu to view your audio files. Only files that are supported by this device will be displayed. Please refer to Appendixes in chapter ‘4.1 Specifications’ for more details about the supported files. 2.4.1 Music Library Options In the music library, press the MENU button to display the option menu and its capable functions Search • Search through your music files. Review Mode • Choose a review mode among Thumbnails, List, and Preview from the option menu. Filter options • Choose All Songs to show all songs. • Choose Albums to search for music files by album. • Choose Artists to search for music files by artist. • Choose Genres to search for music files by genre. • Choose Years to search for music files by modified year. • Choose Playlists to search through saved playlists. Sorting Mode • Choose to sort by Recently Played, Recently Added or by Name from the option menu. 2.4.2 Music Playback Control You can access the following functions during music playback. Button Play/Pause FR / FF Prev / Next Menu Function Begin/Pause playback. Fast rewind or fast forward. Press repeatedly to select the speed. View the previous or next movie. Display or hide the option menu during playback. VOL+/- Increase/Decrease the volume. Repeat Set the repeat option. Shuffle Select the shuffle mode. 2.4.3 Music Playback Options During music playback, press the MENU button to display or hide the option menu at the bottom of the screen. You can get the following functions through the option menu during music playback. Repeat Mode • Choose a repeat mode among Repeat off, Repeat one, Repeat all and Shuffle Loop from option menu. 2.5 File Manager The file manager allows you to browse and play music, photo and movie files stored on an internal HDD, external USB device, memory card and network. 2.5.1 File Manager Options In the file manager, press the MENU button to display the option menu and its capable functions Review Mode • Choose a review mode among Thumbnails, List, and Preview from the option menu. Filter options • Choose Movies to display all the supported video files in the current directory. • Choose Photos to display all the supported image files in the current directory. • Choose Music to display all the supported audio files in the current directory. 2.5.2 A/V Streaming via Network You can stream your media files shared on the home network. Please refer to ’2.1.4 Changing Network Settings’ for more details on network settings. There are two ways to locate media files shared on your local network in the Network menu. 1) Go to File Manager and browse through Workgroup. 2) Go to File Manager and browse through My_Shortcuts. 2.5.2.1 Browsing though workgroup You can choose the Workgroup on which your PC belongs to from the Workgroup list. Find your PC name and press the OK button to confirm. (If you set up file access protection on your PC, you may have to enter the user name and password to gain access) Then you can select and play the shared media files that you want to browse. Note: • Due to different network conditions the workgroup may not be accessible or shown on the list; in this case you will need to use My_Shortcuts to browse shared files. 2.5.2.2 Browsing though ‘My_Shortcuts’ You can also set a ‘Specific File Server IP’ and access it from My_Shortcuts. When in My Shortcuts: 1. Press the Red button and a popup menu appears. 2. Select Add to open a popup menu where you can input Label, Net User ID, Net Password, Domain, Host Name, and Specific File Server IP. Select OK to confirm, Cancel to cancel, and Simple / Detail to switch between simple and advanced options. 3. Select the shortcut you added and press the OK button to confirm. Then you can see and play the shared media files on the destination computer. 2.5.3 A/V Streaming via UPnP-server An UPnP/DLNA (Universal Plug and Play/Digital Living Network Alliance) client has been integrated into the system, which enables the Player to automatically detect UPnP/DLNA Media Servers on the network. You can then browse and stream media files from the UPnP/DLNA. 2.5.3.1 Installing UPnP Media Server on your PC There is a wide variety of free and commercial UPnP Media Server software, such as Windows Media Connect, Windows Media Player 11, XBMC Media Center (Linux/Mac/Windows), MediaTomb (Linux), PlayOn.TV and more. Please install one of them on your networked computer to enable viewing of streaming contents. In the following sections, we will use Windows Media Player 11 DLNA Server on Microsoft Windows XP SP2 and PlayOn TV as examples. 2.5.3.2 Sharing Media on your PC The Media Sharing feature of Windows Media Player 11 lets you enjoy the contents of your Windows Media Player library from anywhere in your home. • Open Windows Media Player 11 and then click Library -> Add Library -> Advanced Options to add or remove media files from the library. • Click Library -> Media Sharing, then you can allow or deny the Player to access the media library. Click Allow to authorize your Player. 2.5.3.3 Streaming Media on your Player • Connect your Player to the home network (LAN or WLAN). • Visit Files Manager - > UPnP menu on the Player, select the UPnP-server, and press OK. • You can then browse the media library shared by Windows Media Player 11. Note: • Make sure your Player and your computer are on the same local area network and subnet. • Firewalls may prevent your Player from communicating with your computer. Please open the ports manually and add your Player to the ‘trusted’ list, or disable the firewall temporarily. 2.5.3.4 Setting Up PlayOn TV UPnP/DLNA Server PlayOn is a software program that runs on your Windows PC, giving you access to a wide range of Internet-based on-demand content on your TV via M400 Media Player. Examples of content sites that are available through PlayOn include YouTube, Hulu, Netflix, Amazon VOD, and many others. This guide is intended as a brief and simple overview of PlayOn and the features it provides. Minimum PC Requirements • Microsoft Windows XP (Service Pack 2 or later), Windows Vista, Windows 7, or Windows Server 2003/Windows Home Server (Service Pack 1 or later). 64-bit versions of Windows are also supported. • Windows Internet Explorer 7 or later • Windows Media Player 9 or later • Installation includes the Microsoft .NET Framework 2.0 (Service Pack 1) if needed • Pentium 4 3.2+ GHz, Pentium M 2.0+ GHz, or any multi-core x86 processor • 512 MB RAM (1 GB recommended) • 100 MB of available disk space for installation, plus recommended 4-5 GB extra space on the same drive where Windows is installed (or on a separate drive if you re-map it) • Internet broadband connection of at least 1.5 Mbps, and home network with wired, powerline, or 802.11n connections (for wireless home networks with 802.11g, either the PC or device should be on a wired connection) • Both the PlayOn PC and device should be connected directly to the same router (putting them on the same "subnet"). Advanced networking setups using additional network interfaces such as virtual adapters (VPNs) or Internet Connection Sharing (ICS) may work, but are not officially supported • Third-party security software must be configured to allow full local and online network access to Program Files\MediaMall\MediaMallServer.exe & SettingsManager.exe Installing and Running PlayOn PlayOn is simple to install and easy to get running and start using. 1) Download and install PlayOn on your Windows PC from www.playon.tv. 2) Turn on your M400 Media Player, find the PlayOn server under Media Browser, UPnP, and watch online content directly on your television. Make sure your M400 Media Player has a network connection to the same router that your PlayOn PC is connected to, and has the latest system software update installed. Note that when selecting any online video, it may take up to 10 seconds or longer before video starts showing on your television. Certain devices also show no indication that video is loading, so you should wait to see if the video does start playing. Having a faster broadband connection and/or PC will help reduce this buffering time. UEBO M400 Media Player You can find the PlayOn Media Server(s) by searching under Media Browser, UPnP. Make sure M400 Player is connected to the same LAN segment as your PlayOn.TV server and that the network function is working properly. PlayOn Settings A number of options can be configured in PlayOn Settings. Also, PlayOn Settings is a good place to start looking for help when you are experiencing technical problems. Open Start Menu / All Programs / PlayOn / PlayOn Settings, and review the available options. UPnP Server Status The status of the PlayOn UPnP server can be seen in PlayOn Settings as well. If the server is running, it allows devices to connect to this PC. You can left-click the status panel to force PlayOn Settings to determine the status of the server. The various status messages are described below: Searching A search is still being performed. Wait for it to finish. Running The PlayOn server is running correctly with no errors detected. Not Running The PlayOn server is not running. Not Found The PlayOn server could not be discovered on the network. Check firewall settings if you think it should be running. Initializing The PlayOn server is still initializing. Click the status panel to restart the search. No Service The MediaMall service is not enabled. You can enable this service in Control Panel/Administrative Tools/Services. No SSDP The SSDP Discovery Service on this PC is disabled. Without it, PlayOn Settings cannot detect the PlayOn server. You can enable this service in Control Panel/Administrative Tools/Services. Error An error occurred when trying to detect the server status. Contact support for assistance. You can manually start and stop the server by pressing the Start/Stop button. When stopping the server, note that if any devices are connected to this PC, those connections will be closed. They can of course be re-established by the device(s) once the server is restarted. You can also disable or enable PlayOn from running automatically when Windows starts, as well as show an optional icon in the system tray, which allows you to see the status of the PlayOn server, and to open PlayOn Settings through a right-click menu option. Video Performance If you are experiencing latent or choppy video playback while using PlayOn, you may want to modify the performance settings to a lower value. This can be especially useful if either your PC processor is a bit slow, or if you are using a home wireless network or broadband connection that is not fast enough. A higher performance setting will attempt to preserve the quality of the videos that are pulled in from the Internet, but will tax your computer and network more. It is recommended that you use the “Auto” setting, as this allows PlayOn to determine which quality setting works best for your setup. If the automatic setting still doesn’t work, try “Low” or “Medium” to see if this helps. You can also use this setting to force PlayOn to always use a “High” or “Max” setting if you are confident your internet and PC speeds are always sufficient. Video Processing You can configure PlayOn to either always fully process every video you start to watch from your device, or to end processing shortly after you stop or pause a video. This may be useful for users who prefer their PC to not allocate resources to PlayOn when they stop or pause a video before it finishes. Allowing all videos to be fully processed gives you the option in most situations to resume playback for the most recently played video, but will tax your PC processor until the entire video has been downloaded and converted. Parental Controls Some content providers have MPAA or FCC TV rated media, and offer the opportunity for the user to filter their content based on parental controls. By enabling the “Enable parental controls” checkbox, you can select a maximum allowed rating for movies and television programming, as well as decide to block unrated content. It is important to note that some content providers may not comply with these settings. User discretion is advised. Software Updates You can manually check for new updates to PlayOn by pressing the “Check Now” button in the “Software Updates” section. If the “Check automatically” checkbox is enabled, then the PlayOn installation will regularly detect if there are new updates available, and inform the user with a balloon notification from the system tray. PC Specifications and Security Software A number of factors can prevent PlayOn from running optimally, and in more severe cases, can even block PlayOn entirely. The main factors that can interfere with PlayOn are listed below. Note also that in some cases, changing your Performance setting (see below) can help remedy issues you may have with playback. Antivirus and Firewall software The vast majority of problems with installing and running PlayOn are due to antivirus and firewall software. You may want to try temporarily disabling your antivirus software to see if it helps fix any issues. If you have third party antivirus or firewall security software installed, make sure that you grant full local and online network access to the following applications: • C:\Program Files\MediaMall\MediaMallServer.exe • C:\Program Files\MediaMall\SettingsManager.exe Broadband download speed In order to stream real-time videos from the Internet, your broadband connection speed must be consistently fast enough to maintain a stable download rate. The general rule of thumb is that if you can’t watch videos from sites like YouTube, Hulu, and Netflix directly in your PC browser without seeing a lot of buffering, then it definitely won’t work in PlayOn either. We recommend a minimum download speed of around 1.5 Mbps. In some cases, even this won’t be fast enough, depending on the stream quality for the particular media that you are attempting to watch. Home network performance Your home network, or LAN (local area network), must be fast enough to handle the throughput of sending videos from your PlayOn PC to your device. If you are using wireless 802.11g, this will in most cases be a bottleneck, especially if the PC is on wireless. We highly recommend that the PC be on an 802.11n or wired connection. PC free hard drive space Since PlayOn needs to convert most online videos to a video format that the devices can understand, you need extra hard disk space to temporarily handle the video conversion. We recommend a minimum of 4 GB of free space. Note that the current version of PlayOn requires that this free disk space be on the same partition where Windows is installed. PC processor speed and RAM The faster your PC processor (CPU) and the more memory your PC has (RAM), the better it will be able to convert online videos and stream them to your device. If your CPU or RAM specifications are too low, you may experience choppy playback for videos, or the device may even show an oftentimes cryptic error message before the video can even start to play. Netflix Watch Instantly You can access your Netflix account “Watch Instantly” videos from your PlayOn device. To do so, provide your Netflix login credentials in the provided fields, and then press the “Test” button to confirm you have entered the information correctly. You may also add videos to your Netflix “Instant Queue” from your PC web browser (if your account has one), for easier access to your favorites through PlayOn. If your Netflix Account does not have an Instant Queue, PlayOn will include any Watch Instantly videos from your “DVD Queue”. Amazon Account (Video On Demand Library) You can access your Amazon “Video On Demand” Library from your PlayOn device. To do so, provide your Amazon login credentials in the provided fields, and press the “Test” button to confirm you have entered the information correctly. Note that you must add videos to your Amazon Video Library for them then to show up on your PlayOn device. This typically requires you to purchase the video, however Amazon does offer some free videos which can be added to your Library as well. For more information on Amazon “Video On Demand”, visit www.amazon.com/videoondemand. Hulu Account Queue You can access your Hulu account “Queue” videos from your PlayOn device. To do so, provide your Hulu login credentials in the provided fields, and then press the “Test” button to confirm you have entered the information correctly. Note that you will need to add videos to your Hulu Queue at http://www.hulu.com/profile/queue from your PC web browser for the videos to then show up on your PlayOn device. YouTube Usernames It is possible to subscribe to public user feeds from YouTube accounts. Enter each username in the field provided, separated by commas. For each username that is entered, PlayOn will give you direct access to that user’s favorite and uploaded (published) videos (up to a max of 150), as well as their playlists and subscriptions. Note that only YouTube videos from publishers that have allowed them to be “embedded” in third party sites will appear on your PlayOn device. For more information on YouTube accounts and feeds, visit www.youtube.com. PlayOn Plugins (Alpha) The “Plugins” tab of PlayOn Settings allows you to view and manage any PlayOn Plugins that you have chosen to download and install on your PlayOn PC. We highly recommend trying out the Revision3 plugin developed by MediaMall, available at www.themediamall.com/playon/plugins, as well as a large number of third party plugins that are available at www.playonplugins.com. Any plugin that you have installed and enabled through PlayOn Settings will appear as an additional video service available through your PlayOn device. Please note that this feature is still in development, and some changes may occur that require the plugins be upgraded to remain compatible. You can install plugins by dragging any “.plugin” file that you’ve downloaded to the Plugins tab of PlayOn Settings. Note that drag and drop will not work if you have UAC (User Account Control) enabled on your PC. You will also need to restart PlayOn for the plugin to show up on your TV. Support Requests If you are experiencing a specific technical problem that you believe is reproducible, you may want to contact MediaMall for help. In order to submit a support request, make sure you first have recently reproduced the issue, and then press the “Support...” button. You will be requested to enter your contact information, as well as a detailed description of the exact nature of the issue you have experienced. Submitting a support request will send diagnostic logs generated by PlayOn to PlayOn support team. It is critical that you indicate the time that the error occurred (according to the system clock on your PC). This helps us to pinpoint your specific issue in the diagnostic logs. 2.5.4 A/V Streaming via Linux NFS server This system enables you to browse media files shared on a Linux NFS Server (Ethernet or WLAN). Please refer to ’2.1.4 Changing Network Settings’ for details about network settings. 1. Visit Files Manager - > NFS menu 2. Press the Menu button and a popup menu will appear. You can then Add/Modify/Delete a NFS server’s shortcut. Select Add to open a popup menu where you can input the NFS Server’s IP and the desired folder destination. 2.6 Playlist management IMPORTANT: To access the file select menu, go to File Manager select the appropriate folder and press the COPY button and select whichever option that is best fit for the task at hand; Choose Multiple Select for all playlists. 2.6.1 Music playlist Select music files you want in the file select menu and then save them to playlist. Open your music library, press the MENU button, and choose Playlists to show your saved music playlists. 3.6.2 Photo Album Select the photos you want in the file select menu, and then save them to a photo album of your choice. Open your photo library, press the MENU button and choose Albums to show your photo albums. 2.7 Copy Function 2.7.1 Copy under Media Library 1. Press the COPY button to enter the file select menu. 2. Press the PLAY/PAUSE button to select a file or folder that you want to copy to the file list. 3. Press the EDIT button to enter multi-file editing menu. 4. Select destination, and then follow the prompt on screen to finish the copy process. 2.7.2 Copy under File Manager Press the EDIT button to enter the file editing menu. Choose Copy and follow the prompt on the screen to finish the process. If you want to select more files and folders, please choose Multiple Select to enter the file select menu. 2.8 Internet Media 2.8.1 SHOUTcast Radio Select the SHOUTcast Radio icon to access all the free internet radio stations. Press OK to select and play a radio station, press RETURN to get to the previous screen, and press MENU to add a radio station to your favorites. Note: • When you enter the SHOUTcast menu for the first time, it will take several seconds to download data from the Internet. For more about SHOUTcast please refer to the website: www.shoutcast.com Station • All downloaded stations will be listed under this menu. Genre • You can search for stations by genre (pop, rock, jazz, etc.) under this menu. Favorite • Your favorite stations can be viewed under this menu. Search • You can search for stations with the on-screen virtual keyboard under this menu. 2.8.2 BT Download Select the BitTorrent icon in the Internet Media menu. You can see the status of torrents downloads and configure the BT download settings in this menu. Press Left/Right button to enter into the download menu and BT setup menu. Add a torrent 1. Load your torrent files on a USB, SD Card, External HDD and/or the Internal HDD. 2. Locate your torrent file in the file manager menu. 3. Press OK to add the torrent to start downloading. Download Menu After adding the BT torrent files; the download progress of the torrents will be displayed in this menu. The following buttons can be used under this menu. Button Function Up/ Down Move cursor up / down. OK press to adjust the priority of the download task Play/Pause Press to start/pause download. Stop Press to stop the download. Back Return to the previous menu. BT setup Menu In the BT Setup menu, you can configure the following settings. Use the Up/Down key and OK to change the settings. • Set the maximum download rate. • Set the maximum upload rate. • Set the idle hours to start the next download automatically. • Set the seeding hours. • Set to delete the finished torrent files automatically or not. • Set the maximum number of simultaneous downloads. 2.9 Web Browser The following buttons can be used during web page browsing. Button Function Red Press to enter navigation mode or normal mode. In normal mode, only the mouse can be used to move the cursor. In Navigation mode, the remote control can be used to move the cursor. Green Press to pop up the address bar. Navigation buttons In Navigation mode, press navigation buttons to move cursor. In normal mode, press Up/Down to move to the top/bottom of the webpage. OK Press to enter selected hyperlink while in navigation mode. Play Press to load the web site when the cursor stays on the address bar. Return to exit web browser. Return 2.10 SAMBA Server and Client This Player can be used either as a SAMBA Server or as a client. 2.10.1 SAMBA Client • You can share media files shared on the home network. Please refer to ’2.5.2 A/V Streaming via Network’ for more details. 2.10.2 SAMBA Server This product functions as a NAS (Network Attached Storage) device when it is attached to the home network via WLAN or LAN. This feature allows users to store and retrieve large amounts of data on their own local network or to share the storage capacity on the Player. 1. Please turn on the SAMBA function in the Setup menu. (Refer to 2.1.4 Changing Network Settings for more details) 2. Type in: \\IP Address or \\Host name in the Run window. a. Click Run in the start menu or open windows explorer and use the address bar. b. For example: In Windows Explorer on your PC, if the IP address of the Player is 192.168.0.9, please type in: \\192.168.0.9 in the address bar and click OK or press the Enter button on the keyboard. Under Windows Vista and Windows 7, please type in: \\192.168.0.9 at the search bar in the Startup menu and then presses the Enter button on the keyboard. Note: • Make sure the Player is connected properly to the WLAN or LAN with Internet access. Please refer to ‘2.1.4 Changing Network Settings’ for more details. 2.11 FTP Server This product can also function as a FTP Server when it is attached to your home network via wired or wireless connection. 2.11.1 FTP Server Configuration • You can configure the username and password of the FTP Server. 1. When accessing the FTP Menu through Setup->Network->FTP you will see the username and password tab. 2. Select both menus one at a time and set your Username and Password. 3. You will use this on your FTP Client running on your PC. On your Player: 1. Assign a manual Fixed IP address for the product, for example 192.168.0.9 is an IP that may be assigned to the Player when you connect to your router either via wired or wireless connection. 2. Assign the same subnet mask as your router, usually 255.255.255.0 and the gateway of your router (router’s local IP address, usually 192.168.xxx.xxx). Please refer to your router documentation on getting this information from your router. 3. Key in your router DNS IP address (primary or secondary) 2.11.2 Accessing from a FTP program You may also use a FTP program that may be on your PC. For example ALFTP, which can be downloaded from http://www.altools.com/ALTools/ALFTP.aspx At the FTP program connection page, you can either connect using your router’s WAN IP address or via your DDNS host name. Be sure to start the FTP service with your User Name and Password as discussed at earlier. FTP Address: Your router’s WAN IP address User ID: The User Name which was set under 2.11 FTP. Password: The Password which was set under Section 2.11. FTP Address: Your DDNS host name User ID: The User Name which was set under Section 2.11. Password: The Password which was set under Section 2.11. After the login is successful you will be able to upload/download files via the FTP Server. 2.12 Remote Management This product comes with a unique remote management feature that allows user to remotely operate the following functions on the product via a built-in HTTP server. • Remote Control Use the on-screen virtual remote control as you would use the Player’s remote control. To access the virtual remote please type in the Player’s IP Address in your Web Explorer. • BitTorrent management View and manage your BitTorrent tasks remotely over the internet. HTTP Server configuration To access the above web functions, launch a web browser such as Internet Explorer, Firefox or Safari, and at the address bar, key in http://192.168.0.9:1024 where 192.168.0.9 is the IP address of your Player. Note: You can check your Fixed IP Address by checking your Network Information, please refer to ‘2.1.5 Miscellaneous’ for more information. To access via HTTP server from out of your local network, launch a web browser such as Internet Explorer,Firefox or Safari, and at the address bar, key in either 3. Upgrading the Firmware “Firmware” is the Operating System (OS) installed on the Player. Firmware upgrades result in new features, improvements and bug fixes. To upgrade the firmware, please follow these steps: 1. Download the firmware from the UEBO support site on http://www.uebo.net. 2. Make sure the firmware version you are downloading is newer than the version currently installed on the Player. You can check the version number by going to Setup->Misc->Version Info on the Player. 3. Copy ‘install.img’ to the root directory of a USB stick, and connect it to the USB HOST port of the Player. 4. Unplug the power chord from the back of the Player and hold down the U button on the back of the Player. 5. Plug the Player power chord back into the Player and wait for the UEBO home screen to appear while holding down the U button. 6. Wait 4-6 seconds and let the power button go. 7. The upgrade will begin and the Player will reboot as soon as the upgrade has completed. Optionally, you can also upgrade the Player using the followings steps. 1. Download the firmware from the UEBO support site on http://www.uebo.net. 2. Make sure the firmware version you are downloading is newer than the version currently installed on the Player. You can check the version number by going to Setup->Misc->Version Info on the Player. 3. Copy “install.img” or extension files to the root directory of a USB stick and then insert it into the USB HOST port of the Player. 4. Navigate to the Setup menu and scroll down to Misc and press OK. 5. Select USB Upgrade. 6. Press the OK button and the upgrade process will start. 4. Appendixes 4.1 Specifications I/O INTERFACES SUPPORTED: Gigabit Network Adapter Built-in Wi-Fi module (802.11b/g/n) 3.5’’ SATA HDD USB 3.0 Device port (compatible to USB 2.0 ) USB 2.0 HOST port (compatible to USB 1.1) Memory Card slot (supports SD/MMC) Composite (CVBS) A/V jack Component Y/Pb/Pr jack HDMI V1.3 interface S/PDIF Optical & Coaxial jack DC-IN 12V 2A NETWORK FEATURE 10/100/1000Mbps Auto-Negotiation Ethernet 802.11b/g/n WLAN, up to 300Mbps FILE SYSTEM SUPPORTED: FAT/FAT32/NTFS/HFS+/EXT3 CONTENT FORMATS SUPPORTED: AVI/MKV/TS/MPG/MP4/MOV/VOB/ISO/IFO/DAT/WMV/RM/RMVB, resolution up to 720p/1080i/1080p MP3/OGG/WMA/WAV/FLAC/APE HD JPEG/BMP/TIF/GIF/PNG VIDEO CODECS SUPPORTED: MPEG-1 HD MPEG-2 HD MPEG-4 SP/ASP/AVC (H.264) WMV9 (VC-1) RealNetworks (RMVB) 8/9/10, up to 720p AUDIO CODECS SUPPORTED: MP2/3, OGG Vorbis, WMA Standard (DRM, and Advanced Profile not supported), PCM, LPCM, RA, DTS, Dolby Digital, Dolby Digital Plus, Dolby TrueHD) SUBTITLE FORMATS SUPPORTED: SRT, SMI, SSA,SUB, IDX+SUB Note: The specifications and design of this product are subject to change without notice. 4.2 Frequently Asked Questions Question 1: When I try to disconnect the USB device, I keep on getting “The device ‘Generic volume’ cannot be stopped right now. Try stopping the device again later.” message, what should I do? Answer: Close any program that might be accessing data on the Player, including Windows® Explorer or Finder. If it does not work, close all programs and wait for another 20 seconds, then try to eject Player again using your computer operating system. If it still does not work, you should shut down the Player and disconnect the USB cable. Question 2: I find new file names and folder names that I never created before or they have strange gibberish names. Answer: Windows and Macintosh often write extra files to the hard disk such as finder.def or System volume info. These are normal and will not do any harm to the Player. Question 3: I used my Player to transfer files back and forth between different computers. Will defragmenting the Player hard disk do any harm to it? Answer: Defragmenting the Player hard disk may be useful after having transferred many files to and from the Player. It is never harmful to run the defragmentation software on the Player. Make sure no other programs are running while using the Windows® defragment utility. Question 4: My files have disappeared from the Player. Answer: Make sure that you browse your files via the correct browser mode which means correct filtered views such as Photos, Music, or Movies. Question 5: Why does the TV have a scrolling blue screen or UEBO splash screen when I turn on my Player? Answer: This is normal, when the system initializes, it will setup the corresponding parameters so it can output the correct video signal to the TV, during the initialization, the TV will receive incorrect signals or the signals will not be stable and will cause the TV screen to flash, some TV’s will treat this as no signal, and will display a blue screen or screensaver. Question 6: Why couldn’t the Player find the hard disk drive? Answer: There are a few things to check. 1) Make sure the firmware is installed correctly. 2) Make sure the hard drive is connected properly. 3) Check to make sure the system partitions on the HDD were not deleted. If none of these options work, please plug the Player into your PC via the USB 3.0 interface and see if you can access the hard drive. If you still cannot access it, the hard drive is probably damaged. Please call UEBO Technical Support for more help if needed. Question 7: Why is the transmission speed of my HDD not reaching up to 3Gbps or higher when connected to PC? Answer: Make sure there is a USB 3.0 host controller installed on your PC to achieve maximum transfer speed. Due to the design, certain hard drives may perform at the lower speed. The transmission speed is also dependent on the configuration of the PC. 5. Copyrights and Trademarks Copyrights All rights reserved. No part of this manual may be reproduced, or transmitted in any form or by any means, whether by electronically or mechanically, without the express written permission from UEBO. Copyrighted materials, such as software, music files, or movies, are protected by local law, and may not be illegally copied or used without permission from UEBO. Trademarks Microsoft and Windows are registered trademarks of Microsoft Corporation. All other trademarks are property of their respective holders. Manufactured under license under U.S. Patent #’s:5,451,942; 5,956,674; 5,974,380; 5,978,762; 6,487,535 & other U.S. and worldwide patents issued & pending. DTS and DTS 2.0 + Digital Out are registered trademarks and the DTS logos and Symbol are trademarks of DTS, Inc. © 1996-2008 DTS, Inc. All Rights Reserved. Manufactured under license from Dolby Laboratories. Dolby and the double-D symbol are trademarks of Dolby Laboratories. 6. Warranty For product warranty information, please refer to the warranty agreement at http://www.uebo.net/warranty 7. GPL Statement This product contains free software licensed under the GNU General Public License. After you purchase this product, you may procure, modify or distribute the source code of the GPL/LGPL software that is used in this product. To obtain a copy of our open source software, please contact our support center and we will provide you with a CD-ROM of the source code that is used, charging only the actual expense involved. However, please note that we cannot provide warranty with the source code, and there is also no technical support for the source code from us.


