1
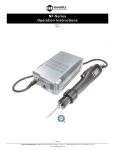
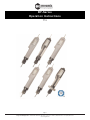
BF-Series Operation Instructions
General Operation for BF-Series models
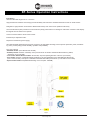
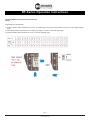
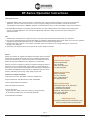
1. Attach cord to the BF Driver. Make sure notch in plug lines up with the notch on the socket. Tighten knurled ground ring.
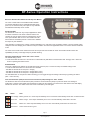
2. Plug in transformer and check power indicator. If it is not on, check fuse in the transformer.
Transformers - Standard transformers feature a HIGH & LOW speed button. Select the appropriate speed for your application.
3. Select the speed first on the Transformer: HIGH or LOW, before connecting the electric screwdriver. (Note: if not then a sudden
sharp peak of current will occur and the over current “led lights” turns on.
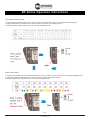
4. Attach cord to the transformer (Transformer required to operate the tool). Make sure notch in plug lines up with the notch on the
socket. Tighten knurled ground ring.
5. Select a bit. Retract the bit collar. Insert the bit and release the retracted collar. To avoid damaging fasteners, make sure the proper
bit is suitable for the head of the fastener.
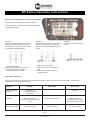
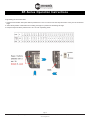
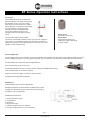
6. The torque limit is determined by the tension of the coil spring housed in the torque adjustment nut. The tighter the coil spring is
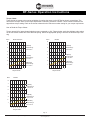
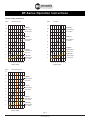
wound the higher the torque limit is raised. See Chart on page 10 & 11 to determine the appropriate torque adjustment setting.
7. Rotate the torque adjustment nut to set the torque limit. Turn clockwise to increase torque and counter clockwise to decrease
torque. The scale adjacent to the Torque Adjustment Nut is a reference guide. The torque output from the driver can change
depending on various fastening factors like friction, type of joint, and the type material being used like a washer.
8. Turn driver on and check for proper rotation. FOR-clockwise, REV-counterclockwise.
9. To apply torque, squeeze the lever (Push-to-Start models - place light downward pressure on the nose of the driver). The driver will
automatically stop when the preset torque has been reached.
10. To remove the screw, turn the FOR/REV switch to REV
For operating the features of the “Plus” models see page 4. For the “Time (Angle) Control & Auto Reverse” models see page 5. For
the “Speed Control” models see page 10.
Over Heat Protection (OHP) and Over Current Protection
(OCP) Settings for Standard & Soft Stop models.
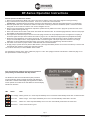
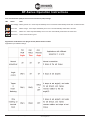
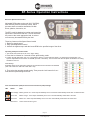
The BF drivers offer Over Heat Protection (OHP) and Over
Current Protection (OCP) to protect the driver from damage or
malfunction. Features a LED display that signals the tool status
for the operator. It’s located on the side. Below is the LED display
indicator for reference.
LED
Status
Note
Over Voltage
Blinks green & red - driver stops immediately as it’s over DC32V. Automatically resets when it’s below DC32V.
Over Load
Blinks orange - driver stops immediately as it’s over 2.5A. Automatically resets after 5 seconds.
Over Heat
Blinks red - driver stops immediately as it’s over 70ºC. Automatically resets when it’s below 70ºC.
Motor Drive
Green means motor is good.
Page 3
Corporate Headquarters: 1080 North 11th Street, San Jose, CA 95112
www.etorque.com
Phone: (408) 292-2214 Fax: (408) 292-2733