1
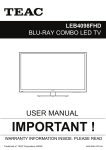
CONTENTS 1 PREFACE ··························································································································· 2 2 SAFETY PRECAUTIONS···································································································· 2 3 FRONT&BACK VIEW, REAR CONNECTION OF LED ······················································ 3 4 CONFIGURATION OF THE LED ······················································································· 4 4.1 PICTURE SETTING ·········································································································· 4 4.2 SOUND SETTING············································································································· 4 4.3 CHANNEL SETTING········································································································· 4 4.4 LOCK SYSTEM SETTING ·································································································· 5 4.5 SETUP SETTING ·············································································································· 5 MEDIA MENU ······················································································································· 7 5 REMOTE CONTROL INSTRUCTIONS ·············································································· 9 6 REMOTE CONTROLS SETUP ························································································· 11 6.1 BATTERY USAGE CAUTION ··························································································· 11 7 ACCESSORIES ················································································································· 11 8 TROUBLE SHOOTING AND ADVICE ·············································································· 11 9 SPECIFICATIONS ············································································································ 12 1 1 PREFACE Thank you for purchasing this LED TV! This manual will help you use all the extensive features of your new TV. Make sure the monitor was not damaged in transit. Should the monitor is damaged, do not install it and contact your dealer. Check that you have all the accessories according to the model. 2 SAFETY PRECAUTIONS Put the monitor on a stable surface. Do not use the monitor with others fixations than those provided or suggested by the manufacturer. Do not place any material on the monitor. If you have a wall mount, check that it is steady. Do not block or cover the ventilation openings on the monitor Power source The monitor must be plugged with a tension source of 100-240V and 50/60 Hz. Connection cables Power cord and cables must be properly routed and protected to prevent people from stepping on them and causing the monitor to fall. Heating sources and humidity Keep the monitor dry and away from humidity. Keep the monitor away from heat sources. Cleaning and maintenance Unplug the monitor before cleaning it. Do not use solvents or liquids to clean the monitor. Only clean the monitor with a soft and dry cloth. In case of troubleshooting, does not use spare parts other than those suggested by the manufacturer. Using inadequate spare parts can lead to electric shocks short-circuits fire or other incidents. Departure in holidays Unplug the TV during lighting storms or when unused for long periods of time. 2 3 FRONT & BACK VIEW, REAR CONNECTION OF LED Front View 1. TV/AV select 2. Menu key 3. Channel up/down 4. Volume up/down 5. STANDBY 6. Remote control sensor Back View (The backview is only for your reference;details according to the model) Rear Connection DC 12V: Direct current power supply EARPHONE:Headphone audio output PC:VGA PC video input PC AUDIO:PC audio input RF:RF antenna connector HDMI:HDMI input USB:USB Host port YPBPR:Component input OPTICAL:Optical digital audio output(OPTICAL) for connection to home theatre audio amplifier AV IN(VIDEO/L/R):Composite video input 3 4 CONFIGURATION OF THE LED 4.1PICTURE SETTING Press <MENU> Key, then enter the Menu. a) Press ► and enter PICTURE Setting Menu. Press ▲ or ▼ key and enter Picture Mode, Brightness,Contrast,Sharpness,Saturation,Hue,Color Temp,Aspect Ratio,Advanced Settings. ◄ or ► key to access and adjust Picture Mode, b) Press Brightness,Contrast,Sharpness,Saturation,Hue,Color Temp,Aspect Ratio,Advanced Settings. 4.2SOUND SETTING Press <MENU> Key, then enter the Menu. a) Press ► and enter SOUND Setting Menu. Press ▲ or ▼ key and enter Sound Mode,Treble,Bass, Balance,Surround Sound,EQ Setting,AVL,SPDIF,Audio description,Sound Tpye. b) Press ◄ or ► key to access and adjust Sound Mode,Treble,Bass, Balance,Surround Sound,EQ Setting,AVL,SPDIF,Audio description,Sound Tpye. 4.3 CHANNEL SETTING Press <MENU> Key, then enter the Menu. a) Press ► and enter CHANNEL Setting Menu. Press ▲ or ▼ key and enter Auto Scan, Manual Scan, Channel Edit, Signal Information. b) Press ◄ or ► key to access and adjust Auto Scan, Manual Scan, Channel Edit, Signal Information. 4 4.4LOCK SYSTEM SETTING Press <MENU> Key, then enter the Menu. a) Press ► and enter LOCK SYSTEM Setting Menu. Press ▲ or ▼ key and enter Enter Password,Enable,Channel Locks,Parental Rating,Lock Keypad,New Password,Clear Lock. b) Press ◄ or ► key to access and adjust Enter Password,Enable,Channel Locks,Parental Rating,Lock Keypad,New Password,Clear Lock. NOTE:THE PASSWORD IS 0000 4.5SETUP SETTING Press <MENU> Key, then enter the Menu. a) Press ► and enter Setup Setting Menu. Press ▲ or ▼ key and enter OSD Language,Audio Languages,Subtitle,Teletext,Mode Setting,Time Settings,HDMI CEC Control,PVR Settings,First Time Setup,OAD,Reset. b) Press ◄ or ► key to access and adjust OSD Language,Audio Languages,Subtitle,Teletext,Mode Setting,Time Settings,HDMI CEC Control,PVR Settings,First Time Setup,OAD,Reset. 5 HOTEL MODE INSTRUCTIONS: Press Menu+7906 to enter the Hotel mode: ACTIVE HOTEL MODE default OFF the following set all invalid; default ON Hotel Mode work MAX VOLUME SET 0/…/100 set a maximum volume value. The user can adjust the volume within the limited preset value after being set the maximum DEFAULT VOLUME Set the default boot volume SOURCE LOCK 1. Default status is OFF 2. The user cannot select the source when it sets ON. DEFAULT SOURCE SET OFF/TV/AV/PC…etc. 1. Default status is OFF 2. If this is set OFF, then it will automatically be in the last-step status when the TV is turned on. 3. If this is set to any other status like TV/AV or PC expect OFF, then it will automatically be in the Source selection when the TV is turned on. DEFAULT DTV/ATV PROGRAM Turning the Default Source into TV at first place, then you can find the acquiescent starting channel being set as 1,2,3……etc. Backup to USB Transfer what we have set for the TV into the USB flash disk(The screen will turn black for one second when it’s done) Restore from USB Import what we have set for the TV which has been transferred into the USB flash disk into the TV(When it’s done, the screen will turn into black for a second, then you can get back of the menu). Recall Clear all the settings above. 6 MEDIA MENU Note:Before operating USB menu,Plug in USB device,then press SOURCE button to set the Input SOURCE to USB. Press ◄ /►button to select USB in the Source menu,then press Enter button to enter. Press ◄ /►button to the option you want to adjust in the main USB menu,then press Enter button to enter. Photo Press ◄ /►button to select PHOTO in the main menu,then press Enter button to enter. Press ◄ /►button to select drive disk you want to watch,then press Enter button to enter. Press ◄ /►button to select return option to back to the preview menu. NOTE:The operation for all 4 kinds of media file is almost same 7 USB MULTIMEDIA PLAYBACK FORMAT Multimedia File Decoder Categories Extension *.avi Video Video Decode Notes Audio Decode MPEG-1,MPEG-2 MP, MPGE1/MPEG2/MPEG4: MPEG-4 SP,MPEG-4 ASP, Up to 1080p@30F MPEG-4 XVID, DIVX, H.264:Up to 1080p@25F H.264(AVC),MP@Level 4, AAC:AAC-LC(type 2), H.264(AVC),HP@Level 4 MPEG-1Layer2 HE-AAC v1(type 5,SBR), MPEG(*.mpeg, MPEG-1 MP, MPEG-1Layer3 HE-AAC v2 *.mpg,*.dat,*vob) MPEG-2 MP MPEG-2Layer3 (type 29,SBR+ps) TS(*.ts,*.trp,*.tp) MPEG-1,MPEG-2 MP, AC3 H.264(AVC),MP@Level 4, AAC-LC H.264(AVC),HP@Level 4 HE-AAC V1 HE-AAC V2 Music *.mp3 MPEG-1 Layer3 MPEG-2 Layer3 Photo *.jpg Baseline Mode .jpeg Bit Rate:up to 320Kbps Sample Rate:32KHz 44.1 KHz,48KHz 72x72<Baseline Resolution<7680x4320 Progressive Mode Note: 1.Max 500 files supported each file. 8 5 REMOTE CONTROL INSTRUCTIONS 9 TV Functions 1.POWER: Press the TV on and standby. 2.SLEEP: Press to select a preset time interval for automatic shut off. 3.MUTE: Press to mutes the sound. 4.SOURCE: Press to display the input source menu. 5.NUMBER: Numeric buttons for direct channel access. 6.AUDIO/LANG.: Stereo, Mono, Dual audio/Change audio language. 7.TV/RADIO: Press to change between TV and Radio 8.EXIT: Exit the menu 9.CH.LIST: channel list 10.BACK:go back to the last viewed channel 11.MENU: Press to display the OSD menu. 12-13.CHANNEL “+” “-”: Press to change the TV channels. 14. ◄►▲▼, ENTER: Use to select on-screen menu items and change menu values 15-16. VOL “+” “-”: Press to increase or decrease the volume. 24.SUB.T: Display/OFF the subtitle on screen 27.EPG: Electronic Program Guide(EPG) display. 28.FAV: Press to display the favorite channel list which you stored before. 29.P.MODE: Press to select the picture mode. 30.S.MODE: Press to select the sound mode 31.INFO: Show Current Information 32/33/34/35. Colour buttons: Channel Edit function PVR Function 17.T.SHIFT:Timeshitf function(Opearted by ►,,,,, keys) 19.REC/●:Press this button to directly record the DTV into USB disk(In USB Mode or PVR Setting to see the PVR file) TEXT functions 20.TEXT: Teletext function 21.REVEAL: Teletext reveal 22.HOLD: Teletext hold. 23.SUB.P: Teletext subpage 24.SUB.T: Teletext subtitle 25.INDEX: Teletext index 26.SIZE: Teletext size 32/33/34/35. Colour buttons: Teletext function USB Functions 17.►:PLAY/PAUSE 18. :STOP/Exit PVR or Timeshift 20.: Fast return key 21.:Fast forward key 22.: Previous key 23.: Next key 32/33/34/35. Colour buttons:Media function 10 6 REMOTE CONTROLS SETUP a: Open the cover b: AA size batteries, When inserting the batteries, make sure correct polarities as per “+”and “-”marks on the batteries and within the battery compartment c: Replace the battery cover 6.1 BATTERY USAGE CAUTION: To prevent battery from leakage which may result in bodily injury or damage to the remote, please do as follows: 1. Install all batteries correctly, and as marked on the remote control. 2. Do not mix batteries :(OLD and NEW or CAR BON and ALKALINE, etc.). 3. Remove batteries when the remote is not used for a long time. 7 ACCESSORIES 1. One Remote Control 2 .Two Batteries 1.5V 3. One User Manual 4. One Adapter 8 TROUBLE SHOOTING AND ADVICE Before calling our SAS centre, please check if you can solve the troubleshooting by yourself. Troubleshooting Control No signal Please check that all cables and cordons are correctly plugged in. No color shades Adjust the contrast, the colour and the brightness Stain show on the May be result from a lighting signal from car, motor, neon screen. light and other electrical devices or appliances. Double or multiple May be the result of an electrical wave disturb from other display image TV, Computer and Game machine or Radio Snow on the screen The cables of the antenna are not correctly plugged in. Please check the batteries order and alignment. The remote control Check that the IR of the remote control is not hidden by does not work something. "Zip" made noise on Even if the display image is correct, the noise may come TV cover from an unsteady fixation of the panel. No sound Make sure that you have not press the MUTE button of the panel or of the remote control. 11 9 SPECIFICATIONS Screen Size 24Inch Display Type LED TV Aspect Ratio 16:9 Power Source 12V 3.0A ≤36W TV System PAL /SECAM Video Input Format PAL / NTSC/SECAM Antenna Input Standard antenna socket 75 Ω Audio Output L / R 3W*2 VGA Input Format Standard VESA mode Input AV Video:1.0Vp-p, 75Ω; Audio20kΩ; RCA Ypbpr 1.0 Vp –p 75 Ω; RCA MAX 1080P/60Hz PC Standard VESA mode HDMI MAX 1080P/60Hz Net Weight Net Dimensions with stand(L * W * H ) Net Dimensions without stand(L * W * H ) 5±1Kg 581*175*401mm 581*43*361mm This manual is only for your reference, any changes to the design and specification will not be advised. 12