1
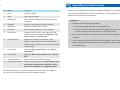
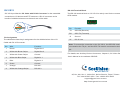
No. Name
Function
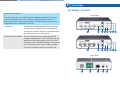
1
Video Input
4 plugs for video inputs.
2
Speaker Output
A plug for the speaker device.
3
Audio Input
Each plug is for 2 audio inputs.
4
Default Button
It resets all configurations to their factory
settings. See 7 Restoring to Default Settings in
the Quick Start Guide.
5
6
Disk Full/Fault LED
Ready LED
This LED is on, indicating the hard drive is full
or faulty.
This LED is on, indicating the GV-Video Server
is ready for connection.
7
Power LED
This LED is on, indicating the power is
supplied.
8
Reset
It reboots the GV-Video Server, and keeps all
current configurations.
9
USB Port
2 USB ports for installing portable storage
devices.
10
Terminal Block
The connectors for digital input, relay output,
PTZ camera, Wiegand device and GPS module
control.
11
Ethernet Port
A plug for a 10/100 Ethernet or PoE.
Note: GV-VS14 does not support PoE function.
12
Power Out
A plug to power on the camera, by using a DC
Male-to-Male Cable, directly through the
GV-Video Server.
Note: When PoE is applied, you cannot power
on the camera through the GV-Video
Server.
13
Power In
A plug to power on the GV-Video Server.
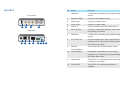
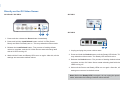
GV-VS11
Front View
1
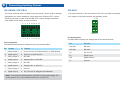
No. Name
2
3
Rear View
4
5
6
7
8
9
Function
1
Video Input
1 plug for video input.
2
Default Button
It resets all configurations to their factory
settings. See 7 Restoring to Default Settings in
the Quick Start Guide.
3
Audio Input
1 plug for audio input.
4
Ready LED
This LED is on, indicating the GV-Video Server
is ready for connection.
5
Power LED
This LED is on, indicating the power is
supplied.
6
USB Port
1 USB port for installing portable storage
device.
7
Ethernet Port
A plug for inserting an Ethernet cable to build
the network connection.
8
Terminal Block
The connectors for digital input, digital output
and PTZ camera control.
9
Power In
A plug to power on the GV-Video Server.