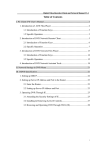
1
USERS MANUAL FOR E-SERIES (refer to E-1000, E-2000 and E-3000) USER’S MANUAL FOR E-SERIES Warnings: Specifications are subject to alternations without notice It is required to comply with the local law, regulations and get all permissions needed from local government before installing. You must install and dismantle your wind turbine on a day with no wind. Please make sure the construction for WTGS mechanical and electronic facilities should be done by professionals Color or figuration of pictures might be varied against physical goods;。 It is forbidden to leave the wind turbine generator working under unloaded state (such as without connecting with batteries). The safety signs involving the manual are as followed Danger-Improper operation might lead to hurt people badly Attention-Improper operation might lead to damage products or hurt People USER’S MANUAL FOR E-SERIES Contents 1. Abstruct.........................................................................................................................3 2.Where to use ………………..…………………………………………………………………………..3 3.Model and parameter………………………………………………………………………………..4 4.How to install the generator..…………………………………………………………………….5 5.How to install guy cable tower...................................................................................10 6.Battery configuration………………………………………….…………………………………..18 7.Wiring diagram…………………………………………………………………………………….....20 8. Operation for controller……………………………………..............……………21 9.Maintenance…………………………………………………………………………….…………….Error! Bookmark not defined. 10.Trouble removal……………………………………………………………………………………Error! Bookmark not defined. USER’S MANUAL FOR E-SERIES 1. Introduction A wind turbine generator system produces electricity by the rotating of blades. The function of the controller is to rectify and stabilize the output power and protect the generator under severe conditions. The E-series wind generator could be applied solely or used with solar in a hybrid application, as the controller also has a connection for solar panels. 2. Where to use This E-series generator could be both applied for home use and factory use, which is available for on-gird and off-grid, While on-gird by matching on-grid inverter and off-gird by matching batteries and off-grid inverter. Not available for below: 1 No loading 2 Directly connecting with consumption USER’S MANUAL FOR E-SERIES 3 Parameter Model E-1000 E-2000 E-3000 Brand Skywing Skywing Skywing Rated Voltage(DCV) 24/48 48/120 48/120 Rated Current(DCA) 41/20 41/20 60/25 Rated power(W) 1000 2000 3000 Start-up wind speed (m/s) 2.5 2.5 2.5 Rated wind speed(m/s) 12 12 12 Security wind speed (m/s) 35 35 35 Generator type PMG PMG PMG Diameter(M) 2.7 3.2 3.7 RPM(r/m) 400 400 220 Blades material GFRP GFRP GFRP Blades NO. 3 3 3 USER’S MANUAL FOR E-SERIES 4 How To Install The Wind Turbine 4.1 Site Selection This wind turbine generator system should be installed at least 50m away from homes, structures or areas where people, animals or things might be gathered. It is best to avoid trees or buildings nearby, as it might affect the wind speed or wind direction. It is absolutely forbidden to install the wind turbine generator on soft land, uneven ground or areas where the ground can be easily influenced or compromised by climate. At the same time, the distance between generator and battery should be also considered; shorter distances will have lower losses and higher efficiency. It is suggested that you use a larger gauge cable, for applications requiring long distances 4.2 Assembly and Connection Note:First connect the controller to the battery, and then to the generator 3. Instruction for connection on wind systems above 5kw Note: R1 to R5 is the connector for the dump loader. USER’S MANUAL FOR E-SERIES 4.3 Diagram for generator USER’S MANUAL FOR E-SERIES 4.4 Assembly of The Generator 1. Connect the cable to the bottom of generator as shown, and then feed the cable through the center of your tower. 2 Connect the generator with the pole with basic bolts and nuts provided. USER’S MANUAL FOR E-SERIES 3. Blades (1)The flange has already been assembled on the motor shaft before delivery. (2)Please note the concave part of blades should face the wind, and tight the blade with flap by screw. Balance is very important, and do not tight the screw before assembling all blades. For finding balance, please make a same distance for every apex, and then tighten the screw. (as below) Note: L1=L2=L3(with tolerance ±5mm)Tighten the screw after finding balance USER’S MANUAL FOR E-SERIES 4. Assemble the nose cone with the hardware provided. 5. Connect the tail vain to the generator with the bolts provided. USER’S MANUAL FOR E-SERIES 6. Connect the cable from the tower to the controller. PLEASE NOT: if you are using a battery array, then a controller should be first be connected with the batteries. 5 How to install tower 5.1 Foundation sizing Please install the generator on a day with little to no wind. Create the foundation in an open area that you selected. USER’S MANUAL FOR E-SERIES Model Foundation 1KW 2KW 3KW 5KW Guy cable Guy cable Guy cable Guy cable tower tower tower tower Radius( m) 3 4 4 6 Center foundation( m) 0.6*0.6*0.8 0.6*0.6*0.8 0.9*0.9*1.2 Edge foundation ( m) 0.5*0.5*0.7 0.6*0.6*0.7 0.8*0.8*0.9 5.2 The Foundation Dig the foundation according to size as specified. Put the anchor in the foundation then assemble the plate as shown below. For generators below 2kw,there are only two pins needed to fit into the foundation; For systems above 3kw, there needs to be three screws towards the front side. USER’S MANUAL FOR E-SERIES Pour the concrete after preparing the base foundation as shown below. Put the anchor into the base foundation, and check the distance between the hook and the center, and then pour the concrete as shown below For the 2kw - 5kw you need two guy cables for proper installation, as shown below To keep the tension balanced between each cable, the height of the base need to be same with the base of the tower, otherwise the tower will be unbalanced. USER’S MANUAL FOR E-SERIES 5.3 Assemble the tower 【1KW – 2KW】Put the tower into the base, and insert the pins into the designated hole, then screwing the pin shaft nut, as shown below 【3KW to 5KW】Connect the two sections of subsidiary poles together, and insert into the main tower, as shown below USER’S MANUAL FOR E-SERIES Connect the 4 pieces of steel wire to the end of the subsidiary pole, and then connect the steel wire which corresponds to the U-shape hooks The steel which corresponds to the front of the base needs to connect with the chain block as shown below USER’S MANUAL FOR E-SERIES Erect the subsidiary pole, and fix the steel wire to the edge as shown below Aim the pin hole of tower to the base, and insert the pin with grease USER’S MANUAL FOR E-SERIES 1. Connect each section of the tower using the bolts provided as shown below 2. Connect the steel wire after connecting to the tower as shown below. For safety, you could twine the tower with the steel cable before fixing the wire to the fixture. There needs to be 2 fixtures for each steel wire, and 10-20 cm need to be left at the end of the wire. USER’S MANUAL FOR E-SERIES 3) Besides aiming the steel wire for the front of the base, the ends of all other steel wires need to connect with the base. You could fix all wires after the installation of the tower as below 4. Put the tower on a yolk with a height of 1m to 1.5m, as shown below, USER’S MANUAL FOR E-SERIES 3. Generator installation ( In the manual for generator part) You could erect the tower with a winch, tractor and crane. Please note, when using a winch and tractor, there needs to be a yolk for 1KW and 2KW. Pay attention to the tension of each steel wire in the process of erecting, to ensure they remain balanced. 4. 【3KW – 5KW】Install the bolts to the three holes at the bottom of the tower after the erecting of the tower. 5. To check the length of 4 pieces of steel wire, and affix the and leave a proper radian for the steel wire. 【3KW – 5KW】You need to take the subsidiary pole away and release the steel wire after installation. 5.4 Lay down the tower When laying down the tower, there must be no wind at that time, and you will need a yoke, similar to one needed for installing. 1. Break the connection to stop the generator, which could be checked in the user’s manual. 2. 【USING A CRANE】The harness should be tied to the generator by professional people. And then ,release the screw and steel wire to lay down the generator slowly to the yoke. 3. 【USING A TRACTOR OR WINCH】First, release the steel wire of the basement, and then connect the steel wire to tractor or winch according to the installing manner by reversing it. Finally, lay down the tower on the yoke slowly. USER’S MANUAL FOR E-SERIES 6. Battery Configuration All Batteries should be placed in a dry building with a constant temperature. By calculating the output of the wind generator, you could decide the number of the batteries and the proper connections, series and parallel. Then design a cage or use a pre manufactured rack, for placing the batteries, controller and inverter as neatly as possible. To avoid electromagnetic interference, after connect the battery, please smear the end of wire with grease or anti-corrosion material. The connecting wire between battery and controller should be no less than 3M. You could check the parameter for choosing the battery. Series connecting is to connect the anode of one battery to the cathode of another battery as below, Parallel connecting is to connect the battery anode with anode, cathode with cathode as below, *Please follow all maintenance and instructions provided with the battery USER’S MANUAL FOR E-SERIES 7 Wiring diagram 7.1 OFF GRID(Picture as below) `Please make sure that the output voltage, voltage of battery and the input voltage of battery should be same. Do not misconnect the end of battery, which would burn the generator, battery and inverter out. USER’S MANUAL FOR E-SERIES 7.2 ON-GRID(Picture as below) Every model of E-series could be applied for on-grid system with the permission of local government, and on-gird inverter and on-grid controller should be purchased by your own part. Please turn off the main supply before connection USER’S MANUAL FOR E-SERIES 8 Instruction for controller 8.1 Interface The interface uses a 485 model to connect with the controller, which is applied with customized KNN LCD to display the data of voltage, current, power, and wind speed. Wish a built-in 4M chips, it could store thousands of historical data. With an buzzer, it would alarm you when the wind speed and voltage overrun. 8.2 Software for PC 1. Use the software for intelligent controller by starting from double clicking, which could display the running status of generator, and set the brake in the controller. 2. Operation for software Interface shows above, clicking "entering principal computer mode" before setting the configuration. USER’S MANUAL FOR E-SERIES 8.3 Instruction for controller 1. Summary Brake:The brake system would act to stop the generator for protection when the wind speed, voltage, temperature overrun. Dump loader :The dump loading system would act when the voltage overrun, which could release the electricity. Shutdown: dump load and then brake. 2. Parameter setting Parameter Instructions Voltage unloading 1 upper limit Dump loader 1 acting when over this voltage Voltage unloading 1 lower limit Dump loader 1 acting when below this voltage Voltage unloading 2 upper limit Dump loader 1,2 acting when over this voltage Voltage unloading 2 lower limit Dump loader 1,2 acting when below this voltage Upper limit for voltage brake When the voltage is over this value, the dumploader1, 2 would act, and then the brake, after that the dump loader 1, 2 would stop action. Lower limit for voltage brake When the voltage is below this value for a while, the brake would stop action. Upper limit for wind speed When the wind speed is over this value, the dumploader1, 2 would act, and then the brake, after that the dump loader 1, 2 would stop action. Lower limit for wind speed When the wind speed is below this value for a while, the brake would stop action. The protection time before brake t1 The acting time of dump loader before brake The protection time after brake t2 The acting time of dump loader after brake Brake duration The acting time for braking USER’S MANUAL FOR E-SERIES 8.4. Interface Screen for interface Switch Monitoring Setting Option + - 1.Parameter Item Parameter Parameter Instruction Voltage Voltage of Battery Current of generator The current for generating power by wind turbine Current of solar panel The current for generating power by solar panel Wind speed Wind speed Rotating speed Rotating speed of wind turbine Temperature The inner temperature of wind turbine Power Instantaneous generation power Generating capacity Cumulative generating capacity State Dump loader 1 The state loader 1 for dump Dump loader 2 The state loader 2 for dump Dump loader 3 The state loader 3 for dump Brake The state for brake Over temperature Signal of over temperature has been detected Communications abnormal Warning for communication failure Utility abnormal Warning for utility USER’S MANUAL FOR E-SERIES 2. Standard Keys: The interface is very easy to use, and there are a total of six buttons on it. Switch:Manual switch machine Monitoring:To check the simulated data Setting:To save the configuration by a long press of ‘setting’ : Shifting Option ▲ :Revising parameter,+ ▼ :Revising parameter,3. Menu: Power On Reset Display properly state SET>3s Enter to set the parameter option>3s Enter the state of time storage for language series +>3s Enter the state of regular shut down USER’S MANUAL FOR E-SERIES Parameter setting Capacity Power Upper limit for dump loading voltage 1 Power Lower limit for dump loading voltage 1 Power Upper limit for dump loading voltage 2 SET Capacity Capacity Capacity Power Lower limit for dump loading voltage 2 Capacity Capacity Capacity Capacity Capacity Power Power Power Power Power Voltage for brake Braking duration: Minutes Upper limit for wind speed: m/s Lower limit for wind speed:m/s L:off-grid B:on-grid USER’S MANUAL FOR E-SERIES Time storage for language series Capacity Capacity Capacity Capacity Capacity Capacity Power Year setting Power Day setting Power Time setting Power 风机级数设定 Power Battery setting:1 Piece-12V full Power The storage interval generating capacity Capacity Power The storage interval for historical data Language : CH Chinese Capacity Power Capacity Power EN English The resetting for capacity:N No resetting Y resetting for USER’S MANUAL FOR E-SERIES Regular shut down code Power Capacity Timing open and shut Capacity Power Capacity Power Timing year Capacity Power Timing day Capacity Power Timing time 8.5 technical parameter PARAMETER E-1000W E-2000W E-3000W WTG RATED POWER 1000w 2000w 3000w PV REATED POWER CUSTOMIZE CUSTOMIZE CUSTOMIZE BATTERY VOLTAGE 24v/48v 48v/120v 48v/120v PV CHARGING CURRENT <=50A <=50A <=50A WTG MAX. OUTPUT CURRENT 50A/25A 50A/20A 75A/30A OVER VOLTAGE 30v/60v 60v/150v 60v/150v CONTROL MODE PLC PLC PLC DISPLAY LCD LCD LCD PROTECTION DUMP LOAD SHORT CIRCUIT DUMP LOAD SHORT CIRCUIT DUMP LOAD SHORT CIRCUIT USER’S MANUAL FOR E-SERIES 8.6 Environment for using controller Requirement for power supply Power supply1 12VDC Power supply 2 5VDC Requirement Working temperature -35 to 50 C° Storage temperature -40C°to 90C° for environment The power supply should be separated from each other 9. Maintenance Maintenance plan: Serial Number Item After storm 1 Check blades: look for cracks or abnormal bends. If you locate any damage caused by storms or weather, replace the blades as using damaged or unbalanced blades will compromise the efficiency and lifetime of windmill. 2 Replace lubricant 3 Check to see if nuts and bolts have remained tight on mill and tower √ 4 Check electric power cables for corrosion and √ Every Moth Every Year √ Every 5 year √ √ √ √ damage. If you detect any abnormal corrosion, replace cables. 5 Please repaint the tower if the painting failed by reason of climate. √ 6 To check if every control system working well √ √ 7 Please check the electrolyte level of the battery. And please add if not enough by following the instruction. USER’S MANUAL FOR E-SERIES 10. Trouble removal (1)Why the Electrical equipment failure after connecting with the system? ○ Please check the remaining power the battery, and the electrical equipment would not work if the power is not enough. If the power is enough, please check if the connection between battery and inverter is correct. (2)Why cannot charge the battery? ○ To check if the blades rotate, and the generator would not work if the wind speed is so low or so high. If the rotating of blade is Ok, please disconnect the battery and inverter from the generator, and then check the output of generator by voltmeter. If the output is OK, please check the battery follow the instruction to see if the battery damaged. If the voltmeter is zero, please check if it’s the problem of generator’s cable. (3)Why the blade do not move or move slowly with a normal wind speed? ○ The rotating of blade would be abnormal if the output line is short-circuited. And please check the generator’s cable with disconnecting the battery and inverter from the generator. (4)If we could extend the using of electrical equipment by adding the capacity of battery? ○ It would be a waste of battery and do harm to the battery, if add the capacity of battery without professional suggestion because it would put the battery always in the state of lacking power. Please contact with our engineer by e-mail or mobile if you can ‘not solve the problem. * Color may be different from physical products of picture. * Please give a kind understanding if the manual has been modified without prior notification. * Two year warranty will be offered from the date of purchasing