1
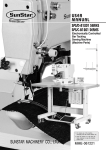
USER ’
S
MANUAL
KM-818
High Slim Post Bed,
1-Needle Unison Feed
Lock Stitch Machine
1) FOR AT MOST USE WITH EASINESS,
PLEASE CERTAINLY READ THIS MANUAL
BEFORE STARTING USE.
2) KEEP THIS MANUAL IN SAFE PLACE
FOR REFERENCE WHEN THE MACHINE
BREAKS DOWN.
SUNSTAR MACHINERY CO., LTD.
MME-050629
lity
a
u
tQ
Besst Pricevice
Be st Ser
Be
1. Thank you for purchasing our product. Based on the rich expertise and
experience accumulated in industrial sewing machine production, SUNSTAR
will manufacture industrial sewing machines, which deliver more diverse
functions, high performance, powerful operation, enhanced durability, and
more sophisticated design to meet a number of user’s needs.
2. Please read this user’s manual thoroughly before using the machine. Make
sure to properly use the machine to enjoy its full performance.
3. The specifications of the machine are subject to change, aimed to enhance
product performance, without prior notice.
4. This product is designed, manufactured, and sold as an industrial sewing
machine. It should not be used for other than industrial purpose.
R
SUNSTAR MACHINERY CO., LTD.
Table of Contents
Safety Guide
1)@Safety Signs and Descriptions ------------------------------------ 4
2)@Positions and Descriptions of the Warning Signs ------------------- 4
3)@Safety Guide --------------------------------------------------- 5
1. Specifications
1)@Specifications -------------------------------------------------- 9
2)@Motor Specifications -------------------------------------------- 9
2. Structure of the machine
1)@Names of Each Parts of the Machine ----------------------------- 10
3. Installation of the machine
1)@Environment for Machine Installation ----------------------------- 10
2)@Electric Installment Conditions ----------------------------------- 10
4. Installation
1)@Machine Head ------------------------------------------------2)@Power Supply Switch Box --------------------------------------3)@Oil Pan ------------------------------------------------------4)@Lubrication ---------------------------------------------------5)@Adjustment of the Belt Tension ---------------------------------6)@Belt Cover ----------------------------------------------------7)@Spool Pin ------------------------------------------------------
11
11
11
12
12
12
13
5. Operations
1)@Insertion of the Needle -----------------------------------------2)@Adjustment of the Hook and Needle Plate ------------------------3)@Timing Adjustment of Needle and Hook --------------------------4)@Lower Threading and Adjusting of the Tension -------------------5)@Upper Threading ----------------------------------------------6)@Installation of the Bobbin-Winding Thread Winder Guide ----------7)@Pressure Adjustment of the Presser Foot --------------------------8)@Presser Bar Lift -----------------------------------------------9)@Adjustment of the Stitch Length --------------------------------10)@Adjustment of stroke for Sub-Presser Foot ----------------------11)@Adjustment of the Feed Cam ----------------------------------12)@Adjustment of the Thread Tension -----------------------------13)@Bobbin Winding ----------------------------------------------14)@Inserting and Taking Out of the Bobbin and the Bobbin Case ------15)@Back-Tack Sewing --------------------------------------------
13
14
14
15
15
15
16
16
16
17
17
18
18
19
19
6. Troble-shooting and maintanance ------------------------------ 20
7. Table drawing
------------------------------------------------- 21
1)@KM-818-1 ---------------------------------------------------- 21
2)@KM-818-2 ---------------------------------------------------- 22
Safety Guide
1) Safety Signs and Descriptions
This manual contains a few safety instructions indicated by such signs as danger, warning and caution.
Disregarding of such instructions may cause injury to persons or damage to this machine.
Danger :Refers to the instructions that must be strictly adhered to. Disregarding of the instructions
following this sign may cause danger to the installation, moving and maintenance of the machine.
Warning :Refers to the instructions that are designed to prevent the risk of injury to persons.
Caution :Refers to the instructions that are designed to prevent the risk of malfunctioning of the machine.
2) Positions and Descriptions of the Warning Signs
CAUTION
경 고
Do not operate without finger guard and
safety devices. Before threading,
changing bobbin and needle, cleaning etc.
switch off main switch.
손가락 보호대와 안전장치 없이 작동하지 마
십시오.
실, 보빈, 바늘교환시나 청소전에는 반드시 주
전원의 스위치를 꺼 주십시오.
4
3) Safety Guide
● Caution / Installation of the Machine
▶The machine has to install autherized engineer only.
▶Contact the Sunstar dealer from whom you purchased your machine or ask an authorized
technician for installation.
▶Because weights of this sewing machine is about 60Kg, in case of the moving the machine it
is required a minimum two person at least.
▶Make sure to keep this sewing machine away from other machines that generate electric noise
such as high frequency welding machines. Such electric noise may cause the malfunction of
this sewing machine.
▶Do not plug in the machine before completing its installation. If pedal is pressed by your
mistake, it is caused injury of operator
▶Be sure to cover the motor and the belt with provided for connected belt pant between motor
and machine head.
▶Never operate the machine without oil lubrication.
▶Check the voltage and phase whether it is correct on the marked specilication of Motor name
plate or not.(phase : single or 3 phase)
▶All electric wires must be installed to have a minimum distance at 25mm from operating parts
of machine. Check the installation whether wire is overly pressed by the fixture for avoiding
the risk of electric shock or fire
▶In case of using a table with wheel for the machine, fix the wheels.
▶Because of the heavy weight of the machine, a minimum of two person must be involved in
titling the machine back or return.
▶When handling the lubricant for the machine, wear glasses and gloves to protect your eyes
and skin from the oil. Do not drink the lubricant and keep it away from children.
5
● Caution / Using Use of the Machine
▶Trained oprerater has to handle the machine only.
▶The machine has to use for sewing on the material only.
▶Always turn the power off (of the machine) for avoiding the risk of accidents or when it is
not used injury. Also, in case of following, turn the power off.
@@-When threading the needle
@@-When replacing the bobbin or the needle
@@-When the machine unuse during long periods.
@@-In case of using the clutch motor, the motor will be rotated for a moment due to its inertia
even the power was turn off. Wait until the motor to stop completely.
▶When using a table with casters, fix the casters.
▶Check the rotating direction of the motor after completing the installation of the machine. To
do so, while the needle bar locate on the lowest position by pulley rotating manually, turn
the power on. And then check the pulley out. (The pulley must rotate in the
counterclockwise direction when it is viewed from the side of pulley.)
▶In case of operating the machine or turning its power on, keep your hands away from the
needle.
▶Do not insert your fingers into the thread take-up cover when the machine is operating.
▶Turn the power off before removing the V-belt or tilting the machine.
▶Install all safety device provided by the manufacturer before operating the machine.
It causres of injury.
▶Never touch any pant of the machine while it is in motion, nor overly press any part of the
machine in order to avoid the risk of injury or the demage of the machine.
▶Because of the heavy weight of the machine, a minimum of two person must be involved in titling
the machine back or return.
▶If any ilregular noise or smell is detected, or any malfunctioning occurs during sewing, turn
the power off of the machine immediately. And then contract the Sunstar dealer.
▶For any other problems occurring during the operation of the machine, contact the Sunstar
dealer or the head quntor.
6
● Caution / Cleaning of the Machine
▶In case of cleaning the machine, turn the power off in order to avoid the risk of injury to
persons firstly.
▶In case of using the clutch motor, the motor will be rotated for a moment due to its inertia,
even the power was turn off. Wait until the motor to stop completely.
▶When using a table with casters, fix the casters.
▶Because of the heavy weight of the, a minimum of two person must be involved in titling
the machine back or return.
▶When handling the lubricant for the machine, wear glasses and gloves to protect your eyes
and skin from the oil. Do not drink the lubricant and keep it away from children.
7
● Caution / Maintenance and Inspection of the Machine
▶Any maintenance and inspection of the machine must be carried out by authorized technicians
only.
▶The maintenance and inspection of the electronic system must be conducted by the Sunstar
dealer or an authorized electric engineer.
▶Turn the power off and unplug the machine before conducting the following operations:
@@-Inspection or adjustment of the machine
@@-Replacement of any consumable parts like hook
@@※ In case of using the clutch motor, the motor will be rotated for a moment due to its
inertia, even the power is turned off. Wait until the motor to stop completely.
▶Take a special care when conducting adjustments that it requires power or air pressure.
▶When using a table with casters, fix the casters.
▶Because of the heavy weight of the machine, a minimum of two person must be involved in
titling the machine back or return.
▶In case of replacing any parts of the machine, use the genuine spare parts made by SunStar.
▶If the safety devices provided by the manufacturer have been disassembled during the
maintenance of the machine, be sure to reassemble the devices. And, check whether the
reassembled safety devices work normally or not.
▶Sunstar will not take any responsibility for any problems caused by the alteration made to the
machine by unauthorized persons without the permission from manufacturor
8
1
Specifications
1) Specifications
KM-818 : High slim post 1-needle unison feed lockstitch sewing machine
Model
KM-818
Classification
Usage
Medium heavy fabric
Sewing Speed
max. 1,600 s.p.m
max. Stitch Length
6 mm
Needle Bar Stroke
36 mm
Threrd Take Up Stroke
62.1mm
Required Hook
Horizontal Hook
Needle
DP×17@#16~23@(Standard@#23)
Presser Foot Height
10 ~ 15 mm
Each end gap of upper feed,
Sub presser foot.
2 ~ 7 mm
Lubricating Method
Manual lubrication
Required Working Space
243.5 mm
2) Motor Specifications
(1) Clutch Motor Specifications
MODEL
VOLT
WATT
HERTZ
HEC-1706(single phase)
110/220V
400W
50/60 Hz
HEC-1705(3-phase)
220/380V
400W
50/60 Hz
9
2
Structure of the machine
1) Names of Each Parts of the Machine
Thread Stand
Arm
Arm Supporter
Post
Knee Lifting
Pedal
[Fig. 1]
3
Installation of the machine
1) Environment for Machine Installation
(1) Do not use the machine where the voltage is over regular voltage ±10% to prevent accidents.
(2) Check the indicated pressure of the devices that use atmospheric pressure such as the air
cylinder to prevent any accidents from occurring.
(3) For safe operation of the machine, use the machine under the following conditions.
Surrounding Temperature During Operation : 5。C~40。C(41。F~104。F)
Surrounding Temperature During Maintenance : -10。C~60。C(14。F~140。F)
(4) Humidity : Between 20~80%(Relative humidity)
2) Electric Installment Conditions
(1) Power Voltage
·The power voltage must be between regular voltage ±10%
·The frequency of the power should be regular frequency (50/60HZ)±1%
(2) Electromagnetic Wave Noise
Use separate power with strong magnetics or high frequency products, and do not leave the
machine near them.
(3) Use low voltage when supplements or accessories are being adhered.
(4) Be careful not to have water or coffee be spilled into the Controller and Motor.
(5) Do not drop the Controller or Motor.
10
4
Installation
1) Machine Head
After assembling the table as shown in Fig. 1.
attach the head supporting rubber ①, the head hinge
guide bar ②, head guide rubber and rubber cushion
[Fig. 2]
2) Power Switch Box
In case of attach the power switch box ①,
install it, on the lower right side of the
table, like a Fig. 2.
①
[Fig. 3]
3) Oil Pan
(1) Place the oil pan ② under the
table and fix it by nailing on the
8 holes on the pan.
(2) After fix the oil tank receiptacle
③ to the oil pan with a screw,
attach oil tank ④ to oil tank
receptacle.
1
3
2
4
[Fig. 4]
11
4) Lubrication
Befor the operating of the machine like
[Fig-4], operator has to put into redmarked oiliy hole the lubricction.
[Fig. 5]
5) Adjustment of Belt Tension
After installing the motor ③, as check nuts, ① of ②
is loosen, the belt ④ will be given the tension by the
weight of the motor. Fasten the check nut ① firstly and
then adjust the tension.
[Refer to Fig. 5.]
[Fig. 6]
6) Belt Cover
Caution:To avoid the risk of accidents, turn the power off
and wait until the motor to stop rotating before
installing the belt cover.
(1) Attach the belt cover guide ① to the 8 screw holes on
the arm.
(2) Insert 8 belt cover guide screws by half of their bodies
into the cover guide only.
(3) Insert the belt covers ③,④,⑤ and rear. Screw
up in the hole.
(4) Fasten the belt covers ③,④,⑤ and ⑥, with screws
⑦.
[Fig. 7]
12
7) Spool Pin
Assemble the spool pin ① as shown in
Fig. 7. Insert the assembled spool pin in
the hole on the table and fasten it, with
the check nut ② and washer ③.
[Fig. 8]
5
Operations
1) Insertion of the Needle
While needle slot ① locate at the left, top of
the needle stick to the top of stopper hole, and
then fix the needle, with the clamp screw ②.
needle grooved
[Fig. 9]
13
2) Adjustment of the Hook and Needle Plate
※ When replacing the hook, check the position of the needle plate. The standard position is match
then needle plate at the side of needle ①or the needle has moved up by 0.15 to 0.2 mm.
Adjust the needle plate by bending it until it
reaches its good position.
(1) In case of bending the needle plate inward. insert
a screwdriver into outward of the needle plate and
then bend it.
(2) In case of bending the plate outward, insert a
screwdriver into inward of the needle plate and
then bend it.
[Fig. 10]
3) Timing Adjustment of Needle and Hook
◆ Preparation for the adjustment of needle and hook
1. Turn
the
stitch
length
adjusting
dial
to
counterclockwise until it will be stopped.
2. While the needle bar pocate lowest point by turning
the flying wheel, loosen the clamp screw ①.
◆ Height of the needle bar
hook point
Set the stitch length at its lowest value and turn
needle center
1.8mm
the machine pulley toward operator until the needle
bar reaches its lowest position. While the pulley is
rotated, the needle bar moves up by about 2.5mm. In
this position, the standard on distance between the
[lowest point
of the needle]
hook and the end of the needle eye must be 1.8 mm.
2.5mm
hook point
0.02~0.1mm
◆ Position of the hook
Set the stitch length at its lowest value and turn
the machine pulley toward operator until the needle
needle bracket
bar reaches its lowest position.
While the pulley is rotated the needle bar moves up
by about 2.5mm.
In this position, the hook point must position on the
center of the needle and the gap between the hook
point and the slot of the needle must be about 0.02 to
0.1 mm.
14
[Fig. 11]
4) Lower Threading and Adjusting of the Tension
(1) Wind the thread on the bobbin several times by
passing through the thread guide according to
ⓐ, ⓑ and ⓒ as shown on Fig. 11.
(2) Take out the bobbin winder pulley ① to the
⇦ direction.
(3) Adjust the position of the bobbin winder by
loosening the clamp screw ② until the thread
is wound upon the bobbin by 80%.
(4) When the winding is completed, the bobbin
winder lever will be stopped automatically.
[Fig. 12]
5) Upper Threading
Place the thread take-up at its highest
position and insert the upper thread according
to marked number on Fig. 12.
[Fig. 13]
6) Installation of the Bobbin-Winding Thread Winder Guide
Fix the thread winder guide on the arm as
shown on Fig. 13.
[Fig. 14]
15
7) Pressure Adjustment of the Presser Foot
Turn the pressure adjusting screw ① of the
presser bar lift to the right to increase the
pressure, and to the left to decrease the
pressure.
decrease
increase
[Fig. 15]
8) Presser Bar Lifter
To stop the presser bar lifter at its "up"
position, turn it to the arrow direction as
shown on Fig. 15. To lower the presser bar
lifter, return it to its original position.
[Fig. 16]
9) Adjustment of the Stitch Length
The numbers marked on the stitch length
adjusting dial ① represent the width of the
stitch by mm. Adjust the stitch width to a
desired still width by turning the dial to the
right or to the left.
[Fig. 17]
16
10) Adjustment of stroke for Sub-Presser Foot
In general, the stroke of the presser foot and subpresser foot is the same mutually. To increase their
stroke, move the upper feed link ① up within the
extenden screw hole. And to decrease, move it down,
and then fasten the nut. In case of deffering the stroke
of the presser foot and the presser foot, loosen the
upper feed link screw when the bottom of both presser
foot meet at the upper position of the needle plate,
fasten screw ② by turning the near fly wheel then the
stroke of sub-presser foot is begger than the stroke of
presser foot. In case of turning the fly wheel to the
opposite direction, the stroke of the presser foot is
bigger than the sub-presser foot.
[Fig. 18]
11) Adjustment of the Feed Cam
The timing of the gear and the needle are adjust by turning to up and down of feed cam.
Turn the pulley manually until the needle bar is placed in its highest position. In this position,
the center of clamp screw ② of the eccentric cam ① must correspond to the central line of the
upper shaft ③.
[Fig. 19]
17
12) Adjustment of the Thread Tension
(1) Upper thread tension
Turn the thread tension disc ① to the
right to increase the tension and to the left
to decrease.
(2) Lower thread tension
Turn the tension screw ② to the right to
increase the tension and to the left to
decrease.
[Fig. 20]
13) Bobbin Winding
To adjust the amount of thread wound upon
the bobbin, use the initial position of the
bobbin winder spindle. To wind less thread on
the bobbin, turn the screw to the direction of
A. To wind more thread on the bobbin, turn
the screw to the direction of B.
(1) Adjustment of thread winding amount for
bobbin depends on the initial position of
the bobbin winder spindle.
(2) In case of the thread winding amount is
over, loosen the screw of thread winder
spindle to“A”direction.
(3) In case of the thread winding amount is
less, turn the screw of thread winder
spindle to“B”direction.
18
bobbin
bobbin winder spindle
[Fig. 21]
14) Inserting and Taking Out of the Bobbin and the Bobbin Case
◆ Insertion of the bobbin case
1. When the thread come out, bobbin insert to bobbin
case after turning of bobbin to arrow direction.
2. The thread is a passed through the under bobbin
case at the tension adjusting disc and the slot of
bobbin case.
◆ Taking out of the bobbin case
Place and stop the needle at its highest position.
Open the hook cover ①, as shown on Fig. 21, and
raise the bobbin case holder, and then take the
bobbin ③ and bobbin case ④ out.
◆ Insertion of cap
1. Pass the thread through the thread slot.
2. Insert the bobbin case into the hook In order to
match the thread passing slot of hook and exit
of bobbin case.
3. Push the bobbin case holder ② down.
[Fig. 22]
15) Back-Tack Sewing
(1) Press the back-tack lever.
(2) While the back-tack lever pressed, back-tack
sewing is available.
(3) Return the back-tack lever to its original position,
sewing direction is return automatically.
[Fig. 23]
19
6
Troble-shooting and maintanance
Problem
1.@Thread cutting
Cause
Solution
① There are rough holes on the path of
the thread, the needle end or the slot
of the inner hook of the needle plate.
② Upper thread tension is strong.
③ The space of inside the middle hook
guide is big.
④ The needle touches the end of the
hook blade.
⑤ The oil of the inside the hook is
insufficient.
⑥ The upper thread tension is weak.
⑦ The thread take-up spring is weak or
its movement rate is low.
⑧ The timing of the needle and hook is
either too fast or too slow.
○ Polish the needle with sand paper and the
inner hook with a buff.
○ Decrease the upper thread tension.
○ Make the space smaller, referring to“20.
Adjustment of the middle hook guide."
○ Refer to“17. Relations between the
needle and the hook."
○ Lubricate the lace of the hook, referring
to“5. Lubrication."
○ Strengthen the upper thread tension.
○ Strengthen the spring and increase its
movement rate.
○ Refer to“17. Relations between the
needle and the hook."
2. Jumping of stitch
① The timing of the needle and hook is
either too fast or too slow.
② The pressing pressure is too weak.
③ The gap between the upper part of
the needle hole and the end of the
hook blade is irregular.
④ The support of the hook needle is
malfunctioning.
⑤ The selection of the needle is
incorrect.
3. Inadequacy of the
Thread Tension
① There is no lower thread inside the
tension spring of the bobbin case.
② The path of the thread has uneven
spots.
③ The bobbin is not moving smoothly.
④ The space inside the middle hook
guide is too big.
⑤ The lower thread tension is too weak.
⑥ The lower thread is wound too
tightly.
20
○ Refer to“17. Relations between the
needle and the hook."
○ Fasten the thumb screw.
○ Refer to“17. Relations between the
needle and the hook."
○ Refer to“18. Adjustment of the hook
needle support."
○ Replace the needle with one of the next
higher rank.
○
○
○
○
Refer to“7. Lower threading."
Polish it with sand paper or buff it.
Replace the bobbin or the hook.
Refer to“20. Adjustment of the middle
hook guide."
○ Strengthen the lower thread tension.
○ Loosen the lower thread.
7
Table drawing
1) KM-818-1
21
2) KM-818-2
22