1
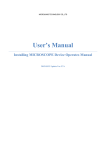
MICROLINKS TECHNOLOGY CO., LTD.
User’s Manual
MICROSCOPE Application Program Operates Manual
MLTC
2012/08/28 Update Ver.2.7A
MICROSCOPE Application Program
http://www.ViTiny.com
MICROSCOPE Application Program Operates Manual
contents
1.
2.
Application Program Interface Introduction ................................................................................. 4
1.1
Main Toolbars ..................................................................................................................... 4
1.2
Main Function Buttons ....................................................................................................... 5
1.3
The File List/Folder .............................................................................................................. 5
1.4
Mode Functions .................................................................................................................. 5
Main Toolbars.................................................................................................................................. 6
2.1
File ....................................................................................................................................... 6
2.1.1 Opening File .............................................................................................................. 6
2.1.2 Save File..................................................................................................................... 7
2.1.3 Printer Setup ............................................................................................................. 7
2.1.4 Print Picture .............................................................................................................. 8
2.1.5 Exit............................................................................................................................. 8
2.2
Setting ................................................................................................................................. 8
2.2.1 Optional Input Devices .............................................................................................. 9
2.2.2 Video Format............................................................................................................. 9
2.2.3 Video Format Source............................................................................................... 10
2.2.4 Video Compressor ................................................................................................... 13
3.
2.2.5 JPG Quality .............................................................................................................. 14
2.2.6 Auto-Save ................................................................................................................ 14
2.3
Window ............................................................................................................................. 14
2.4
Tool .................................................................................................................................... 17
2.4.1 Restore default path ............................................................................................... 17
2.4.2 Open data File ......................................................................................................... 17
2.5
Language ........................................................................................................................... 17
2.6
About................................................................................................................................. 17
Major Keys .................................................................................................................................... 19
3.1
Connect/Disconnect.......................................................................................................... 19
3.1.1 Connect ................................................................................................................... 19
3.1.2 Disconnect............................................................................................................... 19
3.2
Snapshot ........................................................................................................................... 19
3.3
Save Image ........................................................................................................................ 20
3.4
Edit the Picture / Diverge From Editor's Picture ............................................................... 20
3.4.1 Editor's picture ........................................................................................................ 20
3.4.2 Leave Editor............................................................................................................. 23
2
Copyright © 2008-2012 MicroLinks Technology Corp.
MICROSCOPE Application Program
3.5
http://www.ViTiny.com
Delete Image ..................................................................................................................... 24
3.6
Video recording / Stop Making Video Recording .............................................................. 24
3.6.1 Recording ................................................................................................................ 24
3.6.2 Stop Recording ........................................................................................................ 24
3.7
Film Broadcasting / Stopping Broadcasting ...................................................................... 24
3.7.1 Film Broadcasting .................................................................................................... 25
3.7.2 stop broadcast......................................................................................................... 26
3.8
Edit Image / Leave Editing ................................................................................................. 27
3.8.1 Image Editor ............................................................................................................ 27
3.8.2 Leave Image Editor .................................................................................................. 28
3.9
Print Image ........................................................................................................................ 28
4.
3.10 Diverge from the application program ............................................................................. 28
The file List/Folder ....................................................................................................................... 29
4.1
The File Tabulates.............................................................................................................. 29
4.2
5.
The File Tabulates On Page Number ................................................................................. 29
4.2.1
Show the number of pages ..................................................................................... 29
4.2.2
Change page button ................................................................................................ 29
4.2.3
Image Path .............................................................................................................. 29
4.3
Quick Click ......................................................................................................................... 30
Mode Function ............................................................................................................................. 31
5.1
Video Control and rotation mode ..................................................................................... 31
5.2
Scene Mode ...................................................................................................................... 33
5.2.1
5.2.2
5.2.3
5.2.4
5.2.5
5.2.6
Mode of Skin exam ................................................................................................. 33
Mode of Throat exam ............................................................................................. 33
Mode of Long Dental Mirror ................................................................................... 33
Mode of Short Dental Mirror .................................................................................. 34
Mode of Ear Care .................................................................................................... 34
Mode of Ear Wax Removal ...................................................................................... 34
3
Copyright © 2008-2012 MicroLinks Technology Corp.
MICROSCOPE Application Program
http://www.ViTiny.com
1. Application Program Interface Introduction
After the user use MICROSCOPE application program, it will show illustration picture in Fig.1-1.A
tool is arranged and divided into the window. The main button and file tabulate is in 3 groups, which
the left and right windows are the two sub windows. On the left window, it will show MICROSCOPE
whether USB digital video device is connected. If it’s not connected the button will be a white result
as Fig.1-2 shows.
Fig. 1-1 main window picture
Fig. 1-2 connected button white
To prove Fig. 1-1 into three major model's groups, it provides the including:
1.1 Main Toolbars
The picture is based on Fig.1-3 the tool of the application program arranges the group,
which includes File, Setting, Window, Tool, Language and About altogether.
Fig. 1-3 arranging tools model group
4
Copyright © 2008-2012 MicroLinks Technology Corp.
MICROSCOPE Application Program
http://www.ViTiny.com
1.2 Main Function Buttons
Fig.1-4 is a main button group which is very useful function or basic function, which
includes connecting, taking pictures, saving, editing…etc. there are 10 functions button.
Fig. 1-4 main button group
1.3 The File List/Folder
Fig.1-5 is the tabulate of the saved images in the application program. The main list will
list the files in the existing folder, which includes BMP folder, JPG folder and AVI folder.
Fig. 1-5 file list group
1.4Mode Functions
After open MICROSCOPE program, please click connect button shown in Fig.1-1, when it is
connecting, mode functions toolbar will show under the left side of sub-window.
Fig 1-6 Connect Application program
5
Copyright © 2008-2012 MicroLinks Technology Corp.
MICROSCOPE Application Program
http://www.ViTiny.com
2. Main Toolbars
The tool arranges the group and pursues to show, which include file, setup, window, tool,
Language and select greatly about 5 of the choices altogether.
2.1 File
In the beginning, file introducing tools and arranging file choice. The file can open file and
store the file again while selecting, and wait...etc shown as Fig.2-1.
Fig.2-1 Choose file
2.1.1 Opening File
Opening file has three kinds Bmp, Jpg and Avi, which open preserving the route
and taking the file tabulates pages to sign at present as a basis of the file, sign portion
3.1 to more narrate in page. If the file tabulates pages and signs for Bmp picture,
open the materials and insert Bmp picture route in order to preserve in the route, as
Fig. 2-2 shows. If the file selected tabulates pages to sign for Jpg picture, open the
materials and insert Jpg picture route in order to preserve in the route. If the file
selected tabulates pages to sign for the Avi film, open the materials and insert Avi film
route in order to preserve in the route. Ctrl +O are a fast key.
Fig.2-2 Opening bmp file
6
Copyright © 2008-2012 MicroLinks Technology Corp.
MICROSCOPE Application Program
http://www.ViTiny.com
2.1.2 Save File
Saving file’s file, there are only Bmp and Jpg 2 types; saving the same as Fig1-1 of
the left window will show the picture. Storing the file name is the program will
produced automatically by the procedure; the user can change the name by
themselves. File name is annual in year (yyyy), month(mm), day(dd), hour(hh),
minute(nn), second(ss) setting, which Bmp_20080829180445.bmp as 2008(yyyy)
08(mm) 29(dd) 18(hh) 04(nn) 45(ss), which this way is the name of file won’t be
repeated and it can also be realized the date and time by stored file name.
Fig.2-3 save file
2.1.3 Printer Setup
Set up printer can adjust paper between size, source or printer type.
Fig.2-4 setup printer
7
Copyright © 2008-2012 MicroLinks Technology Corp.
MICROSCOPE Application Program
http://www.ViTiny.com
2.1.4 Print Picture
Ctrl+P are a fast key
Fig.2-5 print
2.1.5 Exit
Once to choose to exit, the program would close. Ctrl+E are a fast key.
2.2 Setting
The Setting function is mainly to set up Video Format and JPG compression quality as Fig.
2-6 shows. If MICROSCOPE device isn’t at the line, video format and video signal source
unable to set up (setting in white bar); it can set up on the contrary.
Fig. 2-6 Select Setting
8
Copyright © 2008-2012 MicroLinks Technology Corp.
MICROSCOPE Application Program
http://www.ViTiny.com
2.2.1 Optional Input Devices
Fig 2-7 when there are 2 Input Devices connecting to PC at the same time, it allows
you to choose.
圖 2-7 Optional Input Devices
2.2.2 Video Format
Video Format is mainly to set up the frame rate, color space and output size etc. Fig
2-8a is the Video Format of built in UVC Driver contents. Frame rate is frame numbers per
second (fps) for playing. Adjust the output size will slower or faster the fps, for example, if the
fps is higher, the preview video will be less clearly but with smooth performance. On the
contrary, if the fps is lower, the image will be more clear but with a little lagging performance.
This is due to the more frames requires the more CPU loading then cause the lagging
performance.
Fig. 2-8 Video format table before installing MICROSCOPE driver
9
Copyright © 2008-2012 MicroLinks Technology Corp.
MICROSCOPE Application Program
http://www.ViTiny.com
Fig.2-8b Video Format content after installed MICROSCOPE driver
2.2.3 Video Format Source
Fig. 2-9a & Fig. 2-9b are Properties of Video Format source with or without install
MICROSCOPE driver, i.e., it uses Windows’ built-in driver. Fig. 2-9a Video Proc Amp allows
User to adjust the parameter.
Fig. 2-9a Table of Video Proc Amp content without installing MICROSCOPE driver
10
Copyright © 2008-2012 MicroLinks Technology Corp.
MICROSCOPE Application Program
http://www.ViTiny.com
Fig. 2-9b Table of Camera Control allows User to adjust the parameter. In generally,
Windows built-in driver can support limited functions.
Fig. 2-9b Table of Camera Control without installing MICROSCOPE driver
Fig. 2-9c, 2-9d & 2-9e are properties of Video Format source with installing
MICROSCOPE driver. Firstly, it sets up Video image quality for Brightness 、Contrast 、
Gamma etc. as Fig. 2-12. If the Video image is rotating, it can use vertical rotating and
horizontal rotating. Besides, other functions can be applied by User.
Fig. 2-9c Properties of Video Format source with installing MICROSCOPE driver
11
Copyright © 2008-2012 MicroLinks Technology Corp.
MICROSCOPE Application Program
http://www.ViTiny.com
Fig.2-9d is Function of special Video Effects, beside of effects, there is Frame function,
the Frame styles can be customer zed.
Fig. 2-9d Properties of Video Format source with installing MICROSCOPE driver
12
Copyright © 2008-2012 MicroLinks Technology Corp.
MICROSCOPE Application Program
http://www.ViTiny.com
Fig. 2-9e It can enlarge and shrink the image, also move the position and enable face
tracking.
Fig. 2-9e Properties of video format source with installing MICROSCOPE driver
2.2.4 Video Compressor
Normally, the video size is huge before compressor. We can use Compressor function
to reduce the file size. There are optional Compressors which are built-in or can be installed
by DIVX or other tool. Once the installation is completed, you can see them at the optional
Compressors.
Fig. 2-10 Optional Compressors
13
Copyright © 2008-2012 MicroLinks Technology Corp.
MICROSCOPE Application Program
http://www.ViTiny.com
2.2.5 JPG Quality
User can choose different JPG quality.
Fig. 2-11 Setting JPG qualities
2.2.6 Auto-Save
From 「Setting->Auto-Save」 shown Fig. 2-12, after checked auto-save, when clicking
the save buttons it will not show the save dialog. The system will generate a file name and
auto-save the file.
Fig. 2-12 auto-save option
2.3 Window
The Windows can be chosen per USER’s preferred window size. But it need depend on
User’s PC to choose a suitable resolution as Fig. 2-13. For example, your PC is 1280*960
pixels; you can choose 1280*960.
Fig. 2-13 optional window size
14
Copyright © 2008-2012 MicroLinks Technology Corp.
MICROSCOPE Application Program
http://www.ViTiny.com
User can choose full screen under window mode. The original left window in the AP will
become a single window, available tool bar of the connection (disconnection), snapshot,
video recording and film broadcasting under the full screen.
Fig. 2-14 Full screen of 640*480 under Window mode
15
Copyright © 2008-2012 MicroLinks Technology Corp.
MICROSCOPE Application Program
http://www.ViTiny.com
If changing to single window and want to return to normal mode can click on Fig. 2-15
image to go back.
Fig.2-15 Normal Mode
Single window also has 10 functions of video control mode shown Fig. 2-16. To
preview other functions of 「video control mode」will be explained in section 4.
Fig.2-16 10 Functions of Video Control
Click snapshot button and will pop up fig. 2-17, it provides function of open file, save file,
Delete image, Image process and Print image.
Fig. 2-17 Image Viewer of window
16
Copyright © 2008-2012 MicroLinks Technology Corp.
MICROSCOPE Application Program
http://www.ViTiny.com
2.4 Tool
Use the Tool to open file and set up Path.
Fig. 2-18 Tool
2.4.1 Restore default path
The function allows User to preserve the initial setting route, easily find and Save
the video and photos at the preserved route
2.4.2 Open data File
Open files at BMP 、JPG & AVI folder.
Fig.2-19 Open file folder
2.5 Language
The version includes 5 multi-languages ; English、Tradition Chinese、Simplified Chinese、
Japanese & German. The initial language will automatically follow up User’s OS system. It
can choose the other language, too.
Fig.2-20 Select language
2.6 About
Show the MICROSCOPE relevant information.
Fig.2-21 select about
17
Copyright © 2008-2012 MicroLinks Technology Corp.
MICROSCOPE Application Program
Learn
the
application
http://www.ViTiny.com
program
version,
MICROSCOPE
hardware
manufacturer
MICROSCOPE and the copyright of the application program.
Fig.2-22 about MICROSCOPE
18
Copyright © 2008-2012 MicroLinks Technology Corp.
MICROSCOPE Application Program
http://www.ViTiny.com
3. Major Keys
Fig.1-4 is a main button group which is very useful function or basic function, which includes
connecting, taking pictures, saving, editing…etc. there are 10 functions button.
Fig. 1-4 main button group
3.1Connect/Disconnect
3.1.1
Connect
The connect icon is as Fig. 3-1, the user will connect the line while pushing the
connect button, namely connect with MICROSCOPE device. If it cannot connect, please
reinsert MICROSCOPE device to the other USB port.
Fig.3-1 Connect button icon
3.1.2
Disconnect
The button icon which shows disconnect is like Fig. 3-2, the users please push this
button to disconnect. When the user starts and broadcasts the film button, MICROSCOPE
will be disconnected automatically. People who take off line establishment, Video Format
m will restore the preserved setting value.
Fig 3-2 disconnect button icon
3.2 Snapshot
Snapshot icon is as Fig. 3-1, the function allows taking a photo in Preview、Video &
Play, and image size depends on Video Format source, i.e. Height & Width.
Fig 3-3 snapshot button icon
19
Copyright © 2008-2012 MicroLinks Technology Corp.
MICROSCOPE Application Program
http://www.ViTiny.com
3.3Save Image
Save image icon is as Fig. 3-4, the saved file name is automatically created. The
detail of the file name is as description 1.1.2.
Fig 3-4 save image button icon
3.4Edit the Picture / Diverge From Editor's Picture
3.4.1
Editor's picture
The editor is as Fig. 3-5 including several convenient functions.
Fig. 3-5 editor icon
Fig. 3-6 editor tool
Fig. 3-7 Click (
Fig. 3-8 Click (
) to start editor tool
) to start text tool
20
Copyright © 2008-2012 MicroLinks Technology Corp.
MICROSCOPE Application Program
http://www.ViTiny.com
Fig.3-9 Click (
) to start other functions
「 Editor Image」 toolbar includes many functions, below will explain each
functions:
:When this button is clicked, all the buttons will return to
Normal
normal.
Move Image
:When the「original fit
」button begins using, select
「 Move Image」and click mouse of left button to move on the image.
:「 New file」 can open a blank page of image, image size is
New File
400*300 by the Fig 1-1 of the right side window size.
:Save Fig 1-1 is right side window of image.The image size by
Save Image
video formal of output size.
:Image can rotate left 90 degree.
Rotate Left
:Image can rotate right 90 degree.
Rotate Right
Fit The Window
:This function can let image to fit the window size.
When selecting this function, it cannot use 「 edit text」, 「select」,and
「drawing」functions.
:Enlarg image without interpolation therefore if the scale larger
Zoom In
than orginal size distortion will appare.
Zoom Out
:To shirk image.
Rndo
:To go back the movemenet and only can use up to 3 times
Redo
:To go to next movemenet and only can use up to 3 times.
Line Style
:Choose line style by clicking 「Line style」button and it will
21
Copyright © 2008-2012 MicroLinks Technology Corp.
MICROSCOPE Application Program
http://www.ViTiny.com
pop up(Fig3-10) dialog box.
Fig. 3-10 Choose line styles
Color
:To choose pen’s 「color」 click on the color button and it will pop
up (Fig 3-11) dialog box.
Fig. 3-11 Choose color
Delete Image
Exit Editor
:The Fig1-1 right side window of image will be deleted.
:To exit image editor,the「image editor」toolbar will be closed.
22
Copyright © 2008-2012 MicroLinks Technology Corp.
MICROSCOPE Application Program
http://www.ViTiny.com
Orignal Fit
:When the image size is bigger than the window, using this
function, it can do 「 Edit text」, 「select」, and 「drawing」functions. The
window won’t see the whole image, but only some parts.
:Edit text is words that can be written on image.
Edit Text
Edit Text Color
:Text color can be changed by clicking「edit text color」
button and it will pop up (Fig 3-11) dialog box.
Edit Text Background Color
:Text background color can be changed just
by clicking 「edit background color」 and it will pop up (Fig 3-11) dialog box.
Edit Text Background Transparent
:Text background can be set as
transparent with no background color.
:Text size can be changed.
Text Size
Pen
:Pen can draw anything and its function is like a regular pen and
pencil.
Line
:Draw stright line.
:Draw rectangle.
Rectangle
Ellipse
:Draw ellipse.
Select
:Selects the area on the image, after the selection, it can cut,
copy, paste, and save the selection area function.
Cut
Copy
Paste
:Cut frame on the Fig1-1 right side window of image.
:Copy selected frame on the Fig1-1 right side window of image.
:Paste whats been cut or copied image to display on the Fig1-1
right side window of image.
Save Select
:Save selected frame on the Fig1-1 right side window of
image.
3.4.2
Leave Editor
23
Copyright © 2008-2012 MicroLinks Technology Corp.
MICROSCOPE Application Program
http://www.ViTiny.com
Fig. 3-12 Editor icon
3.5 Delete Image
Fig. 3-13 delete image icon
3.6Video recording / Stop Making Video Recording
3.6.1 Recording
Press video recording icon and firslty name the file name, the file name is
automatically shown as description 1.1.2.
Fig. 3-14 video recording icon
3.6.2
Stop Recording
Fig 3-15 stop recording icon
3.7Film Broadcasting / Stopping Broadcasting
24
Copyright © 2008-2012 MicroLinks Technology Corp.
MICROSCOPE Application Program
3.7.1
http://www.ViTiny.com
Film Broadcasting
The recorded video will plays at left window as Fig. 1-1. Once it palys, the
microscope is automatically disconnected.
Fig. 3-16 film broadcasting icon
Fig. 3-17 Tool of playing
Play
:This button can play video.
:This button can pause video.
Pause
Stop
:This button can stop video.
:This button can repeat play video.
Repeat
Exit
:This button can exit video mode.
No Flip「
Fig 3-18.
」
:Video image’s flip direction, does not makes any flip shown in
Fig 3-18 Video image with no flip
Vertical Flip「
」:The video image upside down 180 degree, which is
25
Copyright © 2008-2012 MicroLinks Technology Corp.
MICROSCOPE Application Program
http://www.ViTiny.com
vertical flip, shown in Fig. 3-19.
Fig. 3-19 Video image do vertical flip
Horizontal Flip「 」:The video image left and right mirror 180 degree flip
which is horizontal flip shown in Fig. 3-20。
Fig 3-20 Video image do horizontal flip
Vertical and horizontal Flip「
」:The video image will do horizontal and
vertical flip shown in Fig. 3-21
Fig. 3-21 video image becomes horizontal flip
Click right of mouse to show Fig. 3-22
Fig. 3-22
3.7.2 stop broadcast
Once it stops play, the microscope is still disconnected.
26
Copyright © 2008-2012 MicroLinks Technology Corp.
MICROSCOPE Application Program
http://www.ViTiny.com
Fig. 3-23 stops broadcasting
3.8Edit Image / Leave Editing
3.8.1 Image Editor
Fig. 3-24 Image Editor Icon
Once it clicks Fig. 3-18, it will show Fig. 3-25 .
Fig. 3-25 Tool of Image Editor Once it clicks
,
it can set up the value. The
image will be changed, too.
Fig. 3-26 Changing Threshold
Below is image process function explanation:
Original Image
Gray Level:
:This function can let image return to original image.
:This function can let the image from color change to gray
Highlight Edge
:This function can let the image show it’s highlight edge
Highlight Pxiel
:This function will strengthen in the picture between the
different pixels.
Black/White
:This function can let the image from color turn to black
and white
27
Copyright © 2008-2012 MicroLinks Technology Corp.
MICROSCOPE Application Program
Inverse
Exit
3.8.2
http://www.ViTiny.com
:This function can let the image become inverse.
:This button is to exit video mode.
Leave Image Editor
Fig. 3-27 Leave Image Editor
3.9Print Image
Fig 3-28printing image
3.10
Diverge from the application program
Fig. 3-29 diverges from the application program
28
Copyright © 2008-2012 MicroLinks Technology Corp.
MICROSCOPE Application Program
http://www.ViTiny.com
4. The file List/Folder
The file tabulates pages and signs as Fig. 1-5 shows, file is it list file materials insert file in,
include BMP materials insert, JPG materials insert and AVI materials insert three at present
mainly to tabulate.
4.1The File Tabulates
Fig.4-1 tabulate for BMP 、JPG & AVI files
Fig. 4-1 file tabulates
4.2The File Tabulates On Page Number
Fig. 4-2 the file tabulates on page number
4.2.1 Show the number of pages
001/001= X/ Y, X is sequence and Y is total number of pages.
4.2.2 Change page button
Fig 4-2 left and right button can be change page number. Left button is to decrease
page number and right button is to increase page number.
4.2.3 Image Path
Click the 「Image Path」 to show Fig. 4-3 and choose the file director
29
Copyright © 2008-2012 MicroLinks Technology Corp.
MICROSCOPE Application Program
http://www.ViTiny.com
Fig. 4-3 Data Path Director
4.3Quick Click
Click right of Mouse on the saved image and show Fig.4-4, it can directly Open or Delete
file.
Fig. 4-4 Quick click
30
Copyright © 2008-2012 MicroLinks Technology Corp.
MICROSCOPE Application Program
http://www.ViTiny.com
5. Mode Function
When connect with MICROSCOPE AP, below the left window will show scene toolbar. See
Fig 5-1.
Fig. 5-1 mode function toolbar
5.1 Video Control and rotation mode
This toolbar has the functions to flip video image. The image will presented upside down as well
as the image moving direction when holding by different hand. By the mode, it can preview the
correct direction. The brightness, contrast and exposure tool can be adjusted and also can cause
the video image to be clearer in different scene. Fig.5-2 is the selection video control mode.
Fig.5-22 is the toolbar of video control mode.
Fig 5-2 Video control and rotation mode toolbar
5.1.1 No Flip「
」:Video image’s flip direction, does not makes any flip shown in Fig 5-3.
Fig 5-3 Video image with no flip
5.1.2 Vertical Flip「
」
:The video image upside down 180 degree, which is vertical flip, shown in
Fig. 5-4.
Fig. 5-4 Video image do vertical flip
5.1.3 Horizontal Flip「
」:The video image left and right mirror 180 degree flip which is
31
Copyright © 2008-2012 MicroLinks Technology Corp.
MICROSCOPE Application Program
http://www.ViTiny.com
horizontal flip shown in Fig. 5-6。
Fig 5-5 Video image do horizontal flip
5.1.4 Vertical and horizontal Flip「
」
:The video image will do horizontal and vertical flip shown
in Fig. 5-7
5.1.5 Adjust Brightness
「
」:To adjust brightness is to click on the brightness button. By scrollbar adjust
brightness. If want to default just click it again.
5.1.6 Adjust Contrast
「
」:To adjust contract just click the contrast button which can adjust by the
scrollbar. If want to default just click it again.
5.1.7 Adjust Exposure
「
」:When adjusting the exposure, click on the exposure button and to default
just click it again. If this button cannot click, it means there’s no diver to support this
function. If adjust has no response, then go to 「setting->video source」 it will pop up
shown Fig. 5-7. the「auto mode control」must be unchecked. If want to use「auto mode
control」must be checked again.
Fig. 5-7 Auto mode control
32
Copyright © 2008-2012 MicroLinks Technology Corp.
MICROSCOPE Application Program
http://www.ViTiny.com
5.2 Scene Mode
Fig. 5-8 Scene mode toolbar. You can choose a different mode by using a different
accessory. Its friendly user interface helps to see the image clearly. The LED must be
adjusted to the brightest level under these modes.
Fig 5-8 Scene Mode toolbar
5.2.1 Mode of Skin exam「
」:
When it applies the skin piece, press the icons , the parameters of the Brightness、Contrast、
Saturation & Gain automatically default the original setting in the system. It can also manually
adjust the parameter from the 「Setting->Video Source」or directly adjust the LED wheel and control
the brightness. Those performances are different.
Fig. 5-9 Skin piece
5.2.2 Mode of Throat exam
「
」
: Press the icons to inspect throat, when it applies the throat exam piece. The
LED brightness must be adjusted to the brightest one.
Fig. 5-10 Throat exam piece
5.2.3 Mode of Long Dental Mirror
「
」:The mode is suitable to observe the rear teeth, when it applies the Long
Dental piece, the LED brightness must be adjusted to the brightest one. Refrain from
breath onto the Long Dental Mirror, it will atomize the mirror and interfere observation
33
Copyright © 2008-2012 MicroLinks Technology Corp.
MICROSCOPE Application Program
http://www.ViTiny.com
Fig. 5-11 Long Dental Mirror
5.2.4 Mode of Short Dental Mirror
「
」:The mode is suitable to observe the front teeth, when it applies the Short
Dental piece, the LED brightness must be adjusted to a little bit lower brightness. Refrain
from breath onto the Short Dental Mirror, it will atomize the mirror and interfere
observation
Fig. 5-12 Short Dental Mirror
5.2.5 Mode of Ear Care
「
」:The mode is suitable to inspect inner ear, when it applies the Ear Care piece,
the LED brightness must be adjusted to the brightest one.
Fig. 5-13 Ear Care piece
5.2.6 Mode of Ear Wax Removal
「
」:The mode is suitable to remove inner ear wax, when it applies the Ear Wax
Removal, the LED brightness must be adjusted to the brightest one.
Fig. 5-14 Ear Wax Removal
34
Copyright © 2008-2012 MicroLinks Technology Corp.