1
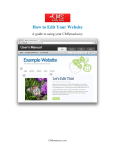
How to Edit Your Website
A guide to using your Content Management System
Revision 1
How to Edit Your Website
2
Table of Contents
Overview ........................................................................................................................................ 3
Accessing the CMS ................................................................................................................. 3
Logging In .......................................................................................................................................... 4
Setting Your Language Preference ........................................................................................................ 4
Resetting Your Password ..................................................................................................................... 4
Sites ................................................................................................................................................... 4
Selecting a Site ................................................................................................................................... 4
The Google Analytics Dashboard ........................................................................................................ 5
Pages ................................................................................................................................................ 6
Selecting a Page .................................................................................................................................. 6
Labeling Pages .................................................................................................................................... 7
Creating Pages ................................................................................................................................... 7
Deleting Pages .................................................................................................................................... 7
Moving Pages ..................................................................................................................................... 7
Editing ............................................................................................................................................. 7
The Live Editor ................................................................................................................................... 8
The Rich-text Editor .......................................................................................................................... 10
The Image Editor .............................................................................................................................. 14
The Full Source Editor....................................................................................................................... 14
Account ........................................................................................................................................ 15
Help ................................................................................................................................................. 15
© DiscoverySquare 2012
www.discoverysquare.co.uk
How to Edit Your Website
3
Overview
This manual will help you edit your website using the Content Management System. A content
management system, or CMS (pronounced C-M-S), is any software that gives you the ability to update
content on your website.
Accessing the CMS
To access the CMS, you will need a web browser and an Internet connection. All modern browsers are
supported, including:
•
•
•
•
•
Internet Explorer 7+ (recommended version: 9)
Firefox
Google Chrome
Safari
Opera
If you are using Internet Explorer 7 or 8, it is highly recommended to install Chrome Frame when prompted, as this
will ensure you have access to all possible features. In addition, you will notice significant visual enhancements and
performance increases.
To access the CMS, navigate to the following URL in your browser:
http://cms.discoverysquare.co.uk
You should see the following login form:
© DiscoverySquare 2012
www.discoverysquare.co.uk
How to Edit Your Website
4
Logging In
To login, use your email address and password. You may have received a password via email already. If not,
contact your designer.
Setting Your Language Preference
You can set your language preference from the login screen and also from the Account section. Your
language preference will be saved in a cookie on your computer, so if you use another computer or clear
your cookies you will need to set it again.
Resetting Your Password
If you forget your password, you can reset it by selecting I forgot my password. Simply enter your email
address and the CAPTCHA code and a new password will be sent to you. If you don’t see the email within
a few minutes, please check your spam folder.
Sites
Selecting a Site
The CMS is capable of managing multiple websites, so if you have access to more than one you will see a
list of them when you login. At any time, you can select the Sites tab to come back to this list. (If you only
have one site, you will be taken directly to that site instead.)
Simply click on the site that you want to edit to see a list of pages.
© DiscoverySquare 2012
www.discoverysquare.co.uk
How to Edit Your Website
5
The Google Analytics Dashboard
The Google Analytics Dashboard is an optional feature that may be enabled for one or more of your sites.
When enabled, you can see important visitor information about your site including pageviews,
geographical data, top content, and more.
To access the analytics dashboard, look for the View Site Analytics option from the sidebar of your site. If
you don’t see this option, contact your designer to see if it can be enabled.
Here is an example of what the analytics dashboard looks like:
There are many reports available through the analytics dashboard:
•
•
•
Overview
Visitors
o Continent – shows traffic by continent
o Country – shows traffic by country
o City – shows traffic by city
o Language – shows what languages your visitors use
o Length of Visit – shows how long visitors stay on your site
o Depth of Visit – shows how many pages visitors access while on your site
Content
o Top Content by Path – shows the path of the most popular pages on your site
o Top Content by Title – shows the title of the most popular pages on your site
o Top Landing Pages – shows which pages users come to first on your site
o Top Exit Pages – shows which pages users leave your site from
o Second Page Visited – shows the second page that visitors go to on your site
© DiscoverySquare 2012
www.discoverysquare.co.uk
How to Edit Your Website
•
•
6
Traffic
o Keyword – shows which keywords visitors used to find your site
o Traffic Sources – shows where the traffic to your site comes from
o Referring URLs – shows where visitors were immediately before your site
Technical
o Browser – shows which browsers your visitors use
o Browser Version – same as Browser, but organized by version
o Operating System – shows which operating systems your visitors use
o Operating System Version – same as Operating System, but organized by version
o Screen Color – shows the color depth of visitors’ devices
o Screen Resolution – shows the screen size of visitors’ devices
Pages
Selecting a Page
This section shows all the pages on your site that you can edit. Depending on your account privileges, the
options you see in the CMS may differ from those shown below.
To select a page to edit, simply click on it. This will take you to the Live Editor, described in the next
section.
© DiscoverySquare 2012
www.discoverysquare.co.uk
How to Edit Your Website
7
Labeling Pages
Page labels are used to identify pages inside the CMS. To change a page label, select the Relabel
button. You will be prompted to enter a new label for the page. Remember that labels are only used inside
of the CMS, and have no effect on the live page.
Creating Pages
If your designer has enabled this feature, you can create
pages using templates. To create a new page, select Create
a New Page from the sidebar.
Enter a label and select the appropriate template from the
resulting dialog. If necessary, select a folder in which to
create the new page.
When creating pages, please select brief and descriptive labels.
The label you select will be converted to a web-safe filename.
For example, the label About Us will become about-us.html.
Please be attentive when creating pages and make certain to
place them in the most appropriate folders to keep your site
organized.
Deleting Pages
If your designer has enabled this feature, you can delete pages from your site. This action is permanent
and cannot be undone, so be very careful and make sure that you really want to delete a page for good
before doing so.
To delete a page, select the Delete
page is deleted.
button. You will be prompted to confirm your action before the
Moving Pages
If your designer has enabled this feature, you can move pages from one folder to another. To move a
page, select the Move
button.
Navigate to the folder that you want to page to be moved to and select OK.
Be very careful when moving pages, as this will cause their URLs to change and may break any links that have
been made to them. You may wish to consult your designer before using this feature.
Editing
© DiscoverySquare 2012
www.discoverysquare.co.uk
How to Edit Your Website
8
The Live Editor
Once you’ve selected a page to edit, you will be taken to the Live Editor. The Live Editor is a nonfunctional version of your page that will show you what your page will look like once it is published. By
design, you will not be able to interact with your page in the Live Editor. That is, you will not be able to
follow links, click buttons, etc.
Here is what the Live Editor looks like with an example site:
SELECTING
A
CONTENT REGION
Editable content regions are indicated by an edit bubble
in the Live Editor. It is normal for some
sections of your page to not be editable. Please contact your designer for any changes that cannot be
made using the Live Editor.
As you hover over a content region, the Live Editor will focus on that area to highlight the region. To edit
the region, simply click on it. If a region is hidden, you can select it using the Region Selection
button in the toolbar.
© DiscoverySquare 2012
www.discoverysquare.co.uk
How to Edit Your Website
9
PAGE PROPERTIES
Page properties include the title, description, and
keywords that are used to tell search engines about each
page. If your designer has enabled this feature, you can
change these values for each of your pages by selecting the
Edit Page Properties
button.
Each title should be brief and descriptive to attract
potential visitors to your page.
Descriptions are used by most search engines to give
potential visitors more information once you have their
attention. Keep them short and relevant, as you are
limited to a varying number of characters depending on
each search engine.
Keywords should be a list of comma-separated words and
phrases that relate to the content of your page. You may
add as many keywords as you like, but three to five are
usually sufficient.
REVISIONS & DRAFTS
Every time a page is published, a revision is created so you can review or revert your changes if the need
arises. All revisions are stored for a maximum of 180 days.
You can save your work and finish editing at a later time using drafts. To save a draft, select the Save
Draft
button after you finish editing. A draft is essentially a revision that has not been published.
To recall a draft or a revision, select the View Revisions
button and look for your draft or revision in
the resulting list. When you click OK, the revision will be displayed in the Live Editor. It will not be
published until you select Publish.
PUBLISHING
When you are done editing, you can publish your changes to the web by selecting the Publish
button. Your changes will be published immediately, so make sure you are truly ready to publish before
doing so.
© DiscoverySquare 2012
www.discoverysquare.co.uk
How to Edit Your Website
10
The Rich-text Editor
The Rich-text Editor appears when you select
certain types of content regions. You will spend
most of your time using this tool. The following is
an example of the rich-text editor showing all
options. Your version of the editor may look
different depending on the features your designer
has enabled.
Working with the rich-text editor is very similar to
working with popular word processing
applications. The following sections will cover
many of the most common features you will use.
UNDO & REDO
The Undo
and Redo
buttons let you step through your changes while editing. You can also use
CTRL+Z to undo and CTRL+Y to redo if you prefer to use the keyboard. (Mac users should replace CTRL
with CMD.)
TEXT FORMATTING
As in many popular word processing applications, you can change the format of text by selecting one or
more characters and clicking on the appropriate formatting option. For example, if you want to make
something bold or italic, highlight the appropriate text and select the Bold
or Italic
button. You
can also underline text, select a different font, specify the size of the font, and add a foreground and
background color using the toolbar.
Most users expect underlined text on your pages to be links. While this option may be available to you, it is
generally not recommended to use in most situations, as it may confuse users.
TEXT ALIGNMENT
You can justify your text in four different ways: Align Left, Align Center, Align Right, and Align Full.
Simply highlight the paragraph(s) you want to align and select the appropriate button from the toolbar.
STRUCTURING YOUR CONTENT
The Format dropdown lets you structure your content using headings, paragraphs, and other types of blocklevel elements. These elements help keep your page organized, so make sure you use headings instead of
just highlighting a line of text, changing its size, and making it bold. This will also keep the design of your
pages consistent with the rest of the site.
At the same time, if you make something a heading, it should make sense structurally. If you’re goal is to
make the selection bigger and bolder but the result doesn’t add structural value to your page, it is
probably not an appropriate use of a heading.
© DiscoverySquare 2012
www.discoverysquare.co.uk
How to Edit Your Website
11
CUSTOM STYLES
Your designer may provide you with custom styles to use in your pages. If these styles are available, you
will find them under the Styles dropdown.
These styles will vary in both name and appearance, depending on how your designer has configured them.
If they are available, you can apply them by highlighting the appropriate content, selecting the Styles
dropdown, and selecting the style you want. Only one style may be applied at a time.
You can remove a style by selecting it again from the Styles dropdown.
LINKS
To create a link to one of your pages—or to another
website—highlight the appropriate text and select the
Link
appear.
button. The Insert/Edit Link dialog will
You can either type in a URL to another website or use
the Browse
button to select a page from your site.
To link to an email address, use the following format:
mailto:[email protected]
You can use the Target dropdown to specify whether
or not the link should be opened in a new window. If you want a tooltip to appear when someone hovers
over the link, enter it into the Title field. Finally, the Class field is used to apply a custom style, as
mentioned in the previous section.
To remove a link, highlight it and select the Unlink
button.
ANCHORS
Anchors let you deep link to a specific section of your
page. To create an anchor, place the cursor in front of
the heading that you want to link to and select the
Anchor
button. The Insert/Edit Anchor dialog
will appear.
You will need to select a name for your anchor, and it must follow these rules:
•
•
•
Names must begin with a letter
Names must contain only A-Z, 0-9, dashes, and underscores
Names cannot contain spaces or other symbols
A good example of an anchor for a photo gallery would be photo-gallery.
When linking to anchors in your page, you will need to prefix the anchor name with a pound symbol. For example,
to link to the photo-gallery anchor, your link should look like: page.html#photo-gallery
© DiscoverySquare 2012
www.discoverysquare.co.uk
How to Edit Your Website
12
LISTS & INDENTING
You can create lists in the rich-text editor by selecting the Bulleted List
button or the Numbered List
button. To create a new list, place the cursor in an empty paragraph and select the appropriate
button. To turn one or more paragraphs into a list, highlight them and the select the appropriate button.
To change the level of a list item, use the Indent
and Outdent
buttons.
TABLES
You can edit tables in the rich-text editor very easily. To change the content of a cell, simply select it and
edit it like any other part of the page. For more complex table editing, use the Table
button. The
left side of the button will insert or edit a table, while the right side of the button shows options for
working with rows, columns, and cells.
REPEATABLE REGIONS
Your designer may configure Repeatable Regions on one or more of your pages. These are useful for many
things, but essentially they allow you to add, remove, and reorder structured sections of your page very
easily.
When your cursor is inside of a repeatable region, the repeatable region buttons become available. You
can usually tell a repeatable region by the dashed borders they have that turn solid when you select them.
To add a new region, select an existing region and click the Add Region
the Delete Region
button. To delete one, select
button. You can also move regions up and down to reorder them.
Here are some keyboard shortcuts that you can use while working with repeatable regions:
•
•
•
•
Add Region – ALT++
Delete Region – ALT+Move Region Up – ALT+UP
Move Region Down – ALT+DOWN
DOCUMENTS
To insert a document into your page, place the cursor where
you would like a link to the document to go and select the
Insert Document
button.
You can enter a URL manually or use the Browse button to
upload and select a document from your site.
© DiscoverySquare 2012
www.discoverysquare.co.uk
How to Edit Your Website
13
IMAGES
To insert an image into your page, place the cursor where you
would like the image to appear and select the Insert Image
button.
The minimum requirements to insert an image are the Image
URL and the Image Description. You can enter a URL
manually or use the Browse button to upload and select an
image from your site.
If you choose to set the Alignment, the image will align itself
accordingly in your content.
When working with Dimensions, keep in mind that changing these values will not affect the actual file size
of the image. Because of this, larger images should be physically resized and re-uploaded to your site.
The remaining values are Border, which controls the width of the border in pixels, and Vertical Space and
Horizontal Space, which affect the margin around the top/bottom and left/right of the image, respectively.
In most cases, it’s perfect find to leave these values empty.
MEDIA
To insert a video or other media into your page, place the
cursor where you would like the media object to appear and
select the Insert Media
button.
This dialog is more complex than prior ones, but that’s because
there are many options when working with media files. If
you’re not sure about something, contact your web designer for
help.
The minimum requirements for embedding media are the Type
and the File/URL fields. You can enter a URL manually or use
the Browse button to upload and select a media file from your
site.
If necessary, you can set the Dimensions and adjust more
settings in the Advanced section.
HTML S N I P P E T S
If your designer has enabled this feature, you can embed snippets of HTML from other sites into your
pages. Examples of this include snippets from Google Maps, YouTube, or any other site that provides
embeddable HTML code for sharing content.
To embed content like this into your page, select the Insert HTML Snippet
paste the HTML code into the resulting dialog and select OK.
© DiscoverySquare 2012
button. Simply copy and
www.discoverysquare.co.uk
How to Edit Your Website
14
The Image Editor
If your designer has made one or more images editable,
selecting them will bring up the Image Editor. You can
use the image editor to safely swap out images and
crop them without affecting the layout of your page.
To choose a new image, select the Browse button and
upload or select an existing file from your site.
The Full Source Editor
This is an advanced feature that most users will not have
or require access to. If you are not familiar with HTML,
CSS, JavaScript, and server-side scripting languages you
should probably avoid this feature to prevent damaging
your pages.
To access the Full Source Editor, select the Full Source
button. You can make changes to any part of
the source code using this feature, so be extremely
cautious unless you know exactly what you are doing.
Most users should avoid this feature, even if it’s
available.
Keep in mind that revisions are not created when pages are modified using the Full Source Editor, so it’s
important to keep a local backup of your pages if you plan on using this feature.
© DiscoverySquare 2012
www.discoverysquare.co.uk
How to Edit Your Website
15
Account
You can manage your account settings—including your name, email, password, and language settings—by
selecting the Account tab.
Help
The Help & Support section is designed to expedite help requests to your designer. When submitting a
help request, please select the appropriate reason for the request and the affected site. Remember to
provide as much information as possible to help troubleshoot the problem. If necessary, include details
such as your operating system, browser version, and any steps they should take to experience the problem.
In most cases, your designer will respond to you via email. Feel free to write them back by replying directly
from your email client.
© DiscoverySquare 2012
www.discoverysquare.co.uk